

Earlier this month, Pebble released version 3.6 of their SDK. My eyes widened when I discovered it included access to their Dictation API. This API gives all Pebble developers access to dictation from the Pebble Time microphone. I eagerly opened up the CloudPebble editor and began experimenting!
In this article, we’ll explore the Dictation API by putting together a watchapp that accepts a dictated message and sends it to a Slack channel via IFTTT.
Key Takeaways
- Pebble’s new Dictation API, introduced in SDK version 3.6, allows developers to integrate voice dictation using the microphone on Pebble Time watches.
- To utilize the Dictation API, developers need a Pebble Time Watch, basic knowledge of Pebble app development, and accounts for IFTTT and Slack (or another service supported by IFTTT).
- The dictation process involves setting up a DictationSession in the C code of the Pebble app, which captures spoken input and handles success or error outcomes.
- Communication between the Pebble app and external services like Slack is managed using JavaScript, specifically handling the transmission of the dictated message through IFTTT using web requests.
- The complete workflow includes capturing voice input on the Pebble, processing and sending this input via IFTTT to Slack, where the message is finally posted.
- This setup demonstrates the potential of the Dictation API to create powerful, voice-activated applications on Pebble Time, enhancing the functionality and interactivity of wearable technology.
What You’ll Need
In order to step through this guide, you’ll need the following:
- A Pebble Time Watch – The older Pebbles do not have a microphone, so this won’t work on them!
- An general knowledge in Pebble app development – If you are new to Pebble development, have a read of my beginner tutorial on Pebble Watch Development with JavaScript to get started.
- An IFTTT account
- A Slack account and Slack Channel to post to – You could switch this out for any other service which IFTTT allows you to send messages if you’re not a Slack user.
The Code
There are developers out there who prefer to jump straight into the code. If you are that type of developer, all the code is available on GitHub.
Our watchapp will have two main files:
main.c– Our C code manages the dictation, the display of instructions and display of the entered message.pebble-js-app.js– This manages our communication to IFTTT.
IFTTT
I’d recommend setting up your IFTTT Maker channel and Slack rule first, just so the code set up we’ll do after this makes more sense.
I’ve previously covered IFTTT in the articles Connecting LIFX Light Bulbs to the IoT Using IFTTT and Connecting the IoT and Node.js to IFTTT (this second one covers the Maker channel). So if you’d like a more in depth explanation of using IFTTT and the Maker channel, have a read through of those.
Here’s a very quick runthrough of what you’ll need to set up:
- Create an IFTTT account if you haven’t already got one.
- Connect the Maker Channel and Slack Channel to your account.
- Create a new recipe with the Maker channel as the trigger.
- Choose the “Receive a web request” trigger option and name the event “slack_message”.
- Choose the Slack channel to be the action channel for this IFTTT rule and choose the “Post to channel” action.
- Select the Slack channel you’d like the message to go to and set the message to only contain
{{Value1}}. - You can remove the title, or choose something like “Pebble Message Received”. I left it blank. I also left the thumbnail URL blank too.
- Create your action and you should be ready to go! IFTTT is ready to send any messages it receives from that event to the Slack channel you specified.
Our C Code
The main.c file looks like so:
#include <pebble.h>
static Window *s_main_window;

static TextLayer *message_layer;
static DictationSession *s_dictation_session;

static char display_message[512];
static void handle_message(char *slack_message) {

  DictionaryIterator *iter;

  app_message_outbox_begin(&iter);
  dict_write_cstring(iter, 0, slack_message);
  app_message_outbox_send();

}
static void dictation_session_callback(DictationSession *session, DictationSessionStatus status, char *transcription, void *context) {

  if(status == DictationSessionStatusSuccess) {

    snprintf(display_message, sizeof(display_message), "Message sent!\n\n\"%s\"", transcription);

    text_layer_set_text(message_layer, display_message);

    handle_message(transcription);

  } else {

    static char error_message[128];

    snprintf(error_message, sizeof(error_message), "Error code:\n%d", (int)status);

    text_layer_set_text(message_layer, error_message);

  }

}
static void select_click_handler(ClickRecognizerRef recognizer, void *context) {

  dictation_session_start(s_dictation_session);

}
static void click_config_provider(void *context) {

  window_single_click_subscribe(BUTTON_ID_SELECT, select_click_handler);

}
static void window_load(Window *window) {

  Layer *window_layer = window_get_root_layer(window);

  GRect bounds = layer_get_bounds(window_layer);
  message_layer = text_layer_create(GRect(bounds.origin.x, (bounds.size.h - 72) / 2, bounds.size.w, bounds.size.h));

  text_layer_set_text(message_layer, "Press select and tell me your Slack message :)");

  text_layer_set_text_alignment(message_layer, GTextAlignmentCenter);

  text_layer_set_font(message_layer, fonts_get_system_font(FONT_KEY_GOTHIC_24_BOLD));

  layer_add_child(window_layer, text_layer_get_layer(message_layer));

}
static void window_unload(Window *window) {

  text_layer_destroy(message_layer);

}
static void init() {

  s_main_window = window_create();

  window_set_click_config_provider(s_main_window, click_config_provider);

  window_set_window_handlers(s_main_window, (WindowHandlers) {

    .load = window_load,

    .unload = window_unload,

  });

  window_stack_push(s_main_window, true);
  app_message_open(app_message_inbox_size_maximum(), app_message_outbox_size_maximum());
  s_dictation_session = dictation_session_create(sizeof(display_message), dictation_session_callback, NULL);

}
static void deinit() {

  dictation_session_destroy(s_dictation_session);
  window_destroy(s_main_window);

}
int main() {

  init();

  app_event_loop();

  deinit();

}
Our Dictation Calls
The first bit of code Pebble developers will notice is new is the line which sets up a DictationSession. This is what we store our transcription data and other data related to the Dictation API within:
static DictationSession *s_dictation_session;
Next, we define a simple char array to store our latest successfully transcribed message:
static char display_message[512];
Within our init() function, we set up the actual dictation session so that it is ready and waiting for us to request it. It is set to provide space to store our dictated message that matches the length of display_message. It also sets the callback function once we’ve performed dictation to be dictation_session_callback().
s_dictation_session = dictation_session_create(sizeof(display_message), dictation_session_callback, NULL);
Running Dictation on Click
We want to set up our dictation to run when the user clicks the select button on their Pebble. We set click functionality via window_set_click_config_provider().
window_set_click_config_provider(s_main_window, click_config_provider);
That tells our Pebble that our click functions are defined within click_config_provider(). Within that, we initialize the process of dictation via a press of the select button (defined as BUTTON_ID_SELECT in Pebble’s SDK). This button action is set up via window_single_click_subscribe() function.
static void click_config_provider(void *context) {

  window_single_click_subscribe(BUTTON_ID_SELECT, select_click_handler);

}
Our select_click_handler() function has only one task – start our dictation session using dictation_session_start():
static void select_click_handler(ClickRecognizerRef recognizer, void *context) {

  dictation_session_start(s_dictation_session);

}
When our dictation session is done and the user has given us their message via the microphone, we told Pebble to run dictation_session_callback(). In this function, we start by checking if the dictation was successful. The API provides this to us via the DictationSessionStatus status variable:
static void dictation_session_callback(DictationSession *session, DictationSessionStatus status, char *transcription, void *context) {

  if(status == DictationSessionStatusSuccess) {

    // Dictation worked!

  } else {

    // Dictation failed :(

  }

}
If dictation was successful, we display the transcribed message on the app (mostly just to give the user visual feedback that the app has their message) and then we pass the transcribed message into handle_message() (we’ll cover how that function works soon):
snprintf(display_message, sizeof(display_message), "Message sent!\n\n\"%s\"", transcription);

text_layer_set_text(message_layer, display_message);

handle_message(transcription);
If there is an error, we display the error message code on screen instead of the transcription:
static char error_message[128];

snprintf(error_message, sizeof(error_message), "Error code:\n%d", (int)status);

text_layer_set_text(message_layer, error_message);
Passing Messages To JavaScript
The handle_message function we used earlier takes a message and puts it into our app’s dictionary. This allows us to send that data to the JavaScript code via Pebble’s AppMessage functionality. We access the dictionary via DictionaryIterator and then open our inbox ready to send a message to our JavaScript using app_message_outbox_begin(). We only have one key in our dictionary for this app, which stores the dictation message, so when we write into our dictionary, we write the message to position 0 in dict_write_cstring(). Once the message is saved in that key, we send it via app_message_outbox_send().
static void handle_message(char *slack_message) {

  DictionaryIterator *iter;

  app_message_outbox_begin(&iter);
  dict_write_cstring(iter, 0, slack_message);
  app_message_outbox_send();

}
The rest of the C code is pretty self explanatory for anyone who has worked with Pebble app development before, so we’ll continue onto the JavaScript!
Our JavaScript Code
The JavaScript side of the equation is a bit shorter and looks like so:
var host = "https://maker.ifttt.com/trigger/",

  key = "PUTYOURKEYHERE";
function send_message(message) {

  console.log(host + "slack_message/with/key/" + key);

  var url = host + "slack_message/with/key/" + key,

    data = {"value1": message};
  sendPOSTRequest(url, data, function() {

    console.log("Error!");

  });

}
function sendPOSTRequest(url, data, fallback) {

  var req = new XMLHttpRequest();
  req.onreadystatechange = function(e) {

    if (req.readyState == 4 && req.status == 200) {

      var response = JSON.parse(req.responseText);

      console.log("Response was ", response);
      if (response !== undefined && !response.error) {

        console.log("Message sent successfully.");

      } else {

        console.log(response.error);

        if (fallback) fallback();

      }

    } else if (req.status == 404 || req.status == 500) {

      console.log("Error " + req.status);

      if (fallback) fallback();

    }

  };
  req.open("POST", url);

  req.setRequestHeader("Content-Type", "application/json");

  req.send(JSON.stringify(data));

}
Pebble.addEventListener("appmessage", function(e) {

  var message = e.payload["0"];

  console.log("Received message: " + message);

  send_message(message);

});
The start of the JavaScript sets up the initial URL settings for the URL we want to call from IFTTT. That call should be in the format of https://maker.ifttt.com/trigger/{event}/with/key/{yourkey}. We store the initial part of the URL in host and your particular key within key. You can find your key on the Maker Channel IFTTT page. The rest will be set up in the next function.
var host = "https://maker.ifttt.com/trigger/",

  key = "PUTYOURKEYHERE";
The function we will call when we want to send a message to IFTTT has been appropriately named send_message(). This places our host and key variables within our IFTTT URL, along with our event name of slack_message. The data variable contains a JSON object with a key of "value1" which IFTTT looks for when it works out how to respond to the POST request. If you wanted to pass in more values, you could pass in value2 and value3 too.
function send_message(message) {

  console.log(host + "slack_message/with/key/" + key);

  var url = host + "slack_message/with/key/" + key,

    data = {"value1": message};
  ...
Then within our function, we pass this url and data into a sendPOSTRequest() function which will do the actual HTTP request magic. It has an error callback that will run if something goes wrong (in this case, we’ll just log it to the console).
  sendPOSTRequest(url, data, function() {

    console.log("Error!");

  });

}
The sendPOSTRequest() function uses the typical XMLHttpRequest JavaScript format. This will remain pretty similar for any POST requests containing JSON data. Explaining the details of how this works is beyond the scope of this article but it is pretty common around the web:
function sendPOSTRequest(url, data, fallback) {

  var req = new XMLHttpRequest();
  req.onreadystatechange = function(e) {

    if (req.readyState == 4 && req.status == 200) {

      var response = JSON.parse(req.responseText);

      console.log("Response was ", response);
      if (response !== undefined && !response.error) {

        console.log("Message sent successfully.");

      } else {

        console.log(response.error);

        if (fallback) fallback();

      }

    } else if (req.status == 404 || req.status == 500) {

      console.log("Error " + req.status);

      if (fallback) fallback();

    }

  };
  req.open("POST", url);

  req.setRequestHeader("Content-Type", "application/json");

  req.send(JSON.stringify(data));

}
Finally, we have the bit of code that triggers our message. We listen for the appmessage event which is triggered by app_message_outbox_send() in our C code. When this app spots it, it sends data through in the format of {"0": "yourmessage"}. We focus on the key of "0" and send that through to our send_message() function.
Pebble.addEventListener("appmessage", function(e) {

  var message = e.payload["0"];

  console.log("Received message: " + message);

  send_message(message);

});
Running Our App
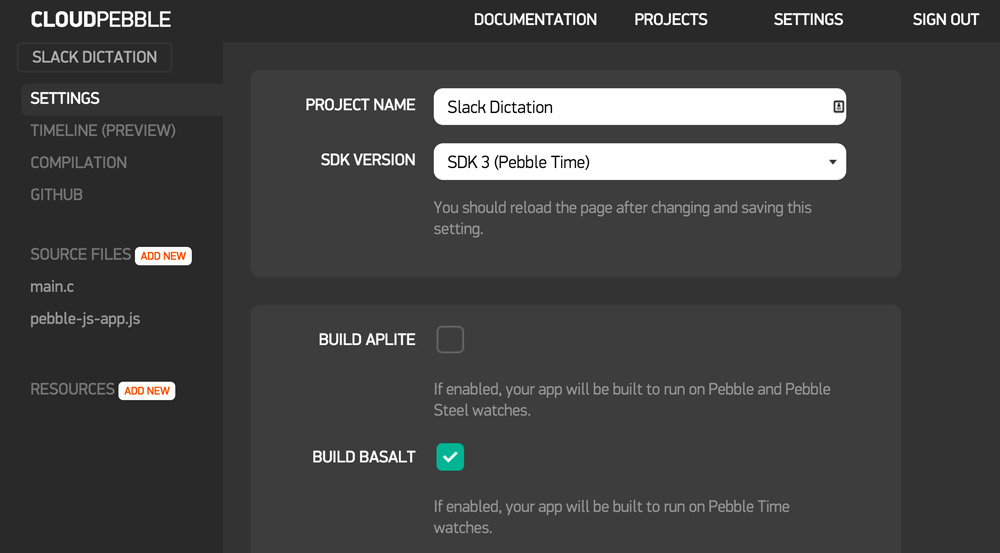
It is best to run the app on your actual Pebble Time watch. You can also use Pebble API commands in the terminal to work with an emulator via the SDK, however I found it much easier to just speak to my Pebble directly via CloudPebble! The main thing to keep in mind when building your app is to ensure that “Build Aplite” is unticked in your project’s settings. Our dictation demo won’t work with the Aplite platform (that’s the first Pebble watchface platform). Your settings should look like so:
The App In Action!
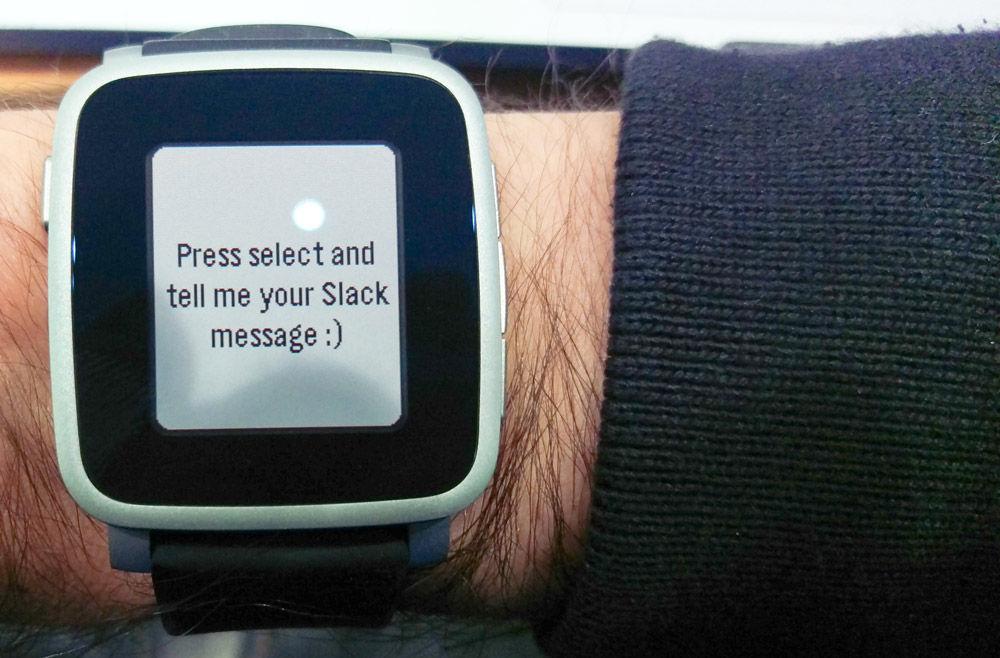
When we first open the app, it should look like so:
Then, when you click the select button (the one in the middle on the right hand side), Pebble’s dictation screen should appear awaiting your voice. Once you’ve spoken and it has your message, it will use Nuance, a third party service, to transcribe your message. Once it has it, the Pebble dictation screen will ask you to confirm that the message is correct.
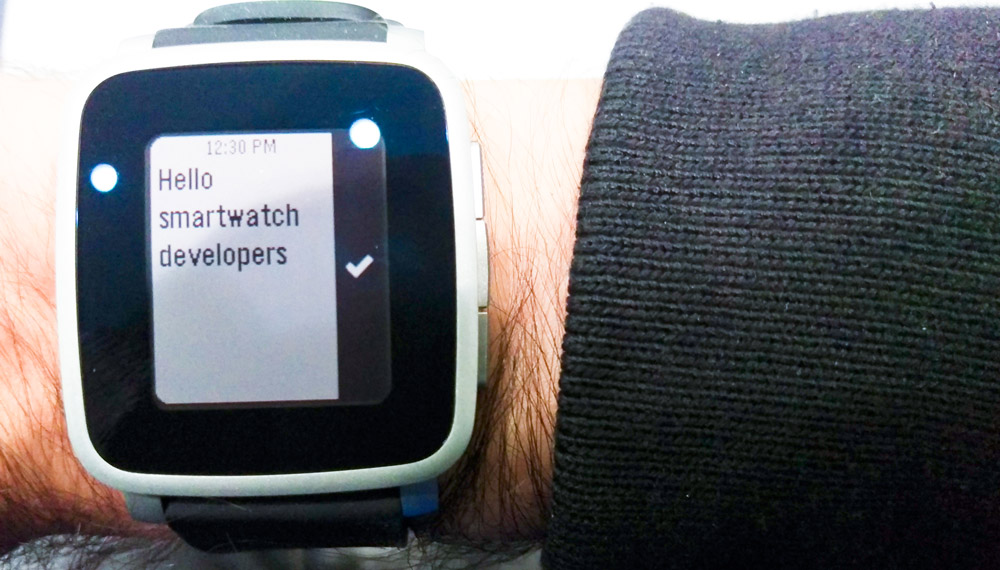
If it is, accept it and it will provide that input to your app:
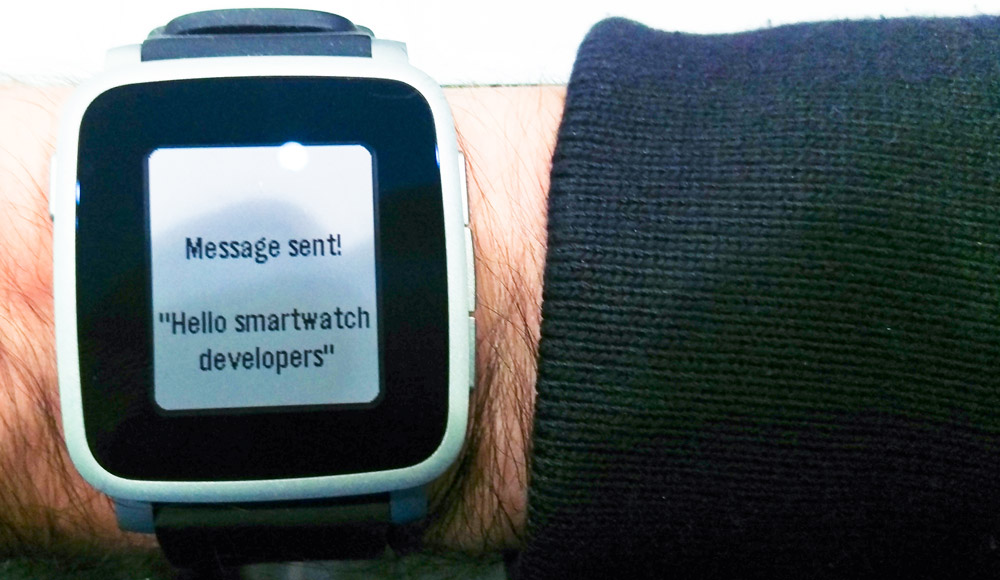
Then if you look over at your Slack channel, the message should also appear there!

Conclusion
The new Dictation API is incredibly simple to implement into a Pebble app. You could connect it up to any number of web APIs (or other IFTTT channels) to do a range of tasks. There’s plenty of potential to analyse the dictated message text and set different actions to run depending on what the user says too.
Feel free to use this code as the starting point for your own Pebble Dictation idea. Give it a go, it’s incredibly empowering to put a voice powered smartwatch app together and see it in action! If you make something from this tutorial, please share it in the comments or get in touch with me on Twitter (@thatpatrickguy). I’d love to hear about it.
If you’re looking for further links on Pebble development or the Dictation API in particular, I’ve got a set of curated links over on my Dev Diner Pebble Development Guide. If you’ve got other great resources I don’t have listed – please let me know too!
Frequently Asked Questions (FAQs) about Pebble’s New Dictation API
What is Pebble’s New Dictation API?
Pebble’s New Dictation API is a powerful tool that allows developers to integrate voice recognition capabilities into their Pebble applications. This API converts spoken words into text, enabling users to interact with apps using their voice. It’s a significant feature that enhances the user experience, especially for those who prefer hands-free operation.
How do I get started with Pebble’s New Dictation API?
To get started with Pebble’s New Dictation API, you need to have the Pebble SDK installed on your system. Once installed, you can access the API through the PebbleKit JS library. You’ll need to initialize the API and set up an event listener for dictation sessions. The API documentation provides detailed instructions and code examples to guide you through the process.
Is Pebble’s New Dictation API available for all Pebble devices?
Yes, Pebble’s New Dictation API is available for all Pebble devices. However, the performance and accuracy of the voice recognition feature may vary depending on the device model and its microphone quality.
Can I use Pebble’s New Dictation API for languages other than English?
Yes, Pebble’s New Dictation API supports multiple languages. However, the accuracy of the voice recognition feature may vary depending on the language. It’s recommended to test the API with your target language to ensure satisfactory performance.
What are the limitations of Pebble’s New Dictation API?
While Pebble’s New Dictation API is a powerful tool, it does have some limitations. For instance, it requires an internet connection to function, as the voice recognition process is carried out on Pebble’s servers. Additionally, the API can only handle short phrases and sentences, not long paragraphs of text.
How can I improve the accuracy of Pebble’s New Dictation API?
The accuracy of Pebble’s New Dictation API can be improved by ensuring a clear and loud voice input. Avoiding background noise and speaking directly into the device’s microphone can also enhance the voice recognition process.
Can I use Pebble’s New Dictation API for commercial purposes?
Yes, you can use Pebble’s New Dictation API for commercial purposes. However, it’s recommended to review Pebble’s terms of service and API usage policies to ensure compliance.
How can I troubleshoot issues with Pebble’s New Dictation API?
If you encounter issues with Pebble’s New Dictation API, you can refer to the API documentation for troubleshooting tips. If the problem persists, you can reach out to Pebble’s developer support for assistance.
Can I customize the functionality of Pebble’s New Dictation API?
Yes, Pebble’s New Dictation API provides several customization options. You can adjust the language, duration of dictation sessions, and more. The API documentation provides detailed instructions on how to customize these settings.
Is Pebble’s New Dictation API free to use?
Yes, Pebble’s New Dictation API is free to use. However, it’s important to note that while the API itself is free, you may incur data charges if you’re using it over a mobile network, as the API requires an internet connection to function.