


Key Takeaways
- Appwrite is a versatile backend service that simplifies user authentication in React apps, offering features like multi-factor authentication and account recovery.
- Before integrating Appwrite, ensure you have Node.js, a basic understanding of React and JavaScript, and an Appwrite account set up.
- Implementing user authentication involves setting up the Appwrite SDK, creating registration and login functionalities, and managing user sessions.
- Secure route handling in React with Appwrite is achieved by creating protected pages that only authenticated users can access, using custom hooks and context for session management.
- Error handling in React and Appwrite should utilize try/catch blocks, React error boundaries, and custom error components to enhance user experience and maintain robust application performance.
Authentication is the process of verifying a user’s identity before granting access to an application. This is an important aspect of development, as it not only protects our users’ data but also enhances the overall user experience. We can also use the verified details to personalize our user’s experience, provide tailored content, and offer features like user-specific settings or saved preferences.
In this article, we’ll provide a step-by-step guide on how to authenticate users in React applications using Appwrite. We’ll also look at how to make use of Appwrite’s features to implement login and signup functionality, manage user sessions, and protected routes.
What is Appwrite?
Appwrite is a free, open-source application that helps developers to integrate backend technology into web applications. As a backend service, Appwrite offers different features for authentication, ranging from multi-factor authentication to account verification and recovery. This makes it easier for developers to implement secure user authentication seamlessly.
Prerequisites for Setting up Appwrite in React Projects
Before following the steps to integrate Appwrite into our React project, we need to have the following in place:
- Node.js installed on our device
- a basic understanding of React and JavaScript
- an Appwrite account (we can create one for free)
1. Create a React app
Open the terminal and run the following command:
npx create-react-app userauthNavigate to the project directory:
cd userauth2. Choose an Appwrite installation method
Appwrite provides various installation options, allowing us to choose the installation method that best fits our preferences. Here are some of the options available for installing Appwrite:
- Docker. This option leverages Docker to simplify the setup and management within a containerized environment.
- Self-hosted. This option provides direct installation on our server, thereby offering more control but requiring manual configuration.
- Cloud-based deployment. This uses a cloud provider for managed services, scalability, and minimal setup overhead.
- Appwrite command-line interface. This works by installing Appwrite locally for development and testing purposes.
For this article, we’ll be using the cloud-based deployment option, as it’s relatively easier to set up and offers better accessibility for users.
3. Create an Appwrite project
To integrate Appwrite into our app, we have to be logged in to our account. Once we’re logged in, we can follow these steps:
- Create a new project.
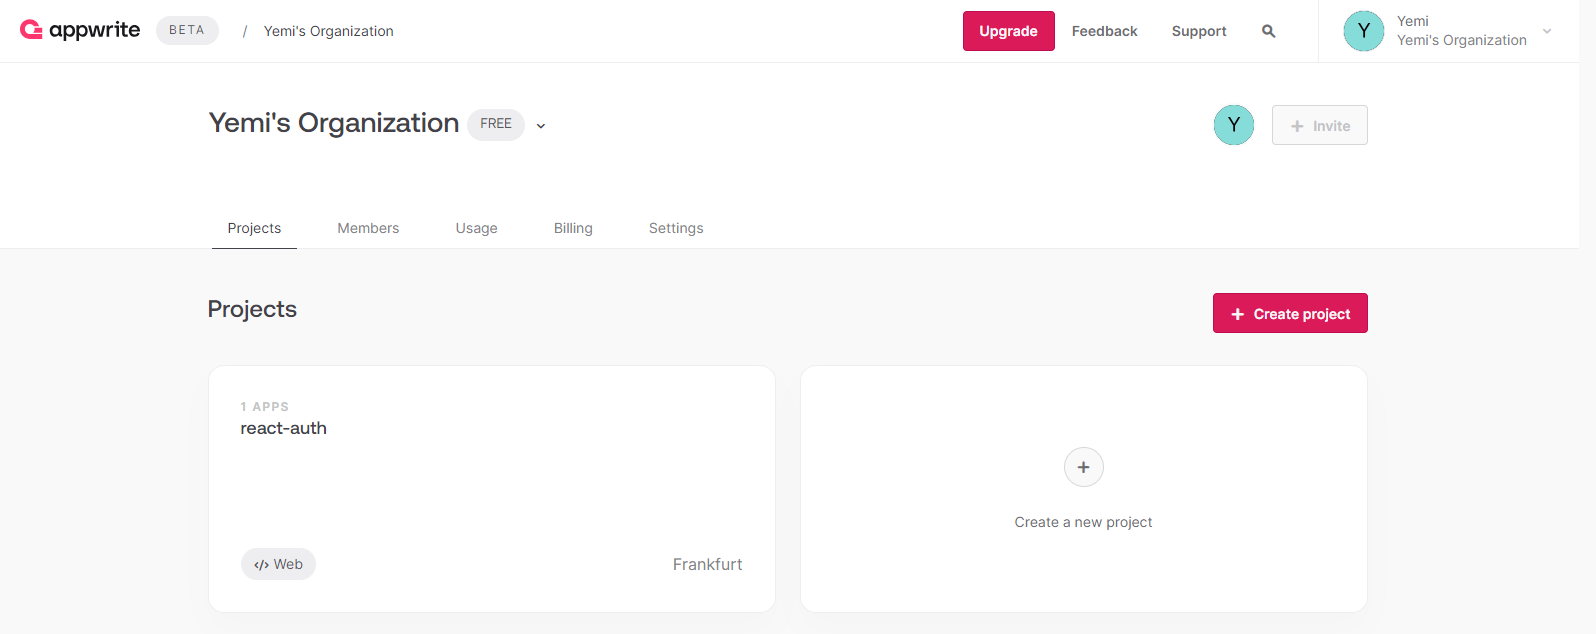
- Select
Web App
as the platform.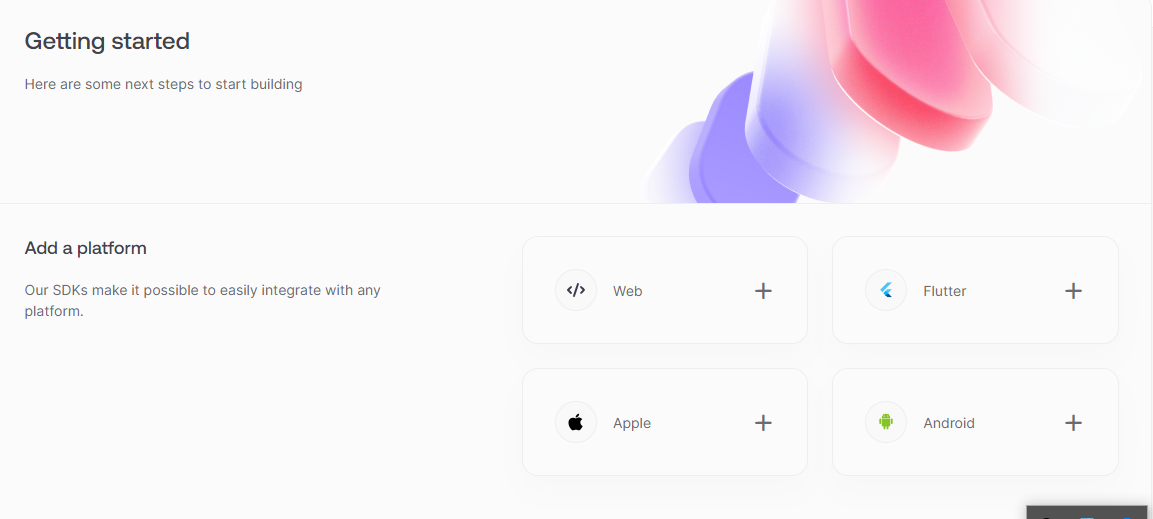
- Choose
localhost
as the host and name the app.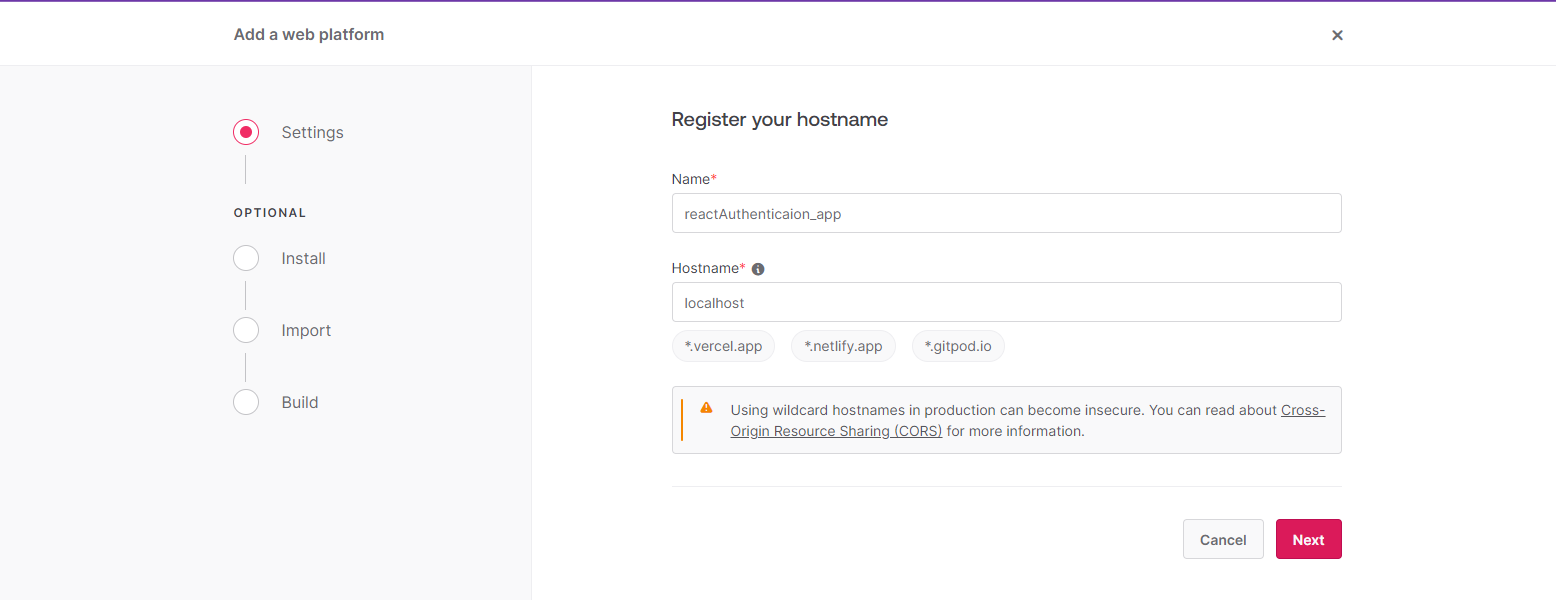
- Open a web browser and navigate to the dashboard.
Installing Appwrite’s SDK in the React App
To integrate Appwrite into our React app, we need to install the Appwrite JavaScript SDK. We can do this through the following steps.
Firstly, run the following command in the project’s root directory:
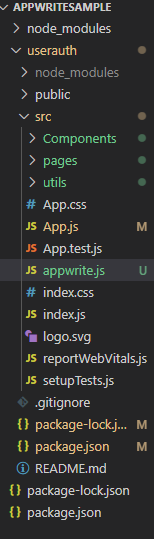
npm install appwriteNext, create a configuration file (Appwrite.js) in the src folder to store the Appwrite endpoint and project ID.
//Appwrite.js

import { Client, Account } from 'appwrite';

export const API_ENDPOINT = 'https://cloud.appwrite.io/v1'
export const PROJECT_ID = 'YOUR PROJECT ID HERE'

const client = new Client()
    .setEndpoint(API_ENDPOINT)
    .setProject(PROJECT_ID);

export const account = new Account(client);

export default client;
Replace placeholders 'YOUR_APPWRITE_ENDPOINT' and 'YOUR_APPWRITE_PROJECT_ID' with the Appwrite endpoint and project ID, which can be gotten from the Appwrite dashboard.
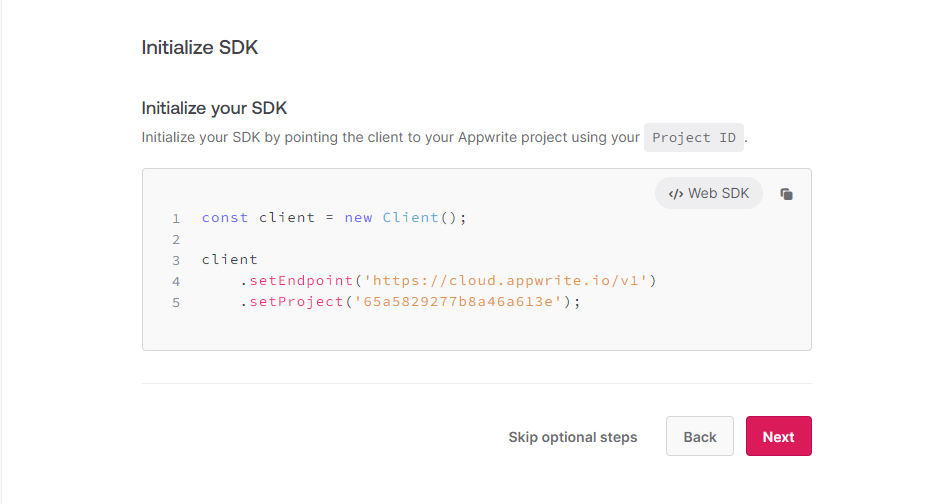
Initialize Appwrite in our React app. In our main index.js or App.js file, import and initialize Appwrite using the configuration file we created earlier:
import React from 'react';
import ReactDOM from 'react-dom';
import App from './App';
import { Appwrite } from 'appwrite';// appwrite import statement
import appwriteConfig from './appwrite';// import statement

//Initializing Appwrite
const appwrite = new Appwrite();
appwrite.setEndpoint(appwriteConfig.endpoint).setProject(appwriteConfig.project);

ReactDOM.render(
  <React.StrictMode>
    <App />
  </React.StrictMode>,
  document.getElementById('root')
);`
Building the Main App
Once the configuration is completed, we can now build our app. In this app, we’ll have login, register, and logout logic, which will make use of functionalities from our Appwrite SDK.
Implementing registration functionality
To allow users to create accounts and register in our React app, we need to do the following.
Firstly, we create a registration form. The form will collect the necessary information, such as email and password, and send it to the Appwrite server for user creation:
return (
  <div className="container">
    <form ref={registerForm} onSubmit={handleRegistration}>
      <div className="form-field-wrapper">
        <label>Name:</label>
        <input required type="text" name="name" placeholder="Enter name..." />
      </div>

      <div className="form-field-wrapper">
        <label>Email:</label>
        <input
          required
          type="email"
          name="email"
          placeholder="Enter email..."
        />
      </div>

      <div className="form-field-wrapper">
        <label>Password:</label>
        <input
          type="password"
          name="password1"
          placeholder="Enter password..."
          autoComplete="password1"
        />
      </div>

      <div className="form-field-wrapper">
        <input type="submit" value="Register" className="btn" />
      </div>
    </form>

    <p>{/* Already have an account? <Link to="/login">Login</Link> */}</p>
  </div>
);
Next, we have to create a function that makes an API call to create a new user in the Appwrite server each time a button is clicked:
import React, { useRef } from "react";
// import { Link } from "react-router-dom";
import { ID } from "appwrite";
import { account } from "../appwrite";

const Register = () => {
  const registerForm = useRef(null);

  const handleRegistration = async (e) => {
    e.preventDefault();

    const name = registerForm.current.name.value;
    const email = registerForm.current.email.value;
    const password1 = registerForm.current.password1.value;

    try {
      const response = await account.create(
        ID.unique(),
        email,
        password1,
        name
      );
      console.log("Registration successful:", response);
      // Redirect or perform further actions upon successful registration
    } catch (error) {
      console.error("Registration failed:", error);
      // Handle registration errors appropriately
    }
  };

  return(
    //return the form we created earlier

  )

};

export default Register;
In this code snippet, we’re creating a registration form that accepts input from the user and sends it to the Appwrite SDK. Here’s a breakdown of the function that handles user registration.
- Function definition.
const handleRegistration = async (e) => { ... }defines an asynchronous function namedhandleRegistrationthat accepts an event object (e) as an argument. - Prevent default form submission.
e.preventDefault();prevents the default behavior of the form submission, which would typically reload the page. This allows us to handle the registration process using JavaScript. - Attempt registration. We make use of the
try...catchblock to handle potential errors during the registration process by implementing the main logic in the try block and catching potential errors in the catch block. - Using Appwrite’s account creation. In
const response = await client.account.create(email, password);we call theaccount.createmethod of the Appwrite client which we used to create a new user account with the email and password provided by the user.awaitpauses the function execution until the asynchronous API call completes.clientrefers to the initialized Appwrite client instance.
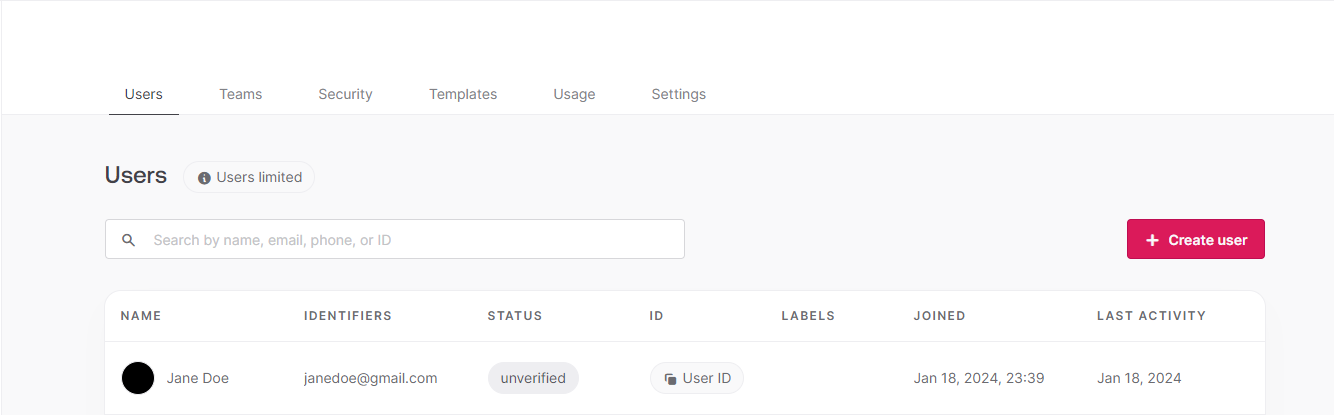
Once the User is registered, a new row that stores the user’s details is created.
Implementing the login functionality
To log in using Appwrite’s SDK, we make use of a function that takes the user’s email and password as parameters and handles the authentication process. If the credentials are valid, the server returns an authentication token, which we can store in the client-side storage (such as local storage or cookies) for future API calls:
import React, { useRef } from "react";
// import { Link } from "react-router-dom";
import { ID } from "appwrite";
import { account } from "../appwrite";

const Login = () => {
  const loginForm = useRef(null);

  const handleLogin = async (e) => {
    e.preventDefault();

    const name = loginForm.current.name.value;
    const email = loginForm.current.email.value;
    const password1 = loginForm.current.password1.value;

    try {
      const response = await account.createEmailSession(email, password1);
      console.log("User has been Logged In:", response);
      // Redirect or perform further actions upon successful registration
    } catch (error) {
      console.error("Login failed:", error);
      // Handle registration errors appropriately
    }
  };

  return (
    <div className="container">
      <form ref={loginForm} onSubmit={handleLogin}>
        <div className="form-field-wrapper">
          <label>Name:</label>
          <input required type="text" name="name" placeholder="Enter name..." />
        </div>

        <div className="form-field-wrapper">
          <label>Email:</label>
          <input
            required
            type="email"
            name="email"
            placeholder="Enter email..."
          />
        </div>

        <div className="form-field-wrapper">
          <label>Password:</label>
          <input
            type="password"
            name="password1"
            placeholder="Enter password..."
            autoComplete="password1"
          />
        </div>

        <div className="form-field-wrapper">
          <input type="submit" value="Login" className="btn" />
        </div>
      </form>

      <p>{/* Already have an account? <Link to="/login">Login</Link> */}</p>
    </div>
  );
};

export default Login;
Like in the registration logic, we’re creating a component that returns a form. This form accepts the user input and sends it to a function that verifies the details and logs in the user if authorized.
Here’s a breakdown of the code that implements the login logic:
- Function definition. The first line of the
handleLoginfunctionconst handleLogin = async (e) => { ... }defines an asynchronous function namedhandleLoginthat takes an event object (e) as input. Theasynckeyword shows that it uses promises for handling asynchronous operations. We also used thepreventDefaultmethod to prevent the browser’s default form submission behavior. - Call Appwrite’s session creation.
const response = await client.account.createSession(email, password);is used to call theaccount.createSession, which creates a session and logins in the user if the provided details correspond with the details saved in the storage.
Creating protected pages
Protected pages are ones that are inaccessible to users who aren’t authenticated. For instance, we have a profile page that displays the user’s details, but we want that page to be accessed by users who are logged in alone. To achieve this using Appwrite, we have to first create a function that keeps track of the authenticated user. This function is created on a separate page that we hook to other pages needing verification.
Creating the authentication hook
To manage user authentication and session tracking in a React app, we can create a custom hook called useAuth. This hook will keep track of the authenticated user’s session and provide the necessary functions to check the authentication status:
import { createContext, useState, useEffect, useContext } from "react";
import { account } from "../appwrite";
import { useNavigate } from "react-router-dom";
import { ID } from "appwrite";

const AuthContext = createContext();

export const AuthProvider = ({ children }) => {
  const navigate = useNavigate();

  const [loading, setLoading] = useState(true);
  const [user, setUser] = useState(null);

  useEffect(() => {
    checkUserStatus();
  }, []);

  const checkUserStatus = async () => {
    try {
      const accountDetails = await account.get();
      setUser(accountDetails);
    } catch (error) {
      console.error("Error checking user status:", error); // Log or handle error
    } finally {
      setLoading(false);
    }
  };

  const contextData = {
    user,
    loading, // Add loading state to context
  };

  return (
    <AuthContext.Provider value={contextData}>
      {loading ? <div>Loading...</div> : children}
    </AuthContext.Provider>
  );
};

// Custom Hook
export const useAuth = () => {
  return useContext(AuthContext);
};

export default AuthContext;
In the AuthProvider component, we use the useState and useEffect hooks to keep track of the user’s authentication status. We also initialize the authentication state by fetching account details from Appwrite’s SDK. The useAuth custom hook allows other components to use the authentication context, by providing access to the current user and loading state.
Creating a separate protected route
To restrict access to certain pages based on the user’s authentication status, we need a component that has access to the hook we created earlier. This ProtectedRoute component will check if the user is authenticated and either render the intended page or redirect the user to the login page if not authenticated:
import { Outlet, Navigate } from "react-router-dom";
import { useAuth } from "./useAuth"; // imports the authentication hook

const ProtectedRoute = () => {
  const { user } = useAuth();

  return user ? <Outlet /> : <Navigate to="/login" />;
};

export default ProtectedRoute;
In the ProtectedRoute component, we use the useAuth hook to check if the user is authenticated. If the user is authenticated, the children (intended page) are rendered. Otherwise, the user is redirected to the login page using the Navigate component from react-router-dom.
Applying protection to intended pages
To apply the protection to our intended pages, we can use the ProtectedRoute component within our routing setup in the main JSX file:
import "./App.css";
import { BrowserRouter as Router, Routes, Route } from "react-router-dom";
// import PrivateRoutes from "./utils/PrivateRoutes";
import { AuthProvider } from "./utils/useAuth";
import Home from "./pages/Home";
import Profile from "./pages/Profile";
import Login from "./pages/login";
import Register from "../src/pages/registeration";
import NavBar from "./Components/NavBar";
import Logout from "./pages/Logout";
import ProtectedRoute from "./utils/ProtectedRoute";

function App() {
  return (
    <Router>
      <AuthProvider>
        <NavBar />
        <Routes>
          <Route path="/login" element={<Login />} />
          <Route path="/logout" element={<Logout />} />
          <Route path="/register" element={<Register />} />
          <Route path="/" element={<Home />} />
          <Route
            path="/profile"
            element={
              <ProtectedRoute>
                <Profile />
              </ProtectedRoute>
            }
          />
        </Routes>
      </AuthProvider>
    </Router>
  );
}

export default App;
In the preceding code snippet, we’re using the ProtectedRoute component to wrap the Home component. This makes it a child of the ProtectedRoute components and ensures that the Home component is only accessible to authenticated users.
Displaying the user’s details on a profile page
When a user has been authenticated, we may want to display the user’s details, such as their username, email, profile picture, etc. This can also include displaying their cart information and wishlist. This can be achieved by retrieving the user’s information from Appwrite’s SDK and rendering it in the React components:
import React, { useState, useEffect } from 'react';
import appwrite from './appwrite';

function UserDetails() {
  const [user, setUser] = useState(null);

  useEffect(() => {
    const fetchUserDetails = async () => {
      try {
        const response = await appwrite.account.get();
        setUser(response);
      } catch (error) {
        console.error(error);
      }
    };

    fetchUserDetails();
  }, []);

  return (
    <div>
      {user && (
        <div>
          <p>Name: {user.name}</p>
          <p>Email: {user.email}</p>
          <img src={user.avatar} alt="User Avatar" />
        </div>
      )}
    </div>
  );
}

export default UserDetails;
In the preceding code, we’re using the useEffect hook to fetch the user details when the component loads. We’re also calling the appwrite.account.get() method to retrieve the user’s information and store it in the user state. Once the user details are available, we can render the user’s name, and email in the component:
Creating the logout functionality
To implement the logout functionality, we have to create a function that deletes the user session and clears the current user’s data:
// Logout.jsx

import React from "react";
import { Link } from "react-router-dom";
import { account } from "../appwrite";
import "./Logout.css"; // Import the CSS file

function Logout() {
  const logoutUser = async () => {
    try {
      const response = await account.deleteSession("current");

      console.log("Logout successful:", response);
      // Redirect or perform further actions upon successful logout
    } catch (error) {
      console.error("Logout failed:", error);
      // Handle logout errors appropriately
    }
  };

  return (
    <div className="logout-container">
      <h2 className="logout-message">Are you sure you want to log out?</h2>
      <div className="logout-options">
        <p>
          <Link to="/" className="header-link">
            No, I don't
          </Link>
        </p>

        <p>
          <button className="logout-button" onClick={logoutUser}>
            Yes, I'm sure
          </button>
        </p>
      </div>
    </div>
  );
}

export default Logout;
In the logoutUser function, we’re using the account.deleteSession method to delete the current user session, effectively logging the user out. We can also perform additional cleanup such as clearing user data or resetting the app state.
Handling Errors in React and Appwrite
Building robust and user-friendly React applications requires effective error handling, especially when utilizing backend services like Appwrite. This is because the user’s experience can be easily disrupted by either a failed API call, network errors, invalid user input, or unexpected server behavior. Here are some of the best practices we can use to handle errors gracefully in our projects.
- Using try/catch blocks. Like in our previous examples, utilize
try/catchblocks around potentially error-prone code. We can do this by writing the intended logic in thetryblock and using thecatchblock to handle the error appropriately by displaying informative messages, logging details, or redirecting users to relevant pages. - Error Boundaries. We can also make use of React error boundaries to get errors in child components without necessarily affecting the entire application.
- Creating custom error components. Creating dedicated error components that display user-friendly messages based on the type of error encountered helps to offer a more personalized and informative experience compared to generic error messages.
Conclusion
Choosing the right authentication system is an integral part of creating a secure application. Therefore, it’s extremely important to consider our application’s requirements, the level of security needed, and the user experience we want to provide when choosing the authentication methods for our app.
By following the steps and best practices outlined in this article, we can implement a reliable and user-friendly authentication system in our React apps using Appwrite.

