

Continuing our Selections In Photoshop series, today let’s take a look at the freehand selection tools. These tools allow you to make much more intricate and precise selections than the basic geometric tools that we covered in the previous post of this series, Selections In Photoshop, Part 1: Geometric Tools.
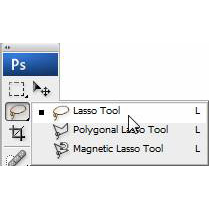
The Lasso Tool
The Lasso tool is truly a freehand tool, and is great when making fast, loose selections. If you have a very steady hand, you can also use it to make more intricate selections. You can drag the Lasso tool (![]() ) around an area to trace a freehand selection, just like drawing with a pencil.
) around an area to trace a freehand selection, just like drawing with a pencil.
- Select the Lasso tool in the toolbox or press L on the keyboard.
- Click and drag the pointer around the object you want to select as if you were drawing a line with a pencil.
- Finish the line where you started and let go of the mouse. Your selection will kick in.

The Polygonal Lasso Tool
The Polygonal Lasso tool ( ![]() ), sets anchor points and creates straight-edge selections.
), sets anchor points and creates straight-edge selections.
- Click on the tool in the toolbar or hit Shift L to cycle through each of the Lasso tools until you come to the Polygonal Lasso.
- To draw a straight segment, click once where you want to start, then move the pointer to where you want the first straight segment to end, and click. Keep on clicking and moving your way around the object in this fashion until you reach your starting point.
Tool Combinations
The advantage of the Polygonal Lasso tool is that you get some lovely straight segments. The disadvantage is that you only get straight segments! You can improve your selections by using a shortcut key to jump between the two. This technique takes a bit of practice to master, but it’s worthwhile learning how to do it in order to speed up your workflow and improve your selections.
Note: Don’t forget to zoom in when you’re making selections so you can clearly see what you’re doing. Hold down the Ctrl key (Windows) or the Cmd key (Mac) and press + or – to zoom in and out of your document.
- Select the Lasso tool (
 ). Starting on the yellow part of the flower, I’m going to drag the lasso, freehand, around the curve, tracing the edge as closely as possible. Do not release the mouse button.

- Hold down Alt (Windows) or Option (Mac), and then release the mouse button so that the Lasso pointer changes to the Polygonal Lasso shape (
 ). Do not release the Alt or Option key.
 - Clicking along the right side of the flower to place anchor points, follow the contours of the flower. Be sure to keep the Alt or Option key held down as long as you want the Polygonal Lasso.
The selection border stretches out like a rubber band between anchor points.
- When you reach the curved edge of the flower, keep the mouse button held down and then release the Alt or Option key. The pointer again appears as the lasso icon.
- Continue to trace around the flower until you arrive back at the starting point, alternating between the lasso and the polygonal lasso.
The Magnetic Lasso Tool
The Magnetic Lasso tool (![]() ) is almost like a combination of the other two lasso tools, and works best when there is good contrast between the area you want to select and its surroundings.
) is almost like a combination of the other two lasso tools, and works best when there is good contrast between the area you want to select and its surroundings.
When you draw with the Magnetic Lasso tool, the border automatically snaps to the borders between areas of contrast. You can also control the selection path by occasionally clicking the mouse to place anchor points in the selection border.
- Select the Magnetic Lasso tool (
 ), hidden under the Lasso tool ( ).
- Click once along the edge of the object, and begin tracing the outline by moving the magnetic lasso pointer around the edge, staying fairly close to the edge as you move. Do not hold down the mouse button.
Here comes the really cool part. Although you may not be tracing 100% accurately, the magnetic tool snaps to the edge of the object and automatically adds fastening points.

- If you think that the tool is not following the edge closely enough, you can add your own fastening points in the border by clicking the mouse button. You can add as many extra fastening points as you feel are necessary. You can also remove the most recent fastening points by pressing Delete for each anchor point you want to remove. Then, move the mouse back to the last remaining fastening point and continue selecting.
- When you reach your starting point again, double-click the mouse button to make the Magnetic Lasso tool close the selection. Or, move the Magnetic Lasso over the starting point and click once.
That’s an overview of the Lasso tools in Photoshop. As you can see, they each have their uses, and can also be used effectively in combination.
Have you tried the Lasso and Polygonal tools combo before? Do you use the Lasso tools for much of your selection work or do you prefer other tools for selecting in Photoshop? Next up we’ll be looking at the Magic Wand and its friends.
Related Reading:
Frequently Asked Questions (FAQs) about Photoshop Freehand Tools
What are the different types of freehand selection tools in Photoshop?
Photoshop offers three main types of freehand selection tools: the Lasso tool, the Polygonal Lasso tool, and the Magnetic Lasso tool. The Lasso tool allows you to draw freeform segments of a selection border. The Polygonal Lasso tool is ideal for straight-edged segments of a selection border, while the Magnetic Lasso tool works best when there are high-contrast areas to follow.
How do I use the Lasso tool in Photoshop?
To use the Lasso tool, select it from the toolbox or press the ‘L’ key. Click and drag to draw a freehand selection border. Release the mouse button to complete the selection. If you want to add or subtract from the selection, hold down the Shift or Alt (Option in Mac) key while drawing.
What is the Polygonal Lasso tool used for?
The Polygonal Lasso tool is used for creating selections with straight edges. It’s perfect for selecting objects with many straight lines or for creating precise straight-edged selections. To use it, click to create the first anchor point, and then continue clicking to create a series of connected straight lines.
How does the Magnetic Lasso tool work?
The Magnetic Lasso tool creates a selection border that automatically snaps to the edges of the defined areas in your image. It’s particularly useful when you’re working with an image that has a high-contrast area you want to select.
Can I switch between different Lasso tools while making a selection?
Yes, you can switch between the different Lasso tools while making a selection. This can be done by holding down the Alt key (Option in Mac) and choosing the desired Lasso tool.
How can I modify my selection using the Lasso tools?
You can modify your selection by adding or subtracting areas. To add to the selection, hold down the Shift key and draw around the area you want to add. To subtract from the selection, hold down the Alt (Option in Mac) key and draw around the area you want to remove.
What is feathering in Photoshop?
Feathering in Photoshop is a technique used to create soft edges in your selections, which can help to blend the selection naturally into the rest of the image. You can set the feather value before making a selection using the options bar.
How can I move my selection to a different part of the image?
To move your selection, simply choose the Move tool from the toolbox or press the ‘V’ key, then click and drag the selection to the desired location.
Can I save my selection for future use?
Yes, you can save your selection for future use. Go to the Select menu, choose Save Selection, and give it a name. You can load this selection anytime by going to the Select menu and choosing Load Selection.
How can I improve my skills with the Lasso tools?
Practice is key when it comes to mastering the Lasso tools. Try using these tools on different types of images and scenarios. Also, explore online tutorials and practice exercises to get a better understanding of how these tools work.

