

Key Takeaways
- jQuery is a JavaScript library that simplifies the process of using JavaScript for web design, offering a range of pre-built functions and tools to improve functionality and user experience.
- jQuery allows designers to manipulate HTML elements, handle events, create animations, and make AJAX calls, among other tasks, in a more streamlined and efficient way than raw JavaScript.
- One of the key features of jQuery is its ability to “chain” functions together, allowing multiple actions to be performed in a single line of code. This makes it a powerful tool for simplifying complex JavaScript tasks.
- jQuery’s load event function allows tasks to be completed during the loading of the page, starting to work as soon as it has all the parts it needs. This is an improvement on traditional onload methods.
- Despite its capabilities for high-end tricks, jQuery’s biggest attraction is its ability to solve small problems quickly and with minimum fuss, making it a valuable tool for web designers.
If the rebirth of JavaScript has been the biggest theme of the past two years, you could probably divide most of the talk surrounding this topic into two main areas.
At the geekier end of town, we’ve seen smarties harnessing JavaScript to do all sorts of amazing — and occasionally ridiculous — things with Ajax.
However for front-end guys like myself, much of the scripting fizz and bubble has been focussed around refitting your markup — that is, using JavaScript to make your markup work better after it gets to the browser. Long-time readers of the Design View newsletter will probably remember a few of my own experiments along these lines over the past few years:
- In Styling Images with the DOM, we used JavaScript to add rounded corners to images.
- In DOM Text Shadows, we used JavaScript to build up a shadow on heading text.
- In Horizontal Rulez! OK!, we used JavaScript to fix the dodgy
hrelement.
Although each of these scripts has quite a different purpose, they all involve sending neat, semantic markup to browsers, and using JavaScript either to fix or extend the abilities of those browsers that are smart enough to understand. In most cases, this involves “wrapping” some part of your markup in some more markup. Today we’re going to look at an easy, all-purpose method that will allow us to do this anytime, anywhere: jQuery.
So, What Is jQuery?
jQuery is yet another JavaScript library to join the already crowded space that includes Prototype, Scriptaculous, Rico, Moo.Fx and more than a dozen others. To use it, simply attach the .js file in the head of your page: magically, you have access to lots of pre-built functions and gizmos.
Q: Why would you possibly want another arcane JavaScript library to deal with?
A: The key attraction of jQuery is what it can offer you within the first 10 minutes of your using it.
A while back, we spent some time improving the way in which SitePoint’s Marketplace operates. While looking for an elegant way to allow sellers to display large screenshots, statistics, graphs and other images without leaving the main auction page, I came across Cody Lindley’s Thickbox, which is powered by John Resig’s jQuery JavaScript library. The image below shows the Thickbox in action.
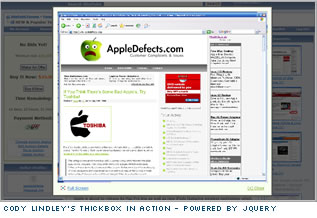
After only five minutes of toying with Thickbox, you’ll begin to see its potential. In the Marketplace, I was able to pull both linked images and full HTML documents through to the Thickbox window, while simultaneously dimming (but not losing) the launch page. Users with browsers in which JavaScript is disabled or unavailable are simply taken directly to the item (that is, the image or page). It’s a very clever, usable, and accessible solution to the “enlarge this thumbnail” problem.
However, since we’d already decided to include the jQuery library in the page (it’s tiny — about 10kB), I thought it would be a good idea to find out what else it could do for us.
An hour later, I was a jQuery convert.
The true beauty of jQuery is its simplicity. Single lines of jQuery code can replace a dozen lines of normal JavaScript, yet it remains very elemental and flexible. Let me illustrate this point with an example. In my “horizontal rules fixer” from two years ago, we used the following script:
function fancyRules() {

  if (!document.getElementsByTagName) return;

    var hr = document.getElementsByTagName("hr");

  for (var i=0; i<hr.length; i++) {

    var newhr = hr[i];

    var wrapdiv = document.createElement('div');

    wrapdiv.className = 'line';

    newhr.parentNode.replaceChild(wrapdiv, newhr);

    wrapdiv.appendChild(newhr);

  }

}


window.onload = fancyRules;
As a quick summary of this code, the browser waits for the page to finish loading before rifling through the DOM to locate each occurrence of hr. Each time it finds one, it creates a new div, gives it the class name “line”, inserts it where the hr was, and pops the old hr inside the new div, to achieve the markup required to implement this particular effect. Semantic pedantry aside, the end result of this script was that we were able to achieve the desired result without having to change hundreds of pages.
At the time, I thought it wasn’t a bad result for 12 lines of code. But let’s look at how we’d achieve the same result using jQuery.
$(document).ready(function(){

  $("hr").wrap("<div class='line'></div>");

});
I kid you not.
To break it down (not that there’s much to break):
$(document).ready(function(){

  ...

});
The first and third lines are jQuery’s load event, and they replace the old window.onload from above. Any task that we wish to complete during the loading of the page can be dropped inside these curly braces.
This is a great improvement on the old onload method, because rather than waiting until everything has finished loading, jQuery’s function watches everything that comes in, and starts working as soon as it has all the parts it needs. It’s really very neat.
Remarkably, the second line is even simpler:
$("hr").wrap("<div class='line'></div>");The “dollar object” — $("hr") — is all we need to tell jQuery to grab every horizontal rule on this page, and wrap is what we will be doing to those hr elements.
jQuery’s built-in wrap function takes in whatever HTML we give it (in this case "<div class='line'></div>") and wraps it around each hr in our page — no loops or tests required.
We’ve used a div here, but we could just as easily been modifying or wrapping a b, span, or a element.
And although we’ve used a very simple selection rule here (all hrs), we could have easily been much more specific with what we targeted. Using familiar old CSS syntax, we could have used any of the following:
$("hr.separate")— Get thehrelements with the class name"separate ".$("li:only-child")— Get list items that are by themselves.$("ul > li")— Get only list items with unordered parent lists.
While I’ve personally found wrap to be of the most instantly useful jQuery functions, it’s just one of many, including hide, show, fadeOut("slow") and slideUp("fast"), just to name a few. You can probably guess what each one of these functions does. The jQuery starter’s tutorial on the jQuery site is quite a gentle beginner’s guide, and takes you through some of the most common functions.
But perhaps jQuery’s single neatest feature is its ability to “chain” functions together. In other words, if I wanted to add a second div to our hr elements for some crazy reason, I could simply add another call to the wrap function to the end of my code, like this:
$("hr").wrap("<div></div>").wrap("<div></div>");It’s so easy, it’s crazy. Crazy like a fox!
The Sell Your Site section of the Marketplace gives you another example of where this might come in handy, as demonstrated below.

When we were developing this page, I wanted to add a small icon to the bottom corner of each thumbnail. This required each img element to be wrapped in a container div, and another div showing the icon to be positioned in the container div.
Again, the jQuery code is just one line (I’ve split it here because we have limited column width to work with).
  $("#thumbnails li img")

.wrap("<div class='wrap'></div>")

.before("<div class='thumb'></div>");
In plain English, this code simply asks jQuery to:
- Find all the images in
lielements that are inside#thumbnails. - Wrap these images in a
divcalled"wrap". - Squeeze another
div(the one with the icon graphic) in my"wrap"divjust before my image.
Now that we have the structure, CSS does the rest.
Of course, if JavaScript is turned off, the thumbnails link directly to the raw image files, and there’s no need for the icons. Now that’s what I call elegant degradation.
Like most other JavaScript libraries, jQuery is capable of some very high-end tricks (we’ve covered its Ajax features in a previous article), but the biggest attraction for me was its ability to solve the little problems quickly and with a minimum of fuss.
As you can probably tell, I’m a big jQuery fan already. I hope you’ll find it useful too.
And of course, if you’re expanding your JavaScript horizons, don’t forget to upgrade to the latest version of Joe Hewitt’s Firebug extension, which is now the undisputed king of JavaScript debuggers.
This article was originally published in Design View #23.
Frequently Asked Questions about jQuery and JavaScript for Designers
What is the difference between jQuery and JavaScript?
JavaScript is a programming language that allows you to implement complex features on web pages. jQuery, on the other hand, is a fast, small, and feature-rich JavaScript library. It makes things like HTML document traversal and manipulation, event handling, and animation much simpler with an easy-to-use API that works across a multitude of browsers. Essentially, jQuery is a set of JavaScript libraries designed to simplify HTML document traversing, event handling, and animating.
How can I start using jQuery in my projects?
To start using jQuery, you need to include the jQuery library in your project. You can download it from the official jQuery website or include it directly from a Content Delivery Network (CDN). Once the library is included in your project, you can start using jQuery functions by using the $ sign followed by a selector (to select HTML elements) and a jQuery action (to perform on the selected elements).
What are some common uses of jQuery for web designers?
jQuery is commonly used for a variety of tasks in web design, including manipulating HTML elements, handling events (like clicks or mouse movements), creating animations, and making AJAX calls to retrieve or send data to a server. It’s also used to create interactive features like image sliders, form validations, and dynamic content loading.
How does jQuery simplify working with JavaScript?
jQuery simplifies JavaScript by providing easy-to-use APIs for common web tasks, abstracting away complex JavaScript functionality. It also handles a lot of cross-browser compatibility issues that can arise when writing raw JavaScript, making your code easier to write and maintain.
Can I use jQuery with other JavaScript libraries?
Yes, jQuery can be used alongside other JavaScript libraries. It provides a feature called noConflict mode, which allows you to use jQuery with other libraries that also use the $ symbol.
What are some resources for learning jQuery?
There are many resources available for learning jQuery. The official jQuery website provides comprehensive documentation and tutorials. Other online platforms like Codecademy, Udemy, and Khan Academy also offer courses on jQuery.
How can I debug jQuery code?
Debugging jQuery code is similar to debugging JavaScript. You can use the browser’s developer tools to inspect elements, view console logs, and step through your code. Additionally, jQuery provides a few methods like .error(), .fail(), and .done() to handle errors and exceptions.
What are some best practices when using jQuery?
Some best practices when using jQuery include: using the latest version of jQuery, leveraging its chaining capabilities, using the document ready function to ensure all elements are loaded before your code runs, and using the jQuery CDN for faster loading times.
How can I optimize my jQuery code for better performance?
There are several ways to optimize your jQuery code for better performance. These include: minimizing DOM manipulation, using ID selectors instead of class selectors, caching jQuery objects, and using the .on() method for event binding.
Can I use jQuery for mobile web development?
Yes, jQuery has a specific library for mobile web development called jQuery Mobile. It provides a unified, HTML5-based user interface system for all popular mobile device platforms.