

Key Takeaways
- KwesForms and Rive can be combined to create dynamic, interactive forms for Astro sites, with custom events controlling different states of a Rive animation based on form events.
- Setting up KwesForms involves adding the KwesForms script to Astro, and creating an HTML form with specific attributes for validation. Rive requires a small amount of configuration in Astro’s Vite config, and animations can be downloaded or created in a browser-based interface.
- Event listeners can be added to form fields to trigger different animation states in Rive. This is done by creating a function that returns an instance of Rive’s stateMachineInputs, which allows values to be set, thus triggering the animation into different states.
In this article, I’ll show you how to add KwesForms to your Astro site and then bring the form to life using custom events and Rive.
Custom events can be used to control the different states of a Rive animation whenever an “event” in the form occurs. This could be when a field becomes invalid, or when the form has been successfully submitted.
If you’re keen to jump ahead, I’ve created an example repo containing all the code, and a live preview:
- 🚀 Preview
- ⚙️ Repository
Getting Started with Astro
To get started with Astro, you have a couple of options. You can either follow the guidelines for installing Astro with the Automatic CLI, or (my preferred approach) install Astro manually.
Create a page
If you’ve installed Astro manually, create a new file called index.astro in the following directory: src/pages.
Create a component
Create a new file called rive-form.astro in the src/components directory.
Add the component to the page
Add the following to render the RiveForm component in the index page:
// src/pages/index.astro

---
import RiveForm from '../components/rive-form.astro';
---

<RiveForm />
For the rest of this article, I’ll be adding code to the rive-form.astro file.
The src can be seen in the repo here: rive-kwes-forms/src/pages/index.astro.
Getting Started with KwesForms
I used KwesForms for a client project recently, and loved the experience. There are, of course, many ways to handle form data, but I found using KwesForms really helped simplify the requirement to have both client- and server-side validation!
To get started, go ahead and sign up (it’s free). There are two ways to include the KwesFroms code in your site: you can either install via npm, or use a script element. In this example, I’ll be using the script element.
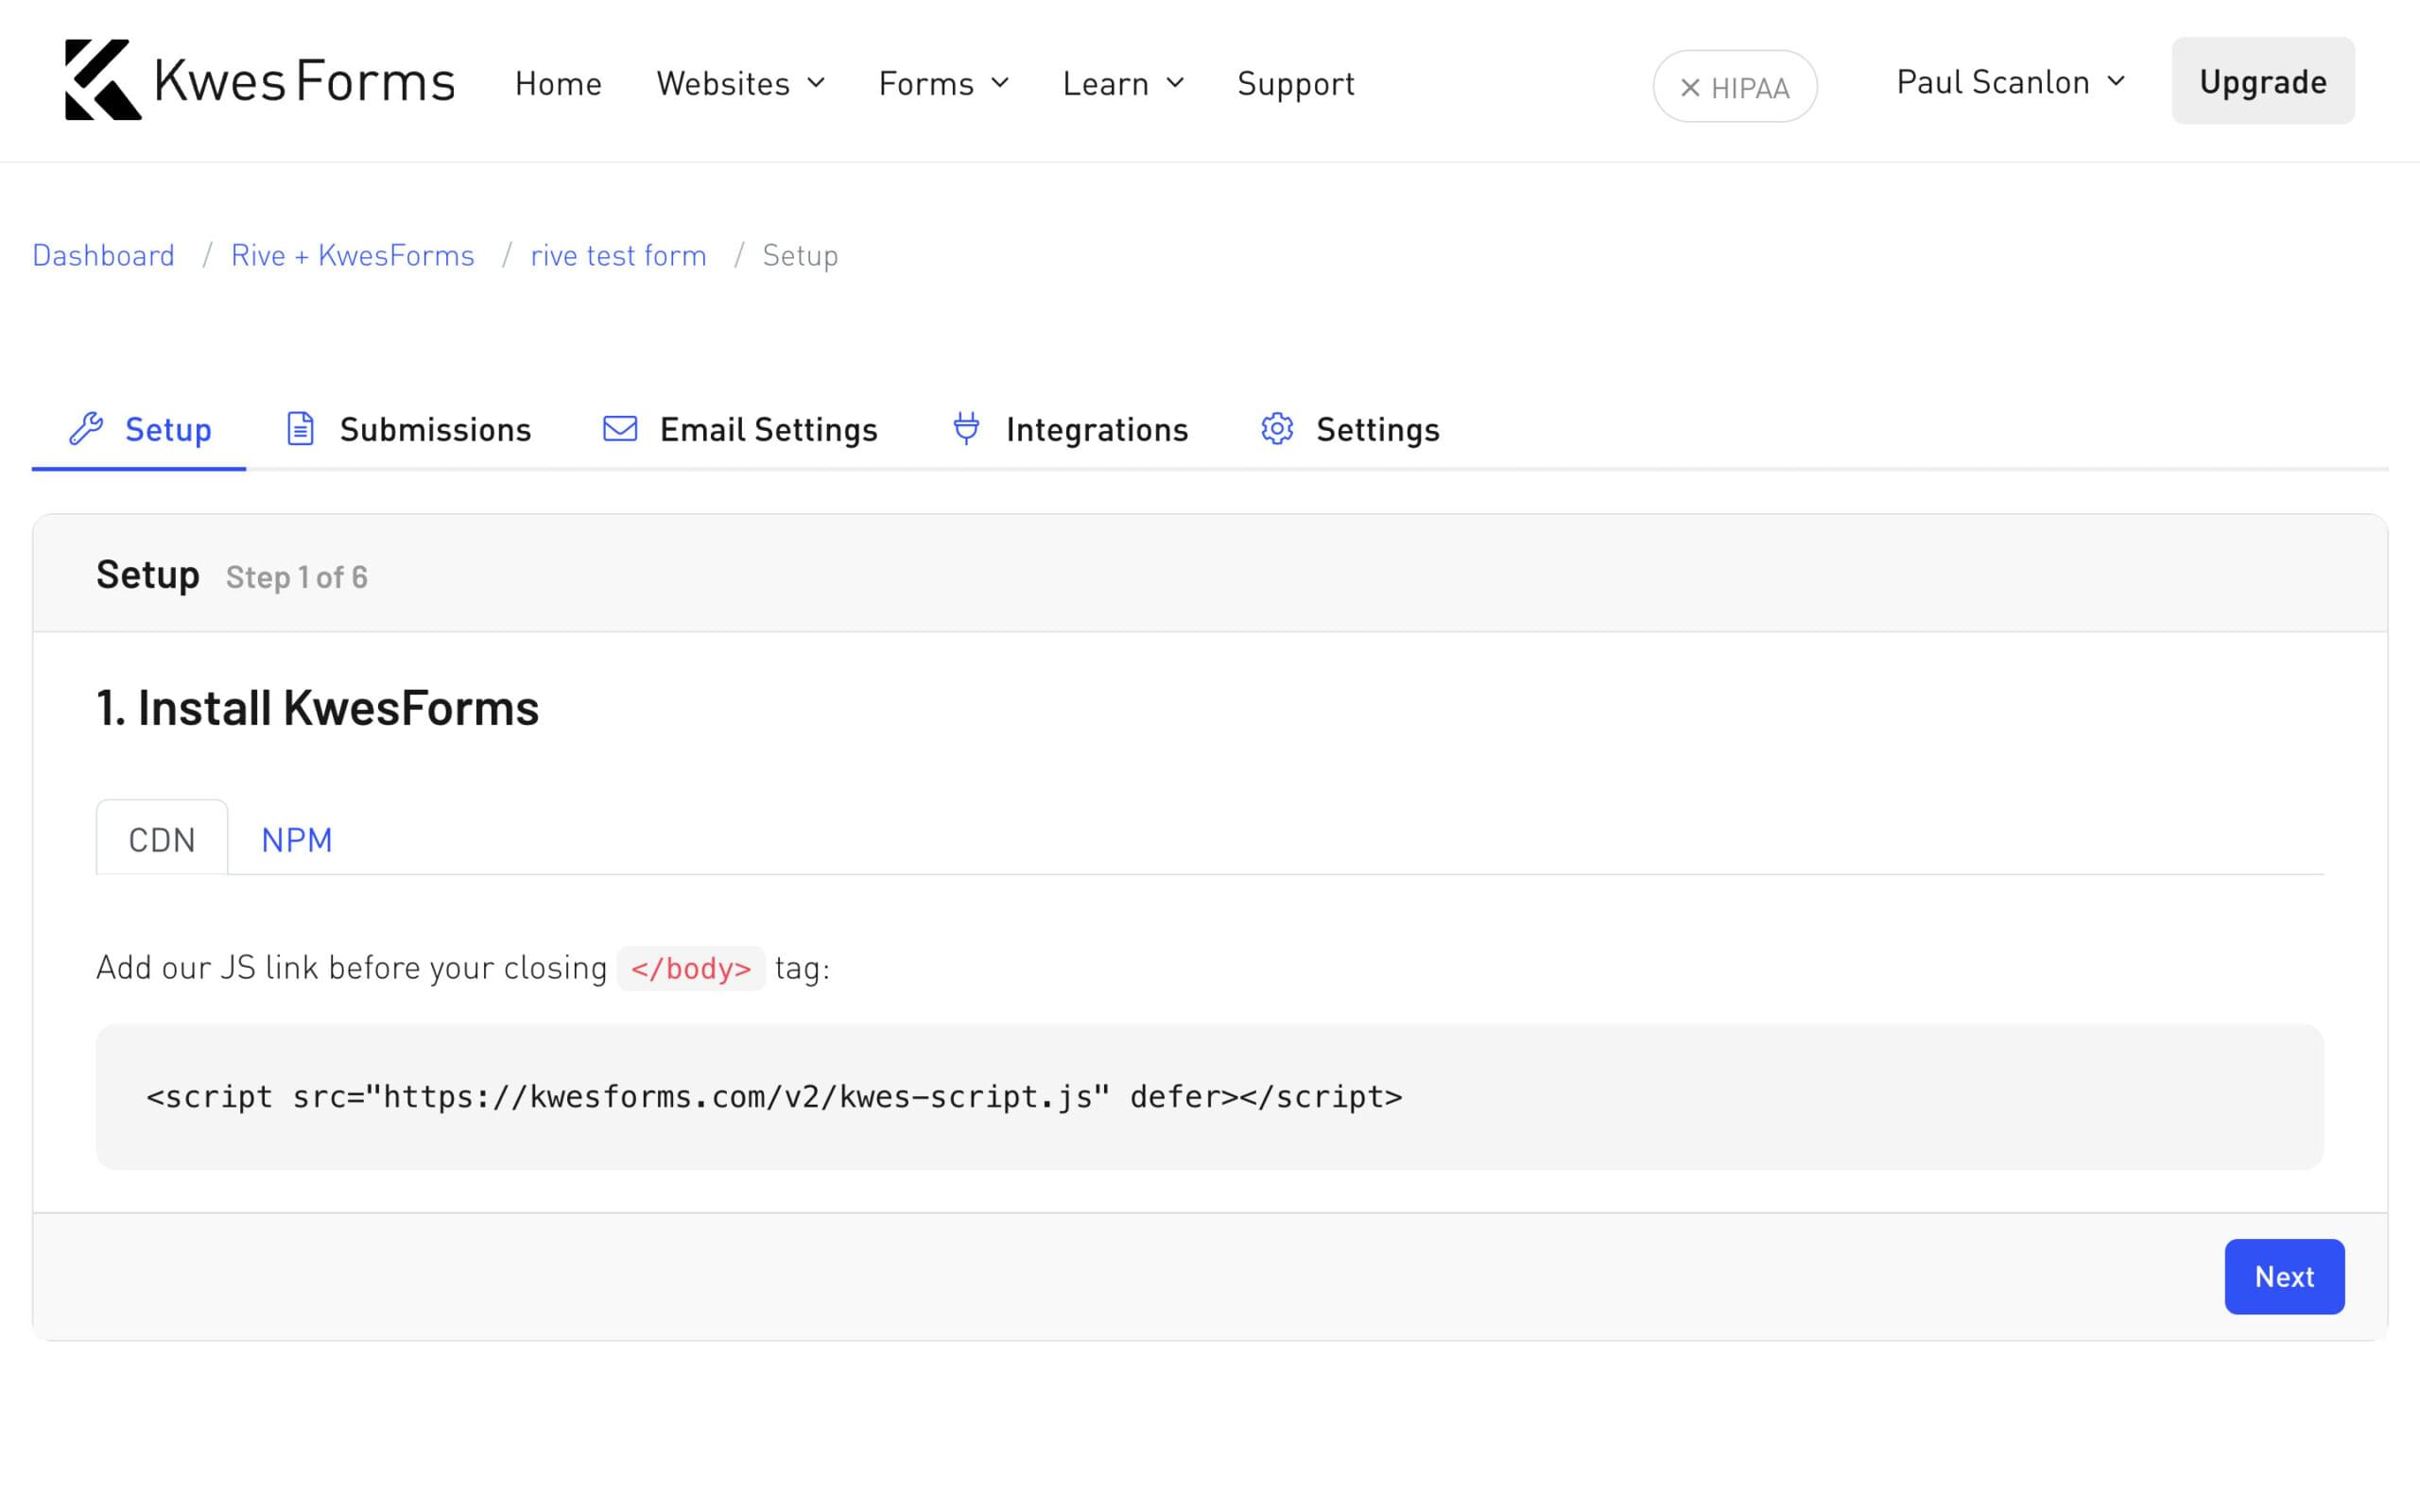
The remaining five steps in the setup section will guide you through how to add an HTML form element to your site.
Adding KwesFroms script to Astro
When using client-sides scripts with Astro, you might want to opt out of processing using the is:inline directive. This tells Astro to leave the script alone and to render it in the HTML as a script element.
In your rive-form.astro file, add the following:
// src/components/rive-form.astro

- <script src='https://kwesforms.com/v2/kwes-script.js' defer></script>
+ <script is:inline src='https://kwesforms.com/v2/kwes-script.js' defer></script>
Adding KwesForms HTML
Here’s the code I’ve used in the example (using Tailwind):
// src/components/rive-form.astro

<script is:inline src="https://kwesforms.com/v2/kwes-script.js" defer></script>

<form
  id="riveForm"
  class="kwes-form flex flex-col gap-6"
  action="https://kwesforms.com/api/foreign/forms/abc123"
  data-kw-no-reload
>
  <div class="flex gap-4">
    <div class="grow">
      <label for="name">Name</label>
      <input id="riveFormName" type="text" name="name" data-kw-rules="required" />
    </div>
    <div class="grow">
      <label for="email">Email</label>
      <input id="riveFormEmail" type="email" name="email" data-kw-rules="required|email" required />
    </div>
  </div>
  <div>
    <label for="name">Message</label>
    <textarea id="riveFormMessage" name="message" rows="4" data-kw-rules="required"></textarea>
  </div>
  <button type="submit">Send Message</button>
</form>
The src can be seen in the repo here: rive-kwes-forms/src/components.rive-form.astro.
There are a couple of attributes that I’ve used to configure my form. You’ll notice on all of the inputs I’ve added the following: data-kw-rules='required'. This tells KwesFroms that these fields must contain a value before the form can be considered valid. I’ve used an additional attribute on the email field to ensure only valid email addresses are used — for example, data-kw-rules='required|email'.
You can see all the validation rules in the KwesForms form documentation.
With the form set up, it’s now time to add a Rive animation.
What is Rive?
Rive is super cool, as it allows designers and animators to create an animation using a browser-based interface, and once it’s complete, developers can simply download a file.
Modifying Astro’s Vite config
To use a .riv file with Astro, there’s a small amount of config required so the Astro compiler knows what to do with files that end in .riv.
To use Rive with Astro, add the following to your astro.config.mjs file:
// astro.config.mjs

import { defineConfig } from 'astro/config';

export default defineConfig({
  vite: {
    assetsInclude: ['**/*.riv'],
  },
});
Download Rive animation
The next step is to find a Rive animation to use, or, if you’re feeling creative you can create your own. There are loads of community examples that can be downloaded and used for free.
The file I’m using, Animated Login Character, was created by Juan Carlos Cruz from the Rive team. To get started, download the file and save it in your public directory.
I’ve saved mine in public/rive/2244-7248-animated-login-character.riv.
The src can be seen in the repo here: rive-kwes-forms/public/rive.
Initializing Rive
To initialize the Rive canvas, add the following to your rive-form.astro file:
// src/components/rive-form.astro

<script>
  const r = new rive.Rive({
    src: '/rive/2244-7248-animated-login-character.riv',
    canvas: document.getElementById('canvas'),
    autoplay: true,
    stateMachines: 'Login Machine',
  });
</script>
<script is:inline src="https://unpkg.com/@rive-app/canvas@2.7.0"></script>
<canvas id="canvas" width="800" height="600"></canvas>
The next part involves adding event listeners to each of the form elements so they can kick the Rive animation into its different animation states.
Rive state machines
You’ll see on the download page that this animation has a number of “states” defined. These are the different states of the animation that can be triggered when certain form events occur.
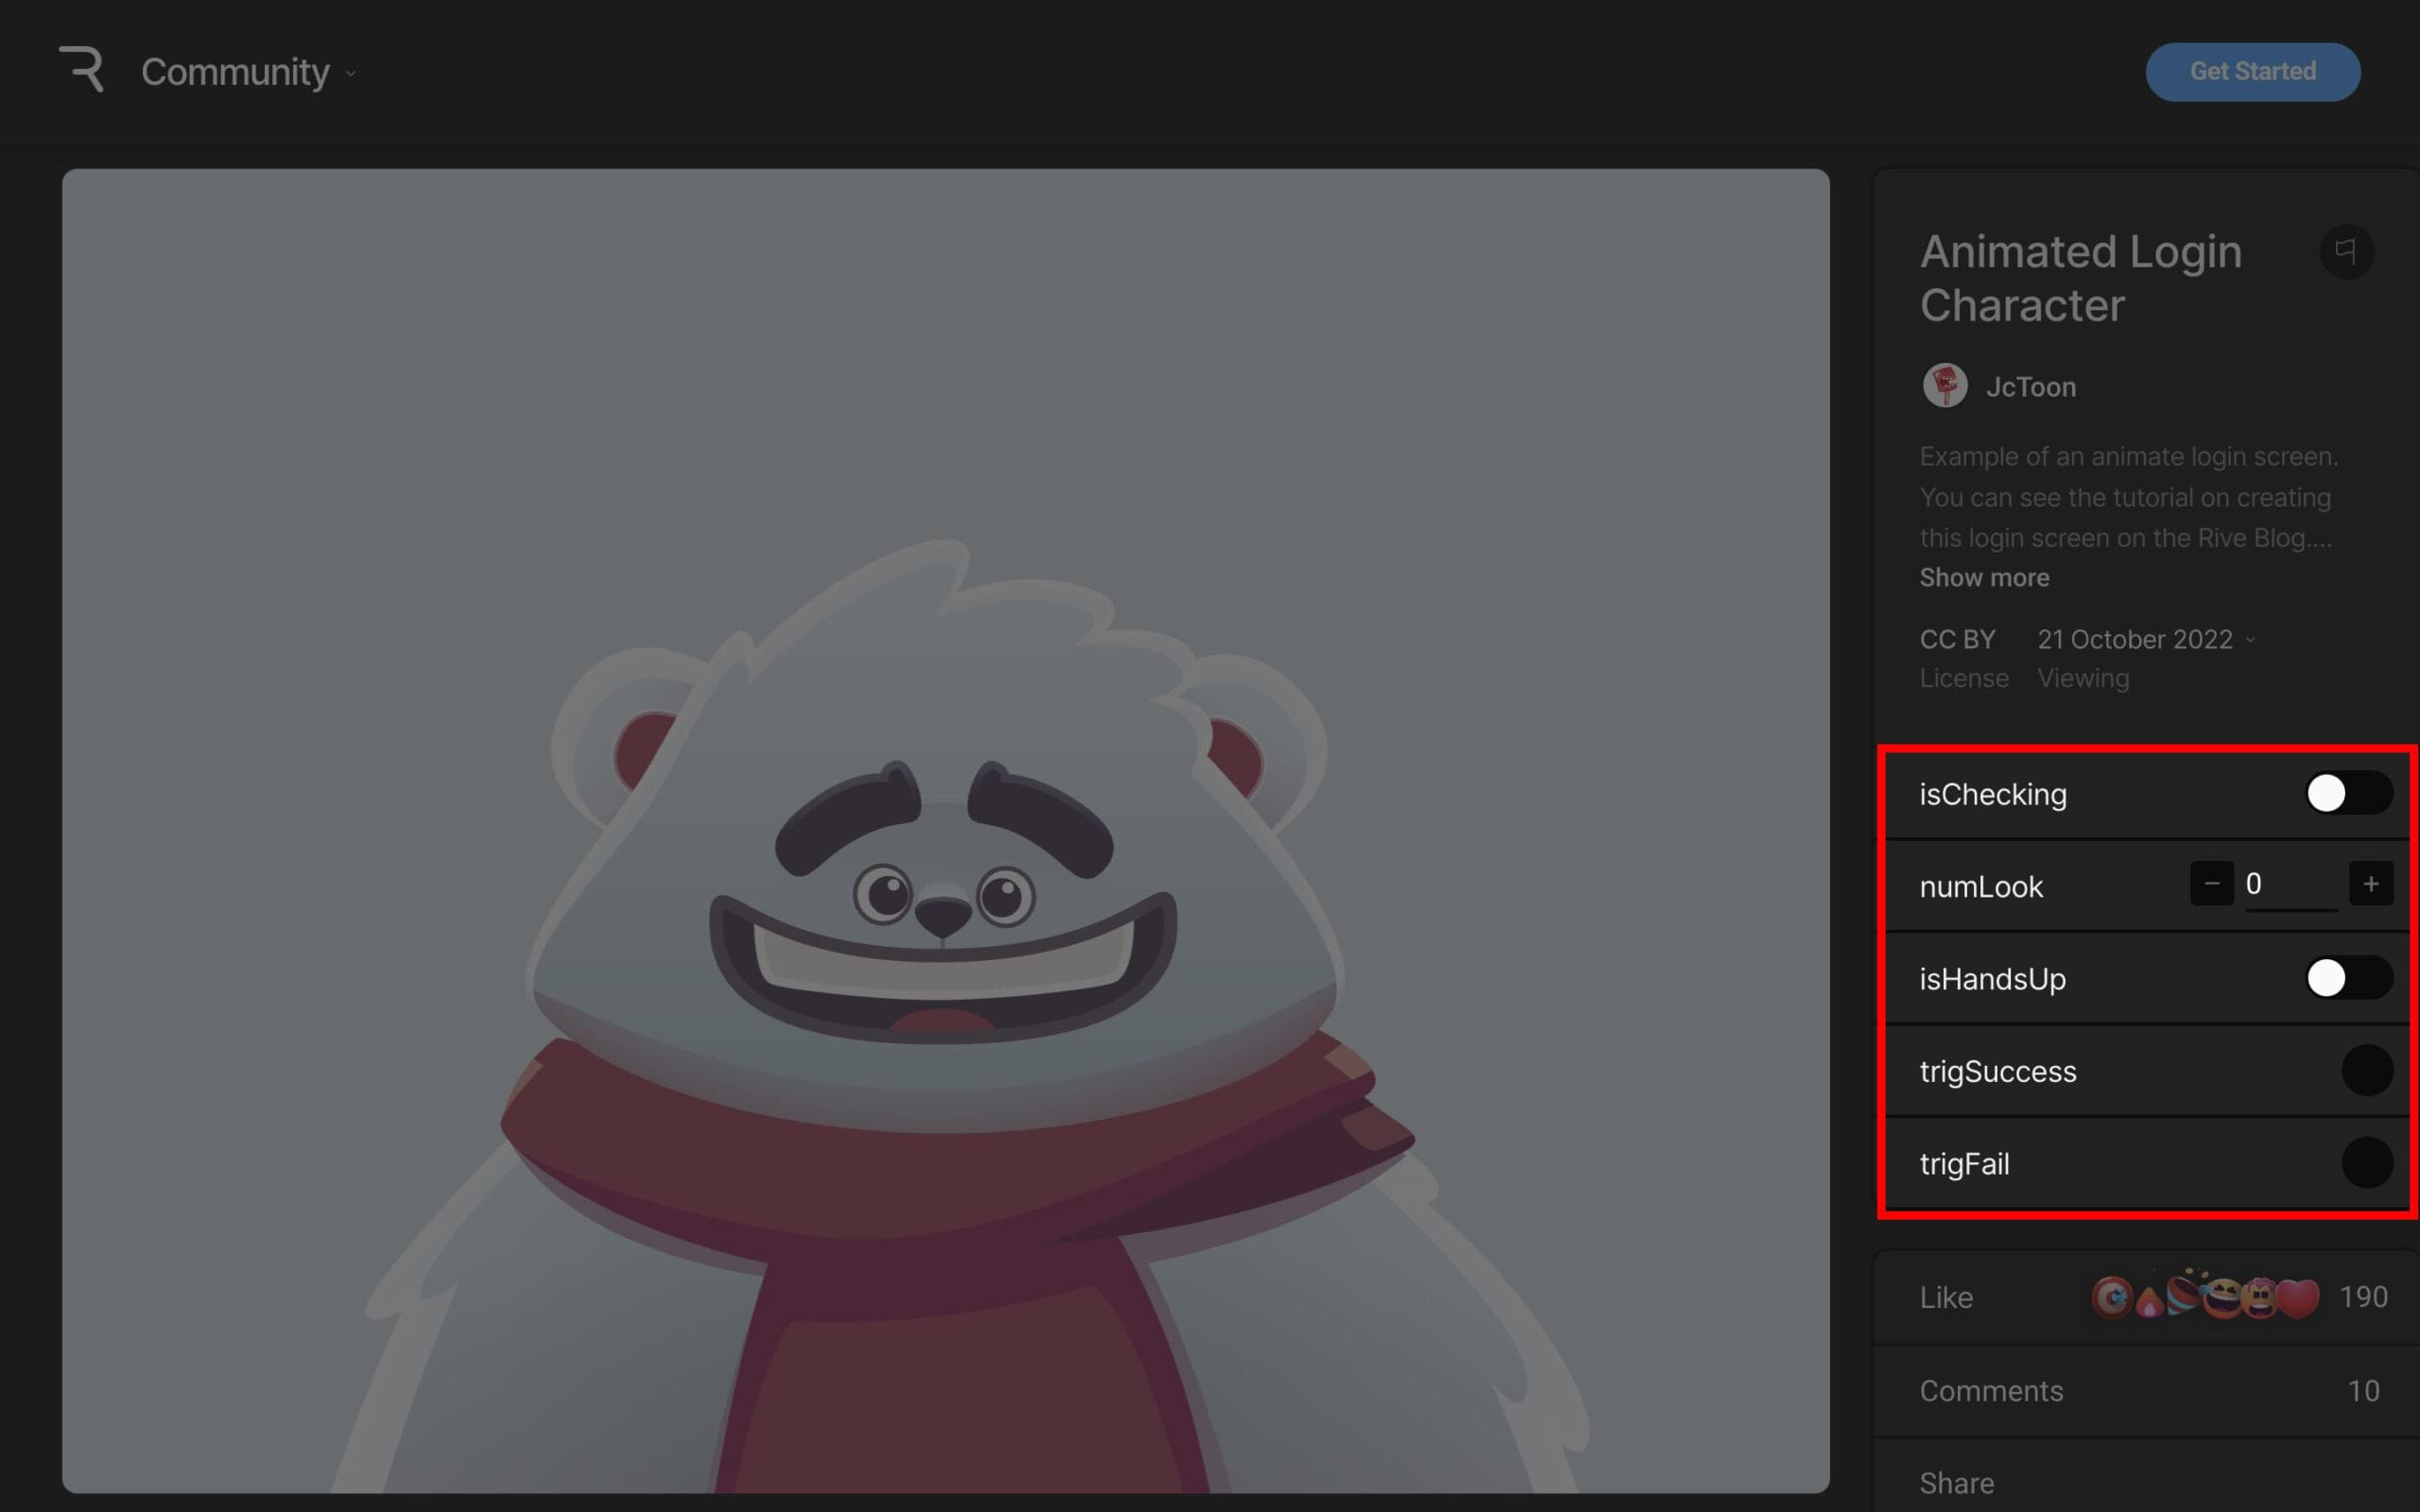
Rive state machines can be one of the following types:
- a trigger that has a
fire()function - a number that has a value number property
- a Boolean that has a value Boolean property
The type of state machines defined in an animation will determine how you invoke them from your form’s event listeners. (I’ll come back to this in just a moment.)
Adding Event Listeners
I’ve given each field in the form an id attribute, and from here I can attach the required event listeners for each event I’d like to tap into.
These events are specific to KwesForms. You can see all the custom events in the KwesForms documentation. Here’s the code for the form:
const form = document.getElementById('riveForm');

form.addEventListener('kwSubmitted', function () {
  console.log('form: kwSubmitted');
});

form.addEventListener('kwHasErrors', () => {
  console.log('form: kwHasErrors');
});
And here’s the code for the email field. These are the standard JavaScript events for focus and blur. I’ve added the same for the name and message fields:
const name = document.getElementById('riveFormName');

name.addEventListener('focus', () => {
  console.log('name: focus');
});

name.addEventListener('blur', () => {
  console.log('name: blur');
});
Triggering Rive State Machines from Form Events
This is where everything comes together. Whenever a form event occurs, I can invoke one of the states from the animation.
Creating a getTrigger function
Just underneath the initialization code, add the following code snippet:
<script>
  const r = new rive.Rive({
  ...

+  const getTrigger = (name) => {
+    return r.stateMachineInputs('Login Machine').find((input) => input.name === name);
+  };

</script>
This function accepts a name parameter. This is the name of the state as seen earlier on the download page. The function returns an instance of Rive’s stateMachineInputs, which allows values to be set, which in turn kicks the animation into its different states.
Calling a Trigger from an Event Listener
Whenever the form has errors, I hook into the KwesForms kwHasErrors event and call the trigFail trigger using the fire function:
form.addEventListener('kwHasErrors', () => {
  console.log('form: kwHasErrors');
+  const trigger = getTrigger('trigFail');
+  trigger.fire();
});
Whenever the name field receives focus, I set isChecking to true, and wherever the name field is blurred, I set isChecking to false:
name.addEventListener('focus', () => {
  console.log('name: focus');
+  const trigger = getTrigger('isChecking');
+  trigger.value = true;
});

name.addEventListener('blur', () => {
  console.log('name: blur');
+  const trigger = getTrigger('isChecking');
+  trigger.value = false;
});
Whenever the email field receives focus, I set isHandsUp to true, and whenever the email field is blurred, I set isHandsUp to false:
email.addEventListener('focus', () => {
  console.log('email: focus');
+  const trigger = getTrigger('isHandsUp');
+  trigger.value = true;
});

email.addEventListener('blur', () => {
  console.log('email: blur');
+  const trigger = getTrigger('isHandsUp');
+  trigger.value = false;
})
Conclusion
By using a combination of KwesForms events and standard JavaScript events with Rive animations, form errors can be surfaced in just about any way you can imagine.
If you have any questions relating to anything I’ve covered in this post, feel free to come find me on Twitter/X: PaulieScanlon.
Want more info on Astro? Check out out our brand new book on SitePoint Premium: Unleashing the Power of Astro, by Tamas Piros, which will show you how to get the most out of the most out of this modern all-in-one framework to build faster, content-focused websites