Immutable Data and Functional JavaScript with Mori

Key Takeaways
- Mori leverages Clojure’s persistent data structures, offering JavaScript developers immutable data options that enhance code simplicity and reliability.
- Utilizing Mori promotes a functional programming paradigm in JavaScript by enforcing immutability, which prevents unintended side effects and ensures data consistency throughout the application lifecycle.
- The library facilitates a different approach to handling data, where functions operate on data structures separately, contrasting with JavaScript’s typical object-oriented methods, thus allowing for cleaner and more predictable code.
- Mori’s structural sharing technique makes data manipulation efficient by reusing existing data structures where possible, which can lead to performance improvements in applications.
- Through examples like the pixel editor with undo functionality, Mori demonstrates practical applications of immutable data structures, providing developers with tools to build features that are both sophisticated and robust.
This article was peer reviewed by Craig Bilner and Adrian Sandu. Thanks to all of SitePoint’s peer reviewers for making SitePoint content the best it can be!
Functional programming and immutable data are a current focus for many JavaScript developers as they try to find ways to make their code simpler and easier to reason about.
Although JavaScript has always supported some functional programming techniques, they’ve only really become popular in the last few years and traditionally there’s been no native support for immutable data either. JavaScript is still learning a lot about both and the best ideas are coming from languages that have tried and tested these techniques already.
In another corner of the programming world, Clojure is a functional programming language that’s dedicated to genuine simplicity, especially where data structures are concerned. Mori is a library that allows us to use Clojure’s persistent data structures directly from JavaScript.
This article will explore the rationale behind the design of these data structures and examine some patterns for using them to improve our applications. We could also think of this as the first stepping stone for JavaScript developers interested in programming with Clojure or ClojureScript.
What Is Persistent Data?
Clojure makes a distinction between persistent values that can’t be changed and transient values that have temporal lifetimes between mutations. Attempts to modify persistent data structures avoid mutating the underlying data by returning a new structure with the changes applied.
It may help to see what this distinction would look in a theoretical programming language.
// transient list
a = [1, 2, 3];
b = a.push(4);
// a = [1, 2, 3, 4]
// b = [1, 2, 3, 4]

// persistent list
c = #[1, 2, 3]
d = c.push(4);
// c = #[1, 2, 3]
// d = #[1, 2, 3, 4]
We can see that the transient list was mutated when we pushed a value onto it. Both a and b point to the same mutable value. In contrast, calling push on the persistent list returned a new value and we can see that c and d point to different to discrete lists.
These persistent data structures can’t be mutated, meaning that once we have a reference to a value, we also have a guarantee that it won’t ever be changed. These guarantees generally help us write safer and simpler code. For instance, a function that takes persistent data structures as arguments can’t mutate them and therefore if the function wants to communicate meaningful change, it must come from the return value. This leads to writing referentially transparent, pure functions, which are easier to test and optimize.
More simply, immutable data forces us to write more functional code.
What Is Mori?
Mori uses the ClojureScript compiler to compile the implementations for the data structures in Clojure’s standard library to JavaScript. The compiler emits optimized code, which means that without additional consideration, it’s not easy to communicate with compiled Clojure from JavaScript. Mori is the layer of additional consideration.
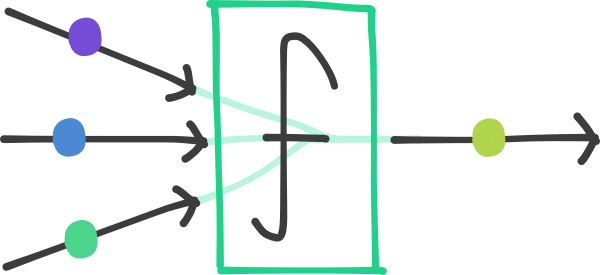
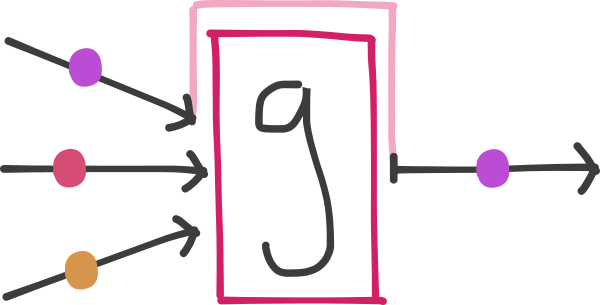
Just like Clojure, Mori’s functions are separated from the data structures that they operate on, which contrasts against JavaScript’s object oriented tendencies. We’ll find that this difference changes the direction we write code.
// standard library
Array(1, 2, 3).map(x => x * 2);
// => [2, 4, 6]

// mori
map(x => x * 2, vector(1, 2, 3))
// => [2, 4, 6]
Mori also uses structural sharing to make efficient changes to data by sharing as much of the original structure as possible. This allows persistent data structures to be nearly as efficient as regular transient ones. The implementations for these concepts are covered in much more detail in this video.
Why Is It Useful?
To begin with, let’s imagine we’re trying to track down a bug in a JavaScript codebase that we inherited. We’re reading over the code trying to figure out why we’ve ended up with the wrong value for fellowship.
const fellowship = [
  {
    title: 'Mori',
    race: 'Hobbit'
  },
  {
    title: 'Poppin',
    race: 'Hobbit'
  }
];

deletePerson(fellowship, 1);
console.log(fellowship);
What is the value of fellowship when it is logged to the console?
Without running the code, or reading the definition for deletePerson() there is no way to know. It could be an empty array. It could have three new properties. We would hope that it is an array with the second element removed, but because we passed in a mutable data structure, there are no guarantees.
Even worse, the function could keep hold of a reference and mutate it asynchronously in the future. All references to fellowship from here onwards are going to be working with an unpredictable value.
Compare this to an alternative with Mori.
import { vector, hashMap } from 'mori';

const fellowship = vector(
  hashMap(
    "name", "Mori",
    "race", "Hobbit"
  ),
  hashMap(
    "name", "Poppin",
    "race", "Hobbit"
  )
)

const newFellowship = deletePerson(fellowship, 1);
console.log(fellowship);
Regardless of the implementation of deletePerson(), we know that the original vector will be logged, simply because there is a guarantee that it can’t be mutated. If we want the function to be useful, then it should return a new vector with the specified item removed.
Understanding flow through functions that work on immutable data is easy, because we know that their only effect will be to derive and return a distinct immutable value.
Functions operating on mutable data don’t always return values, they can mutate their inputs and sometimes it’s left to the programmer to pick up the value again at the other side.
More simply, immutable data enforces a culture of predictability.
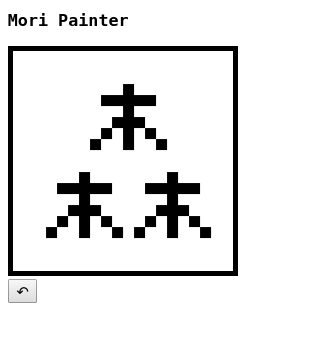
In Practice
We’re going to look at how we can use Mori to build a pixel editor with undo functionality. The following code is available as a CodePen which you can also find at the foot of the article.
We’ll assume you’re either following along on Codepen, or you’re working in an ES2015 environment with Mori and the following HTML.
<div>
  <h3>Mori Painter</h3>
</div>
<div id="container">
  <canvas id='canvas'></canvas>
</div>
<div>
  <button id='undo'>↶</button>
</div>
Setup & Utilities
Let’s get started by destructuring the functions we’ll need from the Mori namespace.
const {
  list, vector, peek, pop, conj, map, assoc, zipmap,
  range, repeat, each, count, intoArray, toJs
} = mori;
This is mostly a stylistic preference. You can also use any of the functions from Mori by accessing them directly on the Mori object (e.g. mori.list()).
The first thing we’ll do is set up a helper function for viewing our persistent data structures. Mori’s internal representation doesn’t make much sense in a console, so we’ll use the toJs() function to convert them into an understandable format.
const log = (...args) => {
  console.log(...args.map(toJs))
};
We can use this function as an alternative to console.log() when we need to inspect Mori’s data structures.
Next we’ll set up some configuration values and a utility function.
// the dimensions of the canvas
const [height, width] = [20, 20];

// the size of each canvas pixel
const pixelSize = 10;

// converts an integer to a 2d coordinate vector
const to2D = (i) => vector(
  i % width,
  Math.floor(i / width)
);
Hopefully you noticed that our to2D() function returns a vector. Vectors are a bit like JavaScript arrays and support efficient random access.
Structuring Data
We’ll use our to2D() function to create a sequence of coordinates that will represent all the pixels on the canvas.
const coords = map(to2D, range(height * width));
We’re using the range() function to generate a sequence of numbers between 0 and height * width (in our case 100) and we’re using map() to transform it into a list of 2D coordinates with our to2D() helper function.
It might help to visualize the structure of coords.
[
  [0, 0], [0, 1], [0, 2], [0, 3], [0, 4], [0, 5], [0, 6], [0, 7], [0, 8], [0, 9],
  [1, 0], [1, 1], [1, 2], [1, 3], [1, 4], [1, 5], [1, 6], [1, 7], [1, 8], [1, 9],
  [2, 0], [2, 1], [2, 2], [2, 3], [2, 4], [2, 5], [2, 6], [2, 7], [2, 8], [2, 9],
  ...
  [8, 0], [8, 1], [8, 2], [8, 3], [8, 4], [8, 5], [8, 6], [8, 7], [8, 8], [8, 9]
  [9, 0], [9, 1], [9, 2], [9, 3], [9, 4], [9, 5], [9, 6], [9, 7], [9, 8], [9, 9]
]
It’s a one-dimensional sequence of coordinate vectors.
Alongside each coordinate we’ll also want to store a color value.
const colors = repeat('#fff');
We’re using the repeat() function to create an infinite sequence of '#fff' strings. We don’t need to worry about this filling up memory and crashing our browser, because Mori sequences support lazy evaluation. We’ll only compute the values of the items in the sequence when we ask for them later.
Finally we want to combine our coordinates with our colors in the form of a hash map.
const pixels = zipmap(coords, colors);
We’re using the zipmap() function to create a hash map, with the coords as keys and the colors as values. Again, it might help to visualize the structure of our data.
{
  [0, 0]: '#fff',
  [1, 0]: '#fff',
  [2, 0]: '#fff',
  [3, 0]: '#fff',
  [4, 0]: '#fff',
  [5, 0]: '#fff',
  ...
  [8, 9]: '#fff',
  [9, 9]: '#fff'
}
Unlike Javascript’s objects, Mori’s hash maps can take any type of data as a key.
Drawing a Pixel
To change the color of pixel we’ll to associate one of the coordinates in our hash map with a new string. Let’s write a pure function that colors a single pixel.
const draw = (x, y, pixels, color='#000') => {
  const coord = vector(x, y);
  return assoc(pixels, coord, color);
};
We use the x and y coordinates to create a coordinate vector that we can use as a key, then we use assoc() to associate that key with a new color. Remember that because the data structure is persistent, the assoc() function will return a new hash map, rather than mutating the old one.
Painting a Picture
Now we have everything we need to draw a simple image onto a canvas. Let’s create a function which takes a hash map of coordinates against pixels and draws them onto a RenderingContext2D.
const paint = (ctx, pixels) => {
  const px = pixelSize;

  each(pixels, p => {
    const [coord, color] = intoArray(p);
    const [x, y] = intoArray(coord);
    ctx.fillStyle = color;
    ctx.fillRect(x * px, y * px, px, px);
  });
};
Let’s take a minute to understand what’s going on here.
We’re using each() to iterate over our pixels hash map. It passes each key and value (together as a sequence) into the callback function as p. Then we use the intoArray() function to convert it into arrays that can be destructured, so we can pick out the values we want.
const [coord, color] = intoArray(p);
const [x, y] = intoArray(coord);
Finally we use canvas methods to draw a coloured rectangle onto the context itself.
ctx.fillStyle = color;
ctx.fillRect(x * px, y * px, px, px);
Wiring It Together
Now we need to do a bit of plumbing just to get all these parts together and working.
const canvas = document.getElementById('canvas');
const context = canvas.getContext('2d');

canvas.width = width * pixelSize;
canvas.height = height * pixelSize;

paint(context, pixels);
We’ll get hold of the canvas and use it to create a context for rendering our image. We’ll also resize the it appropriately to reflect our dimensions.
Finally we’ll pass our context with our pixels to be drawn by the paint method. With any luck, your canvas should be rendering as white pixels. Not the most exciting reveal, but we’re getting close.
Interactivity
We want to listen for click events and use them to change the color of a specific pixel with our draw() function from earlier.
let frame = list(pixels);

canvas.addEventListener('click', e => {
  const x = Math.floor(e.layerX / pixelSize);
  const y = Math.floor(e.layerY / pixelSize);
  const pixels = draw(x, y, frame);
  paint(context, pixels);
  frame = pixels;
});
We’re attaching a click listener to our canvas and using the event coordinates to determine which pixel to draw. We use this information to create a new pixel hash map with our draw() function. Then we paint that into our context and overwrite the last frame we drew.
At this point we can draw black pixels into the canvas and each frame will be based on the previous one, creating a composite image.
Tracking Frames
To implement undo, we’ll want to store each historic revision to the pixel hash map, so we can retrieve them again in the future.
let frames = list(pixels);
We’re using a list to store the different “frames” that we’ve drawn. Lists support efficient addition at the head and O(1) lookup for the first item, which makes them ideal for representing stacks.
We’ll need to modify our click listener to work with our frame stack.
canvas.addEventListener('click', e => {
  const x = Math.floor(e.layerX / pixelSize);
  const y = Math.floor(e.layerY / pixelSize);

  const currentFrame = peek(frames);
  const newFrame = draw(x, y, currentFrame);
  frames = conj(frames, newFrame);
  paint(context, newFrame);
});
We’re using the peek() function to get the frame at the top of the stack. Then we use it to create a new frame with the draw() function. Finally we use conj() to conjoin the new frame onto the top of the frame stack.
Although we’re changing local state (frame = conj(frames, newFrame)) we’re not actually mutating any data.
Undoing Changes
Finally we need to implement an undo button for popping the top frame from our stack.
const undo = document.getElementById('undo');

undo.addEventListener('click', e => {
  if(count(frames) > 1) {
    frames = pop(frames);
    paint(context, peek(frames));
  }
});
When the undo button is clicked we check whether there are currently any frames to undo, then use the pop() function to replace frames with a new list that no longer includes the top frame.
Finally we pass the top frame on the new stack to our paint() function to reflect the changes. At this point, you should be able to draw and undo changes to the canvas.
Demo
Here’s what we end up with:
See the Pen Mori Pixels by SitePoint (@SitePoint) on CodePen.
Extensions
Here are a list of ideas for ways you could improve this application:
- Add a color palette, allowing the user to select a color before drawing
- Use local storage to save the frames between sessions
- Make the Ctrl+Z keyboard shortcut undo changes
- Allow the user to draw whilst dragging the mouse
- Implement redo by moving an index pointer, rather than removing frames from the stack
- Read through the ClojureScript source for the same program
Conclusion
We’ve looked at vectors, lists, ranges and hash maps, but Mori also comes with sets, sorted sets and queues and each of these data structures comes with a complement of polymorphic functions for working with them.
We’ve barely scratched the surface of what’s possible, but hopefully you’ll have seen enough to value the importance of pairing persistent data with a powerful set of simple functions.
Frequently Asked Questions about Immutable Data and Functional JavaScript with Mori
What is the concept of immutability in JavaScript?
Immutability in JavaScript refers to the state of an object that cannot be modified after it’s created. This means once a variable is assigned a value, it cannot be changed. This concept is crucial in functional programming as it helps to avoid side effects and makes your code more predictable and easier to understand. It also enhances the performance of your application by allowing efficient data retrieval and memory usage.
How does Mori library help in handling immutable data in JavaScript?
Mori is a library that provides a set of persistent data structures into JavaScript. These data structures are immutable, meaning they cannot be changed once they are created. This helps in maintaining the integrity of the data and avoids accidental modifications. Mori also provides a rich set of functional programming utilities which makes it easier to manipulate these data structures.
What are the benefits of using Mori over native JavaScript methods for handling immutable data?
While JavaScript does provide methods to handle immutable data, Mori offers a more efficient and robust way to do so. Mori’s persistent data structures are faster and consume less memory than native JavaScript methods. Moreover, Mori provides a wide range of functional programming utilities that are not available in JavaScript.
How does immutability contribute to the performance of an application?
Immutability can significantly enhance the performance of an application. Since immutable objects cannot be changed once created, they can be safely reused across multiple function calls without the risk of being modified. This leads to efficient memory usage and faster data retrieval, thereby improving the overall performance of the application.
What is the difference between mutable and immutable data structures?
Mutable data structures are those that can be changed after they are created. On the other hand, immutable data structures cannot be modified once they are created. Any operation on an immutable data structure results in a new data structure.
How does Mori handle data manipulation?
Mori provides a rich set of functional programming utilities to manipulate data. These utilities allow you to perform various operations like map, reduce, filter, etc., on data structures without changing the original data.
What are persistent data structures in Mori?
Persistent data structures in Mori are immutable data structures that preserve the previous version of the data when modified. This means every time you perform an operation on a persistent data structure, a new version of the data structure is created, and the old version is preserved.
How does Mori ensure data integrity?
Mori ensures data integrity by providing immutable data structures. Since these data structures cannot be modified once created, the risk of accidental data modification is eliminated. This helps in maintaining the integrity of the data.
What are the advantages of functional programming in JavaScript with Mori?
Functional programming with Mori in JavaScript offers several advantages. It makes your code more predictable and easier to understand by avoiding side effects. It also enhances the performance of your application by allowing efficient data retrieval and memory usage.
How can I start using Mori in my JavaScript projects?
To start using Mori in your JavaScript projects, you need to include the Mori library in your project. You can do this by installing it via npm or including it directly in your HTML file. Once the library is included, you can start using Mori’s functions and data structures in your code.
Digital Nomad and co-founder of UK based startup Astral Dynamics.