Sending Emails with the Gmail JavaScript API
This article was peer reviewed by Simon Codrington. Thanks to all of SitePoint’s peer reviewers for making SitePoint content the best it can be!
In a previous article, I demonstrated how to build a basic Gmail inbox and message viewing app using the Gmail JavaScript API. Today I’m going to enhance that app with email sending capability using Gmail’s powerful back-end. We’ll end up with a customizable app which can display recent messages, allow the composition of new messages and allow us to reply to specific messages.
It’s not necessary to have read the previous article to follow along with this one (although it will give you a deeper understanding of the subject matter). As ever, the complete source code for this article can be found on our GitHub repo (in the folder 02 - Sending mail).
Key Takeaways
- The Gmail JavaScript API allows for the creation of applications that can utilize Gmail functionality, including reading, composing, and replying to emails.
- To set up the Gmail API on your Google account, you need to create a project on the Google Developer Console, and generate two sets of credentials: a browser API key and an OAuth client ID.
- To send an email, the API requires further permissions beyond read-only access. The necessary scopes are ‘https://www.googleapis.com/auth/gmail.readonly’ and ‘https://www.googleapis.com/auth/gmail.send’.
- The email sending function interacts with the Gmail API, building up the RFC 5322 email message and sending it to the Gmail API via the Users.messages: send endpoint.
- The Gmail JavaScript API does not directly support email scheduling, but Google Apps Script can be used to create a script for sending an email at a specified time.
Enabling the Gmail API on Your Google Account
The first step is to set up the Gmail API on your Google account. This will allow us to create applications which utilise Gmail functionality. Since we last looked at the Gmail API, Google have changed the user interface for the API management console — so here’s a quick update on how to create the necessary Gmail API credentials.
Navigate to the Google Developer Console and create a project. Clicking Create will take us to the new project dashboard interface. From here we need to pop out the hamburger navigation menu and choose API Manager, then in the sidebar on the left we need to choose Credentials, before clicking on the New credentials button on the following page.
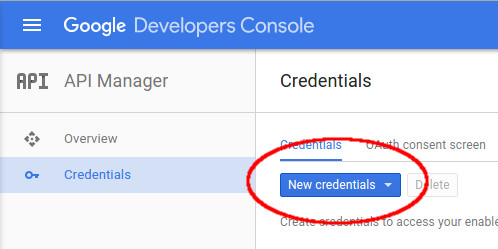
Now we need to create two sets of credentials: a browser API key and an OAuth client ID.
For the browser API key select API key then Browser key. On the following page we need only fill in the name field. However, for production I’d recommend adding a HTTP referrer (this will prevent abuse of our API key from non-authorized domains). Click Create and Google will generate an API key.
For the OAuth client ID, click once more on New credentials and select OAuth client ID. Select Web application as the application type and enter at least one authorized JavaScript origin. For a local development environment this will likely be http://localhost or similar. We do not need to enter an authorized redirect URI. Clicking Create will generate a client ID and client secret.
Once we’ve filled in the necessary fields we should be able to see our credentials back in the Credentials section. Keep this info open in a browser tab for the next step.
Initial Setup
Grab a Copy of the Code
Now that the API credentials are set up we should check out the source code of the existing demo application.
git clone git@github.com:sitepoint-editors/gmail-api-javascript-example.git
The folder 01 - Basic client contains the code from the previous article. This is what we’re interested in.
Enter Our Credentials
And we should enter our credentials in index.html:
var clientId = 'xxxxxxxxxxxx-xxxxxxxxxxxxxxxxxxxxxxx.apps.googleusercontent.com';
var apiKey = 'xxxxxxxxxxxxxxxxxxxxxxxxxxxxxxxxxxxxxxx';
Tweak the Authentication Scopes
Finally, we should tweak the authentication scopes. Previously we required read-only access to the users’ Gmail account. However, sending an email requires further permissions. Modify the scopes variable definition in the index.html as follows (note that the scopes variable is a space-separated string):
var scopes =
  'https://www.googleapis.com/auth/gmail.readonly '+
  'https://www.googleapis.com/auth/gmail.send';
As mentioned in the previous article, it’s always best practice to request the bare minimum permissions when working with someone else’s data — especially something as sensitive as their email account. These two scopes are all we need for this application. Strangely there is a similarly named scope (compose) which allows much greater access than we require.
Test That It’s Working
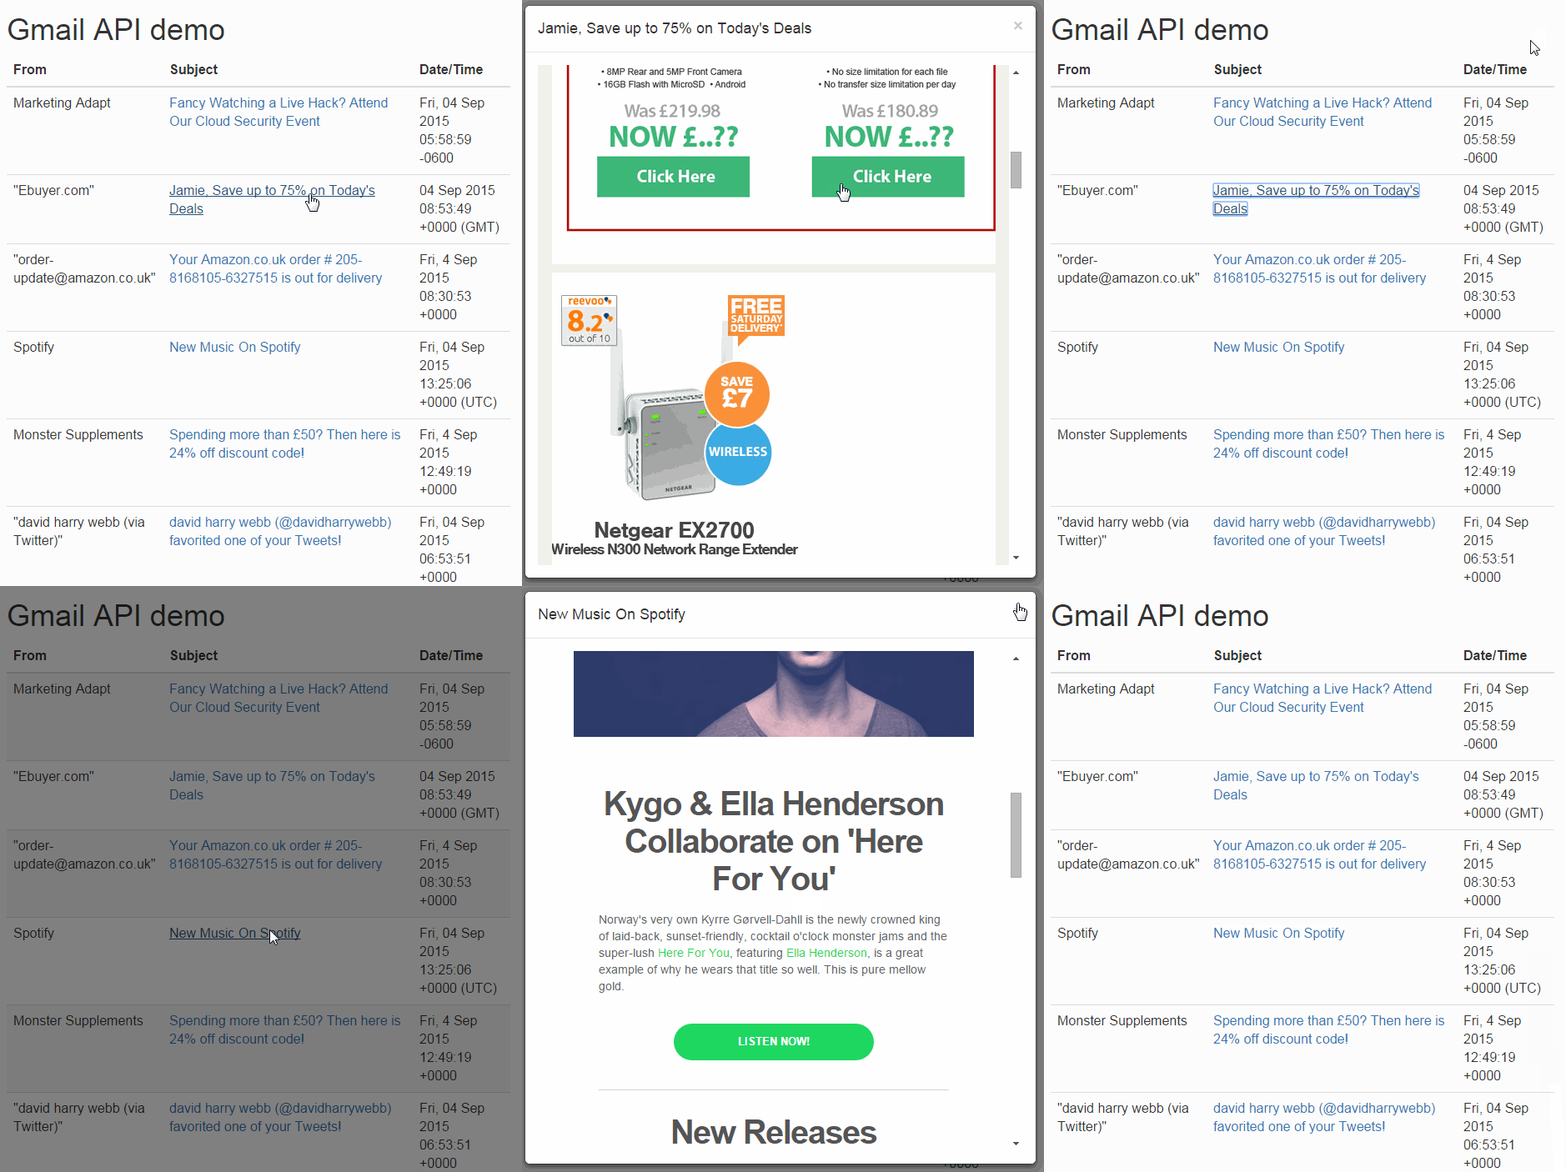
Navigate to http://localhost/gmail-api-javascript-example (or wherever you have placed your index.html file). If things have gone according to plan, the application should ask us for authorization. Once it’s been authorized, we should see something like this:
Sending an Email
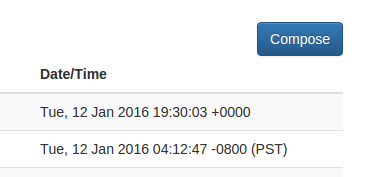
Now we’ve got the required permissions we can go ahead with the first step — tweaking the UI to add a compose button. This button will be positioned in the top right-hand corner of the interface (the pull-right Boostrap class helps with the positioning in this instance).
<a href="#compose-modal"
   data-toggle="modal"
   id="compose-button"
   class="btn btn-primary pull-right hidden">Compose</a>
The compose button is not displayed on the interface by default. This is so that it only appears once the user has authenticated. To enable this functionality we need to remove the hidden class from the element at the same time as we remove the hidden class from the table which displays the inbox. This means that we should amend our handleAuthResult() function to add the following just after the loadGmailApi() call:
$('#compose-button').removeClass("hidden");
The Compose button will simply open a modal, which we’re also going to add directly into the DOM.
<div class="modal fade" id="compose-modal" tabindex="-1" role="dialog">
<div class="modal-dialog modal-lg">
<div class="modal-content">
<div class="modal-header">
<button type="button" class="close" data-dismiss="modal" aria-label="Close">
<span aria-hidden="true">×</span>
</button>
<h4 class="modal-title">Compose</h4>
</div>
<form onsubmit="return sendEmail();">
<div class="modal-body">
<div class="form-group">
<input type="email" class="form-control" id="compose-to" placeholder="To" required />
</div>
<div class="form-group">
<input type="text" class="form-control" id="compose-subject" placeholder="Subject" required />
</div>
<div class="form-group">
<textarea class="form-control" id="compose-message" placeholder="Message" rows="10" required></textarea>
</div>
</div>
<div class="modal-footer">
<button type="button" class="btn btn-default" data-dismiss="modal">Close</button>
<button type="submit" id="send-button" class="btn btn-primary">Send</button>
</div>
</form>
</div>
</div>
</div>
The result should look like this:
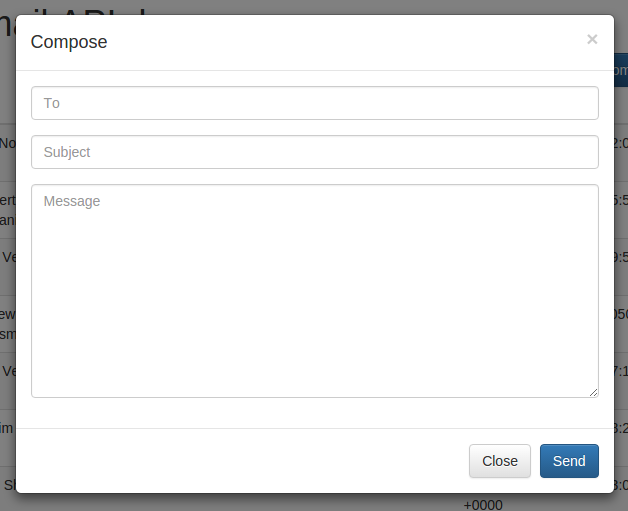
This is a standard Bootstrap-styled form which calls the sendEmail() function on submit.
function sendEmail()
{
  $('#send-button').addClass('disabled');

  sendMessage(
    {
      'To': $('#compose-to').val(),
      'Subject': $('#compose-subject').val()
    },
    $('#compose-message').val(),
    composeTidy
  );

  return false;
}
The first thing we do when sendEmail() is called is disable the send button. It’s important to disable the form submit functionality whenever submission logic is carried out via Ajax, as this prevents the user from re-clicking the button whilst a request is in progress. Next we grab the values from our compose form and hand everything to sendMessage(). Finally we return false. Returning false from an onsubmit function is important when processing the form via Ajax — it prevents the form from submitting and reloading the page.
function sendMessage(headers_obj, message, callback)
{
  var email = '';

  for(var header in headers_obj)
    email += header += ": "+headers_obj[header]+"\r\n";

  email += "\r\n" + message;

  var sendRequest = gapi.client.gmail.users.messages.send({
    'userId': 'me',
    'resource': {
      'raw': window.btoa(email).replace(/\+/g, '-').replace(/\//g, '_')
    }
  });

  return sendRequest.execute(callback);
}
This function is where we interact with the Gmail API. It accepts an object of email headers, the email body and a callback function.
We start by building up the RFC 5322 email message (this includes the headers). Articles have suggested that the Date and From headers are required for the message to be valid by the RFC 5322 specification. However I’ve found those headers are not required when using the Gmail API, as Gmail will automatically add those headers for us. The Gmail API also adds it’s own Message-Id.
Once we’ve got the email message prepared we can send it to the Gmail API, specifically to the Users.messages: send endpoint. Something very important to note here is that we must specify the email message within an object named resource, not an object named message. Google’s documented JavaScript example states that the object should be named message — this is incorrect and will not work. Note that the email message needs to be base-64 encoded, we use window.btoa() for this. Also note that Google’s base-64 implementation differs from what window.btoa() and window.atob() provide – so we need to carry out some character replacements after the encoding. Specifically we must replace + with - and / with _.
Finally we’ll execute the request, passing the callback function.
function composeTidy()
{
  $('#compose-modal').modal('hide');

  $('#compose-to').val('');
  $('#compose-subject').val('');
  $('#compose-message').val('');

  $('#send-button').removeClass('disabled');
}
The composeTidy() callback function is very basic. It simply hides the compose modal, clears the input fields and then re-enables the Send button.
Replying to an Email
Now that we can read emails and compose new emails, the next logical step is to implement replying to emails.
As before, the first thing we do is modify the UI to provide access to this new functionality. So we’re going to add a modal footer to the message view modal we implemented previously.
var reply_to = (getHeader(message.payload.headers, 'Reply-to') !== '' ?
  getHeader(message.payload.headers, 'Reply-to') :
  getHeader(message.payload.headers, 'From')).replace(/\"/g, '"');

var reply_subject = 'Re: '+getHeader(message.payload.headers, 'Subject').replace(/\"/g, '"');

$('body').append(
  ...
  '<div class="modal-footer">\
    <button type="button" class="btn btn-default" data-dismiss="modal">Close</button>\
    <button type="button" class="btn btn-primary reply-button" data-dismiss="modal" data-toggle="modal" data-target="#reply-modal"\
    onclick="fillInReply(\
      \''+reply_to+'\', \
      \''+reply_subject+'\', \
      \''+getHeader(message.payload.headers, 'Message-ID')+'\'\
      );"\
    >Reply</button>\
  </div>'
  ...
);
The footer offers a Reply button which passes all required details (to, subject, message ID) to a new reply modal, and then opens the new modal. The to parameter requires a bit of special attention, so this is defined prior to the markup. We should always attempt to use the Reply-To header for the to parameter, but if that’s not provided then the From header will suffice. We also need to encode any double quotes as a HTML entity to prevent our own markup from breaking. The subject parameter requires the same double quote escaping, and a “Re: ” prefix.
function fillInReply(to, subject, message_id)
{
  $('#reply-to').val(to);
  $('#reply-subject').val(subject);
  $('#reply-message-id').val(message_id);
}
The fillInReply() function, which passes the fields to the reply modal, is very simple. It just passes the data it’s given directly into the new reply modal input fields.
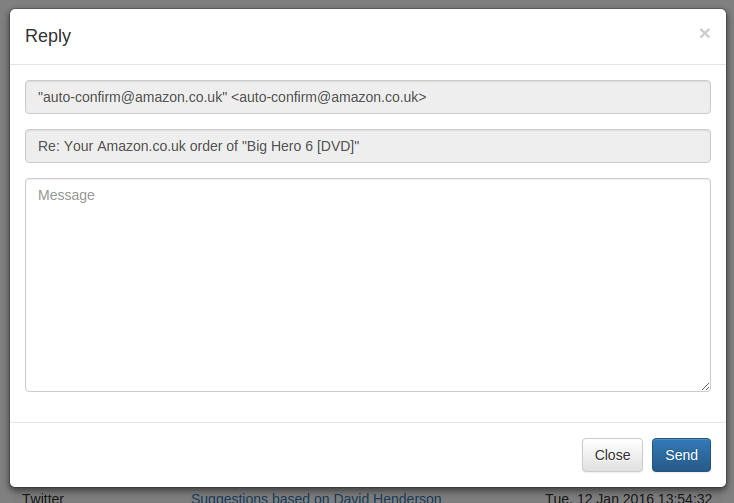
<div class="modal fade" id="reply-modal" tabindex="-1" role="dialog">
<div class="modal-dialog modal-lg">
<div class="modal-content">
<div class="modal-header">
<button type="button" class="close" data-dismiss="modal" aria-label="Close">
<span aria-hidden="true">×</span>
</button>
<h4 class="modal-title">Reply</h4>
</div>
<form onsubmit="return sendReply();">
<input type="hidden" id="reply-message-id" />
<div class="modal-body">
<div class="form-group">
<input type="text" class="form-control" id="reply-to" disabled />
</div>
<div class="form-group">
<input type="text" class="form-control disabled" id="reply-subject" disabled />
</div>
<div class="form-group">
<textarea class="form-control" id="reply-message" placeholder="Message" rows="10" required></textarea>
</div>
</div>
<div class="modal-footer">
<button type="button" class="btn btn-default" data-dismiss="modal">Close</button>
<button type="submit" id="reply-button" class="btn btn-primary">Send</button>
</div>
</form>
</div>
</div>
</div>
The reply modal is quite similar to the compose modal. The main difference being the hidden field which stores the message ID. This is required to thread emails correctly in email clients — matching the subject with a “Re: ” prefix is not enough. Also we’re going to disable the To and Subject fields as they shouldn’t be changed at this point, they are only visible to provide context. Once the reply modal form is submitted the sendReply() function is called.
function sendReply()
{
  $('#reply-button').addClass('disabled');

  sendMessage(
    {
      'To': $('#reply-to').val(),
      'Subject': $('#reply-subject').val(),
      'In-Reply-To': $('#reply-message-id').val()
    },
    $('#reply-message').val(),
    replyTidy
  );

  return false;
}
The sendReply() function is largely the same as sendEmail(), except we now pass through the In-Reply-To header which allows email clients to thread the conversation correctly. The Google documentation states that the References header also needs to be provided, but in our testing it will work without it. Once the reply has been sent the replyTidy() callback is triggered.
function replyTidy()
{
  $('#reply-modal').modal('hide');

  $('#reply-message').val('');

  $('#reply-button').removeClass('disabled');
}
Again this is largely the same as our composeTidy() callback from before. However this time it’s not necessary to clear the Subject and To input fields as our fillInReply() function will always overwrite them.
Closing Remarks
We should now have a working app which can display recent messages, allow the composition of new messages and allow us to reply to specific messages.
If you’re interested in taking it further, there is plenty of room for improvement with this app;
- Staggered authorisation requests so that the user can read their inbox by only agreeing to the
readonlyscope. Then once the user clicks to Compose or Reply, another authorisation request for thesendscope is prompted. - The compose modal To field should be changed from
type="email"so that the user can enter a name and email address combination (eg.Jamie Shields <jamie@somewhere.com>). - The compose modal To field should auto-complete based on the user’s contact list, and also allow the user to choose a recipient directly from the list.
There is also lots of scope for adding new features. Some things I’d like to look at in the future include;
- Adding email forwarding capability
- Adding CC and BCC headers to emails
- Ability to view the complete set of headers attached to an email
- Ability to send HTML email (with a WYSIWYG editor for composing)
If you have any other improvements or suggestions, please feel free to add them in the comments.
And don’t forget, the full source code is available via our GitHub repo.
Frequently Asked Questions (FAQs) about Sending Emails with Gmail JavaScript API
How Can I Send an Email with Attachments Using Gmail JavaScript API?
Sending an email with attachments using the Gmail JavaScript API involves encoding the attachment in Base64 and adding it to the raw property of the email. You can use the FileReader API to read the file as a Base64 encoded string. Then, you can add the encoded string to the raw property of the email, specifying the MIME type of the file. Remember to set the ‘Content-Transfer-Encoding’ to ‘base64’.
How Can I Send Emails to Multiple Recipients Using Gmail JavaScript API?
To send emails to multiple recipients, you can add multiple email addresses separated by commas in the ‘to’ field of the email. The Gmail JavaScript API will automatically send the email to all the recipients listed in the ‘to’ field.
How Can I Schedule Emails Using Gmail JavaScript API?
Unfortunately, the Gmail JavaScript API does not directly support scheduling emails. However, you can use Google Apps Script to create a script that sends an email at a specified time. You can then use the Gmail JavaScript API to send the email.
How Can I Send HTML Emails Using Gmail JavaScript API?
To send HTML emails, you need to set the ‘Content-Type’ of the email to ‘text/html’. Then, you can include your HTML content in the body of the email. The Gmail JavaScript API will automatically render the HTML content when the recipient opens the email.
How Can I Handle Errors When Sending Emails Using Gmail JavaScript API?
The Gmail JavaScript API provides error responses that you can use to handle errors. These responses include HTTP status codes and error messages that describe what went wrong. You can use these responses to debug your code and handle errors appropriately.
How Can I Send Emails with Custom Headers Using Gmail JavaScript API?
To send emails with custom headers, you can add the headers to the raw property of the email. The Gmail JavaScript API supports a variety of headers, including ‘Subject’, ‘To’, ‘CC’, ‘BCC’, and ‘Reply-To’.
How Can I Authenticate Users When Sending Emails Using Gmail JavaScript API?
The Gmail JavaScript API uses OAuth 2.0 for authentication. You need to create a project in the Google Cloud Console, enable the Gmail API, and create credentials. Then, you can use these credentials to authenticate users.
How Can I Send Emails with Emojis Using Gmail JavaScript API?
To send emails with emojis, you can include the emojis in the body of the email. The Gmail JavaScript API supports Unicode, so it can handle emojis without any issues.
How Can I Send Emails with Inline Images Using Gmail JavaScript API?
To send emails with inline images, you need to encode the image in Base64 and add it to the raw property of the email. Then, you can reference the image in your HTML content using the ‘cid’ attribute.
How Can I Monitor the Quota Usage When Sending Emails Using Gmail JavaScript API?
The Gmail JavaScript API provides a method to get the current quota usage. You can use this method to monitor your quota usage and avoid exceeding the quota.
Jamie is co-founder and CTO at Flaunt Digital. An honest, innovative digital agency based in Leeds.


