The Lensbaby is a bendable lens that lets you control which part of a photograph is in focus. By selectively focusing one part of an image, you can add extra emphasis and attract the eye to that part of the image. It is useful for both print and web design as a method of controlling where the viewer’s eye goes. So without buying an extra lens for your camera, here’s a similar effect you can create using the Lens Blur filter in Photoshop.
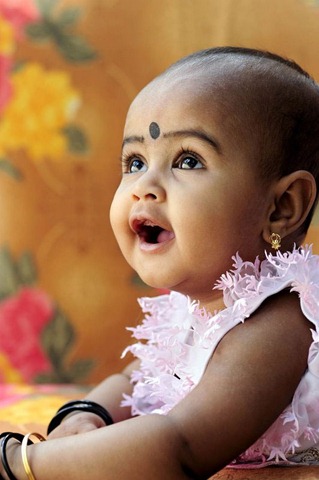
1. Open the photograph that you want to blur a background on or a specific part of the image. I’m using this picture by jyobish (on Stock Xchng) and I want to blur out everywhere except her head.
2. Open the Channels panel by clicking its tab in the Layers panel or by choosing Window > Channels. You need to make a selection to tell Photoshop which part of the image you want to
blur and which part should stay in focus and we’ll do that in the next step by making an alpha channel in the next step.
3. Click the New Channel icon at the bottom of the Channels panel. Then, at the top of the panel, switch off visibility of the RGB channel by clicking the eye icon next to the RGB channel.

The entire image takes on the Quick Mask mode’s red overlay.
4. We want to edit the mask so that the area you want to keep in focus doesn’t have any red on it (any areas that you do leave red will become blurry once you finish this technique). Set the foreground color to white and the background color to black on the toolbar. The shortcut to do this is press D to reset the colors to black and white, and then press X so white is on top.

5. Select a large soft brush and on the Options bar at the top of the screen, set the brush’s opacity to 50%.
6. Make sure the Alpha Channel is selected. Paint over the areas you want to keep in focus. Anything that’s red will be blurry when you’re finished, and the rest of the image will remain sharp. I painted most of the little girls face, stopping at her neck and pink top.

7. Turn off the alpha channel’s visibility eye and select the RGB channel so that you can see full color again.
8. Choose Filter > Blur > Lens Blur. In the Lens Blur dialog box, change the Depth Map source to Alpha 1 – this is the Alpha channel you created earlier. Click on the Invert setting, because initially, the blurry and sharp areas will be the opposite of what you created in the alpha channel. Turning on the Invert checkbox sorts it out. Adjust the Radius slider until you get the right amount of blur.
If you like how it looks, you can add a small amount of noise to the image by dragging the Noise slider.

11. Click OK when you’re finished and voila! Her eyes are sharp and focused with a blurred background and blurred foreground on the baby’s arm and top are blurred.

 Jennifer Farley
Jennifer Farley is a designer, illustrator and design instructor based in Ireland. She writes about design and illustration on her blog at Laughing Lion Design.