

Key Takeaways
- The tutorial guides you through building a WordPress carousel plugin using the WordPress Links Manager API, which is the most effective way to manage a list of links in WordPress.
- The carousel will display a series of items, each with a background image and linked to a custom URL. Visitors can navigate through the items using ‘previous’ and ‘next’ arrows.
- The carousel is essentially a list of links, stored in the WordPress Links Manager. JavaScript and jQuery are used to animate the carousel, and a plugin is created to display it.
- To add an item to the carousel, a name, URL and description are chosen, and an image of the correct dimensions is selected. A category dedicated to the carousel is created, and the target and rel attributes can be used.
- The plugin comprises several files, including the main file which defines the function to display the carousel. The function retrieves the items to display, and if there are items, a list is created with each item contained in a ‘li’ tag. The list items are displayed with a background image, and the carousel is encapsulated in a ‘div’.
In this 3 part series, we will take a look at how to build a WordPress carousel plugin using the WordPress Links Manager API.
As we saw when we introduced it, the Links Manager is the best way to manage a list of links in WordPress. Its API doesn’t contain many functions, but there are enough to be able to develop some useful applications.
We won’t use wp_list_bookmarks(), we’ll be using other functions we saw in our previous article.
If you’re not already familiar with the WordPress Links Manager and its API, then you may need to have a look at both of these articles mentioned above first, before continuing to build your carousel.
Carousels are not a rare thing on the web, and that’s why I thought it is interesting to see how to build one. It is also a good way to test our knowledge of the WordPress Links Manager API, so why not?
What Will We Do?
We can find many different carousels around the web, so before beginning, we need to define exactly what we want to build.
What Will Visitors See?
Our carousel will display a series of ‘items’ each consisting of a background image (large or small, it’s your choice!) and each one will be linked to a custom URL. The name of the image will be displayed at the top, while its description will be found right below. The image below is an example an item which could appear in our carousel.
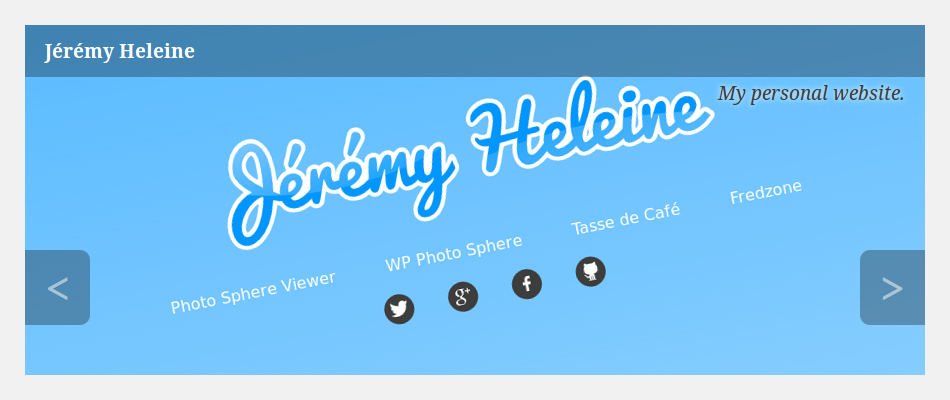
You should note the arrows on this image. As we are building a carousel, we want to display a series of items. Our visitors will be able to display the next / previous one thanks to these arrows.
Note that this image is just an example and you will be able to customize the style of what we will do.
What Do We Need?
Now that we know what to build, it’s time to see what tools we will need to achieve our goal.
As our carousel is no more than a list of links, we will use the WordPress Links Manager to store them. From the Links Manager API, we’ll only use the function get_bookmarks() to get the links we display in the carousel as ‘items’.
To animate this carousel, we will use JavaScript and jQuery. That way, we don’t have to worry about browser compatibility.
In order to write readable and easily editable code, we will create a plugin defining the function which displays the carousel. Then, we can use this function anywhere we want to display the carousel.
Adding an Item to Our Carousel
Before displaying the items, we need to add them and their associated information. We have to respect some rules to get the same result for each item (image, name, description and link URL) we add to the carousel.
You can choose the name, URL and the description of the link you prefer. However, the image you use in the ‘Advanced’ section must have the right dimensions as we won’t resize it. You can choose the size you want but be sure to always select an image of the same size (or, at least, bigger).
We need to create a category dedicated to our carousel. That way, we will know where to search, and we can continue to use the Links Manager without adding new links in the carousel. I chose to create a category named ‘Carousel’ but, here again, you are free to use whatever you want.
Finally, regarding the target and rel attributes, you can use them if you want as our code will display them.
Let’s Create Our Plugin!
Our plugin will use several files so we need to create a folder which will contain those files. You can give this folder any name you want, but you must place it into the wp-content/plugins folder, unless you want to make it a mu-plugin.
The plugin’s main file has two important roles: indicating our plugin’s name and other information used by WordPress, and defining the function which displays the carousel. I called it carousel.php but you can choose any name you want. Place it into the folder you just created.
As we saw in our article about how to create an awesome plugin page on WordPress.org, this file must begin with a special comment like the one below.
/*

Plugin Name: Carousel

Plugin URI:

Description: Creates a simple carousel

Version: 0

Author: Jérémy Heleine

Author URI: http://jeremyheleine.me

License: MIT

*/
Once again, you’re free to fill these fields in as you prefer. In particular, I’m pretty sure that your name is not mine!
Displaying Our Carousel
In this same file we define a new function. I chose to call it display_carousel(). It must be unique if possible (we can’t know all the function names used by all the developers around the world) but it should also be simple, as this function will be the one we call whenever we want to display the carousel.
function display_carousel() {

}
Retrieving the Right Items
The first thing we do in this function is retrieve the items to display. As we want to create a display a bit more complex than a list, wp_list_bookmarks() isn’t suitable, so we will use get_bookmarks().
We don’t want to retrieve all the links in the Links Manager so we must pass a parameter to this function. We will use four options, listed in the array below.
$args = array(

	'category_name' => 'carousel',

	'orderby' => 'link_id',

	'order' => 'DESC',

	'limit' => 5

);
The first option selects the category we want to display. We only want one category and we know its name so the simplest way to selecting it is using the option category_name.
Then we order our items. With the values we’re passing to orderby and order, the first item to display in our carousel will be the last one added by the user. That way, the oldest items will appear at the end of the carousel, or even not at all thanks to the option limit. I chose to not display more than five items. You can choose a different limit and you can even choose to always display all the items, but the advantage of using a limit is that we don’t have to remove old items to hide them on the carousel.
Now that we have our options, we pass them to get_bookmarks() to retrieve our items. Then we count the number of retrieved links, which may not be the same as the limit set above if we have fewer items stored then the limit we specified (we will use this number later).
$links = get_bookmarks($args);

$n = count($links);
A Carousel Is Nothing Other than a List
Then we display our carousel, with a condition: if there’s nothing to display we don’t want to display anything, so we have to test if our $links array is empty or not.
if (!empty($links)) {

	// Here's the code to display the carousel

}
All the code we write from now must be in this condition.
We encapsulate our carousel into a div so, first of all, we open it. You can use echo or you can exit the PHP code using ?>. I personally prefer the second option so this is the one I’ll use here.
if (!empty($links)) {

	?>

	<div id="carousel">

		<ul>

		</ul>

	</div>

	<?php

}
Note the ul tag. If we think about it, our carousel is no more than a list of links with fancy styles and features, so displaying our links (items) in a list is a good idea.
For each item contained in the $links array we display a li tag in the list opened above. To do that we open a foreach loop in this tag.
<ul>

	<?php

	foreach ($links as $i => $link) {

	}

	?>

</ul>
Note the $i variable. We need this iterator to know our position in the list. This way, we’ll know if we must show the ‘previous’ and ‘next’ arrows (thanks to the $n variable we defined above).
Preparing the Future Attributes
Before displaying the li tag, we will create some variables. In fact, all our items won’t display the same thing. For each of them we have a different image to show and different values for the target and rel attributes. Here I chose to begin the loop by creating these variables. If you prefer you can define them later, right before their use.
// We are here in the loop

// Background image

if (!empty($link->link_image))

	$background = 'url(' . $link->link_image . ')';

else

	$background = 'rgb(' . rand(0, 255) . ', ' . rand(0, 255) . ', ' . rand(0, 255) . ')';
First we determine the value of the background variable. We will display the value of $background in the CSS property background. We make a test to be sure that we have an image to show: if present we display it in the background. If the current link does not have an image we display a random color in the background. As you can imagine, this isn’t the best solution so you may choose to create something different such as a fixed color, a random color picked in a predefined list, or a default image. Here we punish an item’s creator who forgot to include an image by displaying a random color which has a great chance of being ugly.
// Target attribute

if (!empty($link->link_target))

	$target = ' target="' . $link->link_target . '"';

else

	$target = '';
After defining the background we define the target attribute. If a value for the link’s target was specified link_target is not empty so we display the attribute, otherwise it is ignored and the target attribute is not used in order to keep the code as clean as possible.
Below you will find the last variable we define in the beginning of our loop. To manage the rel attribute we use the same process we did for target.
// Rel attribute

if (!empty($link->link_rel))

	$rel = ' rel="' . $link->link_rel . '"';

else

	$rel = '';
Note that we wrote if… else statements here but we could also use ternary operators.
Displaying the Main Link
We then create the li tag with the background.
foreach ($links as $i => $link) {

	// …

	// Creation of the background, target and rel variables

	// …

	?>

	<li style="background: <?php echo $background; ?>;">

	</li>

	<?php

}
We will find three a tags in this li tag: the main one which will contain the target URL used if someone clicks on the image, and the two arrows (if we need them). Each of them will have its own CSS class so they can be styled accordingly.
First we find the main a tag that will be a ‘real’ link pointing to the URL we want (the two other a tags are just buttons). In the li tag previously created, we insert the a tag with the right attributes.
<a

	class="carousel-link"

	href="<?php echo $link->link_url; ?>"

	title="<?php echo $link->link_name; ?>"

	<?php echo $target . $rel; ?>

	>

</a>
The first attribute is the CSS class. You can choose whatever you want as the class name but you’ll have to choose different names for the two other a tags. Then we find the href attribute. We’ve also included the title attribute which displays the link’s name. It’s optional, but why not?
Finally we find the target and rel attributes which will only be displayed if there are values for them.
In the a element below we will display the name of the link and its description as the content. I chose to display the name in a strong tag and the description in a em tag but you are free to choose whatever you want.
<a href="<?php echo $link->link_url; ?>">

	<strong><?php echo $link->link_name; ?></strong>

	<?php

	if (!empty($link->link_description)) {

		?>

		<em><?php echo $link->link_description; ?></em>

		<?php

	}

	?>

</a>
Note here that I removed all the attributes except for href to make the code more readable.
I have also added a test for displaying the description. This condition tests whether the description field is empty or not. If it empty, we display nothing, therefore if you didn’t enter a description we won’t find an empty em tag in the carousel.
Displaying the Arrows
The display of the carousel is almost finished, as the only missing details now are the arrows. We display them in the li tag, right after the link we just created, but not every time. We don’t want to display a “previous” arrow on the first item, or a “next” one on the last item.
Let’s display the ‘previous’ arrow if needed. To determine if the current link is the first one or not we can test the iterator $i. If it is equal to zero, then it refers to the first link and we don’t display anything.
<li>

	<!-- Here is the link created above -->
	<?php

	// Previous link

	if ($i > 0) {

		?>

		<a href="#prev" class="carousel-prev"><</a>

		<?php

	}

	?>

</li>
Once again the attributes in the li tag have been removed in the above code to make the example clearer.
There’s not much to say about the a tag. The value of the href attribute can be anything you want, and likewise with the class name. The content is what users will see so it’s important. Here I chose to display a < symbol.
The code to display the ‘next’ arrow is similar. We change the test to detect if we are on the last item or not. To do that we use the $n variable previously created. If the current link is the last one, then $i is equal to $n - 1 (since $i begins with the value 0 and not 1).
<?php

// Next link

if ($i < $n - 1) {

	?>

	<a href="#next" class="carousel-next">></a>

	<?php

}

?>
And we’re done, all the elements of our carousel are displayed.
What’s Next?
We’ve just created our plugin, saw how to add an item compatible with our carousel, and how to display these items. Currently, the result is not very pretty, that’s why we must enhance it.
In the next part of this tutorial, we will see how to stylize our elements with a bit of CSS using an external stylesheet, and in Part 3 we’ll use JavaScript to enable the animation of the items to create the functioning slider.
Frequently Asked Questions (FAQs) about Building a WordPress Carousel Plugin
What is a WordPress Carousel Plugin?
A WordPress Carousel Plugin is a tool that allows you to create and manage carousel sliders on your WordPress website. These sliders can display images, text, videos, and other content in a rotating fashion, making your website more interactive and engaging. The plugin provides various customization options, including the ability to adjust the speed, direction, and transition effects of the carousel.
How do I install a WordPress Carousel Plugin?
Installing a WordPress Carousel Plugin is a straightforward process. First, you need to download the plugin from the WordPress plugin directory or the developer’s website. Then, go to your WordPress dashboard, navigate to the ‘Plugins’ section, and click on ‘Add New’. Upload the plugin file and click ‘Install Now’. Once the plugin is installed, click ‘Activate’ to start using it.
Can I customize the look and feel of the carousel?
Yes, most WordPress Carousel Plugins offer a range of customization options. You can change the size, color, and style of the carousel, adjust the transition effects, and even add your own custom CSS. Some plugins also allow you to choose from different layout templates and add custom navigation buttons.
Can I add videos to the carousel?
Yes, many WordPress Carousel Plugins support multimedia content, including videos. You can add videos from YouTube, Vimeo, or your own media library. The plugin will automatically resize the videos to fit the carousel and ensure they play smoothly.
How do I add images to the carousel?
Adding images to the carousel is easy. Simply go to the carousel settings in your WordPress dashboard, click on ‘Add Images’, and select the images you want to include. You can add images from your media library or upload new ones. Once the images are added, you can rearrange them by dragging and dropping.
Can I use the carousel on multiple pages?
Yes, you can use the carousel on as many pages as you like. Most WordPress Carousel Plugins generate a shortcode that you can insert into any page or post. Some plugins also provide a widget that you can add to your sidebar or footer.
Is the carousel mobile-friendly?
Most WordPress Carousel Plugins are designed to be responsive, meaning they automatically adjust to different screen sizes and orientations. This ensures that your carousel looks great on both desktop and mobile devices.
Can I add text to the carousel?
Yes, many WordPress Carousel Plugins allow you to add text to your slides. You can use this feature to add captions, descriptions, or call-to-action buttons. The plugin will provide options to customize the font, size, color, and alignment of the text.
How do I update the carousel?
Updating the carousel is as simple as going to the carousel settings in your WordPress dashboard and making the desired changes. Once you save the changes, they will be immediately reflected on your website.
What if I need help with the plugin?
If you encounter any issues with the plugin, you can reach out to the developer for support. Most developers provide documentation, tutorials, and customer support to help you get the most out of their plugin.