
Key Takeaways
- The Python Imaging Library (PIL) is a free tool that adds image processing capabilities to your Python interpreter, supporting a wide range of image file formats and offering standard procedures for image manipulation, such as pixel-based manipulations, filtering, image enhancement, and more.
- Despite its last version being released in 2009 and only supporting Python 1.5.2–2.7, a project called Pillow has forked the PIL repository and added Python 3.X support, making it a viable option for most Python users.
- With PIL or Pillow, you can easily perform tasks such as reading an image, converting an image to grayscale or another type, resizing an image, and saving an image. The library’s comprehensive documentation provides further details and tutorials.
In my previous article on time-saving tips for Pythonists, I mentioned that Python is a language that can inspire love in its users.
One reason for this is the number of time-saving libraries available for this language. A nice example is the Python Imaging Library (PIL), which is the focus of this article.
What You Can Do with PIL
PIL is a free library that adds image processing capabilities to your Python interpreter, supporting a range of image file formats such as PPM, PNG, JPEG, GIF, TIFF and BMP.
PIL offers several standard procedures for image processing/manipulation, such as:
- pixel-based manipulations
- masking and transparency handling
- filtering (for example, blurring, contouring, smoothing, edge detection)
- image enhancement (for example, sharpening, brightness adjustment, contrast)
- geometrical, color and other transforms
- adding text to images
- cutting, pasting and merging images
- creating thumbnails.
PIL and Pillow
One issue with PIL is that its most recent version, 1.1.7, was released in 2009, and only supports Python 1.5.2–2.7. Although the PIL site promises a forthcoming version for Python 3.X, its last commit was in 2011, and it appears that development has been discontinued.
Fortunately, all is not lost for Python 3.X users. A project called Pillow has forked the PIL repository and added Python 3.X support. Given that most readers will probably be working with Python 3.X, I’ll focus on the Pillow update in this article.
Installing Pillow
Since Pillow supports versions of Python back to Python 2.4, I’ll only focus on installing Pillow and not the older version of PIL.
Python on a Mac
I’m currently writing this tutorial on a Mac OS X Yosemite 10.10.5, and thus will describe how to install Pillow on a Mac OS X machine. But, don’t worry, I’ll provide a link at the end of this section that describes how to install Pillow on other operating systems.
I just want to note here that Mac OS X comes with Python pre-installed. However, the version most likely will be prior to 3.X.
For instance, on my machine, when I run $ python --version in the terminal, I get Python 2.7.10.
Python and pip
A very easy way to install Pillow is through pip.
If you don’t have pip installed on your machine, simply type the following command in your terminal, and you’re all done:
$ sudo easy_install pipNow, to install Pillow, simply type the following in your terminal:
$ sudo pip install pillowThat was easy, wasn’t it?
As I promised, for installing Pillow on other operating systems, you can find the instructions for that here.
Some Examples
In this section, I’ll demonstrate a few simple things we can do with PIL.
I’ll perform these tests on the following image:
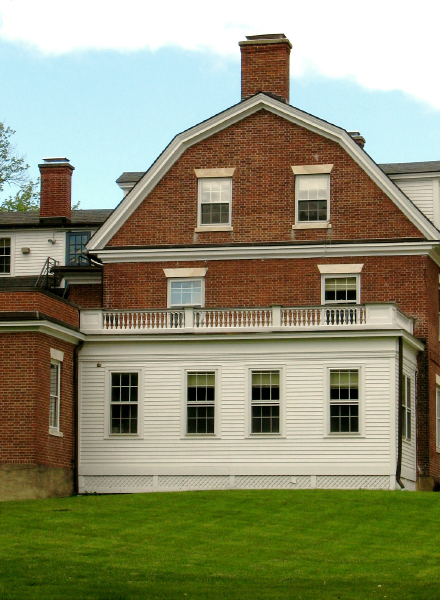
If you’d like to follow along with these examples, download the image.
Read an image
This is the most basic operation in an image processing task, since to process an image, you must read it first. With PIL, this can be easily accomplished as follows:
from PIL import Image
img = Image.open('brick-house.png')
Notice here that img is a PIL image object, created by the open() function, which is part of the PIL Image module.
You can also read already open files, or from a string, or from a tar archive.
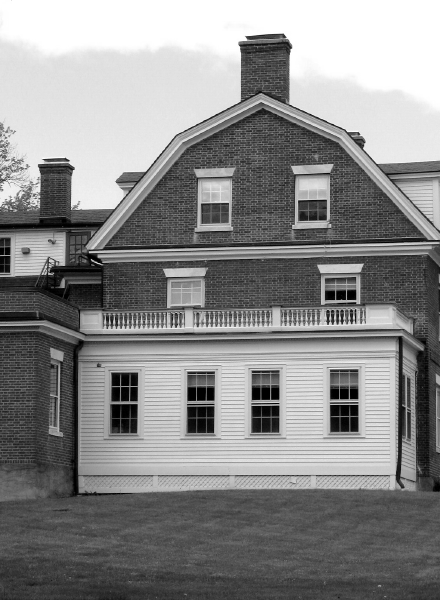
Convert an image to grayscale, display it, and save it
The file brick-house.png is a color image. To convert it to grayscale, display it, and then save the new grayscale image, you can simply do the following:
from PIL import Image
img = Image.open('brick-house.png').convert('L')
img.show()
img.save('brick-house-gs','png')
Notice that we have used three main functions to perform this operation: convert(), show(), and save(). Since we want to convert to a grayscale image, the L parameter was used with convert().
Here is the returned image:
Convert to another image type
The image we are working on is of type png. Say that you want to convert it to another image type, for instance jpg. This operation can be done using the save() function we used to save our result (write output to disk) in the above subsection:
from PIL import Image
img = Image.open('brick-house.png')
img.save('brick-image','jpeg')
Resize an image
The size (dimensions) of our original image is 440 x 600px. If we want to resize it, and make it of size 256 x 256px, this can be done as follows:
from PIL import Image
img = Image.open('brick-house.png')
new_img = img.resize((256,256))
new_img.save('brick-house-256x256','png')
This produces a new square image:

As you can see, this squeezes the image into the desired dimensions rather than cropping it, which may not be what you want. You can, of course, also crop the image while retaining the proper aspect ratio.
In Conclusion
This quick introduction is just intended to scratch the surface of PIL and to demonstrate how easily some complex image processing tasks can be accomplished in Python through the PIL library.
The many other operations you can perform using this library are described in the comprehensive Pillow documentation, where you can read more details about the issues described above, along with handy tutorials.
I hope this introduction has inspired you to try out image manipulation with Python. Have fun!
Frequently Asked Questions (FAQs) about Python Imaging Library (PIL)
How can I install the Python Imaging Library (PIL) on my system?
To install the Python Imaging Library (PIL), you need to use pip, which is a package manager for Python. Open your terminal or command prompt and type the following command: pip install pillow. The ‘pillow’ library is a fork of PIL and is actively maintained, hence it is recommended to use ‘pillow’ instead of PIL. If you have multiple versions of Python installed, you may need to use pip3 install pillow for Python 3.
How can I open and display an image using PIL?
To open and display an image using PIL, you need to use the Image.open() function to open the image and the Image.show() function to display the image. Here is an example:from PIL import Imageimg = Image.open('image.jpg')img.show()
In this code, ‘image.jpg’ is the name of your image file. Make sure the image file is in the same directory as your Python script, or provide the full path to the image file.
How can I resize an image using PIL?
To resize an image using PIL, you can use the Image.resize() function. This function takes a tuple specifying the new size in pixels. Here is an example:from PIL import Imageimg = Image.open('image.jpg')new_img = img.resize((800, 800))new_img.show()
In this code, the image is resized to 800×800 pixels.
How can I rotate an image using PIL?
To rotate an image using PIL, you can use the Image.rotate() function. This function takes an angle in degrees as an argument. Here is an example:from PIL import Imageimg = Image.open('image.jpg')rotated_img = img.rotate(90)rotated_img.show()
In this code, the image is rotated 90 degrees clockwise.
How can I save an image using PIL?
To save an image using PIL, you can use the Image.save() function. This function takes the filename as an argument. Here is an example:from PIL import Imageimg = Image.open('image.jpg')img.save('new_image.jpg')
In this code, the image is saved as ‘new_image.jpg’.
How can I convert an image to grayscale using PIL?
To convert an image to grayscale using PIL, you can use the Image.convert() function with ‘L’ as an argument. Here is an example:from PIL import Imageimg = Image.open('image.jpg')gray_img = img.convert('L')gray_img.show()
In this code, the image is converted to grayscale.
How can I crop an image using PIL?
To crop an image using PIL, you can use the Image.crop() function. This function takes a tuple specifying the left, upper, right, and lower pixel coordinate. Here is an example:from PIL import Imageimg = Image.open('image.jpg')cropped_img = img.crop((100, 100, 400, 400))cropped_img.show()
In this code, the image is cropped to the rectangle specified by the coordinates.
How can I draw on an image using PIL?
To draw on an image using PIL, you can use the ImageDraw.Draw() function to create a drawable image, and then use the draw.text() function to draw text. Here is an example:from PIL import Image, ImageDrawimg = Image.open('image.jpg')draw = ImageDraw.Draw(img)draw.text((100, 100), 'Hello, World!')img.show()
In this code, the text ‘Hello, World!’ is drawn at the coordinates (100, 100).
How can I apply a filter to an image using PIL?
To apply a filter to an image using PIL, you can use the ImageFilter module. This module contains definitions for a pre-defined set of filters, which can be used with the Image.filter() function. Here is an example:from PIL import Image, ImageFilterimg = Image.open('image.jpg')blurred_img = img.filter(ImageFilter.BLUR)blurred_img.show()
In this code, a blur filter is applied to the image.
How can I get the size of an image using PIL?
To get the size of an image using PIL, you can use the Image.size attribute. This attribute returns a tuple containing the width and height of the image in pixels. Here is an example:from PIL import Imageimg = Image.open('image.jpg')print(img.size)
In this code, the size of the image is printed to the console.