

WordPress core is full of features, however, sometimes it is not enough, and we need more. This can be achieved thanks to plugins, and sometimes themes can even add features. However, how can we decide whether a feature should be a plugin or a theme?
The answer to this question can be tricky: it is not always straightforward. If a feature must appear in the theme, or, on the contrary, if it can stay unused without breaking the theme, then you easily know where you should implement it.
What if a feature must be there all the time? Independent of your current theme, this feature might be so important that it must not be deactivated and it does not have its place in the classic plugins system. For these special features, Must-Use plugins can be used.
Key Takeaways
- Must-Use plugins, or mu-plugins, are a type of WordPress plugin that is always activated by default and cannot be deactivated unless uninstalled. They were initially created for sites using multiple blogs but now serve as important features that extend the functionality of WordPress.
- The main feature of a mu-plugin is that it is automatically activated once uploaded to the mu-plugins directory and cannot be deactivated from the plugins page of the WordPress dashboard. This ensures that important features cannot be accidentally deactivated.
- To create a mu-plugin, a PHP file must be created and placed in the /wp-content/mu-plugins directory. This file is automatically activated by WordPress and can be viewed by going to the Installed Plugins page under the Plugins section of the WordPress administration.
- Mu-plugins are loaded before classic plugins in alphabetical order, which can be useful for ensuring certain features are loaded first. However, they cannot use activation hooks, which are typically used by classic plugins to initialize certain features.
- While mu-plugins are useful for adding features to the WordPress core, they do have some limitations. For instance, they do not support activation or deactivation hooks and cannot be updated automatically. They also won’t appear in the must-use plugins list if stored in subdirectories.
What Is a Must-Use Plugin?
A must-use plugin (also called a ‘mu-plugin’) is a plugin that will always be activated by default, without you needing to do it yourself. To activate a mu-plugin, you just have to upload it in the right directory, and WordPress will automatically know that this plugin must be used. Moreover, a mu-plugin cannot be deactivated: it will always be executed, unless it is uninstalled.
Originally, mu-plugins were only available for WPMU, for those sites which used multiple (multisite) blogs. Back then, a mu-plugin was just a plugin activated for all blogs.
Now, since the version 2.8, this feature is in the main branch of WordPress and the ‘MU’ part in mu-plugins has a new meaning: from ‘multi-user’, it became ‘must-use’ and the use of this feature has been changed.
The question is not ‘must this feature appear on all my blogs?‘ anymore, but rather ‘is this feature so important that it can be considered as an extension of WordPress?‘.
Must-use plugins allow users to add features which are not present by default in the WordPress core but that are needed for users.
Must-use plugins can also be seen as features that do not have their place in a theme or classic plugin. For example, as we covered in a previous SitePoint article on updating WordPress, plugins and themes, we can enable automatic updates for plugins and themes, thanks to some specific filters. Adding these filters into another plugin does not really make sense, and even less into a theme. Enabling automatic updates is a perfect example of features for which mu-plugins are useful.
What Are the Features of a Must-Use Plugin?
The main feature of a mu-plugin is that it is activated by default. All you have to do is upload the file into the mu-plugins directory (we will see where to find this below). Then, the plugin is automatically activated, you don’t have to log in to do this yourself: once the file is in the right place, WordPress will always execute it.
Moreover, a mu-plugin can’t be deactivated in the Plugins page of your WordPress dashboard: the only way to deactivate a mu-plugin is by deleting or moving its file. That way, no one can accidentally deactivate a needed feature.
Because they are not activated, mu-plugins can not use activation hooks which are usually used by classic plugins to initialize some needed things like options in the database. The immediate consequence is that if you need activation hooks, you won’t be able to use mu-plugins for the feature you wanted.
Must-use plugins are loaded before classic plugins, in alphabetical order. It can be useful to know if your mu-plugin is there to load a library used in all the pages of your website for example: if a classic plugin uses this library, you can be sure that it is already loaded because mu-plugins are loaded before and they cannot be deactivated.
How to Create a Must-Use Plugin?
As you will see below, a must-use plugin is not too different to a classic plugin, but there are some things to know. The goal of this section is to learn how to create a mu-plugin, where to place it and how to see which mu-plugins are currently used by your site.
The Must-Use Plugins Directory
A mu-plugin is similar to a classic plugin, except that it is not stored in the plugins directory of the wp-content folder, but rather in the mu-plugins directory, of the same folder. If you have never used mu-plugins before, this directory should not exist, but you can create it without any problem.
Note that the directory where you will store your mu-plugins is /wp-content/mu-plugins, but you can change this by defining two constants in the wp-config.php file: WPMU_PLUGIN_DIR and WPMU_PLUGIN_URL.
define('WPMU_PLUGIN_DIR', '/full/path/to/the/new/directory');

define('WPMU_PLUGIN_URL', 'http://URL/to/the/new/directory');
Be careful: if you define these two constants, WordPress won’t redefine them, so if the path is not valid, mu-plugins won’t be loaded. Moreover, in the wp-config.php file, you must define these constants before the line where WordPress includes the wp-settings.php file, that means you won’t be able to use some useful constants like WP_CONTENT_DIR for example.
Unless you are sure of your directory, you should keep the default values for WPMU_PLUGIN_DIR and WPMU_PLUGIN_URL, as it is safer and more practical.
Our First Must-Use Plugin
Basically, a mu-plugin is a PHP file, so is a classic plugin. We will now create a very basic mu-plugin. It will display a ‘Hello World!’ message, so it will be fairly trivial, but that way we will be able to see if it works right after its creation.
Create a new file in the /wp-content/mu-plugins directory (or another one if you changed it). You can give it any name you want, but hello-world.php seems to be a good idea. Fill it with the following function.
function displayHelloWorld() {

echo '<p style="position: absolute; top: 150px; right: 0; padding: 10px; background-color: #0096FF; color: #FFFFFF;">Hello World!</p>';

}
This function will display a paragraph containing the text ‘Hello World!’ and place it at the top right corner of the screen: that way, we can easily see it. Now, you have to call this function.
It is a test, but it is not an excuse to be dirty: we can call our function via an action, wp_footer for example, which is triggered when the footer is displayed on the blog. Add the following line after the above function.
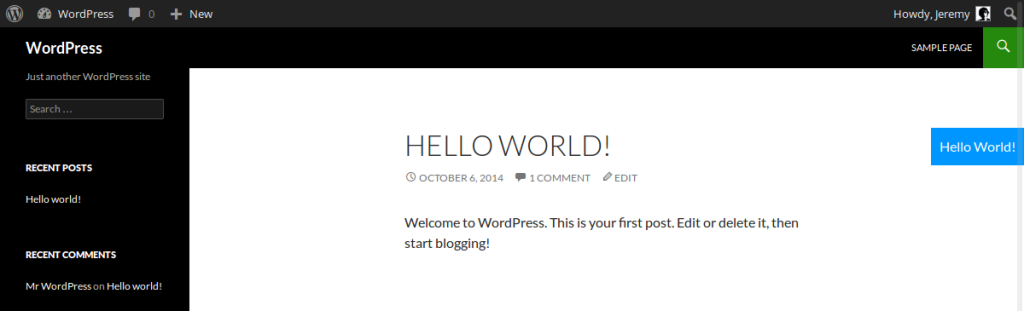
add_action('wp_footer', 'displayHelloWorld');Now, visit your blog. If you haven’t changed anything to the above code, you should see, at the top right corner, a blue box displaying the text ‘Hello World!’. If not, make sure your file is in the right folder: as mu-plugins are automatically activated, you should not have to do anything more than place the file into the right directory.
Seeing the Installed Must-Use Plugins
As mu-plugins cannot be deactivated, they won’t be shown into the default list where you can see other plugins. However, it doesn’t mean you can’t see the list of the currently installed must-use plugins.
In the Plugins section of your WordPress administration, go to the Installed Plugins page. At first, nothing has changed, but look at the tabs below the title of the page. See it?
A new tab appeared: Must-Use. Click on it and, as you can guess, you will see the list of installed mu-plugins, with a message reminding us that this plugins are automatically activated.
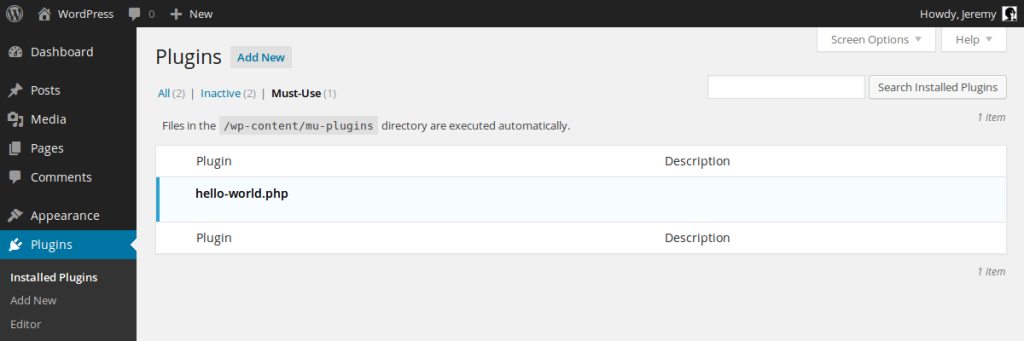
As you can see, this list seems to be less complete than the one which shows the classic plugins: the only thing you see is the name of the file, you don’t see what the plugin does.
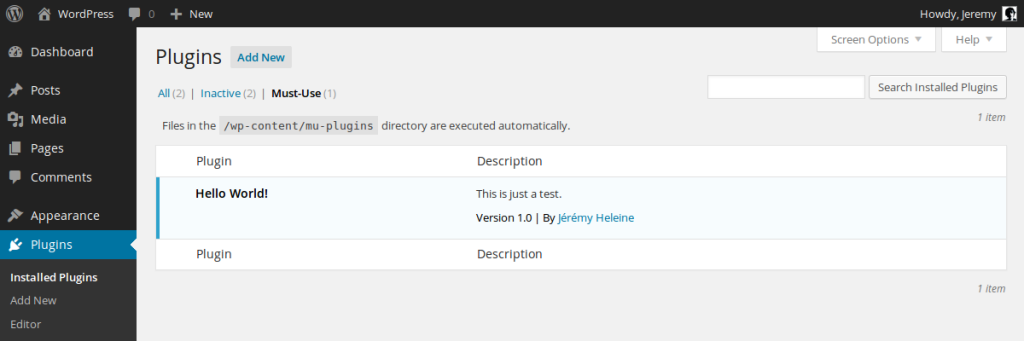
We can change that, and the way to make this change is the same as for the classic plugins: we will add a comment containing all the information we want. Add the following comment at the beginning of the file.
/*

Plugin Name: Hello World!

Description: This is just a test.

Author: Jérémy Heleine

Version: 1.0

Author URI: http://jeremyheleine.me

*/
Replace the different values with yours, refresh the must-use plugins list, and enjoy the result!
Subdirectories
Contrary to a classic plugin, a mu-plugin can’t be stored in a subdirectory of the mu-plugins one so, by default, you won’t be able to sort your mu-plugins with folders. However, if WordPress does not look for plugins in subdirectories, you can do it yourself, with your own loader.
This loader will be a new mu-plugin, consisting in only one file, directly stored in the /wp-content/mu-plugins directory. This is necessary because if you store this loader in a subdirectory, it won’t be executed by WordPress and the other plugins won’t be either.
As we did above, create a new file in the /wp-content/mu-plugins directory. I chose to name this file load.php but you can choose whatever you want as a name. Then, put the following line in this file.
require(WPMU_PLUGIN_DIR . '/myplugin/myplugin.php');This line includes the myplugin.php file stored in the myplugin subdirectory of the directory where we find must-use plugins which is /wp-content/mu-plugins by default. You have what we wanted: your plugin is executed, even if it is not directly stored in the main directory.
If you add a new folder containing another mu-plugin, you will have to edit the load.php file. However, you can automate this process thanks to some PHP functions. Replace the content of the load.php file by the following lines.
// Opens the must-use plugins directory

$wpmu_plugin_dir = opendir(WPMU_PLUGIN_DIR);
// Lists all the entries in this directory

while (false !== ($entry = readdir($wpmu_plugin_dir))) {

$path = WPMU_PLUGIN_DIR . '/' . $entry;
// Is the current entry a subdirectory?

if ($entry != '.' && $entry != '..' && is_dir($path)) {

// Includes the corresponding plugin

require($path . '/' . $entry . '.php');

}

}
// Closes the directory

closedir($wpmu_plugin_dir);
This script will automatically include the mu-plugins stored in subdirectories. Note that it requires that the main file of a plugin has the name of its folder.
Moreover, you can see another disadvantage of including mu-plugins stored in subdirectories: as they are not found by WordPress by default, they won’t appear in the must-use plugins list we presented above. That way, you won’t be able to see which must-use plugin is installed without looking at the directory itself.
In Conclusion
Must-use plugins are a way to add features to the WordPress core by adding files into the wp-content directory. The advantage is they won’t be deleted by an update of WordPress, so you can be sure that you will always retrieve your features.
A mu-plugin is still a plugin. When you want to add feature to WordPress, you can often chose to either use a classic plugin or a must-use plugin without the risk of not retrieving a function you need, unless that function is an activation hook. The only difference between these two types of plugins is that the must-use plugins will always be executed and they can’t be deactivated. So if you ask yourself whether you must choose classic plugins or must-use ones, seeing mu-plugins as an extension of WordPress can be a good idea.
Finally, there is another disadvantage of must-use plugins which we did not cover above. WordPress won’t tell you if an update exists for mu-plugins, so if you use one that you did not write yourself, you will have to verify by yourself if an update exists.
The examples of this tutorial can be retrieved here, where you will find an archive containing four mu-plugins: the ‘Hello World!’ example and another example which loads two other ‘Hello World!’ type plugins to show that we can store mu-plugins in subdirectories. To test these examples, create the mu-plugins subdirectory into the wp-content folder and place the files and folders of the archive in this subdirectory.
Frequently Asked Questions (FAQs) about WordPress MU Plugins
What are the key differences between regular plugins and MU plugins in WordPress?
Regular plugins in WordPress are those that you install and activate individually on your site. They can be deactivated or deleted at any time. On the other hand, MU plugins, also known as “Must-Use” plugins, are automatically activated on your site. They remain active until you remove the plugin file from the server. Unlike regular plugins, MU plugins can’t be deactivated from the WordPress admin area. This makes them ideal for critical functionalities that you want to ensure remain active at all times.
How can I create a WordPress MU plugin?
Creating a WordPress MU plugin involves a few steps. First, you need to create a PHP file with a unique name. Next, you need to add a PHP comment at the top of the file, which WordPress uses to identify the plugin. After writing your code, you can save the file and upload it to the /wp-content/mu-plugins/ directory on your WordPress site. If the directory doesn’t exist, you can create it. Once the file is uploaded, WordPress automatically activates the MU plugin.
Can I control the loading order of MU plugins?
By default, WordPress loads MU plugins in alphabetical order based on their file names. If you need to control the loading order, you can create a PHP file and include the MU plugins in the order you want them to load. Remember to upload this file to the /wp-content/mu-plugins/ directory.
Are there any limitations to using MU plugins?
While MU plugins offer several advantages, they also have some limitations. For instance, they don’t support activation or deactivation hooks. Also, if an MU plugin has an error, it could cause issues on your site because it’s always active.
Can I use MU plugins on a multisite network?
Yes, you can use MU plugins on a multisite network. In fact, they can be very useful in this context. When you add an MU plugin to your network, it’s automatically activated on all sites in the network. This can save you a lot of time if you need to activate a plugin on multiple sites.
How can I troubleshoot issues with MU plugins?
Troubleshooting MU plugins can be a bit tricky because they’re always active. If you’re experiencing issues, a good starting point is to check the error logs on your server. You can also try removing the MU plugin file from the server to see if the issue resolves.
Can I update MU plugins?
Unlike regular plugins, MU plugins don’t have an automatic update feature. To update an MU plugin, you need to manually replace the old file with the new one on your server.
Are MU plugins secure?
The security of an MU plugin depends on the quality of its code. If the plugin is well-coded and regularly updated, it should be secure. However, because MU plugins are always active, a vulnerable MU plugin could pose a security risk to your site.
Can I use MU plugins to modify the functionality of other plugins?
Yes, you can use MU plugins to modify the functionality of other plugins. This can be useful if you want to customize a plugin without modifying its core files.
Where can I find MU plugins for my site?
There are many sources where you can find MU plugins. Some developers offer them on their websites. You can also find them in the WordPress plugin repository. Additionally, there are several online communities where developers share their MU plugins.