

Building good APIs is hard, and anyone who had the chance to do so can relate to this. A project can easily grow to become a mess. One can keep trying to adopt an approach to make it more enjoyable, like trying a documentation-first workflow, but something always feels clumsy.
I was trying out Postman lately, a tool we’ve briefly covered before, and I discovered that they’re doing a great job by providing an integrated environment for different components of an API, like authorization, testing, documentation, versioning, etc.

In this article, we’re going to walk through the different features that Postman provides and how we can organize them to make our API workflow less painful.
Key Takeaways
- Utilize Postman’s environment variables feature to streamline the authentication process by storing and reusing tokens across different API requests, eliminating the need to manually copy and paste them each time.
- Leverage Postman’s testing capabilities to automate and validate API responses using JavaScript, ensuring that the API behaves as expected before deploying or integrating it further.
- Organize API requests into collections, which act like folders, to maintain a clean workspace and to group related API calls, making it easier to manage and execute integration tests sequentially.
- Employ Postman’s built-in documentation tools to effortlessly generate and publish comprehensive API documentation, enhancing clarity and accessibility for API consumers.
- Take advantage of Postman’s mocking feature to simulate API endpoints during the prototyping phase, allowing teams to develop in parallel without waiting for backend services to be live.
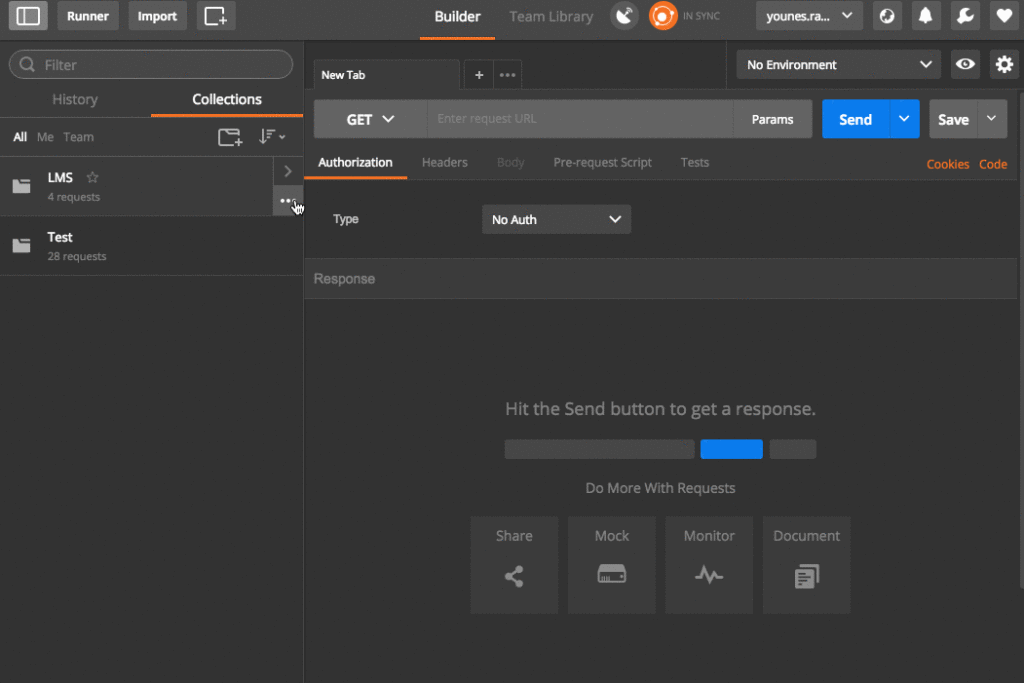
Making Requests
The first step to discovering Postman is making a simple API request and seeing the response.
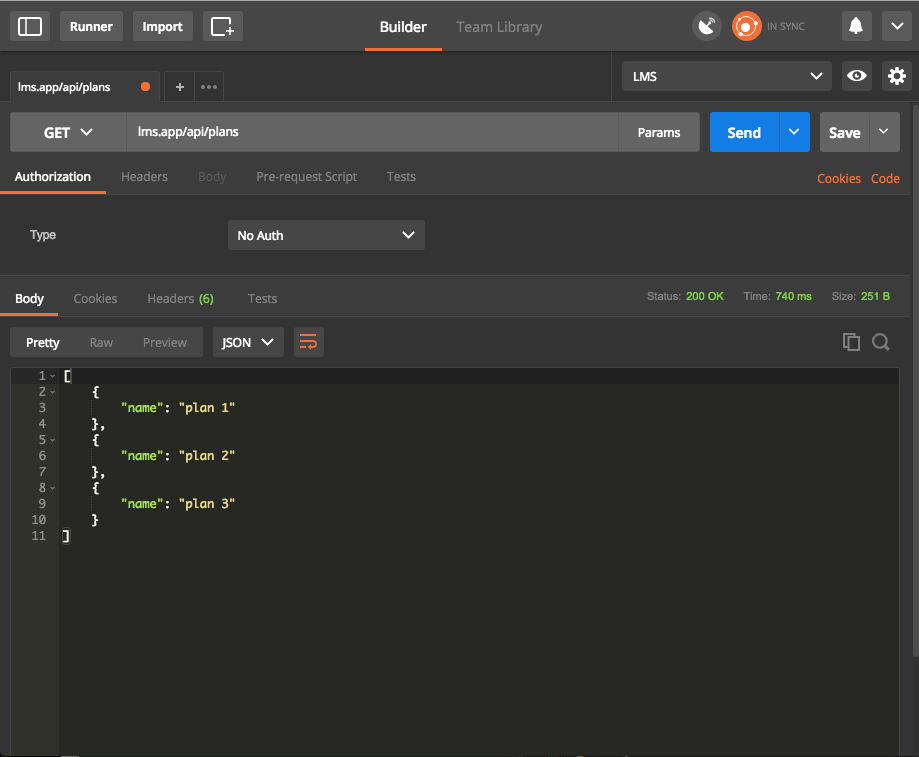
From the screenshot above we can see that the view incorporates different elements. The top bar contains the request method (in this case GET), and right next to it we specify the endpoint to make the request to. If the request has some params we can specify them by clicking the Params button, which will open a table for entering them. When ready, we can click the send button to initiate the request.
The next section contains five tabs:
- Authorization: Specifies how to authorize the request. Like
Basic Auth,OAuth2, etc. - Headers: Any header that should be sent with the request. Like
content-type,Authorization, etc. - Body: Request body for request types like
Post,PUT, etc. - Pre-request Script: JS code to be executed before performing the request. (More about this later)
- Tests: JS code to validate the response payload.
The bottom section contains all the details about the response (status, time and size). The four tabs are self explanatory, except for Tests which contains the tests result if we have any (more about this later).
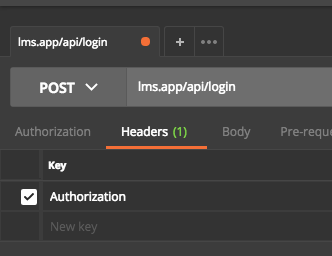
Authorization
Postman supports all types of authorization, as we saw above. We’re going to focus on token authorization set via header. You can read more about authorization here.
The header format that Postman will use is:
Authorization: Bearer <TOKEN>
Now, we’ll go ahead and get a token we can use for our future requests. I’m testing on an in-development application of mine, but you can use any application you have lying around, or set one up quickly with Laravel as described here.
Not familiar with Laravel? Try our premium course – it’s a comprehensive introduction, and you’ll get the upcoming newer version of it automatically if you grab it in its current iteration!
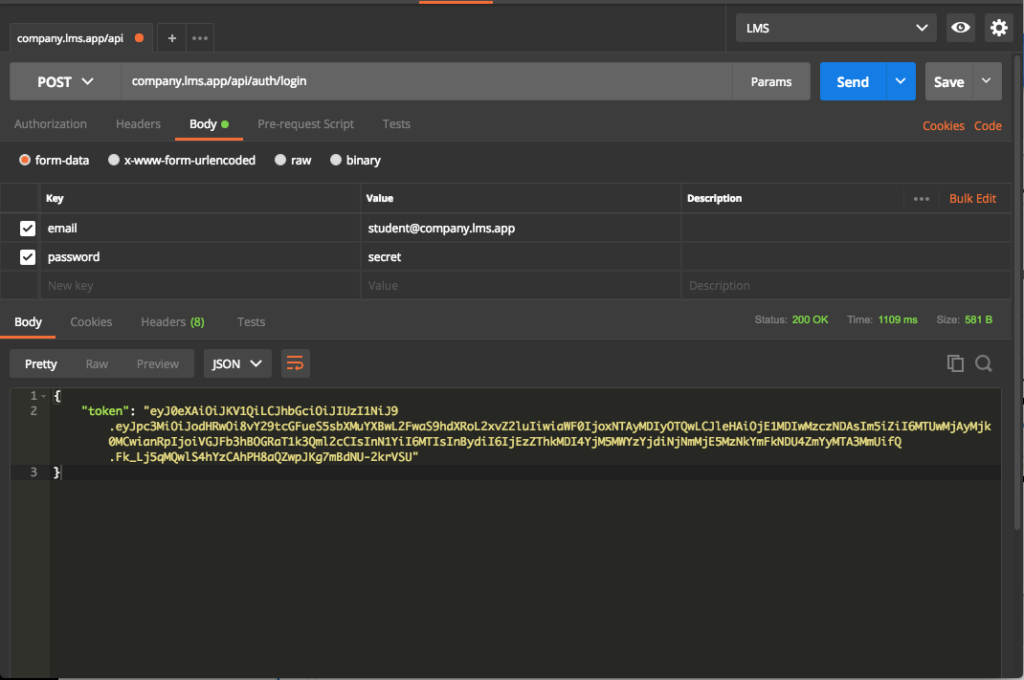
At this point, we have a token to be used for querying data from the API as an authenticated user. However, copying and pasting the token for every request is tedious!
Environment Variables
This nice feature alleviates the pain of copy/paste and groups our variables in one place. An environment is an execution context: we may have a local environment, testing, staging, etc.
Postman has different scopes for variables:
- Global
- Environment
- Local
- Data
The global variables are available everywhere, separately from the selected environment. You can read more in the documentation.
We need at least three variables for now:
domain: current active subdomaincompany1,company2, etc.url: our app URL.token: Token for future authentication.

Now we can update our login endpoint to use our new environment, but first we need to select our environment from the top right selection box.

We can use our variables inside the URL, parameters, tests, etc. But how are we going to use our token now?
Well, we have two choices. The first is to copy the token and paste it as a value for the token variable (this is what we’re trying to avoid).
The second method is to set this via code executed after the request is done. This is where tests come into play, let’s find out what they are!
Testing
As we develop our application we need to make sure that we’re getting the proper result from the API before moving forward. Using tests, we can create different types of validation for our response. Let’s start with some basic assertions.
In the login request, go to the tests tab, type the following code and send the request.
tests["Successful request"] = responseCode.code === 200;
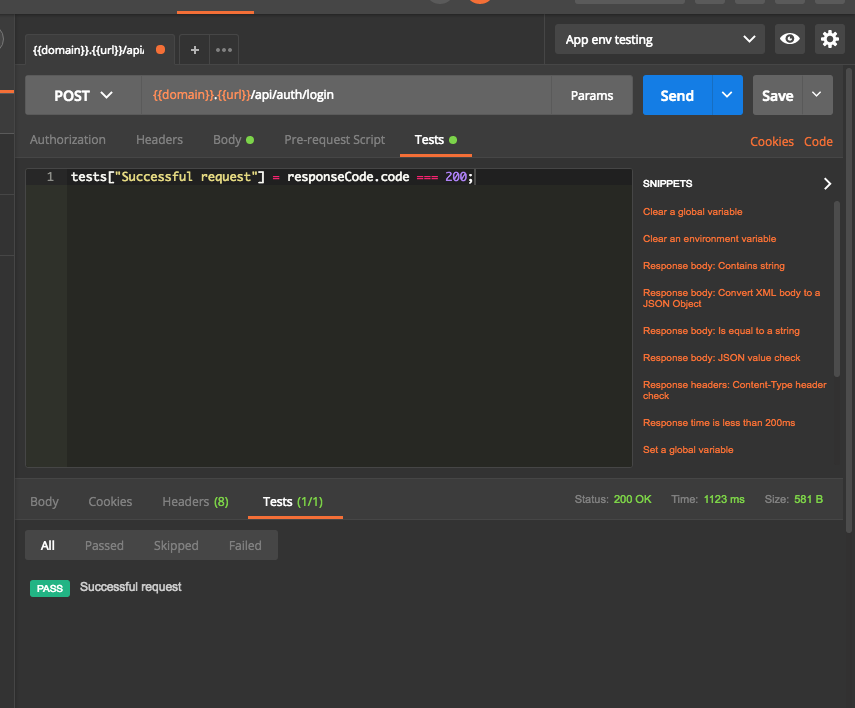
The responseCode contains the response status object, so we use it to validate that the response is a 200 OK. We also have other objects to validate the response body (responseBody), response headers (responseHeaders), response time (responseTime). You can read more about test scripts here.
The tests object will hold a list of boolean assertions that will be used to decide if everything is going as expected. However, we can add any JS code we want here. For example, we can get our token from the response and set it in our environment variable!
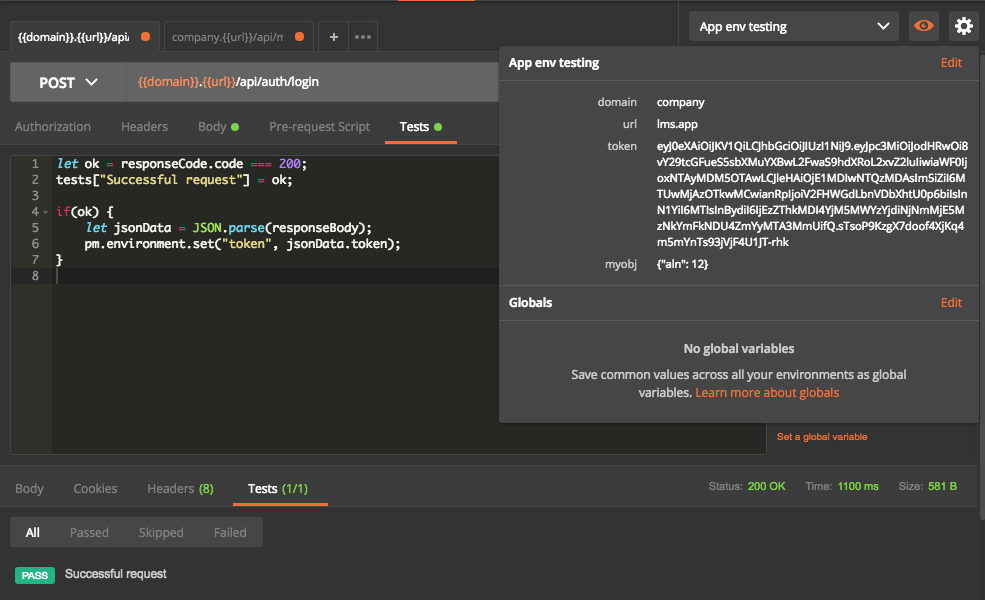
First, we test the status. Next, we parse the response body to JSON and get the token. We can see from the environment variable view that the token is set properly in our environment.
Using the Console
This may be obvious, but sometimes you need to play with some objects or examine the response. You can open the console using cmd+alt+C or View > Show Postman Console.
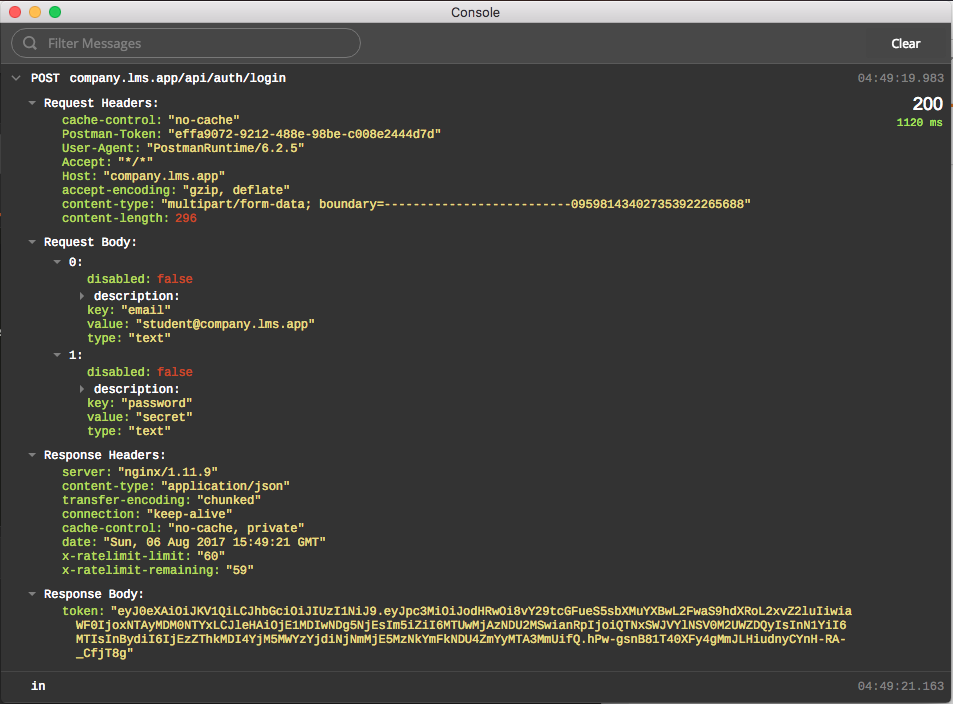
The console logs the request and response objects with extensive details that can help investigate the problem.
Help Libraries
Validating the response and asserting things like JSON structure with attribute types validation from scratch is painful.
Postman includes a set of helpful libraries that we can use to enhance our tests. Most notably Lodash and tv4 JSON schema validator. You can check the full list here.
Let’s continue testing the login endpoint first, and we’ll do another complicated example to make it useful.
Since our login endpoint only returns a token value, we can test if the value is set in the response.
let jsonData = JSON.parse(responseBody);
let ok = responseCode.code === 200;
tests["Successful request"] = ok;
tests["Token is set"] = _.has(jsonData, "token");

if(ok) {
    pm.environment.set("token", jsonData.token);
}
A more complicated example is testing if a resource is returned, as this can quickly become a nightmare with a test like this:
var data = JSON.parse(responseBody);
tests["Response OK"] = responseCode.code === 200;
tests["Data is OK"] = data.hasOwnProperty("data") && Object.isObject(data.data);

var requiredKeys = ["uuid", "student_number", "title", "first_name", "last_name", "email", "last_login_at"];

tests["Response structure is OK"] = _.every(requiredKeys, _.partial(_.has, data.data));
The above test is asserting the resource keys are present, and that the response status is OK. Imagine having to do this over and over again!
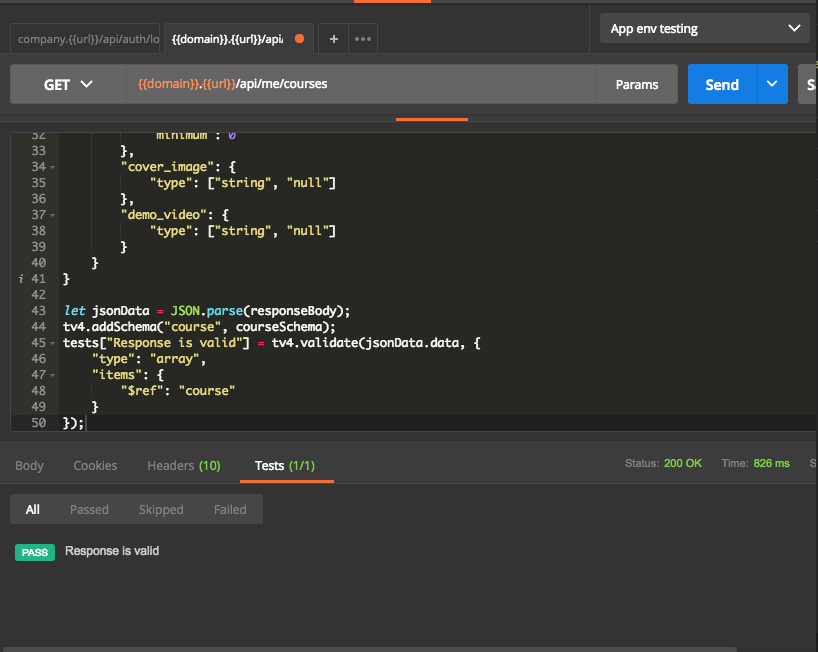
The best solution here is using tv4 for validating schema.
let courseSchema = {
    "title": "Course",
    "type": "object",
    "properties": {
        "name": {
            "type": "string"
        },
        "code": {
            "type": "string"
        },
        "uuid": {
            "type": "string"
        },
        "is_active": {
            "type": "boolean"
        },
        "is_free": {
            "type": "boolean"
        },
        "is_enrollable": {
            "type": "boolean"
        },
        "in_catalogue": {
            "type": "boolean"
        },
        "price": {
            "type": "integer",
            "minimum": 0
        },
        "total_duration": {
            "type": "integer",
            "minimum": 0
        },
        "cover_image": {
            "type": ["string", "null"]
        },
        "demo_video": {
            "type": ["string", "null"]
        }
    }
}

let jsonData = JSON.parse(responseBody);
tv4.addSchema("course", courseSchema);
tests["Response is valid"] = tv4.validate(jsonData.data, {
    "type": "array",
    "items": {
        "$ref": "course"
    }
});
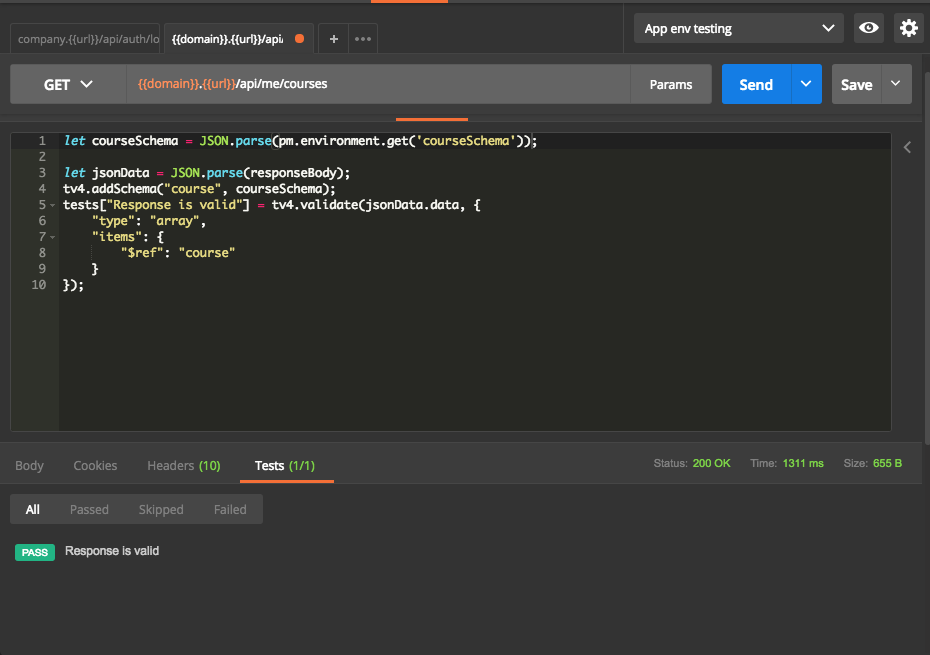
The above code snippet is creating a schema for our course resource. Then we parse the JSON response and validate it using tv4 validator.
You can learn more about building the JSON schema here.
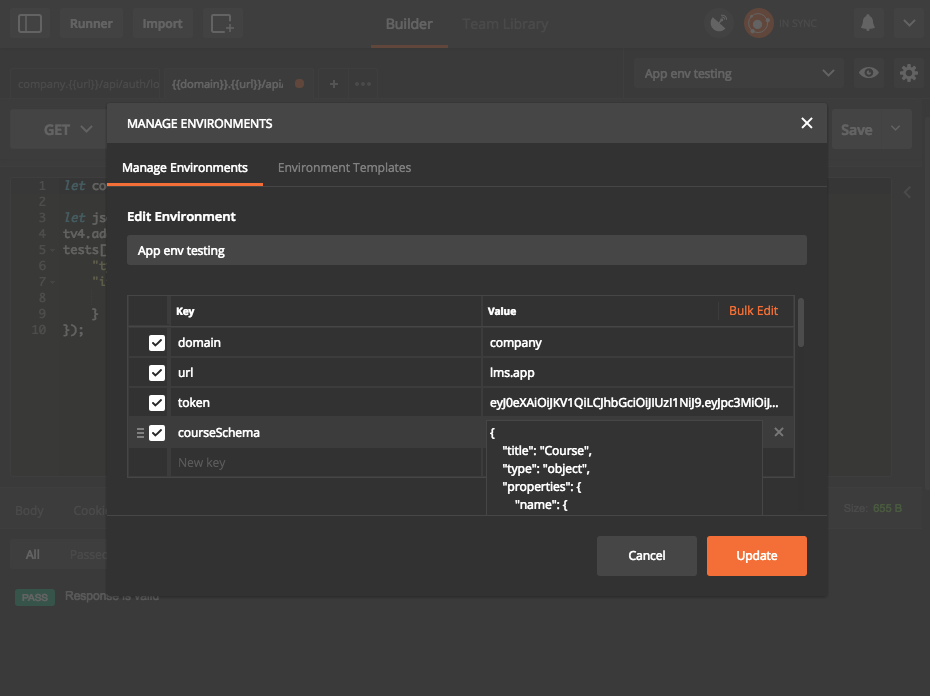
The problem with our current test is copying and pasting the schema from one test to another. To avoid this, we store our schemas inside an environment variable to be reused in other places.
Note: It may seem strange to store things like schema inside the environment variable. But it’s totally fine, because they can store anything and are not limited to certain values.
Now everything seems fine. However, applications don’t have just two or three endpoints! They grow bigger easily, and will play against us in the near future if not organized properly.
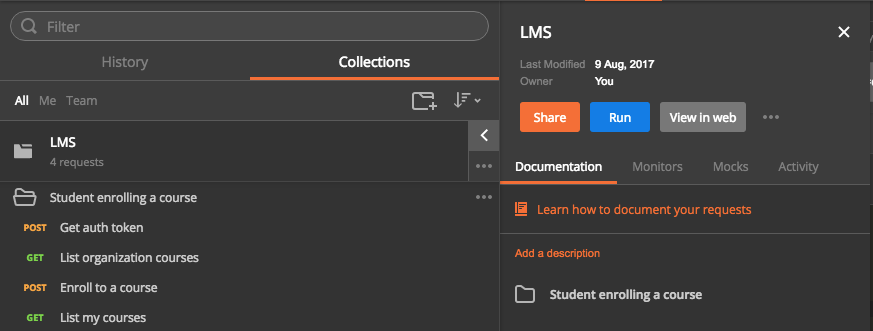
Collections
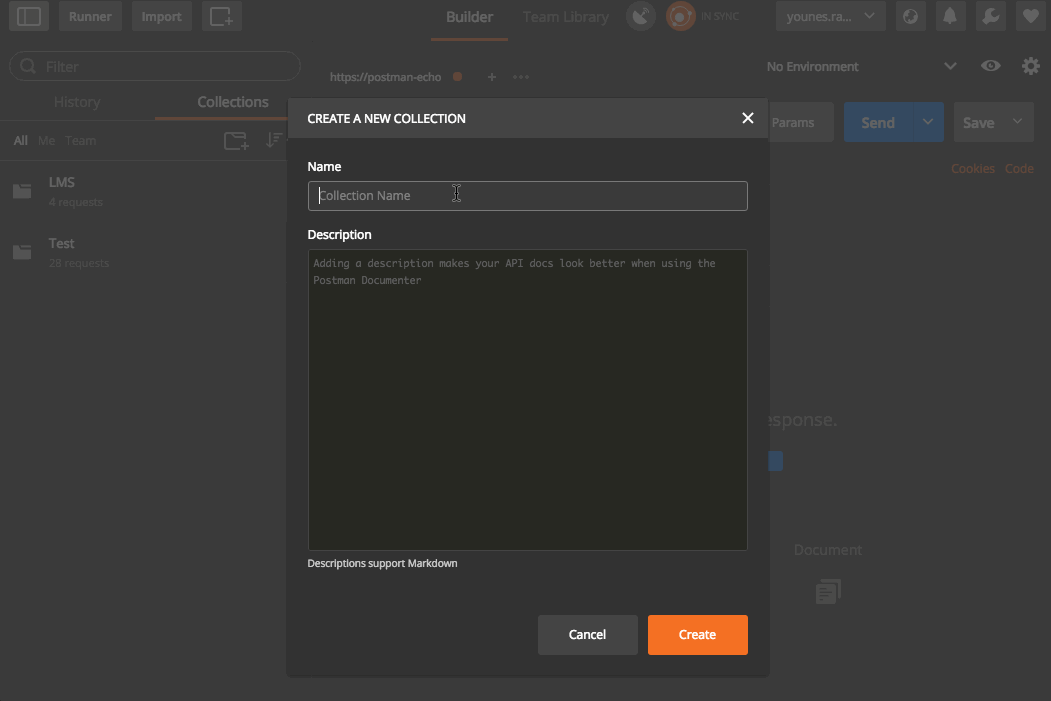
Collections are like folders for grouping things belonging to the same type or category. The documentation provides a good explanation for creating and managing collections, and we’ll try to do the same with examples.
We can create a new collection by going to the left menu and clicking on the new folder button. When making a new request we can click on the save button and select a folder for it.
We can probably all agree that a simple structure is always the best, and since these can be categorized as integration tests, it’s best to make folders for features.
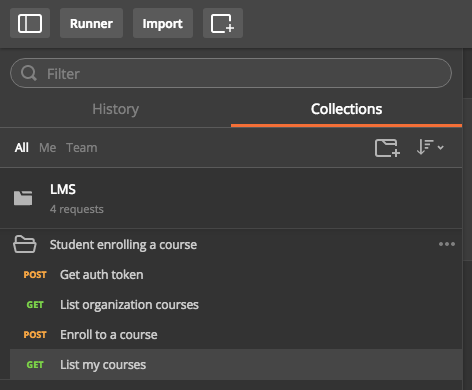
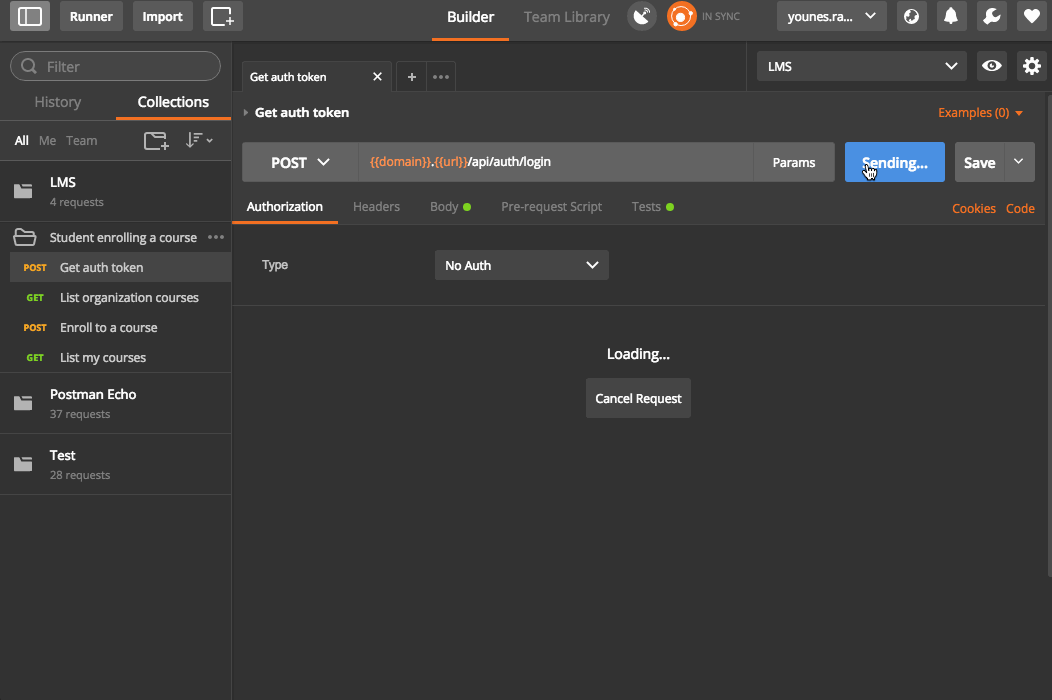
In our application, we have a list of courses for every organization, and a user can enroll to a course. They should then be able to see it in their courses list. We will create a test for this feature and put it in its own folder. But how can we run these tests in the correct order to see the expected result?
Testing Collections
This is a very interesting feature – it allows us to chain the execution of requests and tests to achieve a good set of integration tests. This is our chain of tests:
- Get auth token.
- List organization courses.
- Enroll to a course.
- List my courses.
// Get auth token

var jsonData = JSON.parse(responseBody);

tests['Token is set'] = jsonData.hasOwnProperty('token');

pm.environment.set("token", jsonData.token);

postman.setNextRequest("List organization courses");
Notice the postman.setNextRequest method call. This is how we tell Postman to order our tests. Thus, it runs the “List organization courses” test after getting the token, and we can pass null to end the chain.
// List organization courses

let jsonData = JSON.parse(responseBody);
let courseSchema = JSON.parse(pm.environment.get('courseSchema'));

tv4.addSchema("course", courseSchema);

tests["Response OK"] = responseCode.code === 200;
tests["Data is OK"] = jsonData.hasOwnProperty("data") && Array.isArray(jsonData.data);
tests["Response is valid"] = tv4.validate(jsonData.data, {
    "type": "array",
    "items": {
        "$ref": "course"
    }
});

pm.environment.set('courseId', jsonData.data[0].uuid);

postman.setNextRequest("Enroll to a course");
The pm.environment.set('courseId', jsonData.data[0].uuid); statement will get the first course from the list and put it in an environment variable for the enroll request.
// Enroll to a course

tests["Response OK"] = responseCode.code === 201;

postman.setNextRequest("List my courses");
// List my courses

let jsonData = JSON.parse(responseBody);
let courseSchema = JSON.parse(pm.environment.get('courseSchema'));

tv4.addSchema("course", courseSchema);

tests["Response OK"] = responseCode.code === 200;
tests["Data is OK"] = jsonData.hasOwnProperty("data") && Array.isArray(jsonData.data);
tests["Response is valid"] = tv4.validate(jsonData.data, {
    "type": "array",
    "items": {
        "$ref": "course"
    }
});
tests["Enrolled course added"] = jsonData.data[0].uuid === pm.environment.get('courseId');

postman.setNextRequest(null);
We put all our tests inside folder named after our feature.
Running the Collection
To run our collection, we go to the left sidebar, click on the right arrow to open the menu and select run.
We can choose to run the whole collection, or just run a folder. If something went wrong while running the tests, we can open the Postman dev console to see the logs. You can check the documentation for more details about testing collections.
There is also an interesting feature for running the collection with some pre-defined data. You can read more about that here.
Documentation
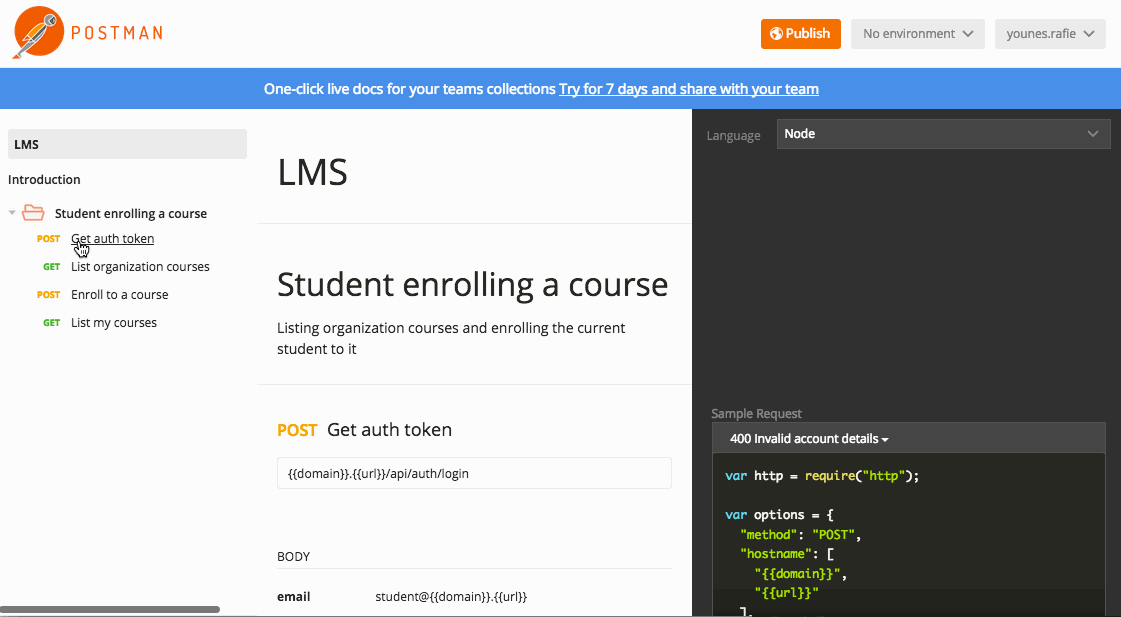
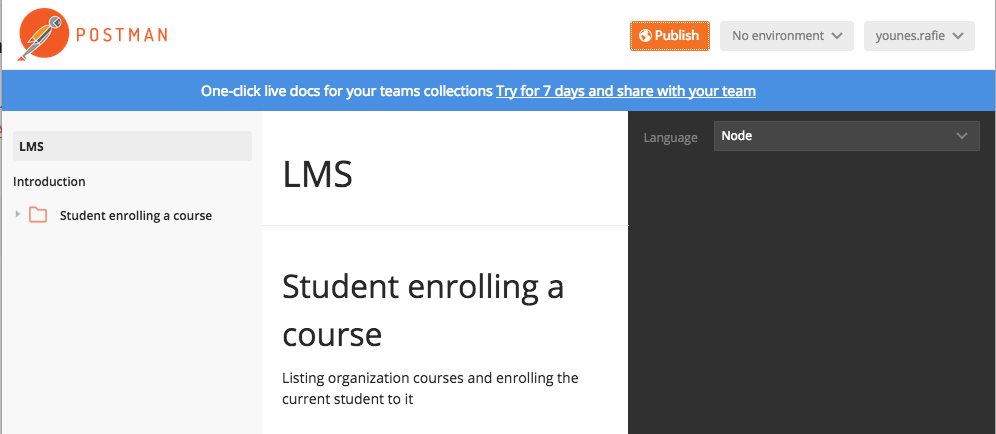
An essential part of an API is the documentation, and Postman does a great job of simplifying this process.
To generate our documentation we select our collection and click on view in web. This will open the documentation for our collection and requests, and we can navigate through it to see every request’s details – body parameters, headers, method, etc. You can read more about generating the documentation here.
I know you’re thinking about including responses in here, and Postman developers already thought of this. They built the ability to include examples with our documentation.
Using Examples
Examples are response snippets that can be included for API consumers to see what they’re getting from a request without actually having to call it.
When we execute a request in Postman, we can click the Save response button and define headers, parameters, etc.
Now, we can go back and view our documentation in the web to see our examples included.
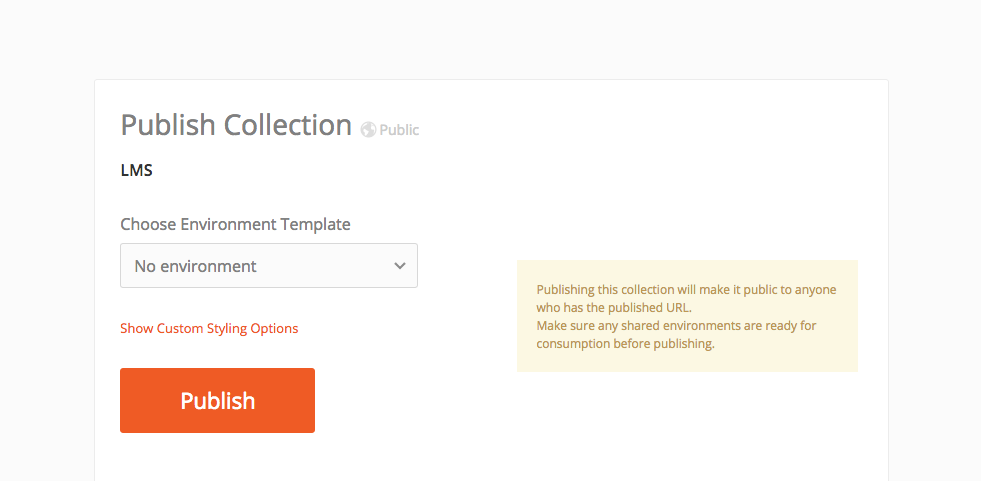
Publishing Documentation
Documentation is not just for us – it’s also for API consumers and they need to access it and see how different parts of the API behave. Postman has several ways to share the documentation. We can share private documentation and create teams to collaborate with if we have a pro account, but Postman also generates a sharing link that we can send to others.
On the view doc page, we have a Publish button at the top of the page.
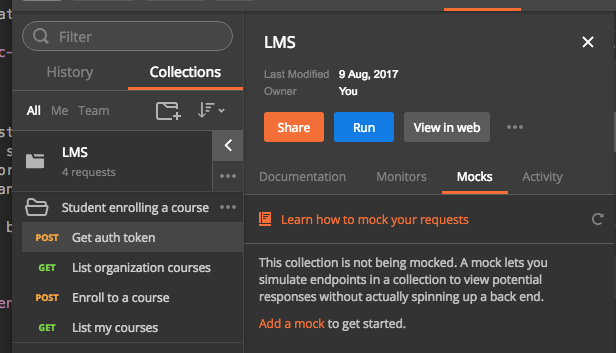
Mocking
Mocking is very useful when prototyping the application and deciding on the API structure. In the case of teams, after agreeing on these mocks everyone can start working on their part (backend, front-end, mobile, etc) separately and only switch environment to the new server after everything is finished.
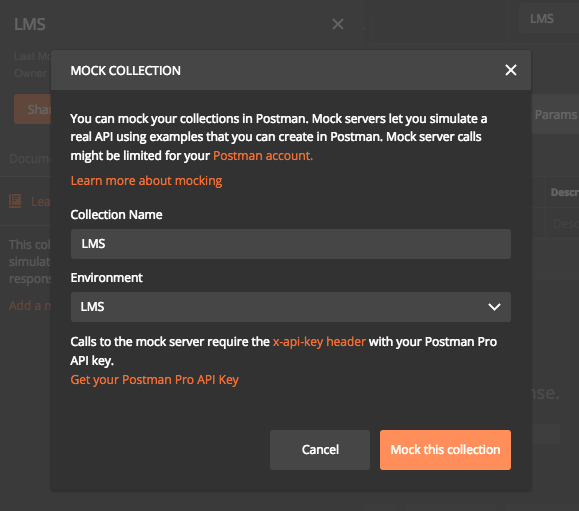

After our mock server link has been generated, we need to get our Postman API key for authentication. From the second screenshot we see a warning about getting the API key. So go ahead and click on the Get your Postman API key link and generate a new key.
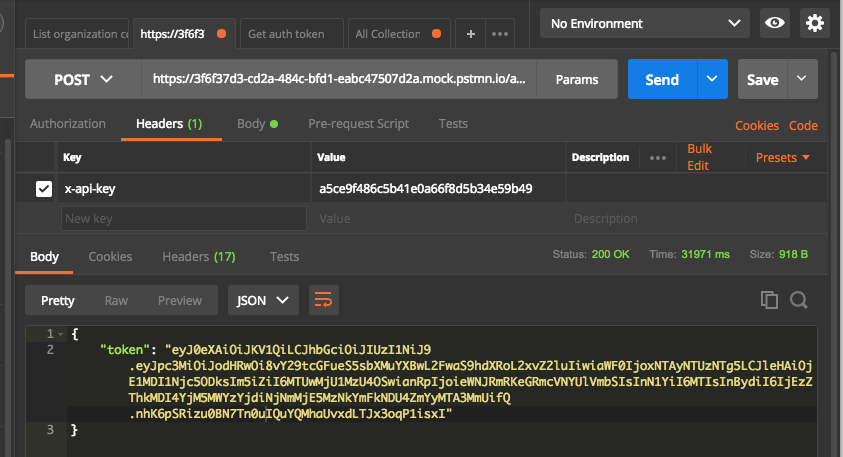
Now with the mock URL and the API key we can call our API endpoints as usual. ex: <mockUrl/api/auth/login>
Mocking with Postman is a big topic, you can read more here and here.
Exporting/Importing
We saw earlier how to share documentation with colleges and consumers. However, an essential part of developing the API is sharing environment, collection progress, etc. Postman offers the ability to export and import almost everything.
If you have a Postman account, you can easily share anything with your team members. However, we can still use the export/import feature to share things while testing this tool.
Collections
To export a collection, go to the collections list on left sidebar and click on collection menu and click on Export. This will bring a pop-up to select an exporting format, but v2 is the advised choice here.
For importing a collection, go to the top menu, click Import, and select your JSON file to be imported.
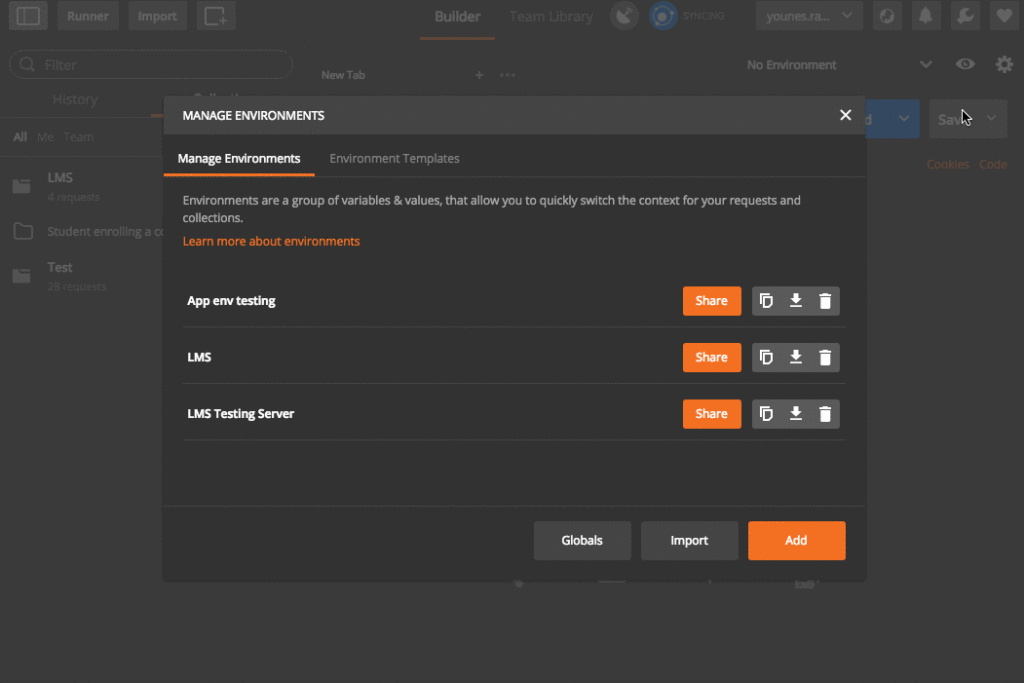
Environments
Same for collections, we can export and import our environments easily from the Manage Environments menu.
There’s more to sharing that we can’t cover here, like collection runs and other features you can read about in the documentation.
Useful Resources
- https://www.getpostman.com/docs/
- http://blog.getpostman.com/2017/07/28/api-testing-tips-from-a-postman-professional/
- https://medium.com/@codebyjeff/using-postman-environment-variables-auth-tokens-ea9c4fe9d3d7
Conclusion
We learned how to integrate Postman in our API development workflow and we also explored some of the available features, but there are many more things to learn! Be sure to skim through the docs to see how this tool can help you in your API development.
If you have any questions, comments or tips about Postman, be sure to post them below. Have you aver used Postman? If yes, what are the most interesting features you use most frequently?
Frequently Asked Questions (FAQs) about Mastering API Workflow with Postman
How can I use Postman to test APIs?
Postman is a powerful tool that allows you to test APIs in a simple and efficient way. To test an API using Postman, you first need to create a new request. You can do this by clicking on the ‘New’ button and selecting ‘Request’. You then need to enter the URL of the API you want to test in the ‘Enter request URL’ field. You can also select the HTTP method (GET, POST, PUT, DELETE, etc.) from the drop-down menu next to the URL field. Once you’ve entered the URL and selected the HTTP method, you can click on the ‘Send’ button to send the request to the API. Postman will then display the response from the API in the ‘Response’ section.
What is the Postman Console and how can I use it?
The Postman Console is a powerful feature that allows you to view the details of your API requests and responses. It provides a detailed log of all the network requests that Postman makes and receives. To open the Postman Console, you can click on the ‘Console’ button in the bottom left corner of the Postman interface. Once the console is open, you can see the details of your API requests and responses, including the headers, body, and status codes. You can also filter the logs by different criteria, such as method, status, and URL, to help you find specific information.
How can I document my API using Postman?
Postman provides a feature called ‘Documentation’ that allows you to create detailed documentation for your APIs. To document your API, you first need to create a new collection. You can do this by clicking on the ‘New’ button and selecting ‘Collection’. Once you’ve created a new collection, you can add requests to it and then document each request. You can add descriptions, parameters, examples, and more to each request. Once you’ve documented your API, you can publish it to the web or export it as a PDF or HTML file.
How can I use Postman to automate API testing?
Postman provides a feature called ‘Runner’ that allows you to automate your API testing. To use the Runner, you first need to create a collection of requests. You can then click on the ‘Runner’ button at the top of the Postman interface to open the Runner. In the Runner, you can select the collection you want to run, set the iteration count, and configure other settings. Once you’ve configured the Runner, you can click on the ‘Run’ button to start the automated testing.
How can I share my Postman collections with others?
Postman allows you to share your collections with others in a few different ways. One way is to use the ‘Share’ button in the Postman interface. This allows you to share your collection via a link or by embedding it in a website. Another way is to export your collection as a JSON file. You can then send this file to others, who can import it into their own Postman application.
How can I use Postman to monitor my APIs?
Postman provides a feature called ‘Monitors’ that allows you to monitor your APIs. Monitors can be used to schedule automated tests of your APIs and receive notifications when something goes wrong. To create a monitor, you first need to create a collection of requests. You can then click on the ‘New’ button and select ‘Monitor’. In the Monitor setup, you can select the collection you want to monitor, set the frequency of the monitoring, and configure other settings.
How can I use Postman to debug my APIs?
Postman provides several features that can help you debug your APIs. One of these features is the Postman Console, which provides a detailed log of all the network requests that Postman makes and receives. Another feature is the ‘Tests’ tab in the request editor, which allows you to write tests for your requests and see the results in real time.
How can I use Postman to generate code snippets?
Postman provides a feature called ‘Code’ that allows you to generate code snippets for your requests. To generate a code snippet, you first need to create a request. You can then click on the ‘Code’ button in the top right corner of the request editor. This will open a dialog where you can select the programming language and library you want to use, and Postman will generate a code snippet for your request in that language and library.
How can I use Postman to manage my APIs?
Postman provides a feature called ‘APIs’ that allows you to manage your APIs. In the APIs section, you can create and manage API specifications, view and edit API documentation, and set up API monitors and mock servers.
How can I use Postman to collaborate with my team?
Postman provides a feature called ‘Workspaces’ that allows you to collaborate with your team. In a workspace, you can share collections, environments, and other resources with your team members. You can also use the ‘Activity Feed’ to see what your team members are doing and the ‘Comments’ feature to communicate with them.