

Key Takeaways
- NativeScript from Telerik is a tool that allows developers to build native apps for iOS, Android and Windows Universal using HTML, CSS and JavaScript, while sharing the application code across the platforms. It abstracts the differences between the native platforms, making it easier to create cross platform apps.
- The tutorial demonstrates how to use NativeScript to create a simple app that searches for images on Flickr and displays the results. It involves designing the app using XML, fetching data from Flickr using its developer API, and binding the data to the UI. The source code for the tutorial is available on GitHub.
- NativeScript is a unique JavaScript framework that allows direct access to native APIs and UI performance without the need for WebViews. This means you can create truly native mobile applications with the same performance as if they were written in Swift, Objective-C, or Java. It also works seamlessly with Vue.js and Angular through plugins, and supports TypeScript out of the box.
There are many options available for utilizing HTML, CSS and JavaScript to create cross platform applications and I have covered many of them before. In this article I will look at NativeScript from Telerik that claims to be easier to create for cross platform apps than many existing options.
From their official documentation.
NativeScript enables developers to build native apps for iOS, Android and Windows Universal while sharing the application code across the platforms. When building the application UI, developers use our libraries, which abstract the differences between the native platforms.
Creating an image search flicker app
In this tutorial we will create a simple app that searches for images on flickr and displays the results. We will make use of the flicker developer API to search images.
Source code from this tutorial is available on GitHub.
Getting Started
Install nodejs and then using the node package manager (npm), install native script.
npm install -g nativescript
After installing native script, create a new project called NativeApp.
tns create NativeApp
Navigate to the project directory and add the mobile development platform.
tns platform add android
Run the application on the android emulator.
tns run android --emulator
Project Structure
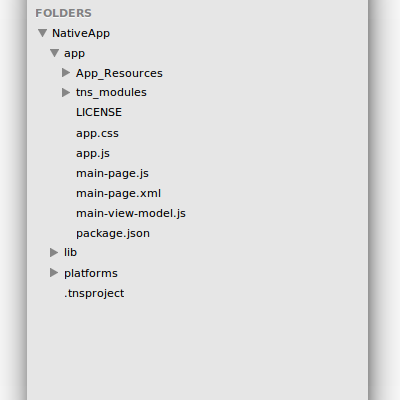
Inside the project folder there are 3 sub-folders: app, lib and platforms. The application source code resides in the app folder. Application code is written using JavaScript and the user interface designed using XML.
Inside the app folder is a file called main-page.xml which has the default user interface code. In main-view-model.js is the default model code and main-page.js defines the application logic. Finally app.js contains the code to start the application with the defined modules.
Designing the app
Let’s start by designing the app using XML. Open main-page.xml and look at the default code. Remove everything except the page tag. The Page tag has an attribute called loaded which executes the pageLoaded function once the app loads. The pageLoaded function is inside the main-page.js file.
This project will use a stack layout to design our app. There are a number of layouts offered by native script.
Inside the Page tag add the stack layout.
<StackLayout orientation="vertical">
</StackLayout>
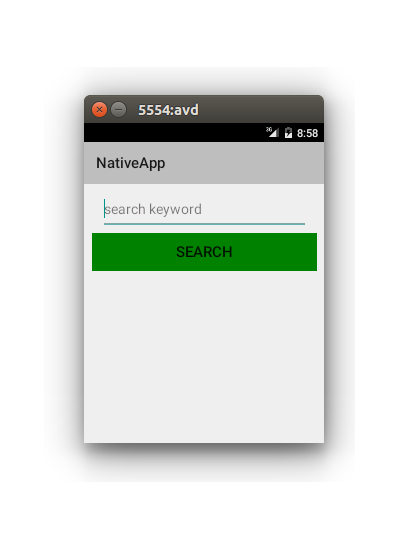
Define the stack layout with a vertical orientation. Add a search text box and button inside the stack layout.
<TextField width="300px" hint="search keyword" />
<Button text="Search" height="50px" style="background-color:green;width:300px;border:none;font-size:20px;" />
Save changes and run the app. It should look something like the below.
Fetching data from flickr
Add an attribute called tap to the search button.
tap="signin"
Now, when the user taps the search button the signin function is called. Let’s define the signin function inside main-page.js.
exports.signin = function() {

  // Code would be here !

};
To use flickr’s developer APIs you will need a free account on flickr. Request an API key to make API requests.
In main-page.js define the API key.
var api_key = 'replacewithyourkey';
Calling the API will require the http module, so import the module into main-page.js.
var http = require("http");
Inside the signin function, and using the http module, now make the API call.
http.getJSON("https://api.flickr.com/services/rest/?method=flickr.photos.search&api_key=" + api_key + "&text=hello&format=json&nojsoncallback=1&per_page=5").then(function(r) {
    console.log(JSON.stringify(r));
}, function(e) {
    console.log(e);
});
The code above makes the API call with the search text hard coded for now, this will become dynamic later in the tutorial.
When running an app in the emulator you will need to run ‘adb logcat’ to check log messages.
Save changes and run the app on the emulator. Click the search button and the returned result from Flickr should be visible in terminal.
Next create the image url using the response returned and push the URL to the images array.
An observable array is required to create and detect changes to a collection of things. Bind this same observable array to the view so that the view updates whenever a change occurs.
To create the observable array, add these variable declarations to main-page.js :
var observableArray = require("data/observable-array");

var images = new observableArray.ObservableArray([]);
Based on the response returned from the API request, the next task is to create the flickr image URL. Detailed information can be found here about creating flickr URLs.
Next, we iterate through the returned data, create the image URLs and push to the images array. Add this code inside the signin function.
var imgUrl = '';
var photoList = r.photos.photo;
for (var i = 0; i < photoList.length; i++) {

    imgUrl = "https://farm" + photoList[i].farm + ".staticflickr.com/" + photoList[i].server + "/" + photoList[i].id + "_" + photoList[i].secret + ".jpg";
    images.push({

        img: imgUrl

    });
}
Binding data to the UI
Once the data is in the images array, bind it to the UI. For displaying the data, create a ListView in main-page.xml, underneath the existing Button element.
<ListView>

    <ListView.itemTemplate>
        <Image stretch="fill" height="200px" />
    </ListView.itemTemplate>

</ListView>
Bind the images array to the list view and set the source of the image.
<ListView items="{{ images }}">

    <ListView.itemTemplate>
        <Image stretch="fill" height="200px" src="{{img}}" />
    </ListView.itemTemplate>

</ListView>
For the images array to be available across the view, set the images array in the observable module. Do this by importing an observable module and using it to create an observable object.
var observableModule = require("data/observable");

var pageData = new observableModule.Observable();
In the pageLoaded function, set the images array to the observable module and add the observable module to the page context.
function pageLoaded(args) {

    var page = args.object;

    pageData.set("images", images);

    page.bindingContext = pageData;

}
Using the same pageData observable object, the values from the search text box are readable. Modify the text field to add the text attribute.
<TextField width="300px" text="{{txtKeyword}}" hint="search keyword"/>
Inside the signin function, remove the hard coded hello search text and replace it with:
pageData.get('txtKeyword')
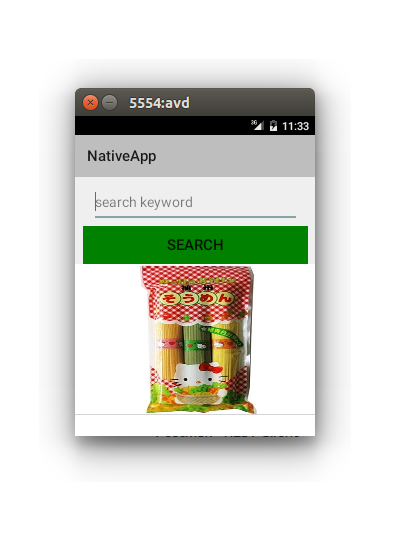
Save changes and run the app on the emulator. Click on the search button and images received from the Flickr API should be viewable. The request is for 5 images, so scrolling down should show all the images.
Conclusion
This tutorial demonstrates how to get started using NativeScript to create a simple mobile app. For detailed information about using NativeScript, I would recommend reading the official documentation.
Do you have had any mobile development experience using NativeScript? What’s your opinion about using NativeScript ? Let us know your thoughts, suggestions and corrections in the comments below.
Frequently Asked Questions (FAQs) about Building Native Apps with JavaScript Using NativeScript
What is the difference between NativeScript and other JavaScript frameworks?
NativeScript is a unique JavaScript framework that allows developers to build native mobile applications using JavaScript, CSS, and HTML. Unlike other JavaScript frameworks like React Native or Ionic, NativeScript allows direct access to native APIs and UI performance without the need for WebViews. This means you can create truly native mobile applications with the same performance as if they were written in Swift, Objective-C, or Java.
How does NativeScript work with Vue.js?
NativeScript and Vue.js work together seamlessly through the NativeScript-Vue plugin. This plugin allows developers to write Vue.js components and use them directly in their NativeScript applications. This means you can leverage the power and simplicity of Vue.js while still creating truly native mobile applications.
Can I use Angular with NativeScript?
Yes, NativeScript works well with Angular. In fact, NativeScript was designed to be framework-agnostic, meaning it can work with any JavaScript framework. The NativeScript team has even created a plugin for Angular, allowing you to write Angular components that can be used directly in your NativeScript applications.
How does NativeScript compare to React Native?
While both NativeScript and React Native allow you to build native mobile applications using JavaScript, there are some key differences. React Native uses a JavaScript bridge to communicate with native APIs, which can lead to performance issues. On the other hand, NativeScript allows direct access to native APIs, resulting in better performance. However, React Native has a larger community and more third-party libraries available.
Is NativeScript free to use?
Yes, NativeScript is an open-source framework that is free to use. You can find the source code on GitHub and contribute to the project if you wish.
How can I get started with NativeScript?
To get started with NativeScript, you’ll first need to install Node.js and npm on your machine. Then, you can install NativeScript globally using npm. From there, you can create a new NativeScript project using the NativeScript CLI.
What platforms does NativeScript support?
NativeScript supports both iOS and Android platforms. This means you can write one codebase in JavaScript and deploy it to both iOS and Android devices.
Can I use TypeScript with NativeScript?
Yes, NativeScript supports TypeScript out of the box. This means you can write your NativeScript applications using TypeScript, which can help catch errors early and provide a better development experience.
What kind of apps can I build with NativeScript?
With NativeScript, you can build any kind of mobile application that you could build with native code. This includes everything from simple utility apps to complex, data-driven applications.
How is the performance of NativeScript apps?
NativeScript apps have excellent performance because they run directly on the native platforms. This means they can take full advantage of the device’s hardware and native APIs, resulting in smooth, responsive applications.

