

In Part 1 of this tutorial – the Retro Revolution: Building a Pong Clone in Unity – we created a Pong clone with basic artificial intelligence (AI) and almost no user interface (UI).
In this tutorial, we’ll build upon our previously created clone and update it so that it will look identical to classic Pong, have basic UI, and have improved gameplay.

Let’s jump right in, but first, please either go through the original tutorial, or just download the resulting project from GitHub if you’d like to follow along. (You can also view the working demo. Or, if you prefer, play the improved game, which is the result of this article.
Key Takeaways
- Update your Pong clone in Unity by importing new black and white sprites and adjusting the pixels per unit to match the classic Pong aesthetics.
- Improve ball collision handling by adding code to calculate the impact angle on paddles, enhancing the game’s responsiveness and realism.
- Enhance enemy AI to make paddle movements smoother and more challenging by adjusting movement algorithms based on the ball’s position and speed.
- Create a retro-styled pause menu using custom fonts and simple UI elements, and add functionality to manage game pausing and resuming with keyboard inputs.
- Develop a dynamic main menu with simulated gameplay in the background, giving players an engaging preview of the game upon launch.
- Implement a scoring system that tracks player and AI scores, displays them on the UI, and ends the game when a score limit is reached, complete with a game over screen.
Styling the Game
Classic Pong is traditionally black and white, so we must get rid of the colored elements in our Pong.
This also means we need to import new sprites into the Unity project (by dragging them into the Sprites folder in the Assets pane). If you’re following along, feel free to use these examples from the demo code.
After importing the new sprites into Unity, we should select both sprites in the Assets pane and change their pixels per unit to 64. We must also hit Apply for the changes to take effect.
Now that we have our images, we can start updating our Pong Clone. First, we should change the color of the Main Camera’s background to black. This can be done by clicking on the color bar next to the word Background in the Main Camera’s inspector pane. Next, we need to change the color of the paddles. We should select the Player game object in the hierarchy pane and drag the white square sprite into the Sprite attribute’s value in the Sprite Renderer element. Now we should do the same for the Enemy game object.
In order to create the nice middle bar in Pong (see below), we need to create an empty game object (right-click in hierarchy -> create empty) and name it MiddleBar
. The Middle Bar game object should have an X of 0 and a Y of 0, so that it’s located in the center of the screen. We can now drag the white square sprite onto the Middle Bar game object to make white squares that are children of the Middle Bar Game object. All of the children’s X scales should be low so that they look like skinny, white sticks.

Finally, we need to change the ball’s sprite so that instead of a grey circle it will be a white circle. If we go to the the ball prefab (located in the Prefabs folder), we can select it and change its sprite as we did with the Player and Enemy, except using the white circle sprite.
Making Collision Better
When playing the Pong clone from the last tutorial we can observe a few bugs with the collisions. Sometimes the ball may shoot off at a weird angle, or the ball’s reaction to hitting an object may make the ball fly straight back instead of at an angle. To fix this, we need to add code to the ball that allows the ball to calculate the angle it hits a paddle at and bounce off the paddle according to that angle. Let’s open the BallController script located in the Scripts folder. With the BallController script open, we should make its OnCollisionEnter2D method look like the one below:
void OnCollisionEnter2D(Collision2D col) {

        //tag check
        if (col.gameObject.tag == "Enemy") {
            //calculate angle
            float y = launchAngle(transform.position,
                                col.transform.position,
                                col.collider.bounds.size.y);

            //set angle and speed
            Vector2 d = new Vector2(1, y).normalized;
            rig2D.velocity = d * speed * 1.5F;
        }

        if (col.gameObject.tag == "Player") {
            //calculate angle
            float y = launchAngle(transform.position,
                                col.transform.position,
                                col.collider.bounds.size.y);

            //set angle and speed
            Vector2 d = new Vector2(-1, y).normalized;
            rig2D.velocity = d * speed * 1.5F;
        }
    }

    //calculates the angle the ball hits the paddle at
    float launchAngle(Vector2 ball, Vector2 paddle,
                    float paddleHeight) {
        return (ball.y - paddle.y) / paddleHeight;
    }
All we need to do now is create a tag for the Enemy paddle and add a tag to the Player paddle so that the ball can know which is which. If we select the Enemy game object from the hierarchy pane and click Untagged in the Inspector pane under the Enemy’s name, a drop down will appear. We can click on Add Tag to view the Tags and Layers menu. By clicking on the + symbol we can add a tag named Enemy to our list of tags. Now let’s select the Enemy game object again, click untagged, and then click Enemy to set its tag to Enemy. For the Player game object, all we have to do is select the game object, click untagged, and then click the Player tag, since Unity creates a Player tag for us when the project is first created.
Improving Enemy AI
The previous tutorial’s enemy AI was a simplified version of the AI we’ll be using in this tutorial. The old AI moved based on the ball’s Y position, but had a low speed so that the paddle wouldn’t bounce or shake. In the new AI, we’ll still be using the ball’s Y position as the basis for our code, but we’ll make it so that the paddle moves based on time. This allows for the paddle to be able to move in quick bursts that human eyes will barely be able to follow. If the timing and speed values are done correctly (or even close enough to perfect) the enemy paddle’s movement will look almost completely smooth.
We’ll also be adding a bit of range to the enemy paddle’s movement, so that instead of being directly equal to the ball’s Y position, the paddle will have a slight range that still allows the paddle to hit the ball and also allows the ball to hit different spots on the paddle.
If we open the EnemyController script and change it to look like the code below, we’ll get the results that we want:
// Use this for initialization
    void Start () {
        //Continuously Invokes Move every x seconds (values may differ)
        InvokeRepeating("Move", .02F, .02F);
    }

    // Movement for the paddle
    void Move () {

        //finding the ball
        if(ball == null){
            ball = GameObject.FindGameObjectWithTag("Ball").transform;
        }

        //setting the ball's rigidbody to a variable
        ballRig2D = ball.GetComponent<Rigidbody2D>();

        //checking x direction of the ball
        if(ballRig2D.velocity.x < 0){

            //checking y direction of ball
            if(ball.position.y < this.transform.position.y-.5F){
                //move ball down if lower than paddle
                transform.Translate(Vector3.down*speed*Time.deltaTime);
            } else if(ball.position.y > this.transform.position.y+.5F){
                //move ball up if higher than paddle
                transform.Translate(Vector3.up*speed*Time.deltaTime);
            }

        }

        //set bounds of enemy
        if(transform.position.y > topBound){
            transform.position = new Vector3(transform.position.x, topBound, 0);
        } else if(transform.position.y < bottomBound){
            transform.position = new Vector3(transform.position.x, bottomBound, 0);
        }
    }
Note: Making the InvokeRepeating method’s time longer slows the paddle down but adds a jittery effect. Mixing the paddle’s speed between 1 and 4 (floating point numbers) and the InvokeRepeating’s time between .1 and .3 has worked best from my testing.
Even though this updated code is better than the old code, we still want the enemy paddle to be able to get to the ball when the ball first spawns. To fix this, we’ll need the enemy paddle to reset its position once the ball is destroyed. We can accomplish this by opening the BoundsController script and changing it to look like this:
//enemy transform
public Transform enemy;

    void OnTriggerEnter2D(Collider2D other){
        if(other.gameObject.tag == "Ball"){

            //Destroys other object
            Destroy(other.gameObject);

            //sets enemy's position back to original
            enemy.position = new Vector3(-6,0,0);

            //pauses game
            Time.timeScale = 0;
        }
    }
We also need to make sure to drag the Enemy paddle from the hierarchy into the Enemy transform value on both bounding objects, or else we’ll get a Null Reference Exception.
Creating a Pause Menu
The pause functionality for this Pong clone is going to be slightly different from the functionality in my Dodger tutorial. Since this game has text that will appear when the ball is destroyed and when the player pauses the game, we have to specifically target this text using Unity’s gameObject.name variable to set its active state. We’ll also be adding a custom font from Font Squirrel to the game, to give it a more retro feel.
Making a Retro Pause Menu
In order to add a custom font to Unity, we need to download it to our computer and then import it into Unity via drag and drop. First, we need to download SilkScreen (not a download link) and then unzip the downloaded file. After unzipping the file, we can see that there are a number of different types of SilkScreen. For the sake of this tutorial, we’ll be using slkscreb.ttf. We don’t need to install the font into our computer. Instead, let’s make a folder in the Assets pane named Fonts. Now we can open the Fonts folder and drag the the slkscreb.ttf file into the Assets pane.
With SilkScreen added to Unity, we can now begin working on our pause menu. Our menu will be aligned to the top (see below) and will feature two buttons and the text from the last article:
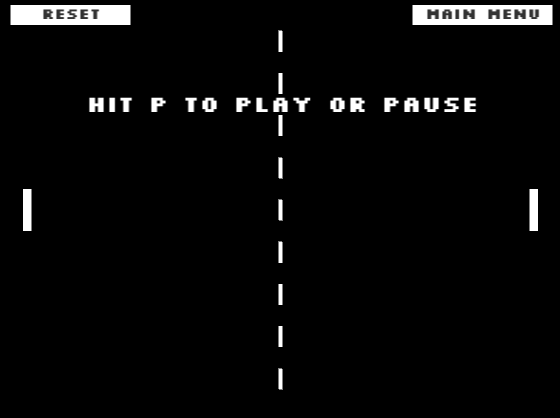
We should now create a button game object named ResetButton. In order to stick to the traditional theme we’ve set for ourselves, we should replace the button’s Source Image attribute (located in the Inspector under the Image element) with the white square sprite. We can do this by dragging the white square sprite from the Sprites folder into the value for the Source Image attribute. Now we should see that the button is a white rectangle without rounded corners.
Next, we need to change the font on the button to the more pixelated SilkScreen font. If we select the child text object from the hierarchy, we can make the text object’s text property look like the values below:

Note: To change the Font of the text we can simply drag the slkscreb.ttf file from the Assets pane into the Font attribute’s value. Also note that the font’s size may be different for everybody.
To create the Main Menu button, we can select the Reset button in the hierarchy and duplicate it (command/ctrl + d or right-click -> duplicate). Now all we have to do is name the duplicated button MainMenuButton. We should align each button to its respective area on the screen (Reset to the top left, Main Menu to the top right).
Next we can style the text created from the last tutorial. If the text is not named PauseText already, we should change it to PauseText. We should also change the Font attribute from Arial to our SilkScreen font. Let’s make sure the text is white and is centered. Finally, we need to align it to the middle of the screen, slightly above the center.
Adding Functionality to the Pause Menu
We’ve created a retro styled pause menu, but right now it’s constantly on screen when the game is played, and the buttons don’t do anything when they’re clicked. In order to add functionality to our menu, we should create an empty game object named UIManager. Now let’s create a script named UIManager and open it inside our IDE. For complete functionality, we can add the code below to our script:
GameObject[] pauseObjects;

    // Use this for initialization
    void Start () {
        pauseObjects = GameObject.FindGameObjectsWithTag("ShowOnPause");
    }

    // Update is called once per frame
    void Update () {

        //uses the p button to pause and unpause the game
        if(Input.GetKeyDown(KeyCode.P))
        {
            if(Time.timeScale == 1)
            {
                Time.timeScale = 0;
                showPaused();
            } else if (Time.timeScale == 0){
                Time.timeScale = 1;
                hidePaused();
            }
        }


        if(Time.timeScale == 0){
            //searches through pauseObjects for PauseText
            foreach(GameObject g in pauseObjects){
                if(g.name == "PauseText")
                    //makes PauseText to Active
                    g.SetActive(true);
            }
        } else {
            //searches through pauseObjects for PauseText
            foreach(GameObject g in pauseObjects){
                if(g.name == "PauseText")
                    //makes PauseText to Inactive
                    g.SetActive(false);
            }
        }
    }


    //Reloads the Level
    public void Reload(){
        Application.LoadLevel(Application.loadedLevel);
    }

    //controls the pausing of the scene
    public void pauseControl(){
        if(Time.timeScale == 1)
        {
            Time.timeScale = 0;
            showPaused();
        } else if (Time.timeScale == 0){
            Time.timeScale = 1;
            hidePaused();
        }
    }

    //shows objects with ShowOnPause tag
    public void showPaused(){
        foreach(GameObject g in pauseObjects){
            g.SetActive(true);
        }
    }

    //hides objects with ShowOnPause tag
    public void hidePaused(){
        foreach(GameObject g in pauseObjects){
            g.SetActive(false);
        }
    }

    //loads inputted level
    public void LoadLevel(string level){
        Application.LoadLevel(level);
    }
This UIManager is very similar to the UIManager from the Dodger tutorial series. The main difference is inside the Update() method. We added code that looks through the pauseObjects array for the pause text by using a foreach loop to look for an object named PauseText. Once found, it sets the pause text’s active state dependent on the time scale of the game.
Now that we’ve written our script, let’s add it to the UIManager game object inside Unity by dragging it onto the game object. To hide our menu when the screen is paused, we should make the buttons and pause text’s tags ShowOnPause. This means we need to create a new tag ShowOnPause for each of the objects.
With the tags added and the UIManager script attached to the UIManager game object, we can now pause the game to view our menu. We can also see that the pause text appears when the game is paused or when the ball is destroyed.
To finish up the menu, we need to add our methods to the buttons. We can select the Reset button and hit the + symbol on the OnClick() menu located in the Inspector under the Button element. Now we can drag the UIManager game object from the Hierarchy pane to the first input box. If we click the second dropdown box and select UIManager -> Reload, the Reload() function will be added to the button. The OnClick() menu should look like this:

For the Main Menu button we can do the same as above, but add the LoadLevel() method instead. With the LoadLevel() method added, we’ll see a box appear that will allow us to add our string parameter. Inside the box we can type MainMenu, so that our Main Menu scene will be loaded when the button is clicked. The Main Menu button’s OnClick() menu should look like this:

Fixing the Pause Functionality
Now that we’ve added our menu and UIManager, we’ve fixed some problems and added a problem. If we try to pause the game, we may notice (this may be dependent on the Unity version) that the pause doesn’t work. This is because we have two different scripts setting the screen’s time scale, thus causing them to cancel each other out. To fix this, we can open the PlayerController script and delete the code below:
//pauses or plays game when player hits p
        if(Input.GetKeyDown(KeyCode.P) && Time.timeScale == 0){
            Time.timeScale = 1;
        } else if(Input.GetKeyDown(KeyCode.P) && Time.timeScale == 1){
            Time.timeScale = 0;
        }
Adding a Main Menu
For this Pong clone, we’ll be creating an interesting main menu. This scene won’t be a static scene with just text and a play button. We’re going to add simulated gameplay to the background of our main menu. This means when players first open the game, they see the UI elements that we put in the scene, as well as two AI paddles playing against each other.
Creating the Scene
To start making our main menu, we need a new scene. Instead of creating a whole new scene, we’re going to duplicate our current scene. We should make sure our scene is saved before we continue.
With the scene saved, we can now select it in the Assets pane and duplicate it (command/ctrl + d). Now let’s rename the duplicate to MainMenu and open it (by double clicking).
Inside the Main Menu scene we should disable/delete the BallSpawner game object, the MiddleBar game object, the LeftBound game object, the RightBound game object, and the pause menu game objects from the hierarchy. We’re deleting these because they’re not needed, and may get in the way of the UI we’ll be adding.
Adding the UI
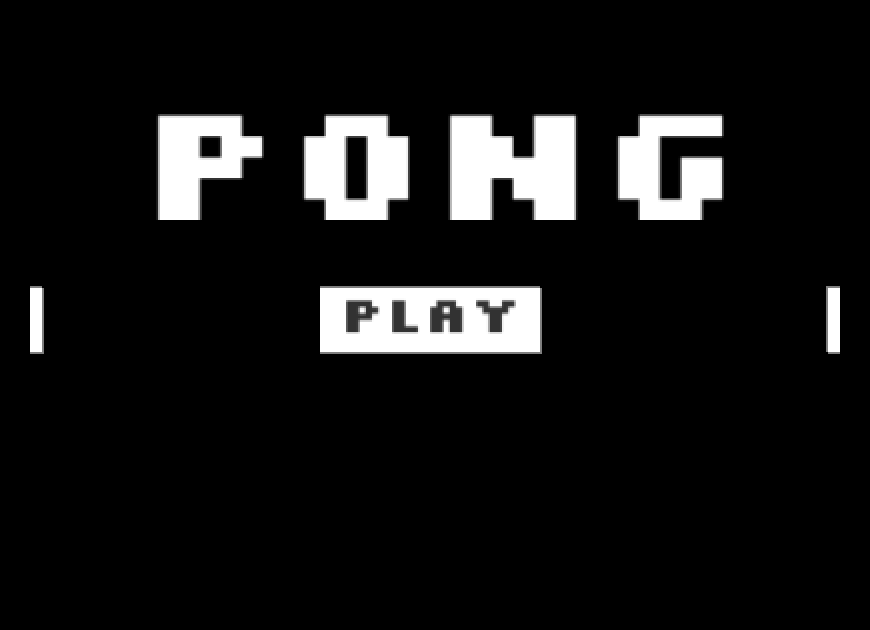
The main menu’s UI will be kept minimalistic. We’ll have a large title text that displays the word Pong and a button that says play.
We can begin by creating a text object named TitleText. The title text’s text element should have the attribute values as shown below:

Next, we can create a button object and name it PlayButton. We should change the play button’s source image to the white square sprite. Let’s also add the LoadLevel() method to the play button with the string parameter being the name of our play scene. We can check the name of our play scene by finding it in the Assets pane or going to File -> Build Settings (the play scene should be the only one listed; if not, then it’s the top-most scene). The child text object’s properties should be the same as the title text’s, except the text should be kept gray and will be of a different font size.
Finally, we need to align the UI elements into a spot we like, such as below:
Adding Simulated Gameplay
In order to simulate gameplay in the background of our main menu, we’ll need to add AI to the paddles that is similar to the AI we used for the Enemy in the play level. We’ll also need to add a ball so that AI paddles can play.
First, let’s add a ball to the scene by going to the Prefabs folder in the Assets pane and adding the ball prefab. We should make sure its transform position is X:0 Y:0 Z:0 so that it’s centered on the screen.
Inside the Scripts folder in the Assets pane we need to create a new script named AutoPlayer, and then open it in our IDE. The AutoPlayer script should contain the code below:
//Speed of the AI
    public float speed = 2.75F;

    //the ball
    Transform ball;

    //the ball's rigidbody 2D
    Rigidbody2D ballRig2D;

    //bounds of AI
    public float topBound = 4.5F;
    public float bottomBound = -4.5F;

    // Use this for initialization
    void Start () {
        //Continuously Invokes Move every x seconds (values may differ)
        InvokeRepeating("Move", .02F, .02F);
    }

    // Movement for the paddle
    void Move () {

        //finding the ball
        if(ball == null){
            ball = GameObject.FindGameObjectWithTag("Ball").transform;
        }

        //setting the ball's rigidbody to a variable
        ballRig2D = ball.GetComponent<Rigidbody2D>();

        //checking x direction of the ball
        if(ballRig2D.velocity.x > 0){

            //checking y direction of ball
            if(ball.position.y < this.transform.position.y-.3F){
                //move ball down if lower than paddle
                transform.Translate(Vector3.down*speed*Time.deltaTime);
            } else if(ball.position.y > this.transform.position.y+.3F){
                //move ball up if higher than paddle
                transform.Translate(Vector3.up*speed*Time.deltaTime);
            }

        }

        //set bounds of AI
        if(transform.position.y > topBound){
            transform.position = new Vector3(transform.position.x, topBound, 0);
        } else if(transform.position.y < bottomBound){
            transform.position = new Vector3(transform.position.x, bottomBound, 0);
        }
    }
We can now delete the PlayerController script from the Player game object in the hierarchy and add the AutoPlayer Script.
Inside our Scripts folder, let’s create another script named AutoEnemy and open it in our IDE. The AutoEnemy script should contain the following code:
/Speed of the AI
    public float speed = 2.75F;

    //the ball
    Transform ball;

    //the ball's rigidbody 2D
    Rigidbody2D ballRig2D;

    //bounds of AI
    public float topBound = 4.5F;
    public float bottomBound = -4.5F;

    // Use this for initialization
    void Start () {
        //Continuously Invokes Move every x seconds (values may differ)
        InvokeRepeating("Move", .02F, .02F);
    }

    // Movement for the paddle
    void Move () {

        //finding the ball
        if(ball == null){
            ball = GameObject.FindGameObjectWithTag("Ball").transform;
        }

        //setting the ball's rigidbody to a variable
        ballRig2D = ball.GetComponent<Rigidbody2D>();

        //checking x direction of the ball
        if(ballRig2D.velocity.x < 0){

            //checking y direction of ball
            if(ball.position.y < this.transform.position.y-.3F){
                //move ball down if lower than paddle
                transform.Translate(Vector3.down*speed*Time.deltaTime);
            } else if(ball.position.y > this.transform.position.y+.3F){
                //move ball up if higher than paddle
                transform.Translate(Vector3.up*speed*Time.deltaTime);
            }

        }

        //set bounds of AI
        if(transform.position.y > topBound){
            transform.position = new Vector3(transform.position.x, topBound, 0);
        } else if(transform.position.y < bottomBound){
            transform.position = new Vector3(transform.position.x, bottomBound, 0);
        }
    }
We’ll need to mess around with the Player and Enemy’s speed values in order to get good simulated gameplay.
If we hit play we should see that the background has simulated gameplay. However, if we click on the play button, we’ll notice that it doesn’t work. This is because we must add the scene to the build settings. We can do this by clicking File -> Build Settings and dragging the scene from the Assets pane to the menu or by clicking the Add Current button. After adding the Main Menu scene to the build settings, we need to drag it to the top of the scene list.
Adding Player Score UI
For our clone, we’re going to make it so that the game ends when a player or the AI reaches a score of 7. Before we can code game over functionality, we need to keep track of the two scores.
We can now save the Main Menu scene and open the Play scene. Let’s add a text object and name it ScoreText. The score text’s properties should be as pictured below:

We should align the score to the top of the screen in the center. Now, let’s open the BoundController script and make it look like the code below:
//enemy transform
    public Transform enemy;

    public int enemyScore;
    public int playerScore;

    void Start(){
        enemyScore = 0;
        playerScore = 0;
    }

    void OnTriggerEnter2D(Collider2D other){
        if(other.gameObject.tag == "Ball"){
            if(other.gameObject.GetComponent<Rigidbody2D>().velocity.x > 0){
                enemyScore++;
            } else {
                playerScore++;
            }

            //Destroys other object
            Destroy(other.gameObject);

            //sets enemy's position back to original
            enemy.position = new Vector3(-6,0,0);
            //pauses game
            Time.timeScale = 0;
        }
    }
We need to drag the Enemy game object from the hierarchy to the Bound Controller Enemy property for both the left and right bounds objects. The enemy’s transform will be used to reset the enemy’s position after the ball is destroyed. After adding the Enemy game object to the bounds, we can create a new script named PointCounter and open it in our IDE. We should make the PointCounter script look like the code below:
using UnityEngine;
using UnityEngine.UI;
using System.Collections;

public class PointCounter : MonoBehaviour {

    public GameObject rightBound;
    public GameObject leftBound;
    Text text;
    // Use this for initialization
    void Start () {
        text = GetComponent<Text>();
        text.text = rightBound.GetComponent<BoundController>().enemyScore + "\t\t" +
            leftBound.GetComponent<BoundController>().playerScore;
    }

    // Update is called once per frame
    void Update () {
        text.text = rightBound.GetComponent<BoundController>().enemyScore + "\t\t" +
            leftBound.GetComponent<BoundController>().playerScore;
    }
}
We should attach the PointCounter script to the score text. We also need to drag the left and right bound game objects to their appropriate places as values for the RightBound and LeftBound variables for the PointCounter script.
Finishing the Game
The last thing we have to do to finish our Pong clone is create game over functionality so players know whether they lost to the AI or they beat it.
Creating the Menu
Let’s start by creating a new tag named ShowOnFinish. After creating this tag we can create a text object named GameOverText. We can set the game over text’s tag to ShowOnFinish. We can set the text properties of the game over text to the same as the image below:

Now we can align the game over text to the center of the screen.
Instead of creating all new buttons for the game over state, we can instead duplicate the main menu and reset buttons and set their tags to ShowOnFinish. We can name the new main menu button FinishMainMenuButton and the new reset button to FinishResetButton. The game over menu is now created, but we haven’t added any functionality to it.
Adding Functionality
Let’s open the UIManager script and make the code look the same as below:
//arrays for pause and game over objects
    GameObject[] pauseObjects, finishObjects;

    //variables for the bounds
    public BoundController rightBound;
    public BoundController leftBound;

    //game over variables
    public bool isFinished;
    public bool playerWon, enemyWon;

    // Use this for initialization
    void Start () {
        pauseObjects = GameObject.FindGameObjectsWithTag("ShowOnPause");
        finishObjects = GameObject.FindGameObjectsWithTag("ShowOnFinish");
        hideFinished();
    }

    // Update is called once per frame
    void Update () {

        //checks to make sure the current level is play level
        if(Application.loadedLevel == 1){
            if(rightBound.enemyScore >= 7 && !isFinished){
                isFinished = true;
                enemyWon = true;
                playerWon = false;
            } else if (leftBound.playerScore >= 7  && !isFinished){
                isFinished = true;
                enemyWon = false;
                playerWon = true;
            }

            if(isFinished){
                showFinished();
            }
        }

        //uses the p button to pause and unpause the game
        if(Input.GetKeyDown(KeyCode.P) && !isFinished)
        {
            pauseControl();
        }

        if(Time.timeScale == 0  && !isFinished){
            //searches through pauseObjects for PauseText
            foreach(GameObject g in pauseObjects){
                if(g.name == "PauseText")
                    //makes PauseText to Active
                    g.SetActive(true);
            }
        } else {
            //searches through pauseObjects for PauseText
            foreach(GameObject g in pauseObjects){
                if(g.name == "PauseText")
                    //makes PauseText to Inactive
                    g.SetActive(false);
            }
        }
    }

    //Reloads the Level
    public void Reload(){
        Application.LoadLevel(Application.loadedLevel);
    }

    //controls the pausing of the scene
    public void pauseControl(){
        if(Time.timeScale == 1)
        {
            Time.timeScale = 0;
            showPaused();
        } else if (Time.timeScale == 0){
            Time.timeScale = 1;
            hidePaused();
        }
    }

    //shows objects with ShowOnPause tag
    public void showPaused(){
        foreach(GameObject g in pauseObjects){
            g.SetActive(true);
        }
    }

    //hides objects with ShowOnPause tag
    public void hidePaused(){
        foreach(GameObject g in pauseObjects){
            g.SetActive(false);
        }
    }

    //shows objects with ShowOnFinish tag
    public void showFinished(){
        foreach(GameObject g in finishObjects){
            g.SetActive(true);
        }
    }

    //hides objects with ShowOnFinish tag
    public void hideFinished(){
        foreach(GameObject g in finishObjects){
            g.SetActive(false);
        }
    }

    //loads inputted level
    public void LoadLevel(string level){
        Application.LoadLevel(level);
    }
We can now add the left and right bounds game objects to the appropriate variables for the UIManager script attached to the UIManager game object. We also need to create a new script named GameOver. Let’s open it and make the code look like this:
using UnityEngine;
using UnityEngine.UI;
using System.Collections;

public class GameOver : MonoBehaviour {

    public UIManager uiManager;
    private Text text;
    // Use this for initialization
    void Start () {
        text = GetComponent<Text>();
    }

    // Update is called once per frame
    void Update () {
        if(uiManager.playerWon){
            text.text = "GAME OVER!\nPLAYER WON!";
        } else if(uiManager.enemyWon){
            text.text = "GAME OVER!\nENEMY WON!";
        }
    }
}
Now all we have to do is add the script to the game over text game object and drag the UIManager game object to the UIManager variable. If we play the game and lose on purpose, we should see the words change and the buttons appear upon losing.
Note: if the words don’t appear or are cut off, it means the width and height of the GameOverText’s Rect Transform should be made larger. Also, if the pause menu doesn’t work correctly, try recreating the buttons.
Conclusion
Congratulations, we have officially made a complete, soundless Pong clone!
It took a while, but hopefully this tutorial was approachable enough for you to start experimenting with your own basic 2D physics games in Unity. Let us know what you come up with!
Remember that you can download the full project on GitHub.
Frequently Asked Questions (FAQs) about Building a Pong Clone in Unity UI and Gameplay
How can I add more complexity to the Pong game I’ve built in Unity?
Adding complexity to your Pong game can be achieved by introducing new elements or modifying existing ones. For instance, you can add power-ups that temporarily increase the size of the paddle or speed up the ball. You could also introduce obstacles in the playing field that the ball can bounce off. Another way to add complexity is by implementing a scoring system that rewards players for hitting the ball at different angles or speeds.
Can I build a multiplayer version of Pong in Unity?
Yes, Unity supports the development of multiplayer games. You can use Unity’s built-in networking features or third-party solutions like Photon Unity Networking (PUN) to create a multiplayer version of Pong. This would allow two players to compete against each other over a network, adding a new level of competition and fun to the game.
How can I optimize my Pong game for mobile devices?
Optimizing your Pong game for mobile devices involves several steps. First, you need to ensure that the game’s controls are touch-friendly. You can do this by implementing touch controls for the paddles instead of keyboard controls. Second, you need to optimize the game’s performance for mobile devices. This can be done by reducing the complexity of the game’s graphics, optimizing the game’s code, and using Unity’s built-in tools for performance optimization.
Can I monetize my Pong game built in Unity?
Yes, there are several ways to monetize a game built in Unity. One of the most common methods is through in-app purchases, where players can buy items or features in the game. Another method is through ads, where you display advertisements in your game and earn revenue from ad impressions and clicks. Unity provides built-in support for both of these monetization methods.
How can I add sound effects and music to my Pong game in Unity?
Adding sound effects and music to your Pong game can greatly enhance the player’s experience. Unity provides a built-in audio system that you can use to play sound effects and music. You can add audio clips to your game objects and use scripts to control when they are played. For example, you could play a sound effect when the ball hits a paddle or when a player scores a point.
Can I customize the look and feel of my Pong game in Unity?
Yes, Unity provides a wide range of tools and features for customizing the look and feel of your game. You can use Unity’s built-in UI system to create custom menus, buttons, and other UI elements. You can also use Unity’s Shader Graph to create custom shaders and effects for your game objects. Additionally, you can import custom assets like 3D models, textures, and animations to further customize your game.
How can I debug my Pong game in Unity?
Debugging your Pong game in Unity can be done using Unity’s built-in debugging tools. The Unity Editor includes a console window that displays error messages, warnings, and other information about your game. You can also use breakpoints and step-through debugging in Unity’s MonoDevelop IDE to inspect your code and find bugs.
Can I publish my Pong game on different platforms?
Yes, one of the main advantages of using Unity is its cross-platform support. You can build and publish your Pong game on a wide range of platforms, including Windows, macOS, Linux, iOS, Android, and many more. Unity provides tools and resources to help you optimize your game for each platform and manage the publishing process.
How can I improve the AI of the opponent paddle in my Pong game?
Improving the AI of the opponent paddle in your Pong game can make the game more challenging and fun. You can do this by implementing more advanced AI algorithms, such as machine learning or neural networks. These algorithms can make the opponent paddle more unpredictable and responsive, providing a better challenge for the player.
How can I learn more about game development in Unity?
There are many resources available for learning about game development in Unity. Unity’s official website provides a wealth of tutorials, documentation, and sample projects. There are also many online courses and tutorials available on websites like Udemy, Coursera, and YouTube. Additionally, there are many books and guides available on the subject, as well as online communities and forums where you can ask questions and get help from other Unity developers.

