

Before starting you can view the game at itch.io
Key Takeaways
- Building a Pong clone in Unity involves several key steps including setting up the game environment, adding player input, managing ball and boundary collisions, implementing enemy AI, spawning the ball, and adding basic text instructions.
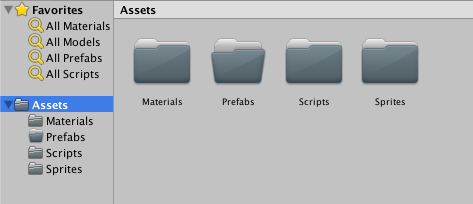
- The game environment setup involves creating a new 2D project in Unity, setting the game screen’s aspect ratio to 4:3, and creating folders for Scripts, Sprites, Prefabs, and Materials. The sprites need to be downloaded and added to the Sprites folder, with pixels per unit adjusted to ensure a crisp clean look.
- Player input is added through a C# script named “PlayerController” which sets the speed of the player and the bounds of player movement. A Box Collider 2D is added to the Player game object to handle collisions.
- Ball and boundary collisions are managed through the creation of a Physics2D Material named “Bounce” with bounciness set to 1 and friction set to 0. A Circle Collider 2D and a Rigidbody 2D are added to the Ball game object to manage its interactions with the environment.
- The enemy AI is implemented through a C# script named “EnemyController” which sets the speed of the enemy and manages its movement in response to the ball’s position. The enemy’s bounds are also set within this script.
- The ball is spawned through the creation of a “BallSpawner” game object and a C# script named “BallSpawnerController”. The script checks if a ball is present and if not, creates a new one.
Analyzing Pong
Pong was one of the first video games ever made and was the first successful commercial game. When Pong was first created the developers most likely struggled with the logic for the code, however, nowadays you can make a simple two player Pong with one method call, colliders, and sprites. Pong gets harder to create once the decision to make a one-player Pong is made. In this tutorial, we will create the base gameplay for Pong and break down a very simple AI alternative that still adds to gameplay value.
We must ask, what are the core elements of Pong gameplay? Here is a list with the answer to that question:
- Player Input – We want the player to be able to move their paddle up and down so that they can hit the ball.
- Ball Collision – When the ball hits the paddle or boundaries it can’t be allowed to lose any speed.
- Boundary Collision – The ball has to be able to bounce off of the top and bottom part of the screen so that it doesn’t leave the play area.
- Enemy AI – The gameplay value of the game would be next to zero if the enemy sat on the opposite end of the screen and didn’t move.
- Spawning the Ball – When the ball hits one of the boundaries behind the paddles we need it to respawn so that we can continue the game.
- Ball to Paddle Hit Area Detection – This allows for the ball to bounce off the paddle at unique angles so that we are able to to better aim the ball when it is hit with the paddle.
With this list we can beginning programming the game.
Note that any numbers used relating to a game object’s location, rotation, scale, etc are relative and may need to be changed for your specific setup.
Setting up the Game
Now that we’ve analyzed the fundamentals of Pong we can start setting up the game. Go ahead and open Unity and create a new 2D project. Once the editor opens, set the game screen’s aspect ratio to 4:3. We are using 4:3 since this is one of the most common screen ratios and is one of the closest ratios to being a standard. Inside of the Assets pane create four folders named Scripts, Sprites, Prefabs, and Materials. These folders will be used to hold all of our game assets.
Download the appropriate images for the game and add them to the Sprites folder (this can be done via drag and drop). The images we just added will be the sprites, interactive game objects, used in the game.


We are going to need to change the pixels per unit for the sprites so that they conform to a standard. I generally use 64 pixels per unit as this gives most sprites a crisp clean look, and keeps their relative size. You can think of pixels per unit as the density of pixels allocated in a 1×1 space in Unity’s editor.
Let’s set the squares’ pixels per unit to 64 and the circle’s pixels per unit can be set to 128. We can go on and add the three images to the hierarchy pane.
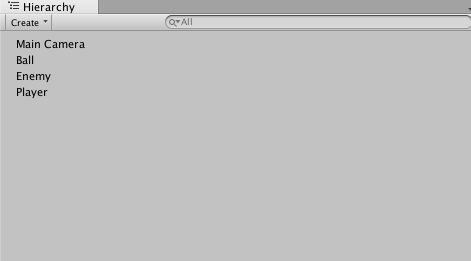
Now we need to give each asset a name and set their initial properties and tags. You can name the blue block “Player” and set the player’s x-position to 6 and its x-scale to .2.
We are going to need to create a tag to separate the paddle game objects from other game objects. In a broad sense, you can think of Tags as categories for game objects. Click on “Untagged” (located under the player’s name) and select “Add Tag”. Create a new tag named “Paddle”, and re-select the player game object and set its tag to Paddle.
Name the red block “Enemy”. Set the enemy’s x-position to -6 and its x-scale to .2. Make the enemy game object’s tag Paddle.
Name the grey circle “Ball” and go on and create a new tag named “Ball”. Make sure to set the ball game object’s tag to Ball.
Adding Player Input
In the Assets pane, open the Scripts folder and create a new C# script named “PlayerController”. Open the PlayerController script in your IDE and type:
	//speed of player
	public float speed = 10;

	//bounds of player
	public float topBound = 4.5F;
	public float bottomBound = -4.5F;

	// Use this for initialization
	void Start () {
		Time.timeScale = 0;
	}

	void Update(){

		//pauses or plays game when player hits p
		if(Input.GetKeyDown(KeyCode.P) && Time.timeScale == 0){
			Time.timeScale = 1;
		} else if(Input.GetKeyDown(KeyCode.P) && Time.timeScale == 1){
			Time.timeScale = 0;
		}
	}

	// Update is called once per frame
	void FixedUpdate () {

		//get player input and set speed
		float movementSpeedY = speed * Input.GetAxis("Vertical") * Time.deltaTime;
		transform.Translate(0, movementSpeedY, 0);

		//set bounds of player
		if(transform.position.y > topBound){
			transform.position = new Vector3(transform.position.x, topBound, 0);
		} else if(transform.position.y < bottomBound){
			transform.position = new Vector3(transform.position.x, bottomBound, 0);
		}
	}
Add the PlayerController script to the Player game object in the hierarchy pane by dragging the script onto the game object. Select the Player game object and add a Box Collider 2D to the game object by clicking on “Add Component” at the bottom of the Inspector pane.
Ball Collision
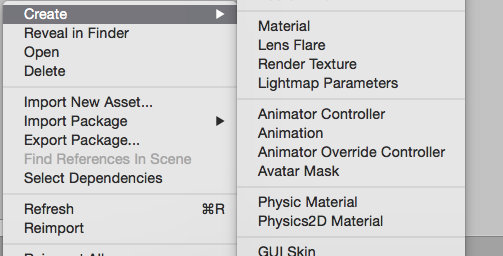
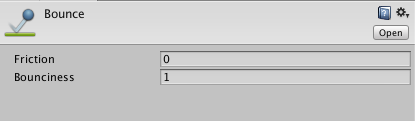
Open the Materials folder inside of the Assets pane. You can create a new Physics2D Material by right-clicking and selecting Create -> Physics2D Material (as in image below).
Go ahead and name the new material “Bounce”, and set its bounciness to 1 and its friction to 0.
Select the Ball game object in the hierarchy pane. Add a Circle Collider 2D to the Ball game object. Drag the bounce material to the collider’s Material property in order to set the material to bounce. By giving the Ball game object the bounce material we make it so that when the Ball game object hits the boundaries it won’t lose any speed and will bounce off in the correct angle. We also need to add a Rigidbody 2D to the Ball game object and set gravity scale to 0, then check fixed angle.

Open the Scripts folder inside of the Assets pane and create a script named “BallController”. Open the BallController script inside of your IDE and type:
//speed of the ball
	public float speed = 3.5F;

	//the initial direction of the ball
	private Vector2 spawnDir;

	//ball's components
	Rigidbody2D rig2D;
	// Use this for initialization
	void Start () {
		//setting balls Rigidbody 2D
		rig2D = this.gameObject.GetComponent<Rigidbody2D>();

		//generating random number based on possible initial directions
		int rand = Random.Range(1,4);

		//setting initial direction
		if(rand == 1){
			spawnDir = new Vector2(1,1);
		} else if(rand == 2){
			spawnDir = new Vector2(1,-1);
		} else if(rand == 3){
			spawnDir = new Vector2(-1,-1);
		} else if(rand == 4){
			spawnDir = new Vector2(-1,1);
		}

		//moving ball in initial direction and adding speed
		rig2D.velocity = (spawnDir*speed);

	}
Boundary Collision
Inside of the hierarchy pane, create two empty game objects (right-click -> create empty), and name the new game objects “RightBound” and “TopBound”. Set the RightBound’s x-position to 7 and add a Box Collider 2D to the RightBound game object. In the Inspector pane check “Is Trigger” and set the collider’s y-size to 20. Duplicate the RightBound game object (select it and Command+D). Name the duplicate “LeftBound” and set its y-position to -7.
Next, select the TopBound game object and set its y-position to 5.5, and add a Box Collider 2D to the TopBound game object. Set the collider’s x-size to 20. Duplicate the TopBound game object and name the duplicate “BottomBound”. Set the BottomBound game object’s y-position to -5.5.
We want the left and right bounds to destroy the ball when the ball gets past one of the paddles. Inside of the Assets pane open the Scripts folder and create a new C# script named “BoundController”. Open BoundController inside of your favorite IDE and type:
void OnTriggerEnter2D(Collider2D other){

		//Destroys gameobject if its tag is Ball
		if(other.gameObject.tag == "Ball"){
			Destroy(other.gameObject);
		}
}
Add the BoundController script to the LeftBound game object and the RightBound game object.
Enemy AI
Select the Enemy game object and add a Box Collider 2D. Inside of the Assets pane open the Scripts folder. Create a new C# script named “EnemyController” and type:
//Speed of the enemy
	public float speed = 1.75F;

	//the ball
	Transform ball;

	//the ball's rigidbody 2D
	Rigidbody2D ballRig2D;

	//bounds of enemy
	public float topBound = 4.5F;
	public float bottomBound = -4.5F;

	// Use this for initialization
	void Start () {

	}

	// Update is called once per frame
	void FixedUpdate () {

		//finding the ball
		ball = GameObject.FindGameObjectWithTag("Ball").transform;

		//setting the ball's rigidbody to a variable
		ballRig2D = ball.GetComponent<Rigidbody2D>();

		//checking x direction of the ball
		if(ballRig2D.velocity.x < 0){

			//checking y direction of ball
			if(ball.position.y < this.transform.position.y){
				//move ball down if lower than paddle
				transform.Translate(Vector3.down*speed*Time.deltaTime);
			} else if(ball.position.y > this.transform.position.y){
				//move ball up if higher than paddle
				transform.Translate(Vector3.up*speed*Time.deltaTime);
			}

		}

		//set bounds of enemy
		if(transform.position.y > topBound){
			transform.position = new Vector3(transform.position.x, topBound, 0);
		} else if(transform.position.y < bottomBound){
			transform.position = new Vector3(transform.position.x, bottomBound, 0);
		}
	}
Note: 1.75 is used for the enemy’s speed solely because it makes the enemy slow enough not to be able to get to every ball that comes its direction.
Another Note: We used fixed update because this method is better for movement since it updates the game object at a fixed rate.
Spawning the Ball
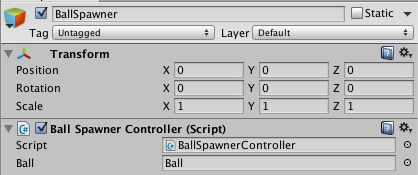
Create an empty game object inside of the hierarchy pane and name it “BallSpawner”. Next, add the Ball game object to the Prefabs folder inside of the Assets pane. We can delete the Ball game object inside of the hierarchy pane.
Open the Scripts folder inside of the Assets pane and create a new C# script named “BallSpawnerController”. Open BallSpawnerController inside of your IDE and type:
public GameObject ball;

	// Use this for initialization
	void Start () {
		GameObject ballClone;
		ballClone = Instantiate(ball, this.transform.position, this.transform.rotation) as GameObject;
		ballClone.transform.SetParent(this.transform);
	}

	// Update is called once per frame
	void Update () {
		if(transform.childCount == 0){
			GameObject ballClone;
			ballClone = Instantiate(ball, this.transform.position, this.transform.rotation) as GameObject;
			ballClone.transform.SetParent(this.transform);
		}
	}
Add the BallSpawnerController script to the BallSpawner game object. Now we can drag the Ball game object from the Prefabs folder into the Ball value of the BallSpawnerController.
Adding Basic Text
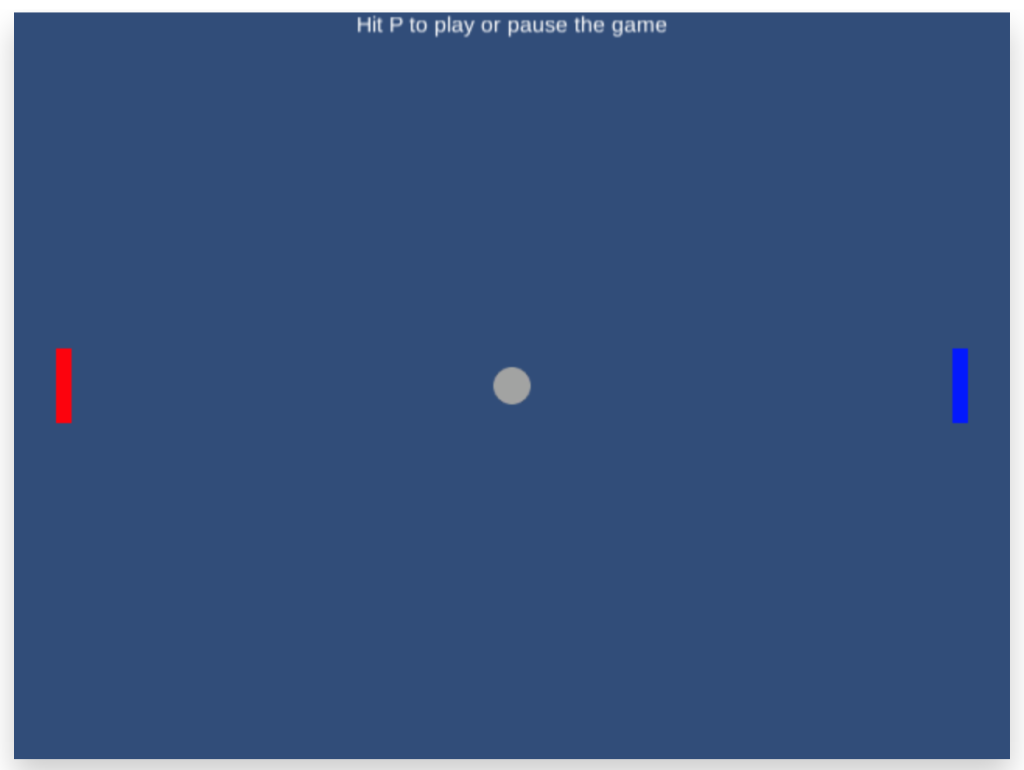
We need to add some text to the screen telling players to hit P to play and pause the game so that players know how to start and pause the game.
We can create a text game object (in the hierarchy pane right-click -> UI -> Text), and name the text game object PlayText. Next let’s set its Text value to “Hit P to play or pause” and center align the text. Now we can align the game object to the top of the screen and then anchor it. Let’s set its width to 200 so that all of the text is visible. Finally, set the text color to white.
Save the scene and add it to the build settings (by dragging or checking add current scene) and you’re done!
Conclusion
You have now officially created a basic one-player Pong clone in Unity2D. For more practice try to think of ways to update the game and make it better – add accelleration to the ball (the more hits, the faster the ball), add inertia to paddles, add difficulty levels by increasing the enemy speed, etc.
You can download the project on GitHub
Frequently Asked Questions about Building a Pong Clone in Unity
How can I duplicate a material in Unity?
Duplicating a material in Unity is a straightforward process. First, select the material you want to duplicate in the Project window. Then, right-click on it and select ‘Duplicate’ from the context menu. This will create a copy of the material with the same properties as the original. You can then modify the duplicate material as needed without affecting the original material.
How can I clone a material without creating a new instance?
In Unity, you can clone a material without creating a new instance by using the ‘CopyPropertiesFromMaterial’ method. This method allows you to copy the properties from one material to another. To use this method, you first need to create a new material. Then, you can use the ‘CopyPropertiesFromMaterial’ method to copy the properties from the original material to the new material.
What is the process of building a Pong clone in Unity?
Building a Pong clone in Unity involves several steps. First, you need to set up the game environment, including the paddles, ball, and boundaries. Then, you need to write scripts to control the movement of the paddles and the ball. You also need to implement game mechanics, such as scoring and game over conditions. Finally, you need to polish the game by adding sound effects and visual effects.
How can I control the movement of the paddles in a Pong clone?
In a Pong clone, you can control the movement of the paddles by writing a script. This script should take input from the player (such as keyboard or mouse input) and translate it into movement of the paddle. You can use the ‘Translate’ method to move the paddle up and down.
How can I implement scoring in a Pong clone?
Scoring in a Pong clone can be implemented by writing a script that detects when the ball hits a boundary. When the ball hits a boundary, the script should increment the score of the player on the opposite side. The score can be displayed on the screen using a UI text element.
How can I add sound effects to a Pong clone?
Sound effects can be added to a Pong clone by using the ‘AudioSource’ and ‘AudioClip’ classes in Unity. You can create an ‘AudioSource’ for each sound effect and assign an ‘AudioClip’ to it. Then, you can play the sound effect by calling the ‘Play’ method on the ‘AudioSource’.
How can I add visual effects to a Pong clone?
Visual effects can be added to a Pong clone by using Unity’s particle system. You can create a particle system for each visual effect and configure it to your liking. Then, you can activate the particle system when a certain event occurs, such as when the ball hits a paddle or a boundary.
How can I optimize the performance of a Pong clone?
Performance optimization in a Pong clone can be achieved by using efficient coding practices, such as avoiding unnecessary calculations and minimizing the use of expensive operations. You can also use Unity’s profiler to identify performance bottlenecks and address them.
How can I make a Pong clone multiplayer?
Making a Pong clone multiplayer involves writing scripts that handle network communication. Unity’s networking system allows you to synchronize the state of the game across multiple clients. You can use this system to synchronize the position of the paddles and the ball, as well as the score.
How can I publish a Pong clone?
Publishing a Pong clone involves building the game into an executable file and distributing it. Unity provides tools for building and publishing games on various platforms, including Windows, Mac, Linux, iOS, and Android. You can also publish your game on online platforms, such as the Unity Asset Store or Steam.

