Build a Native Desktop GIF Searcher App Using NodeGui

NodeGui is an open-source library for building cross-platform, native desktop apps with Node.js. NodeGui apps can run on macOS, Windows, and Linux. The apps built with NodeGui are written using JavaScript, styled with CSS and rendered as native desktop widgets using the Qt framework.
Some of the features of NodeGui are:
- native widgets with built-in support for dark mode
- low CPU and memory footprint
- styling with CSS including complete support for Flexbox layout
- complete Node.js API support and access to all Node.js compatible npm modules
- excellent debugging support using Chrome’s DevTools
- first-class TypeScript support
NodeGui is powered by the Qt framework, which makes it CPU and memory efficient compared with other Chromium-based solutions such as Electron. This means that applications written using NodeGui do not open up a browser instance and render the UI in it. Instead, all the widgets are rendered natively.
This tutorial will demonstrate how to install NodeGui and use it to build a meme searcher that lives in the system tray and communicates with the GIPHY API.
The full source code for this tutorial is available on GitHub.
Key Takeaways
- NodeGui is a high-performance library for building native desktop applications using JavaScript, CSS, and the Qt framework, without relying on a web browser engine.
- The tutorial demonstrates the creation of a meme searcher application that interacts with the GIPHY API, showcasing the installation, setup, and usage of NodeGui.
- Key features of NodeGui include native widget support, low system resource consumption, full Node.js API compatibility, and the ability to style with CSS.
- The tutorial provides step-by-step instructions on setting up the development environment, including installation of Node.js, CMake, and necessary compilers.
- It covers the development process from displaying a simple “Hello World” window to implementing search functionality and handling GIF displays using QMovie and QLabel.
- Advanced NodeGui functionalities such as adding system tray support, making lists scrollable with QScrollArea, and copying GIF URLs with click listeners are explored.
- The tutorial concludes with instructions for packaging the application for cross-platform distribution using NodeGui’s packaging tool, @nodegui/packer, ensuring the app can be easily shared and run on different operating systems.
Installation and Basic Setup
For this tutorial it’s assumed that you have Node.js v12 or greater installed. You can confirm that both Node and npm are available by running:
# This command should print the version of Node.js
node -v

# This command should print the version of npm
npm -v
If you need help with this step, check out our tutorial on installing Node.
Install CMake and Compilation Tools
NodeGui requires CMake and C++ compilation tools for building the native C++ layer of the project. Make sure you install CMake >= 3.1 along with a C++ compiler that supports C++11 and up. The detailed instructions are a bit different depending on your operating system.
macOS
It’s recommended to install CMake using Homebrew. Run the following commands in a terminal after installing Homebrew:
brew install cmake
brew install make
You can confirm the installation by running:
# This command should print the version of CMake which should be higher than 3.1
cmake --version

make --version
Lastly, you need GCC/Clang to compile C++ code. Verify that you have GCC installed using this command:
gcc --version
If you don’t have GCC installed, make sure you install Command Line Tools for Xcode or XCode Developer tools from Apple’s developer page.
Windows
You can install CMake on Windows by downloading the latest release from the CMake download page.
It’s strongly recommend you use Powershell as the preferred terminal in Windows.
You can confirm the CMake installation by running:
# This command should print the version of CMake which should be higher than 3.1
cmake --version
Lastly, you need a C++ compiler. One possibility would be to install Visual Studio 2017 or higher. It’s recommended you choose the Desktop development with C++ workload during the installation process.
Linux
We’ll focus on Ubuntu 18.04 for the purposes of this tutorial. It’s recommended to install CMake using the package manager. Run the following commands in a terminal:
sudo apt-get install pkg-config build-essential
sudo apt-get install cmake make
You can confirm the installation by running:
# This command should print the version of CMake which should be higher than 3.1
cmake --version

make --version
Lastly, you need GCC to compile C++ code. Verify that you have GCC installed using the command:
# gcc version should be >= v7
gcc --version
Hello World
In order to get started with our NodeGui meme app, we’ll clone the starter project.
Note: Running this requires Git and npm.
Open a terminal and run:
git clone https://github.com/nodegui/nodegui-starter memeapp
cd memeapp
npm install
npm start
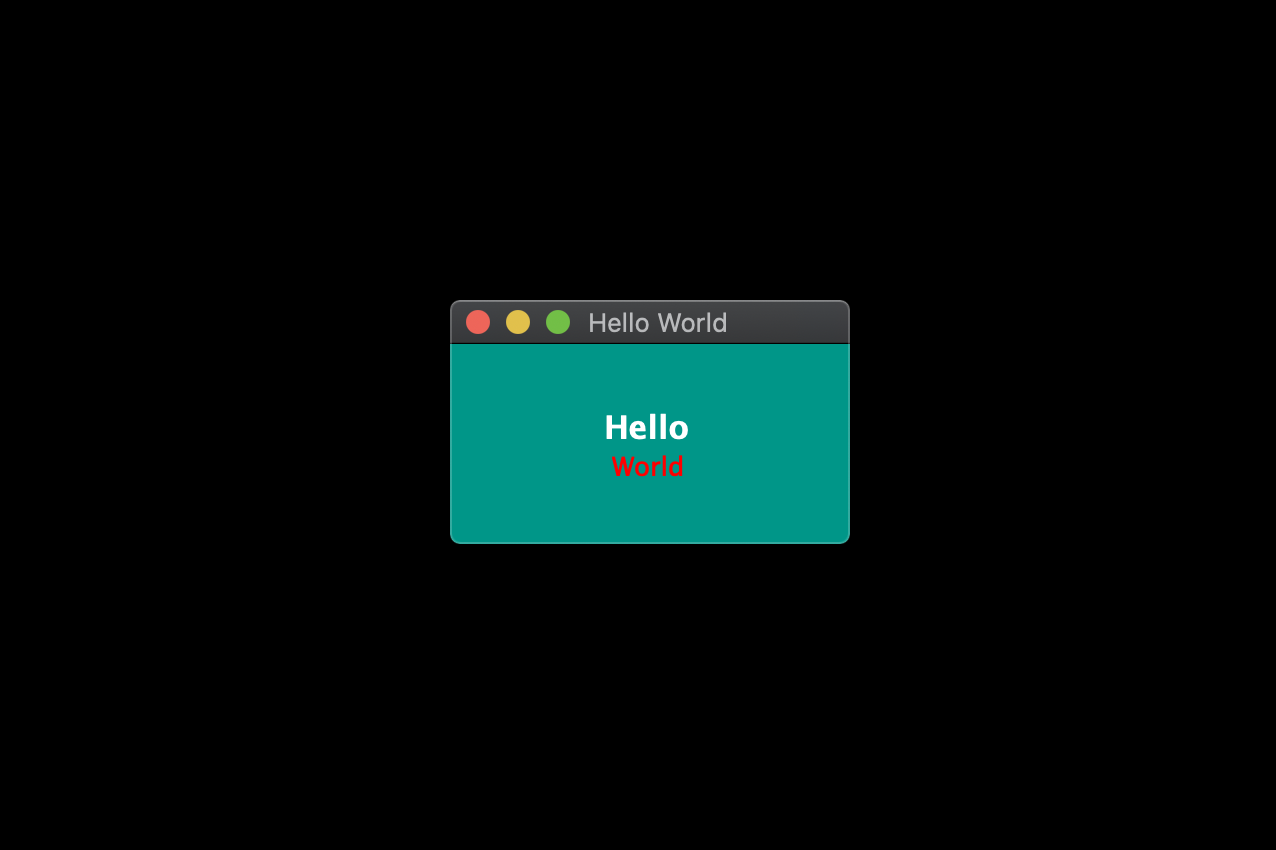
If everything goes well, you should see a working hello world NodeGui app on the screen.
By default, the nodegui-starter project is a TypeScript project. However, in this tutorial we’ll be writing our application in JavaScript. In order to convert our starter to a JS project, we’ll make the following minor changes:
-
Delete the
index.tsfile in thesrcfolder. -
Create a new file
index.jsin thesrcdirectory with the following contents:src/index.js
const { QMainWindow, QLabel } = require('@nodegui/nodegui');

const win = new QMainWindow();
win.setWindowTitle('Meme Search');

const label = new QLabel();
label.setText('Hello World');

win.setCentralWidget(label);
win.show();

global.win = win;
As far as development is concerned, a NodeGui application is essentially a Node.js application. All APIs and features found in NodeGui are accessible through the @nodegui/nodegui module, which can be required like any other Node.js module. Additionally, you have access to all Node.js APIs and Node modules. NodeGui uses native components instead of web-based components as building blocks.
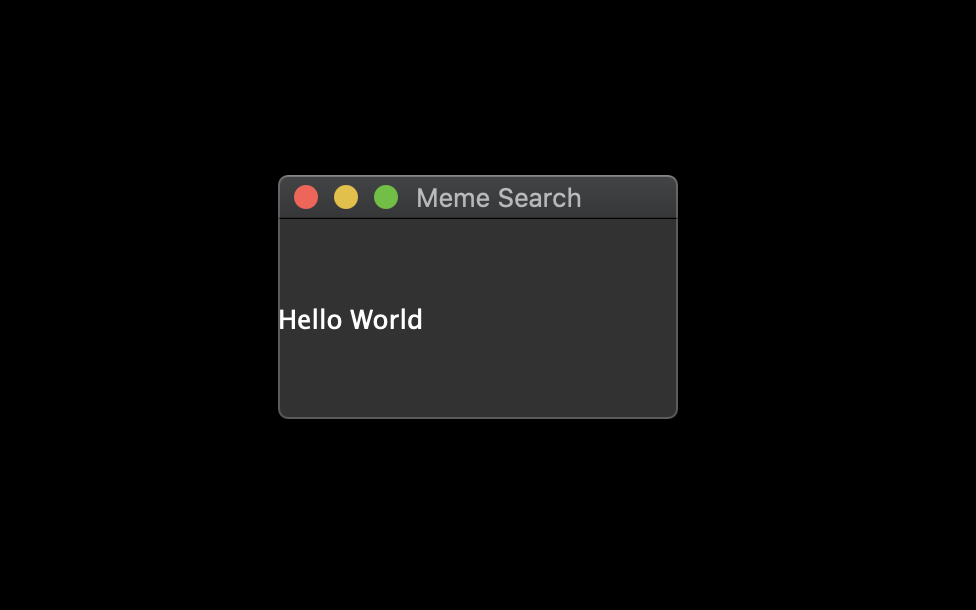
In the above example, we’ve imported QMainWindow and QLabel to create a native window that displays the text “Hello World”.
Now run the app again:
npm start
Now that we have our basic setup ready, let’s start building our meme searcher 🥳.
Note: If something doesn’t work while following this tutorial, check your package.json file to ensure that the starter project has pulled in the most up-to-date version of NodeGui.
Displaying an Animated GIF
Since memes are generally animated GIFs, we’ll start by creating a basic window that displays a GIF image from a URL.
To do this, we’ll make use of QMovie along with QLabel. QMovie is not a widget but a container that can play simple animations. We’ll use it in combination with QLabel.
An example usage of QMovie looks like this:
const movie = new QMovie();
movie.setFileName('/absolute/path/to/animated.gif');
movie.start();

const animatedLabel = new QLabel();
animatedLabel.setMovie(movie);
Since, we want to load an image from a URL, we can’t use QMovie‘s setFileName method, which is reserved only for local files. Instead, we’ll download the GIF image using axios as a buffer and use the QMovie method loadFromData instead.
So let’s start with the axios installation:
npm i axios
Now let’s create a function that will take a URL as a parameter and will return a configured QMovie instance for the GIF:
async function getMovie(url) {
  const { data } = await axios.get(url, { responseType: 'arraybuffer' });
  const movie = new QMovie();
  movie.loadFromData(data);
  movie.start();
  return movie;
}
The getMovie function takes in a URL, tells axios to download the GIF as a buffer, and then uses that buffer to create a QMovie instance.
You can think of QMovie as a class that handles the inner logic of playing the GIF animation frame by frame. QMovie is not a widget, so it can’t be shown on the screen as it is. Instead, we’ll use a regular QLabel instance and set QMovie to it.
Since getMovie returns a promise, we need to make some changes to the code. After some minor refactoring, we end up with the following.
src/index.js
const { QMainWindow, QMovie, QLabel } = require('@nodegui/nodegui');
const axios = require('axios').default;

async function getMovie(url) {
  const { data } = await axios.get(url, { responseType: 'arraybuffer' });
  const movie = new QMovie();
  movie.loadFromData(data);
  movie.start();
  return movie;
}

const main = async () => {
  const win = new QMainWindow();
  win.setWindowTitle('Meme Search');

  const label = new QLabel();
  const gifMovie = await getMovie(
    'https://upload.wikimedia.org/wikipedia/commons/e/e3/Animhorse.gif'
  );
  label.setMovie(gifMovie);

  win.setCentralWidget(label);
  win.show();
  global.win = win;
};

main().catch(console.error);
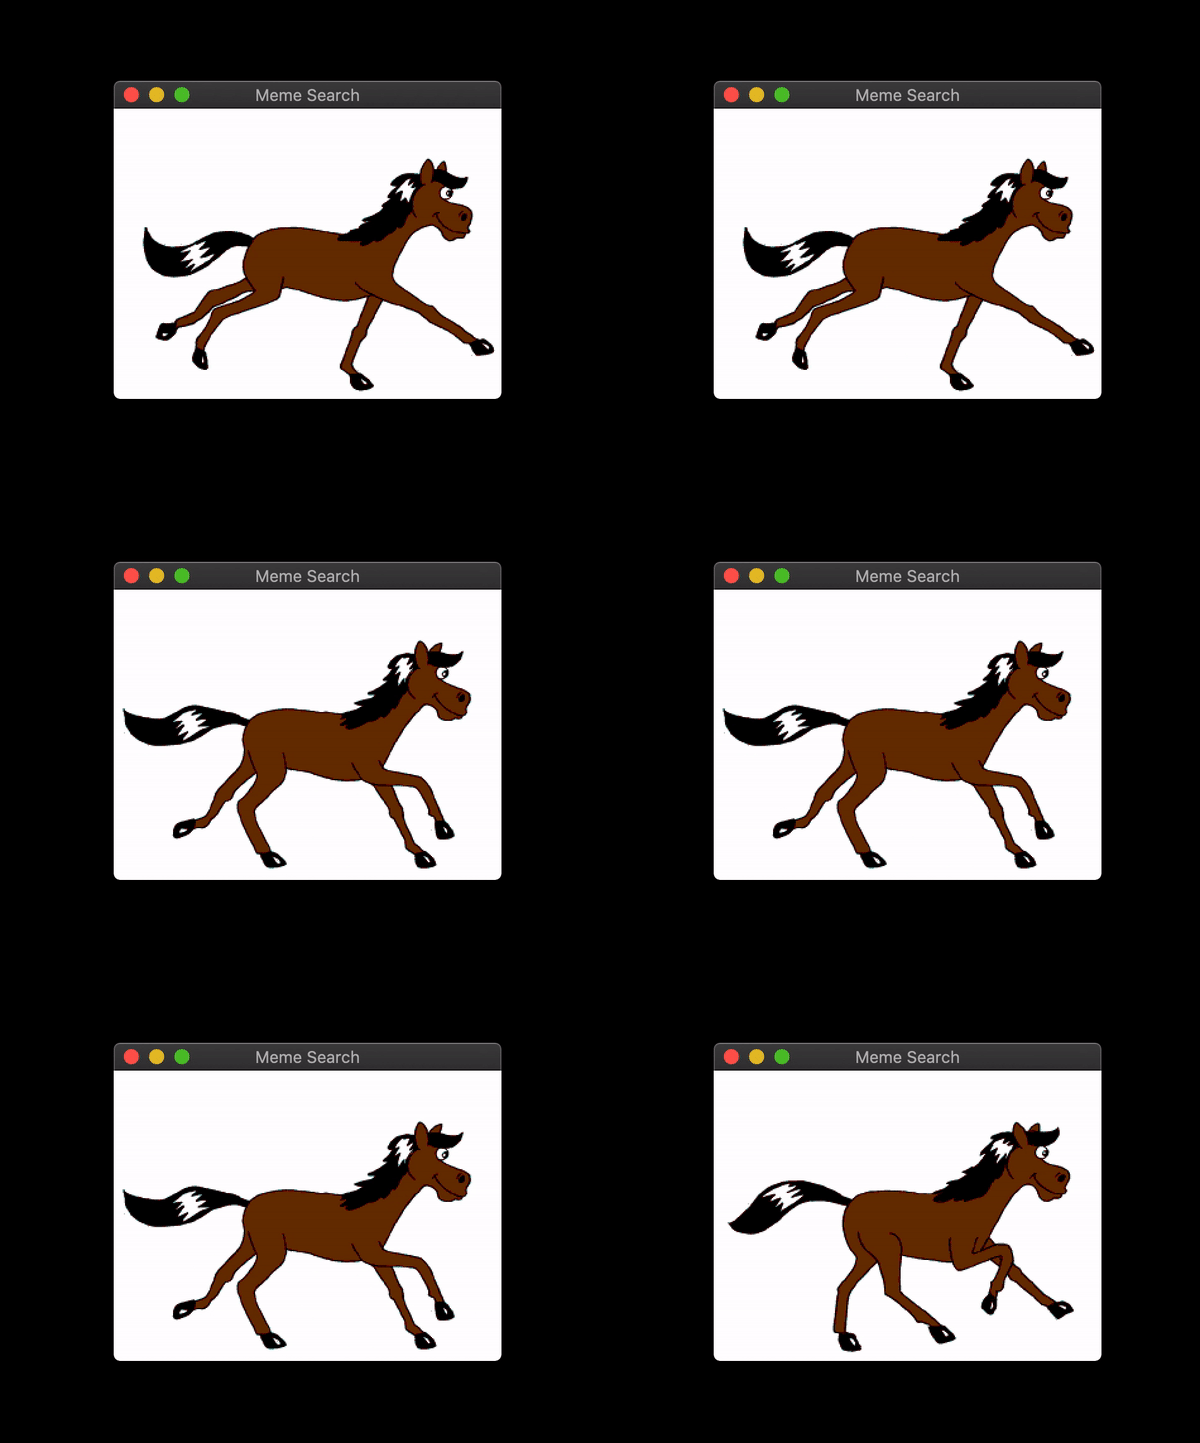
The main function is our entry point. Here we create a window and a label. We then instantiate a QMovie instance with the help of our getMovie function, and finally set the QMovie to a QLabel.
Run the app with npm start and you should see something like this:
Fetching GIFs from the GIPHY API
Giphy.com has a public API which anyone can use to build great apps that use animated GIFs. In order to use the GIPHY API, you should register at developers.giphy.com and obtain an API key. You can find further instructions here.
We’ll be using the search endpoint feature for implementing our meme search.
Let’s start by writing a searchGifs function that will take a searchTerms parameter as input and request GIFs using the above endpoint:
const GIPHY_API_KEY = 'Your API key here';

async function searchGifs(searchTerm) {
  const url = 'https://api.giphy.com/v1/gifs/search';
  const res = await axios.get(url, {
    params: {
      api_key: GIPHY_API_KEY,
      limit: 25,
      q: searchTerm,
      lang: 'en',
      offset: 0,
      rating: 'pg-13'
    }
  });
  return res.data.data;
}
The result of the function after execution will look something like this:
[
  {
    "type": "gif",
    "id": "dzaUX7CAG0Ihi",
    "url": "https://giphy.com/gifs/hello-hi-dzaUX7CAG0Ihi",
    "images": {
      "fixed_width_small": {
        "height": "54",
        "size": "53544",
        "url": "https://media3.giphy.com/media/dzaUX7CAG0Ihi/100w.gif?cid=725ec7e0c00032f700929ce9f09f3f5fe5356af8c874ab12&rid=100w.gif",
        "width": "100"
      },
      "downsized_large": {
        "height": "220",
        "size": "807719",
        "url": "https://media3.giphy.com/media/dzaUX7CAG0Ihi/giphy.gif?cid=725ec7e0c00032f700929ce9f09f3f5fe5356af8c874ab12&rid=giphy.gif",
        "width": "410"
      },
      ...
    },
    "slug": "hello-hi-dzaUX7CAG0Ihi",
    ...
    "import_datetime": "2016-01-07 15:40:35",
    "trending_datetime": "1970-01-01 00:00:00"
  },
  {
    type: "gif",
    ...
  },
  ...
]
The result is essentially an array of objects that contain information about each GIF. We’re particularly interested in returnValue[i].images.fixed_width_small.url for each image, which contains the URL to the GIF.
Showing a List of GIFs Using the API’s Response
In order to show a list of GIFs, we’ll create a getGifViews function that will:
- create a QWidget container
- create a
QMoviewidget for each GIF - create a
QLabelfrom eachQMovieinstance - attach each
QLabelas a child of theQWidgetcontainer - return the
QWidgetcontainer
The code looks like this:
async function getGifViews(listOfGifs) {
  const container = new QWidget();
  container.setLayout(new FlexLayout());

  const promises = listOfGifs.map(async gif => {
    const { url, width } = gif.images.fixed_width_small;
    const movie = await getMovie(url);
    const gifView = new QLabel();
    gifView.setMovie(movie);
    gifView.setInlineStyle(`width: ${width}`);
    container.layout.addWidget(gifView);
  });

  await Promise.all(promises);

  container.setInlineStyle(`
      flex-direction: 'row';
      flex-wrap: 'wrap';
      justify-content: 'space-around';
      width: 330px;
      height: 300px;
  `);

  return container;
}
Let’s break this down a bit.
First, we create our container widget. QWidgets are essentially empty widgets that act as containers. They’re similar to <div> elements in the web world.
Next, in order to assign child widgets to the QWidget, we need to give it a layout. A layout dictates how the child widgets should be arranged inside a parent. Here we choose FlexLayout.
Then, we use our getMovie function to create a QMovie instance for each GIF URL. We assign the QMovie instance to a QLabel (named gifView) and give it some basic styling using the setInlineStyle method. Finally, we add the QLabel widget to the container’s layout using the layout.addWidget method.
Since this is all happening asynchronously, we wait for everything to resolve using Promise.all, before setting some container styles and returning the container widget.
Attaching the List to Our Window Widget
Now let’s modify our main function in order to see the list of widgets we prepared.
src/index.js
const { FlexLayout, QLabel, QMainWindow, QMovie, QWidget } = require('@nodegui/nodegui');
const axios = require('axios').default;
const GIPHY_API_KEY = 'Your API key here';

async function getMovie(url) { ... }
async function searchGifs(searchTerm) { ... }
async function getGifViews(listOfGifs) { ... }

const main = async () => {
  const win = new QMainWindow();
  win.setWindowTitle('Meme Search');

  const center = new QWidget();
  center.setLayout(new FlexLayout());

  // We get the list of gifs here
  const listOfGifs = await searchGifs('hello');

  // We create the container with GIF view widgets
  const container = await getGifViews(listOfGifs);

  // We finally attach the container to the widget
  center.layout.addWidget(container);

  win.setCentralWidget(center);
  win.show();

  global.win = win;
};

main().catch(console.error);
If you run the project after making these changes, you should see:
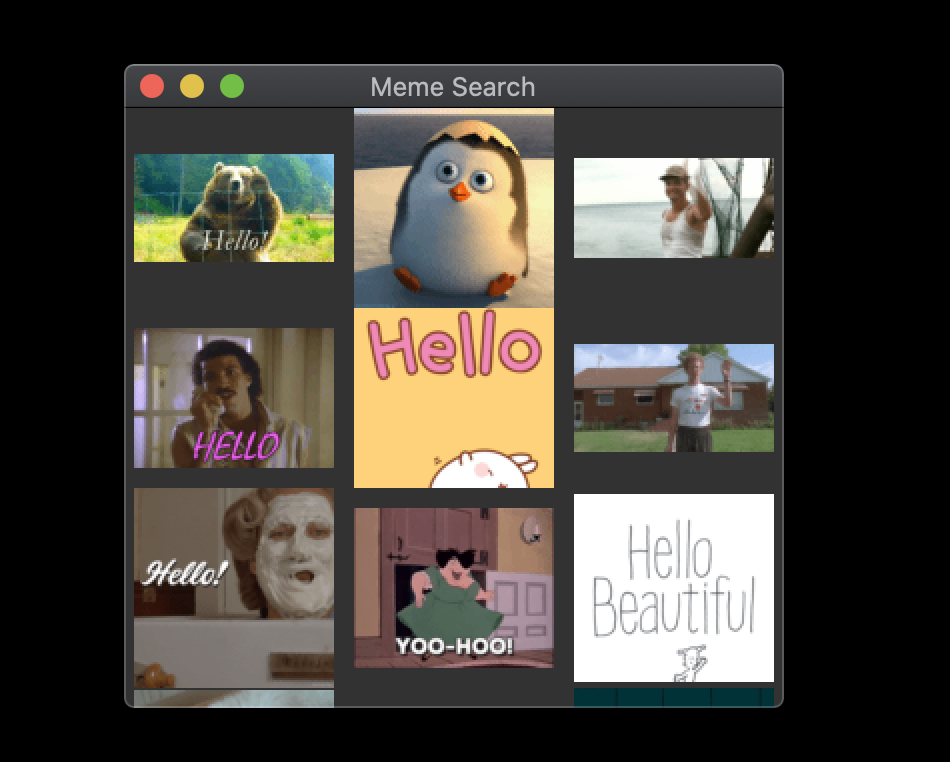
Great! Now, let’s add a search input field along with a button, so that users can search for something other than “hello” GIFs.
Adding a Search Input and Button
Let’s start by creating a createSearchContainer function, which will accept a callback function as a parameter. This will be called when the search button is clicked.
Here’s what the function should do:
- create a
QWidgetcontainer, to which we’ll add a search input field and button as children - create a layout and attach it to the container
- create a search input and button, then attach them to the
FlexLayout - attach an event listener to the button which, when clicked, will call the
onSearchcallback function passing it whatever text is present in the text input field - return the
QWidgetcontainer
The code looks like this:
function createSearchContainer(onSearch) {
  const searchContainer = new QWidget();
  searchContainer.setObjectName('searchContainer');
  searchContainer.setLayout(new FlexLayout());

  const searchInput = new QLineEdit();
  searchInput.setObjectName('searchInput');

  const searchButton = new QPushButton();
  searchButton.setObjectName('searchButton');
  searchButton.setText(' 🔎 ');

  searchButton.addEventListener('clicked', () => {
    onSearch(searchInput.text());
  });

  searchContainer.layout.addWidget(searchInput);
  searchContainer.layout.addWidget(searchButton);

  searchContainer.setStyleSheet(`
    #searchContainer {
      flex-direction: 'row';
      padding: 10px;
      align-items: 'center';
    }
    #searchInput {
      flex: 1;
      height: 40px;
    }
    #searchButton {
      margin-left: 5px;
      width: 50px;
      height: 35px;
    }
  `);
  return searchContainer;
}
Hopefully you have a fair idea of what’s going on here, but one new thing to notice is the setStyleSheet method. You can think of this as a way to apply block-level CSS in one go. It’s very similar to global stylesheets on the Web, but with the difference that in NodeGui/Qt a stylesheet can be attached to any block and not just globally.
In order to style a widget using a stylesheet, we need to add an objectName to a widget, which we’ll use to reference it in the stylesheet. This is pretty much identical to an id in the web world. In order to set an objectName, we’ll use the setObjectName method.
Now let’s add this searchContainer to the main window.
src/index.js
const {
  FlexLayout,
  QLabel,
  QLineEdit,
  QMainWindow,
  QMovie,
  QPushButton,
  QWidget,
} = require('@nodegui/nodegui');

const axios = require('axios').default;
const GIPHY_API_KEY = 'Your API key here';

async function getMovie(url) { ... }
async function searchGifs(searchTerm) { ... }
async function getGifViews(listOfGifs) { ... }
function createSearchContainer(onSearch) { ... }

const main = async () => {
  const win = new QMainWindow();
  win.setWindowTitle('Meme Search');

  const center = new QWidget();
  center.setLayout(new FlexLayout());

  // Here we create the search container
  const searchContainer = createSearchContainer(searchText => {
    console.log('searchText: ', searchText);
  });

  // Here we add it to the center widget before we add the list of GIFs.
  center.layout.addWidget(searchContainer);

  const listOfGifs = await searchGifs('hello');
  const container = await getGifViews(listOfGifs);

  center.layout.addWidget(container);

  win.setCentralWidget(center);
  win.show();

  global.win = win;
};

main().catch(console.error);
Now, when you launch the app and enter something in the search field, you should see whatever you searched for logged to your terminal.
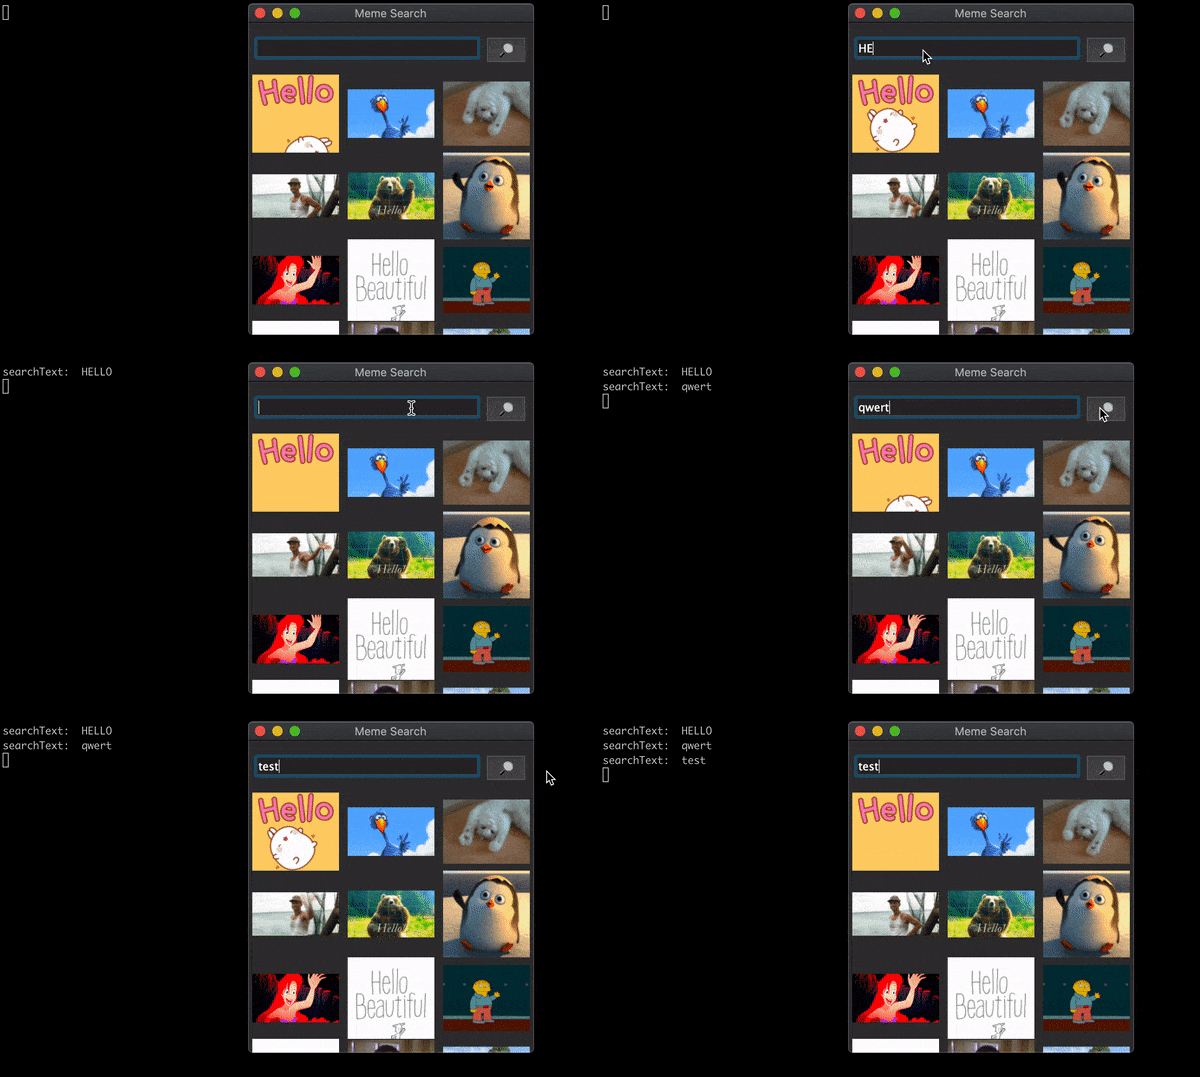
Connecting the Search to the GIF View
In order to load new GIFs in response to a user’s search, we need to do the following:
- Inside the callback that’s fired when the search button is clicked, grab the search text and use
searchGifsfunction to get a new list of GIFs. - Create a new container for these GIFs using the
getGifViewsfunction. - Remove the existing container from the window.
- Add the new container to the window.
If we shuffle things around a little, we get:
const main = async () => {
  const win = new QMainWindow();
  win.setWindowTitle('Meme Search');

  const center = new QWidget();
  center.setLayout(new FlexLayout());

  let container = new QWidget();
  const searchContainer = createSearchContainer(async searchText => {
    try {
      // Create a new GIF container with new GIFs
      const listOfGifs = await searchGifs(searchText);
      const newGifContainer = await getGifViews(listOfGifs);

      // Remove existing container from the window
      center.layout.removeWidget(container);
      container.close();

      // Add the new GIF container to the window
      center.layout.addWidget(newGifContainer);
      container = newGifContainer;
    } catch (err) {
      console.error('Something happened!', err);
    }
  });
  center.layout.addWidget(searchContainer);

  win.setCentralWidget(center);
  win.show();

  global.win = win;
};
Let’s run it again and see the magic 🧙♂️.
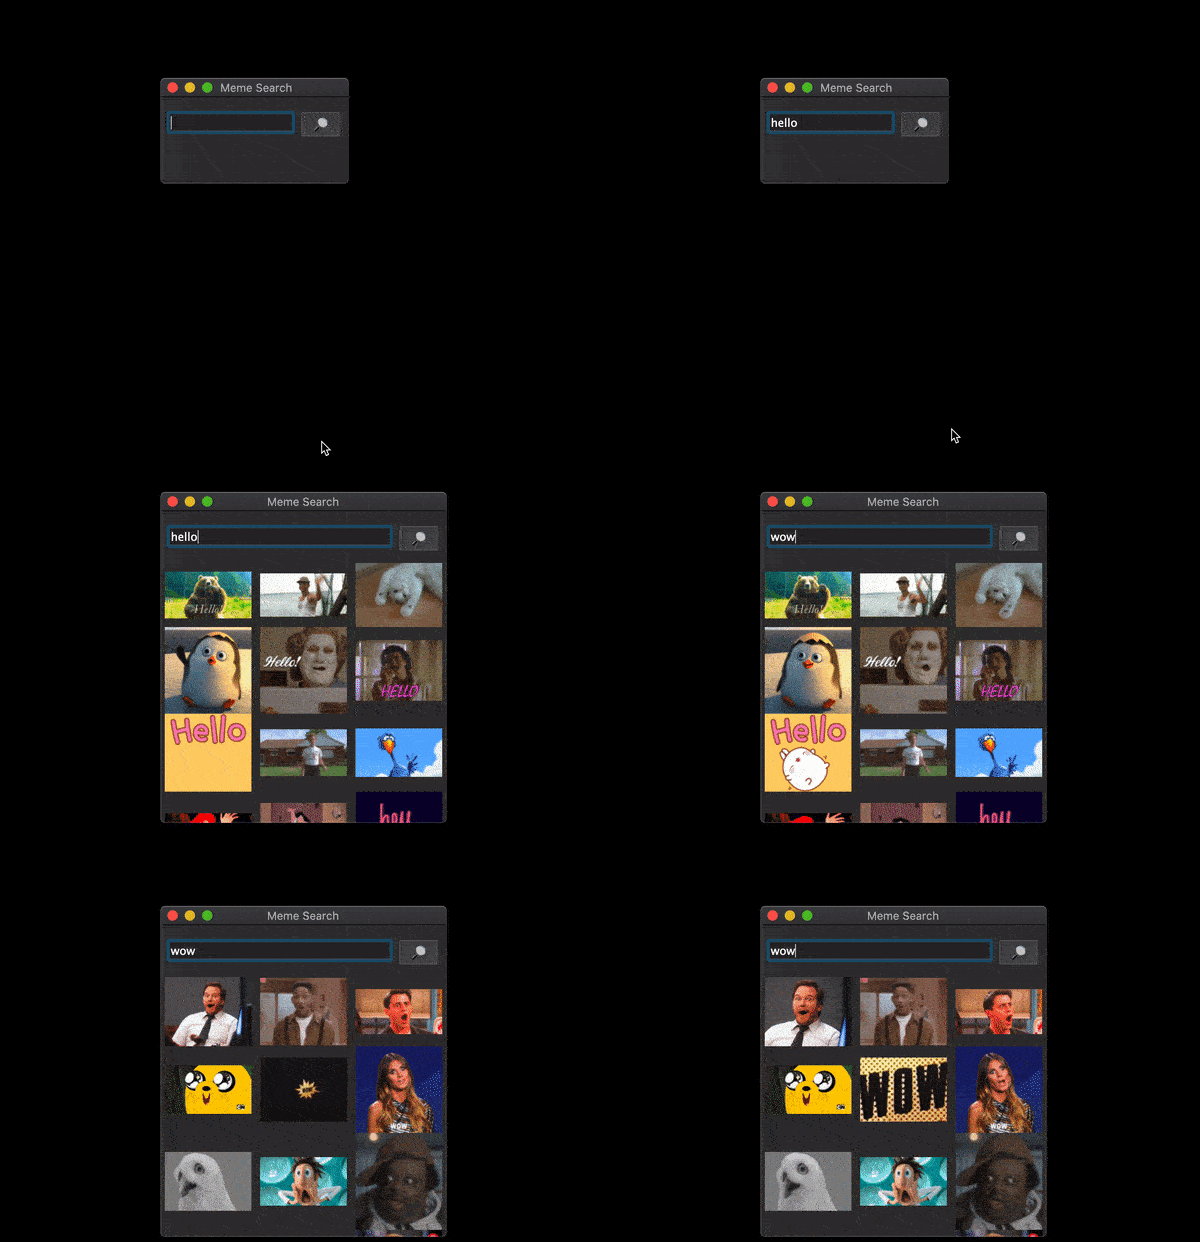
As you can see, when you type something into the search box and hit the search button, our widget will fetch a list of GIFs matching the search term from the GIPHY API.
Using QScrollArea to Make the List of GIFs Scrollable
While this is all moving in the right direction, you have probably noticed that the list of GIFs are cut off at the bottom and there’s no way to scroll them. This is because we’re using a QWidget container to display them. To make the container scrollable, we need to swap the QWidget for a QScrollArea. This provides a scrolling view onto another widget.
We’ll start off by removing the height property in the getGifViews function:
async function getGifViews(listOfGifs) {
  ...

  container.setInlineStyle(`
      flex-direction: 'row';
      flex-wrap: 'wrap';
      justify-content: 'space-around';
      width: 330px;
-     height: 300px;
  `);

  return container;
}
Then we need to change src/index.js to look like this:
const {
  FlexLayout,
  QLabel,
  QLineEdit,
  QMainWindow,
  QMovie,
  QPushButton,
  QScrollArea,
  QWidget,
} = require('@nodegui/nodegui');

const axios = require('axios').default;
const GIPHY_API_KEY = 'Your API key here';

async function getMovie(url) { ... }
async function searchGifs(searchTerm) { ... }
async function getGifViews(listOfGifs) { ... }
function createSearchContainer(onSearch) { ... }

const main = async () => {
  const win = new QMainWindow();
  win.setWindowTitle('Meme Search');

  const center = new QWidget();
  center.setLayout(new FlexLayout());

  const scrollArea = new QScrollArea();
  scrollArea.setWidgetResizable(false);
  scrollArea.setInlineStyle('flex: 1; width: 350px; height: 400px;');

  const searchContainer = createSearchContainer(async searchText => {
    try {
      const listOfGifs = await searchGifs(searchText);
      const newGifContainer = await getGifViews(listOfGifs);

      // Remove existing container from the scrollArea
      const oldContainer = scrollArea.takeWidget();
      if (oldContainer) oldContainer.close();

      // Add the new GIF container to the scrollArea
      scrollArea.setWidget(newGifContainer);
    } catch (err) {
      console.error('Something happened!', err);
    }
  });

  center.layout.addWidget(searchContainer);
  center.layout.addWidget(scrollArea);

  win.setCentralWidget(center);
  win.show();

  global.win = win;
};

main().catch(console.error);
There’s nothing too exciting going on here. We’re creating a new QScrollArea, which we add to the layout beneath the search field. We’re also using the QScrollArea‘s takeWidget method to remove any existing container from the scroll area, before appending the new search results.
If you launch the meme searcher, you should now have scrollable GIFs:
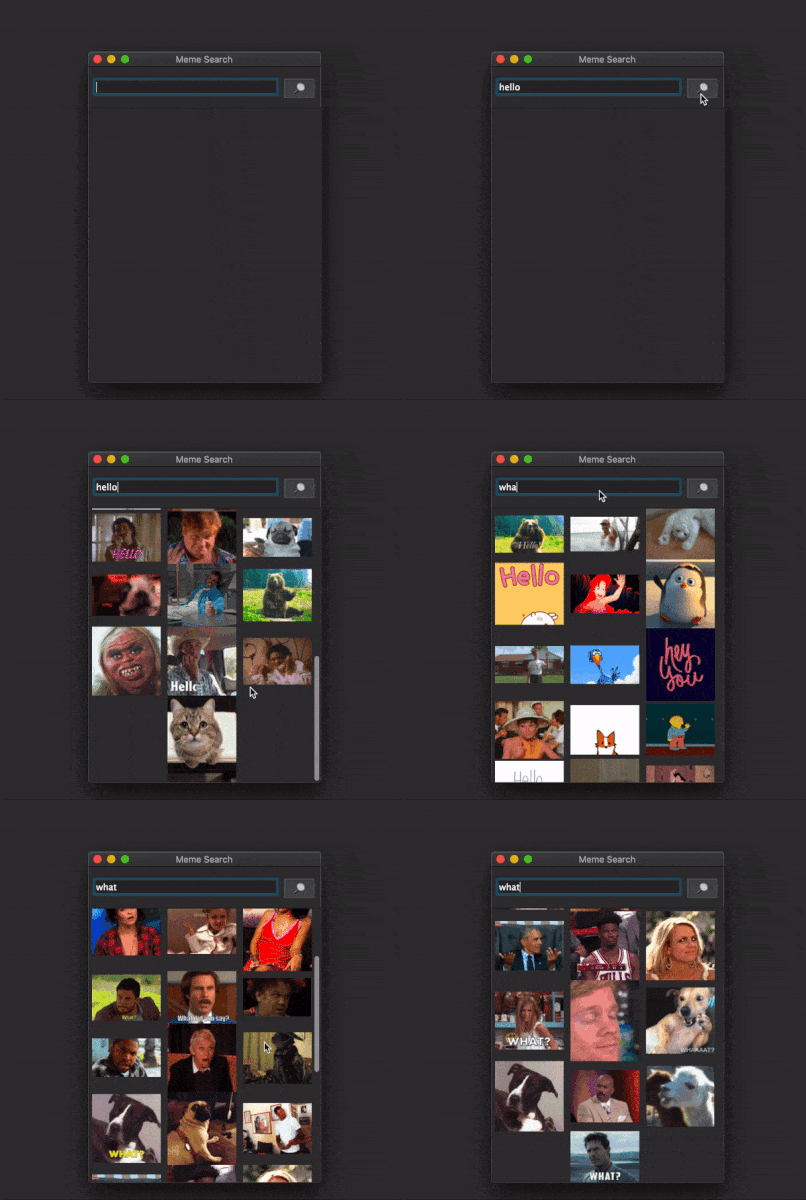
Add Click Listeners to Copy GIF URLs for Sharing
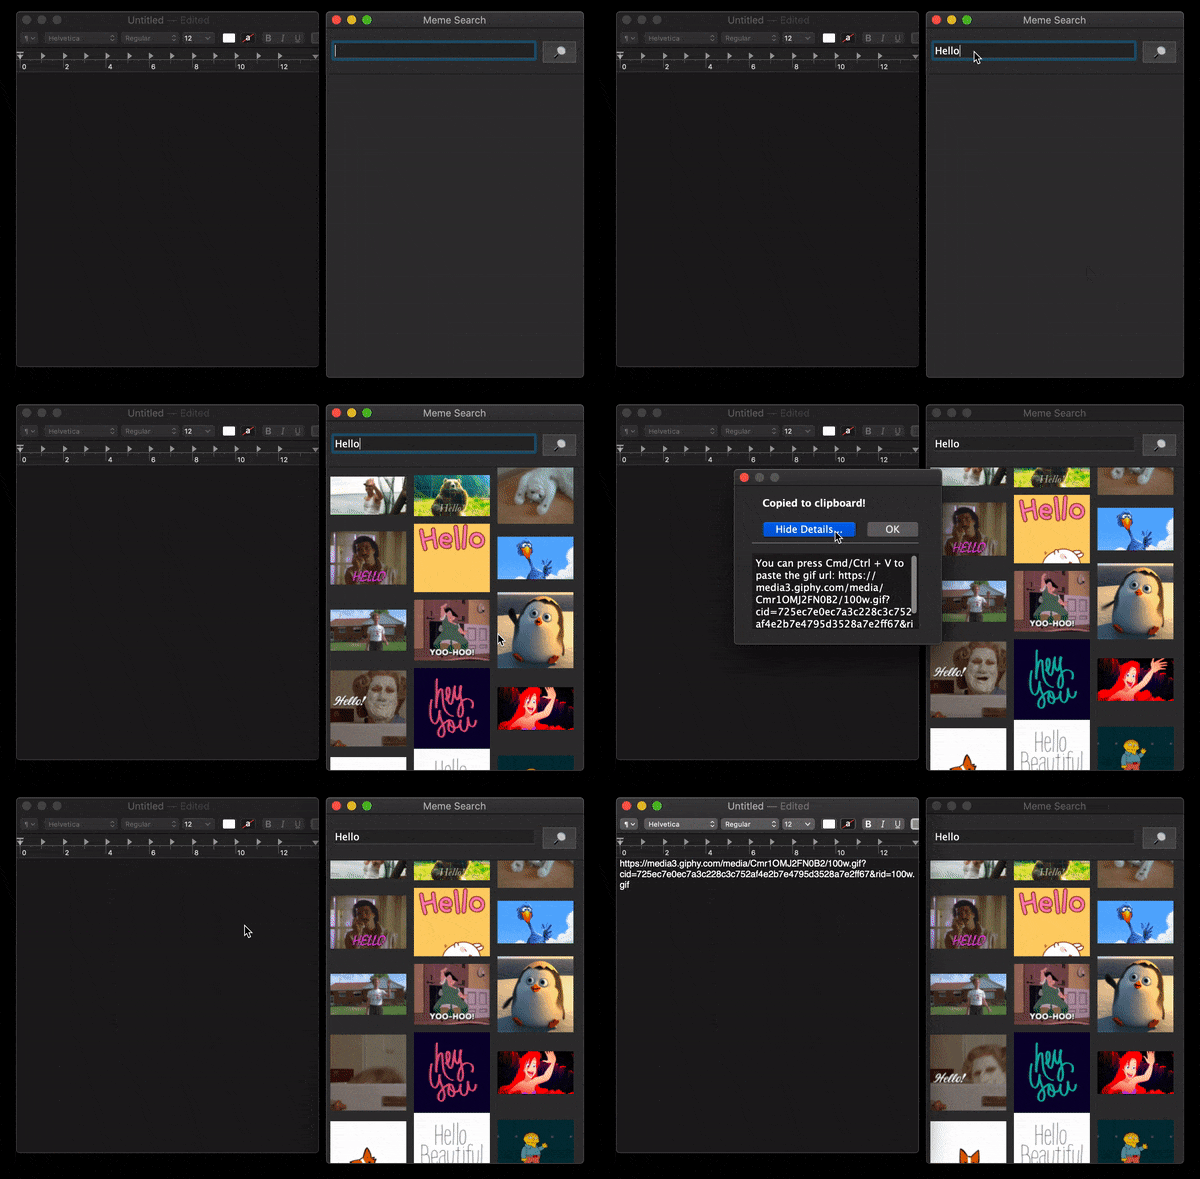
Now that we can see all the GIFs, we want to be able to share them. One quick way to do this is to copy the URL onto the global clipboard whenever a user clicks on the GIF of their choice.
Then the user can simply navigate to the place they want to use the GIF and insert it with Ctrl/Cmd + V.
In order to do that, we must:
- attach a mouse-down event listener to each GIF
- inside the event listener callback, use the QClipboard class to copy the URL to the global clipboard
- show a modal to the user saying that the URL has been copied
The event listener can be attached inside the getGifViews function:
async function getGifViews(listOfGifs) {
  ...

  const promises = listOfGifs.map(async gif => {
    ...

    gifView.addEventListener(WidgetEventTypes.MouseButtonRelease, () => {
      const clipboard = QApplication.clipboard();
      clipboard.setText(url, QClipboardMode.Clipboard);

      showModal(
        'Copied to clipboard!',
        `You can press Cmd/Ctrl + V to paste the GIF url: ${url}`
      );

    });

    container.layout.addWidget(gifView);
  });

  ...

  return container;
}
Here, QApplication.clipboard returns an object for interacting with the clipboard. We can use this object’s setText method to alter the actual clipboard’s contents.
We’re also making use of a showModal function. Let’s define that next:
function showModal(title, details) {
  const modal = new QMessageBox();
  modal.setText(title);
  modal.setDetailedText(details);
  const okButton = new QPushButton();
  okButton.setText('OK');
  modal.addButton(okButton, ButtonRole.AcceptRole);
  modal.exec();
}
The QMessageBox widget is similar to an alert box in a web browser. It can be used to halt user interaction and display a message.
Finally, we need to import all of these new widgets at the top of src/index.js:
const {
  ButtonRole,
  FlexLayout,
  QApplication,
  QClipboardMode,
  QLabel,
  QLineEdit,
  QMainWindow,
  QMessageBox,
  QMovie,
  QPushButton,
  QScrollArea,
  QWidget,
  WidgetEventTypes,
} = require('@nodegui/nodegui');
const axios = require('axios').default;
const GIPHY_API_KEY =  'Your API key here';

async function searchGifs(searchTerm) { ... };
async function getGifViews(listOfGifs) { ... };
async function getMovie(url) { ... };
function createSearchContainer(onSearch) { ... };
function showModal(title, details) { ... };

const main = async () => { ... };

main().catch(console.error);
If you launch the meme searcher, you should now have the ability to copy/paste GIF URLs:
Adding a System Tray Icon
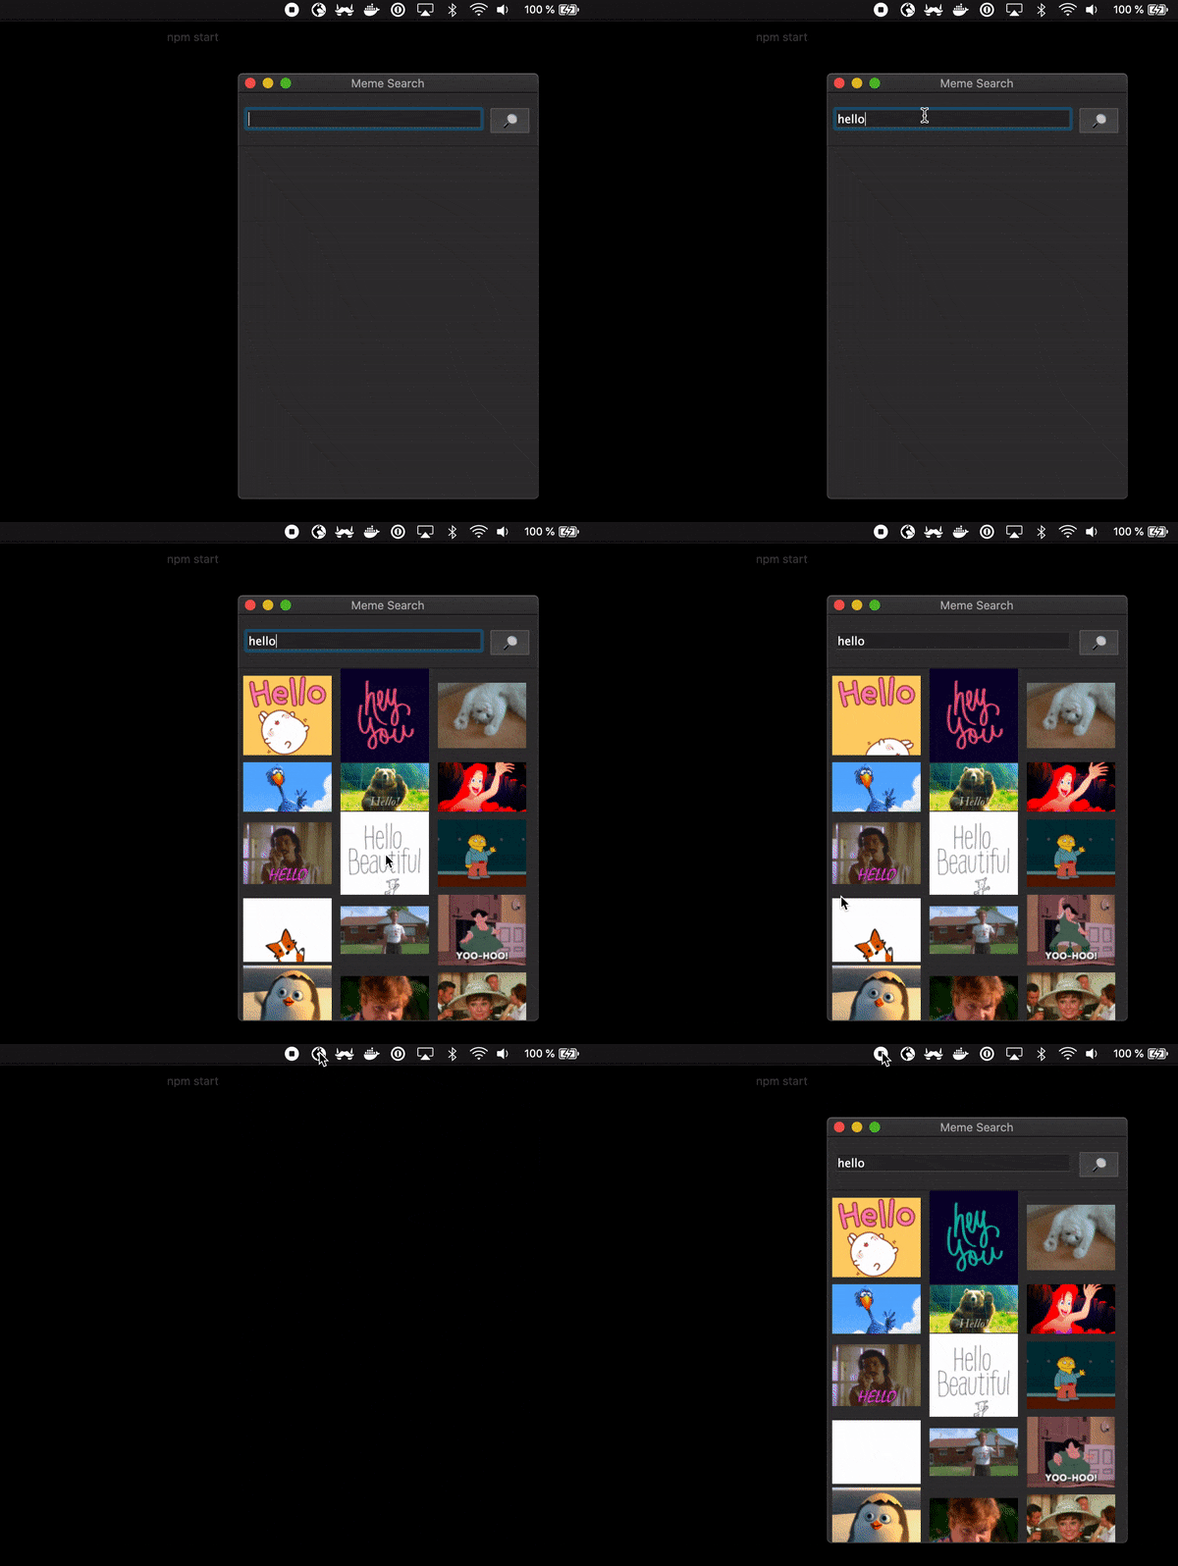
We want our app to be hidden away in the system tray when not in use. For this, we’ll create a system tray icon that will have a menu item which, upon click, will toggle the visibility of the running widget.
The steps involved are:
- Create a QSystemTrayIcon with an icon.
- Create a menu for the system tray icon using QMenu. Set the menu instance as system tray’s context menu.
- Create menu items using QAction widgets and set up event listeners to listen for their
triggerevents. - On trigger, hide or show the window.
Let’s start off by requiring the necessary modules, then making a small change to the main function to tell it to use our icon:
const {
  ButtonRole,
  FlexLayout,
  QApplication,
  QClipboardMode,
  QIcon,
  QLabel,
  QLineEdit,
  QMainWindow,
  QMenu,
  QMessageBox,
  QMovie,
  QAction,
  QPushButton,
  QScrollArea,
  QSystemTrayIcon,
  QWidget,
  WidgetEventTypes,
} = require('@nodegui/nodegui');
const axios = require('axios').default;
const path = require('path');
const iconImg = require('../assets/systray.png').default;
const GIPHY_API_KEY =  'Your API key here';

const main = async () => {
  ...

  win.show();
  systemTrayIcon(win);

  global.win = win;
};
As you can see, we’re requiring an icon from the assets folder. If you’re following along, you can download the icon file from here.
Now comes the function to create the system tray icon:
function systemTrayIcon(win) {
  const icon = new QIcon(path.resolve(__dirname, iconImg));
  const tray = new QSystemTrayIcon();
  tray.setIcon(icon);
  tray.show();

  // Menu that should pop up when clicking on systray icon.
  const menu = new QMenu();
  tray.setContextMenu(menu);

  //Each item in the menu is called an action
  const visibleAction = new QAction();
  menu.addAction(visibleAction);
  visibleAction.setText('Show/Hide');
  visibleAction.addEventListener('triggered', () => {
    if (win.isVisible()) {
      win.hide();
    } else {
      win.show();
    }
  });

  global.tray = tray;
}
Here, we’re creating the icon using NodeGui’s QIcon class. Then we’re using the QSystemTrayIcon class to create a system tray icon for our app.
Finally, we need to tweak our webpack settings (in webpack.config.js) to prevent webpack from polyfilling __dirname:
const path = require('path');

module.exports = {
  ...
  node: {
-    __dirname: true,
-    __filename: true
+    __dirname: false,
+    __filename: false
  },
  ...
}
The final result:
Some Final Tweaks
Error Handling
Before we go on to packaging, let’s make use of our showModal function and add an error-handling dialog:
const main = async () => {
  ...
  const searchContainer = createSearchContainer(async searchText => {
    try {
      ...
    } catch (err) {
      ...
      showModal('Something went wrong!', JSON.stringify(err));
    }
  });
  ...
};
This will alert the user if, for instance, anything goes wrong with the Ajax request to fetch GIFs from GIPHY. You can try this out by altering your API key to something invalid, then launching the app and attempting to search for a GIF.
Allow the User to Input an API Key
While we are on the subject of API keys, let’s add a dialog to allow a user to input their API key. This means that it doesn’t have to be hard-coded in the program:
const {
  ...
  QDialog,
  ...
} = require('@nodegui/nodegui');
...
let GIPHY_API_KEY = '';

async function searchGifs(searchTerm) { ... }
async function getGifViews(listOfGifs) { ... }
async function getMovie(url) { ... }
function createSearchContainer(onSearch) { ... }
function showModal(title, details) { ... }
function systemTrayIcon(win) { ... }

function showAPIKeyDialog() {
  const dialog = new QDialog();
  dialog.setLayout(new FlexLayout());
  const label = new QLabel();
  label.setText('Enter your Giphy API Key');
  const input = new QLineEdit();
  const okButton = new QPushButton();
  okButton.setText('OK');
  okButton.addEventListener('clicked', () => {
    GIPHY_API_KEY = input.text();
    dialog.close();
  });
  dialog.layout.addWidget(label);
  dialog.layout.addWidget(input);
  dialog.layout.addWidget(okButton);
  dialog.setInlineStyle(`
    padding: 10;
    height: 150px;
    flex-direction: 'column';
    align-items:'center';
    justify-content: 'space-around';
  `);
  dialog.exec();
}

const main = async () => {
  ...
  showAPIKeyDialog();
  global.win = win;
};

main().catch(console.error);
As you can see, we’re using a QDialog widget to prompt the user for input, then storing whatever they provide in the GIPHY_API_KEY variable. If you’re looking to improve your NodeGui skills after reading this tutorial, you could look at improving this — for example, by persisting the key to the file system, or validating it and providing feedback to the user.
Note: Don’t forget, the complete source code is available here: https://github.com/sitepoint-editors/memesearchapp-nodegui-tutorial.
Packaging the App for Cross-platform Distribution
After we’ve successfully built the app, we need to create distributables for macOS, Windows and Linux that the end users can download and use.
The process of creating distributables is usually different for each operating system, so to ease the pain we’ll use NodeGui’s packaging tool called @nodegui/packer.
Usage
First, install packer as a dev dependency:
npm install --save-dev @nodegui/packer
Next, use packer to create a deployment template:
npx nodegui-packer --init MemeApp
The template is essentially an OS-specific project that contains the code to successfully package all of NodeGui app’s code, assets and dependencies. Note that you need to run this in Windows, macOS and Linux separately to create three different templates. This template allows you to fine tune the final deployment settings specific to each OS. You can adjust things like company info, icons and other metadata to suit your needs.
For Linux, the template looks like this:
.
└── deploy
    ├── config.json
    └── linux
        └── MemeApp
            ├── default.desktop
            ├── default.png
            └── qode.json
Note that you only need to run the init command once. Then you make changes to the template and commit it in the project repo.
The next step is to actually build and package the project into a distributable.
Delete the build directory if it exists:
rm -rf ./deploy/build
Then build the app using webpack:
npm run build
Finally, run the packer’s pack command, passing it the dist folder as an argument:
npx nodegui-packer --pack ./dist
This will result in the following:
- On macOS, packer will output a
dmgfile. - On Linux, packer will output an
AppImage, which is something similar to an.appfile in macOS. - On Windows, packer outputs a folder containing the executable and all the dlls.
Once the command is successful, it should print the output directory, which is typically inside the deploy/<os>/build directory. Make sure you don’t commit this directory:
.
└── deploy
    ├── config.json
    └── linux
        ├── build
        │   └── MemeApp
        │       ├── Application-aed23d8-x86_64.AppImage
        │       ├── AppRun -> qode
        │       ├── default.desktop
        │       ├── default.png
        │       ├── dist
        │       │   ├── f59514675cec2e70ce8598286c94dc22.png
        │       │   ├── index.js
        │       │   └── nodegui_core-7b3e73f5fef149ae765d5ea5d13d5bb0.node
        │       ├── doc
        │       │   └── ...
        │       ├── lib
        │       │   └── ...
        │       ├── plugins
        │       │   └── ...
        │       ├── qode
        │       ├── qode.json
        │       └── qt.conf
        └── MemeApp
            ├── default.desktop
            ├── default.png
            └── qode.json
The Linux distributable is deploy/linux/build/MemeApp/Application-aed23d8-x86_64.AppImage 🚀📦.
Conclusion
In this tutorial, we successfully built a real-world meme search app using NodeGui in roughly 200 lines of code. We learned some of the library’s basic concepts and capabilities. We also were able to package the finished app into a distributable that can be shared with end users.
I believe NodeGui opens the door to create a lot of truly efficient native apps with Node.js.
NodeGui also supports libraries and frameworks such as React (official), Angular (community) and soon Vue.js (community). Please check these out and give them a star on GitHub if they’re the sort of thing you’re interested in.
NodeGui is an open-source library that will greatly benefit from code contributions. It has a relatively easy codebase to understand and a very welcoming community. I encourage everyone to help out.
Finally, thanks to their many inbuilt widgets and styling through CSS, I believe NodeGui apps are as easy to develop as web or Electron apps. I encourage you to build something cool of your own and share it with us.
This tutorial is an excerpt from the SitePoint Premium library, where you can build a job-ready Node.js skillset.
Frequently Asked Questions (FAQs) about Building a Native Desktop GIF Searcher App Using NodeGui
What is NodeGui and why is it used for building desktop applications?
NodeGui is an open-source library for JavaScript that allows developers to build powerful, native desktop applications. It uses the Qt library, which is a widely used tool for creating graphical user interfaces. NodeGui provides a high level of performance because it runs on the system’s native resources, unlike other JavaScript frameworks that run on a web browser. This results in a smoother, more responsive user experience. NodeGui also supports CSS styling, making it easier for developers to design attractive interfaces.
How does NodeGui differ from Electron?
While both NodeGui and Electron are used for building desktop applications using JavaScript, they have some key differences. Electron uses Chromium and Node.js, which makes it heavier and more resource-intensive. On the other hand, NodeGui uses the Qt library and doesn’t rely on a web browser to run, making it lighter and more efficient. This results in NodeGui applications having a smaller bundle size and using less memory compared to Electron applications.
How can I install NodeGui?
To install NodeGui, you need to have Node.js and npm (Node Package Manager) installed on your system. Once you have these, you can install NodeGui by running the command npm install @nodegui/nodegui in your terminal or command prompt. This will download and install the NodeGui library and its dependencies.
Can I use CSS to style my NodeGui application?
Yes, NodeGui supports CSS styling. You can use a subset of CSS properties to style your application’s widgets. This includes properties for layout, colors, fonts, and more. You can apply styles directly to widgets or use a StyleSheet object to define styles that can be reused across multiple widgets.
How can I create a window in NodeGui?
In NodeGui, you can create a window using the QMainWindow class. You need to create an instance of this class and call its show() method to display the window. You can customize the window’s size, title, and other properties using various methods provided by the QMainWindow class.
How can I handle events in NodeGui?
NodeGui uses an event-driven architecture, similar to Node.js. You can listen for events on widgets using the addEventListener() method. This method takes two arguments: the name of the event and a callback function to be executed when the event occurs. You can handle various types of events, such as clicks, key presses, and more.
Can I use Node.js modules in my NodeGui application?
Yes, you can use any Node.js module in your NodeGui application. This includes both built-in modules, like ‘fs’ and ‘path’, and third-party modules installed via npm. You can require() these modules in your code and use their functionality as you would in a regular Node.js application.
How can I package and distribute my NodeGui application?
NodeGui provides a tool called nodegui-packer for packaging and distributing applications. This tool bundles your application’s code and the NodeGui library into a standalone executable file. You can then distribute this file to users, who can run your application without needing to install NodeGui or any other dependencies.
Can I build cross-platform applications with NodeGui?
Yes, NodeGui supports cross-platform development. You can build applications for Windows, macOS, and Linux using the same codebase. However, you may need to account for platform-specific differences in your code, such as file paths and system APIs.
What are the limitations of NodeGui?
While NodeGui is a powerful tool for building desktop applications, it does have some limitations. It supports a subset of CSS properties, so some complex styles may not be possible. Also, because it uses the Qt library, your application’s look and feel may not exactly match the native look and feel of the operating system. Finally, while NodeGui supports cross-platform development, you may need to handle platform-specific differences in your code.
Atul Ramachandran is a full-stack software engineer, editor of NodeGui, and has experience with VR, image processing, robotics, game development and desktop apps. You can read more of his writing on his blog.
Published in
·CMS & Frameworks·Development Environment·Patterns & Practices·PHP·Programming·Web·August 7, 2014


