Key Takeaways
- Xamarin Forms provides a unified approach to developing UIs for Android, iOS, and Windows using C#, reducing the need to write platform-specific UI code.
- Xamarin Forms uses an abstraction layer, allowing developers to define UI elements once and deploy across multiple platforms, though this can impact performance and control over design.
- The setup for Xamarin development requires Visual Studio and a Mac for iOS builds, but a build agent can facilitate iOS builds on Windows machines.
- Developers familiar with XAML from other Microsoft technologies will find Xamarin Forms approachable, with similar concepts and tools available.
- When deciding between Xamarin and Xamarin Forms, consider the complexity of the app and the need for pixel-perfect control over the UI, as Xamarin Forms adds an abstraction layer that may limit this control.
This article was peer reviewed by Adrian Sandu. Thanks to all of SitePoint’s peer reviewers for making SitePoint content the best it can be!
Xamarin aims to provide a solution to allow companies and developers develop natively and cross-platform. Using Xamarin, developers can target Android, iOS and Windows (Mobile) 10, using a single industry standard language, C#. Certain aspects of the code base are platform specific, for example the UI layer, forcing programmers to develop them repeatedly for each platform.
With Microsoft’s recent acquisition of Xamarin, it is likely to become a better supported, integrated and essential part of a cross-platform strategy for Microsoft and developers.
In 2014, Xamarin introduced Xamarin Forms (XF). XF introduces an abstraction layer which allows developers to declare the UI using XAML (Extensible Application Markup Language) declarations and/or code.
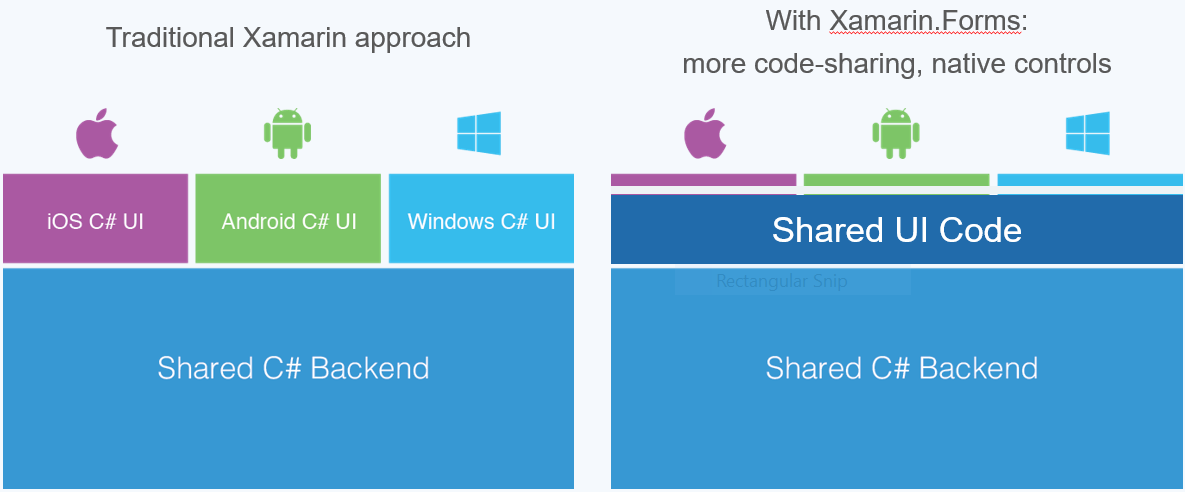
Using XF, programmers are now able to define and create mobile applications targeting multiple platforms with the same code and definitions. XF renders those instructions into platform-specific code and user experiences. Using this approach, applications get a native user experience, controls and patterns familiar to their users.

XAML makes the creation of the UI declarative and succinct in comparison to creating the UI by code, but it’s not required to get started. Developers with a background in XAML related technologies, such as WPF (used to develop Windows desktop applications) or Windows Phone / Windows Store applications, will feel at home, since many of the concepts are similar.
Should I Use Xamarin or Native?
The advantage to using Xamarin is the ability to share code between different platforms whilst harnessing the power of C# features and frameworks such as Async-Await, LINQ and Reactive Extensions. The disadvantages are that you dependent on another layer of abstraction which could introduce bugs and issues dependent on Xamarin to fix whenever a new version of a platform is available for developers.
Should I Use Xamarin Forms or Xamarin?
Xamarin maps 100% of the APIs of iOS and Android. It gives you the same abilities you have when developing natively and (Xamarin claims) without any performance loss. With Xamarin Forms the extra abstraction layer hinders your ability to get pixel perfect design implementation and there is a slight hit on performance (especially on Android, which Xamarin are rigorously improving). If your application is a complex, you should consider if Xamarin Forms is right for your needs.
Now that the context is set, let’s jump into coding your first XF application.
There’s a small issue to get out of the way. To use Xamarin, you need to acquire a license. Xamarin offers a trial period and I urge you to use it to follow this tutorial. Note that Xamarin Forms is not offered with the free Xamarin Starter Edition.
Environment Setup
XF applications can be developed using Xamarin Studio or Microsoft Visual Studio (only available on Windows).
Things are not as easy as we would like. Apple requires a Mac to build iOS applications, and Microsoft requires a machine running Windows to build for its platforms.
To help, Xamarin provides a build agent that you can install on a Mac machine and use to build iOS applications on a Windows machine. Another option is to use a Mac and host Windows in a virtual machine.
In this tutorial I’m going to use Visual Studio, but Xamarin Studio will allow you to complete the same steps, as I am not using any Visual Studio specific features.
Download Xamarin and install it. The final project you will be creating is available on GitHub.
In Visual Studio 2015, create a new project via the File Menu. Under templates, locate the Visual C# node and select the Cross-Platform option.
This should list several options:
- Blank App (Native Portable / Native Shared) – This template will create a ‘Solution’ consisting of Xamarin.iOS, Xamarin.Droid and Windows Phone projects. These project types are out of scope for this tutorial.
- Blank App (Xamarin.Forms Portable / Xamarin.Forms Shared) – These templates will create two flavors of a Xamarin Forms solution. I will discuss the differences below.
- Class Library (Xamarin.Forms) – This template will create a class library which can be referenced from any Xamarin.Forms project.
- UI Test App (Xamarin.UITest / Cross – Platform) – This template will create a project using Xamarin’s UI automated testing feature. This is out of scope of this tutorial.
Select Blank App (Xamarin.Forms Portable), which will create a solution consisting of 4 projects, one per platform and a PCL library which can be referenced from all these platform specific projects.
Portable vs Shared
When using the Shared option, Visual Studio creates a project for each platform and a special project you can add files and resources to. All items are considered part of the platform specific projects, creating a single point where changes have an effect over the rest of the projects.
When using the Portable option, Visual Studio creates a project for each platform and a portable class library (PCL). A PCL can be referenced from each project. The compiler will enforce usage of types that are common for every member of the PCL configuration.
If possible, always use the portable option. While both options are viable, PCL makes it easier to develop and keep your code cleaner. Using the Shared option you are most likely to use macros to define code that is platform specific.
Install and Update Xamarin Forms
Update the solution’s nuget packages. Xamarin.Forms is installed into the solution via nuget, and this allows the Xamarin.Forms team to release updates on a regular basis.
When running on Windows, starting the Windows specific project should be the easiest, but setting up the Android project is more complex and requires setting up a physical device or emulator. Xamarin provides an Android emulator as a separate download. Microsoft also provides an Android emulator and there is the unrecommended Android emulator provided by the Android Toolkit installation.
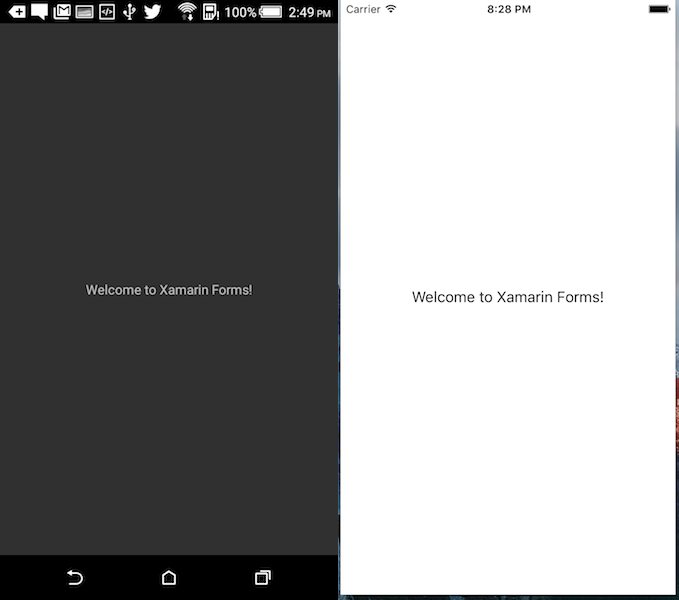
Found in the PCL project, App.cs contains the current output code :
// The root page of your application
MainPage = new ContentPage
{
    Content = new StackLayout
    {
        VerticalOptions = LayoutOptions.Center,
        Children = {
            new Label {
                HorizontalTextAlignment = TextAlignment.Center,
                Text = "Welcome to Xamarin Forms!"
            }
        }
    }
};
This code creates a ContentPage page (XF provides several page types, including NavigationPage and TabbedPage). It then adds a StackLayout layout (XF provides several layouts, including Grid, Absolute and Relative). Finally it creates a Label control responsible for displaying simple text (XF provides many useful controls, including Input and Map).
The Text and HorizontalTextAlighnment properties horizontally center the text with the value Welcome to Xamarin Forms!
. MainPage is a property of the App object, created when the application starts and is the root object of any Xamarin Forms application.
I will not be discussing the generated code in the platform specific projects, this will be covered in future platform specific tutorials.
Creating an Application
You are now ready to start coding your first application with XF. For this tutorial you will create the following application:
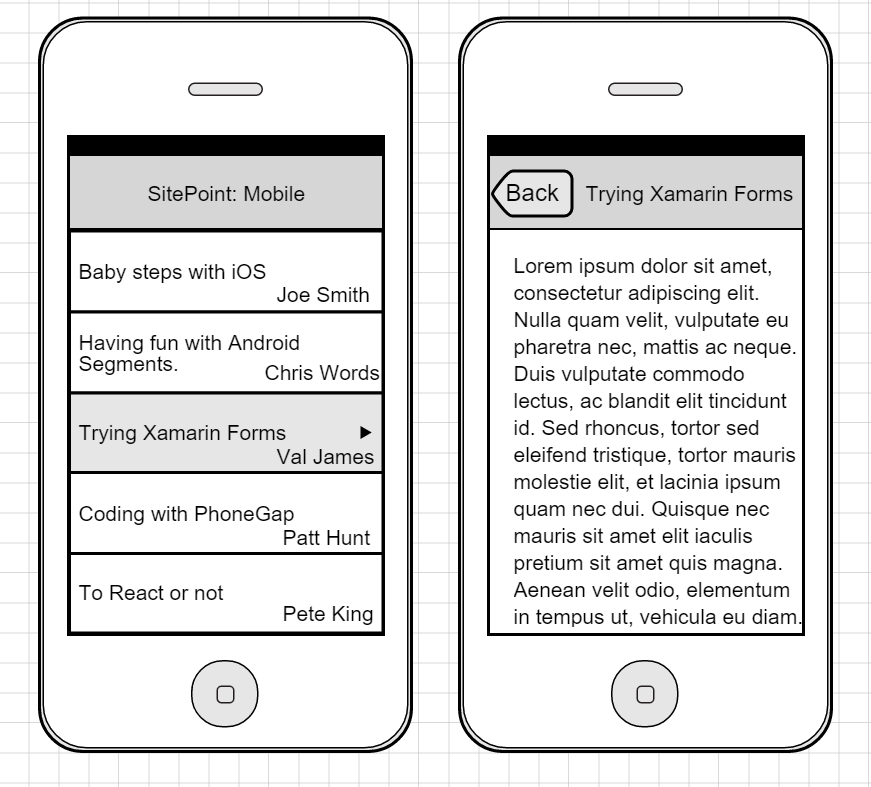
The application has two separate pages and the built-in NavigationPage will be used to navigate between them. The first page has a list of articles associated with a SitePoint domain, for example, Mobile. Clicking on a list item will navigate to a page containing a WebView control that displays the contents of the article. The NavigationPage will allow a user to navigate back to the list of articles. To keep things simple the list of articles is hard coded into the app, as performing HTTP operations is beyond the scope of this tutorial.
Start by adding a Model
layer into the application.
The Model layer will contain the list of articles displayed in the list. But first you need to define the article object. Create Article.cs and add:
public class Article
{
  public string Title { get; set; }
  public string Author { get; set; }
  public string ArticleUrl { get; set; }
}
The app shows the title and author of the article in the list, and the second page will navigate to the URL, so a simple class is enough for this application. Next, is a new DataService.cs class to provide a list of articles.
public static class DataService
{
    public static IList<Article> GetArticles()
    {
        return new List<Article>
        {
            new Article
            {
                Title = "Quick Tip: Installing React",
                Author = "Jon Shaffer",
                ArticleUrl = "https://www.sitepoint.com/quick-tip-installing-react-native/"
            },
            new Article
            {
                Title = "Displaying Collections of Items on Windows Phone",
                Author = "Deivi Taka",
                ArticleUrl = "https://www.sitepoint.com/displaying-collections-of-items-on-windows-phone/"
            },
            new Article
            {
                Title = "Using C and C++ Code in an Android App with the NDK",
                Author = "Rico Zuñiga",
                ArticleUrl = "https://www.sitepoint.com/using-c-and-c-code-in-an-android-app-with-the-ndk/"
            },
            new Article
            {
                Title = "Using Classy to Create Stylesheets for Native iOS Apps",
                Author = "Chris Ward",
                ArticleUrl = "https://www.sitepoint.com/using-classy-to-create-stylesheets-for-native-ios-apps/"
            },
            new Article
            {
                Title = "Fast, Lightweight Data Storage for Cordova Apps with LokiJS",
                Author = "Wern Ancheta",
                ArticleUrl = "https://www.sitepoint.com/fast-lightweight-data-storage-for-cordova-apps-with-lokijs/"
            },
            new Article
            {
                Title = "How to Make Your Web App Smarter with Image Recognition",
                Author = "Patrick Catanzariti",
                ArticleUrl = "https://www.sitepoint.com/how-to-make-your-web-app-smarter-with-image-recognition/"
            }
        };
    }
}
So far no changes have been that affect the UI, so running the app should look the same as the default Blank application.
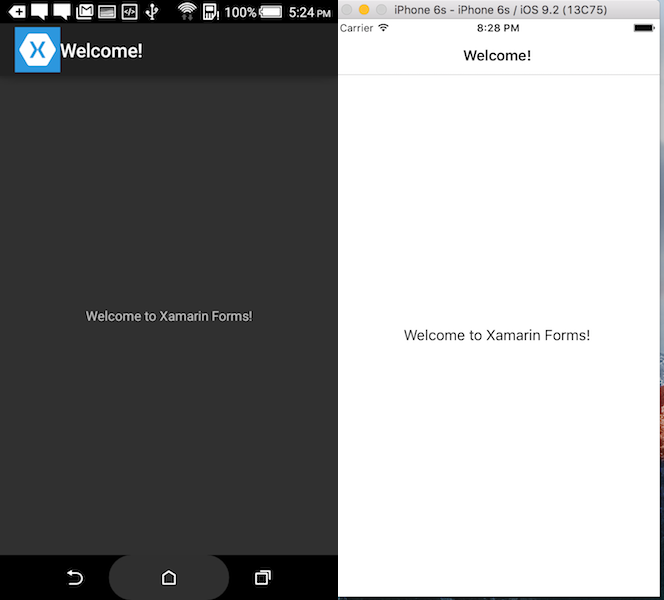
Open App.cs and wrap the creation of the existing ContentPage with a NavigationPage.
MainPage = new NavigationPage(new ContentPage
{
    Title = "Welcome!",
    Content = new StackLayout
    {
        VerticalOptions = LayoutOptions.Center,
        Children = {
            new Label {
                HorizontalTextAlignment = TextAlignment.Center,
                Text = "Welcome to Xamarin Forms!"
            }
        }
    }
});
NavigationPage takes the first page to display as an argument, as it doesn’t have any content of its own. Depending on the platform, it may provide UI for navigation. Note that I added a value for the Title of the ContentPage since on some platforms the NavigationPage can display this value to the user.
Now the app should look like this:
Now you are ready to start coding the first page, which will replace the default ContentPage, making it the page displayed on startup. Open the Add New Item menu item and select the Forms ContentPage code template, name it ArticlesView. The key component I am introducing is the ListView control, which displays a list of rows containing data.
In the constructor, replace the default implementation with:
public ArticlesView()
{
    Title = "Sitepoint: Mobile";
    Content = new ListView
    {
        ItemsSource = DataService.GetArticles(),
    };
}
ListView has a property named ItemsSource where a list of items is assigned and then creates a cell for each item in the list, using the DataService created earlier to provide items to the page.
Change App.cs to display this page when the app loads.
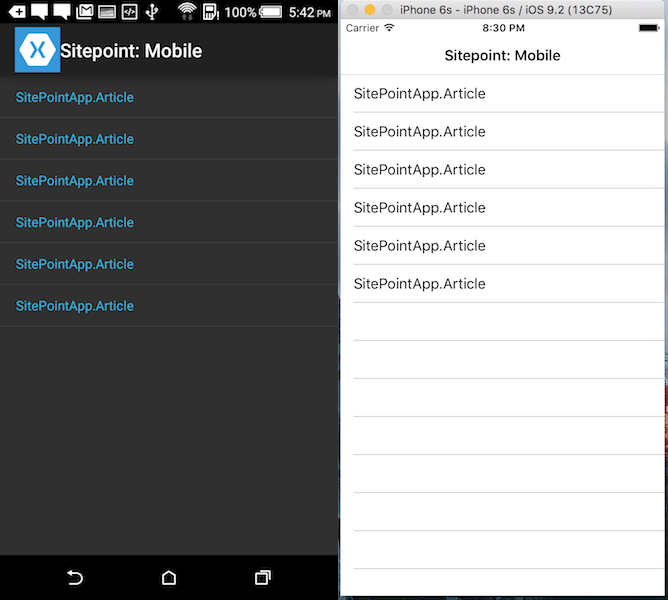
MainPage = new NavigationPage(new ArticlesView());If you run the application now, you will see the new page with a list displayed. It has created cells for each article provided by the DataService, but this is not yet helpful to the user.
You need to specify how the ListView should display each item. When used with XAML, ListView shines in this regard, but it’s also possible to accomplish this with code. Change the code in the constructor of ArticlesPage.cs:
public ArticlesView()
{
Title = "Sitepoint: Mobile";
var listView = new ListView();
var textCell = new DataTemplate(typeof(TextCell));
textCell.SetBinding(TextCell.TextProperty, "Title");
textCell.SetBinding(TextCell.DetailProperty, "Author");
listView.ItemTemplate = textCell;
listView.ItemsSource = DataService.GetArticles();
Content = listView;
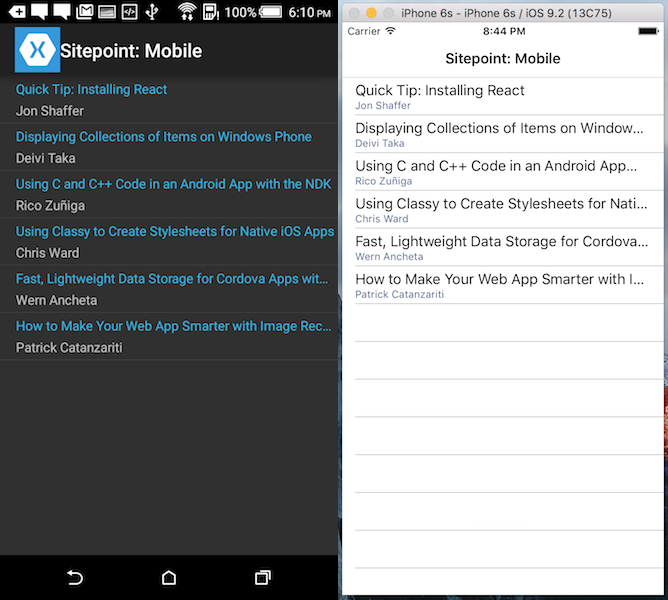
}This sets a DataTemplate to the ItemTemplate property of the ListView, which is an instruction to the ListView on how to display each cell. It uses the built-in TextCell (there are others provided by Xamarin such as ImageCell and CustomCell that allows developers to specify any content to display on the cell level). The key aspect to creating DataTemplates is Data-Binding, you need to specify two instructions to bind the values from the Article object to the Text and Detail properties of the TextCell.
Now, when you run the application, you will see the correct data displayed:
With the first page completed, you can now create the second page, again using a ContentPage, this time named ArticleContentPage.cs. Doing the heavy lifting on this page is the WebView control (Part of the Xamarin Forms platform), which will render the content of the provided URL.
public class ArticleContentPage : ContentPage
{
    private WebView _webView;
    public ArticleContentPage()
    {
        Content = _webView = new WebView();
    }
}
There’s nothing else to be done at this time, since you don’t know which article the user has selected on the first page. Add an Article property after the constructor that the first page sets before navigating.
public ArticleContentPage()
{
    ...
}

public Article Article { get; set; }
Switching back to the first page (ArticlesPage.cs), you need a way to know when the user selected an article. The ListView defines an ItemSelected event, which will be registering to.
public ArticlesView()
{
  Title = "Sitepoint: Mobile";
  var listView = new ListView();
  ...
  listView.ItemSelected += ListView_ItemSelected;
  Content = listView;
}

private void ListView_ItemSelected(object sender, SelectedItemChangedEventArgs e)
{
  // Check that there is a selected item
  if (e.SelectedItem == null) return;

  // Set the item as the article to display in the next page
  var page = new ArticleContentPage {Article = e.SelectedItem as Article};
  Navigation.PushAsync(page, true);

  // Clear the selected item in the list
  var listView = sender as ListView;
  listView.SelectedItem = null;
}
The event handler has 2 parts, the first handles the navigation itself. The second clears the current selection, so when the user navigates back to the list, the list doesn’t contain any item selected and it can be selected again if the user chooses. A side effect of this is that the event handler be called again, this time with a nullified SelectedItem. Protection against this case is added at the start of the method.
To navigate, each Page has access to the Navigation property helper that implements modal and non-modal navigation.
Platform Specific Navigation
Navigation is one of those areas where creating an abstraction layer on top of the supported platforms proves to be a difficult task.
A caveat is that non-modal Navigation on iOS requires NavigationPage to exist while both Android and Windows do not.
The final piece of the puzzle is to handle the navigation on ArticleContentPage.cs and render the article. Each page provides methods that can be overridden to handle when the page has appeared or disappeared.
protected override void OnAppearing()
{
base.OnAppearing();
Title = Article.Title;
_webView.Source = new UrlWebViewSource {
Url = Article.ArticleUrl
};
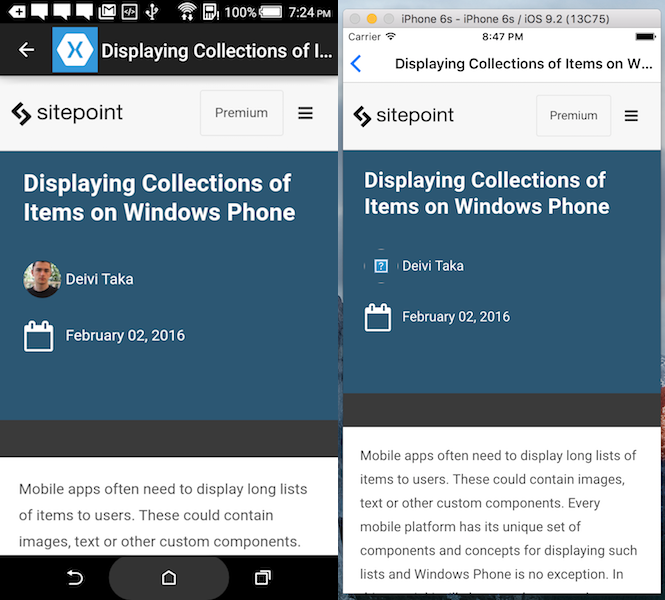
}In this case, access the WebView instance and set its’ source to the Article’s URL. This is enough for the WebView to start rendering:
With these final steps you have a useful application that works on all supported platforms, without needing to write any platform specific code.
Wrapping Up
Over the course of this tutorial, I covered the context and merit of using the solutions that Xamarin provides for building cross-platform applications and how Xamarin Forms further increases the abstraction layer that the platform specific Xamarin solutions.
I also explained how to setup a developer environment and building a real-world Xamarin Forms applications.
Thank you for your time, I hope you enjoyed this tutorial and found it useful. Please add your comments and questions below.
Frequently Asked Questions about Building Cross-Platform Android and iOS UIs with Xamarin.Forms
What are the prerequisites for building cross-platform UIs with Xamarin.Forms?
To start building cross-platform UIs with Xamarin.Forms, you need to have a basic understanding of C# programming language. Additionally, you should have Visual Studio installed on your computer. Visual Studio is a powerful IDE that supports Xamarin.Forms development. It’s available for both Windows and Mac. You also need to install Xamarin.Forms within Visual Studio, which can be done through the Visual Studio Installer.
How can I create a new Xamarin.Forms project in Visual Studio?
To create a new Xamarin.Forms project in Visual Studio, go to File > New > Project. In the new project dialog box, select Mobile App (Xamarin.Forms) under the C# category, then name your project and click OK. In the next dialog box, select the platforms you want to target and the template you want to use, then click OK.
How can I design the UI in Xamarin.Forms?
Xamarin.Forms uses XAML for UI design. XAML is a markup language that allows you to build UIs using XML. In Xamarin.Forms, you can create a XAML file for each page in your app, and define the layout and controls for that page in the XAML file. You can also use the Xamarin.Forms Previewer in Visual Studio to preview your UI while you’re designing it.
How can I handle user interaction in Xamarin.Forms?
Xamarin.Forms provides a variety of controls that can handle user interaction, such as buttons, sliders, and switches. You can handle user interaction by attaching event handlers to these controls. For example, you can attach a Clicked event handler to a button, and write code in the event handler to perform an action when the button is clicked.
How can I use data binding in Xamarin.Forms?
Data binding is a technique that allows you to link your UI to your data. In Xamarin.Forms, you can use data binding to bind a control to a property of a model class. For example, you can bind a Label’s Text property to a model’s Name property, and the label will automatically display the name of the model.
How can I navigate between pages in Xamarin.Forms?
Xamarin.Forms provides a navigation system that allows you to navigate between pages. You can use the NavigationPage class to create a navigation stack, and use the PushAsync method to navigate to a new page, and the PopAsync method to navigate back to the previous page.
How can I use styles in Xamarin.Forms?
Styles in Xamarin.Forms allow you to define the look and feel of your UI in a reusable way. You can define a style in your XAML file, and apply it to multiple controls. A style can define properties such as background color, font size, and margin.
How can I use custom renderers in Xamarin.Forms?
Custom renderers allow you to customize the appearance and behavior of Xamarin.Forms controls. To create a custom renderer, you need to create a class that inherits from the Renderer class, and override the OnElementChanged method to customize the control.
How can I use plugins in Xamarin.Forms?
Plugins in Xamarin.Forms allow you to add functionality to your app, such as accessing the camera, geolocation, and local storage. You can install plugins through NuGet, and use them in your code.
How can I test my Xamarin.Forms app?
Xamarin.Forms supports unit testing and UI testing. You can write unit tests in C# using a testing framework such as NUnit, and run them in Visual Studio. For UI testing, you can use Xamarin.UITest to write automated tests that interact with your app’s UI.