
In part 1, we covered basic installation and usage of Coinbase’s Bitcoin PHP API and the accompanying SDK. In this second and final part, we’ll be building our sample application.
Key Takeaways
- The Coinbase API allows for simple sending and receiving of Bitcoin (BTC) using PHP, with methods such as sendMoney() and requestMoney().
- Transaction status can be verified using the $response->transaction->status property, and the transaction id can be retrieved using $response->transaction->id.
- The API system is frequently updated, but the PHP package may not always be updated with all the wrapper methods around the API. If you need something “special” you can use the get, post, put and delete methods to deal with the API directly.
- A simple demo application can be created using the Coinbase API to emulate a real-world situation, such as creating a donation page for a non-profit organization. The application includes a welcome page, payment page, thanks page, and cancel page.
Send and Receive Bitcoins
Sending or receiving BTC with the Coinbase API is really simple. There are a couple of intuitive methods you can easily guess: sendMoney() and requestMoney().
Here’s the first one:
public function sendMoney($to, $amount, $notes=null, $userFee=null, $amountCurrency=null)
The first parameter is “who” will receive the money. The second one is the amount that you want to send. Transaction notes will be available only to recipients that also have a Coinbase account. Otherwise, the BTC network doesn’t support it.
Let’s take a look at an example:
$response = $coinbase->sendMoney($receiverAddress, "2");
If you want to verify your transaction status, use the $response->transaction->status property.
echo $response->transaction->status;
You can also verify the result:
	if($response->success)

	{

		echo 'Done.';

	}
If you want to get the transaction id, just use $response->transaction->id.
Now let’s take a look at how you can request BTC. The method you will have to use is requestMoney() and this is its syntax.
$response = $coinbase->requestMoney($emailAddress, 10, "Maintenance Operation (10 BTC)");
The mechanism, this time, is a little bit different. Coinbase will use the specified mail address as a first parameter to send a message in which Coinbase itself will explain to our BTC sender what to do and how to do it.
Here’s how to check the transaction status:
	echo $response->transaction->request ? 'true' : 'false';

	// 'true'

	echo $response->transaction->id;

	// 'request_transaction_id'
You can also use some methods to cancel or resend the same request, if you have some issues. As a key, you will have to use the previously obtained transaction key.
	$response = $coinbase->resendRequest('request_transaction_id');

	echo $response->success ? 'true' : 'false';

	// 'true'
	$response = $coinbase->cancelRequest('request_transaction_id');

	echo $response->success ? 'true' : 'false';

	// 'true'
After you’ve made sure the procedure is completed, you will have to call the completeRequest() method.
Like this:
	$response = $coinbase->completeRequest('501a3554f8182b2754000003');

	echo $response->success ? 'true' : 'false';
And that’s all!
Other Methods
The API system is frequently updated, but the PHP package could be not updated with all the wrapper methods around the API. If you need something “special” you can use the get, post, put and delete methods to deal with the API directly.
	var_dump($coinbase->get('/account/balance'));
	// object(stdClass)#4 (2) {

	//   ["amount"]=>

	//   string(10) "0.56902981"

	//   ["currency"]=>

	//   string(3) "BTC"

	// }
In this specific example we used /account/balance, but the same principle is applied to every other API method. After the first parameter, the metod name, you can specify an array of options, if you need any.
We are done with the basics. Now that we know the tools of the trade, what about trying to make a really simple application to deal with a payment?
First Application with the Coinbase API
It’s time to create a simple first real application, emulating a real world situation. Let’s assume we have a friend who owns a small non-profit organization. A really important cause: he decided to dedicate his life to defending the rights of sentient robots.
Ok, they don’t exist yet, but the sooner you start, the sooner you finish!
He stumbled across this BTC thing and he wants to enable donations with this new cryptocurrency.
No problem!
All we have to do is to create four simple pages:
- Welcome Page: where the user will insert the amount of the donation in BTC;
- Payment Page: where we will create a button using the PHP SDK;
- Thanks Page: a confirmation page to show when the donation is completed;
- Cancel Page: an error page to show in case of errors during the process;
Install the SDK as demonstrated in Part 1. After composer update you will be ready to go.
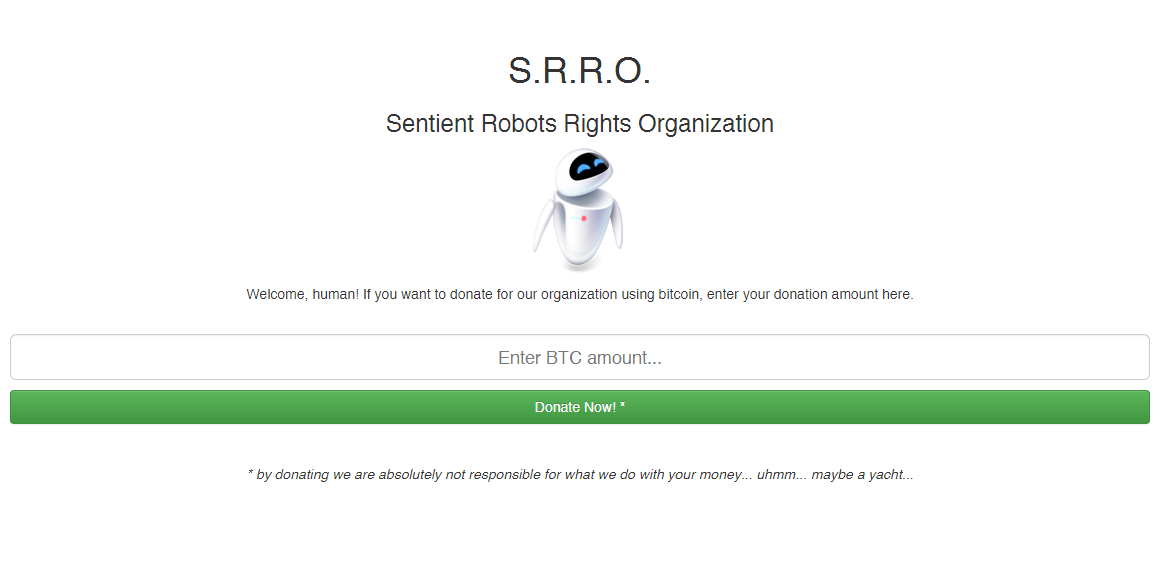
Now, let’s start with the Welcome Page. Create an index.php file that will contain the following code.
	<!DOCTYPE html>

	<html>

		<head>

			<!-- Latest compiled and minified CSS -->

			<link rel="stylesheet" href="https://maxcdn.bootstrapcdn.com/bootstrap/3.2.0/css/bootstrap.min.css">
			<!-- Optional theme -->

			<link rel="stylesheet" href="https://maxcdn.bootstrapcdn.com/bootstrap/3.2.0/css/bootstrap-theme.min.css">
			<!-- Latest compiled and minified JavaScript -->

			<script src="https://maxcdn.bootstrapcdn.com/bootstrap/3.2.0/js/bootstrap.min.js"></script>
			<title>Welcome! - The Sentient Robots Rights Organization</title>

		</head>

		<body>

			<div class="container">
		      <div class="starter-template" style="text-align:center; padding-top:50px;">

		        <h1>S.R.R.O.</h1>

		        <h3>Sentient Robots Rights Organization</h3>
		        <p><img src="logo.png" /></p>
		        <p>Welcome, human! If you want to donate for our organization using bitcoin, enter your donation amount here.</p>
		        <br/>
		        <form action="payment.php" method="post">

		        	<p><input type="text" class="form-control input-lg" placeholder="Enter BTC amount..." style="text-align:center;" name="amount" autofocus /></p>

		        	<p><button class="form-control btn-success">Donate Now! *</button></p>

		        </form>
		        <p> </p>
		        <p><i>* by donating we are absolutely not responsible for what we do with your money... uhmm... maybe a yacht...</i></p>

		      </div>
		    </div><!-- /.container -->

		</body>

	</html>
Note: as you can easily imagine, I used Bootstrap via CDN to setup a structure and some style quickly for our pages. Don’t mind the lack of a framework or the mixing of views with logic, this is just a demo.
Nothing special: we just created a form with an input field and a button to send that form data. On submit, data will be sent to the payment.php page. Here we go to the next step: payment.php.
	<?php require('includes/coinbase.inc.php'); ?>
	<!DOCTYPE html>

	<html>

		<head>

			<!-- Latest compiled and minified CSS -->

			<link rel="stylesheet" href="https://maxcdn.bootstrapcdn.com/bootstrap/3.2.0/css/bootstrap.min.css">
			<!-- Optional theme -->

			<link rel="stylesheet" href="https://maxcdn.bootstrapcdn.com/bootstrap/3.2.0/css/bootstrap-theme.min.css">
			<!-- Latest compiled and minified JavaScript -->

			<script src="https://maxcdn.bootstrapcdn.com/bootstrap/3.2.0/js/bootstrap.min.js"></script>
			<title>Payment - The Sentient Robots Rights Organization</title>

		</head>

		<body>

			<div class="container">
		      <div class="starter-template" style="text-align:center; padding-top:50px;">

		        <h1>S.R.R.O.</h1>

		        <h3>Sentient Robots Rights Organization</h3>
		        <p><img src="logo.png" /></p>
		        <p>It's time to pay. You decided to donate...</p>
		        <p style="font-size:32px;"><b><?php echo $_POST['amount']; ?> BTC</b></p>
		        <hr/>
		        <?php echo $button->embedHtml; ?>
		        <p> </p>

		      </div>
		    </div><!-- /.container -->

		</body>

	</html>
What we have here? $_POST['amount'] is the donation amount that we have chosen in the previous screen. Then we also have $button->embedHTML.
Wait, wait. Where is this button located?
You got it: in the other file that is included here, includes/coinbase.php. Let’s create the folder and the file. This is what are we going to put in it.
	<?php
		require('vendor/autoload.php');
		$coinbaseAPIKey = 'MY_COINBASE_API_KEY';

		$coinbaseAPISecret = 'MY_COINBASE_API_SECRET';
		$coinbase = Coinbase::withApiKey($coinbaseAPIKey, $coinbaseAPISecret);
		if(!isset($_POST['amount']))

			header('Location: index.php');
		if (!preg_match('/^[0-9]+(?:\.[0-9]+)?$/', $_POST['amount']))

			header('Location: index.php');
		$button = $coinbase->createButton(

			"Your Donation to S.R.R.O.",

			$_POST['amount'],

			"BTC",

			"",

			array(

	        	"description" => "My " . $_POST['amount'] . " BTC donation to S.S.R.O.",

	        	"cancel_url" => "http://localhost/coinbase/cancel.php",

	        	"success_url" => "http://localhost/coinbase/thanks.php"

	    	)

	    );
The first required is used to load the SDK. Further instructions are used to, respectively:
- declare the
$coinbaseAPIKeyvariable; - declare the
$coinbaseAPISecretvariable; - create the
$coinbaseobject that we are going to use to generate our payment button;
After that, a little bit of validation. Just to stay on the safe side.
Note: this is an article about Coinbase API, so we will not go deeper into validation. In a real world situation things would be different and we can use many tools and techniques to create better (and safer) code.
The final step is the button creation, using the createButton method. I left the fourth parameter blank because, in this specific case, I didn’t need a tracking code for my order. However, rembember that this is the parameter you have to use if you need it.
Now that we have the button we can echo its code in the payment.php page.
Note: before you create buttons, fill your merchant profile on the Coinbase website. It is a necessary step. If you don’t do it, you will be blocked with a fatal error.
Now that we have everything, we just have to set up our thanks.php and cancel.php pages. Here they are.
This is thanks.php:
	<!DOCTYPE html>

	<html>

		<head>

			<!-- Latest compiled and minified CSS -->

			<link rel="stylesheet" href="https://maxcdn.bootstrapcdn.com/bootstrap/3.2.0/css/bootstrap.min.css">
			<!-- Optional theme -->

			<link rel="stylesheet" href="https://maxcdn.bootstrapcdn.com/bootstrap/3.2.0/css/bootstrap-theme.min.css">
			<!-- Latest compiled and minified JavaScript -->

			<script src="https://maxcdn.bootstrapcdn.com/bootstrap/3.2.0/js/bootstrap.min.js"></script>
			<title>Thank you! - The Sentient Robots Rights Organization</title>

		</head>

		<body>

			<div class="container">
		      <div class="starter-template" style="text-align:center; padding-top:50px;">

		        <h1>S.R.R.O.</h1>

		        <h3>Sentient Robots Rights Organization</h3>
		        <p><img src="logo.png" /></p>
		        <p> </p>
		        <p><b>Thank you!</b></p>
		        <p>Hey, thank you for your donation! World is a better place now. Visit our site again in the future to follow our updates.</p>

		        <p>Now <a href="index.php">go to index page and make another donation</a>.</p>

		      </div>
		    </div><!-- /.container -->

		</body>

	</html>
… and this is cancel.php:
	<!DOCTYPE html>

	<html>

		<head>

			<!-- Latest compiled and minified CSS -->

			<link rel="stylesheet" href="https://maxcdn.bootstrapcdn.com/bootstrap/3.2.0/css/bootstrap.min.css">
			<!-- Optional theme -->

			<link rel="stylesheet" href="https://maxcdn.bootstrapcdn.com/bootstrap/3.2.0/css/bootstrap-theme.min.css">
			<!-- Latest compiled and minified JavaScript -->

			<script src="https://maxcdn.bootstrapcdn.com/bootstrap/3.2.0/js/bootstrap.min.js"></script>
			<title>Donation Cancelled - The Sentient Robots Rights Organization</title>

		</head>

		<body>

			<div class="container">
		      <div class="starter-template" style="text-align:center; padding-top:50px;">

		        <h1>S.R.R.O.</h1>

		        <h3>Sentient Robots Rights Organization</h3>
		        <p><img src="logo.png" /></p>
		        <p> </p>
		        <p>It seems something went wrong with your donation. <a href="index.php">Try again</a>...</p>

		      </div>
		    </div><!-- /.container -->

		</body>

	</html>
Done! Now we are absolutely ready to start accepting donations for our robot friends.
Note: this is quite a simple demo project and its full code is available on Github.
Conclusion
We made it to the end of this series. The Coinbase API is pleasing to work with and easy to implement. The PHP SDK is also frequently updated, which shows us they care about stability and community.
Any feedback? Wishes for more in-depth coverage? Let us know in the comments below!
Frequently Asked Questions (FAQs) about Bitcoin PHP and Coinbase’s API Demo App
How can I get started with Bitcoin PHP and Coinbase’s API Demo App?
To get started with Bitcoin PHP and Coinbase’s API Demo App, you first need to have a basic understanding of PHP and Bitcoin. You will also need to set up a Coinbase account and generate an API key. Once you have these, you can download the Coinbase PHP library and start building your application. The library provides a simple way to integrate Bitcoin payments into your PHP application, allowing you to create, send and receive transactions, as well as perform other operations related to Bitcoin.
What are the prerequisites for using the Coinbase PHP library?
Before you can use the Coinbase PHP library, you need to have PHP 5.3 or later installed on your server. You also need to have the cURL extension enabled, as the library uses it to make HTTP requests. Additionally, you need to have a Coinbase account and an API key, which you can generate from your account settings.
How secure is the Coinbase PHP library?
The Coinbase PHP library uses OAuth2 for authentication, which is a secure protocol for authorizing access to web applications. It also uses HTTPS for all communication with the Coinbase servers, ensuring that your data is encrypted and secure. However, as with any online service, it’s important to follow best practices for security, such as using strong passwords and keeping your API key secret.
Can I use the Coinbase PHP library to create a Bitcoin wallet?
Yes, you can use the Coinbase PHP library to create a Bitcoin wallet. The library provides methods for creating and managing wallets, as well as for sending and receiving Bitcoin. You can also use it to check the balance of a wallet, get the transaction history, and perform other wallet-related operations.
How can I handle errors with the Coinbase PHP library?
The Coinbase PHP library throws exceptions when it encounters an error, such as a network error or an invalid API key. You can catch these exceptions in your code and handle them appropriately. The library also provides a way to log errors for debugging purposes.
Can I use the Coinbase PHP library with other cryptocurrencies?
The Coinbase PHP library primarily supports Bitcoin, but it also provides limited support for other cryptocurrencies that are available on Coinbase, such as Ethereum and Litecoin. However, the functionality for these other cryptocurrencies may not be as extensive as for Bitcoin.
How can I test my code that uses the Coinbase PHP library?
The Coinbase PHP library includes a sandbox mode, which you can use for testing. In sandbox mode, the library interacts with a simulated version of the Coinbase API, allowing you to test your code without making real transactions or affecting your actual Coinbase account.
How can I contribute to the development of the Coinbase PHP library?
The Coinbase PHP library is open source, so you can contribute to its development by submitting pull requests on GitHub. You can also report bugs, suggest new features, or help improve the documentation.
Can I use the Coinbase PHP library in a commercial project?
Yes, you can use the Coinbase PHP library in a commercial project. The library is licensed under the Apache License 2.0, which allows for commercial use. However, you must comply with the terms of the license, which include providing attribution and including a copy of the license in your project.
Where can I get help if I have problems with the Coinbase PHP library?
If you have problems with the Coinbase PHP library, you can get help by posting a question on Stack Overflow with the ‘coinbase-php’ tag. You can also check the issues on the library’s GitHub page to see if someone else has had the same problem and if there’s a solution available.