

Are you looking for an introduction to WordPress plugin development that will discuss all of the important steps and hold your hand along the way? If so, you’re in luck. This tutorial will outline the basics of what you need to know about designing your own plugins and some pointers on best practices.

Key Takeaways
- Plugins are modular tools in WordPress that enhance or add new functionality to your site, operating independently from themes using hooks, filters, shortcodes, and widgets.
- Understanding core concepts such as actions (hooks) and filters is crucial as they allow developers to modify or add functionality at specific points in the WordPress core operations.
- Shortcodes offer a straightforward method for embedding custom plugin code within posts and pages, enabling site admins to manage complex features with simple code snippets.
- Widgets extend plugin functionality into theme widget areas, providing a user-friendly interface for displaying information or features on the site.
- Object-Oriented Design (OOD) is recommended for plugin development to encapsulate related functions and data effectively, making code more robust and manageable.
What Are WordPress Plugins?
Plugins are one of WordPress’ most powerful assets. In essence, plugins are modules you activate on your website to provide a series of features or elements.
The functionality you can add to your website depends on what each specific plugin has been created to do. There are a wide selection of plugins, ranging from simple plugins (such as ones that add styling or small theme changes) all the way to extensive plugins (that provide significant changes such as eCommerce integrations or third party connections).
Plugins are different from your theme and work independently, using hooks, filters, shortcode, widgets and custom code to perform their functionality.
Strengths, Weaknesses & Considerations
Plugins are great, they provide both developers and admins with a way to extend and re-use functionality. While they are a great tool they do still have both their strengths and weaknesses.
Strengths
- You can add plugins with almost any theme and expect it to work correctly. Plugins were created to be modular so that you can copy into a new project (or distribute) which is great.
- A plugin acts as a container for all of your code and elements. If you were to build similar functionality in the theme you might get the elements mixed up. With a plugin, everything that needs to function exists within a single package.
- They are easy to make and can take advantage of WordPress’s action and filter hooks.
- Can be created easily in an Object Orientated fashion, creating more robust and manageable code.
Weaknesses
- Limited access to the website’s theme. Plugins can’t output code directly into a location on a theme. A theme has to provide an area for your plugin to output such as the content area or via a widget area.
- Plugin conflicts do occur. Sometimes another plugin (or even the theme) will negatively affect your plugin and it can ruin the experience (for example, you could be using the WordPress media uploader and it has been altered and not longer functions as expected, ruining your plugin).
- Limited access to templates and design. Plugins are supposed to provide the functionality and the theme provides the styling.
Core Concepts – Actions, Filters, Shortcodes, Widgets and More
Let’s take a moment to talk about some key aspects of plugin development.
You might be familiar with these areas if you have worked on WordPress themes, however, a solid understanding of how these concepts work will help you build easy to use and maintainable functionality.
Actions (Hooks)
An action hook is an activity that is performed by WordPress at a specific time. When this action is triggered it will find all functions that have been attached to this action and execute them in the correct order.
WordPress has dozens of actions defined throughout its core functionality, each action consisting of a unique name. For example, when WordPress is saving a post (such as a post, page or other content type) it will call the action save_postwhich will look for any functions attached to this action.
All actions are defined using the do_action() function. This function takes in the following parameters
$tag(required)$args(optional one or more variables)
Overall, each action will have its name (its tag) and also an optional number of additional useful variables (there could be multiple or zero additional variables)
A Simple WordPress Action
Let’s consider the save_post action hook. This action takes in four values. The first value is the name of the action, while the other three are additional variables that can be accessed (containing the id of the post, the post object itself and also if the posts exists and is being updated)
//the save_post action hook
do_action(`save_post`, $post_ID, $post, $update);
You can hook onto this action so that when a post is saved you can do something else, such as send and email or update the database.
Creating Your Own Actions
While WordPress comes with plenty of actions you can define your own. Creating your own actions will give you an easy way to call your functionality at set points throughout your theme or plugin.
Let’s use the do_action function to create our new action. We will be creating an action that will be called straight after the title on single pages.
//create a new action to be used after our page title
do_action('page_subtitle', $post);
When a single page is displayed it will show the title as normal and then afterwards it will hit our page_subtitle action. WordPress will check for any functions hooked to this action and execute them (it will pass in the global $post variable so the function knows what page it is supposed to show the subtitle for).
Executing Your Functions by Calling Your Action
To call a specific function when an action is taking place, you need to use add_action() to attach your function. add_action takes then following parameters.
$hook(required)$function_to_add(required)$priority(optional)$accepted_args(optional, but required when the action has more than one passed variables)
Using the Mandatory Arguments
You can call the add_action function by supplying the mandatory values of the hook name and the function to call. This is the easiest way to call your actions.
//when 'save_post' is triggered, call our saving function
add_action('save_post','save_my_custom_post');
//defines our function that will handle our saving
function save_my_custom_post($post_id){
    //you will do your saving here
}
As you can see, when the save_post action occurs we attach our save_my_custom_post function to it, giving us access to do something after we save.
Using All of the Arguments (Understanding the Priority and accepted_args Values)
Sometimes using the mandatory values wont be enough. You may have to manually set the $priority and $accepted_args values to make your action work.
The priority of the action determines the order in which functions will be executed. By default actions will use the value of 10 for its priority. You can set this value either higher or lower to make your function execute earlier or later. This is useful when your theme or plugins are also using the same action hook (so you can specify when your function should run).
The accepted_args refer to how many variables are being passed in the add_action call. The default number of arguments that an action accepts will be one. However, if your action takes in multiple variables you have to tell WordPress how many it is taking. Let’s look at the save_post action.
//the save post action, defined in WordPress
do_action( 'save_post', $post_ID, $post, $update );

//add our function onto the 'save_post' hook, supplying priority and args
add_action('save_post','save_my_page_extended,10,3);

//function executed on save (we want all three variables)
function save_my_page_extended($post_ID, $post, $update){
    //access all of our variables to do some work
}
The save_post action has multiple variables that can be passed to it, as such we have to set its priority and also the number of variables it will be passing. Once we have told WordPress we will be accepting multiple variables, we can add these into our function and we will be able to access them.
Summary of Actions
Overall, you will use the do_action function inside of your theme or plugin to execute code at a set location (setting the values that will be available to any hooked function). You will then use the add_action function to hook on your specific function. You can call your action with just the bare minimum (the name of the action and the function you want to call), or you can also supply the priority and number of variables that will be passed,
Filters (Hooks)
A WordPress filter is a hook that accepts a variable (or series of variables) and returns them back after they have been modified. These filters are often used so that you have a way to manipulate default information.
WordPress comes bundled with dozens of these filters and they are created using the apply_filters() function. This function takes in the following arguments
$tag(required)$value(required)$var(optional)
The $tag variable is the name of the filter.
The $value is the variable or value that will be filtered.
The $var variable is optional but allows you to pass extra values into your function.
Plugins and themes often create these filters so that you can change elements without having to modify the source itself (making them extensible). These filters are often defined inside functions.
A Simple WordPress Filter
The get_the_excerpt filter is a filter that you can use inside the posts loop to access the excerpt.
This filter is defined as part of WordPress’s core and only defines the name of the filter and the function to call, it doesn’t define any optional arguments.
//get the except for a post, as defined in /wp-includes/post-template.php
echo apply_filters( 'the_excerpt', get_the_excerpt() );
You could attach your own function to the the_excerpt filter and then manipulate the excerpt before you return it (for example, you could wrap it inside a container, change its content or trim its length).
Creating Your Own Filters
Let’s look at an example. If we are creating an array of names in a plugin we can make it filterable by using the apply_filters hook to tell WordPress that these values can be changed by any function that hooks onto them.
//make our name value array filterable
$name_values = apply_filters('filter_name_array_values',
            array('Joanna','Peter')
);
Creating a filter like this will let other developers (or yourself) change these values in a dynamic way. Generally, if you are inside a function or doing some sort of functionality it is good practice to offer filters to make your elements extensible.
Executing Your Filters
When you want to execute your filter you will need to use the add_filter() function. This function takes the following values
$tag(required)$function_to_add(required)$priority(optional)$accepted_args(optional but mandatory if we have multiple passed arguments)
The add_filter function works in a similar way to add_action. You define the name of the filter you want to call, along with the function that will be called and you’re good to go. Let’s look at how we can use this to filter the list of names we created in our previous example.
//Change the saved name values by filtering them
function add_new_names($names){
    $names[] = 'Simon';
    return $names;
}
add_filter('filter_name_array_values','add_new_names');
As you can see we are attaching our add_new_names function onto our filter_name_array_values filter and taking in a single variable of $names. When we defined our filter before with apply_filters we set the default values to be an array with the values of Joanna and Peter.
Our function here will take the existing values (which we have called $names here for simplicity) and added a new value onto the end of it called Simon.
At the very end we return the values. Returning the values is very very important, if you don’t you will break everything. The reason the values must be returned is because any additional function also attached to that filter will receive these values. If you don’t return them they will have nothing to use.
Summary of Filters
You will use the apply_filters function to create your filters inside your theme or plugin (supplying the values you wish to filter). You will then use the add_filter function to hook your specific function onto this filter, allowing you to manipulate the filtered variable and return it).
Shortcodes
For a more comprehensive article on shortcodes you can read or view the shortcode API on the WordPress Codex or read my previous article on Custom WordPress Shortcodes. The following will be a brief summary to get you up and running with shortcodes.
Since your plugin generally won’t have access to your theme files, you need a way to display your custom functionality to the end user while making it easy to customize by your site admin.
Shortcodes are perfect way to do this as they allow developers to create complex functionality that can be modified with simple values and attributes. These shortcodes are added to the visual editor (or other locations) and when viewed by your users they execute your code.
A shortcode in the editor:
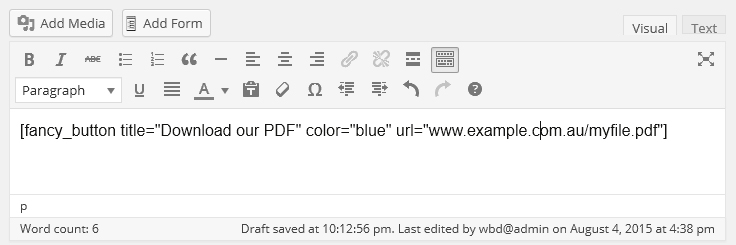
A shortcode when processed and displayed on the front end:

A Quick Lesson on Shortcodes
You will need to create your shortcode using the add_shortcode() function. This function will take in the first variable as the name of your shortcode and the second being the output_function.
The output_function will itself take three values; attributes, content and name. Inside of this function you will build your shortcode and return it for display.
The parameters of the function will be looked at in further detail in our example, right now it’s fine to just ignore them.
Let’s look at a simple example:
//Add our shortcode
add_shortcode('test_shortcode','my_shortcode_output');
//perform the shortcode output
function my_shortcode_output($atts, $content = '', $tag){
    $html = '';
    $html .= '<p>Hello World</p>';
    return $html;
}
Now when we add the shortcode [test_shortcode] to the editor it will run our function and convert the results to <p>Hello World</p>
Widgets
If you are looking at learning more about widgets you should start with the WordPress Widget API codex page. This page outlines the majority of what you need plus it provides a documented working example.
Widgets are important because they give you another means of executing your plugins code while providing an easy to use interface.
A sample shortcode with configuration options.
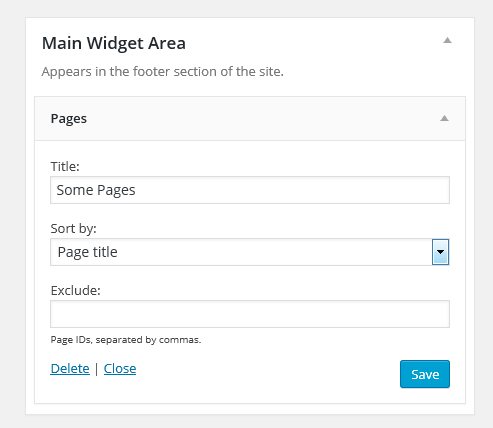
Since most themes will support one or more sidebars; adding your own widgets will give you quick access to display your information inside the theme.
Widgets are more complex than shortcodes but follow the same principals – defining some options for its output and then displaying it on the front-end.
A Brief Intro to Widgets
To create a widget you need to extend the WP_Widget class. WordPress has created an object orientated approach to widgets and they exists as a class; this class needs to be extended to provide your functionality.
Let’s look at a basic widget example:
//class for our widget
class my_widget extends WP_widget{
    //constructor (sets basic elements for the widget)
    public function __construct(){
        parent::__construct(
            'my_widget', // Base ID
            'My Widget', // Name
            array( 'description' => 'An awesome widget') // Args
        );
        add_action('widgets_init',array($this,'register_widget'));
    }
    //handles front end display
    public function widget($args,$instance ){
        echo $args['before_widget'];
        echo $instance['title'];
        echo $args['after_widget'];
    }
    //handles back end widget display
    public function form($instance){
        $title = (isset($instance['title']) ? $instance['title'] : '');
        echo '<input type="text" id="' . $this->get_field_id('title') . '" name="' . $this->get_field_name('title') . '" value="' . $title  . '"/>';
    }
    //handles saving
    public function save($new_instance, $old_instance){
        $instance = array();
        $title = $new_instance['title'];
        return $instance;
    }
    //registers the widget with WordPress
    public function register_widget(){
        register_widget('my_widget');
    }
}
$my_widget = new my_widget;
This will produce a basic widget in which you can save a text value and display it to the front end, as you can see the output is pretty boring.

In the upcoming real world example we will look into widgets in more depth.
Classes (Object Orientated Design)
Object Orientated Design (OOD) is a different development technique in which you build your functionality around the concept of classes.
Classes are a way to store related functions and values inside of a single entity, giving you a single location for your development. The overall purpose of object orientated design is create an object that performs your functionality.
Plugins are a perfect candidate for object orientated design as they are separate modules created to perform a task on your website. Your plugin will generally contain its own CSS and JavaScript files along with potentially images and additional PHP files, so developing using object orientated design will make your development easier.
Our upcoming real world example will be entirely object orientated. If you are interested in reading more you could have a read of my article Object Orientated Development with WordPress.
Next Steps
This article has introduced you to many of the core concepts needed for WordPress plugin development. In the next article, we’ll take a detailed look at the code of a real world example.
Frequently Asked Questions on WordPress Plugin Development
What are the prerequisites for developing a WordPress plugin?
Before you start developing a WordPress plugin, you need to have a basic understanding of PHP, HTML, CSS, and JavaScript. PHP is the backbone of WordPress and is used extensively in plugin development. HTML, CSS, and JavaScript are used for creating the user interface of your plugin. Additionally, you should also have a local development environment set up on your computer. This will allow you to test your plugin without affecting your live website.
How do I create a basic WordPress plugin?
Creating a basic WordPress plugin involves creating a new directory in your WordPress installation’s plugins directory, creating a PHP file within this new directory, and adding a header comment to this PHP file. The header comment is important as it tells WordPress that a plugin exists here. Once you’ve done this, you can activate your plugin from the WordPress admin dashboard.
How can I add functionality to my WordPress plugin?
You can add functionality to your WordPress plugin by writing PHP functions and hooking them into WordPress’s action and filter hooks. Action hooks allow you to add or modify functionality at specific points in the WordPress lifecycle, while filter hooks allow you to modify data before it is sent to the database or the browser.
How do I create a settings page for my WordPress plugin?
Creating a settings page for your WordPress plugin involves registering a settings page using the add_menu_page or add_submenu_page function, registering settings using the register_setting function, and creating a form that allows users to update these settings. Once you’ve done this, WordPress will automatically handle saving these settings for you.
How can I make my WordPress plugin compatible with different versions of WordPress?
Ensuring compatibility with different versions of WordPress involves testing your plugin with different versions of WordPress, using WordPress’s backward compatibility features, and following WordPress’s coding standards and best practices. It’s also a good idea to keep up-to-date with changes in WordPress by following the WordPress development blog and participating in the WordPress community.
How can I debug my WordPress plugin?
Debugging a WordPress plugin involves using PHP’s error reporting features, using WordPress’s built-in debugging features, and using debugging tools like Xdebug. It’s also a good idea to write unit tests for your plugin using a testing framework like PHPUnit.
How can I make my WordPress plugin secure?
Making a WordPress plugin secure involves validating and sanitizing user input, escaping output, using nonces to protect against cross-site request forgery attacks, and following WordPress’s security best practices. It’s also a good idea to keep up-to-date with WordPress security news and to participate in the WordPress security community.
How can I internationalize my WordPress plugin?
Internationalizing a WordPress plugin involves using WordPress’s internationalization functions to make your plugin’s text strings translatable, generating a POT file using a tool like Poedit, and providing translations for different languages. Once you’ve done this, WordPress will automatically use the appropriate translation based on the user’s language settings.
How can I distribute my WordPress plugin?
Distributing a WordPress plugin involves submitting it to the WordPress plugin directory, selling it on a marketplace like CodeCanyon, or offering it for download on your own website. Before distributing your plugin, you should thoroughly test it, write comprehensive documentation, and provide support for your users.
How can I improve the performance of my WordPress plugin?
Improving the performance of a WordPress plugin involves optimizing your code, using WordPress’s caching features, and using a profiling tool like Xdebug to identify performance bottlenecks. It’s also a good idea to follow WordPress’s performance best practices and to keep up-to-date with the latest performance techniques and technologies.