


One part of working with the Internet of Things is the difficulty of connecting to devices in your home when you aren’t in your home network. I face this difficulty every week when travelling around — I need to run tests and build Internet of Things demos, yet I’m not home to do so! I decided to turn my Raspberry Pi into a VPN so I could connect to my home network remotely. Here’s how you can do the same thing using an OpenVPN installer called PiVPN.
You can run through the following tutorial using either the terminal on your Pi or using SSH to connect to your Raspberry Pi remotely. If you aren’t quite sure how to SSH into your Raspberry Pi, I have a short guide on how to SSH into a Raspberry Pi which might help! If you don’t have a static IP address set up on your Pi, I’d recommend working directly on your Pi (otherwise, it’s likely your IP addresses will change during the process to a static IP and kick you out of your SSH session!).
Key Takeaways
- Setting up a home VPN server with a Raspberry Pi allows remote access to home network devices, useful for IoT testing and demos when not at home.
- The process involves using an OpenVPN installer called PiVPN, which can be run through either the terminal on the Pi or remotely via SSH.
- The PiVPN installer sets up a static IP for the Pi, important for the VPN service to function properly. It also allows for the choice of running the VPN through an ethernet connection or Wi-Fi.
- The process also involves setting up a client for VPN access, which requires generating an .ovpn file for each client device. OpenVPN clients are available for various platforms.
- The security of the VPN setup is critical as it opens a port to the wider internet. It is recommended to turn on unattended upgrades, which will automatically update security packages. Regular monitoring for security vulnerabilities and strange network activity is also advised.
Starting the Install Process
To get started, we run the following command in our Pi’s terminal (either via SSH or directly on the Pi):
curl -L https://install.pivpn.io | bash
Important Note: This command parses a random script downloaded from the web directly into your Pi’s bash. That can be incredibly dangerous if you don’t trust the installation source, as it will run whatever code you give it straight away. I haven’t gone through and vetted their bash command line by line (I trust them!) but it is available to look through on their GitHub account (under install.sh within the auto_install folder) if you have any concerns.
Running that command will open a slightly nicer looking, text-based GUI that starts with a simple prompt:

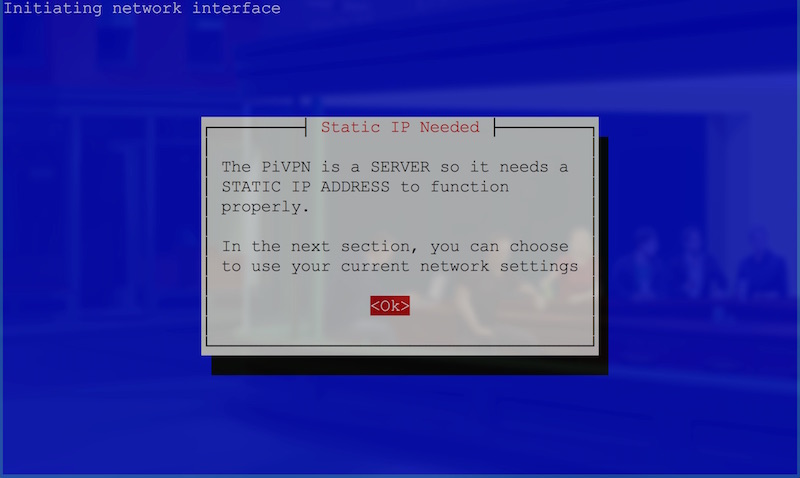
Once you’ve hit Enter, you’ll be taken to another screen which will point out that a static IP address is important for this VPN service to work: if you don’t have a static IP for your Pi, your router won’t have an IP address to forward VPN functionality to. Don’t have a static IP on your Pi? Don’t worry — the automated installer will set up a static IP for you soon.
Hit Enter to go to the next screen:

Be careful on this screen: hitting Enter will take you to the next screen, rather than making a selection in the two radio button options. I made this mistake during the install process, and it gets messy to restart the install process to change it!
In the interface selection, you can choose whether you’d like to set the VPN up on your ethernet connection (eth0) or your Wi-Fi (wlan0). I personally choose Wi-Fi as my Pi isn’t close to my router. If you can connect the Pi via ethernet, this will be much better for speeds! To choose an option, move your selection with the arrow keys and select it with the Spacebar. Then click Enter to go to the next screen.
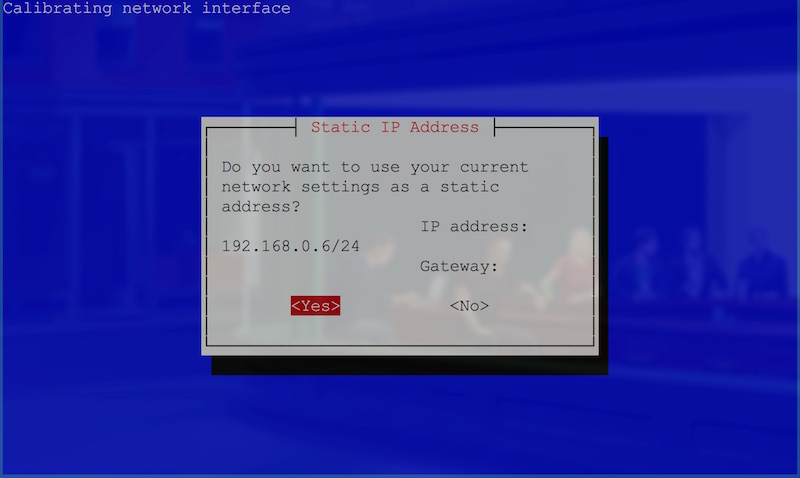
This screen confirms your current IP address for the Pi. I personally wanted to change my Pi’s IP to something more memorable, so I clicked the arrow key to move my selection to <No> and hit Spacebar to select it. I then hit Enter to go to the setup to change my Pi’s static IP.
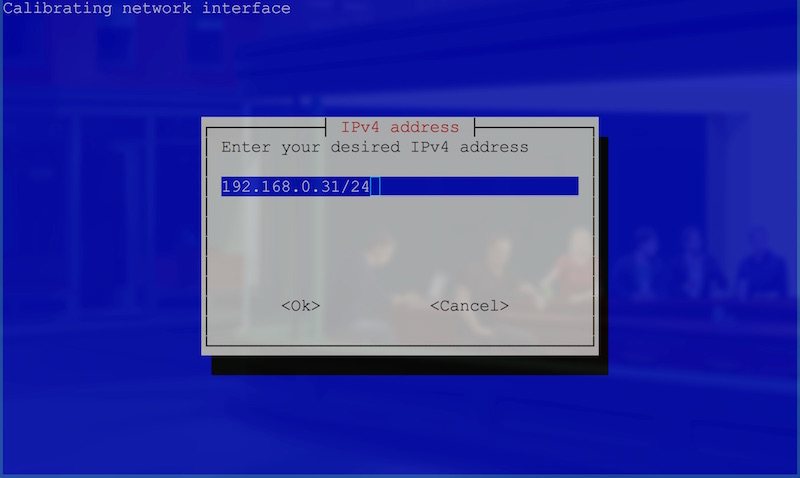
In this screen, you’ll enter in the static IP address you’d like your Pi to have. I chose 192.168.0.31. Once you’ve got the IP address you’d like, hit Enter.
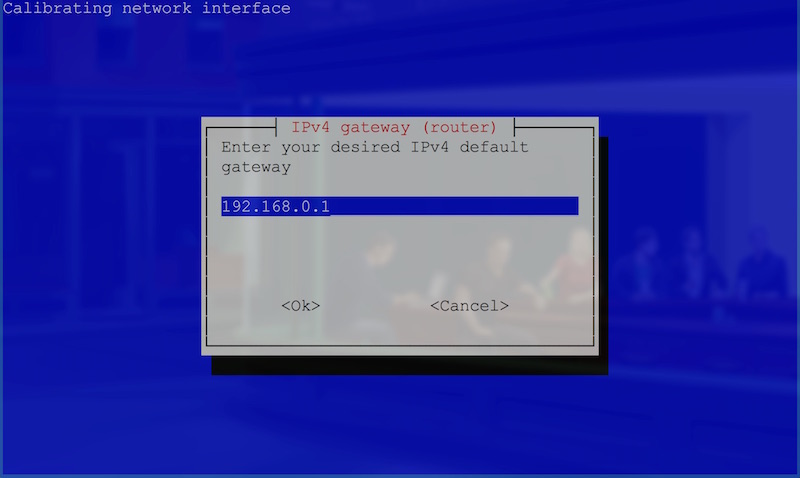
In this screen, you’ll need to enter in the IP address of your router or default gateway. This will depend on your network setup, but a lot of the time this will be 192.168.0.1. If you aren’t sure, try entering whatever IP address you enter to get to your router’s config page in your browser. Once you’ve got this entered in, hit the Enter key.

Hit Enter on this screen to confirm your IP address settings are correct. They should look similar to my ones above if your home network is set up to the defaults of most home networks. If not, chances are high that you already know your own settings.

The visual GUI style interface will then disappear and you’ll see in the terminal that your settings are confirmed in the text shown. Wait a bit as it performs these actions to set a static IP and so on. If you’ve SSHed in and just changed your IP address … chances are, this is where you’ll get stuck, because your connection will get dropped! If this happens to you, run through the process again, but connect to the static IP you set up this time around.
Once PiVPN’s network setting adjustments are done, it will bring you back to a nicer looking screen.

This screen above is just notifying us that we will soon choose our VPN’s local user. Hit Enter to begin and move to the next screen.

In this screen, if your Pi is set to defaults you’ll likely only have one option — the pi user. If that’s the case, hit Enter! If you’ve got a custom user set up and want to set things up through that, select that user via the arrow keys and hit Spacebar. Then once that user is selected, hit Enter.

This next screen is advising you of something that’s incredibly important to pay attention to! Setting up your Pi as a VPN means it will have a port open to the wider internet. This comes with serious responsibility: if security issues arise, your Pi is potentially open for anyone to access. Access to your Pi as a VPN means something incredibly dangerous depending on how your network is set up. It likely means access to your whole home network. For this reason, PiVPN recommends turning on unattended upgrades, which will automatically update security packages at the very least. It is important to note it is still your responsibility to watch for security vulnerabilities in the press and keep an eye out for strange activity on your network. You can set up most routers to show logs of connections and so on; keep an eye on these things and more.

So, for the unattended upgrades question, you’ll likely want to say yes — unless you know what you’re doing in terms of maintaining your Pi’s updates. Once you make that decision, the fancy UI screen will disappear.
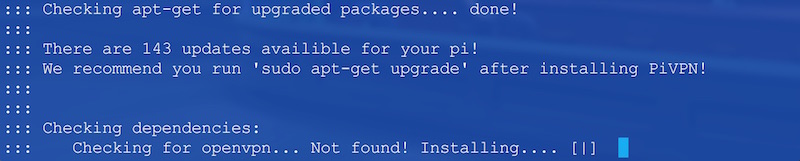
Here it’s checking for potential updates via apt-get. After this process, it will notify you if there are updates you should do after installation. In my case, it found 143 updates on my rather old and upgraded Pi! After this whole process of getting the VPN running, run sudo apt-get upgrade to ensure your Pi is secure in the immediate future.
It then also checks if OpenVPN is installed on your Pi. If not, it begins that process! That should bring up the following screen:
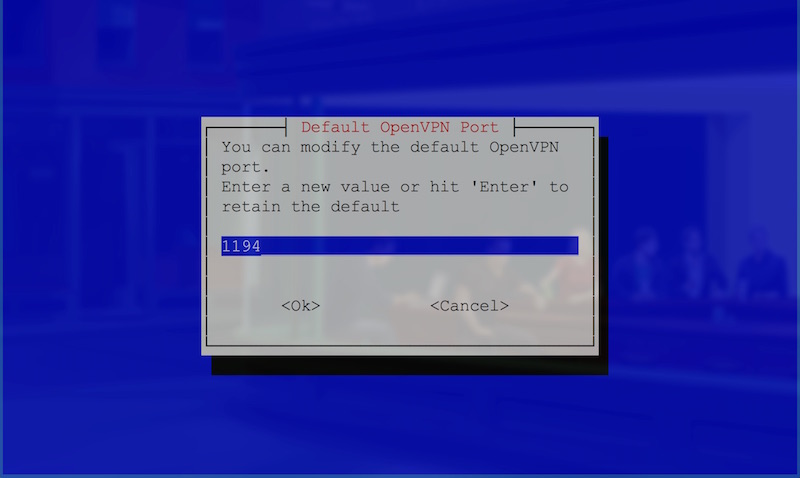
This screen is part of the OpenVPN install process. You can choose which port to run your VPN through on the Pi. I left it as is — at port 1194 — and hit Enter.

Check that the port entered looks correct, then hit Enter once more.
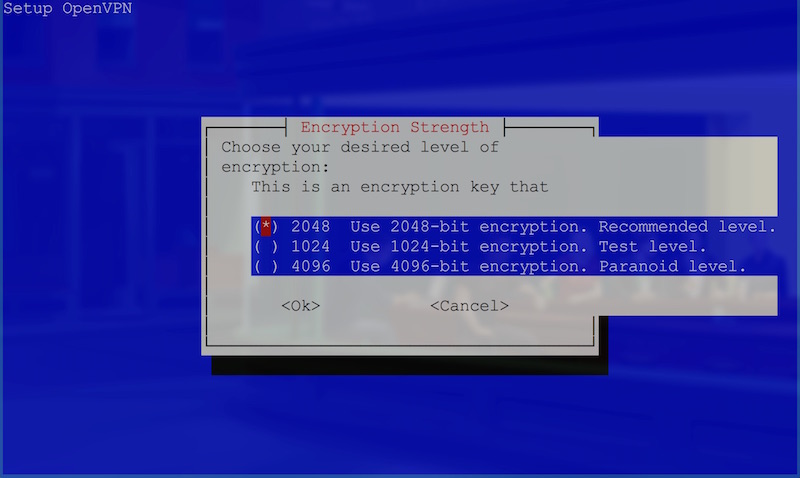
In the screen above, we’re choosing our desired level of encryption. The larger the encryption, the longer it will take to run and set up — but the more secure it will be. I stuck with 2048-bit as recommended and hit Enter. I wouldn’t recommend dropping to 1024-bit, but if you’d like super thorough encryption, you could go up to 4096-bit.

Now, this screen above just tells us that the next one is going to show the default values for the security certificate info. It lets you know you don’t need to change them as you and the clients who connect are the only ones who’ll see them. It speaks the truth. You don’t need to worry about changing these. Hit Enter to go to the next screen.
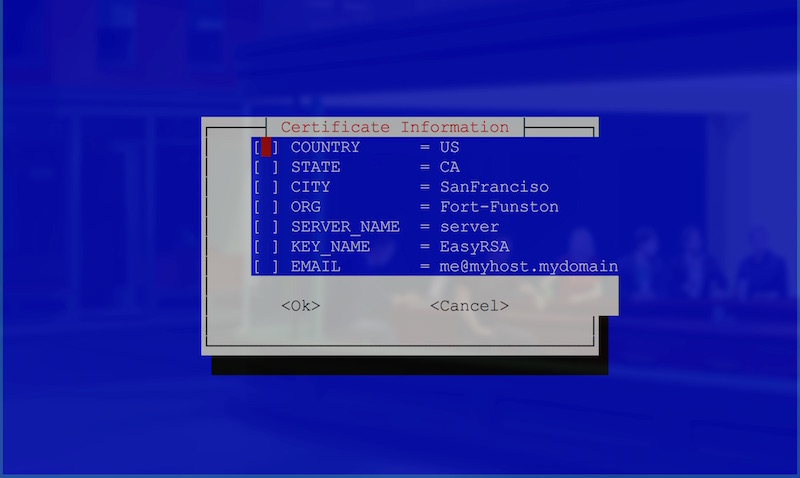
Not only do you not need to worry about changing them, I couldn’t see a way to change the values in this screen either. Look through them and then click Enter.

It will ask if those values are correct, just hit Enter once more.

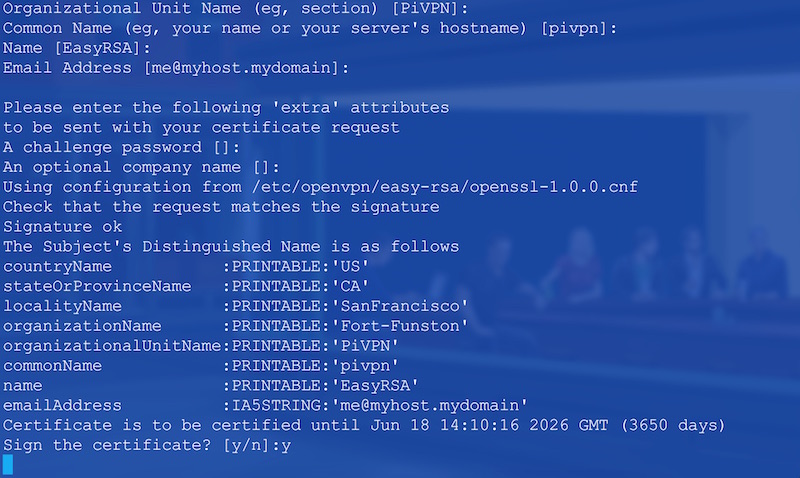
Next, it lets you know that it’s about to generate your encryption keys. Click Enter.
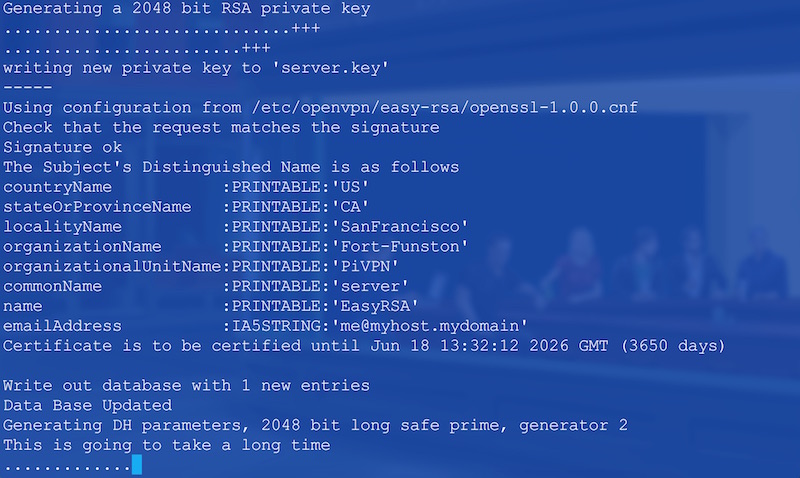
It will then leave the slick UI and bring you back to the terminal, where it begins key generation. It will take a while to generate — longer if you chose 4096-bit encryption!
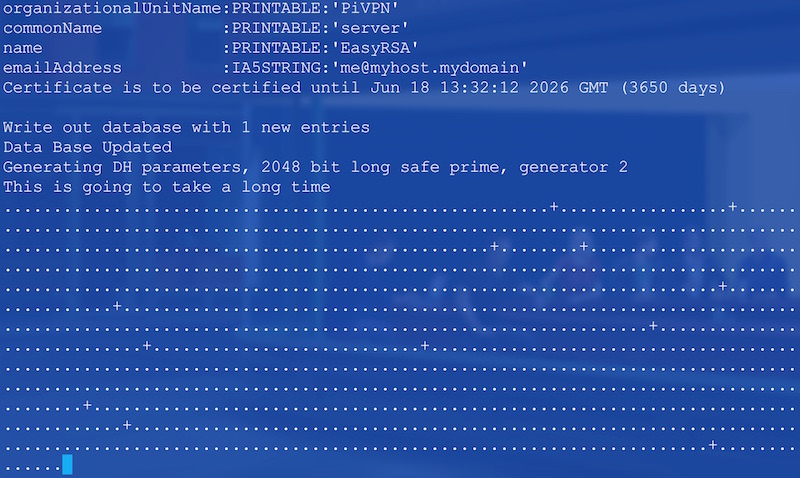
A really long time …

Definitely grab some tea or coffee while this runs.
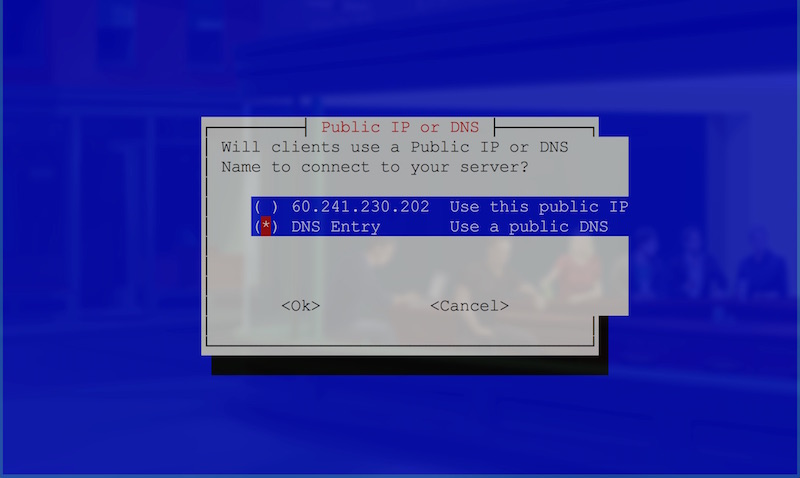
Once it’s done, it will ask whether or not you’ve got a public DNS entry you’d like to use, or whether you’d like to use an IP address. This part is entirely up to you. Your IP address is the public facing IP that you have on the web from your ISP. It’s the one that appears if you go to services like www.whatismyip.com. Some ISPs give a static one that won’t change, others will change it intermittently.
With my own ISP, there’s no guarantee it will remain the same, so I registered with No-IP — a service that allows you to link a free web address they provide (such as yourdomain.ddns.net) to your public IP. If your IP changes, you can change the value with No-IP.
If you want to use the IP address provided by your ISP, leave it as is and hit Enter. Otherwise, navigate to “DNS Entry” with your keyboard, hit Spacebar and then hit Enter to go to the next screen.

If you chose “DNS Entry”, you’ll be prompted with the screen above. Add your URL as I’ve done above. If you chose “IP address”, it’ll ask for that instead.
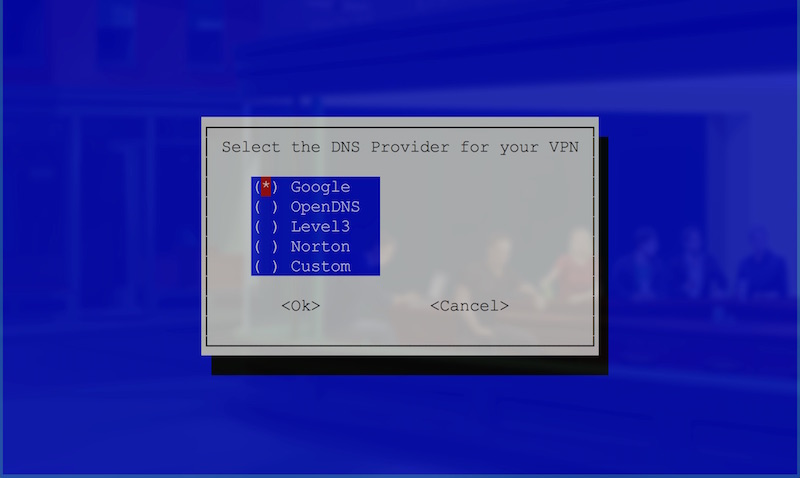
Next, you’ll be asked to select the DNS provider you’d like to use for your VPN. This can be important if the reason you’re looking to have a VPN is for privacy: whichever DNS provider you choose will have visibility over requests made by the VPN. If you’re looking for a completely private VPN, you’ll want a more private DNS solution. In my case, I’m not using it for that purpose and left it as “Google”, hitting Enter to continue on.

With that, you’ve successfully run through the installation! Click Enter to pass through the congratulatory screen but take note that we’ll need to run pivpn add as it says!

Choose Yes to reboot your Pi! You may need to select it with the keyboard as with other selections earlier.
It should do its final bits and pieces and then restart your Pi.
Remember to Update!
Remember — now you’ve completed the whole process of getting the VPN installed, run the following command to ensure your Pi is secure in the immediate future:
sudo apt-get upgrade
Once that is all updated, we can feel safe enough to set up a client for VPN access!
Setting up Your First VPN Client
From this point, you’ve got an OpenVPN instance running on your Pi through PiVPN. However, to access the VPN from other computers and devices on the network, it will need a client that these devices can connect through. To add this client, we enter the following command:
pivpn add
It will ask you for a name for the client. Call it whatever your heart desires. It will also ask for a passphrase: this is the password for accessing the VPN through this client. Don’t forget this one — as you otherwise won’t be able to connect to your VPN server using this client!
Once you’ve done that, it will generate an .ovpn file for that client. You’ll need this to log in on each client device.
OpenVPN Clients
There are a range of OpenVPN clients you can download to use on various platforms. You can find them at openvpn.net. Those aren’t the only ones available; I personally used Tunnelblick on my Mac.
Port Forwarding
One area that will be different for everyone is port forwarding on your router. You need to set up forwarding on your router for the port you set up for the VPN (by default, it was 1194). We want any requests to that port to go to your Pi’s IP address. This setup is different for every router; however, you can find out more about the process of port forwarding here. Look up “port forwarding” and your router name to find out how to do this for your own router. Be careful when updating router settings!
FTPing Your Key
The easiest way to copy across files from your Pi is using SFTP. You can do this using FTP programs like Filezilla. There are official docs on how to use FTP with Raspberry Pi here. Once you’ve connected to your Pi, copy across your key from /home/pi/ovpns:
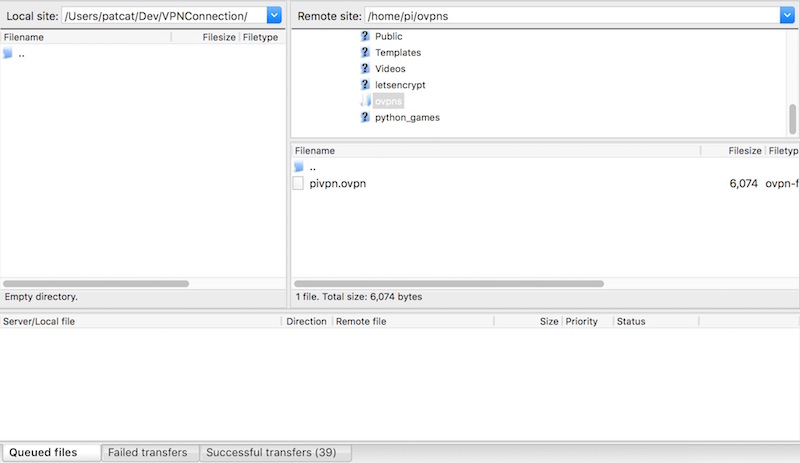
Connecting to Your Pi’s FTP
Once you’ve got everything set up, open up your OpenVPN application on your device and load up the .ovpn file you’ve downloaded from the Pi. Upon loading it, it will ask for the passphrase you set: enter that in, and it should run through and connect you!
Conclusion
Now that you’ve successfully connected to your home network via a VPN, you should be able to access devices on that network with ease. For example, if you’ve got a local web server on that network, you should be able to visit web pages running on that server using its local network address. Likewise, if you try to connect to an IoT device on the network from your VPN-connected device using its IP address, it should now work!
Don’t have a Raspberry Pi handy? Check out these instructions from Surfshark on setting up a VPN server using a home computer or your router. And if you just want to add a reliable VPN to your toolkit, you can compare the best VPNs for developers in our buyer’s guide.
If you have any tips for setting up a VPN over Raspberry Pi, tips on securing a Raspberry Pi better on the open web, or additional ideas on what’s possible after a VPN is set up, I’d love to hear them! Let me know in the comments below, or get in touch with me on Twitter at @thatpatrickguy.
Frequently Asked Questions (FAQs) about Setting Up a Home VPN Using Your Raspberry Pi
What are the benefits of using a Raspberry Pi for setting up a home VPN?
Raspberry Pi is a cost-effective and versatile device that can be used to set up a home VPN. It is compact, energy-efficient, and capable of running 24/7 without significant power consumption. This makes it an ideal choice for a home VPN server. Moreover, Raspberry Pi offers a high level of customization and control over your VPN setup. You can configure it to suit your specific needs and preferences, which is not always possible with commercial VPN services.
How secure is a Raspberry Pi VPN?
A Raspberry Pi VPN can be very secure, provided it is set up and configured correctly. It uses strong encryption protocols to secure your data and protect your online privacy. However, the security of your VPN also depends on other factors such as your password strength, the security of your home network, and whether you keep your Raspberry Pi and its software up to date.
Can I use my Raspberry Pi VPN to access geo-restricted content?
Yes, you can use your Raspberry Pi VPN to access geo-restricted content. By connecting to your VPN, your internet traffic is routed through your home network, making it appear as if you are browsing from your home location. This can allow you to access content that is only available in your home country.
How can I find my Raspberry Pi’s external public IP address?
You can find your Raspberry Pi’s external public IP address by using online services such as “What Is My IP Address”. Simply visit the website from your Raspberry Pi’s browser and it will display your current public IP address.
Can I use my Raspberry Pi VPN as a development server?
Yes, you can use your Raspberry Pi VPN as a development server. This can be particularly useful if you want to test your applications in a secure and controlled environment. However, keep in mind that the Raspberry Pi has limited processing power and storage capacity compared to a full-fledged server.
How does a Raspberry Pi VPN compare to a commercial VPN service?
A Raspberry Pi VPN offers more control and customization options compared to a commercial VPN service. However, it requires more technical knowledge to set up and maintain. Commercial VPN services, on the other hand, are easier to use and often come with additional features such as multiple server locations and dedicated customer support.
Can I set up a Raspberry Pi VPN without any prior technical knowledge?
While setting up a Raspberry Pi VPN does require some technical knowledge, there are plenty of detailed guides and tutorials available online to help you through the process. With some patience and willingness to learn, it is certainly possible to set up your own Raspberry Pi VPN even if you are not a tech expert.
What are the hardware requirements for setting up a Raspberry Pi VPN?
The hardware requirements for setting up a Raspberry Pi VPN include a Raspberry Pi device, a microSD card for the operating system, a power supply, and an Ethernet cable for a stable internet connection. You may also need a USB keyboard, a monitor, and a USB mouse for the initial setup.
Can I use a Raspberry Pi VPN with multiple devices?
Yes, you can use a Raspberry Pi VPN with multiple devices. Once your VPN is set up, you can connect to it from any device that supports VPN connections. This includes smartphones, tablets, laptops, and desktop computers.
How can I troubleshoot issues with my Raspberry Pi VPN?
Troubleshooting issues with your Raspberry Pi VPN can involve checking your network settings, verifying your VPN configuration, and ensuring that your Raspberry Pi and its software are up to date. If you are still experiencing issues, you may want to seek help from online communities or forums dedicated to Raspberry Pi and VPNs.

