

Key Takeaways
- Adobe XD offers a seamless design-to-prototype workflow, eliminating the need for syncing between different tools and making the design process more efficient. It supports interactive prototyping, allowing designers to create dynamic and engaging user experiences.
- Adobe XD integrates well with other Adobe Creative Cloud apps, allowing designers to import files from Photoshop or Illustrator and continue working on them in XD. It supports both wireframing and high-fidelity prototyping, making it a versatile tool for different stages of the design process.
- Adobe XD is designed with collaboration in mind, allowing multiple users to work on the same project simultaneously. Designers can share their prototypes with team members or stakeholders, who can then provide feedback directly within the app, leading to a more efficient design process.
Even though Adobe XD is still relatively new, the reception has been terrific. So I thought we’d do a quick-but-fun tutorial that illustrates how designing and prototyping with Adobe XD is wonderfully rolled into a single tool, without making the app feel too bulky. In fact, Adobe XD is pretty minimal and it’s really easy to use once you know how.
Not too long ago, I compared Adobe XD vs. Sketch. While Sketch is still a brilliant choice for designing user interfaces, Adobe XD came off as the clear winner for those switching from other Adobe apps such as Photoshop or Fireworks.
With Sketch you’ll need to install extensions and quite possibly subscribe to third-party services to add any prototyping functionality, whereas Adobe XD offers these tools natively.
Plus, if you already have an Adobe Creative Cloud subscription, then you’ll already have the entire feature-set of XD at your disposal! Design + prototyping + feedback all rolled into a single app, what more could you ask for?
It’s also available for Windows now!
Let’s dive right into Adobe XD by designing and prototyping two screens in a mobile app.
Note: the examples used in this tutorial are based on the free Cactaceae UI kit for Adobe XD.
Interested to learn about Adobe XD in more detail? Check out our new book, Jump Start Adobe XD! Buy the ebook for $19 or sign up as a Premium member and get it as part of your subscription. You can also grab a physical copy via O’Reily.
Prototyping with Adobe XD: Low-Fidelity Wireframes
Adobe XD makes it super-easy to quickly mockup a low-fidelity wireframe. Being able to design low-fidelity wireframes quickly means that we can make huge strides towards to creating a layout that offers a terrific user experience, while not having to worry about the visuals too much (at first). Let’s illustrate our first idea so that we can receive feedback from our teammates ASAP — ideas develop faster when there are more brains on deck.
Everybody has a design workflow that works for them — when designing low-fidelity wireframes I have a strict rule of using only text and shapes (unless absolutely necessary). What’s the use of designing icons, sourcing images and defining styles for a layout that we might not move forward with? Here are the vital keyboard shortcuts that you’ll need right now.
- Select Tool (V)
- Rectangle (R)
- Ellipse (E)
- Line (L)
- Text (T)
- Artboard (A)
Lets mock-up an idea.
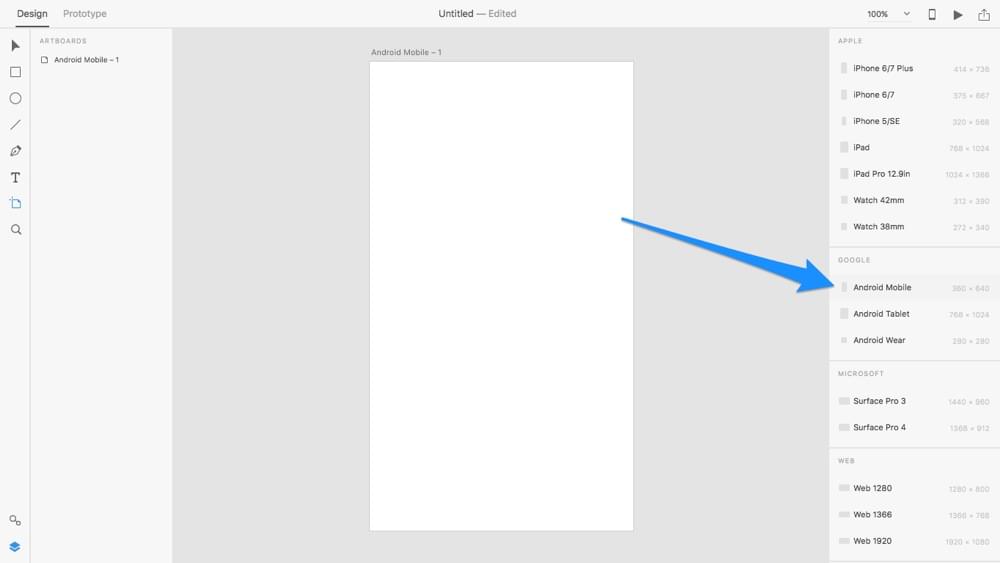
Start by creating an artboard (A) and selecting the “Android Mobile” artboard from the inspector on the right-hand side.
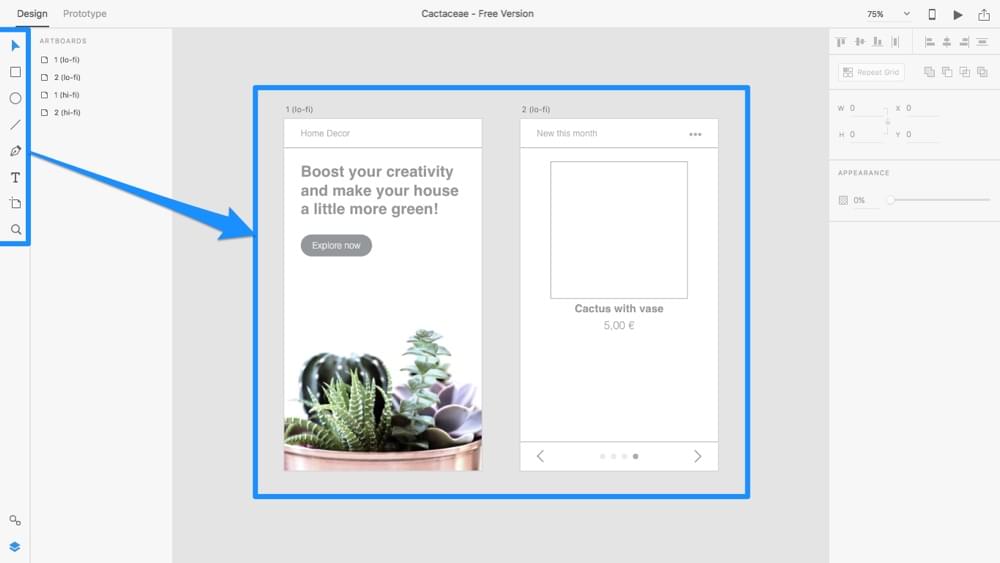
Now, using the toolbar on the left-hand side, or the keyboard shortcuts mentioned above, draw some shapes on the canvas to construct your layout. If it adds further clarity, or if there’s any space unaccounted for that makes the layout look confusing, then add maybe one or two images that depict what that space will be used for, as I’ve done below.
Very basic icons are fine too, as long as you aren’t wasting copious amounts of time illustrating them. Remember, our aim here is to validate our idea with feedback, only after that should we allocate more time to making it look appealing.
If you’re interested to see how rapid iteration compares with Sketch, check out my comparative overview.
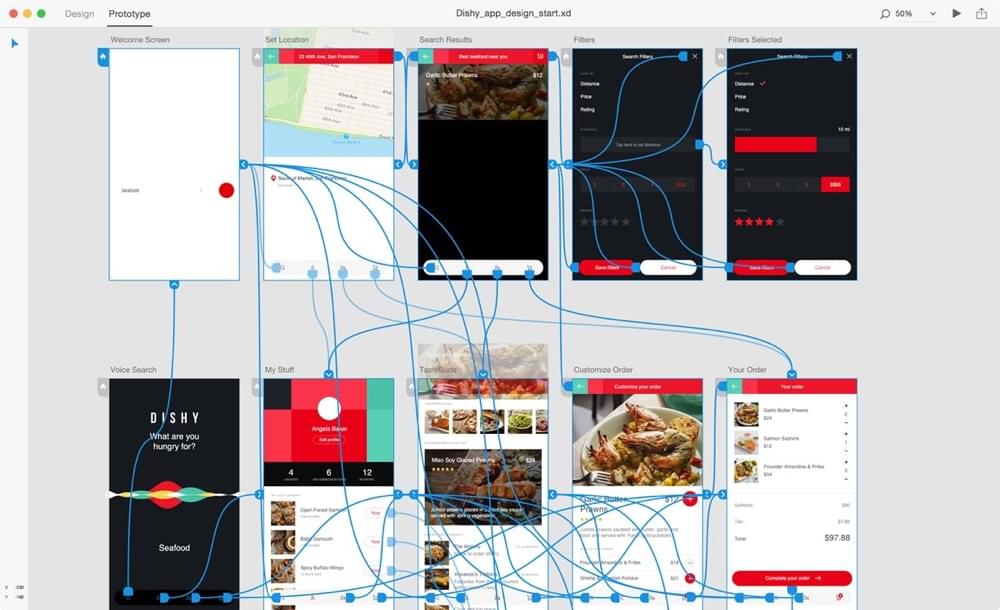
Prototyping Interactions and User Flows
We now have our rough idea mocked up. It’s time to demonstrate how these two screens might link up — how would the user flow from one screen to the next? I mean, that’s what user interfaces are all about, right? Helping the user from A to B?
Switch to the “Prototype” workspace using the tab in the top-left corner. You’ll notice that this workspace doesn’t differ too much from the Design workspace; the main difference that there is no inspector, and when we select objects on the canvas, we’re given the opportunity to link the tap target to another artboard instead of styling them (hence why no inspector).

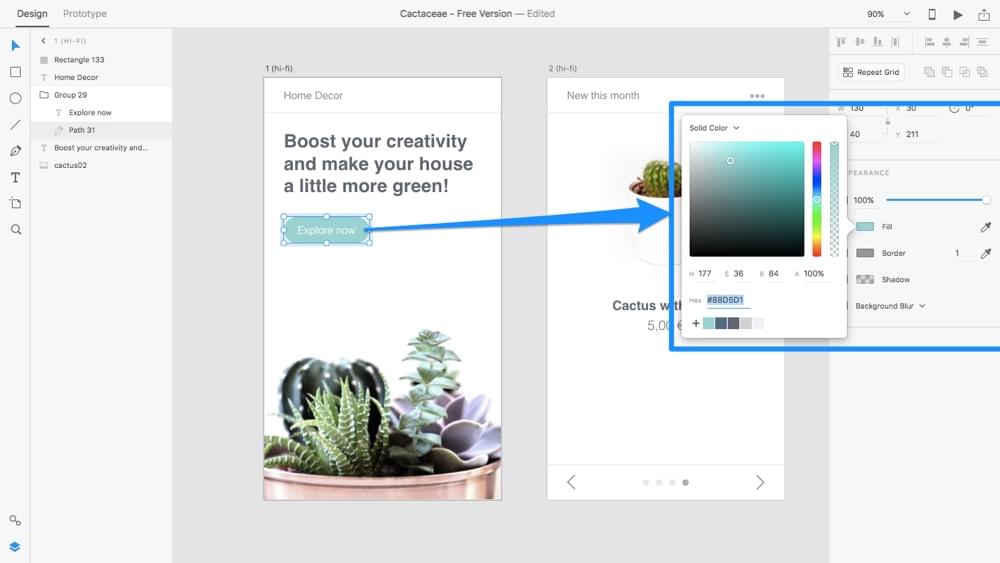
If you’re following along with my example, select the “Explore now” button, where you’ll notice that a blue, draggable handle appears on the right-side side of it. Drag this handle into the neighbouring artboard. Awesome, you’ve created a user flow!
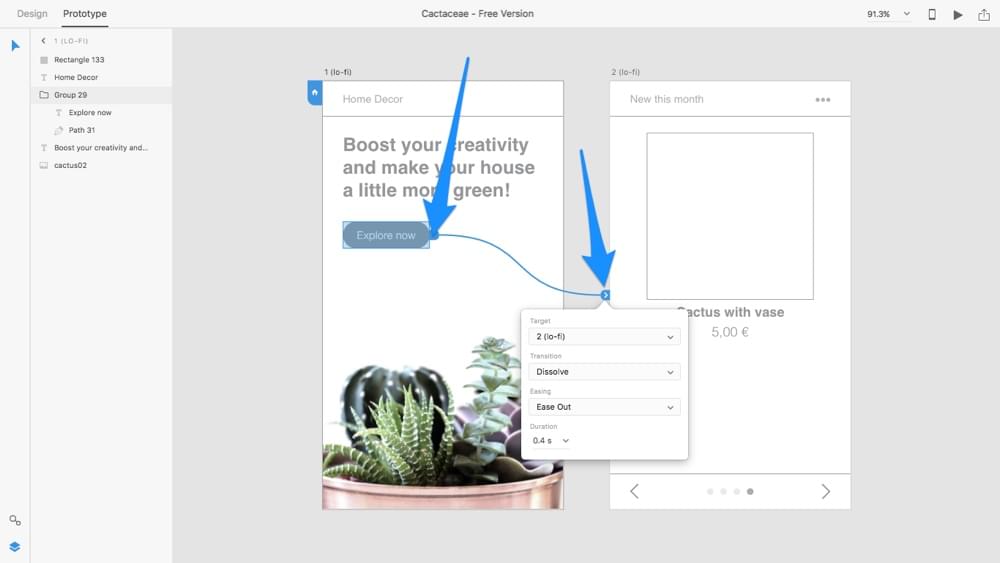
In a very short moment we’ll learn how to test this user flow in a real device, but for now, let’s specify the type of transition that the user will experience and how long the animation will last for.
When you drop the handle into the target artboard, a modal will appear. You’ll see the following settings:
- Target: we already specified the target
- Transition: the effect that occurs when the user flows from one screen to the next (“None” is the default option for websites, whereas “Slide Left/Right” is pretty standard for native mobile apps)
- Easing: the acceleration of which the animation occurs (ease-out animations for example will be faster at the beginning, then slow down as the animation comes to a halt)
- Duration: how long it takes the animation to complete
Check out my article on easings and animations if you’re interested to know more about them!
In our case, choose “Slide Left” for the Transition setting and leave the other settings with their default option.
Sharing Prototypes and Gathering Feedback
When you’re ready to share your wireframe and receive some feedback, hit the share icon in the very top-right corner of the Prototype workspace window, then click “Create Link”.
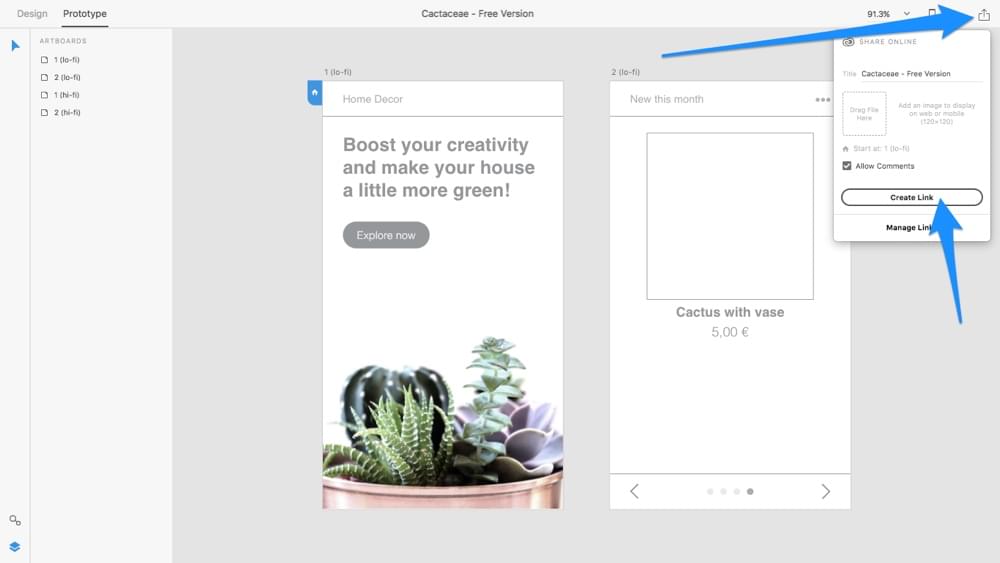
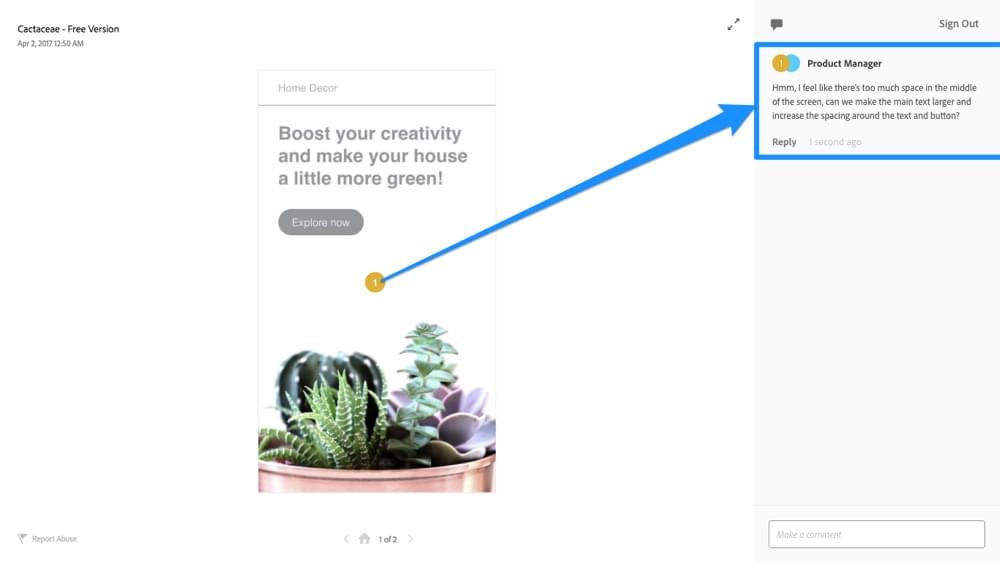
Next, share this link with your teammates, who will then be able to view the mockup in their browser, make comments on it, and even use their mouse to click through the prototype like a real user.
Desktop Preview vs. Device Preview
“Do I have to create a share link to test the prototype?”.
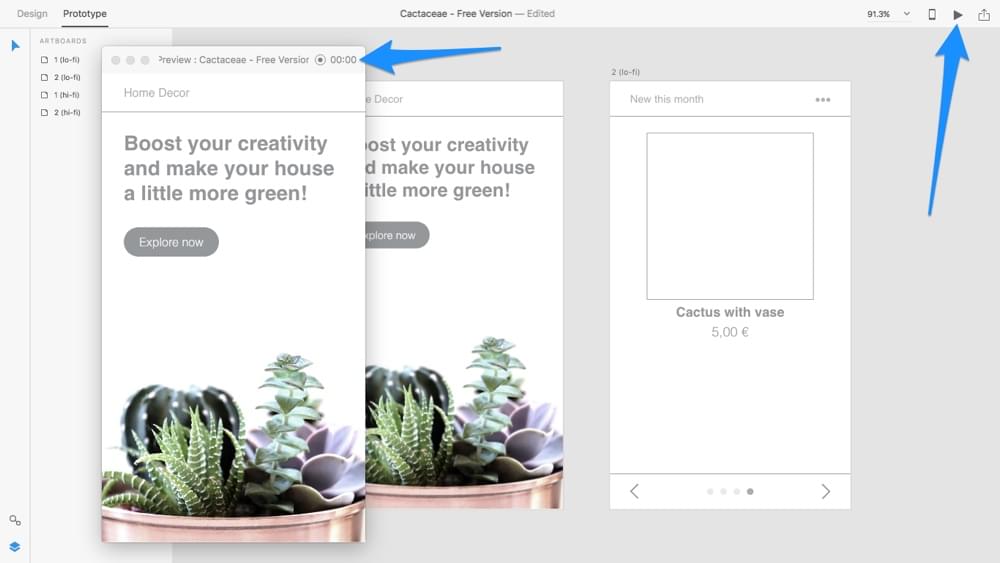
Of course not! You can test the prototype to make sure that all of the screens are linked up properly at any time — simply hit the “Desktop Preview” icon (the play icon) and click away. If it’s just you, Desktop Preview is more than ideal.
Quick-tip: you can even record yourself using the prototype — just hit the record button in the Desktop Preview window!
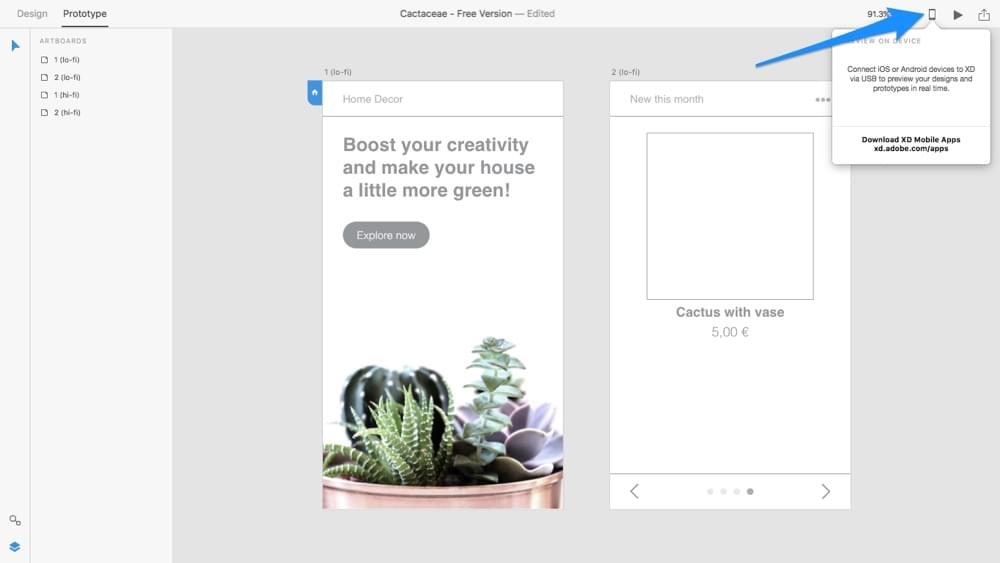
Device Preview lets you (or your teammates) accomplish the same thing, but in a real device; after all, mobile apps are designed to be used by thumbs, not mice, right? Hit the “Device Preview” icon (the device icon) and follow the instructions:
- Download the Adobe XD mobile app for iOS or Android
- Connect to the device via USB
- Decide whether or not to enable “Hotspot Hinting”
- Choose a screen in the prototype to start from
Note: hotspot hinting allows the testing user to receive additional help when navigating the prototype — this is useful for incomplete prototypes, however, complete prototypes should have hotspot hinting disabled to offer the “real” experience.
Prototyping with Adobe XD: High-Fidelity Designs
Great, we’re almost there! Now let’s assume that we’ve received some feedback and that our concept has been somewhat validated in a realistic environment (i.e. in a real device using Device Preview). Switch back to the “Design” workspace and use the inspector on the right-hand side to apply any visual aesthetics (opacities, fills, borders, shadows, corner radii, etc) to the layout (that is, after making any initial layout adjustments in accordance with the feedback).
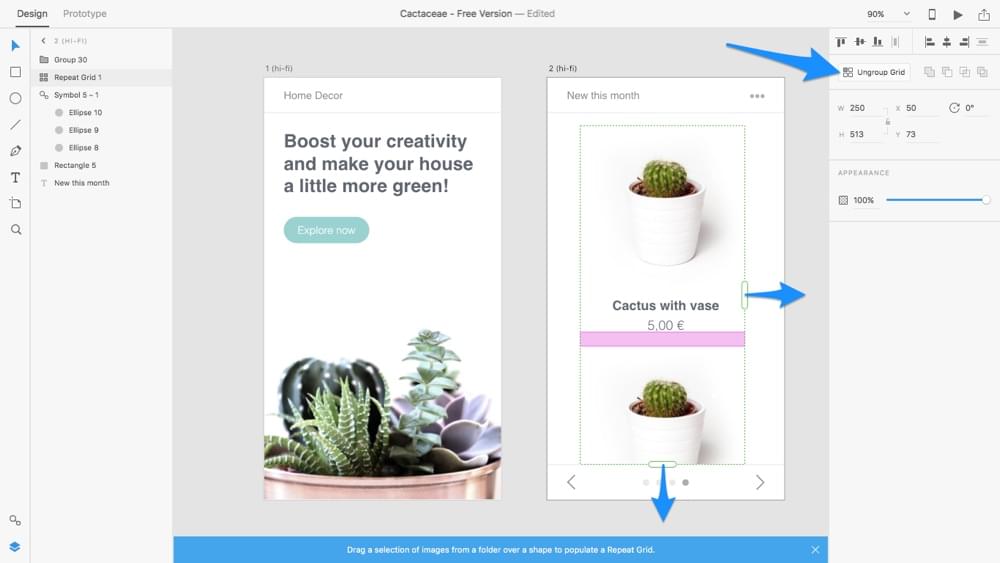
High-fidelity prototyping is usually the most time-consuming aspect of designing user interfaces, but there are ways that we can drastically speed up this workflow. Firstly, there’s Repeat Grids, which allow us to tile components horizontally and/or vertically and keep them visually consistent, although with completely unique content, which can be dragged and dropped right in (i.e. if you drag 4 images into the grid at once, Adobe XD will intuitively distribute one image to each tile in the grid!).
Click “Repeat Grid” in the inspector to begin (or use the keyboard shortcut: ⌘/Ctrl + R), then use the draggable handles to tile the component horizontally or vertically (vertically, in this case).
Maintaining Visual Consistency with Symbols
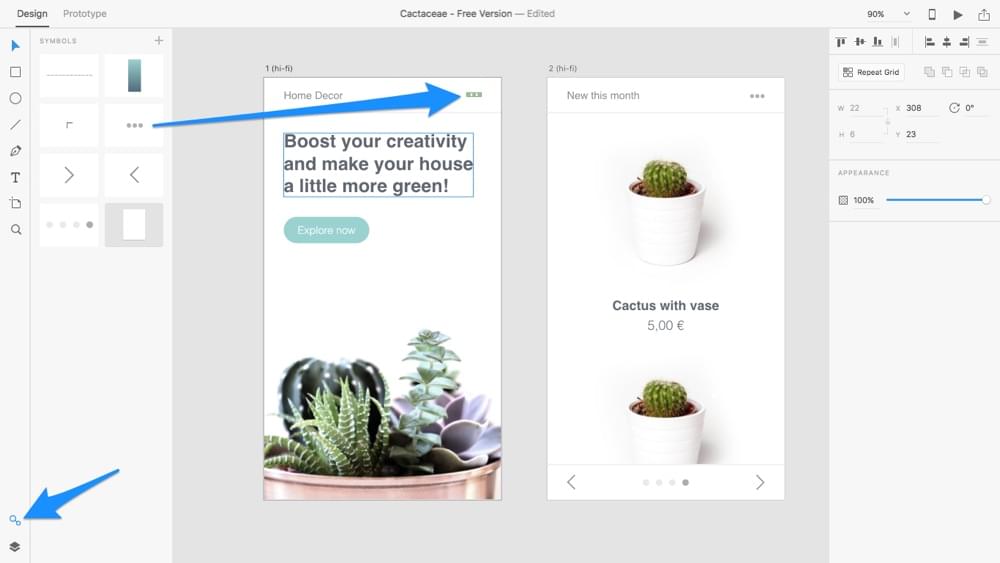
Secondly, there’s symbols, which allows you to keep certain components visually consistent when the various instances are scattered over multiple artboards. When you change one instance of a symbolled component, they all change, achieving visual consistency and saving you bundles of time. If you’ve used Sketch before, you’ll be very familiar with the use of symbols.
When you have a component that you know you’ll use over and over again, select it and use the keyboard shortcut ⌘/Ctrl + K to turn it into a symbol; then, later on, you can switch to the symbols list (⌘/Ctrl + Shift + Y) and drag one instance of that symbol into the artboard.
Conclusion
What else can I say? Give it a try! It’s still free!
Convinced, but need a guide to getting started? Check out Jump Start Adobe XD. Buy the ebook for $19 or sign up as a Premium member. You can also grab a physical copy via O’Reilly.
Frequently Asked Questions (FAQs) about Prototyping with Adobe XD
What are the key features of Adobe XD that make it suitable for prototyping?
Adobe XD is a powerful tool for prototyping due to its wide range of features. It offers a seamless design-to-prototype workflow, allowing designers to switch between design mode and prototype mode within the same app. This eliminates the need for syncing between different tools, making the process more efficient. Adobe XD also supports interactive prototyping. Designers can create interactive prototypes with auto-animate, voice triggers, and other features. Additionally, it provides tools for sharing and collaboration. Designers can share their prototypes with stakeholders and collect feedback directly within the app.
How does Adobe XD compare to other prototyping tools?
Adobe XD stands out from other prototyping tools due to its seamless integration with other Adobe Creative Cloud apps, its intuitive interface, and its robust set of features. It allows designers to import files from Photoshop or Illustrator and continue working on them. The interface is user-friendly, making it easy for beginners to get started. Moreover, Adobe XD supports both wireframing and high-fidelity prototyping, making it a versatile tool for different stages of the design process.
Can I use Adobe XD for collaborative projects?
Yes, Adobe XD is designed with collaboration in mind. It allows multiple users to work on the same project simultaneously. Designers can share their prototypes with team members or stakeholders, who can then provide feedback directly within the app. This makes it easier to collect and incorporate feedback, leading to a more efficient design process.
How can I create interactive prototypes with Adobe XD?
Adobe XD offers a variety of features for creating interactive prototypes. You can add interactions to your design elements using the prototype mode. This includes transitions, overlays, and auto-animate. You can also use voice triggers to create voice-activated prototypes. Once you’ve added interactions, you can preview your prototype within the app or share it with others.
What is the learning curve for Adobe XD?
Adobe XD is known for its user-friendly interface, which makes it relatively easy for beginners to learn. However, like any design tool, it requires some time and practice to master. Fortunately, Adobe provides a wealth of resources for learning XD, including tutorials, guides, and community forums.
Can I use Adobe XD for web design?
Yes, Adobe XD is a versatile tool that can be used for both web and mobile design. It provides features like responsive resize and auto-animate, which are particularly useful for web design. You can also export your designs as HTML or CSS, making it easier to turn your prototypes into live websites.
Is Adobe XD free to use?
Adobe XD offers a free starter plan, which includes one active shared prototype and design spec, 2GB of cloud storage, and limited fonts. For more advanced features and resources, Adobe offers paid plans.
How can I share my Adobe XD prototypes?
Adobe XD provides several options for sharing your prototypes. You can generate a shareable link, which allows others to view and interact with your prototype in their web browser. You can also invite others to collaborate on your project, allowing them to make edits and provide feedback directly within the app.
Can I import my designs from other Adobe apps into Adobe XD?
Yes, Adobe XD allows you to import files from other Adobe apps like Photoshop and Illustrator. This makes it easier to incorporate existing designs into your prototypes.
How can I use Adobe XD to implement design thinking?
Adobe XD supports the design thinking process by providing tools for ideation, prototyping, and testing. You can use XD to create wireframes and prototypes, test them with users, and iterate based on feedback. This aligns with the design thinking approach of empathizing, defining, ideating, prototyping, and testing.