

Seasonal advertising is common for very good reason. Aligning your promotions with time-sensitive annual events creates a distinct sense of urgency that your products might otherwise lack. Many consumers have become habitual spenders during these specific times of the year, and if you haven’t positioned your products as part of the cyclical festivities, you’re likely losing revenue to your competitors, who didn’t have to come up with deep discounts or inventive marketing to best you. Let’s not let that happen.
In this tutorial, I’ll walk you through the process of crafting a perfect way to align your products with the holidays — a Halloween pumpkin. We’ll use the pen tool, the brush tool, shape tools, and various options within the filter and edit menus to achieve the final result. Hopefully, you will learn few handy tips along the way. So, let’s get started!
Key Takeaways
- Seasonal advertising can increase product visibility and sales, and creating a Halloween-themed image in Photoshop is a fun and effective way to do this.
- The tutorial guides users through the process of creating a stylized Halloween pumpkin using a variety of Photoshop tools, including the pen tool, brush tool, shape tools, and various filters and editing options.
- The process involves creating a base sketch, adding shading and texture, drawing the pumpkin’s facial features, and adding final details like a stem, shadow, and faint glow.
- The tutorial also answers frequently asked questions about the process, including what basic Photoshop tools are needed, how to create realistic texture, how to use the design as a YouTube thumbnail, and how to save the design for future editing.
Resources:
Free Halloween Photoshop Brushes by Jennifer Moore
Feast of Flesh BB Font
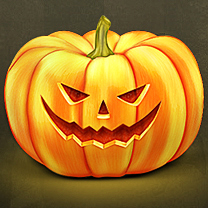
Final result:
(Download the finished, layered Photoshop file.)
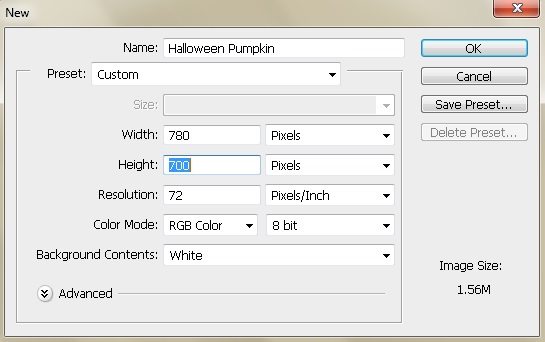
Step 1
Create a new document in Photoshop with a 780px width and a 700px height.
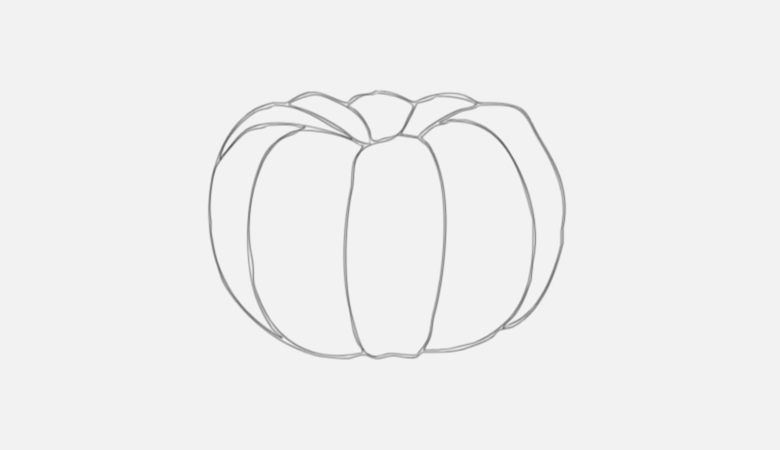
Step 2
We’ll start by making a rough sketch of the pumpkin. You can make the sketch on paper if you want to import it to Photoshop. I’ve made the sketch using a 2px soft round brush.
Now, we’ll trace it using the pen tool (“P”). Pick #ff6b07 as your Fill color and select the pen tool (“P”); make sure to choose “Shape” as your tool mode within the top control bar. Start drawing one of the pumpkin parts on a layer below your sketch.
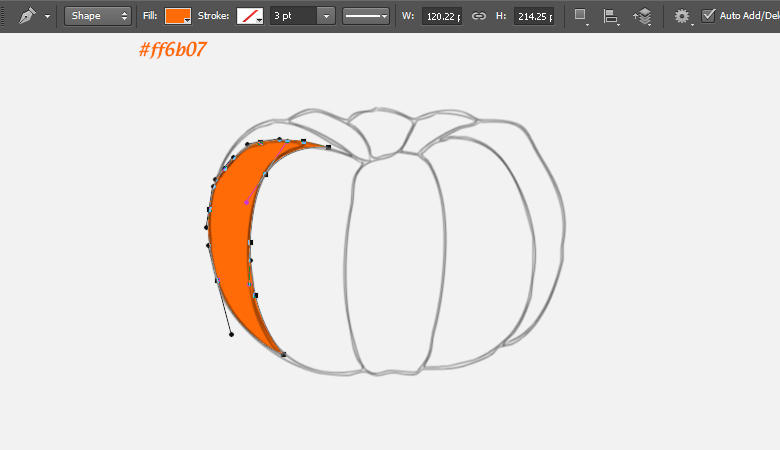
Step 3
Draw each part on separate new layers. Once you are done, select them by holding the “Shift” key and pressing Ctrl + “G” to collect them into a group. Label the group as “Base”.
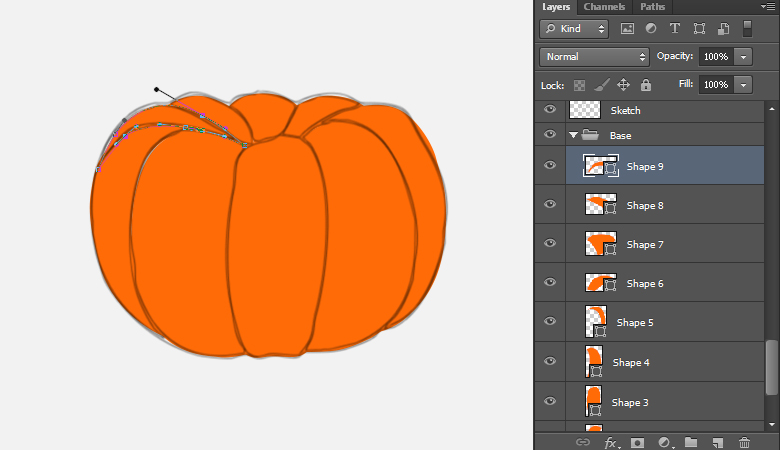
Step 4
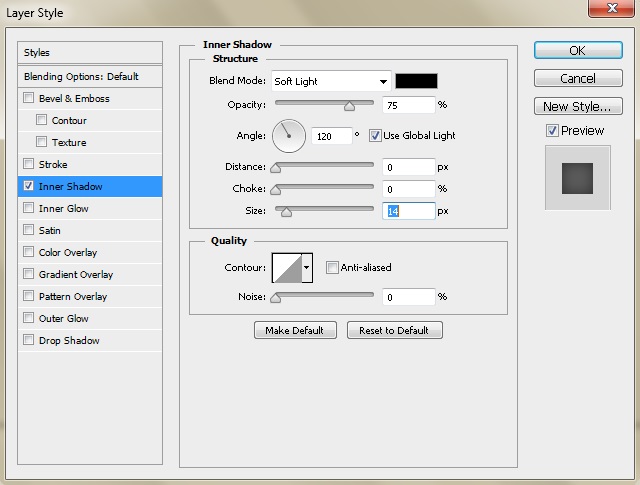
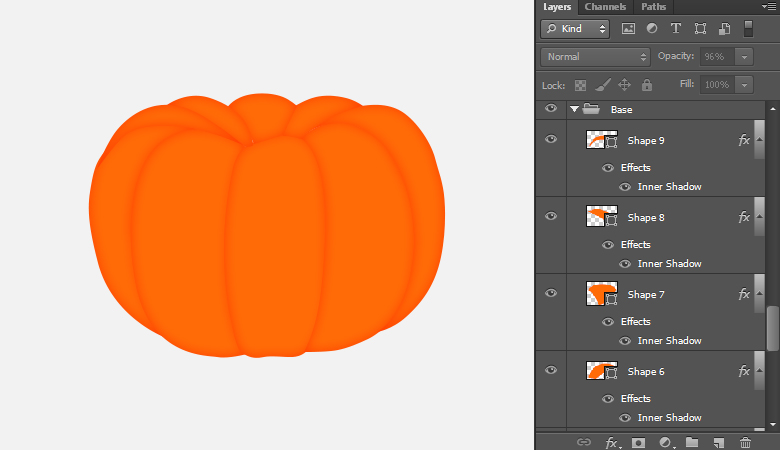
Hide or delete the sketch layer. Now, double-click one of the shape layers to view the”Layer styles” window and apply the following settings for “Inner Shadow”. Now, right-click this layer and select the “Copy Layer Style” option. After that, right-click on the rest of the shapes one by one and select “Paste Layer Style” from the options to apply the same inner shadow settings to them.
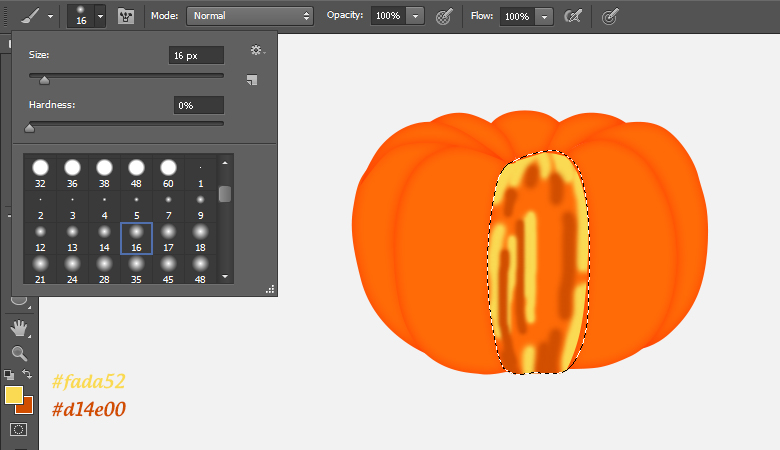
Step 5
Next, we’ll apply some shading to make our pumpkin realistic and interesting. Press Ctrl +
Step 6
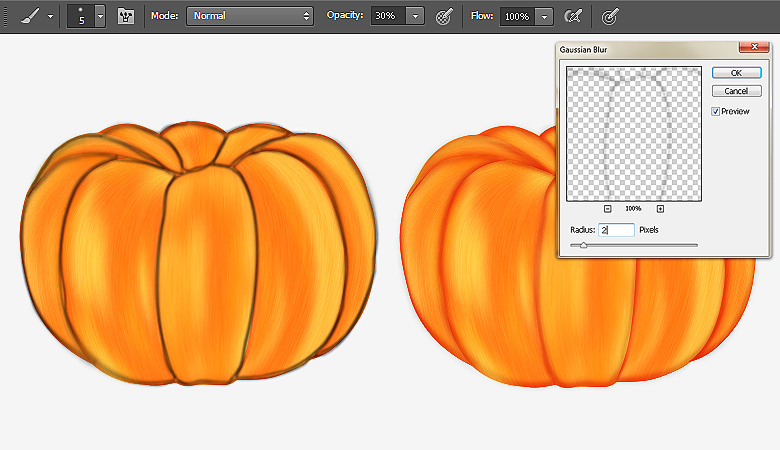
Click the newly-created shading layer and go to “Filter” > “Blur” > “Motion Blur” and apply the following settings here.

After that, go to “Filter” > “Blur” > “Gaussian Blur” and apply a 5-6px Gaussian blur effect to blur the shading properly.
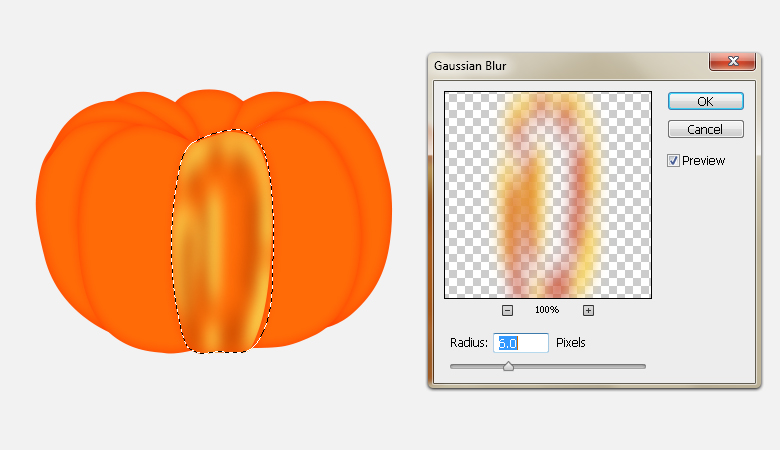
Now change its blending mode to “Screen” and adjust its opacity to 50-70%.

Step 7
Use the same techniques explained in steps 5-6 to apply shading to the rest of the pumpkin parts one by one. Change the blending mode of all the shading layers to “Screen” with opacity set between 50-70%.
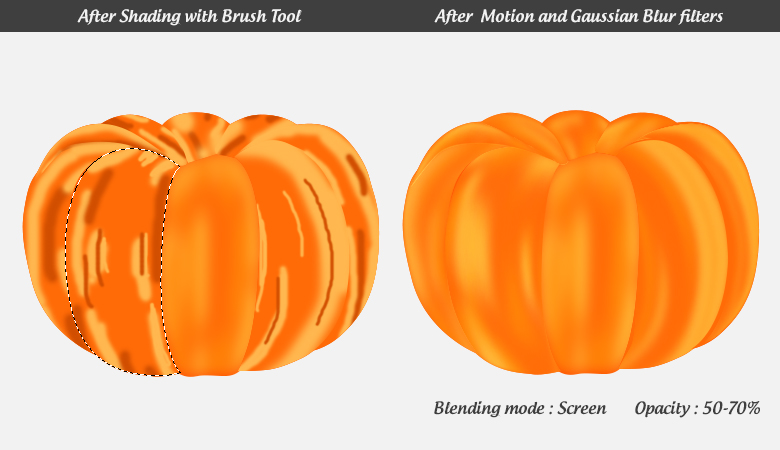
An alternate technique to blend the shading is achieved with the smudge tool, which you can view under the blur tool within the tool bar. Pick the smudge tool and choose a 100px soft round brush with a 15-25px Strength from the top control bar and blend the strokes gently within the selected area.
Step 8
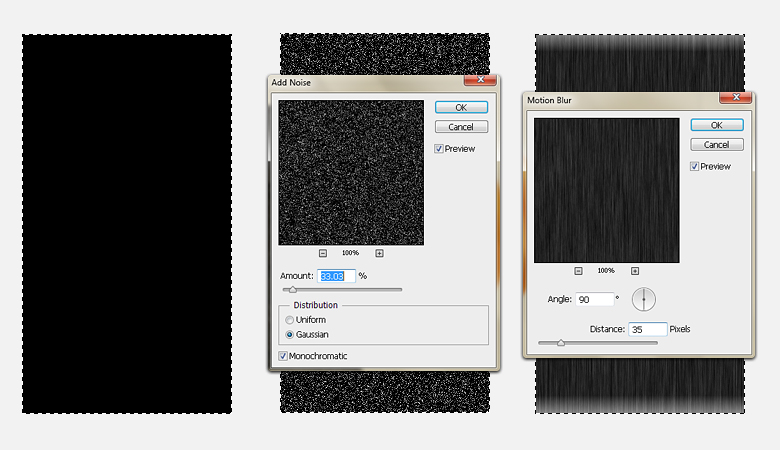
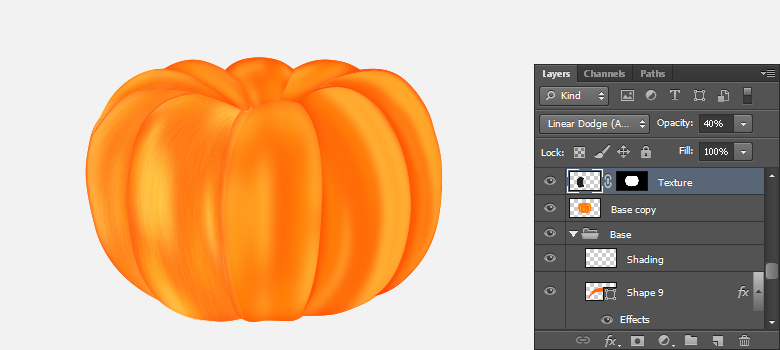
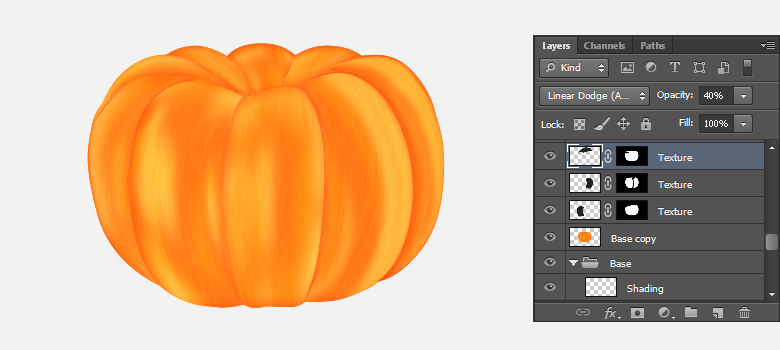
Next, we’ll add texture to our pumpkin. Draw a rectangle using the rectangular marquee tool on a new layer. Fill it with black using the paint bucket tool and go to “Filter” > “Noise” > “Add Noise” and apply the following settings to add noise. After that, apply the provided settings for “Motion Blur”. Label this new layer as as “Texture” and duplicate it 2-3 times.
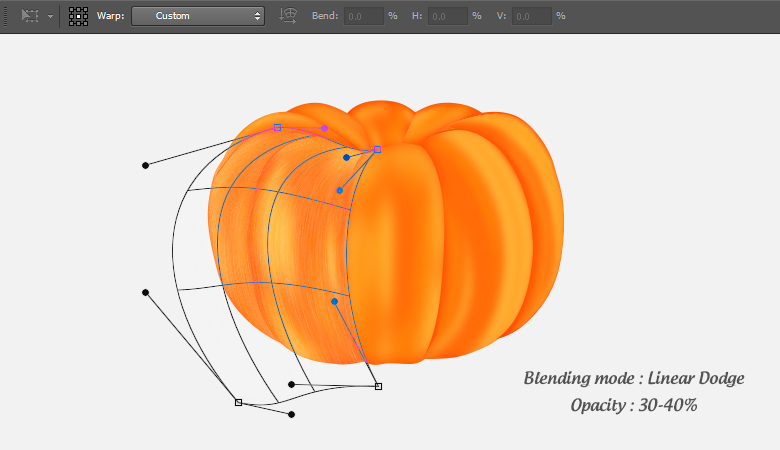
Step 9
Now take a texture layer, change its blending mode to “Linear Dodge” with a 30-40% opacity, and position it over the left side of pumpkin. Now, go to “Edit” > “Transform” > “Warp” and manipulate the tool to arrange the texture in a curve as shown below.
To confine the texture within the pumpkin, we’ll apply a layer mask to it. Duplicate the base layer and merge it. Now, click on the texture layer, press Ctrl +
Step 10
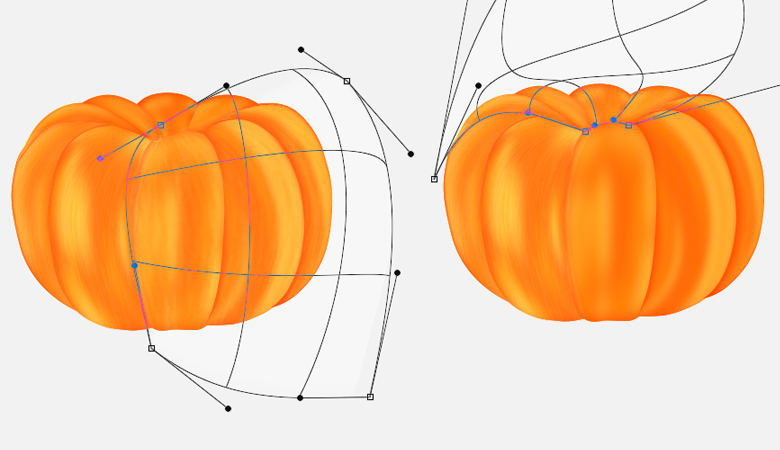
Now, take a copy of the texture (Blending mode: “Linear Dodge”, Opacity: 30-40%), position it over the right side of pumpkin, and curve it using the warp tool. Similarly, modify the texture for the top portion of the pumpkin.
Step 11
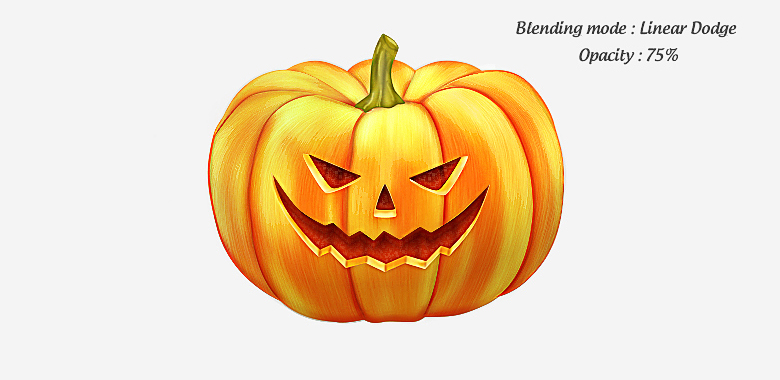
Create a new layer, pick a 4-5px soft round brush tool with 30% opacity, and apply it on this new layer at the junction of various pumpkin parts. After that, apply a 2px Gaussian blur filter to it. Duplicate it, change the blending mode of original layer to “Overlay” with a 100% opacity, and change the blending mode of the duplicated layer to “Multiply” with a 30% opacity.
Step 12
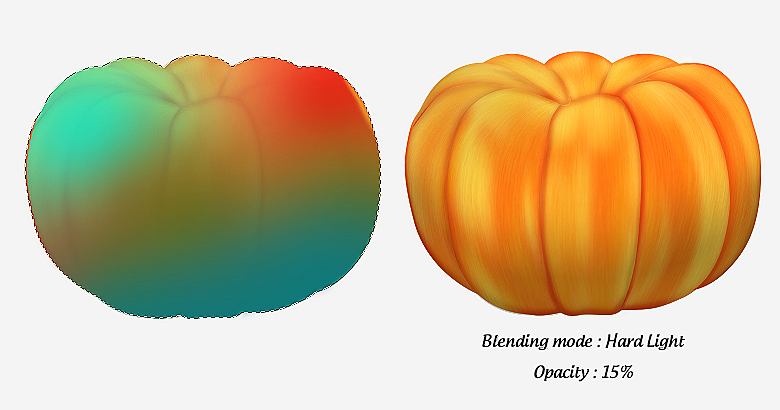
Now, we’ll apply even more shading over the pumpkin. Press Ctrl +

Step 13
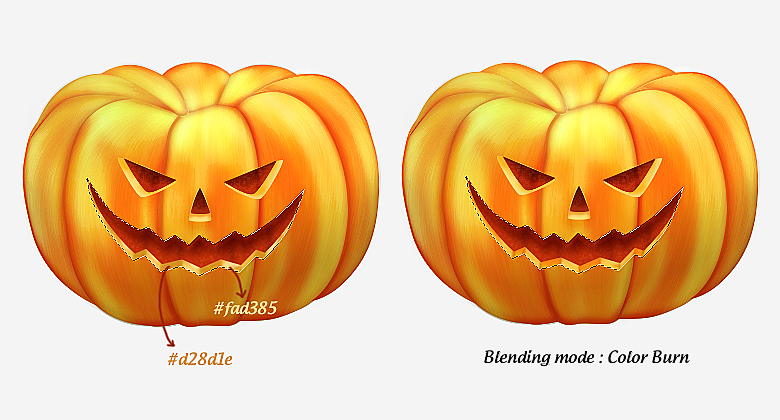
Bring the “Base copy” layer above the rest of the layers, and change its blending mode to “Hard Light” with a 35% opacity.
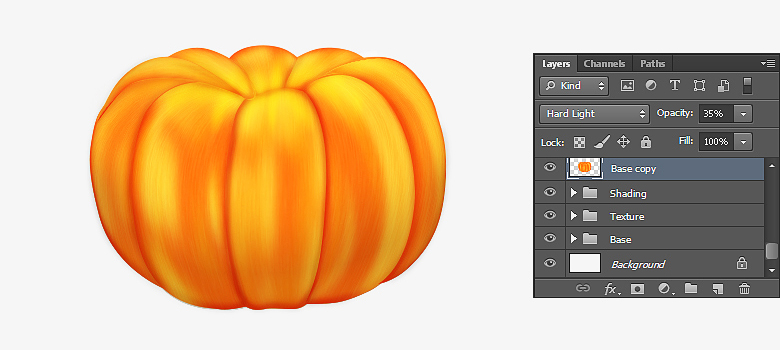
Press Ctrl +
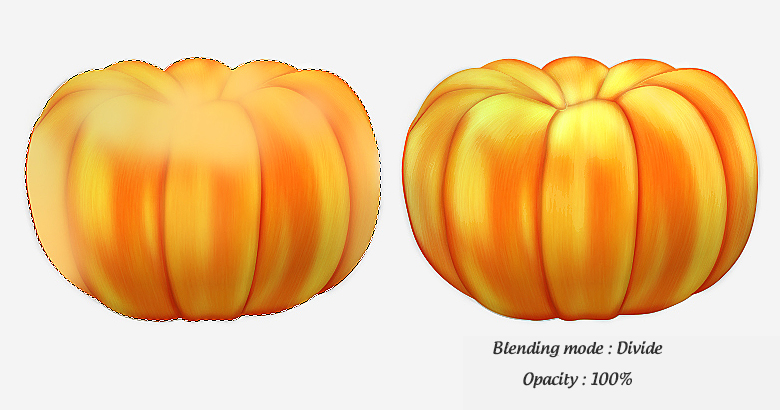
Now, pick #ffca6c as your color and apply a soft round brush on a new layer as shown below. Change its blending mode to “Divide” with 100% opacity.
Step 14
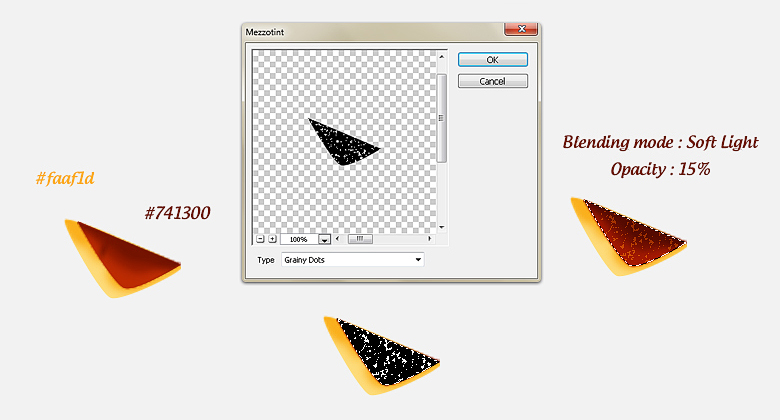
Next, we’ll draw the pumpkin’s carved eyes. Select the pen tool (Tool mode: Shape) to draw two triangular shape as shown below. Label these shapes as “outer” and “inner eye”.
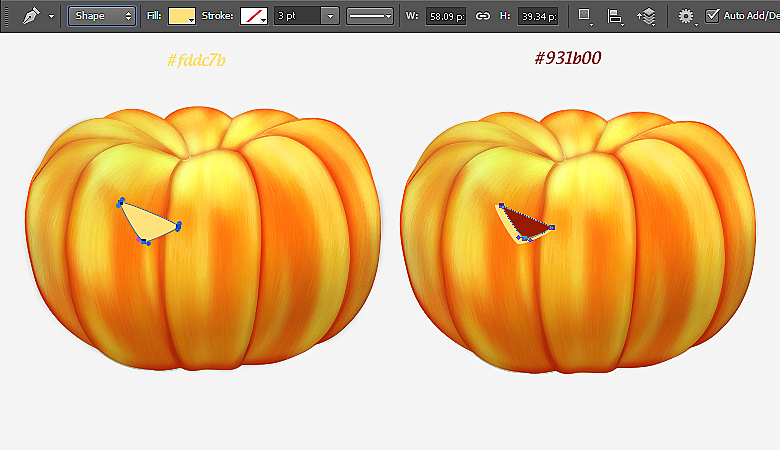
Press Ctrl +
Collect the eye layers into a single group, duplicate it, and flip it horizontally by going to “Edit” > “Transform” > “Flip Horizontal”. Position it over the right side as shown below. Also, make pumpkin’s nose using the same techniques.
Step 15
To make the mouth, draw the following two shapes. Label them as “outer” and “inner mouth”. Press Ctrl +
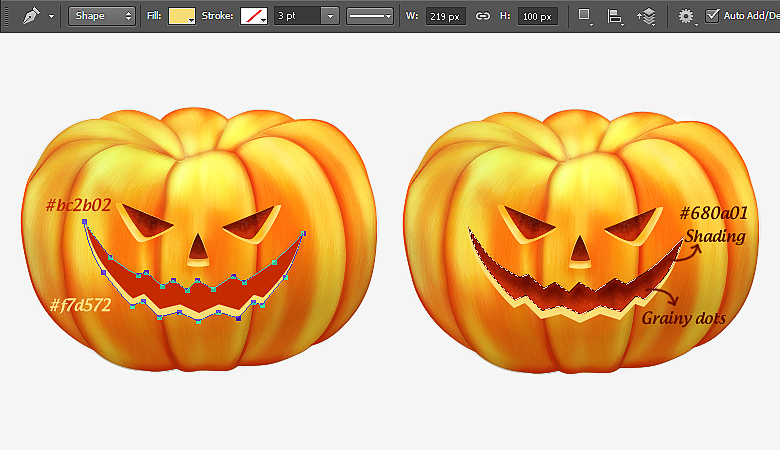
Now, press Ctrl +
Step 16
To make the pumpkin stem, draw the following shape using the pen tool (Tool mode: Shape) with #a0910e as your color. Apply some shading over it using a soft round brush tool with the following two colors. Create yellow highlights with a 1px hard round brush tool; change its blending mode to “Screen” with a 30% opacity.

Step 17
To sharpen all the details, collect all of the layers into a single group and label it as “Pumpkin”. Duplicate this new layer, merge it, and go to “Filter” > “Other” > “High Pass”. Apply a 2px high pass effect on it. Change its blending mode to “Linear Dodge” with a 75% opacity.
Step 18
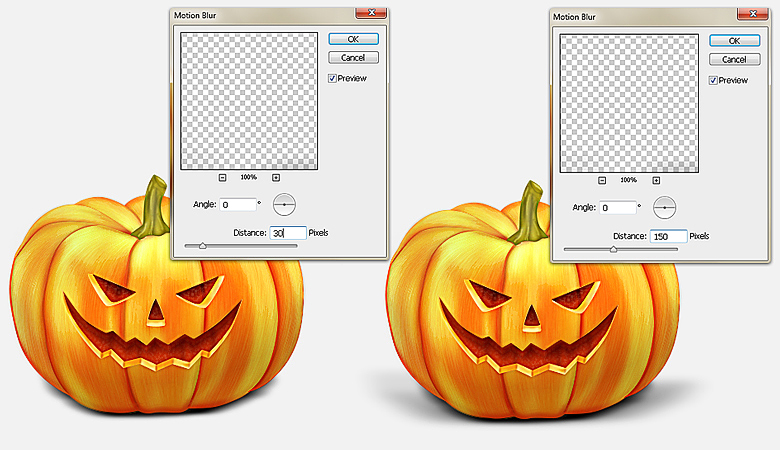
Next, we’ll make pumpkin’s shadow. Create a new layer just above the background and apply a soft round brush with a size of 30px and a black fill color near the bottom of pumpkin. After that, apply a motion blur filter on it at a O degree angle and a 30px distance. Duplicate this new layer and once again apply a motion blur filter on this layer at a O degree angle and at a 150px distance.
Step 19
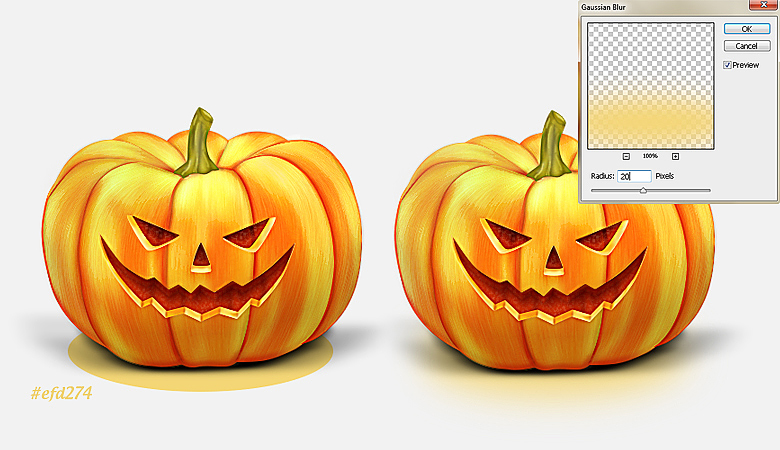
Now, we’ll make a faint glow under the pumpkin. Draw an ellipse below the rest of the layers using #efd274 as your fill color and apply a 20px Gaussian blur filter to it.
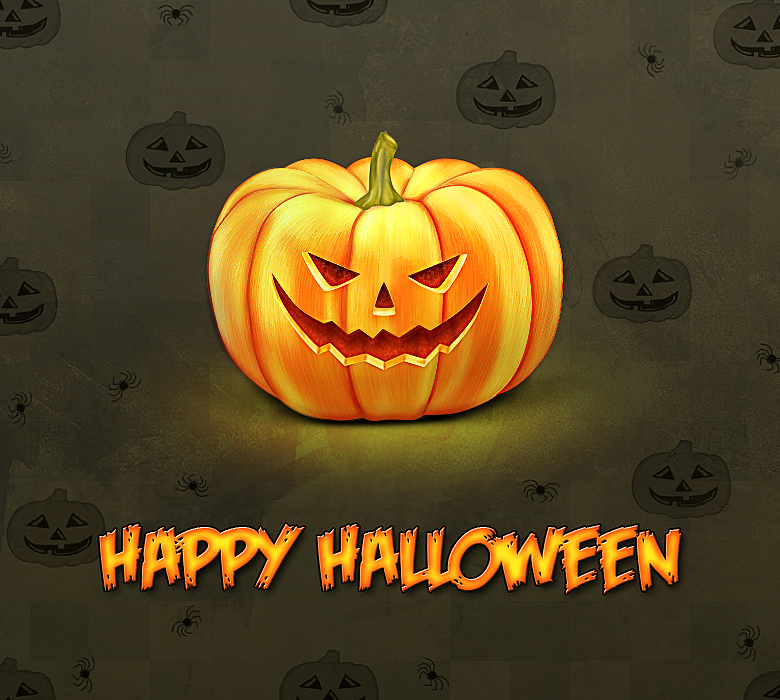
Step 20
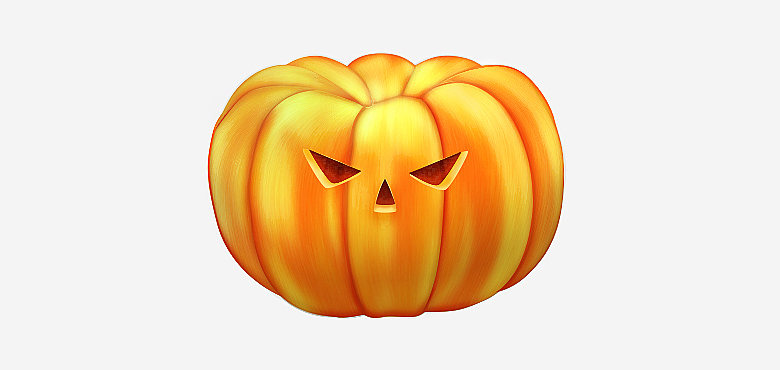
Our Halloween pumpkin is ready. You can now add a suitable complementary background and the title.
I hope you enjoyed the tutorial and learned something useful. I’ll wait for your feedback. Happy Halloween!
Frequently Asked Questions about Creating a Stylized Halloween Pumpkin in Photoshop
What are the basic tools in Photoshop that I need to create a stylized Halloween pumpkin?
To create a stylized Halloween pumpkin in Photoshop, you will need to familiarize yourself with several basic tools. These include the Brush Tool for painting and drawing, the Pen Tool for creating precise paths, the Shape Tool for creating custom shapes, and the Gradient Tool for applying gradients to your design. Additionally, you will need to use the Layers Panel to manage your design elements and the Adjustment Layers to modify colors and tones.
How can I create a realistic texture for my Halloween pumpkin in Photoshop?
Creating a realistic texture for your Halloween pumpkin involves using a combination of Photoshop tools and techniques. You can start by using the Brush Tool to paint the basic shape of the pumpkin. Then, use the Burn and Dodge Tools to add shadows and highlights, respectively. You can also use the Texturizer filter to add a texture to your pumpkin, making it look more realistic.
Can I use Photoshop to create a thumbnail for my Halloween-themed YouTube video?
Yes, you can use Photoshop to create a thumbnail for your Halloween-themed YouTube video. You can design a custom thumbnail using the same techniques you used to create your stylized Halloween pumpkin. Once you’re done, you can save your design as a JPEG or PNG file and upload it to YouTube as your video’s thumbnail.
How can I add a spooky background to my Halloween pumpkin design in Photoshop?
You can add a spooky background to your Halloween pumpkin design by using the Place Embedded command in Photoshop. This allows you to import an image file into your design. You can then use the Free Transform command to resize and position the image as your background. You can also use the Adjustment Layers to modify the colors and tones of your background to make it look more spooky.
Can I share my Halloween pumpkin design on Pinterest directly from Photoshop?
While Photoshop does not have a direct sharing feature to Pinterest, you can save your design as a JPEG or PNG file and then upload it to Pinterest. Make sure to use the Save for Web command in Photoshop to optimize your design for online sharing.
How can I animate my Halloween pumpkin design in Photoshop?
Photoshop has a built-in animation feature called the Timeline Panel. You can use this to create a simple animation of your Halloween pumpkin design. You can animate different elements of your design, such as the pumpkin’s eyes glowing or the background changing colors.
Can I use my Halloween pumpkin design as a custom thumbnail for my YouTube video?
Yes, you can use your Halloween pumpkin design as a custom thumbnail for your YouTube video. After creating your design in Photoshop, save it as a JPEG or PNG file. Then, when you upload your video to YouTube, you can select your design as the custom thumbnail.
How can I make my Halloween pumpkin design look more professional in Photoshop?
To make your Halloween pumpkin design look more professional, pay attention to details such as shadows, highlights, and textures. Use the Burn and Dodge Tools to add depth to your design, and the Texturizer filter to add a realistic texture. Also, use the Adjustment Layers to fine-tune the colors and tones of your design.
Can I print my Halloween pumpkin design from Photoshop?
Yes, you can print your Halloween pumpkin design directly from Photoshop. Use the Print command in the File menu to open the Print dialog box. Here, you can adjust the print settings to suit your needs. Make sure to select the correct printer and paper size before printing.
How can I save my Halloween pumpkin design in Photoshop for future editing?
To save your Halloween pumpkin design for future editing, use the Save command in the File menu. Make sure to save your design as a PSD file, which is the default Photoshop format. This will preserve all your layers and adjustments, allowing you to edit your design in the future.