In part two of this tutorial series we finished putting together the basics of our Simple Content Management System. It’s now possible to create, edit, and delete pages with pretty URLs.
In this post, we’re going to look at adding an Administration section and defining which pages are public facing and which are private.
Key Takeaways
- The tutorial shows how to add an Administration section to a Simple Content Management System (CMS) in Sinatra, which allows users to create, edit, and delete pages. This includes configuring the application to use sessions, creating a helper method to track whether a user is logged in or out, and adding a login button to the application.
- The tutorial demonstrates how to add a very basic, insecure authentication system, which can be enhanced with stronger authentication procedures such as the sinatra-auth gem, Twitter Authentication, or a custom solution.
- The tutorial guides on how to protect admin features by creating a protected! helper method, which stops unauthorized users from accessing certain routes. It uses Sinatra’s halt helper method to issue a 401 ‘unauthorized’ error if the user is not logged in.
- The tutorial explains how to display different URLs for different users. When a user is logged in, the URL uses the page’s ID, otherwise it uses the page’s pretty URL. A helper method called url is created for this purpose.
Logging In and Logging Out
First off, we’ll add some functionality to allow a user to log in and out. To do this, we need to configure our application to use sessions. Change the configure block near the top of main.rb to the following:
configure do
  Mongoid.load!("./mongoid.yml")
  enable :sessions
end
We can now access the session hash to keep track of whether a user is logged in from request to request.
Next, we will create a helper method called admin? that is true if the session[:admin] hash is true (this will be set as true when a user logs in and set to nil when the user logs out). Add the following line below the configure block in main.rb:
helpers do
  def admin?
    session[:admin]
  end
end
We now have a convenient way to check if a user is logged in or not in views and route handlers. Let’s use this to add a login button to our application.
We want this to be on every page, so change the layout.slim file in the views folder to the following:
doctype html
html
  head
    title= @title || "Simple Sinatra CMS"
    link rel="stylesheet" href="/styles/main.css"
  body
    - if admin?
      == slim :admin
    - else
      a.rounded.button href="/login" Log In
    h1.logo
      a href="/pages" Simple Sinatra CMS
    == yield
The section after the body now checks to see if the user is logged in (by checking if the admin? helper method that we just created is true). If they are, then we will display the admin partial view (we’ll create this in a minute).
If the user is not logged in, then a link is displayed to allow them to log in. This link has the classes .rounded.button that we created in the last tutorial so it appears as a button. It also contains the route /login, which we’ll handle shortly.
Let’s get the admin view sorted – save the following code as admin.slim in the views folder:
#admin
  nav
    ul
      li
        a.round.button href='/pages' Pages
      li
        a.round.button href='/pages/new' Add a page
      - if @page
        li
          a.round.button href="/pages/#{@page.id}/edit" Edit this page
        li
          a.round.button href="/pages/delete/#{@page.id}" Delete this page a.rounded.button href="/logout" Log Out
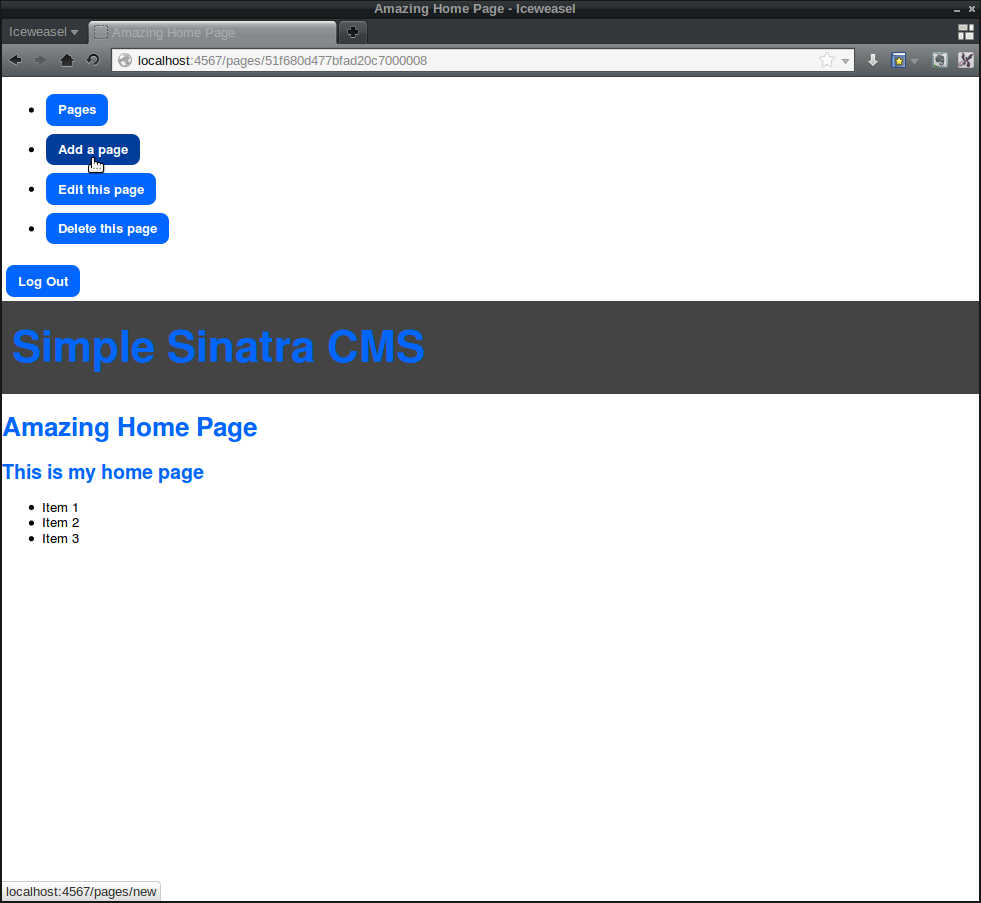
This adds the “create new page” button as well as buttons for edit and delete that only show if you are looking at an actual page. These buttons should only be available if the user is logged in. In the previous version of our application, they were placed in other views, so we need to remove them now and limit them to only being in the admin view.
In index.slim, remove the following line of code:
a.button.round href='/pages/new' Add a new pageNow in show.slim, remove the following code:
a.button href="/pages/#{@page.id}/edit" Edit
a.button href="/pages/delete/#{@page.id}" Delete
To finish off, we need to create the actual route handlers that are used to log the user in and out. Add the following lines above the page route handlers in main.rb:
get('/login'){session[:admin]=true; redirect back}
get('/logout'){session[:admin]=nil; redirect back}
These route handlers set the session[:admin] hash to true when the user logs in and to nil when the user logs out by visiting the relevant URL. This information is retained in the session hash using cookies and is then used by the admin? helper method that we just created to check whether the user is logged in or out. Both route handlers also use the handy back helper method that Sinatra provides. This will take the user back to whichever page they were viewing before they logged in or out.
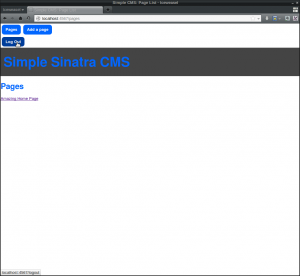
This should now all be working. Make sure you start the server running and then navigate to http://localhost:4567/pages and have a play around at logging in and out. You should only be able to see the buttons for adding, editing and deleting pages if you are logged in.

The Most Insecure Security Ever?
The eagle-eyed amongst you might have noticed that this authentication system is not particularly strong – there isn’t even a password! This is because having a strong auth procedure is an important business and beyond the scope of this tutorial. What we have done here is put the pieces in place so that a suitable auth solution can then be baked in to the relevant places.
You might want take a look at the sinatra-auth gem (or one of the many other gems that provide auth). You could use Twitter Authentication or you could even roll your own solution.
For the purposes of this tutorial though, I just wanted to demonstrate how the application would function differently depending on whether the user is logged in or not.
Protecting Admin Features
We have a number of routes in our application that we don’t particularly want all users to access. In fact, most of the routes fall under this category, we actually only want the ‘show’ URLs to be visible to everybody.
We have successfully hidden the buttons that link to the admin routes, but that might not stop a determined or curious user from simply typing the URLs directly into the browser address bar. For example, you can just navigate to ‘http://localhost:4567/pages/new’ to add a new page.
We need to add some security to the routes themselves to actually only allow users to access these routes if they are logged in. This is done by creating a protected! helper method.
Add the following method inside the helpers block that we created earlier:
def protected!
  halt 401,"You are not authorized to see this page!" unless admin?
end
This uses Sinatra’s halt helper method to stop the request in its tracks and issue a 401 ‘unauthorized’ error with a custom message (this can be a string or you could create a view for it). Notice that we use the admin? helper method that we created at the beginning of this tutorial to check if the user is logged in, so the request will only be halted if the user is NOT logged in.
This method now needs to be added to all the route handlers that we want to protect. This means we need to change a lot of our route handlers to the following:
get '/pages/new' do
  protected!
  @page = Page.new
  slim :new
end

post '/pages' do
  protected!
  page = Page.create(params[:page])
  redirect to("/pages/#{page.id}")
end

put '/pages/:id' do
  protected!
  page = Page.find(params[:id])
  page.update_attributes(params[:page])
  redirect to("/pages/#{page.id}")
end

get '/pages/delete/:id' do
  protected!
  @page = Page.find(params[:id])
  slim :delete
end

delete '/pages/:id' do
  protected!
  Page.find(params[:id]).destroy
  redirect to('/pages')
end

get '/pages/:id/edit' do
  protected!
  @page = Page.find(params[:id])
  slim :edit
end
Now none of these routes will be accessible to any users that are not logged in, even if they type the route directly into the browser.
Different URLs for Different Users
In the last post, we created pretty URLs that are based on the title of the page. These are the URLs that we would like to use for the majority of users – they look better and we don’t want them to see the IDs of each page exposed in the URL.
When a user is logged in however, we want to use the URL that refers to the ID of the page. To do this we need to add a helper called url our helper block in main.rb:
def url_for page
  if admin?
    "/pages/" + page.id
  else
    "/" + page.permalink
  end
end
This basically uses an if ... else block to check if the user is logged in using our same admin? helper. If the user is logged in, then the URL will use the page’s ID, otherwise it will use the page’s pretty URL.
We can now just use this helper whenever we want to link to a page, confident that the correct URL will be displayed. Also, if we want to change the naming structure for the page URLs then we only have to do it in this one place.
The only place where we currently link to pages is in the page partial, so we need to change the page.slim view to the follwoing:
li
  a href="#{url_for page}" =page.title
Add Some Style
Just to finish off, we can make the list of buttons in the admin section appear as a horizontal list by adding the following piece of Sass code to the bottom of styles.scss:
#admin ul{
  list-style: none;
  margin: 0;
  padding: 0;
  li{
        display: inline-block;
  }
}
Now restart the server and play around with using the different functionality – check that the links are different depending on whether you are logged in or out.

That’s All Folks!
In this post, we’ve added an admininstration section to our content management system, albeit with possibly the least secure authentication system around.
Despite the lack of security, the ability for users to log in has allowed us to separate the different views and functionality of the application. In the next post we’ll be looking at how to cache the pages as well as adding timestamps and versioning to the pages.
Please leave any comments below, as well as any requests for how you’d like to see this CMS develop.
Frequently Asked Questions (FAQs) about Simple CMS in Sinatra
How can I add more functionalities to my CMS in Sinatra?
Adding more functionalities to your CMS in Sinatra depends on the specific functionality you want to add. For instance, if you want to add a search functionality, you can use the ‘sinatra-searchkick’ gem. This gem integrates the Searchkick library with Sinatra, allowing you to add full-text search to your application. You can also add user authentication, image uploading, and many other functionalities using various Sinatra plugins and gems. Always remember to update your Gemfile and run ‘bundle install’ after adding a new gem.
How can I secure my Sinatra CMS against SQL injection attacks?
Sinatra does not provide built-in protection against SQL injection attacks. However, you can use the ‘sinatra-activerecord’ gem to leverage ActiveRecord’s built-in protection against SQL injection. When using ActiveRecord, always use parameterized queries or the ActiveRecord query methods instead of string interpolation to prevent SQL injection.
How can I deploy my Sinatra CMS to a live server?
There are several ways to deploy a Sinatra application to a live server. One of the most popular methods is using Heroku. First, you need to create a Procfile in your application’s root directory. The Procfile should contain the command to run your application. For a typical Sinatra application, the command would be ‘web: bundle exec ruby app.rb -p $PORT’. After creating the Procfile, you can create a new Heroku application and push your code to the Heroku remote.
How can I add a comment section to my Sinatra CMS?
Adding a comment section to your Sinatra CMS involves creating a new Comment model, adding a form to your article view for creating comments, and adding a route to handle the form submission. The Comment model should have fields for the comment content and the associated article. The form should include a textarea for the comment content and a hidden field for the article id. The route should create a new comment with the submitted content and article id, and then redirect back to the article view.
How can I add a user registration and login system to my Sinatra CMS?
Adding a user registration and login system to your Sinatra CMS involves creating a new User model, adding forms for registration and login, and adding routes to handle the form submissions. The User model should have fields for the username and password. The password should be hashed using a gem like ‘bcrypt’. The registration form should include fields for the username and password, and the login form should include fields for the username and password. The routes should handle the creation of new users and the authentication of existing users.
How can I add pagination to my Sinatra CMS?
Adding pagination to your Sinatra CMS involves using a gem like ‘sinatra-paginate’. After adding the gem to your Gemfile and running ‘bundle install’, you can use the ‘paginate’ method in your routes to fetch a specific page of records. In your views, you can use the ‘pagination_links’ helper method to generate links to the different pages.
How can I add a tagging system to my Sinatra CMS?
Adding a tagging system to your Sinatra CMS involves creating a new Tag model and a join model to associate articles with tags. The Tag model should have a field for the tag name. The join model should have fields for the article id and the tag id. In your article form, you can add a field for the tag names, separated by commas. In your article route, you can split the tag names by commas, find or create tags with those names, and associate them with the article.
How can I add a RSS feed to my Sinatra CMS?
Adding a RSS feed to your Sinatra CMS involves creating a new route that generates the RSS feed. The route should fetch the articles to include in the feed, and then use a gem like ‘builder’ to generate the XML for the feed. The XML should include a channel element with information about your site, and an item element for each article with the article title, link, description, and publication date.
How can I add a sitemap to my Sinatra CMS?
Adding a sitemap to your Sinatra CMS involves creating a new route that generates the sitemap. The route should fetch the articles to include in the sitemap, and then use a gem like ‘xml-sitemap’ to generate the XML for the sitemap. The XML should include a url element for each article with the article link and last modification date.
How can I add a contact form to my Sinatra CMS?
Adding a contact form to your Sinatra CMS involves creating a new route and view for the contact form, and another route to handle the form submission. The form should include fields for the sender’s name, email, and message. The submission route should send an email with the submitted information using a gem like ‘pony’. After sending the email, the route should redirect to a confirmation page.
Darren loves building web apps and coding in JavaScript, Haskell and Ruby. He is the author of Learn to Code using JavaScript, JavaScript: Novice to Ninja and Jump Start Sinatra.He is also the creator of Nanny State, a tiny alternative to React. He can be found on Twitter @daz4126.


