
Photoshop is adored by web designers around the globe, as it has the potential to make their ideas come to life. Designers are focusing on creating more and more realistic items these days. Photoshop holds its own in this regard; it has all the necessary gadgets to attain that realism — all you need to do is keep practicing and polishing your skills.
Today, I’ll show you how to create a leather wallet in Photoshop from scratch. We’ll use various shape tools, blending options, and filters to achieve the final result. Hopefully, you will learn some useful tips along the way. So, let’s get started!
Resources:
Leather Texture
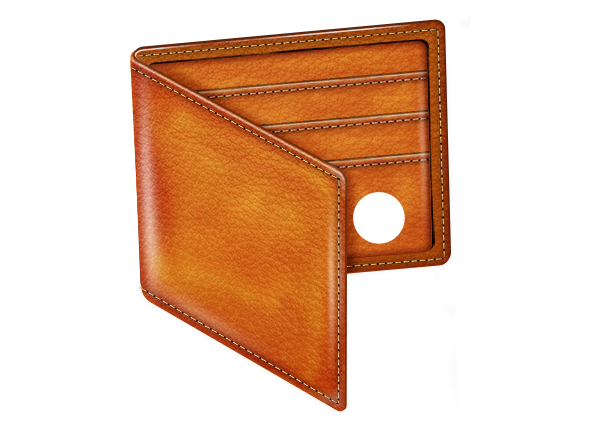
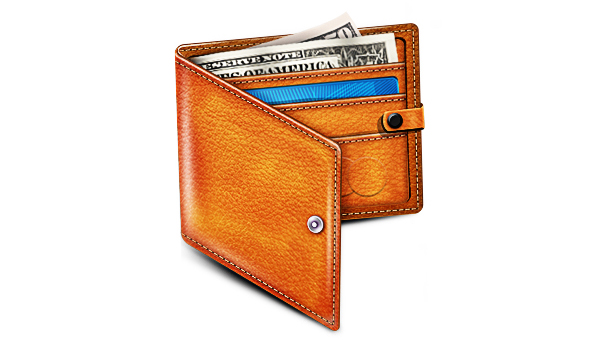
Final result: (Download the finished, layered PSD file.)

Key Takeaways
- Photoshop’s tools and features can be used to create realistic, vectorized items like a leather wallet, with the use of shape tools, blending options, and filters.
- The process involves creating the shape of the wallet, adding texture and shading for realism, and adding details like stitching and pockets, using various Photoshop tools and techniques.
- The article provides a step-by-step guide, starting from creating a new document, setting the foreground color, using the rounded rectangle tool, to more advanced steps like applying burn and dodge tools for shading, adding texture, creating a stitch effect, and adding additional elements like credit cards and money vectors.
- The guide emphasizes the importance of practicing and refining skills in Photoshop to create more realistic designs, and highlights the flexibility and customization options offered by the software, such as adjusting size, shape, color, and adding personalized details.
Step 1
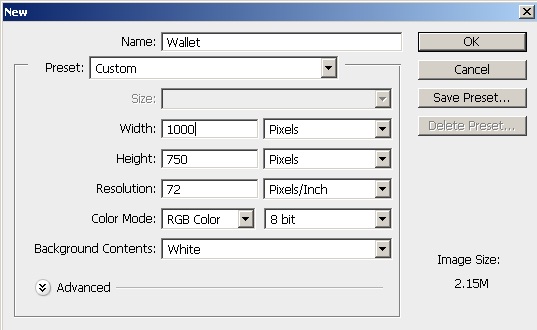
Create a new document in Photoshop with a 1000px width and a 750px height.
Step 2
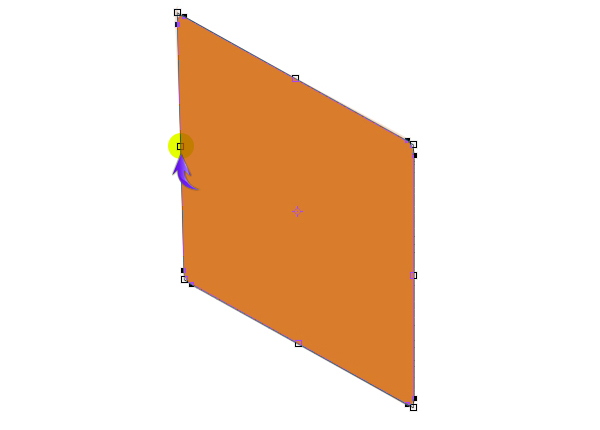
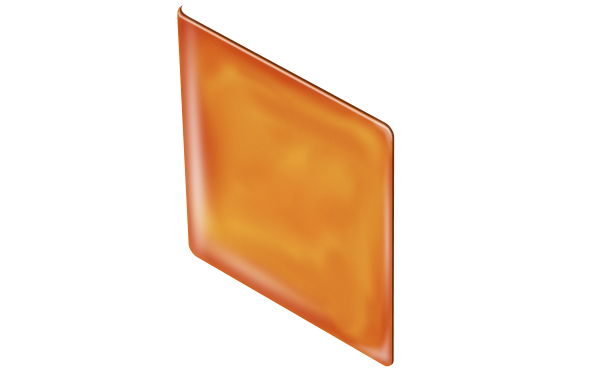
Set #d97d2b as your foreground color and select the rounded rectangle tool. Click on the canvas, and enter following values for rounded rectangle, and hit “OK”.

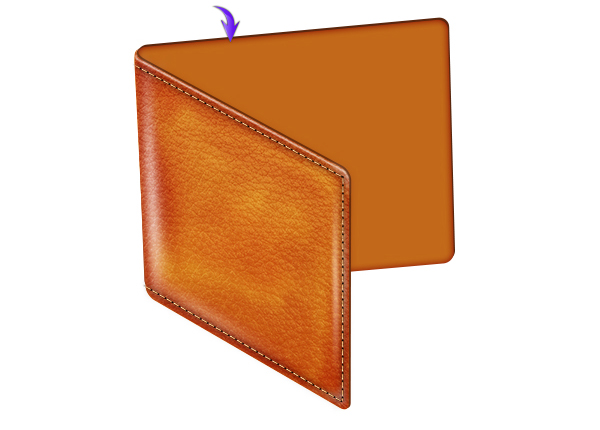
Now go to “Edit” > “Transform” > “Skew” and drag the point shown below upwards.
Step 3
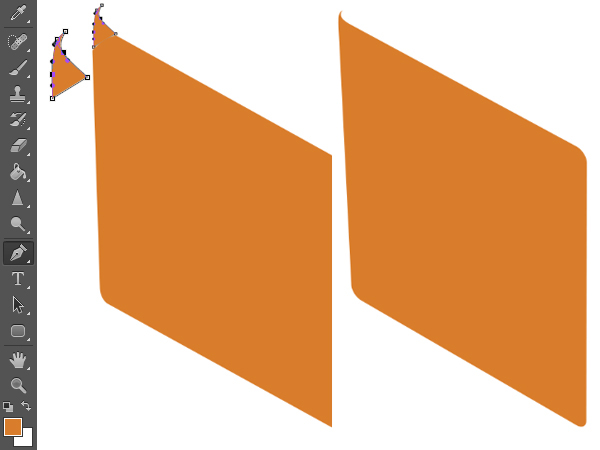
Select the pen tool (Tool mode: Shape) to draw the shape below over the top-left corner of the rectangle. After that, select both the rectangle and the new shape layers and go to “Layer” > “Combine shapes” > “Unite Shapes.” Now, label the combined shape as “Wallet front”.
Step 4
Duplicate the wallet front layer, change its color to #79330c, drag it a bit outward, and position it behind the original layer.

Step 5
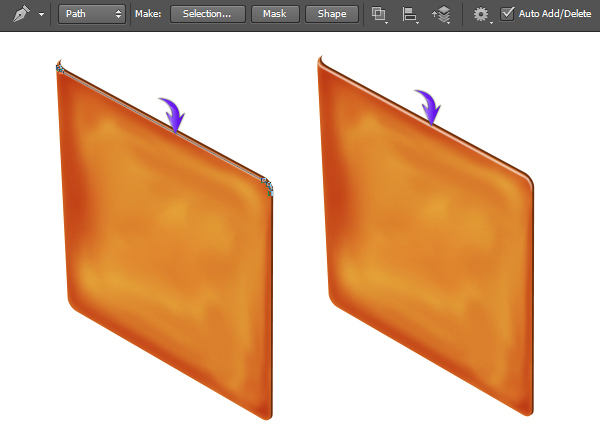
To create shading, we’ll use the burn and dodge tools. Press Ctrl + <click on the wallet front layer> to make a selection around it. Create a new layer above it and go to “Edit” > “Fill.” Use 50% gray to fill the selection. Now, select the burn tool (Range: Midtones, Exposure: 40-70%), choose varying sizes soft round brushes, and apply them roughly on this layer to darken some areas. Once you are done, select this layer and go to “Filter” > “Blur” > “Gaussian Blur” and apply a 3px value to blend any harsh outlines.

To create highlights, select the dodge tool with the same settings used with burn tool and apply it on the gray layer. Apply a 2-3px Gaussian blur filter on it to blend it in. Change the blending mode of gray layer to “Overlay” and adjust its opacity to 80-90%.

Step 6
Set white as your fill color and select a 5px soft round brush. Now, select the pen tool (Tool mode: Path) to draw the path shown below. After that, right-click the canvas and choose the option of “Stroke path” > “Brush.” Then, hit “Delete” to get rid of the path.
To make another highlight, draw the line shown below using a 16-18px soft round brush and go to “Filter” > “Blur” > “Motion Blur.” Apply the following settings here.

Make few more highlights using the same technique. Collect all of the highlights and gray layer in a single group, and label it as “Shading.”
Step 7
Next, we’ll apply texture on the wallet. Go to “File” > “Place” and choose the desired leather texture. Resize and align it over the wallet using the free transform tool (Ctrl + “T”). Now, press Ctrl + <click on the wallet front layer> and press the “Add layer mask” icon present at the bottom of the layers panel. Change its blending mode to “Soft Light.”

Step 8
Now, we’ll give it stitch effect. Set #e49251 as your fill color and go to “Window” > “Brush Presets.” Load the square brushes. Press “F5” to open the brush panel and apply the following settings for square brush.
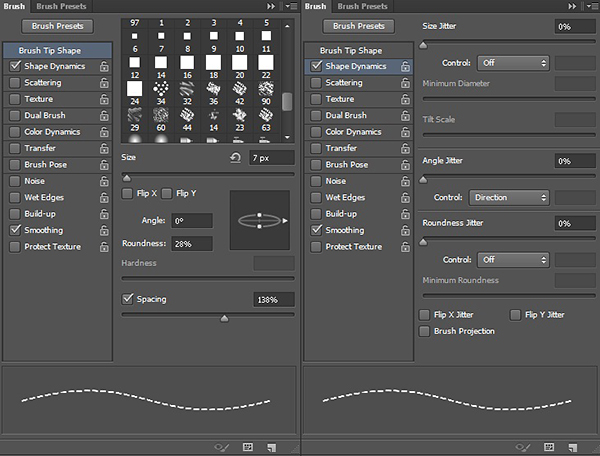
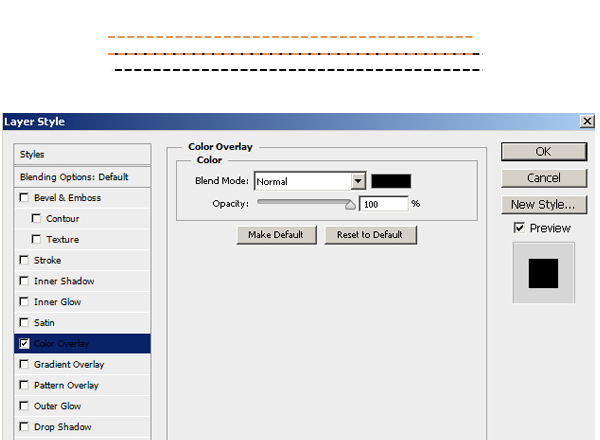
Next, we’ll apply this on a new layer in a straight line. Duplicate it and change its color to black using “Color Overlay” with the settings shown below. Drag the black stitches layer a bit to the right and below the original layer.
Step 9
Double-click on the original stitches layer to open the layer style window and apply the following settings.


Select both stitches layer and press Ctrl + “E” to merge them. Now, duplicate it, position near the top edge of wallet using the free transform tool, and erase any unwanted parts. Duplicate it twice and position them over the other sides.

Step 10
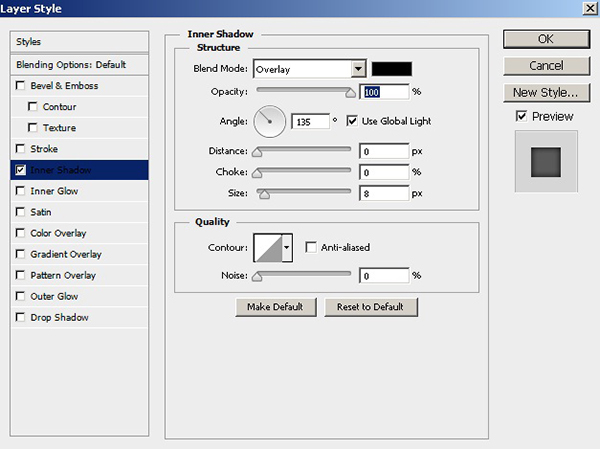
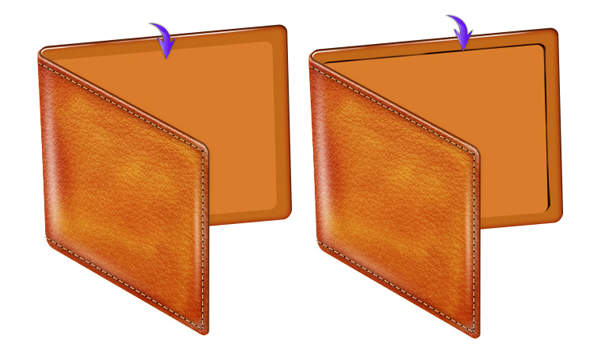
Set #c16819 as your foreground color, drag a round rectangle with the same settings as used in step 2 and skew its right border a bit to give it the shape shown below. Label it as “Backside.” Duplicate it and change its color to #59260d. Place it behind the original and drag it slightly outwards.

Apply the following values for inner shadow on the backside layer.
Step 11
Now, make a highlight near the top edge of the wallet backside in the same way as explained in step 6. Select the soft round eraser tool to erase the line at several points to make it realistic. Look below for clarity.

Step 12
Duplicate the backside rectangle, decrease its size, and change its color to #d97d2b. Label it as “Inside.” Duplicate it, change its color to black, place it behind the original layer and drag it outwards as shown below.
Step 13
Apply the leather texture at the backside in the same way that we applied it to the front in step 7. Reduce its opacity to 80-90%.

Step 14
Duplicate the stitches layer few times and arrange them over the backside, as shown below.

Step 15
Next, we’ll make few pockets. Duplicate the inside rectangle and apply the texture on it. Merge both layers and label it as “Pocket.” Apply the following layer style settings to it.


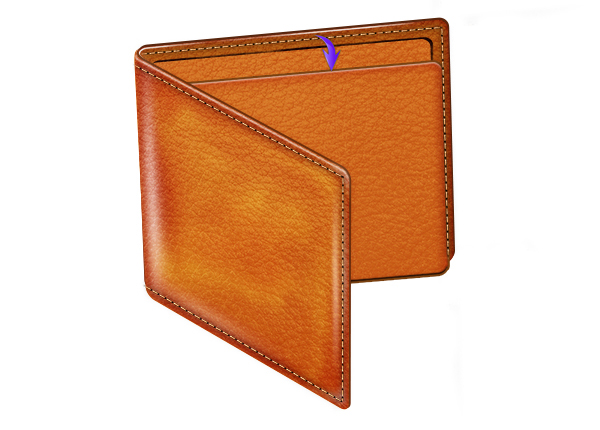
Duplicate the stitch layer, place it near the top edge of pocket, and merge it with pocket layer. Now, duplicate the pocket layer twice and arrange them at some distance over each other. Now, click on the pocket layers one by one, press Ctrl + <click the inside rectangle> to make a selection around it, and add layer mask to them.

Step 16
Select a soft round brush with 50% opacity and apply it on a new layer in black. Change its blending mode to “Overlay.”
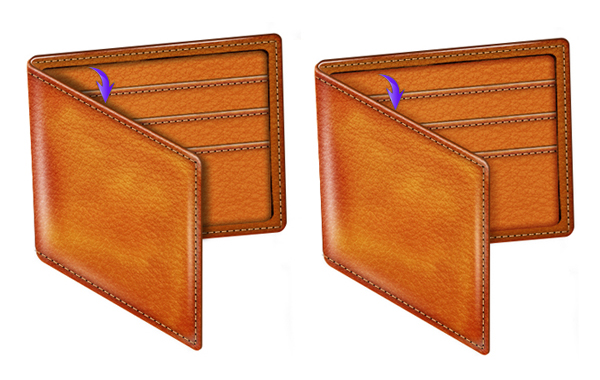
To do more shading over the pockets, create a gray fill layer and apply burn and dodge tools over it using the same technique from step 5. After that, change its blending mode to “Overlay” and its opacity to 40-50%.

Step 17
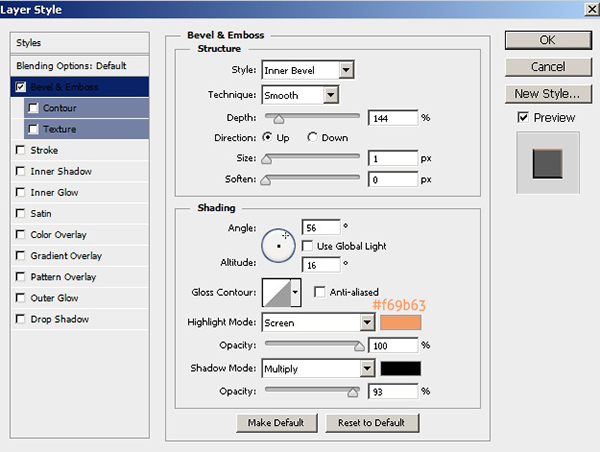
To give the impression of coin in lower pocket, make an ellipse using the ellipse tool.
Set your fill color to 0% and apply the following settings for “Bevel and Emboss.”

Now, apply a 1.5px Gaussian blur filter on it after rasterizing the layer. You can make more coins by simply duplicating the layer.

Step 18
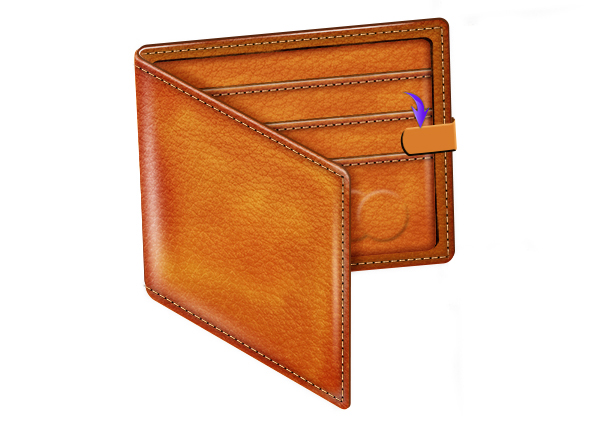
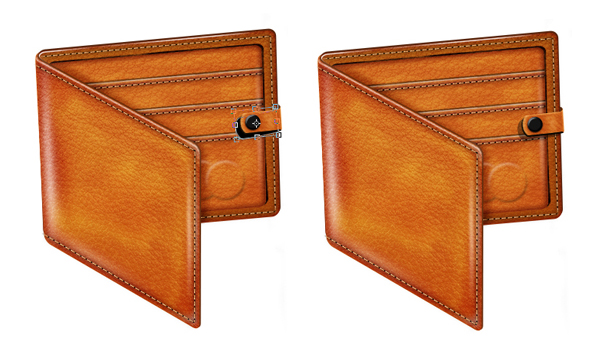
To make the stripe, draw the following shape using the pen tool (Tool mode: Shape) using color #d97d2b. Make a small ellipse below the rest of the layers in #682f08 color and position at the top-right corner of the stripe.

Step 19
I did some shading over the stripe and applied a texture with 40-50% opacity. To make the button, draw an ellipse using color #141414.

Step 20
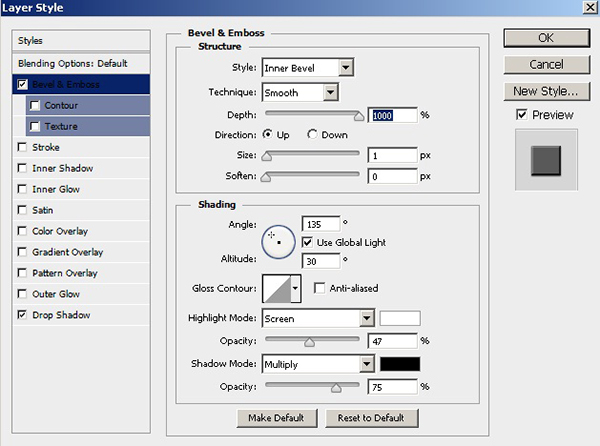
Now, apply following settings for Bevel and Emboss and Drop Shadow on the button.

Duplicate the stripe layer, change its color to black, and place it below the original layer. Now, position it at an angle using the free transform tool. Finally, change its blending mode to “Multiply” and its opacity to 40%.
Step 21
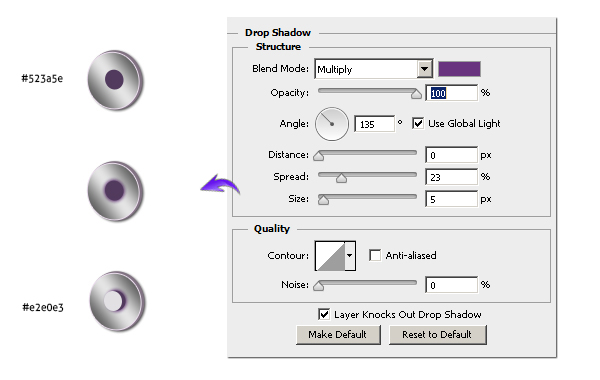
To make the other half of button, draw an ellipse using color #817282. Slightly compress it using the free transform tool. Then, duplicate it. Apply the following values for Drop Shadow on the original layer.

Apply the following settings for Stroke and Gradient Overlay on the duplicated layer.

Now, make a smaller purple ellipse above and apply the following drop shadow settings on it. Make another ellipse above it using color #e2e0e3.
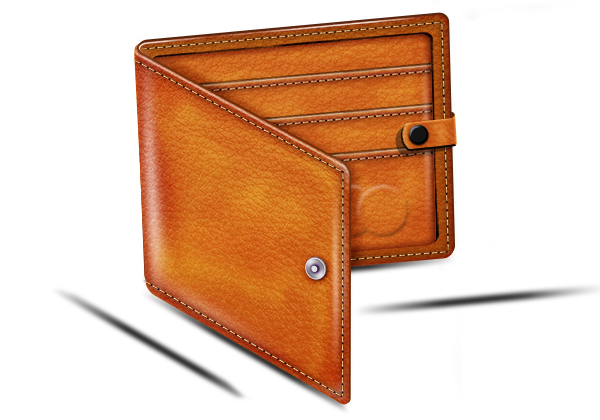
Step 22
Now, make the shadow using the same technique from step 6, but use a pure black color this time. Duplicate and position your two shadows as shown below.
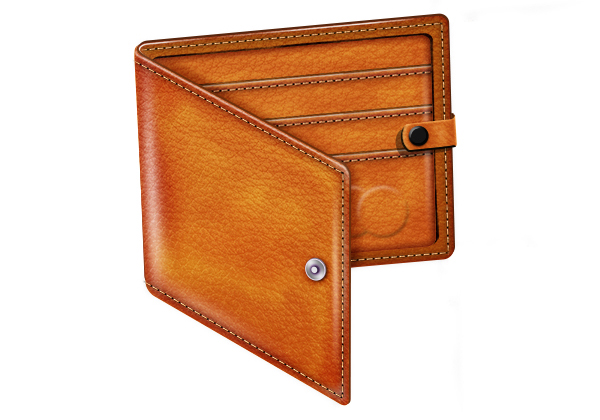
Step 23
That’s it guys, the leather wallet is ready. However, you can add further enhancements your wallet to make it even more interesting. I’ve add few credit cards and money vectors as an example.
That’s all for now, I’ll be back with some other exciting tutorials for you.
Frequently Asked Questions about Creating a Vectorized Leather Wallet in Photoshop
What are the basic tools needed in Photoshop to create a vectorized leather wallet?
To create a vectorized leather wallet in Photoshop, you will need to familiarize yourself with several tools. These include the Pen Tool for creating paths, the Direct Selection Tool for adjusting points on the path, the Brush Tool for adding texture, and the Gradient Tool for adding depth and dimension. You will also need to use the Layers Panel to manage different elements of your design.
How can I add a realistic texture to my vectorized leather wallet in Photoshop?
Adding a realistic texture to your vectorized leather wallet can be achieved by using the Brush Tool and Layer Styles. You can create a new layer and use a leather texture brush to paint over your wallet. Then, adjust the blending mode and opacity to achieve the desired effect. Layer Styles such as Bevel & Emboss or Inner Shadow can also be used to add depth and dimension.
Can I customize the size and shape of my vectorized leather wallet in Photoshop?
Yes, you can customize the size and shape of your vectorized leather wallet in Photoshop. This can be done using the Transform Tool. Simply select the layer containing your wallet, then go to Edit > Transform > Scale or Edit > Transform > Warp to adjust the size and shape.
How can I add details like stitching to my vectorized leather wallet in Photoshop?
Adding details like stitching can be done using the Brush Tool. You can either download a custom brush designed to mimic stitching or create your own by adjusting the brush settings. Once you have your brush ready, create a new layer and paint the stitching onto your wallet.
What are the best practices for saving and exporting my vectorized leather wallet design in Photoshop?
When saving and exporting your design, it’s important to consider the intended use. If you’re planning to print your design, save it as a high-resolution PDF or TIFF file. If it’s for web use, a JPEG or PNG file will suffice. Always remember to save your original Photoshop file (PSD) so you can make changes in the future.
Can I use my vectorized leather wallet design for commercial purposes?
Yes, you can use your vectorized leather wallet design for commercial purposes, provided you have not used any copyrighted images or elements in your design. It’s always a good idea to create your own elements or use royalty-free resources to avoid copyright issues.
How can I create a realistic shadow for my vectorized leather wallet in Photoshop?
Creating a realistic shadow can be done using the Drop Shadow Layer Style. Simply select your wallet layer, go to Layer > Layer Style > Drop Shadow, and adjust the settings to achieve the desired effect.
Can I add other elements like cards or money to my vectorized leather wallet design in Photoshop?
Yes, you can add other elements to your design. This can be done by creating new layers and using the same techniques you used to create the wallet. Remember to keep your layers organized for easier editing.
How can I change the color of my vectorized leather wallet in Photoshop?
Changing the color of your wallet can be done using the Hue/Saturation adjustment. Simply select your wallet layer, go to Image > Adjustments > Hue/Saturation, and adjust the sliders until you achieve the desired color.
What if I make a mistake while creating my vectorized leather wallet in Photoshop?
If you make a mistake, don’t worry. Photoshop has a History Panel that allows you to undo your actions. Simply go to Window > History to access it. Remember to save your work frequently to avoid losing progress.