The Ultimate Angular CLI Reference Guide

In this article, we’ll have a look at what Angular CLI is, what it can do for you, and how it performs some of its magic behind the scenes. Even if you already use Angular CLI, this article can serve as a reference to better understand its inner workings.
Technically, you’re not required to use Angular CLI to develop an Angular application, but its many features can highly improve the quality of your code and save you a lot of time along the way.
Prefer to learn Angular using a step-by-step video course? Check out Learn Angular 5 on SitePoint Premium.
This is the preliminary article in a 4-part series on how to write a Todo application in Angular.
- Part 0 — The Ultimate Angular CLI Reference Guide
- Part 1 — Getting our first version of the Todo application up and running
- Part 2 — Creating separate components to display a list of todos and a single todo
- Part 3 — Update the Todo service to communicate with a REST API
- Part 4 — Use Angular router to resolve data.
Key Takeaways
- Angular CLI is a robust toolset that simplifies the development of Angular applications by automating tasks such as creation, testing, and deployment.
- Installation of Angular CLI requires Node.js and npm, and it is recommended to also install TypeScript to enhance the development experience.
- The `ng new` command is used to create a new Angular application, setting up all necessary files, dependencies, and configurations automatically.
- Angular CLI supports live reloading through the `ng serve` command, allowing developers to preview changes in real time during development.
- Developers can add new features (components, services, classes, etc.) to an existing application using the `ng generate` command, which supports various sub-commands.
- For production, the `ng build` command prepares the application by bundling all JavaScript and CSS files, with options for environment-specific builds.
- Angular CLI is not just a code generator; it integrates understanding of the application structure, which aids in maintaining the quality and consistency of the codebase.
Some History
On September 15, 2016, Angular Final was released.
Where AngularJS 1.x was limited to a framework, Angular has grown into an ambitious platform that allows you to develop fast and scalable applications across all platforms such as web, mobile web, native mobile and even native desktop.
With this transition to a platform, tooling has become more important than ever. However, setting up and configuring tooling is not always easy. To make sure Angular developers can focus on building applications with as little friction as possible, the Angular team is putting a lot of effort into providing developers with a high-quality development toolset.
Part of that toolset are close integrations with a wide array of IDEs and editors. Another part of that toolset is Angular CLI.
So let’s get started!
2017.04.25: As of March 24, Angular CLI v1.0 was released. This article has been updated to reflect the latest changes. If you want to add the latest features of Angular CLI v1.0 to your existing Angular project that was generated with an earlier version of Angular CLI, check out the Angular CLI v1.0 migration guide.
2017.02.17: As of February 9, 2017, the ng deploy command has been removed from the core of Angular CLI. Read more here.
2017.01.27: As of January 27, 2017, the official recommendation is to use the name AngularJS for any 1.x release and the name Angular for any 2+ release. This article has been updated to reflect the official branding guidelines.
What Is Angular CLI?
Angular CLI is a command-line interface (CLI) to automate your development workflow. It allows you to:
- create a new Angular application
- run a development server with LiveReload support to preview your application during development
- add features to your existing Angular application
- run your application’s unit tests
- run your application’s end-to-end (E2E) tests
- build your application for deployment to production.
Before we have a look at each of the above in detail, let’s first see how you can install Angular CLI.
Prerequisites
Before you can use Angular CLI, you must have Node.js 6.9.0 and npm 3.0.0 or higher installed on your system.
You can download the latest version of Node.js for your operating system and consult the latest installation instructions on the official Node.js website.
If you already have Node.js and npm installed, you can verify their version by running:
$ node -v # => displays your Node.js version
$ npm -v # => displays your npm version
Once you have Node.js installed, you can use the npm command to install TypeScript:
$ npm install -g typescript@2.2.0
Although TypeScript is technically not an absolute requirement, it’s highly recommended by the Angular team, so I recommend you install it to make working with Angular as comfortable as possible.
Now that you have Node.js and TypeScript installed, you can install Angular CLI.
Installing Angular CLI
To install Angular CLI, run:
$ npm install -g @angular/cli
This will install the ng command globally on your system.
To verify whether your installation completed successfully, you can run this:
$ ng version
This displays the version you have installed:
@angular/cli: 1.0.0
node: 6.10.0
os: darwin x64
Now that you have Angular CLI installed, let’s use it to create a new application.
Creating a New Angular Application
There are two ways to create a new application using Angular CLI:
ng init: create a new application in the current directoryng new: create a new directory and runng initinside the new directory.
So ng new is similar to ng init, except that it also creates a directory for you.
Assuming you haven’t created a directory yet, let’s use ng new to create a new project:
$ ng new my-app
Behind the scenes, the following happens:
- a new directory
my-appis created - all source files and directories for your new Angular application are created based on the name you specified (
my-app) and best-practices from the official Angular Style Guide - npm dependencies are installed
- TypeScript is configured for you
- the Karma unit test runner is configured for you
- the Protractor end-to-end test framework is configured for you
- environment files with default settings are created.
You’ll learn more about each of these aspects in the following sections.
At this point you have a working Angular application and your new directory my-app looks like this:
.
├── README.md
├── e2e
│   ├── app.e2e-spec.ts
│   ├── app.po.ts
│   └── tsconfig.e2e.json
├── karma.conf.js
├── package.json
├── protractor.conf.js
├── src
│   ├── app
│   │   ├── app.component.css
│   │   ├── app.component.html
│   │   ├── app.component.spec.ts
│   │   ├── app.component.ts
│   │   └── app.module.ts
│   ├── assets
│   ├── environments
│   │   ├── environment.prod.ts
│   │   └── environment.ts
│   ├── favicon.ico
│   ├── index.html
│   ├── main.ts
│   ├── polyfills.ts
│   ├── styles.css
│   ├── test.ts
│   ├── tsconfig.app.json
│   ├── tsconfig.spec.json
│   └── typings.d.ts
├── tsconfig.json
└── tslint.json
Available Options
--dry-run: boolean, defaultfalse, perform dry-run so no changes are written to filesystem--verbose: boolean, defaultfalse--link-cli: boolean, defaultfalse, automatically link the@angular/clipackage (more info)--skip-install: boolean, defaultfalse, skipnpm install--skip-git: boolean, defaultfalse, don’t initialize git repository--skip-tests: boolean, defaultfalse, skip creating tests--skip-commit: boolean, defaultfalse, skip committing the first git commit--directory: string, name of directory to create, by default this is the same as the application name--source-dir: string, default'src', name of source directory--style: string, default'css', the style language to use ('css','less'or'scss')--prefix: string, default'app', the prefix to use when generating new components--mobile: boolean, defaultfalse, generate a Progressive Web App application (see section on upcoming features)--routing: boolean, defaultfalse, add module with routing information and import it in main app module--inline-style: boolean, defaultfalse, use inline styles when generating the new application--inline-template: boolean, defaultfalse, use inline templates when generating the new application.
Run $ ng generate --help to see all available options of your locally installed Angular CLI.
Let’s see how you can start your application so you can see it in action.
Running Your Application
To preview your new application in your browser, navigate to its directory:
$ cd my-app
and run:
$ ng serve
to start the built-in development server on port 4200:
** NG Live Development Server is running on http://localhost:4200 **
Hash: 09fb2ad840c1472e5885
Time: 6230ms
chunk    {0} polyfills.bundle.js, polyfills.bundle.js.map (polyfills) 158 kB {4} [initial] [rendered]
chunk    {1} main.bundle.js, main.bundle.js.map (main) 3.62 kB {3} [initial] [rendered]
chunk    {2} styles.bundle.js, styles.bundle.js.map (styles) 9.77 kB {4} [initial] [rendered]
chunk    {3} vendor.bundle.js, vendor.bundle.js.map (vendor) 2.37 MB [initial] [rendered]
chunk    {4} inline.bundle.js, inline.bundle.js.map (inline) 0 bytes [entry] [rendered]
webpack: Compiled successfully.
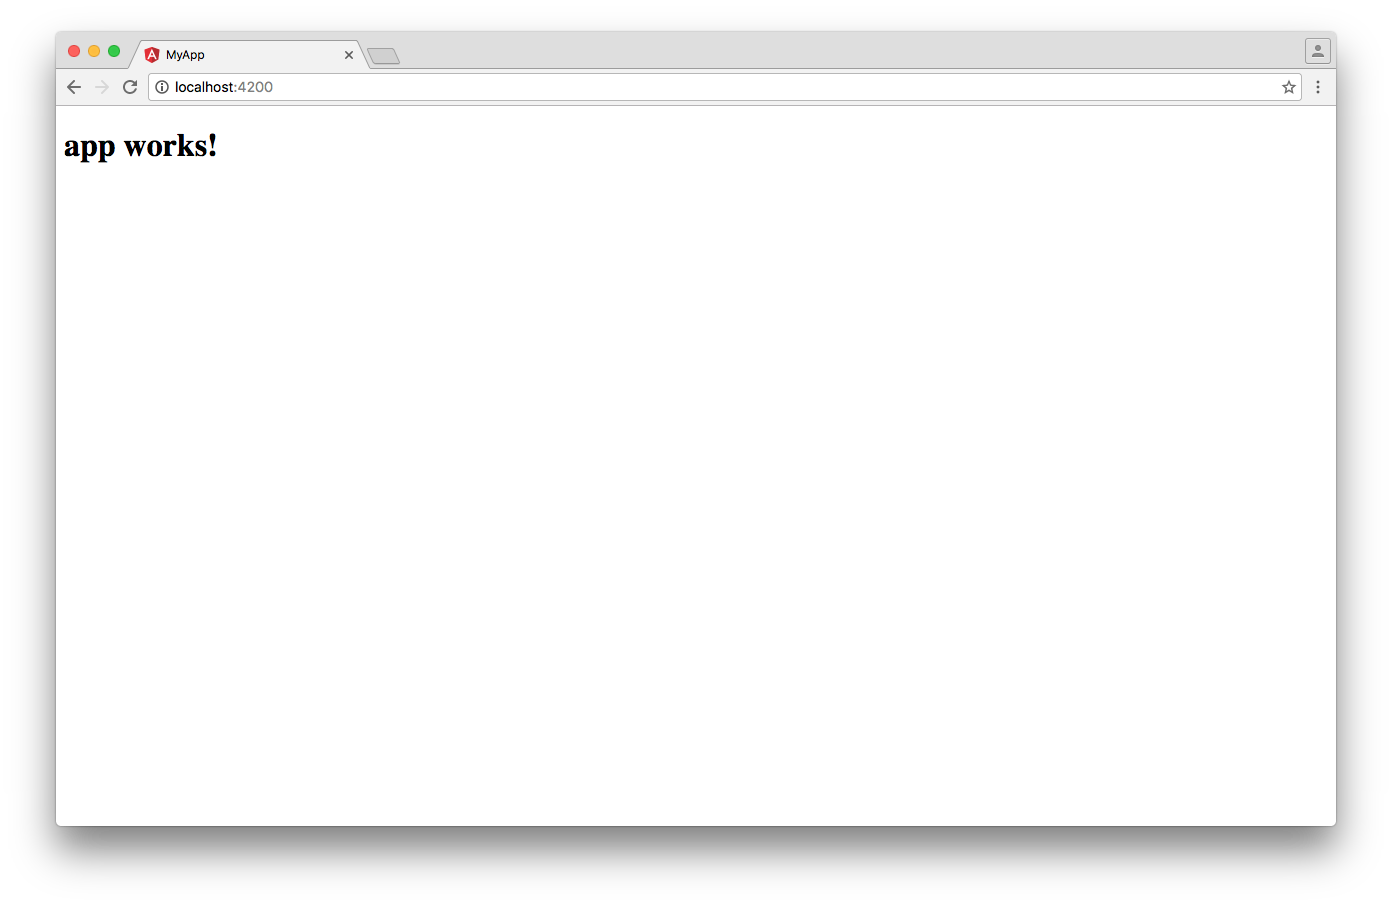
You can now navigate your favorite browser to http://localhost:4200/ to see your application in action:
Behind the scenes, the following happens:
- Angular CLI loads its configuration from
.angular-cli.json - Angular CLI runs Webpack to build and bundle all JavaScript and CSS code
- Angular CLI starts Webpack dev server to preview the result on
localhost:4200.
Notice that the ng serve command doesn’t exit and return to your terminal prompt after step 3.
Instead, because it includes LiveReload support, the process actively watches your src directory for file changes. When a file change is detected, step 2 is repeated and a notification is sent to your browser so it can refresh automatically.
To stop the process and return to your prompt, press ctrl-c.
Adding Features to Your Angular Application
You can use the ng generate command to add features to your existing application:
ng generate class my-new-class: add a class to your applicationng generate component my-new-component: add a component to your applicationng generate directive my-new-directive: add a directive to your applicationng generate enum my-new-enum: add an enum to your applicationng generate module my-new-module: add a module to your applicationng generate pipe my-new-pipe: add a pipe to your applicationng generate service my-new-service: add a service to your application
The generate command and the different sub-commands also have shortcut notations, so the following commands are similar:
ng g cl my-new-class: add a class to your applicationng g c my-new-component: add a component to your applicationng g d my-new-directive: add a directive to your applicationng g e my-new-enum: add an enum to your applicationng g m my-new-module: add a module to your applicationng g p my-new-pipe: add a pipe to your applicationng g s my-new-service: add a service to your application.
Each of the different sub-commands performs a different task and offers different options and parameters.
Let’s have a look at each of them.
Adding a new class
To add a class called UserProfile, run:
$ ng generate class user-profile
installing component
  create src/app/user-profile.ts
Angular CLI will automatically adjust the letter case of the file name and class name for you, so the following commands have the same effect:
# All three commands are equivalent
$ ng generate class user-profile
$ ng generate class userProfile
$ ng generate class UserProfile
Behind the scenes, the following happens:
- a file
src/app/user-profile.tsis created that exports an empty class namedUserProfile
Available options
--spec: boolean, defaultfalse, generate spec file with unit test
Run $ ng generate --help to see all available options of your locally installed Angular CLI.
Examples:
# Generate class 'UserProfile'
$ ng generate class user-profile

# Generate class 'UserProfile' with unit test
$ ng generate class user-profile --spec
Adding a new component
To add a component with a selector app-site-header, run:
$ ng generate component site-header
installing component
  create src/app/site-header/site-header.component.css
  create src/app/site-header/site-header.component.html
  create src/app/site-header/site-header.component.spec.ts
  create src/app/site-header/site-header.component.ts
  update src/app/app.module.ts
Angular CLI will automatically adjust the letter case of the file name and component name for you and apply the prefix to the component selector, so the following commands have the same effect:
# All three commands are equivalent
$ ng generate component site-header
$ ng generate component siteHeader
$ ng generate component SiteHeader
Behind the scenes, the following happens:
- a directory
src/app/site-headeris created - inside that directory four files are generated:
- a CSS file for the component styles
- an HTML file for the component template
- a TypeScript file with a component class named
SiteHeaderComponentand selectorapp-site-header - a spec file with a sample unit test for your new component
SiteHeaderComponentis added as a declaration in the@NgModuledecorator of the nearest module, in this case theAppModuleinsrc/app/app.module.ts.
Available options
--flat: boolean, defaultfalse, generate component files insrc/appinstead ofsrc/app/site-header--inline-template: boolean, defaultfalse, use an inline template instead of a separate HTML file--inline-style: boolean, defaultfalse, use inline styles instead of a separate CSS file--prefix: boolean, defaulttrue, use prefix specified in.angular-cli.jsonin component selector--spec: boolean, defaulttrue, generate spec file with unit test--view-encapsulation: string, specifies the view encapsulation strategy--change-detection: string, specifies the change detection strategy.
Run $ ng generate --help to see all available options of your locally installed Angular CLI.
Examples:
# Generate component 'site-header'
$ ng generate component site-header

# Generate component 'site-header' with inline template and inline styles
$ ng generate component site-header --inline-template --inline-style
Adding a new directive
To add a directive with a selector appAdminLink, run:
$ ng generate directive admin-link
installing directive
  create src/app/admin-link.directive.spec.ts
  create src/app/admin-link.directive.ts
  update src/app/app.module.ts
Angular CLI will automatically adjust the letter case of the file name and directive name for you and apply the prefix to the directive selector, so the following commands have the same effect:
# All three commands are equivalent
$ ng generate directive admin-link
$ ng generate directive adminLink
$ ng generate directive AdminLink
Behind the scenes, the following happens:
- a file
src/app/admin-link.directive.tsis created that exports a directive namedAdminLinkDirectivewith a selectorappAdminLink - a file
src/app/admin-link.directive.spec.tsis created with a unit test for the directive AdminLinkDirectiveis added as a declaration in the@NgModuledecorator of the nearest module, in this case theAppModuleinsrc/app/app.module.ts.
Available options
--flat: boolean, defaulttrue, generate directive files insrc/appinstead ofsrc/app/admin-link--prefix: boolean, defaulttrue, use prefix specified in.angular-cli.jsonin directive selector--spec: boolean, defaulttrue, generate spec file with unit test
Run $ ng generate --help to see all available options of your locally installed Angular CLI.
Examples:
# Generate directive 'adminLink'
$ ng generate directive admin-link

# Generate directive 'adminLink' without unit test
$ ng generate directive admin-link --spec=false
Adding a new enum
To add an enum called Direction, run:
$ ng generate enum direction
installing enum
  create src/app/direction.enum.ts
Angular CLI will automatically adjust the letter case of the file name and enum name for you, so the following commands have the same effect:
# Both commands are equivalent
$ ng generate enum direction
$ ng generate enum Direction
Behind the scenes, the following happens:
- a file
src/app/direction.enum.tsis created that exports an enum namedDirection
Available options
There are no command line options available for this command.
Adding a new module
To add a new module to your application, run:
$ ng generate module admin
installing module
  create src/app/admin/admin.module.ts
Behind the scenes, the following happens:
- a directory
src/app/adminis created - an
AdminModulemodule is created insidesrc/app/admin/admin.module.ts.
Notice that the AdminModule module is not added automatically to your main module AppModule in src/app/app.module.ts. It’s up to you to import the module where you need it.
To import your new module in another module, you can specify is as an import in an @NgModule definition. For example:
import { AdminModule } from './admin/admin.module';

@NgModule({
  // ...
  imports: [
    AdminModule
  ]
})
export class AppModule { }
Available options
--routing: boolean, defaultfalse, generate an additional moduleAdminRoutingModulewith just the routing information and add it as an import to your new module--spec: boolean, defaultfalse, addsrc/app/admin/admin.module.spec.tswith a unit test that checks whether the module exists.
Run $ ng generate --help to see all available options of your locally installed Angular CLI.
Examples:
# Add module 'admin'
$ ng generate module admin

# Add module 'admin' with additional module containing routing information
$ ng generate module admin --routing
Adding a new pipe
A pipe is the Angular equivalent of a filter in AngularJS 1.x and allows you to transform a displayed value within a template.
To add a pipe with a name convertToEuro, run:
$ ng generate pipe convert-to-euro
installing pipe
  create src/app/convert-to-euro.pipe.spec.ts
  create src/app/convert-to-euro.pipe.ts
  update src/app/app.module.ts
Angular CLI will automatically adjust the letter case of the file name and pipe name for you, so the following commands have the same effect:
# All three commands are equivalent
$ ng generate pipe convert-to-euro
$ ng generate pipe convertToEuro
$ ng generate pipe ConvertToEuro
Behind the scenes, the following happens:
- a file
src/app/convert-to-euro.pipe.tsis created that exports a pipe class namedConvertToEuroPipe - a file
src/app/convert-to-euro.pipe.spec.tsis created with a unit test for the pipe ConvertToEuroPipeis added as a declaration in the@NgModuledecorator of the nearest module, in this case theAppModuleinsrc/app/app.module.ts.
Available options
--flat: boolean, defaulttrue, generate component files insrc/appinstead ofsrc/app/site-header--spec: boolean, defaulttrue, generate spec file with unit test.
Run $ ng generate --help to see all available options of your locally installed Angular CLI.
Examples:
# Generate pipe 'convertToEuro' with spec and in /src/app directory
$ ng generate pipe convert-to-euro

# Generate pipe 'convertToEuro' without spec and in /src/app/convert-to-euro directory
$ ng generate pipe convert-to-euro --spec=false --flat=false
Adding a new service
To add a service with a dependency injection token BackendApiService, run:
$ ng generate service backend-api
installing service
  create src/app/backend-api.service.spec.ts
  create src/app/backend-api.service.ts
  WARNING Service is generated but not provided, it must be provided to be used
Angular CLI will automatically adjust the letter case of the file name and pipe name for you, so the following commands have the same effect:
# All three commands are equivalent
$ ng generate service backend-api
$ ng generate service backendApi
$ ng generate service BackendApi
Behind the scenes, the following happens:
- a file
src/app/backend-api.service.tsis created that exports a service class namedBackendApiService - a file
src/app/backend-api.service.spec.tsis created with a unit test for your new service.
Notice how Angular CLI warns that the service is generated but not provided anywhere yet. It’s up to you to register the service as a provider by adding it to the providers: [] array where you need it (e.g. in a module or component). For example:
import { BackendApiService } from './backend-api.service';

@NgModule({
  // ...
  providers: [BackendApiService],
  bootstrap: [AppComponent]
})
Available options
--flat: boolean, defaulttrue, generate service file insrc/appinstead ofsrc/app/backend-api--spec: boolean, defaulttrue, generate spec file with unit test
Run $ ng generate --help to see all available options of your locally installed Angular CLI.
Examples:
# Generate service with DI token 'BackendApiService' in /src/app directory
$ ng generate service backend-api

# Generate service with DI token 'BackendApiService' in /src/app/backend-api directory
$ ng generate service backend-api --flat=false
Special note
Angular CLI does not just blindly generate code for you. It uses static analysis to better understand the semantics of your application.
For example, when adding a new component using ng generate component, Angular CLI finds the closest module in the module tree of your application and integrates the new feature in that module.
So if you have an application with multiple modules, Angular CLI will automatically integrate the new feature in the correct module, depending on the directory where you run the command from.
Running Your Unit Tests
Angular CLI automatically configures the Karma test runner for you when your application is initially created.
When adding a feature to your application, you can use the --spec option to specify whether you want Angular CLI to also create a corresponding .spec.ts file with a sample unit test for your new feature.
Spec files are created in the same directory of their corresponding feature in the src directory. This allows you to easily locate them when working on a feature.
Running all unit tests of your application thus implies running all unit tests specified in all files ending in .spec.ts in all directories inside your src directory.
To run all unit tests, run:
$ ng test
The following output will appear in your console:
$ ng test
[karma]: No captured browser, open http://localhost:9876/
[karma]: Karma v1.4.1 server started at http://0.0.0.0:9876/
[launcher]: Launching browser Chrome with unlimited concurrency
[launcher]: Starting browser Chrome
[Chrome 57.0.2987 (Mac OS X 10.12.0)]: Connected on socket 4OBzlsVyIPZyE1AYAAAA with id 41455596
Chrome 57.0.2987 (Mac OS X 10.12.0): Executed 3 of 3 SUCCESS (0.132 secs / 0.121 secs)
A special browser instance will also be launched:
Here’s what happens behind the scenes:
- Angular CLI loads
.angular-cli.json. - Angular CLI runs Karma with the configuration specified in
.angular-cli.json. By default this iskarma.conf.jslocated in the root directory of your application. - Karma opens the browser specified in the Karma configuration. By default the browser is set to Google Chrome.
- Karma then instructs the browser (Chrome) to run
src/test.tsusing the testing framework specified in the Karma config. By default this is the Jasmine framework. The filesrc/test.tsis automatically created when your application is created. It’s pre-configured to load and configure the code that’s needed to test your Angular application and run all spec files ending in.spec.tsin yoursrcdirectory. - Karma reports the result of the test run to the console.
- Karma watches the
srcfile for changes and repeats step 4 and 5 when a file change is detected.
To end the process, you can press ctrl-c.
If you want to learn more about testing your Angular code, you can check out the Official Angular Testing Guide.
Running Your End-to-end (E2E) Tests
Angular CLI automatically configures Protractor for you when your application is initially created.
To run your E2E tests, run:
$ ng e2e
The following output will appear in your console:
** NG Live Development Server is running on http://localhost:49152 **
Hash: e570d23ac26086496e1d
Time: 6087ms
chunk    {0} polyfills.bundle.js, polyfills.bundle.js.map (polyfills) 158 kB {4} [initial] [rendered]
chunk    {1} main.bundle.js, main.bundle.js.map (main) 3.62 kB {3} [initial] [rendered]
chunk    {2} styles.bundle.js, styles.bundle.js.map (styles) 9.77 kB {4} [initial] [rendered]
chunk    {3} vendor.bundle.js, vendor.bundle.js.map (vendor) 2.37 MB [initial] [rendered]
chunk    {4} inline.bundle.js, inline.bundle.js.map (inline) 0 bytes [entry] [rendered]
webpack: Compiled successfully.
I/file_manager - creating folder /Users/jvandemo/Projects/test/my-app/node_modules/protractor/node_modules/webdriver-manager/selenium
I/downloader - curl -o /Users/jvandemo/Projects/test/my-app/node_modules/protractor/node_modules/webdriver-manager/selenium/chromedriver_2.29.zip https://chromedriver.storage.googleapis.com/2.29/chromedriver_mac64.zip
I/update - chromedriver: unzipping chromedriver_2.29.zip
I/update - chromedriver: setting permissions to 0755 for /Users/jvandemo/Projects/test/my-app/node_modules/protractor/node_modules/webdriver-manager/selenium/chromedriver_2.29
I/launcher - Running 1 instances of WebDriver
I/direct - Using ChromeDriver directly...
Spec started

  my-app App
    ✓ should display message saying app works

Executed 1 of 1 spec SUCCESS in 0.523 sec.
I/launcher - 0 instance(s) of WebDriver still running
I/launcher - chrome #01 passed
A special browser instance will also be launched:

Here’s what happens behind the scenes:
- Angular CLI loads
.angular-cli.json. - Angular CLI runs Protractor with the configuration specified in
.angular-cli.json. By default this is theprotractor.conf.jsfile located in the root directory of your application. - Protractor opens the browser specified in the Protractor configuration. By default the browser is set to Google Chrome.
- Protractor then instructs the browser (Chrome) to run all spec files ending in
.e2e-spec.tsin youre2edirectory. - Protractor reports the result of the test run to the console.
The process then exits automatically after step 5.
If you want to learn more about E2E testing your Angular code, you can check out the Official Angular Testing Guide and the Protractor documentation.
Building Your Application for Production
Running ng serve builds and bundles your Angular application automatically to a virtual filesystem during development.
However, when your application is ready for production, you’ll need real files that you can deploy to your server or to the cloud.
To build and bundle your application for deployment, run:
$ ng build
The output of the command is sent to your console:
Hash: 59aaa9ef8eac5d46cdf8
Time: 5433ms
chunk    {0} polyfills.bundle.js, polyfills.bundle.js.map (polyfills) 158 kB {4} [initial] [rendered]
chunk    {1} main.bundle.js, main.bundle.js.map (main) 3.61 kB {3} [initial] [rendered]
chunk    {2} styles.bundle.js, styles.bundle.js.map (styles) 9.77 kB {4} [initial] [rendered]
chunk    {3} vendor.bundle.js, vendor.bundle.js.map (vendor) 2.07 MB [initial] [rendered]
chunk    {4} inline.bundle.js, inline.bundle.js.map (inline) 0 bytes [entry] [rendered]
This is what happens behind the scenes:
- Angular CLI loads its configuration from
.angular-cli.json. - Angular CLI runs Webpack to build and bundle all JavaScript and CSS code.
- The result is written to the
outDirdirectory specified in your Angular CLI configuration. By default, this is thedistdirectory.
Available options
--aot: enable ahead-of-time compilation--base-href: string, the base href to use in the index file--environment: string, defaultdev, environment to use--output-path: string, directory to write the output to--target: string, defaultdevelopment, environment to use--watch: boolean, defaultfalse, watch files for changes and rebuild when a change is detected.
Targets
Specifying a target impacts the way the build process operates. Its value can be one of the following:
development: default mode, do not minify or uglify codeproduction: minify and uglify code.
Building your application in production mode:
$ ng build --target=production
This results in bundles that are minified, uglified and have hashes in their names:
Hash: 4dea6adc9ac01de3c11b
Time: 5588ms
chunk    {0} polyfills.2d45a4c73c85e24fe474.bundle.js (polyfills) 158 kB {4} [initial] [rendered]
chunk    {1} main.a64b48e56248eb808195.bundle.js (main) 20.8 kB {3} [initial] [rendered]
chunk    {2} styles.d41d8cd98f00b204e980.bundle.css (styles) 69 bytes {4} [initial] [rendered]
chunk    {3} vendor.205c7417e47c580a2c34.bundle.js (vendor) 1.1 MB [initial] [rendered]
chunk    {4} inline.310ccba0fff49a724c8f.bundle.js (inline) 0 bytes [entry] [rendered]
Environments
Environments let you specify settings to customize your application behavior.
You can define your own environments in the .angular-cli.json file. The default ones are:
source: use settings defined inenvironments/environment.tsdev: use settings defined inenvironments/environment.tsprod: use settings defined inenvironments/environment.prod.ts.
Here, environments/environment.ts equals:
export const environment = {
  production: false
};
And environments/environment.prod.ts equals:
export const environment = {
  production: true
};
The build process will use the dev environment by default.
If you specify a different environment, the build process will use the corresponding environment:
# Uses environments/environment.ts
$ ng build

# Also uses environments/environment.ts
$ ng build --environment=dev

# Uses environments/environment.prod.ts
$ ng build --environment=prod
As you can see in src/main.ts, you can access the environment settings from your code by importing environments/environment:
import { enableProdMode } from '@angular/core';
import { platformBrowserDynamic } from '@angular/platform-browser-dynamic';

import { AppModule } from './app/app.module';
import { environment } from './environments/environment';

if (environment.production) {
  enableProdMode();
}

platformBrowserDynamic().bootstrapModule(AppModule);
The build process will make sure the right environment is provided when you import it.
Deploying Your Application
As of February 9, 2017, the ng deploy command has been removed from the core of Angular CLI. Read more here.
Ejecting your application
As of v1.0, Angular CLI provides a command to decouple your application from Angular CLI.
By default, Angular CLI manages the underlying webpack configuration for you so you don’t have to deal with its complexity.
If, at any given time, you wish to manually configure Webpack and you no longer want to use Angular CLI with your Angular application, you can run:
$ ng eject
This will generate the following output in your console:
==========================================================================================
Ejection was successful.

To run your builds, you now need to do the following commands:
   - "npm run build" to build.
   - "npm run test" to run unit tests.
   - "npm start" to serve the app using webpack-dev-server.
   - "npm run e2e" to run protractor.

Running the equivalent CLI commands will result in an error.

==========================================================================================
Some packages were added. Please run "npm install".
This is what happens behind the scenes:
- A property
ejected: trueis added to the.angular-cli.jsonfile - A
webpack.config.jsfile is generated in the root of your application with a standalone Webpack configuration so you can build your project without Angular CLI - The
buildscript in yourpackage.jsonis updated so you can runnpm run buildto build your project - The
testscript in yourpackage.jsonis updated so you can runnpm run testornpm testto run your unit tests - The
startscript in yourpackage.jsonis updated so you can runnpm run startornpm startto start a development server - The
e2escript in yourpackage.jsonis updated so you can runnpm run e2eto run your end-to-end tests.
After ejecting your application, you can manually update the Webpack configuration to your liking and the Angular CLI commands will no longer work.
So if, for some reason, you want to move away from Angular CLI, the eject command has you covered.
A Glimpse into the Future
Angular CLI’s roadmap contains many exciting upcoming features:
- progressive web app (PWA) support
Angular CLI will be able to create a Web Application Manifest for you, generate an App Shell and provide Service Worker scripts to cache your application data.
Learn more about mobile support here. - Refactoring Support
In addition to adding features to your application, Angular CLI will also let you refactor existing features — for example, moving a component or renaming a service. - Upgrade Support
Angular CLI will be able to help you with Angular upgrades. Because Angular CLI has a semantic understanding of your application, it will be able to help you with code changes that are required when upgrading to a newer version of Angular. - Extensibility
Improved extensibility support so you can create your own custom add-ons and deployment scripts. - Increased Performance
Improved performance so Angular CLI becomes faster. - Library Developer Mode
In addition to creating a new application, Angular CLI will also let you create a new library that can be consumed by others.
Some of these features are already partially available. Check out the GitHub repository if you want to play around with them.
Summary
Angular CLI is a command-line interface (CLI) to automate your development workflow.
Today, you can already use Angular CLI to:
- create a new Angular application
- run a development server with LiveReload support to preview your application during development
- add features to your existing Angular application
- run your application’s unit tests
- run your application’s end-to-end (E2E) tests
- build your application for deployment to production
- deploy your application to a server.
Although it’s technically not required to use Angular CLI to develop an Angular application, it can definitely improve the quality of your code and save you a lot of time and effort.
Because of the many exciting features that will be added over time, Angular CLI will probably become an indispensable tool for developing Angular applications.
To learn more about Angular CLI, check out the official website and the GitHub repository.
The Ultimate Angular CLI Reference Guide was peer reviewed by Tim Severien, Vildan Softic and Joan Yin. Thanks to all of SitePoint’s peer reviewers for making SitePoint content the best it can be!
Frequently Asked Questions (FAQs) about Angular CLI
What is the difference between Angular CLI and AngularJS CLI?
Angular CLI and AngularJS CLI are both command-line interfaces used for automating the development workflow. However, Angular CLI is used for Angular applications (Angular 2 and above), while AngularJS CLI is used for AngularJS applications (Angular 1.x). Angular CLI provides a more robust set of commands for creating, testing, and deploying Angular applications. It also supports TypeScript, a statically typed superset of JavaScript, which AngularJS CLI does not.
How do I update my Angular CLI to the latest version?
To update your Angular CLI to the latest version, you can use the following commands in your terminal or command prompt. First, uninstall the current version of Angular CLI using the command npm uninstall -g @angular/cli. Then, clear the cache using npm cache verify. Finally, install the latest version of Angular CLI using npm install -g @angular/cli@latest.
How do I create a new Angular project using Angular CLI?
To create a new Angular project using Angular CLI, use the command ng new project-name. Replace project-name with the name you want to give to your project. This command creates a new directory with the same name as your project, sets up the necessary Angular files and directories, and installs the necessary npm packages.
How do I serve my Angular application locally using Angular CLI?
To serve your Angular application locally, navigate to the root directory of your project in the terminal or command prompt and use the command ng serve. This command compiles your application and starts a web server. By default, your application will be served at http://localhost:4200/.
How do I build my Angular application for production using Angular CLI?
To build your Angular application for production, use the command ng build --prod. This command compiles your application into an output directory named dist/ at the root of your project. The --prod flag enables production mode, which optimizes the build for production.
How do I generate a new component using Angular CLI?
To generate a new component using Angular CLI, use the command ng generate component component-name. Replace component-name with the name you want to give to your component. This command creates a new directory with the same name as your component, and sets up the necessary files for the component.
How do I add a new module to my Angular application using Angular CLI?
To add a new module to your Angular application, use the command ng generate module module-name. Replace module-name with the name you want to give to your module. This command creates a new directory with the same name as your module, and sets up the necessary files for the module.
How do I run unit tests in my Angular application using Angular CLI?
To run unit tests in your Angular application, use the command ng test. This command runs the unit tests in your application using Karma and Jasmine.
How do I run end-to-end tests in my Angular application using Angular CLI?
To run end-to-end tests in your Angular application, use the command ng e2e. This command runs the end-to-end tests in your application using Protractor.
How do I lint my Angular application using Angular CLI?
To lint your Angular application, use the command ng lint. This command checks your application for linting errors according to the rules specified in the tslint.json file.
Front-end Architect at The Force - specializing in JavaScript and AngularJS. Developer Expert at Google. Gymnast. Dad. Family man. Creator of Angular Express.