

Key Takeaways
- This tutorial provides a detailed guide on integrating Twitter Bootstrap with a Rails 3.1 app using gems Formtastic and Tabulous, which simplify web form implementation and tab-based navigation respectively.
- The tutorial covers creating a new Rails app, adding Bootstrap-Sass, adding scaffolding, integrating Formtastic using Formtastic-Bootstrap, and adding tab navigation with Tabulous.
- Formtastic, a gem by Justin French, produces cleaner HTML than standard Rails methods, making it easier to create appealing forms. However, it doesn’t work well with Twitter Bootstrap without the use of Formtastic-Bootstrap, a gem by Matthew Bellantoni.
- Tabulous, a gem by Wyatt Greene, simplifies the creation of the Twitter Bootstrap navigation bar. It automatically generates most of the necessary code, simplifying the process for developers.
- Twitter Bootstrap is a powerful tool for quickly building attractive websites, but it requires a web application like Rails to bring its design elements to life. However, the two frameworks weren’t designed to work perfectly together, so it’s important to research the available gems and their updates.
Last month I discussed all of the different gems that are available for integrating Twitter Bootstrap with a Rails 3.1 app. These gems make the Twitter Bootstrap CSS styles available in your Rails 3.1 asset pipeline as Less or Sass code. However, getting the Twitter CSS code is just the first step – you also need to know how to use it in a Rails app.
Today I’ll take the next step. This article is a detailed, step by step tutorial that will take you through the process of writing a new Rails 3.1 app that uses Twitter Bootstrap with Formtastic and Tabulous, two great gems that make it easier to implement web forms and tab based navigation in Rails – two major features of Twitter Bootstrap. We’ll also use a third gem called Formtastic-Bootstrap that modifies the HTML produced by Formtastic to play nicely with the Twitter Bootstrap files.
Read on to learn more… in just five easy steps we’ll have a simple web site up and running that illustrates how to implement Twitter Bootstrap forms and tab navigation using Rails 3.1!
Step 1: Create a new Rails app
Let’s get started by creating a brand new Rails 3.1.3 app, the latest version of Rails available as I write this:
$ rails -v

Rails 3.1.3

$ rails new origami_hub

$ cd origami_hub

$ rm public/index.html

$ rails generate controller welcome index
You can see we’re going to create a web site to keep track of Origami artwork! You can also see I deleted the default, static home page, public/index.html. And the last command generates a controller called “Welcome” that will handle displaying the web site’s home page.
The next step is to edit the config/routes.rb file. Go ahead and paste this into the routes file:
OrigamiHub::Application.routes.draw do

  root :to => 'welcome#index'

end
Finally, let’s start up our Rails server (type “rails server”) and open http://localhost:3000:
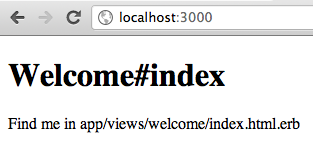
You should see this text in the site’s new home page; if you don’t then double check the commands above carefully.
Step 2: Add Bootstrap-Sass
Today I’ll use the Bootstrap-Sass gem by Thomas McDonald to import the Twitter Bootstrap code. To learn more about Bootstrap-Sass and how it works, check out my post from November. Adding it to our new Rails app is simple; first edit your Gemfile and add it to the “assets” group:
# Gems used only for assets and not required

# in production environments by default.

group :assets do

  gem 'bootstrap-sass'
etc...
Then you need to install it with Bundler:
$ bundle install
Next, we need to create a new Sass code file to hold our CSS style code. Create a file called “origami_hub.css.scss” in the app/assets/stylesheets folder with this one line of code in it. This imports the Twitter Bootstrap CSS styles into our app:
@import 'bootstrap';
Now if you stop, re-run your Rails server and refresh the page you should see the same thing, but with subtle changes in the font and layout:
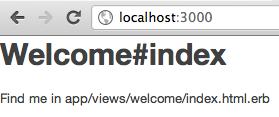
This may not look much different, but actually there are subtle changes in the fonts, and also the text is flush against the top left corner now. These changes mean we have successfully loaded Twitter Bootstrap into our Rails app! If you ran View –> Source in your browser and inspected the code returned by the origami_hub.css request, you’d see all of the Twitter styles.
Step 3: Add Scaffolding
So far, so good; now we have our site’s navigation bar appearing correctly. As a next step, let’s create an Origami model along with pages for displaying and editing them – Rails scaffolding will be perfect. For today, I’ll just use two string attributes; the name of the origami artwork and the name of the artist. Here are the commands:
$ rails generate scaffold origami name:string artist:string

$ rake db:migrate

$ rm app/assets/stylesheets/scaffolds.css.scss

$ rm app/assets/stylesheets/origamis.css.scss
Notice that I deleted two generated files called “scaffolds.css.scss” and “origamis.css.scss” which interfere with Twitter Bootstrap’s styles. Now if you open the origami index page, http://localhost:3000/origamis, you’ll see this:
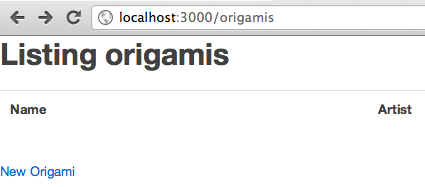
This should look familiar if you’ve ever used Rails scaffolding before, but here we also see the Twitter Bootstrap table styling.
Step 4: Add Formtastic using Formtastic-Bootstrap
Our next step today will be to introduce Formtastic, written by Justin French, into our sample app. If you’re not familiar with it yet, Formtastic produces cleaner HTML than the standard Rails “form_for” and related methods, making it easier to create a nice looking form. It’s also easier to use while writing Rails view code. Finally, Formtastic’s HTML is also easier to work with while writing Javascript code or Cucumber tests, since there are CSS styles added to make finding specific form elements easier.
Unfortunately, Formtastic and Twitter Bootstrap don’t play well together: Twitter’s styles don’t refer to the HTML tags produced by Formtastic. But we can get these two components to work together by using a great new gem called Formtastic-Bootstrap, by Matthew Bellantoni – a Boston Rubyist like me. Take a look at the github readme page for more details on how Formtastic-Bootstrap actually works.
To put it into our application, I need to first add it to my Gemfile:
gem 'formtastic-bootstrap'
And now as Matthew explains on his readme page, I also need to create a new file called config/initializers/formtastic.rb, which should contain this one line of code:
Formtastic::Helpers::FormHelper.builder = FormtasticBootstrap::FormBuilder
This instructs Formtastic to use Matthew’s new form builder object, instead of Formtastic’s standard form builder. Matthew’s form builder is what generates the HTML Twitter expects.
Next, I need to rewrite the form produced by the Rails scaffold generator to use Formtastic’s semantic_form_for function – paste this code into app/views/origamis/_form.html.erb, overwriting what was there before:
<%= semantic_form_for @origami do |f| %>

  <%= f.semantic_errors %>

  <%= f.inputs do %>

    <%= f.input :name,   :hint => "Enter the origami artwork's name" %>

    <%= f.input :artist, :hint => "Enter the origami artist's name" %>

  <% end %>

  <%= f.buttons do %>

    <%= f.commit_button :button_html => {:class => "primary"} %>

  <% end %>

<% end %>
A couple of details to note here:
- I’ve passed in the Formtastic “hint” option for each of my fields to add some help text on the screen, and
- I’ve passed in the “button_html” option to use the Twitter Bootstrap blue button style
We need to run bundle install again to install Matthew’s gem; bundler will also install Formtastic itself since it’s a dependency for Formtastic-Bootstrap:
$ bundle install
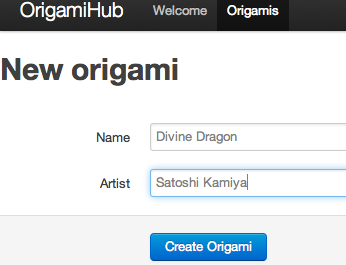
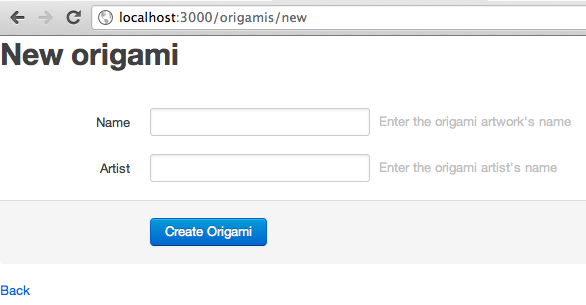
After restarting the server and clicking on the “New Origami” link I get a nice looking form that uses the Twitter Bootstrap styles:
Step 5: Adding tab navigation with Tabulous
Another one of the great features of Twitter Bootstrap is the nice looking black navigation bar along the top of the page. How can we get that into our sample app? We could just copy/paste the HTML code in from one of the Twitter examples pages, but instead I’ll show you how to use a great new gem called Tabulous. Wyatt Greene, another fellow Boston Rubyist, wrote Tabulous earlier this year and it’s tremendously easy to use. We’re lucky to have such a creative Ruby community here: two of the four gems I’m using today with Twitter Bootstrap were written in Boston! For more information on Tabulous, be sure to read two great articles Wyatt wrote when he introduced the gem in March: Introducing Tabulous: Tabs in Rails and Tutorial for Adding Tabs to Rails Using Tabulous.
Once again, let’s first add the gem to our app by editing the Gemfile:
gem 'tabulous'
…and running bundle install:
$ bundle install
Now as Wyatt explains in his tutorial, we need to run this command:
$ rails generate tabs
This will create a new file called app/tabs/tabulous.rb, where we declare all of the tabs we want to display in our site. I won’t explain all of the syntax here; again refer to Wyatt’s tutorial for more information on exactly what’s in tabulous.rb.
For our sample app, we’ll just need to make a minor edit to the tabs table:
config.tabs do

[

  [ :welcome_tab,  'Welcome',  root_path,     true, true ],

  [ :origamis_tab, 'Origamis', origamis_path, true, true ],

]

end
It’s amazing how Wyatt’s generator already did most of the work for us! All I did here was reorder the two lines. For the sake of readability and to save space I removed some comments that normally appear in the tabulous.rb file explaining the purpose of each column in the table; you’ll see those if you open the tabulous.rb file on your machine.
And we’re almost done! The last thing I need to do is add the HTML for displaying the Twitter Bootstrap navigation bar. To do that, I’ll just copy/paste some HTML from their “fluid.html” example page – you can find this HTML in the Twitter Bootstrap github repo. The HTML should go into the app/views/layouts/application.html.erb file, between the <body> tag and the call to yield:
<body>
<div class="topbar">

  <div class="topbar-inner">

    <div class="container-fluid">

      <a class="brand" href="#">OrigamiHub</a>

      <%= tabs %>

    </div>

  </div>

</div>
<%= yield %>
Notice I replaced the <ul>… </ul> HTML from Twitter’s example with a single call to <%= tabs %>. This will display the tabs that I’ve declared in the tab table above!
Now restarting my server again – remember I ran bundle install earlier – let’s refresh the page:
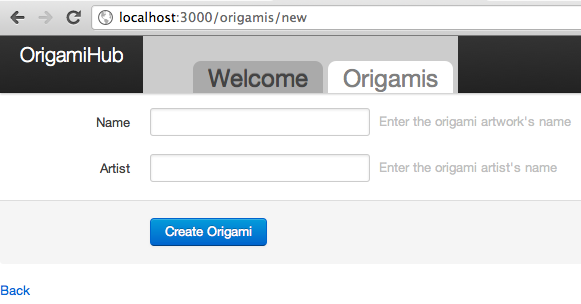
Almost there… but this is still not quite right. By default, Tabulous will include some scaffolding tab CSS code to help you get started. However, since we’re using Twitter Bootstrap we don’t need any of that. To remove it, all we need to do is change the “scaffolding” setting to false in app/tabs/tabulous.rb:
config.css.scaffolding = false
We also need to change the “active_tab_clickable” setting to be true – this will tell Tabulous to always generate an <a> tag for each tab, which is what Twitter Bootstrap expects:
config.active_tab_clickable = true
Now let’s refresh our page once more:
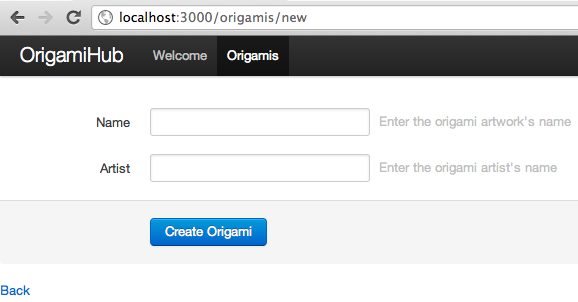
And it works! Now we see the tabs appear properly, and not only that, they actually work too! You can click on “Welcome” to see the Welcome index placeholder page from above, and on “Origamis” to get the Origami index page, since we entered those paths into the tab table in app/tabs/tabulous.rb.
There’s one other CSS bug here you may not have noticed: the “New Origami” text at the top of the form was obscured by the navigation bar – this is because the way Twitter’s CSS code works is that it assumes the HTML body will have padding on it. To fix this, we just need to manually add the 60px padding on the body style in our origami_hub.css.scss file like this – be sure to put the padding style after the import or it won’t work:
@import 'bootstrap';
body {

  padding-top: 60px;

}
And refreshing the page once again we get:

Wyatt’s Tabulous gem will also automatically display the currently active tab properly, since Tabulous and Twitter Bootstrap both use the “active” CSS style to indicate that. It all just works! Now as I add more pages to my app, I just need to add entries in the tabs table, and I’m also free to re-order them.
Conclusion
Twitter Bootstrap is a fantastic way to build a nice looking web site very quickly; however, having a sophisticated CSS library will only take you so far. You still need to build a web application of some kind to bring the Twitter design elements to life. Using Rails on the back end can be a perfect complement to Twitter Bootstrap, but, as we’ve seen today, using Rails can also be a challenge since the two frameworks weren’t designed to work together perfectly. Before you dive into building your next Rails 3.1 application with Twitter Bootstrap, be sure to do your homework – there are a lot of gem authors actively working in this area and as Twitter Bootstrap becomes more and more popular expect to see even more new gems and changes to existing gems.
Frequently Asked Questions (FAQs) about Twitter Bootstrap, Formtastic, and Tabulous
What is the main advantage of using Twitter Bootstrap with Formtastic and Tabulous?
The main advantage of using Twitter Bootstrap with Formtastic and Tabulous is the seamless integration and ease of use. Twitter Bootstrap provides a robust framework for developing responsive, mobile-first projects on the web. When combined with Formtastic, a Rails FormBuilder plugin, and Tabulous, a tabs solution for Rails, it allows developers to create dynamic, responsive forms and tabs with less effort and coding. This combination significantly reduces the time and complexity involved in web development.
How does Formtastic compare to other form builders?
Formtastic stands out from other form builders due to its simplicity, flexibility, and compatibility with Rails. It provides a semantic, accessible way to build forms in Rails, with a DSL (Domain Specific Language) that is both easy to read and write. Compared to other form builders, Formtastic offers a more intuitive and developer-friendly approach.
Can I use Formtastic without Twitter Bootstrap or Tabulous?
Yes, you can use Formtastic without Twitter Bootstrap or Tabulous. Formtastic is a standalone FormBuilder plugin for Rails. However, integrating it with Twitter Bootstrap and Tabulous can enhance its functionality and provide a more streamlined development process.
What are the prerequisites for using Twitter Bootstrap, Formtastic, and Tabulous?
To use Twitter Bootstrap, Formtastic, and Tabulous, you need to have a basic understanding of web development with Rails. You should also be familiar with HTML, CSS, and JavaScript, as these technologies are used in conjunction with these tools.
How does Tabulous enhance the functionality of my web application?
Tabulous enhances the functionality of your web application by providing a simple, intuitive way to create and manage tabs. It offers a DSL for defining tabs, which makes it easy to add, remove, or modify tabs in your application. This can greatly improve the user experience and navigation of your web application.
Are there any limitations or drawbacks to using Twitter Bootstrap, Formtastic, and Tabulous?
While these tools offer many benefits, they may not be suitable for all projects. For instance, Twitter Bootstrap may add unnecessary weight to your project if you only need a few of its features. Similarly, Formtastic and Tabulous are specifically designed for Rails, so they may not be suitable if you’re using a different framework.
How can I customize the appearance of forms created with Formtastic?
Formtastic provides several options for customizing the appearance of your forms. You can use CSS to style your forms, and Formtastic also supports custom form builders, which allow you to define your own form styles and behaviors.
Can I use Twitter Bootstrap, Formtastic, and Tabulous for commercial projects?
Yes, you can use Twitter Bootstrap, Formtastic, and Tabulous for commercial projects. These tools are open source and free to use, but it’s always a good idea to check the specific licensing terms of each tool before using them in a commercial project.
How do I troubleshoot issues with Twitter Bootstrap, Formtastic, and Tabulous?
If you encounter issues with these tools, you can refer to their respective documentation for troubleshooting tips. You can also seek help from the community through forums, GitHub issues, or Stack Overflow.
Are there any alternatives to Twitter Bootstrap, Formtastic, and Tabulous?
Yes, there are several alternatives to these tools. For instance, instead of Twitter Bootstrap, you could use Foundation or Bulma for front-end frameworks. Instead of Formtastic, you could use SimpleForm or Rails Form Helpers. And instead of Tabulous, you could use jQuery UI Tabs or Bootstrap Tabs. However, the choice of tools depends on your specific needs and preferences.

