

Key Takeaways
- OpenAI now supports models up to GPT-4 Turbo, providing Python developers an excellent opportunity to explore advanced AI functionalities. The ChatGPT API allows developers to interact with and utilize GPT models for generating conversational responses.
- Python developers can integrate the OpenAI API into their projects using advanced techniques such as automating tasks, using Python requests for data retrieval, and managing large-scale API requests. These techniques can make Python projects more efficient and scalable.
- The OpenAI API can be incorporated into real-world projects, such as integrating ChatGPT in web development to create interactive, dynamic content, or building chatbots that understand context and respond intelligently to user inputs.
- While the OpenAI API is powerful, it does have limitations including data storage, model capacity, and pricing. Developers need to be aware of these limitations when integrating the API into their projects.
With OpenAI now supporting models up to GPT-4 Turbo, Python developers have an incredible opportunity to explore advanced AI functionalities. This tutorial provides an in-depth look at how to integrate the ChatGPT API into your Python scripts, guiding you through the initial setup stages and leading to effective API usage.
The ChatGPT API refers to the programming interface that allows developers to interact with and utilize GPT models for generating conversational responses. But it’s actually just OpenAI’s universal API that works for all their models.
As GPT-4 Turbo is more advanced and three times cheaper than GPT-4, there’s never been a better time to leverage this powerful API in Python, so let’s get started!
Setting Up Your Environment
To start off, we’ll guide you through setting up your environment to work with the OpenAI API in Python. The initial steps include installing the necessary libraries, setting up API access, and handling API keys and authentication.
Installing necessary Python libraries
Before you begin, make sure to have Python installed on your system. We recommend using a virtual environment to keep everything organized. You can create a virtual environment with the following command:
python -m venv chatgpt_env
Activate the virtual environment by running:
chatgpt_env\Scripts\activate(Windows)source chatgpt_env/bin/activate(macOS or Linux)
Next, you’ll need to install the required Python libraries which include the OpenAI Python client library for interacting with the OpenAI API, and the python-dotenv package for handling configuration. To install both packages, run the following command:
pip install openai python-dotenv
Setting up OpenAI API access
To make an OpenAI API request, you must first sign up on OpenAI’s platform and generate your unique API key. Follow these steps:
- Visit OpenAI’s API Key page and create a new account, or log in if you already have an account.
- Once logged in, navigate to the API keys section and click on Create new secret key.
- Copy the generated API key for later use. Otherwise, you’ll have to generate a new API key if you lose it. You won’t be able to view API keys via the OpenAI website.
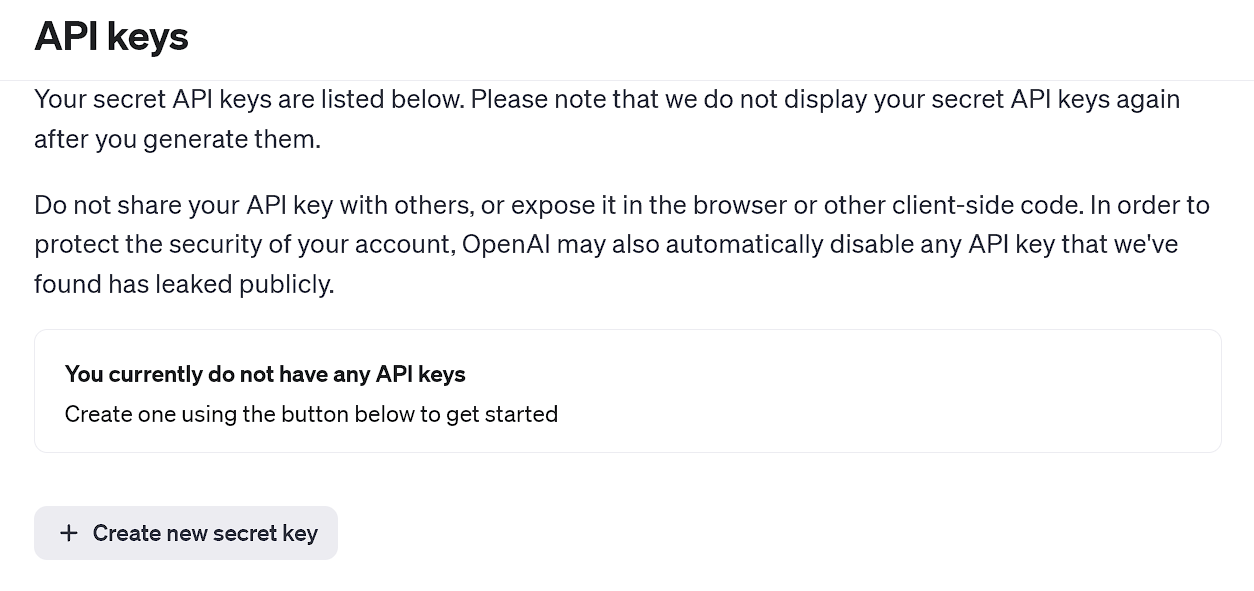
OpenAI’s API keys page
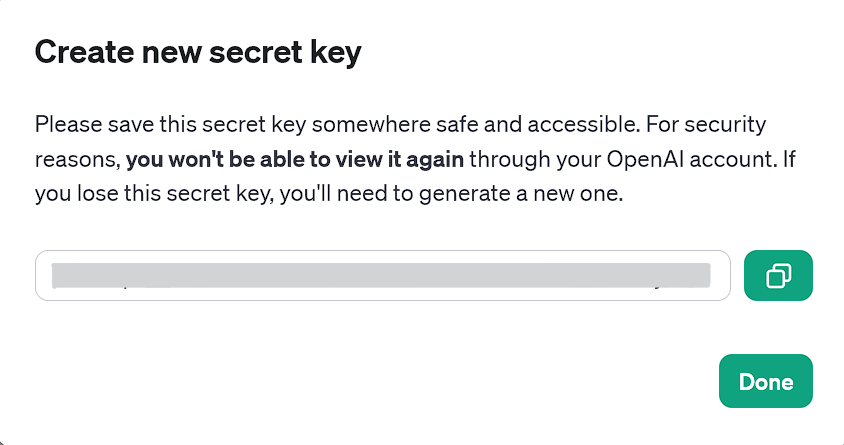
Generated API key that can be used now
API Key and Authentication
After obtaining your API key, we recommend storing it as an environment variable for security purposes. To manage environment variables, use the python-dotenv package. To set up an environment variable containing your API key, follow these steps:
-
Create a file named
.envin your project directory. -
Add the following line to the
.envfile, replacingyour_api_keywith the actual API key you copied earlier:CHAT_GPT_API_KEY=your_api_key. -
In your Python code, load the API key from the
.envfile using theload_dotenvfunction from the python-dotenv package:
  import openai
  from openai import OpenAI
  import os
  from dotenv import load_dotenv

  # Load the API key from the .env file
  load_dotenv()
  client = OpenAI(api_key=os.environ.get("CHAT_GPT_API_KEY"))
Note: In the latest version of the OpenAI Python library, you need to instantiate an OpenAI client to make API calls, as shown below. This is a change from the previous versions, where you would directly use global methods.
Now you’ve added your API key and your environment is set up and ready for using the OpenAI API in Python. In the next sections of this article, we’ll explore interacting with the API and building chat apps using this powerful tool.
Remember to add the above code snippet to every code section down below before running.
Using the OpenAI API in Python
After loading up the API from the .env file, we can actually start using it within Python. To use the OpenAI API in Python, we can make API calls using the client object. Then we can pass a series of messages as input to the API and receive a model-generated message as output.
Creating a simple ChatGPT request
-
Make sure you have done the previous steps: creating a virtual environment, installing the necessary libraries, and generating your OpenAI secret key and
.envfile in the project directory. -
Use the following code snippet to set up a simple ChatGPT request:
  # Create a chat completion
  chat_completion = client.chat.completions.create(
      model="gpt-4",
      messages=[{"role": "user", "content": "query"}]
  )
  print(chat_completion.choices[0].message.content)
Here, client.chat.completions.create is a method call on the client object. The chat attribute accesses the chat-specific functionalities of the API, and completions.create is a method that requests the AI model to generate a response or completion based on the input provided.
Replace the query with the prompt you wish to run, and feel free to use any supported GPT model instead of the selected GPT-4 above.
Handling errors
While making requests, various issues might occur, including network connectivity problems, rate limit exceedances, or other non-standard response status code. Therefore, it’s essential to handle these status codes properly. We can use Python’s try and except blocks for maintaining program flow and better error handling:
# Try to create a chat completion
try:
    chat_completion = client.chat.completions.create(
        model="gpt-4",
        messages=[{"role": "user", "content": "query"}],
        temperature=1,
        max_tokens=150  # Adjust the number of tokens as needed
    )
    print(chat_completion.choices[0].message.content)

except openai.APIConnectionError as e:
    print("The server could not be reached")
    print(e.__cause__)

except openai.RateLimitError as e:
    print("A 429 status code was received; we should back off a bit.")

except openai.APIStatusError as e:
    print("Another non-200-range status code was received")
    print(e.status_code)
    print(e.response)
Note: you need to have available credit grants to be able to use any model of the OpenAI API. If more than three months have passed since your account creation, your free credit grants have likely expired, and you’ll have to buy additional credits (a minimum of $5).
Now here are some ways you can further configure your API requests:
- Max Tokens. Limit the maximum possible output length according to your needs by setting the
max_tokensparameter. This can be a cost-saving measure, but do note that this simply cuts off the generated text from going past the limit, not making the overall output shorter. - Temperature. Adjust the temperature parameter to control the randomness. (Higher values make responses more diverse, while lower values produce more consistent answers.)
If any parameter isn’t manually set, it uses the respective model’s default value, like 0 — 7 and 1 for GPT-3.5-turbo and GPT-4, respectively.
Aside from the above parameters, there are numerous other parameters and configurations you can make to make use of GPT’s capabilities exactly the way you want to. Studying OpenAI’s API documentation is recommended for reference.
Nonetheless, effective and contextual prompts are still necessary, no matter how many parameter configurations are done.
Advanced Techniques in API Integration
In this section, we’ll explore advanced techniques to integrate the OpenAI API into your Python projects, focusing on automating tasks, using Python requests for data retrieval, and managing large-scale API requests.
Automating tasks with the OpenAI API
To make your Python project more efficient, you can automate various tasks using the OpenAI API. For instance, you might want to automate the generation of email responses, customer support answers, or content creation.
Here’s an example of how to automate a task using the OpenAI API:
def automated_task(prompt):
    try:
        chat_completion = client.chat.completions.create(
            model="gpt-4",
            messages=[{"role": "user", "content": prompt}],
            max_tokens=250
        )
        return chat_completion.choices[0].message.content
    except Exception as e:
        return str(e)

# Example usage
generated_text = automated_task("Write an short note that's less than 50 words to the development team asking for an update on the current status of the software update")
print(generated_text)
This function takes in a prompt and returns the generated text as output.
Using Python requests for data retrieval
You can use the popular requests library to interact with the OpenAI API directly without relying on the OpenAI library. This method gives you more control over get request, and flexibility over your API calls.
The following example requires the requests library (if you don’t have it, then run pip install requests first):
headers = {
    'Content-Type': 'application/json',
    'Authorization': f'Bearer {api_key}',
}

data = {
    'model': 'gpt-4',  # Update to the desired model
    'messages': [{'role': 'user', 'content': 'Write an interesting fact about Christmas.'}]
}

response = requests.post('https://api.openai.com/v1/chat/completions', headers=headers, json=data)
print(response.json())
This code snippet demonstrates making a POST request to the OpenAI API, with headers and data as arguments. The JSON response can be parsed and utilized in your Python project.
Managing large-scale API requests
When working with large-scale projects, it’s important to manage API requests efficiently. This can be achieved by incorporating techniques like batching, throttling, and caching.
- Batching. Combine multiple requests into a single API call, using the
nparameter in the OpenAI library:n = number_of_responses_needed. - Throttling. Implement a system to limit the rate at which API calls are made, avoiding excessive usage or overloading the API.
- Caching. Store the results of completed API requests to avoid redundant calls for similar prompts or requests.
To effectively manage API requests, keep track of your usage and adjust your config settings accordingly. Consider using the time library to add delays or timeouts between requests if necessary.
Applying these advanced techniques in your Python projects will help you get the most out of the OpenAI API while ensuring efficient and scalable API integration.
Practical Applications: OpenAI API in Real-world Projects
Incorporating the OpenAI API into your real-world projects can provide numerous benefits. In this section, we’ll discuss two specific applications: integrating ChatGPT in web development and building chatbots with ChatGPT and Python.
Integrating ChatGPT in web development
The OpenAI API can be used to create interactive, dynamic content tailored to user queries or needs. For instance, you could use ChatGPT to generate personalized product descriptions, create engaging blog posts, or answer common questions about your services. With the power of the OpenAI API and a little Python code, the possibilities are endless.
Consider this simple example of using an API call from a Python backend:
def generate_content(prompt):
    try:
        response = client.chat.completions.create(
            model="gpt-4",
            messages=[{"role": "user", "content": prompt}]
        )
        return response.choices[0].message.content
    except Exception as e:
        return str(e)

# Use this function to generate content
description = generate_content("Write a short description of a hiking backpack")
You can then also write code to integrate description with your HTML and JavaScript to display the generated content on your website.
Building chatbots with ChatGPT and Python
Chatbots powered by artificial intelligence are beginning to play an important role in enhancing the user experience. By combining ChatGPT’s natural language processing abilities with Python, you can build chatbots that understand context and respond intelligently to user inputs.
Consider this example for processing user input and obtaining a response:
def get_chatbot_response(prompt):
    try:
        response = client.chat.completions.create(
            model="gpt-4",
            messages=[{"role": "user", "content": prompt}]
        )
        return response.choices[0].message.content
    except Exception as e:
        return str(e)

# Taking user input from the command line
user_input = input("Enter your prompt: ")
response = get_chatbot_response(user_input)
print(response)
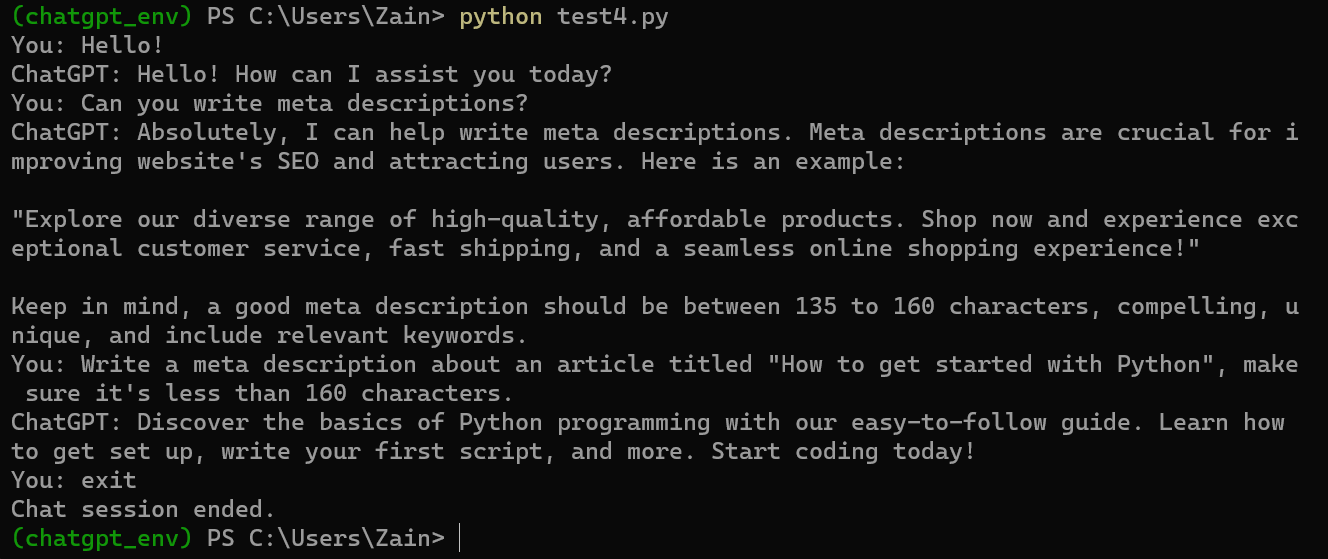
But since there’s no loop, the script will end after running once, so consider adding conditional logic. For example, we added a basic conditional logic where the script will keep looking for user prompts until the user says the stop phrase “exit” or “quit”.
Considering the mentioned logic, our complete final code for running a chatbot on the OpenAI API endpoint could look like this:
from openai import OpenAI
import os
from dotenv import load_dotenv

# Load the API key from the .env file
load_dotenv()
client = OpenAI(api_key=os.environ.get("CHAT_GPT_API_KEY"))

def get_chatbot_response(prompt):
    try:
        response = client.chat.completions.create(
            model="gpt-4",
            messages=[{"role": "user", "content": prompt}]
        )
        return response.choices[0].message.content
    except Exception as e:
        return str(e)

while True:
    user_input = input("You: ")
    if user_input.lower() in ["exit", "quit"]:
        print("Chat session ended.")
        break
    response = get_chatbot_response(user_input)
    print("ChatGPT:", response)
Here’s how it looks when run in the Windows Command Prompt.
Hopefully, these examples will help you get started on experimenting with the ChatGPT AI. Overall, OpenAI has opened massive opportunities for developers to create new, exciting products using their API, and the possibilities are endless.
OpenAI API limitations and pricing
While the OpenAI API is powerful, there are a few limitations:
-
Data Storage. OpenAI retains your API data for 30 days, and using the API implies data storage consent. Be mindful of the data you send.
-
Model Capacity. Chat models have a maximum token limit. (For example, GPT-3 supports 4096 tokens.) If an API request exceeds this limit, you’ll need to truncate or omit text.
-
Pricing. The OpenAI API is not available for free and follows its own pricing scheme, separate from the model subscription fees. For more pricing information, refer to OpenAI’s pricing details. (Again, GPT-4 Turbo is three times cheaper than GPT-4!)
Conclusion
Exploring the potential of the ChatGPT model API in Python can bring significant advancements in various applications such as customer support, virtual assistants, and content generation. By integrating this powerful API into your projects, you can leverage the capabilities of GPT models seamlessly in your Python applications.
If you enjoyed this tutorial, you might also enjoy these: