Internationalization for Your WordPress Theme
WordPress is used to create a variety of types of websites. When building a WordPress theme, you should build it for as large of an audience as possible. That goal also implies that your theme should be ready for sites in different languages. WordPress provides a simple API that you can use in a theme to provide internationalization for it. In this article, you will see how you can make your theme ready for different languages.
Key Takeaways
- WordPress provides an API that allows you to internationalize your theme, making it accessible to users speaking different languages. This involves downloading and installing translation files for the languages you want to support.
- The first step in internationalizing your WordPress theme is to create a child theme and define a unique text domain for it. This text domain will be used to load the translation files for the theme.
- Functions like __ and _e are used to internationalize text in WordPress. The __ function returns a localized string based on the language selected, while the _e function displays the localized text directly on the page.
- The .mo files, which contain the actual translations, can be created using tools like poedit. Once these files are created and saved in the appropriate directory, your WordPress theme should display content in the selected language.
How to Configure WordPress for Different Languages
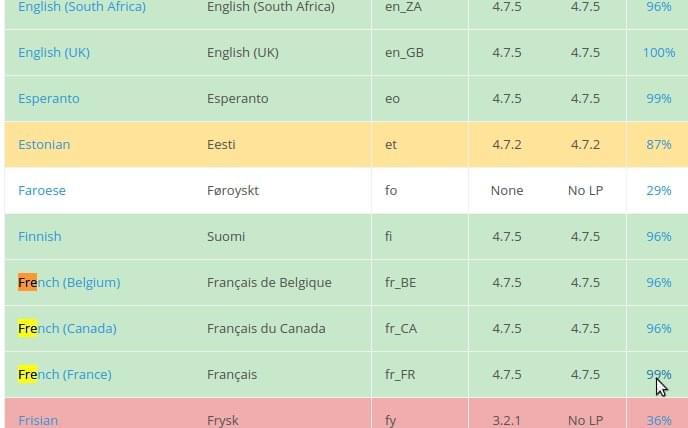
You can add different languages to your WordPress site. For that, you can download the translation files from the blog of the WordPress translator team. From this page, you can see the various languages whose translations are present, as well as what percentage of the translation is complete. Suppose I want to download the French language. I will go to the French language row, then click on the percentage as shown in the image below.
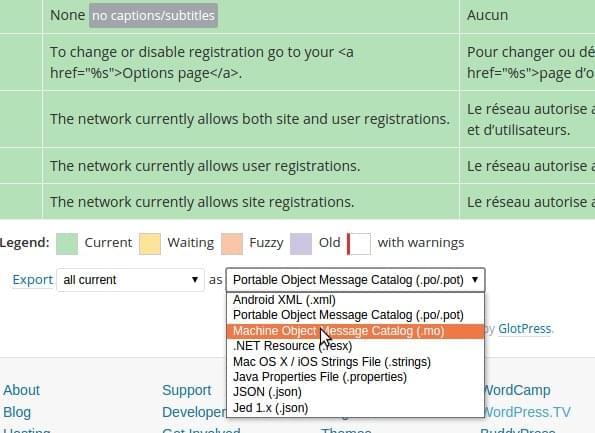
Then, you can click on the WordPress version, and export the .mo file as shown in the image below
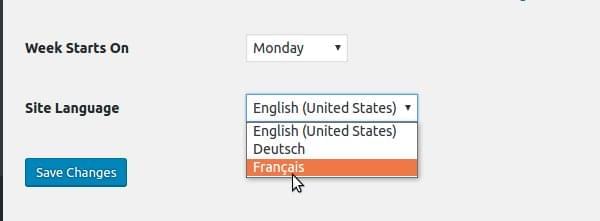
Once you have downloaded the .mo file, you will have to upload it to the wp-content/languages folder of your WordPress installation. You can then go to the Settings -> General in your WordPress admin. There you should be able to see the language options which you have put in the wp-content/languages folder as shown below in the image. Please select the desired language you want to change the site to and click ‘Save Changes’
Loading the Text Domain in Your Theme
The first step to internationalization for your theme is to create the theme. You can start, in this example by creating a child theme of the theme twentyseventeen. To create a child theme, first create a folder wp-content/themes/wpinternationlizationtheme. In this folder add the file style.css with the following content:
/*
 Theme Name:   wpinternationlizationtheme
 Description:  Twenty Seventeen Child Theme.
 Author:       Abbas Suterwala
 Author URI:   http://example.com
 Template:     twentyseventeen
 Version:      1.0.0
 Text Domain:  wpinternationlizationtheme
*/
This file defines a child theme with the name wpinternationlizationtheme. This is the child theme of twentyseventeen. In the above, every field is standard fields which we define for a child theme. The field Text Domain is the field which defines a unique name for the text domain of this theme. This theme should load the translation files with this key as the unique identifier.
Create a functions.php with the following code
<?php
function wpinternationlizationtheme_enqueue_styles() {

    $parent_style = 'parent-style';

    wp_enqueue_style( $parent_style, get_template_directory_uri() . '/style.css' );
    wp_enqueue_style( 'child-style',
        get_stylesheet_directory_uri() . '/style.css',
        array( $parent_style ),
        wp_get_theme()->get('Version')
    );
}
add_action( 'wp_enqueue_scripts', 'wpinternationlizationtheme_enqueue_styles' );

?>
The above code loads the parent theme (which is twentyseventeen in this case) styles. Then the styles from the child theme are loaded.
This allows the child theme styles to be the ones who are loaded last, and can be customized to the needs of the child theme. Now you’ll want to load the text domain, which means indicating where will WordPress search for the translations for this theme. You can load the theme’s text domain using the WordPress function load_theme_textdomain.
To do that, add the following code to your functions.php:
function wpinternationlizationtheme_setup(){
    $domain = 'wpinternationlizationtheme';
    // wp-content/languages/wpinternationlizationtheme/de_DE.mo
    load_theme_textdomain( $domain, trailingslashit( WP_LANG_DIR ) . $domain );
    // wp-content/themes/wpinternationlizationtheme/languages/de_DE.mo
    load_theme_textdomain( $domain, get_stylesheet_directory() . '/languages' );
    // wp-content/themes/wpinternationlizationtheme/languages/de_DE.mo
    load_theme_textdomain( $domain, get_template_directory() . '/languages' );
}
add_action( 'after_setup_theme', 'wpinternationlizationtheme_setup' );
The above code hooks up to the after_setup_theme action. On that action, you load the text domain for the theme. This is done using the function load_theme_textdomain. This function is setup to look for the .mo files in the following directories:
- Languages directory
- Child theme directory
- Parent theme directory
WordPress Functions for Internationalization
Once you have set up the text domain, take a look at the functions you can use for internationalization in WordPress. There are primarily two functions which you can use. The first one is __ . This function takes two arguments, the first being the string and the second the domain. This function then returns the approriate localized string based on the language selected.
So if you want to add some text at the end of each post, but also want this to be localized based on the language select, add the following code to your functions.php:
function wpinternationlizationtheme_after($content) {
    return $content . __('Read more', 'wpinternationlizationtheme');
}
add_filter('the_content', 'wpinternationlizationtheme_after');
The other function is _e. This takes the same two arguments as __. This function displays the localized text directly on the page rather than just returning it.
So, for example, if you wanted to add a footer message which should display localized, then you should create a footer.php with the following content:
<?php
_e('This site is powered by WordPress','wpinternationlizationtheme');
?>
Creating the .mo Files
Once you have created the code necessary for internationalization you will want to create the localization files. There are many tools available to create .mo files. In this article, you are going to see one of the popular ones, poedit. You can download poedit for your operating system from https://poedit.net/download.
Once you have downloaded poedit you can select ‘file->New Catalog’ to see the following screen:
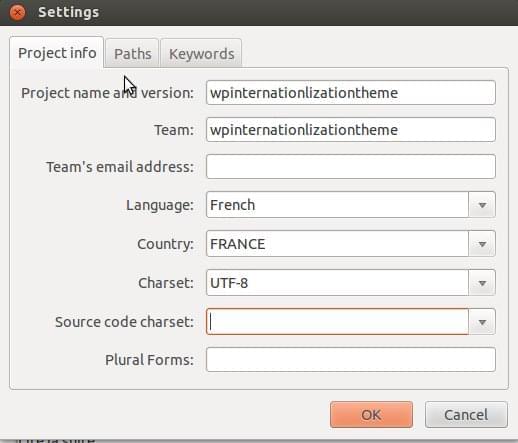
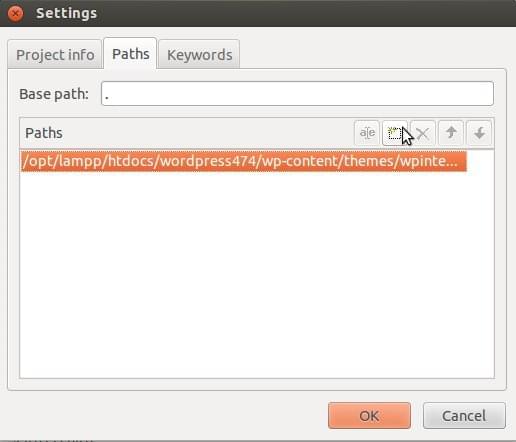
In this screen, you can enter the basic information about the project. The next tab is to give the path of the code which needs to be parsed to find the strings which need to be localized, as shown below:
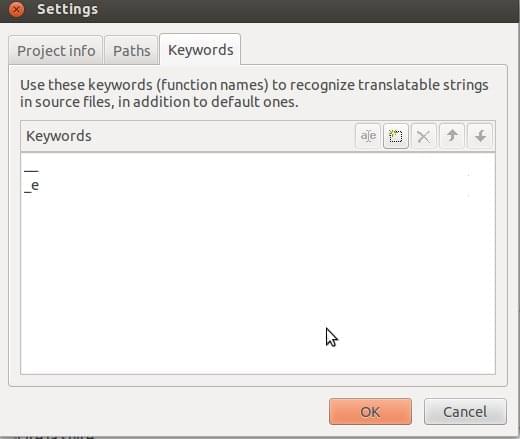
The next tab lets you enter the keywords which need to be searched to get all the strings which need localization. As you have already used the two functions __ and _e in the above examples, add those two on this tab.
Once you have done this, the tool will search all the strings which need localization as shown in the image below.
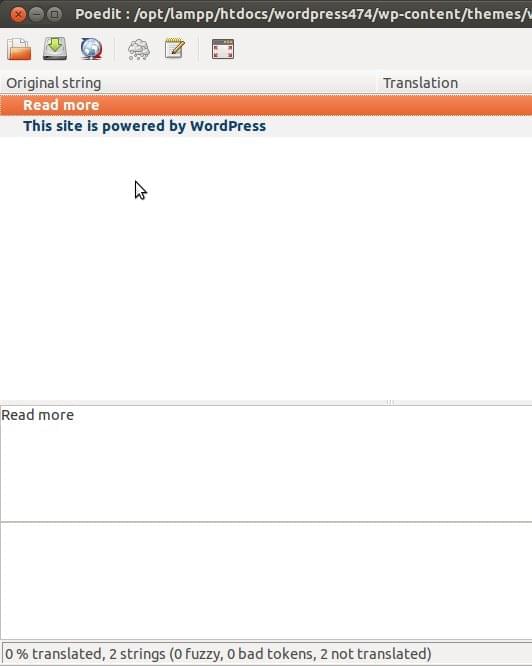
You can now add the localization for each string and then click ‘Save’ to save the file at wp-content/themes/wpinternationlizationtheme/languages/fr_FR.mo
Now, finally, if you change the language to ‘French’ you should see your strings localized in French on the main site.
Conclusion
WordPress is one of the most popular CMS platforms. You can learn about WordPress theme development with relative ease. The users of sites made on WordPress themes are vast in number and variety. Hence the pressing need for your theme to have a wide range of languages available. In many industries, it’s absolutely necessary for your WordPress site to be able to cater to an audience of different regions and countries.
Making your theme ready for internationalization can be a key factor for success. The WordPress API for internationalization is easy to use. It makes it very easy to localize your theme without changing any of the code files. So, have fun internationalizing your next WordPress theme, and tell us about your experiences in the comments below!
Frequently Asked Questions on Internationalizing Your WordPress Theme
What is the importance of internationalizing a WordPress theme?
Internationalizing a WordPress theme is crucial for reaching a global audience. It allows your website to be translated into different languages, making it accessible to users worldwide. This not only enhances user experience but also increases your site’s visibility and reach. By internationalizing your theme, you can cater to a diverse audience and expand your business globally.
How does text domain play a role in internationalizing a WordPress theme?
A text domain is a unique identifier that allows WordPress to distinguish between all loaded translations. It’s essentially the handle of your theme and is used in conjunction with the __() or _e() functions to make your theme translatable. Without a text domain, WordPress wouldn’t know which translations to load for a specific theme, making internationalization impossible.
What are the steps to internationalize a WordPress theme?
Internationalizing a WordPress theme involves several steps. First, you need to prepare your theme for translation by wrapping all text in gettext functions. Next, you need to create a .pot file, which is a template file that contains all the translatable text. Then, you need to translate your theme using a .po file, which is a portable object file that contains the actual translations. Finally, you need to load the text domain to tell WordPress which translations to use.
How can I translate my WordPress theme?
You can translate your WordPress theme using a .po file. This file contains all the translatable text from your theme and their corresponding translations. You can use a translation editor like Poedit to open the .po file and add your translations. Once you’re done, you can save the file with a .mo extension, which is a machine object file that WordPress can read.
What are the common issues faced during the internationalization of a WordPress theme?
Some common issues faced during the internationalization of a WordPress theme include missing text domains, incorrect text domain names, and untranslated text. These issues can prevent your theme from being fully translatable. To avoid these issues, make sure to include a text domain in all gettext functions, use the correct text domain name, and wrap all text in gettext functions.
Can I use plugins to internationalize my WordPress theme?
Yes, there are several plugins available that can help you internationalize your WordPress theme. These plugins can generate .pot files, provide a user-friendly interface for adding translations, and load the text domain for you. However, it’s important to note that using a plugin should not replace the manual process of internationalizing your theme.
How can I test the internationalization of my WordPress theme?
You can test the internationalization of your WordPress theme by changing the language of your WordPress installation. If your theme is properly internationalized, you should see the translated text in your theme. You can also use tools like the WordPress Theme Check plugin, which can check your theme for common internationalization issues.
What is the difference between localization and internationalization?
Internationalization is the process of preparing your theme to be translated into different languages, while localization is the process of actually translating your theme. In other words, internationalization is the first step towards making your theme translatable, and localization is the next step where you add the actual translations.
How can I make my WordPress theme RTL (Right to Left) language compatible?
To make your WordPress theme RTL language compatible, you need to create an rtl.css file in your theme directory. This file should contain all the necessary CSS rules to flip the layout of your theme for RTL languages. WordPress will automatically load this file when the website language is set to an RTL language.
Can I internationalize a child theme in WordPress?
Yes, you can internationalize a child theme in WordPress. The process is similar to internationalizing a parent theme. However, you need to use the text domain of the parent theme in your gettext functions and load the text domain in your child theme’s functions.php file.
Abbas is a software engineer by profession and a passionate coder who lives every moment to the fullest. He loves open source projects and WordPress. When not chilling around with friends he's occupied with one of the following open source projects he's built: Choomantar, The Browser Counter WordPress plugin, and Google Buzz From Admin.

Published in
·AI·Computing·Content Marketing·Email Marketing·Entrepreneur·Low Code·Marketing·SEO & SEM·October 6, 2021


