How to Build a WordPress Theme from Scratch: the Basics

In this tutorial, we’ll explore WordPress theme file structure in depth, and learn how to create a basic WordPress theme from scratch.
In the first part of this series, we introduced WordPress theming, and the fundamental terminology relating to WordPress theme development. We covered templates, partials, template hierarchy, WordPress post types, the style.css stylesheet, WordPress filter and action hooks, WordPress loop, conditional tags, and we briefly took a look at a typical simple WordPress theme file structure.
Key Takeaways
- Start by setting up a bare minimum theme using an index.php and style.css file, ensuring WordPress recognizes your new theme.
- Integrate Bootstrap for responsive design and aesthetics, modifying template files to include Bootstrap’s HTML and CSS classes.
- Utilize the functions.php file to add custom functionality, enqueue styles and scripts, and manage WordPress hooks effectively.
- Customize the dynamic output of the header and navigation menus using WordPress hooks and conditionals to adapt to different page types.
- Ensure your theme is responsive and user-friendly on mobile devices by adjusting CSS and using media queries.
Creating the Bare Minimum Theme
The first thing we’ll do is install a plugin that will enable us to batch create WordPress posts and other content. This way, we’ll be able to quickly populate our development website without losing too much time. One plugin that serves this purpose is FakerPress by Gustavo Bordoni, available in the WordPress plugin repository.
We quickly install and activate the plugin via WP-CLI.
Now, when we log in to the admin dashboard, we’ll see that FakerPress is installed, and we can create all sorts of content in batch, including any custom post types we have.
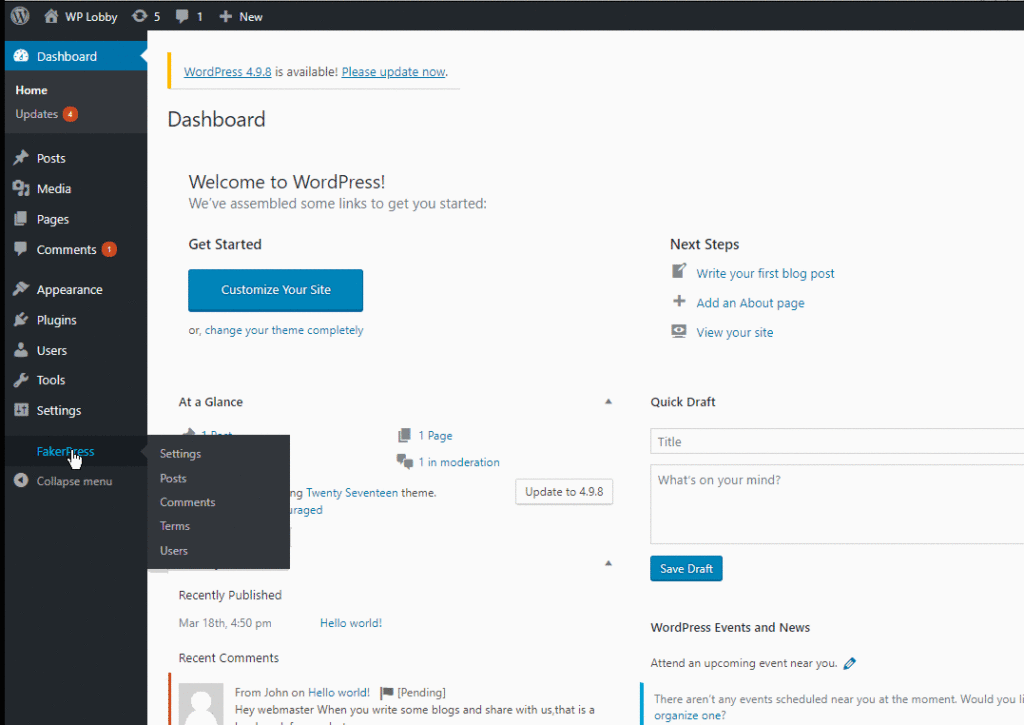
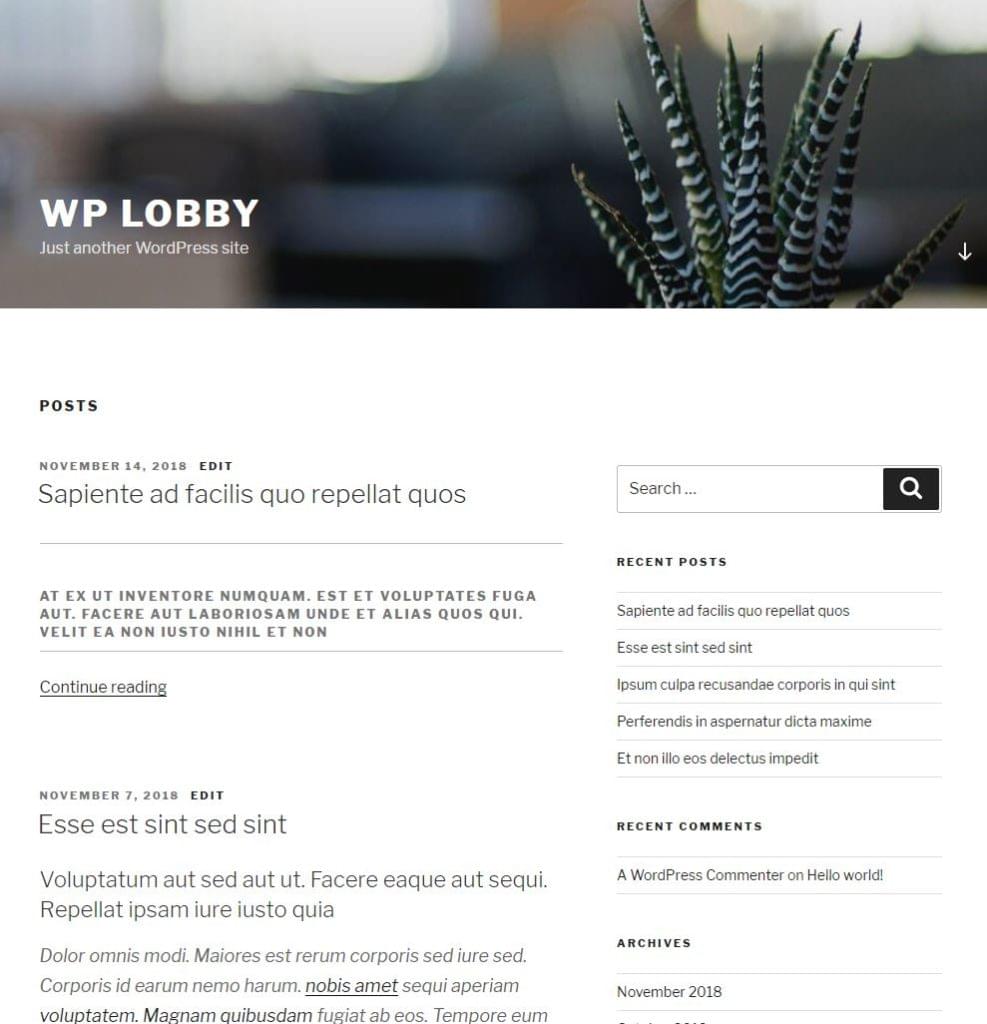
Now, using this plugin, we’ll create some fake content. This is the result, using the default TwentySeventeen WordPress theme:
Now, we quickly dive in and set up a bare minimum theme that consists of the catch-all index.php file, and style.css, which we need for the WordPress templating system to recognize the theme:
/*
Theme Name: Botega Simple Theme
Theme URI: https://botega.co.uk
Author: Tonino Jankov
Author URI: https://botega.co.uk
Description: Basic WordPress theme for Sitepoint theme building tutorial
Text Domain: bsimple
Version: 1.0.0
License: GNU General Public License v2 or later
*/
This is the style.css, which consists only of meta CSS comments for now. These comments are required.
This is the index.php file. It will catch all the requests for now:
<?php
/**
 *
 * @package Botega_Scratch_Theme
 */
?>

<!DOCTYPE html>
<html <?php language_attributes(); ?>>
<head>
    <title><?php bloginfo('name'); ?></title>
    <link rel="stylesheet" href="<?php bloginfo('stylesheet_url'); ?>">
    <?php wp_head(); ?>
</head>
<body>

      <header>
         <h1><?php bloginfo('name'); ?></h1>
         <h3><?php bloginfo('description'); ?></h3>
      </header>

        <?php
        if ( have_posts() ) :
            /* Start the Loop */
            while ( have_posts() ) :
                the_post();
            endwhile;
        endif;
        ?>

</body>
We now upload and activate the minimal theme we have. I activate it using WP-CLI:
The theme is now visible to WordPress, and is active:
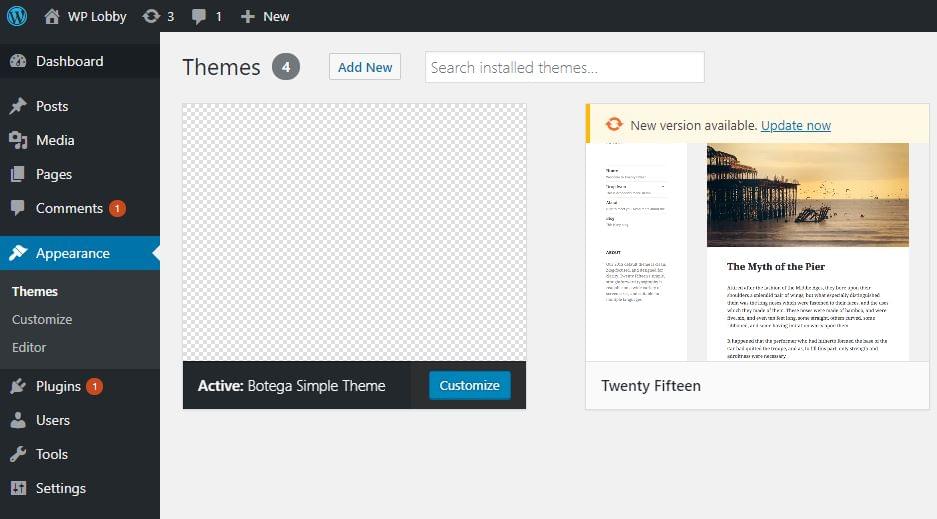
We haven’t provided a screenshot, so the display in the backend is basic.
If we visit our website now in the browser, this is what we’ll see:

Obviously, we have work to do.
If we view the source code of the home page, we’ll see that the wp_head() function has outputted a lot of default WordPress tags in the <head>, like CSS, JavaScript, link and meta tags.
The bloginfo() function is used to output website information.
Our home page is empty, because we aren’t outputting anything inside the Loop — a pattern that WordPress uses in all of its templates to output content.
The Codex page about the Loop goes deep into details about it. A typical structure for the loop — which is based on PHP while control structure — looks like this:
<?php
if ( have_posts() ) {
    while ( have_posts() ) {
        the_post();
        //
        // Post Content here
        //
    } // end while
} // end if
?>
We need to fill that while loop with content — or with content-outputting WordPress tags.
If we change our loop, by adding the_title(), the_excerpt(), and we add HTML markup and the_ID(), to look like this:
    <?php
    if ( have_posts() ) : while ( have_posts() ): the_post(); ?>

    <div id="post-<?php the_ID(); ?>">
        <h2><?php the_title(); ?></h2>
        <div class="post-excerpt"><?php the_excerpt(); ?></div>
    </div>

    <?php endwhile;
    endif;
    ?>
We’ll now get a list of posts on our home page, with no style applied:
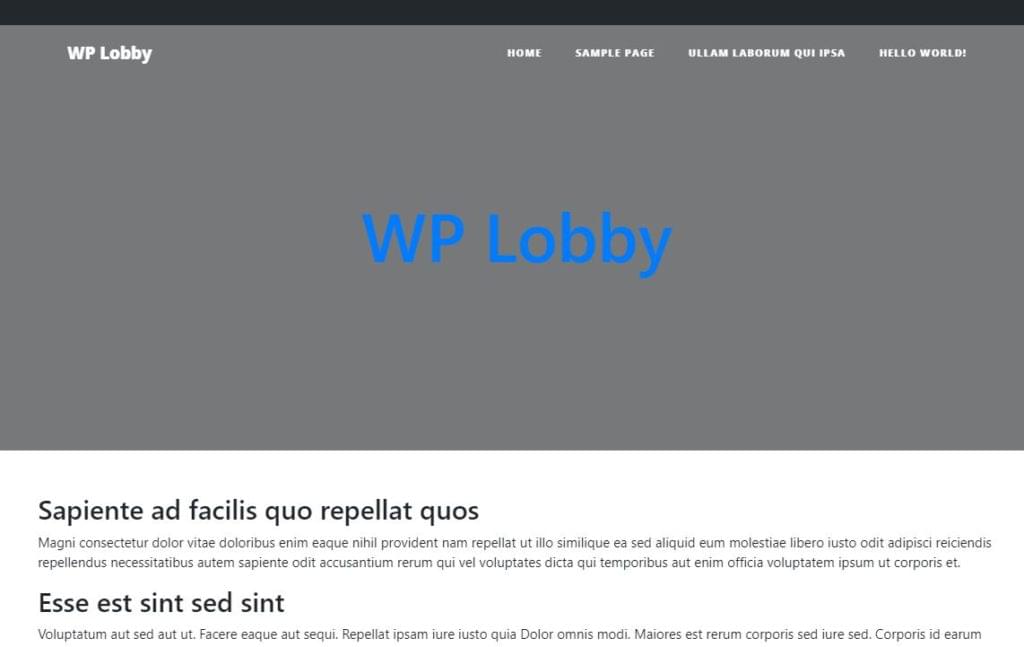
WordPress shows A blog page — an archive page for all the blog posts — by default.
If we now visit single post URL — something like http://my-website.com/2018/11/14/sapiente-ad-facilis-quo-repellat-quos/ — we’ll see something like this:
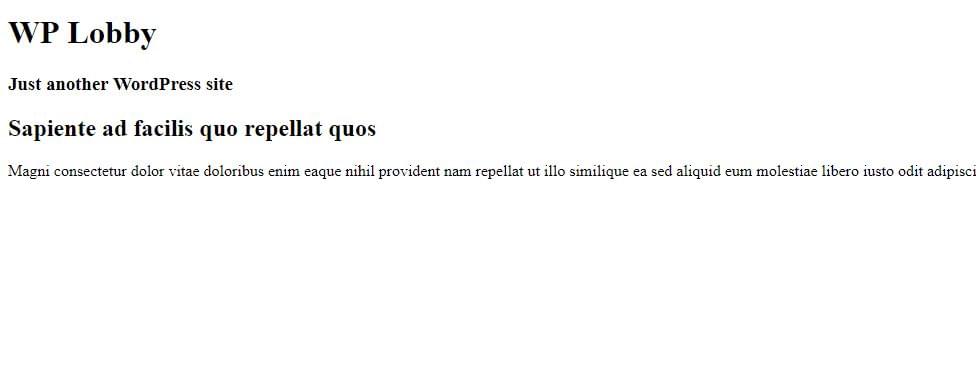
Our loop, albeit very crude, actually works.
Structuring Our Theme into Files and Applying Bootstrap Markup
We’ll now implement partials, like header.php and footer.php and various specialized templates, all using Twitter Bootstrap markup, so that we can style it more easily.
Starting with index.php, we replace all the content before and after the loop with get_header() and get_footer() functions:
<?php
/**
 *
 * @package Botega_Scratch_Theme
 */

get_header(); ?>

    <?php
    if ( have_posts() ) : while ( have_posts() ): the_post(); ?>

    <div id="post-<?php the_ID(); ?>">
        <h2><?php the_title(); ?></h2>
        <div class="post-excerpt"><?php the_excerpt(); ?></div>
    </div>

    <?php endwhile;
    endif;
    ?>

<?php get_footer(); ?>
This means we need to provide all that content in the partials we mentioned.
In line with what we said — that we’ll use Twitter Bootstrap theme — our header.php file will look like this:
<?php
/**
 * The header for our theme.
 *
 * @package Botega_Scratch_Theme
 *
 */
?>
<!DOCTYPE html>
<html>
<head>
<meta charset="<?php bloginfo( 'charset' ); ?>">
<meta name="viewport" content="width=device-width, initial-scale=1">

<?php wp_head(); ?>
</head>

<body <?php body_class(); ?>>

  <nav class="navbar navbar-default navbar-custom navbar-fixed-top">
    <div class="container-fluid">
      <div class="navbar-header page-scroll">
              <a href="<?php echo esc_url( home_url( '/' ) ); ?>" rel="home" class="navbar-brand"><?php bloginfo( 'name' ); ?></a>
      </div>

      <div class="collapse navbar-collapse" id="bs-example-navbar-collapse-1">
          <ul class="nav navbar-nav navbar-right">
          <?php wp_nav_menu( array( 'theme_location' => 'primary', 'items_wrap' => '%3$s' ) ); ?>
          </ul>
      </div>
    </div>
  </nav>

  <div class="container">
      <div class="row">
Our footer.php file will look like this:
<?php
/**
 * Footer template partial
 *
 * @package Botega_Scratch_Theme
 *
 */
?>
     </div>
     <!-- /.row -->
  </div>
  <!-- /.container -->

  <!-- Footer -->
  <footer>
    <div class="container">
      <div class="row">
          <div class="col-lg-8 col-md-10 mx-auto">
          </div>
      </div><!-- /.row -->
    </div><!-- /.container -->
  </footer><!-- /footer -->

<?php wp_footer(); ?>

</body>
</html>
We are using Bootstrap classes in our HTML tags, and wp_head() and wp_footer() fire wp_head and wp_footer action hooks.
The next thing we’ll do is include the CSS and JavaScript from clean bootstrap template from startbootstrap.com, which comes with an MIT license, so we can freely use it. This way, our theme will come with predefined styles, responsiveness, and we’ll still be able to style it further.
functions.php
functions.php is a file that comes with any serious WordPress theme. This is a file that acts as a poor man’s plugin archive. It allows us to include any custom functionality in our theme.
We’ll firstly use this file to include Bootstrap and our bootstrap theme’s styles and scripts:
function bsimple_scripts() {
    wp_enqueue_style( 'bsimple-style', get_stylesheet_uri() );
    wp_enqueue_style( 'bsimple-clean', get_template_directory_uri() . '/css/clean-blog.min.css' );
    wp_enqueue_style( 'bsimple-bootstrap', get_template_directory_uri() . '/css/bootstrap.min.css' );
    wp_enqueue_style( 'bsimple-fontawesome', get_template_directory_uri() . '/css/fa-all.min.css' );
    wp_enqueue_style( 'bsimple-font1', "https://fonts.googleapis.com/css?family=Lora:400,700,400italic,700italic" );
    wp_enqueue_style( 'bsimple-font2', "https://fonts.googleapis.com/css?family=Open+Sans:300italic,400italic,600italic,700italic,800italic,400,300,600,700,800" );

    wp_enqueue_script( 'bsimple-jq', get_template_directory_uri() . '/js/jquery.min.js');
    wp_enqueue_script( 'bsimple-bootstrap', get_template_directory_uri() . '/js/bootstrap.bundle.min.js');
    wp_enqueue_script( 'bsimple-clean', get_template_directory_uri() . '/js/clean-blog.min.js');
}

add_action( 'wp_enqueue_scripts', 'bsimple_scripts' );
This is a WordPress-idiomatic way of including scripts and styles in a theme. It allows us to specify that the position of the scripts will be enqueued (header vs footer) and the priority of enqueuing. We can even specify the dependency of each particular resource on the other. This will ensure resources will be loaded in the right order.
We’re using the wp_enqueue_scripts action hook here. We can learn more about it in the Codex. (We covered action hooks in the previous article.)
Inside our custom bsimple_scripts() function — which we hook to wp_enqueue_scripts action hook — we use two WordPress functions to load our scripts and styles — wp_enqueue_script() and wp_enqueue_style(). Arguments for these functions — as specified in its linked reference pages — allow us to fully leverage flexibility that we mentioned.
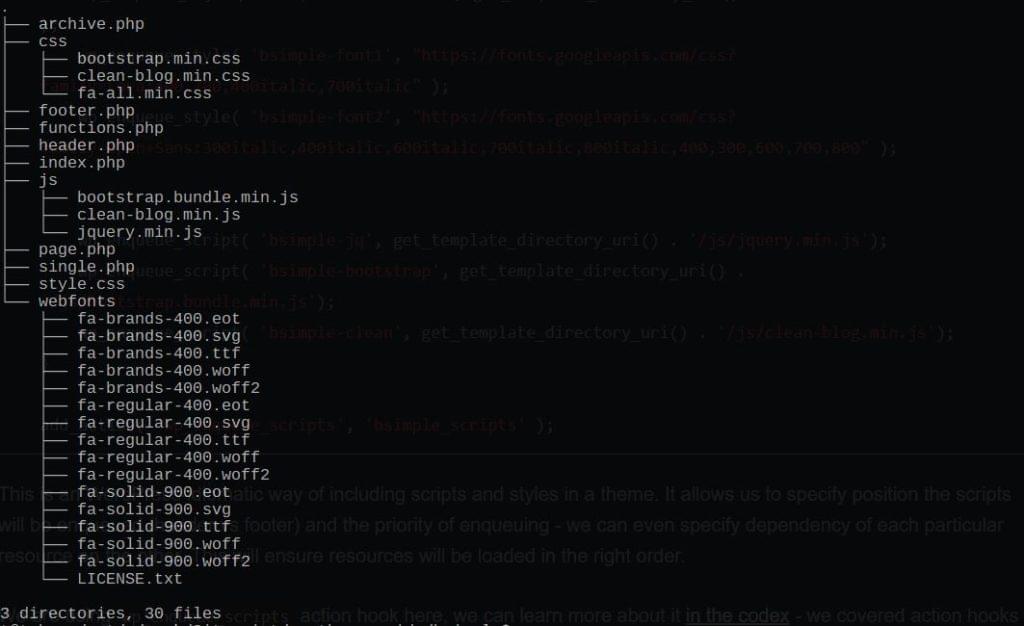
We can see that we’re loading styles from the Internet (Google fonts) and from our theme folder. Therefore, we create css, js and webfonts directories in our theme folder, and copy our Bootstrap theme’s CSS, JavaScript files, and FontAwesome icon-font files.
We also copy our index.php file to archive.php, page.php and single.php files, which we’ll modify.
Now our theme file structure will look something like this:
Adjusting the Markup
If we now visit our home page, we’ll see the menu on the top — though it and the page are still a mess – because the following line in our header is still outputting the menu wrapped in div and its own ul tags, so it isn’t affected by our bootstrap styles:
<?php wp_nav_menu( array( 'theme_location' => 'primary', 'items_wrap' => '%3$s' ) ); ?>
To solve this, we first need to go to our wp-admin dashboard and create — in the customizer — a new menu. we’ll name it Top Menu.
After we’ve done this, we’ll go to our header.php file remove these lines:
<ul class="nav navbar-nav navbar-right">
<?php wp_nav_menu( array( 'theme_location' => 'primary', 'items_wrap' => '%3$s' ) ); ?>
</ul>
In their place we put these lines:
<ul class="navbar-nav ml-auto">
    <?php wp_nav_menu(array(
      'menu' => 'Top Menu',
      'items_wrap'=>'%3$s',
      'container' => false,
      )); ?>
</ul>
This will remove the div tag and the duplication of the ul tag for us, but we still need to apply nav-item and nav-link to our menu items (to li and a tags respectively). How will we go about this? wp_nav_menu does not provide arguments for this. We’ll use the nav_menu_link_attributes and nav_menu_css_class filter hooks. We put this into our functions.php file:
function add_menu_link_class( $atts, $item, $args ) {
    if($args->link_class) {
        $atts['class'] = $args->link_class;
    }
    return $atts;
}
add_filter( 'nav_menu_link_attributes', 'add_menu_link_class', 1, 3 );

function add_menu_list_item_class($classes, $item, $args) {
    if($args->list_item_class) {
        $classes[] = $args->list_item_class;
    }
    return $classes;
}
add_filter('nav_menu_css_class', 'add_menu_list_item_class', 1, 3);
Now we can specify new attributes in our wp_nav_menu in our header.php:
<ul class="navbar-nav ml-auto">
      <?php wp_nav_menu(array(
        'menu' => 'Top Menu',
        'items_wrap'=>'%3$s',
        'container' => false,
        'list_item_class' => "nav-item",
        'link_class' => "nav-link",
        )); ?>
</ul>
Now our top menu links can take advantage of styles already defined in our Bootstrap theme’s CSS.
Dynamic Header
To be able to use a dynamic header — that is, a different header for the front page, for other selected pages, or for archives — we’ll define a dynamic_header() function in our functions.php file, where we’ll output our header markup dependent on the page the visitor loads.
So now our header.php file will end like this:
</nav>

<?php dynamic_header(); ?>

<div class="container">
    <div class="row">
We’ll also define that function like this:
if(!function_exists('dynamic_header')){

function dynamic_header(){

    global $post;

    ?>

    <?php if (is_front_page()){ ?>

        <header class="masthead" style="background:#ccc;">
            <div class="overlay"></div>
            <div class="container">
                <div class="row">
                    <div class="col-lg-8 col-md-10 mx-auto">
                        <div class="site-heading">
                        <h1 class="site-title"><a href="<?php echo esc_url( home_url( '/' ) ); ?>" rel="home"><?php bloginfo( 'name' ); ?></a></h1>
                        <span class="subheading"><?php get_bloginfo( 'description', 'display' );?></span>
                        </div>
                    </div>
                </div>
            </div>
        </header>

    <?php } else if (is_home()){ ?>

        <header class="masthead" style="background:#ccc;">
            <div class="overlay"></div>
            <div class="container">
                <div class="row">
                    <div class="col-lg-8 col-md-10 mx-auto">
                        <div class="site-heading">
                        <h1 class="site-title"><a href="<?php echo esc_url( home_url( '/' ) ); ?>" rel="home"><?php bloginfo( 'name' ); ?></a></h1>
                        <span class="subheading"><?php get_bloginfo( 'description', 'display' );?></span>
                        </div>
                    </div>
                </div>
            </div>
        </header>

    <?php } else if (is_page()){ ?>

        <header class="masthead" style="background:#ccc;">
            <div class="overlay"></div>
            <div class="container">
                <div class="row">
                    <div class="col-lg-8 col-md-10 mx-auto">
                        <div class="site-heading">
                        <h1 class="site-title"><a href="<?php echo esc_url( home_url( '/' ) ); ?>" rel="home"><?php bloginfo( 'name' ); ?></a></h1>
                        <span class="subheading"><?php get_bloginfo( 'description', 'display' );?></span>
                        </div>
                    </div>
                </div>
            </div>
        </header>

    <?php } else if (is_single()){ ?>

        <header class="masthead" style="background:#ccc;">
            <div class="overlay"></div>
            <div class="container">
                <div class="row">
                    <div class="col-lg-8 col-md-10 mx-auto">
                        <div class="site-heading">
                        <h1 class="site-title"><a href="<?php echo esc_url( home_url( '/' ) ); ?>" rel="home"><?php bloginfo( 'name' ); ?></a></h1>
                        <span class="subheading"><?php get_bloginfo( 'description', 'display' );?></span>
                        </div>
                    </div>
                </div>
            </div>
        </header>

    <?php } else { ?>

        <header class="masthead" style="background:#ccc;">
            <div class="overlay"></div>
            <div class="container">
                <div class="row">
                    <div class="col-lg-8 col-md-10 mx-auto">
                        <div class="site-heading">
                        <h1 class="site-title"><a href="<?php echo esc_url( home_url( '/' ) ); ?>" rel="home"><?php bloginfo( 'name' ); ?></a></h1>
                        <span class="subheading"><?php get_bloginfo( 'description', 'display' );?></span>
                        </div>
                    </div>
                </div>
            </div>
        </header>

    <?php }
}

}
To be able to use all the current URL or post data — like in the loop — we declare a $post variable global. Then we just fill different page or request cases with filler header HTML, which we’ll finish later. This sets the foundation for a truly dynamic header.
We need to make sure that our front page — with dynamic top menu — will look good even when the user is logged in. WordPress shows an admin bar when visitors are logged in, even when they visit the front page. Because it has position: fixed, it overlays the top zone on our website, covering whatever is there, so we need to specify an offset for our top menu.
We’ll add this to our style.css:
body.logged-in.admin-bar #mainNav {
    margin-top: 32px;
}

@media screen and (max-width: 782px) {
    body.logged-in.admin-bar #mainNav {
        margin-top: 46px;
    }
}
This makes sure the #mainNav — our menu container — has enough offset from the top, so it isn’t covered when user is logged in. WordPress adds logged-in and admin-bar classes to body in these cases, so we can easily target it.
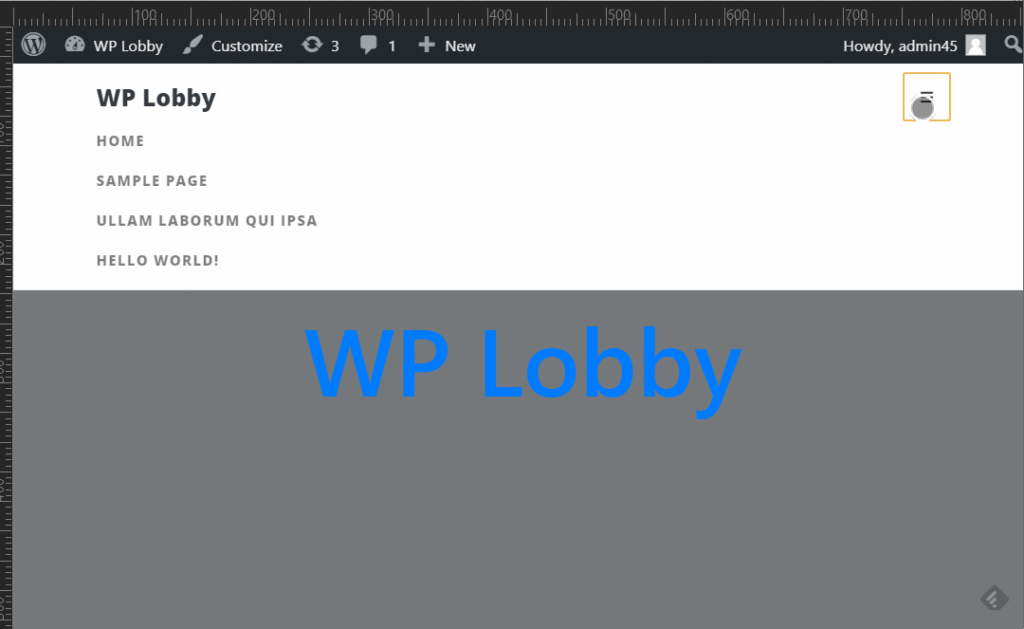
We can see that we address two cases in our CSS — one default, and another one for smaller screens. This is because WordPress outputs a wider admin bar on mobile devices, so we need to provide a 46px offset.
On mobile, we should now have a responsive, JavaScript-powered dropdown menu:
Conclusion
In this second part on creating a WordPress theme from scratch, we created a very basic WordPress theme, and we included Bootstrap styles and scripts into it. We adjusted the menu output to fit our predefined styles. We also separated header and footer output into their respective partials.
The functions.php file — a crucial file in theme development — is another topic we introduced and leveraged. Header output has been separated into its own function, which will use particulars of page visit, and site-owner–defined variables to determine the final output.
In the third part of the guide, we’ll finish building particular templates, give better structure to our theme functions and partials, and finish up the styling of our website.
There are three articles in this series on building a WordPress theme from scratch:
- understanging a theme’s structure
- theme basics
- refining the theme
Frequently Asked Questions (FAQs) about Building a WordPress Theme from Scratch
What are the prerequisites for building a WordPress theme from scratch?
Before you start building a WordPress theme from scratch, you need to have a basic understanding of HTML, CSS, PHP, and JavaScript. These are the core technologies used in WordPress theme development. Additionally, you should be familiar with the WordPress platform itself, including its file structure and template hierarchy. It’s also helpful to have a local development environment set up on your computer, such as MAMP or XAMPP, where you can test your theme as you build it.
How do I start building a WordPress theme from scratch?
The first step in building a WordPress theme from scratch is to create a new directory in your WordPress themes folder. This will be the home for all your theme files. Next, you’ll need to create a style.css file and an index.php file. The style.css file is where you’ll write all your CSS code, and it’s also where you’ll define your theme details. The index.php file is the main template file for your theme. It’s where you’ll write the PHP and HTML code that generates your website’s layout.
How can I add custom functionality to my WordPress theme?
You can add custom functionality to your WordPress theme by creating a functions.php file in your theme directory. This file acts like a plugin, allowing you to add custom features and functionality to your theme. You can use it to register navigation menus, add sidebars, enqueue styles and scripts, and much more.
How do I create a responsive WordPress theme?
To create a responsive WordPress theme, you’ll need to use media queries in your CSS code. Media queries allow you to apply different styles depending on the size of the user’s screen. This means you can create a different layout for desktop, tablet, and mobile devices. You’ll also need to make sure your images are responsive, which you can do by setting their width to 100%.
How do I customize the header and footer of my WordPress theme?
You can customize the header and footer of your WordPress theme by creating a header.php file and a footer.php file in your theme directory. The header.php file is where you’ll write the HTML and PHP code for your header, and the footer.php file is where you’ll write the code for your footer. You can then include these files in your other template files using the get_header() and get_footer() functions.
How do I add a custom post type to my WordPress theme?
You can add a custom post type to your WordPress theme by using the register_post_type() function in your functions.php file. This function allows you to define a new post type with its own labels, capabilities, and features. You can then create a single-{posttype}.php file and an archive-{posttype}.php file to control the display of your custom post type.
How do I add a sidebar to my WordPress theme?
You can add a sidebar to your WordPress theme by creating a sidebar.php file in your theme directory and using the register_sidebar() function in your functions.php file. You can then display your sidebar in your other template files using the get_sidebar() function.
How do I add a navigation menu to my WordPress theme?
You can add a navigation menu to your WordPress theme by using the register_nav_menus() function in your functions.php file. This function allows you to register one or more navigation menus in your theme. You can then display your menu in your other template files using the wp_nav_menu() function.
How do I customize the loop in my WordPress theme?
You can customize the loop in your WordPress theme by modifying the loop code in your index.php file or other template files. The loop is the PHP code that WordPress uses to display posts. You can customize it to change the way posts are displayed, the number of posts displayed, and more.
How do I update my WordPress theme?
You can update your WordPress theme by making changes to your theme files and then uploading them to your WordPress site. If you’re using a child theme, you can update the parent theme without losing your changes. If you’re not using a child theme, you should make a backup of your theme before updating it, as updates will overwrite your changes.
Tonino is a web developer and IT consultant who's dived through open-source code for over a decade. He's also a crypto enthusiast, Linux fan, and moderate libertarian.
Published in
·automation·Cloud·Debugging & Deployment·Meta·Open Source·PHP·Programming·Web·July 19, 2014


