


In this tutorial I will show how to allow users buy products or services from your app, using Stripe. Stripe is one of the simplest way to manage your online products, orders, and payments.
You can find the code for this tutorial on Github.
Key Takeaways
- Utilize the Stripe Android library to implement a seamless payment solution in your Android app, allowing users to purchase subscription plans directly.
- Ensure the app connects securely with Stripe’s API using test keys for fetching and displaying subscription plans, handling the process asynchronously to maintain UI responsiveness.
- Implement a user-friendly payment interface in the PayActivity, where users can enter their payment details and submit for processing, leveraging Stripe’s tokenization system for secure transactions.
- Handle backend charge creation through server-side scripts in PHP, ensuring that sensitive API keys are not exposed in the client-side application, thus maintaining security and compliance with best practices.
Stripe Dashboard
In the end of this tutorial, users would be able to buy plan subscriptions. The first step is creating some simple plans.
To begin with, login to Stripe (or create an account if you haven’t already). Make sure that you are in Test Mode before creating the plans from the dashboard.

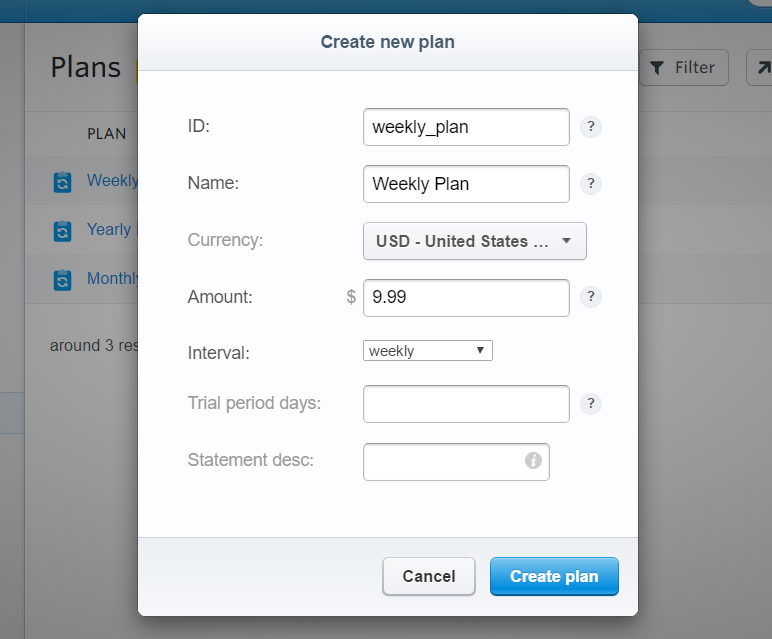
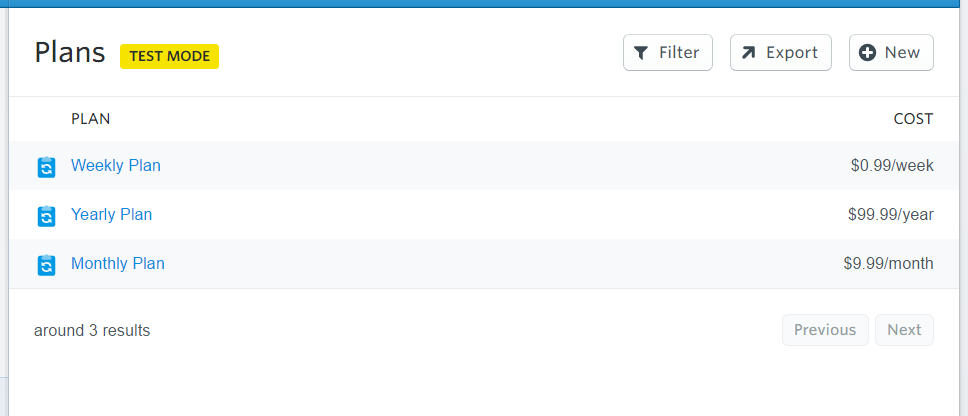
Below I have created 3 subscription plans, Weekly, Monthly and Yearly. They have some bulk information and prices just to be differentiated from one another.
Setting up the Android Project
Create a new Project in Android Studio and add these lines inside dependencies in build.gradle file:
compile ('com.stripe:stripe-android:1.0.4@aar'){
    transitive=true
}
Since this app would need an internet connection, please add the following user-permission inside AndroidManifest.xml file:
<uses-permission android:name="android.permission.INTERNET" />
Loading the Products
To download our plans from the Stripe Dashboard, we first need to connect our app with it using the API Keys.
There are 4 keys in total, but we are going to use only the test keys. Now open the MainActivity.class and add these declarations before the onCreate() method:
ArrayList<SimplePlan> planArrayList;
RecyclerView recyclerView;
ItemsAdapter adapter;
Then, inside onCreate() the initialize the ArrayList:
    planArrayList = new ArrayList<>();

    new Async().execute();
Inside the Main class, we need to create an AysncTask. This task will download the data from stripe and it will be running in a new Thread, so the main thread won’t be disrupted by the network connectivity events.
Add this class inside the Main Activity code:
public class Async extends AsyncTask<Void,String,ArrayList<SimplePlan>> {

        @Override
        protected ArrayList<SimplePlan> doInBackground(Void... params) {

            try {
            String line, newjson = "";
            URL url = new URL("[YOUR_SERVER_PLANS_SCRIPT_URL]");
            try (BufferedReader reader = new BufferedReader(new InputStreamReader(url.openStream(), "UTF-8"))) {
                while ((line = reader.readLine()) != null) {
                    newjson += line;
                }
                String json = newjson.toString();
                JSONObject jObj = new JSONObject(json);
                Log.e("Obj",jObj.toString());
                JSONArray plans = jObj.getJSONArray("plans");
                for (int i=0;i<plans.length();i++){
                    JSONObject plan = plans.getJSONObject(i);
                    plan.getString("amount");
                    Log.e("Amount",plan.getString("amount"));
                    planArrayList.add(new SimplePlan(plan.getInt("amount"),plan.getString("name"),plan.getString("statement_descriptor")));
                }
            }
        } catch (Exception e) {
            e.printStackTrace();
        }

        return planArrayList;
    }

        @Override
        protected void onPostExecute(final ArrayList<SimplePlan> plan) {
            super.onPostExecute(plan);
            new Handler().postDelayed(new Runnable() {
                @Override
                public void run() {
                    showRcv(plan);
                }
            },3000);
        }
    }
This code retrieves all the plans from the Stripe API and adds them to an ArrayList called planArrayList. All these instructions are executed in background. This doInBackground function returns an ArrayList. The other function onPostExecute(final ArrayList<SimplePlan> plans) is called when the first one finishes.
It requires as a parameter the same ArrayList returned from the first method. Since we are not really sure how much can the first call lasts in seconds, it is better to run the second method after a certain period of time, after which we are sure that the call has finished. This period is 3000ms.
So after that time, this function runs another one called showRcv(plans). You can find its code below:
public void showRcv(ArrayList<SimplePlan> plans){
        adapter = new ItemsAdapter(this,plans);
        recyclerView = (RecyclerView)findViewById(R.id.recyclerView);
        recyclerView.setLayoutManager(new LinearLayoutManager(this));
        recyclerView.setAdapter(adapter);
    }
Until now we are just listing the plans inside the application. I will not focus on the RecyclerView Adapter and ViewHolder code but you can find them in Github.
This is how the plans would be listed:
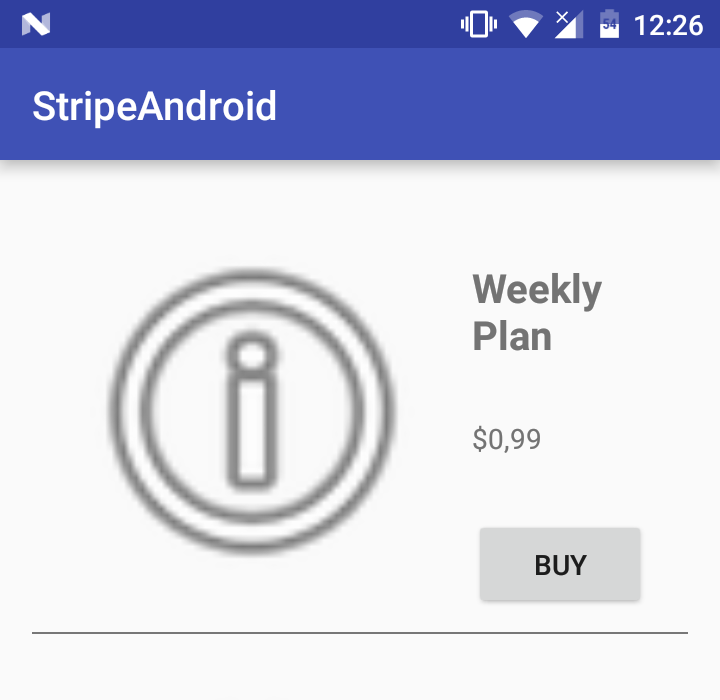
Each item listed in the main activity has a Buy button on the right.
There is an OnClickListener attached on each Buy button:
holder.buy.setOnClickListener(new View.OnClickListener() {
            @Override
            public void onClick(View v) {
                Intent buyIntent = new Intent(activity,PayActivity.class);
                buyIntent.putExtra("plan_id",""+planArrayList.get(i).getId());
                buyIntent.putExtra("plan_price",planArrayList.get(i).getAmount());
                buyIntent.putExtra("plan_name",""+planArrayList.get(i).getName());
                activity.startActivity(buyIntent);
            }
        });
On the click of the button, two variables are passed as Intent Extras: plan_price and plan_name. These are the most important ones to create a charge.
Accepting Payments
Right-click on your package directory and create a new Empty Activity. This activity will open after any of the plans is chosen to buy.
Its xml code is:
<?xml version="1.0" encoding="utf-8"?>
<RelativeLayout
    xmlns:android="http://schemas.android.com/apk/res/android"
    xmlns:tools="http://schemas.android.com/tools"
    android:id="@+id/activity_main"
    android:layout_width="match_parent"
    android:layout_height="match_parent"
    tools:context="com.example.theodhor.stripeandroid.PayActivity">

    <RelativeLayout
        android:layout_width="match_parent"
        android:layout_height="wrap_content"
        android:layout_margin="20dp">


        <EditText
            android:layout_width="wrap_content"
            android:layout_height="wrap_content"
            android:id="@+id/cardNumber"
            android:layout_alignParentTop="true"
            android:layout_alignParentLeft="true"
            android:layout_alignParentStart="true"
            android:layout_alignParentRight="true"
            android:layout_alignParentEnd="true"
            android:text="4242 4242 4242 4242" />

        <EditText
            android:layout_width="30dp"
            android:layout_height="wrap_content"
            android:inputType="number"
            android:ems="10"
            android:id="@+id/month"
            android:layout_below="@+id/cardNumber"
            android:layout_alignParentLeft="true"
            android:layout_alignParentStart="true"
            android:text="12" />

        <EditText
            android:layout_width="30dp"
            android:layout_height="wrap_content"
            android:inputType="number"
            android:ems="10"
            android:id="@+id/year"
            android:text="19"
            android:layout_below="@+id/cardNumber"
            android:layout_toRightOf="@+id/textView"
            android:layout_toEndOf="@+id/textView" />

        <TextView
            android:layout_width="wrap_content"
            android:layout_height="36dp"
            android:textAppearance="?android:attr/textAppearanceLarge"
            android:text="/"
            android:id="@+id/textView"
            android:layout_alignBottom="@+id/month"
            android:layout_toRightOf="@+id/month"
            android:layout_toEndOf="@+id/month" />

        <EditText
            android:layout_width="wrap_content"
            android:layout_height="wrap_content"
            android:id="@+id/cvc"
            android:text="123"
            android:layout_below="@+id/cardNumber"
            android:layout_toRightOf="@+id/year"
            android:layout_toEndOf="@+id/year"
            android:layout_marginLeft="49dp"
            android:layout_marginStart="49dp" />

        <Button
            android:layout_width="wrap_content"
            android:layout_height="wrap_content"
            android:text="Submit"
            android:id="@+id/submitButton"
            android:layout_below="@+id/cvc"
            android:layout_alignParentRight="true"
            android:layout_alignParentEnd="true"
            android:onClick="submitCard" />

    </RelativeLayout>

</RelativeLayout>
Pay Activity
We need to declare some variables inside this class.
Stripe stripe;
Integer amount;
String name;
Card card;
Token tok;
Now inside the onCreate() method we need to get the extras sent from the Buy button before. The plan’s price amount and name will be used later when the charge would be created.
Bundle extras = getIntent().getExtras();
amount = extras.getInt("plan_price");
name = extras.getString("plan_name");


    Also, a Stripe instance will be created using the *Publishable Test Key*:

try {
        stripe = new Stripe("[YOUR_PK_TEST_KEY_HERE]");
                } catch (AuthenticationException e) {
        e.printStackTrace();
}
Before the charge is created, the Card information should be validated.
This method sumbitCard(View view) checks whether the given card information is valid, and if yes, it creates a card token that will be used for the charge.
public void submitCard(View view) {
        // TODO: replace with your own test key
        TextView cardNumberField = (TextView) findViewById(R.id.cardNumber);
        TextView monthField = (TextView) findViewById(R.id.month);
        TextView yearField = (TextView) findViewById(R.id.year);
        TextView cvcField = (TextView) findViewById(R.id.cvc);

        card = new Card(
                cardNumberField.getText().toString(),
                Integer.valueOf(monthField.getText().toString()),
                Integer.valueOf(yearField.getText().toString()),
                cvcField.getText().toString()
        );

        card.setCurrency("usd");
        card.setName("[NAME_SURNAME]");
        card.setAddressZip("[ZIP]");
        /*
        card.setNumber("4242424242424242");
        card.setExpMonth(12);
        card.setExpYear(19);
        card.setCVC("123");
        */


        stripe.createToken(card, "[YOUR_PK_TEST_KEY_HERE]", new TokenCallback() {
            public void onSuccess(Token token) {
                // TODO: Send Token information to your backend to initiate a charge
                Toast.makeText(getApplicationContext(), "Token created: " + token.getId(), Toast.LENGTH_LONG).show();
                tok = token;
                new StripeCharge(token.getId()).execute();
            }

            public void onError(Exception error) {
                Log.d("Stripe", error.getLocalizedMessage());
            }
        });
The default testing information for a valid card is as shown below:
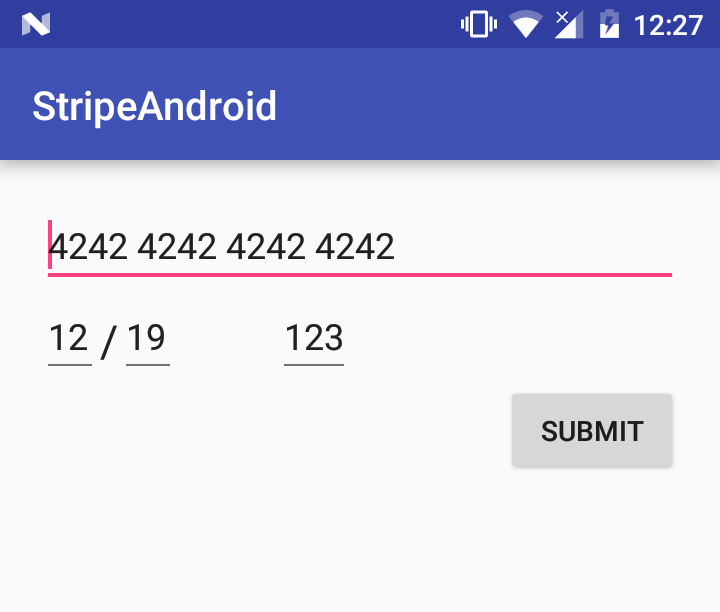
but you can set the values by using:
card.setNumber("4242424242424242");
card.setExpMonth(12);
card.setExpYear(19);
card.setCVC("123");
So after the card is validated and the token is generated, the charge can be created. The Charge is created by your server-side script charge.php. So we need to post data to server, including the card validation token, and it should not be executed on the Main Thread.
Inside the PayActivity.class create a new AsyncTask class called StripeCharge:
public class StripeCharge extends AsyncTask<String, Void, String> {
    String token;

    public StripeCharge(String token) {
        this.token = token;
    }

    @Override
    protected String doInBackground(String... params) {
        new Thread() {
            @Override
            public void run() {
                postData(name,token,""+amount);
            }
        }.start();
        return "Done";
    }

    @Override
    protected void onPostExecute(String s) {
        super.onPostExecute(s);
        Log.e("Result",s);
    }
}
The most important parameters of the charge model are the amount, currency and card which is identified by the token id.
The next method performs a call to the server, posting the required data to create a charge:
public void postData(String description, String token,String amount) {
        // Create a new HttpClient and Post Header
        try {
            URL url = new URL("[YOUR_SERVER_CHARGE_SCRIPT_URL]");
            HttpURLConnection conn = (HttpURLConnection) url.openConnection();
            conn.setReadTimeout(10000);
            conn.setConnectTimeout(15000);
            conn.setRequestMethod("POST");
            conn.setDoInput(true);
            conn.setDoOutput(true);

            List<NameValuePair> params = new ArrayList<NameValuePair>();
            params.add(new NameValuePair("method", "charge"));
            params.add(new NameValuePair("description", description));
            params.add(new NameValuePair("source", token));
            params.add(new NameValuePair("amount", amount));

            OutputStream os = null;

            os = conn.getOutputStream();
            BufferedWriter writer = new BufferedWriter(new OutputStreamWriter(os, "UTF-8"));
            writer.write(getQuery(params));
            writer.flush();
            writer.close();
            os.close();
        } catch (IOException e) {
            e.printStackTrace();
        }
    }
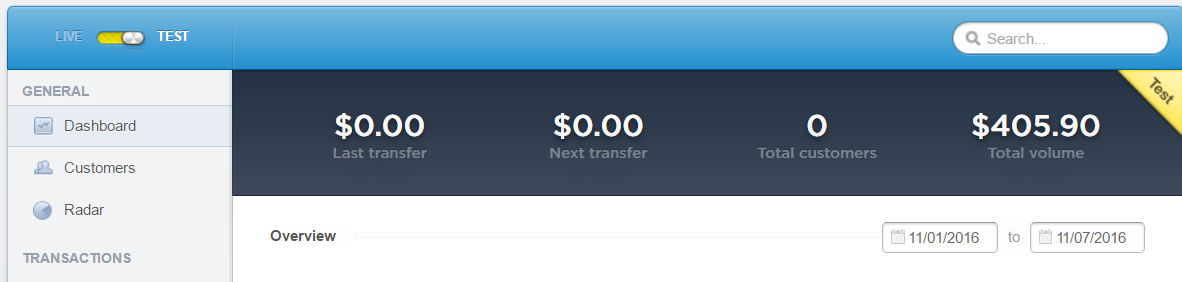
If the charging was successful, you should see the amount transferred in your Stripe Dashboard Total Volume as shown below:
The server-side script (PHP)
Be careful! Your Secret API Key should only exist in your server side scripts. For security purposes, do not include it in the client side code.
retrieveplans.php:
<?php
define('STRIPE_SECRET_KEY','[YOUR_SECRET_API_KEY]');
define('STRIPE_PUBLIC_KEY','[YOUR_PUBLISHEABLE_API_KEY]');
header('Content-Type: application/json');
$results = array();
require 'vendor/autoload.php';
\Stripe\Stripe::setApiKey(STRIPE_SECRET_KEY);
try{
    $products  = \Stripe\Plan::all();
    $results['response'] = "Success";
    $results['plans'] = $products->data;

}catch (Exception $e){
    $results['response'] = "Error";
    $results['plans'] = $e->getMessage();
}
echo json_encode($results);
and the other script that uses the token id and the amount to create a charge.
charge.php:
<?php
define('STRIPE_SECRET_KEY','[YOUR_SECRET_API_KEY]');
define('STRIPE_PUBLIC_KEY','[YOUR_PUBLISHEABLE_API_KEY]');
header('Content-Type: application/json');
$results = array();
require 'vendor/autoload.php';
\Stripe\Stripe::setApiKey(STRIPE_SECRET_KEY);
if(isset($_POST['method'])){
    $method = $_POST['method'];
    if($method =="charge"){
        $amount = $_POST['amount'];
        $currency = $_POST['currency'];
        $source = $_POST['source'];
        $description = $_POST['description'];
        try {
            $charge = \Stripe\Charge::create(array(
                "amount" => $amount, // Amount in cents
                "currency" => $currency,
                "source" => $source,
                "description" => $description
            ));
            if($charge!=null){
                $results['response'] = "Success";
                $results['message'] = "Charge has been completed";
            }
        } catch(\Stripe\Error\Card $e) {
            $results['response'] = "Error";
            $results['message'] = $e->getMessage();
        }
        echo json_encode($results);
    }else {
        $results['response'] = "Error";
        $results['messsage'] = "Method name is not correct";
        echo json_encode($results);
    }
}else {
    $results['response'] = "Error";
    $results['message'] = "No method has been set";
    echo json_encode($results);
}
Conclusion
Stripe is one of the best online payment platforms. Its unique Dashboard lets you build e-commerce applications and sell products even without a single line of back-end code.
I hope you find it as easy to use as I do and if you have any comments or questions, please let me know below.
Frequently Asked Questions (FAQs) on Integrating Stripe into Your Android App
What are the prerequisites for integrating Stripe into my Android app?
Before you start integrating Stripe into your Android app, you need to have a few things in place. First, you need to have a Stripe account. If you don’t have one, you can create it on the Stripe website. Second, you need to have an Android project where you will integrate Stripe. This project should be set up with the minimum SDK version of 21. Lastly, you need to add the Stripe Android library to your project. This library provides the necessary APIs for integrating Stripe.
How do I add the Stripe Android library to my project?
To add the Stripe Android library to your project, you need to add the following line to your app’s build.gradle file under dependencies: implementation ‘com.stripe:stripe-android:16.10.0’. After adding this line, sync your project with Gradle files. The Stripe Android library should now be added to your project.
How do I create a Stripe instance in my Android app?
To create a Stripe instance in your Android app, you need to first initialize the Stripe object. You can do this in the onCreate method of your activity. Here is an example of how to do it:Stripe stripe = new Stripe(
this,
PaymentConfiguration.getInstance(this).getPublishableKey());
In this code, ‘this’ refers to the context, which is your activity. The getPublishableKey method returns the publishable key that you set in the PaymentConfiguration instance.
How do I handle payment result in my Android app?
To handle payment result in your Android app, you need to override the onActivityResult method in your activity. In this method, you can use the Stripe object’s handlePaymentResult method to handle the payment result. Here is an example:@Overrideprotected void onActivityResult(int requestCode, int resultCode, Intent data) {
super.onActivityResult(requestCode, resultCode, data);
// Handle the result of stripe.confirmPayment
stripe.onPaymentResult(requestCode, data, new PaymentResultCallback(this));}
In this code, the PaymentResultCallback is a callback that you need to implement to handle the payment result.
How do I confirm a payment in my Android app?
To confirm a payment in your Android app, you can use the Stripe object’s confirmPayment method. This method takes two parameters: a PaymentIntentParams object and a callback. The PaymentIntentParams object contains the payment details, and the callback is used to handle the payment result. Here is an example:stripe.confirmPayment(this, paymentIntentParams);
In this code, ‘this’ refers to the context, which is your activity.
How do I create a PaymentIntent in my Android app?
Creating a PaymentIntent is usually done on your server side. You can create a PaymentIntent by making a POST request to the /v1/payment_intents endpoint of the Stripe API. The response from this request will contain a client secret, which you can use to confirm the payment on your Android app.
How do I handle errors in my Android app?
To handle errors in your Android app, you can use the onError method of the callback that you pass to the confirmPayment method. This method is called when there is an error during payment. Here is an example:@Overridepublic void onError(@NonNull Exception e) {
// Handle error here}
In this code, the Exception object contains the details of the error.
How do I test the Stripe integration in my Android app?
Stripe provides a set of test card numbers that you can use to test the integration in your Android app. You can find these test card numbers on the Stripe website. When you use these card numbers, the payments will not be processed, but you will receive a response as if the payment was successful.
How do I handle different payment methods in my Android app?
Stripe supports various payment methods, such as card payments, bank transfers, and digital wallets. To handle different payment methods in your Android app, you can use the PaymentMethodCreateParams class. This class provides methods to create parameters for different payment methods.
How do I secure the payment data in my Android app?
When you integrate Stripe into your Android app, the payment data is handled by Stripe, so you don’t need to worry about securing the payment data. Stripe is a PCI Service Provider Level 1, which is the highest level of certification available in the payments industry. However, you should still follow best practices for securing your app, such as using HTTPS for network requests and storing sensitive data securely.

