 This idea of alternate histories or parallel universes even stretches to the casting of movies themselves.
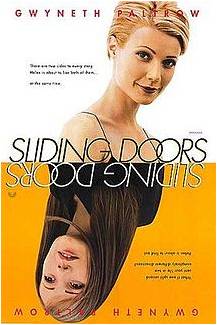
For instance, did you know that Eric Stolz, the drug dealer in Pulp Fiction, was originally cast as Marty McFly in Back to the Future? It’s hard to imagine now but it was a “Sliding Doors” moment — who knows how film history would have changed if this casting had stuck?
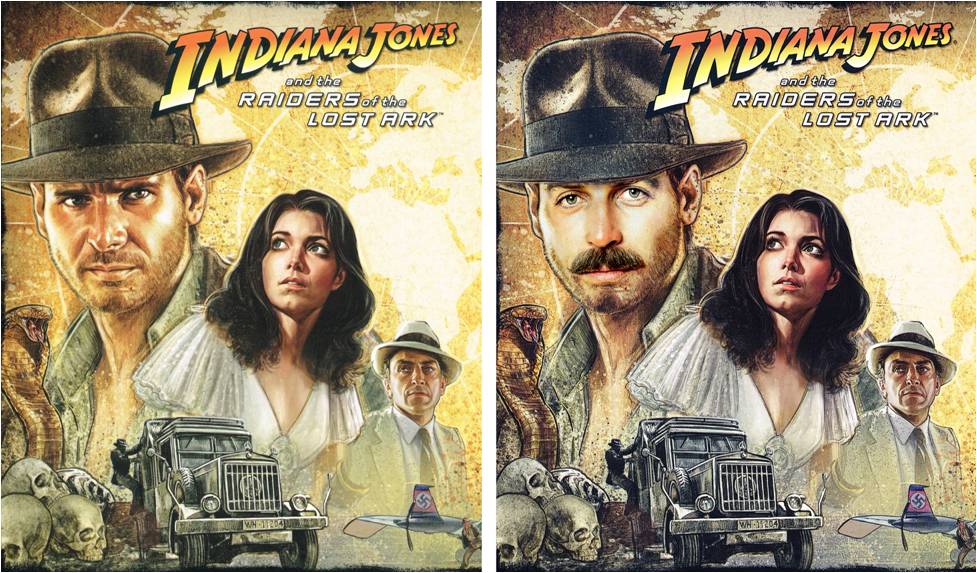
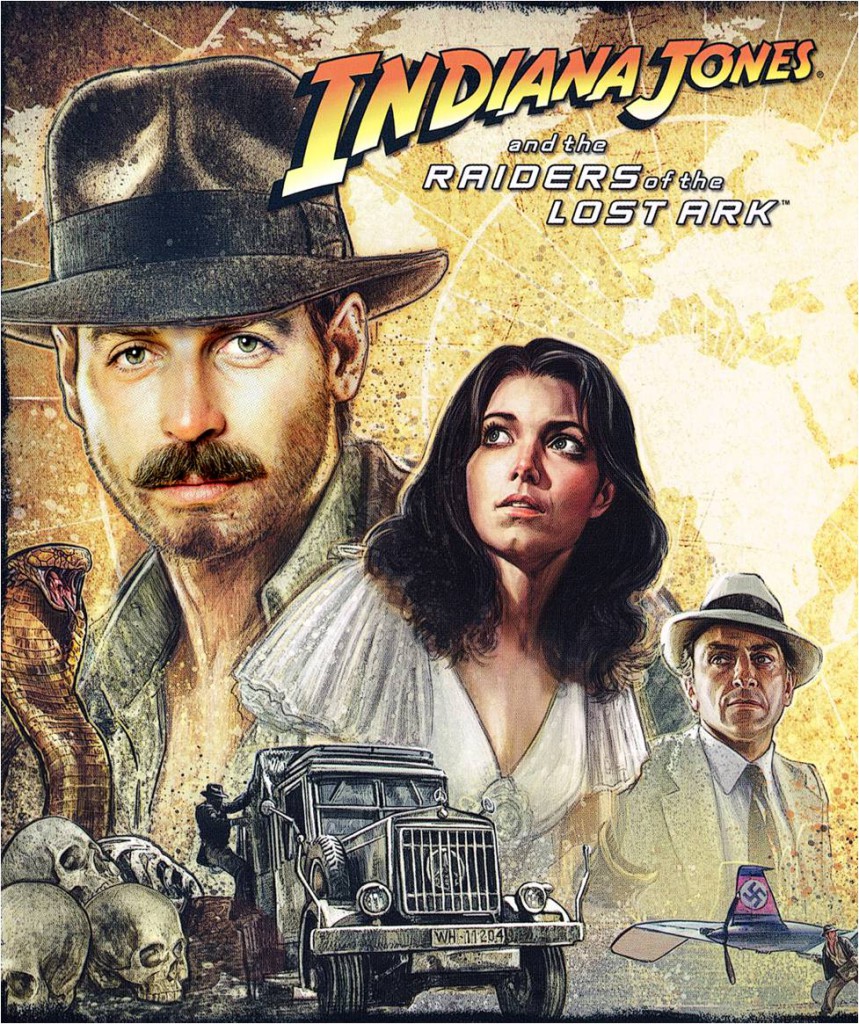
A similar situation almost occurred with Indiana Jones. George Lucas wanted Tom Selleck (Magnum PI) to star as the beloved Indy because he didn’t want Harrison Ford to become his “Baby Bobby Dinero.” As it turns out, after Selleck conducted some screen tests for the role he decided to go with Ford.
This begs the question: What if he we went with Selleck?
While we’ll probably never know the answer to this question, we can at least get a clear image of what Selleck would’ve looked liked as Indiana Jones compared to Ford.
In this post, we’re trading in our Delorean for Photoshop and learning how to reshape the ‘80s universe into one in which the mighty Tom Selleck ruled the movie screens.
This idea of alternate histories or parallel universes even stretches to the casting of movies themselves.
For instance, did you know that Eric Stolz, the drug dealer in Pulp Fiction, was originally cast as Marty McFly in Back to the Future? It’s hard to imagine now but it was a “Sliding Doors” moment — who knows how film history would have changed if this casting had stuck?
A similar situation almost occurred with Indiana Jones. George Lucas wanted Tom Selleck (Magnum PI) to star as the beloved Indy because he didn’t want Harrison Ford to become his “Baby Bobby Dinero.” As it turns out, after Selleck conducted some screen tests for the role he decided to go with Ford.
This begs the question: What if he we went with Selleck?
While we’ll probably never know the answer to this question, we can at least get a clear image of what Selleck would’ve looked liked as Indiana Jones compared to Ford.
In this post, we’re trading in our Delorean for Photoshop and learning how to reshape the ‘80s universe into one in which the mighty Tom Selleck ruled the movie screens.
What You’ll Need
- Two photos
- Photoshop (I’m using CS5)
- A graphics tablet (I’ve used my laptop touchpad as well)
- This texture
What You’ll Make
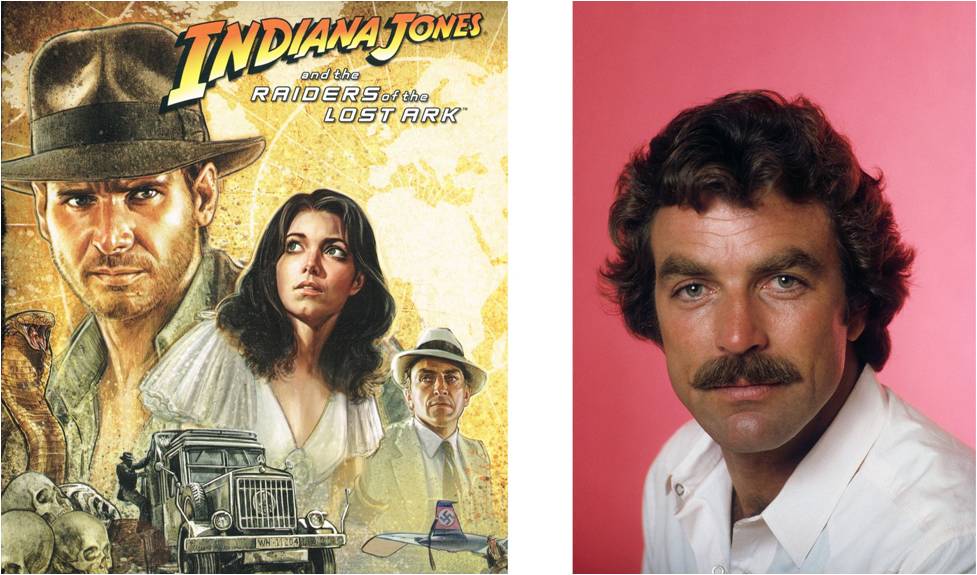
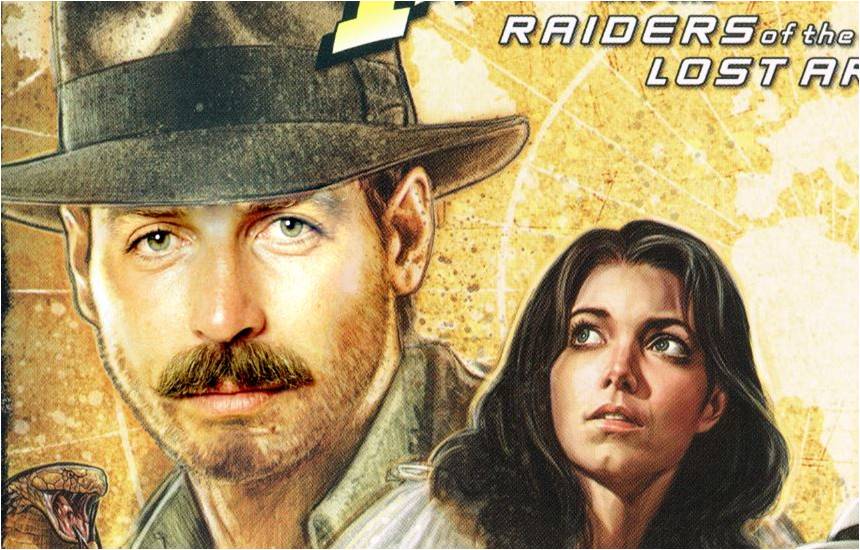
Choose the Right Images
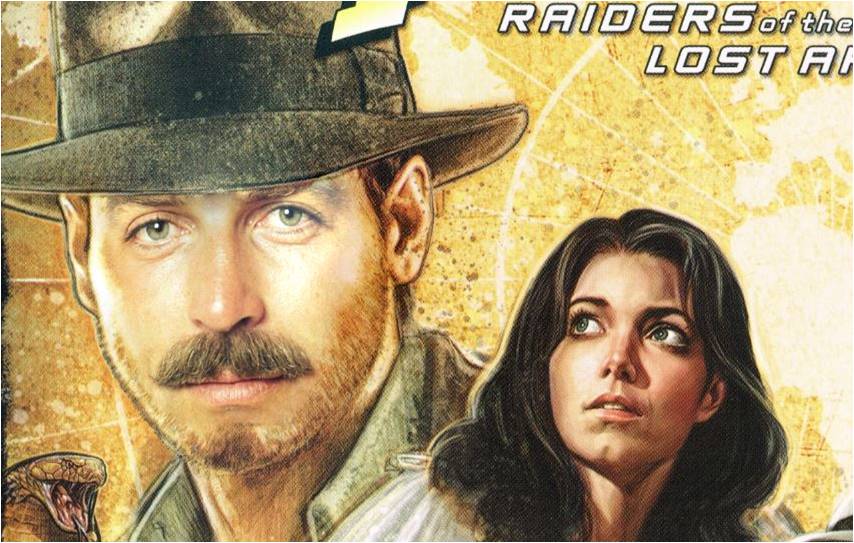
To make your face swap work, you need to make sure that the two images you choose are similar in size and resolution and To ensure your face swap works, you need to find two images, which are similar in size and resolution, with nearly identical poses. For example, both people’s heads need to be tilted or turned the same way. I’d also try to select images with similar nose and mouth angles.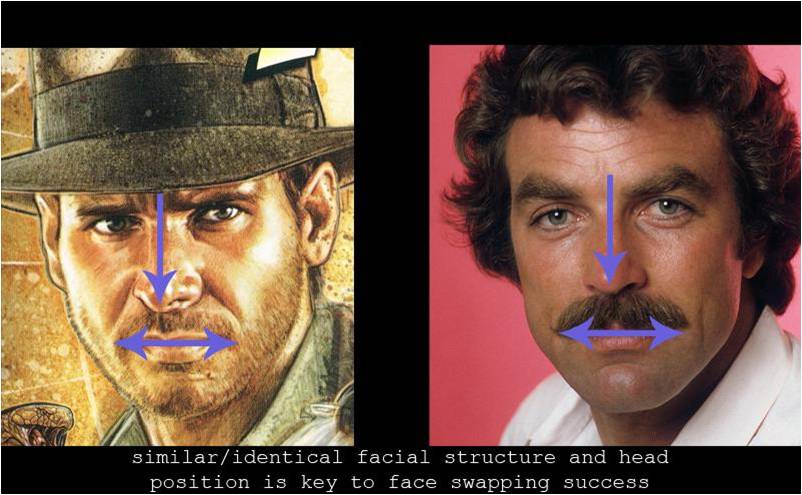 Below you’ll see the two images I will be using.
 While I mentally aligned the images in my head to see if they would work, you can opt to overlap them in Photoshop to see if your selections work together.
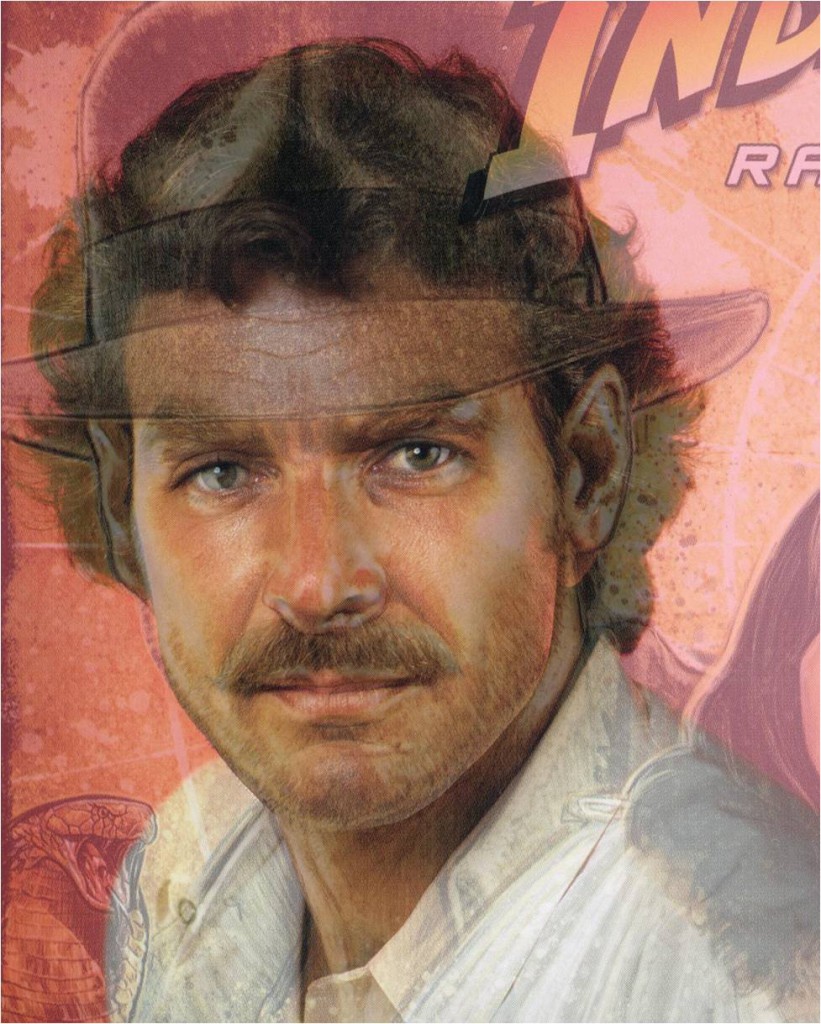 As you can see above, the images I chose look pretty good here.
Face Selection and Placement
Now that we’ve selected our images, we need to get Selleck’s face on Ford’s. To begin, you simply need to isolate the main facial features, including eyebrows, eyes, nose and mouth. You can do this using either the Lasso Tool or the Pen Tool. To get nicer edges and curves for blending, I recommend the Pen Tool, but either will work.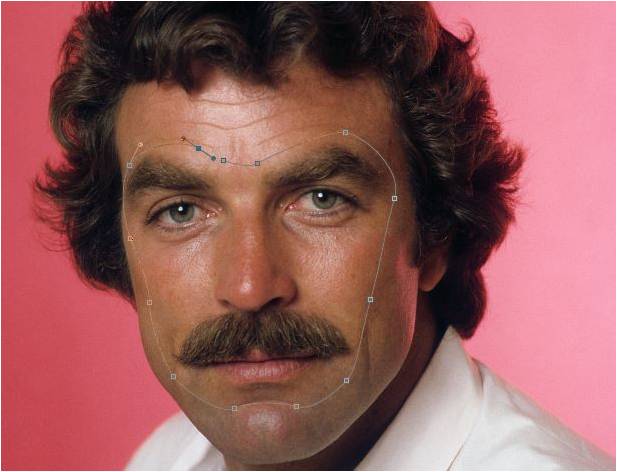 With the face selected simply copy it (CTRL + C or CMD + C) and then paste it onto your working canvas with CTRL + V or CMD + V.
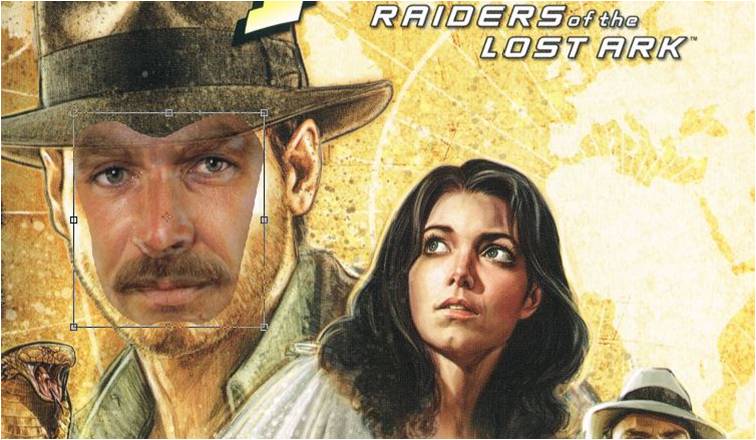
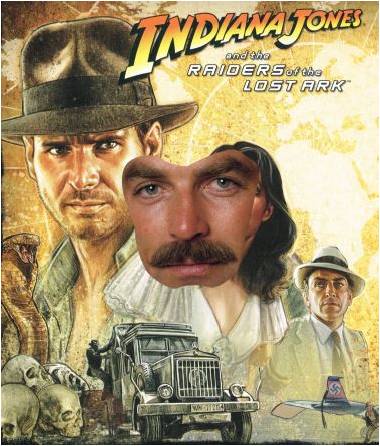 Next, we need to move Selleck’s face on top of Ford’s.
Reduce the face layer’s opacity by around 50% or until you can see both layers.
Then use the Transform Tool to make adjust the layer for proper placement.
Next, we need to move Selleck’s face on top of Ford’s.
Reduce the face layer’s opacity by around 50% or until you can see both layers.
Then use the Transform Tool to make adjust the layer for proper placement.
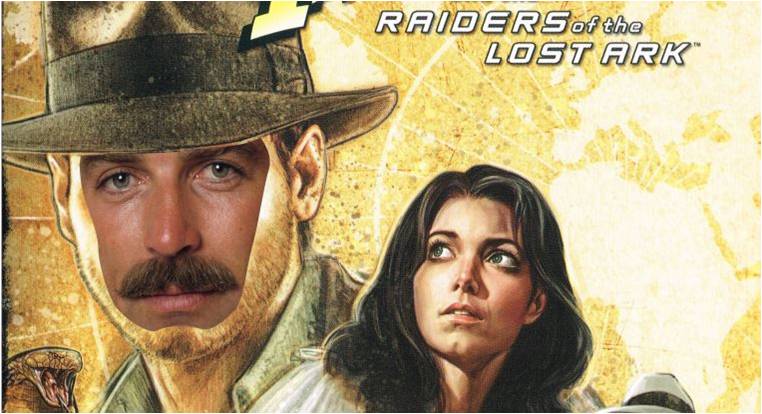
 Now, erase the excess parts of Selleck’s face that should be currently covered by the hat.
Blending Prep
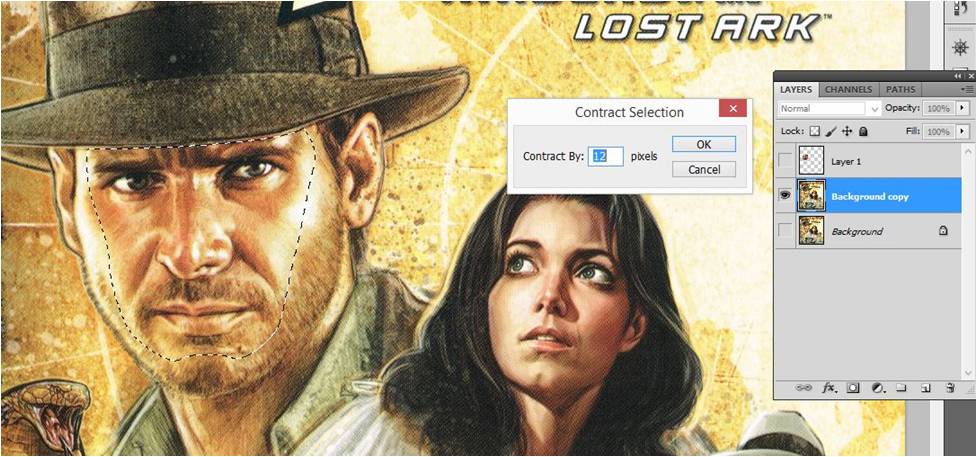
Before we blend our layers we need to clean up a bit so that our end result looks virtually seamless. First, duplicate the poster image so you have three layers like the screenshot below.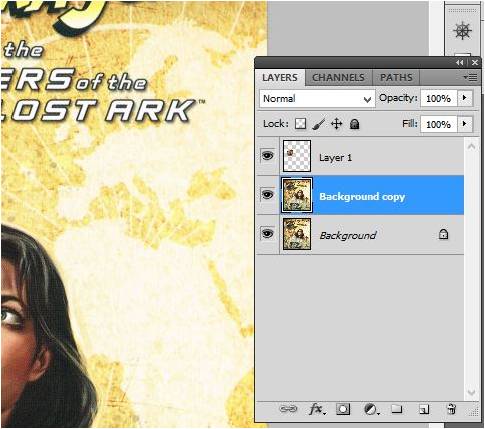 Using the Wand Tool, select around the inner portion of Selleck’s face. We’ll use this selection as our blending guideline.
Next, hide this selected layer and the original image to make it easier to see what you’re working on.
Using the Wand Tool, select around the inner portion of Selleck’s face. We’ll use this selection as our blending guideline.
Next, hide this selected layer and the original image to make it easier to see what you’re working on.
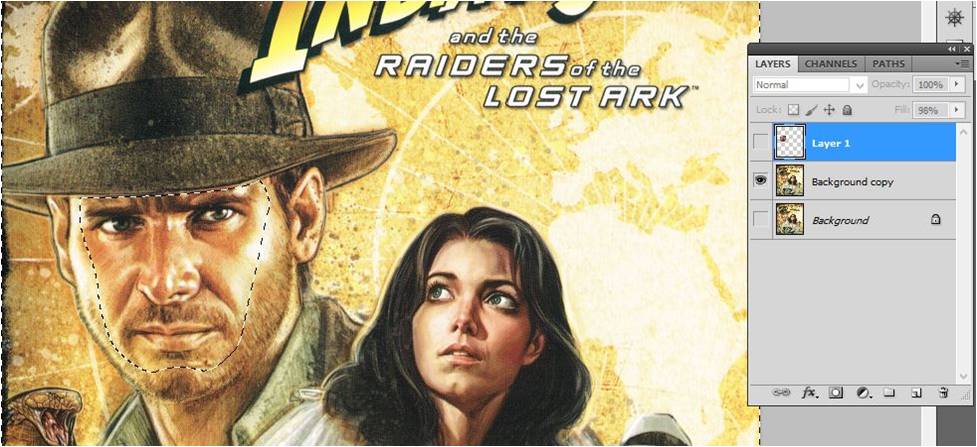 Click on the newly duplicated layer then go to SELECT > INVERSE > MODIFY > CONTRACT > 12px then press OK.
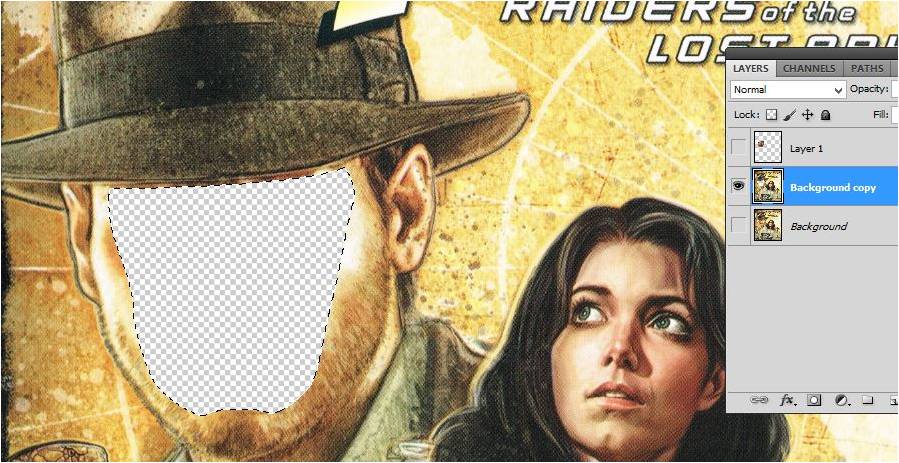
 Click DELETE so that Ford’s face is just a big hole, like the screenshot below.
 Before we get to blending we need to do a slight color correction. On the Selleck layer we need to make it active then go to IMAGE > ADJUSTMENTS > CURVES:
- RGB: Output- 170 Input- 85
- BLUE: Output- 219 Input- 255
Auto-Blending Layers
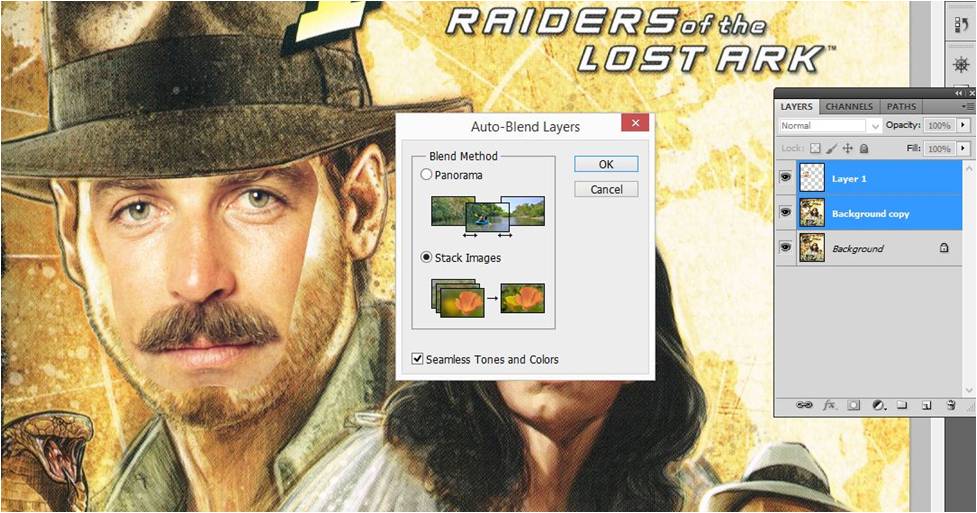
It’s time to blend these layers. First, make all your layers “active.”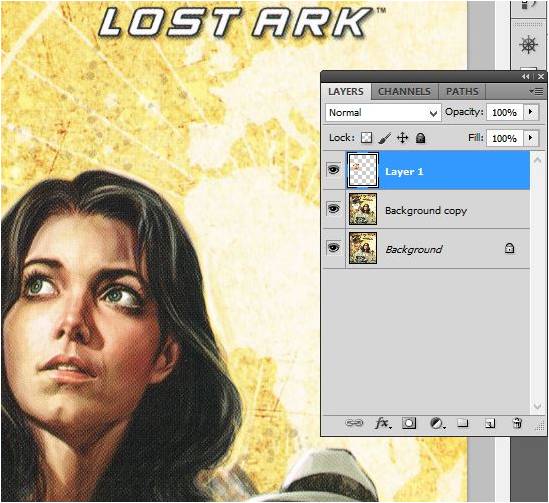 Next, select only the top two layers then go to: EDIT > AUTO-BLEND LAYERS > STACK IMAGES > OK.
Important Note: Notice how I have the “Seamless Tones and Colors” box checked, this is important.
Next, select only the top two layers then go to: EDIT > AUTO-BLEND LAYERS > STACK IMAGES > OK.
Important Note: Notice how I have the “Seamless Tones and Colors” box checked, this is important.
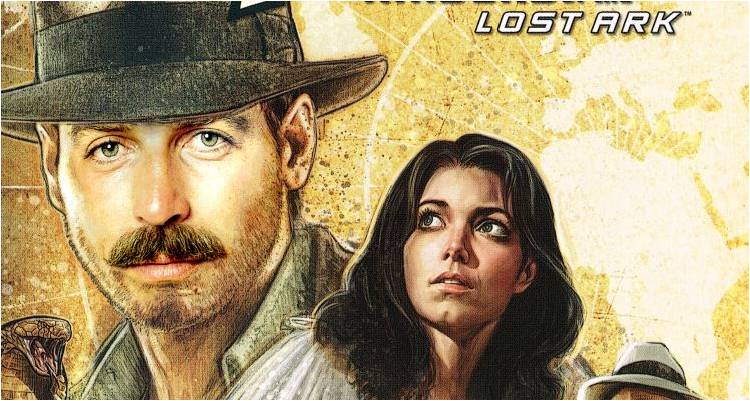
 The below shot is what your blended image should look like now.
Color Correction
Since we want a realistic face swap and an ‘80s retro-type look, we need to make some color corrections before we add extra effects. Begin by adjusting the facial levels. Go to EDIT > ADJUSTMENTS > LEVELS.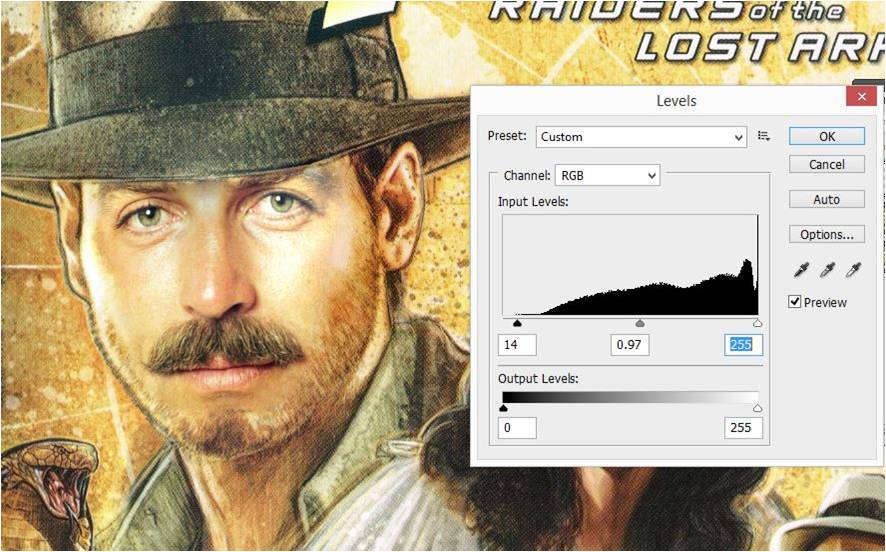 Then, go to: EDIT > ADJUSTMENTS > EXPOSURE.
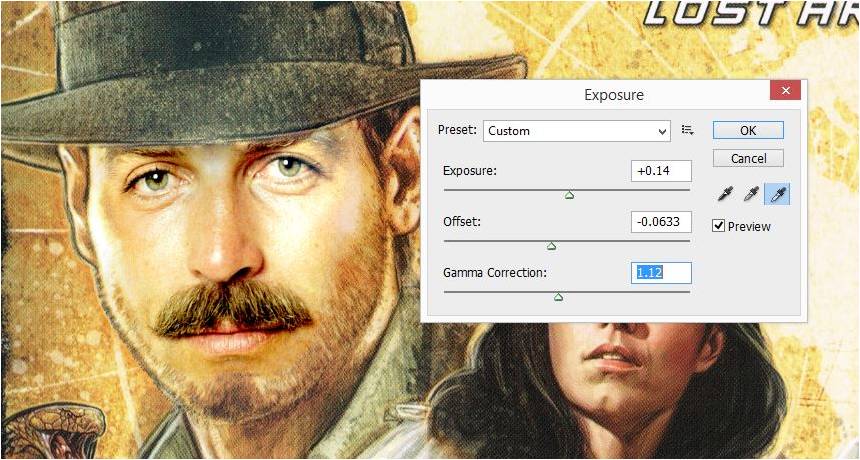 With the color of the layer containing Tom Sellack’s face edited pretty close to the rest of the original skin tone, I went in with a soft round brush and erased around the bottom lip to expose more of the facial hair.
Texture Application
Now, it’s time to nail the retro-look we’re aiming for here. First, merge all layers; then duplicate the image so you have two layers. Select the top layer, and go to: FILTER > ARTISTIC > POSTER EDGES. Lower the opacity – around 66% should work.
 Next, apply your texture, and make sure to position it on the majority of the face. Then change the layer mode to MULTIPLY.
 Erase the excess and drop the opacity to 29%.
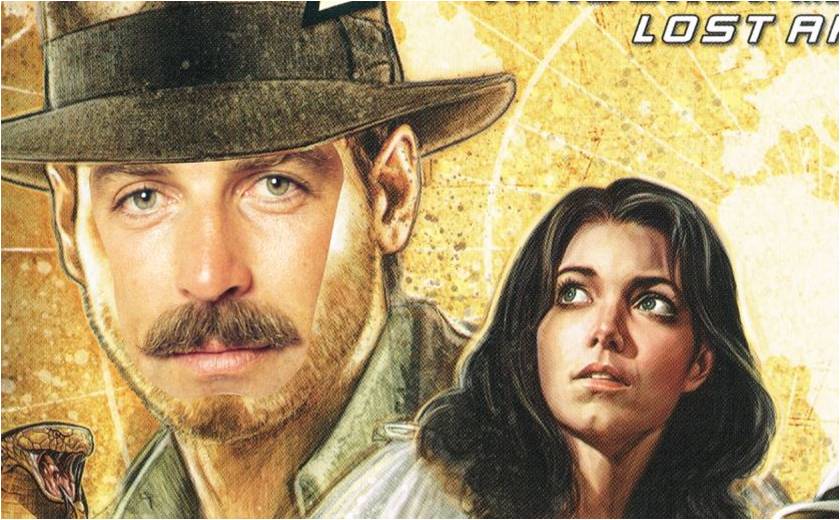
 Finally, add any additional desired tones, shadows, highlights or whatever else your little heart desires to make your poster pop.
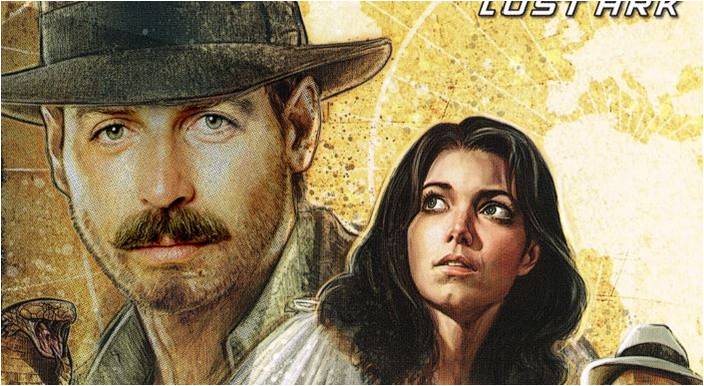
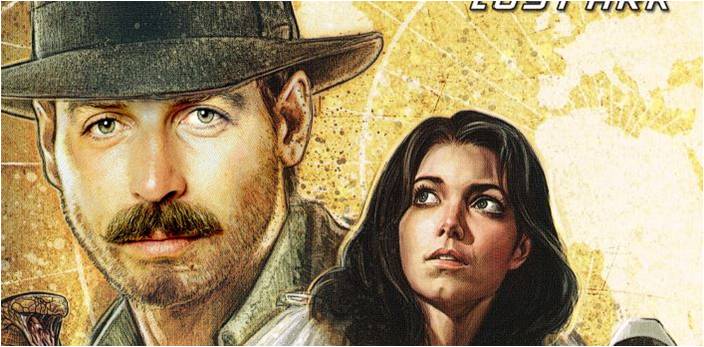
Here’s my final result.
Finally, add any additional desired tones, shadows, highlights or whatever else your little heart desires to make your poster pop.
Here’s my final result.
What now?
Of course, you aren’t limited to only dropping celebrity faces into your favorite posters. In fact, I can dream up hundreds of amusing use cases. Here’s a few of my ideas, also inspired from the ‘80s: Show us your results in the comments below. We’re dying to see how yours’ turned out.Frequently Asked Questions about Making Alternative 80s Film History Come to Life in Photoshop
What are the key elements of 80s film aesthetics that I should incorporate in my Photoshop design?
The 80s film aesthetics are characterized by bold, vibrant colors, high contrast, and a certain grainy texture that gives a nostalgic feel. You can incorporate these elements in your Photoshop design by using the right blend of colors, applying filters for the grainy effect, and adjusting the contrast levels. Also, don’t forget the iconic 80s elements like neon lights, geometric shapes, and futuristic fonts.
How can I achieve the 80s makeup look in Photoshop?
Achieving the 80s makeup look in Photoshop involves several steps. First, you need to understand the key characteristics of 80s makeup – bold, vibrant colors, heavy blush, and dramatic eye makeup. You can use the brush tool to apply the makeup on the face, adjusting the opacity and flow for a more realistic look. Use the smudge tool for blending the colors. Remember to use bright, bold colors for the eyeshadow and lipstick.
Can I use Photoshop to recreate 80s style icons?
Yes, you can use Photoshop to recreate 80s style icons. You can start by finding a reference image of the icon you want to recreate. Then, use the various tools and features in Photoshop to replicate the look. This includes using the pen tool for outlining, the brush tool for coloring, and the layer styles for adding effects.
What are some popular 80s makeup trends that I can incorporate in my Photoshop design?
Some popular 80s makeup trends that you can incorporate in your Photoshop design include bold eyeshadow colors like blue, pink, and purple, heavy blush applied in a diagonal line, and bright, glossy lipstick. You can also include iconic 80s elements like the winged eyeliner and the high-arched eyebrows.
How can I use Photoshop to create a vintage 80s film effect?
Creating a vintage 80s film effect in Photoshop involves several steps. First, you need to adjust the color balance to give the image a warm, nostalgic feel. Then, add a grainy texture to mimic the film grain of 80s films. You can also add a vignette effect to darken the edges of the image and draw focus to the center.
Can I use Photoshop to create 80s inspired posters?
Yes, you can use Photoshop to create 80s inspired posters. You can start by choosing a bold, vibrant color palette that reflects the 80s aesthetics. Then, use the text tool to add text in a futuristic, geometric font. You can also add 80s elements like neon lights, geometric shapes, and a grainy texture.
How can I use Photoshop to create 80s inspired album covers?
Creating 80s inspired album covers in Photoshop involves several steps. First, choose a bold, vibrant color palette. Then, use the text tool to add the album title and artist name in a futuristic, geometric font. You can also add 80s elements like neon lights, geometric shapes, and a grainy texture.
What are some tips for creating realistic 80s makeup in Photoshop?
When creating realistic 80s makeup in Photoshop, remember to use bold, vibrant colors. Use the brush tool to apply the makeup, adjusting the opacity and flow for a more realistic look. Use the smudge tool for blending the colors. Also, don’t forget to add the iconic 80s elements like heavy blush, dramatic eye makeup, and bright lipstick.
How can I use Photoshop to create 80s inspired fashion designs?
You can use Photoshop to create 80s inspired fashion designs by incorporating the key elements of 80s fashion – bold colors, geometric shapes, and futuristic designs. Use the pen tool to draw the design, the brush tool to add color, and the layer styles to add effects.
Can I use Photoshop to recreate iconic 80s film scenes?
Yes, you can use Photoshop to recreate iconic 80s film scenes. You can start by finding a reference image of the scene you want to recreate. Then, use the various tools and features in Photoshop to replicate the look. This includes using the pen tool for outlining, the brush tool for coloring, and the layer styles for adding effects.
 Gabrielle Gosha
Gabrielle is a creative type who specializes in graphic design, animation and photography.