
Key Takeaways
- The Particle Photon is a compact microcontroller with cloud connectivity that is an upgrade from the Particle Core, offering improved Wi-Fi, CPU and memory.
- The hardware differences between the Particle Core and the Photon include a renamed MODE button, the addition of a Digital to Analog Converter (DAC) pin and an Active-high Wakeup Pin (WKP), and improvements to Wi-Fi, CPU, and memory.
- The process of connecting the Photon to Wi-Fi and getting code onto it is straightforward and similar to the process for the Particle Core. The Particle smartphone app can be used to connect the Photon to Wi-Fi.
- The Photon is a powerful and flexible platform for creating a wide range of connected products and services, suitable for both hobbyists and professionals. It uses AES 128-bit encryption to secure communications between the device and the Particle Cloud.
Late last year, the team at Particle announced their newest device – the Photon. After eager anticipation, my Photon arrived in the mail this week. I decided to give it a test run and compare the process to working with the Particle Core.
The Photon is the follow up device to their Particle Core, a tiny microcontroller with cloud connectivity. You may know it as the Spark Core – they renamed themselves recently and are now Particle! I’ve previously written about the Particle Core in my articles on Cloud Connected NeoPixels Using The Particle Core and Monitoring Your Particle Devices With IFTTT. Those demos are applicable to the Photon too – the Photon is pretty much backwards compatible with Core apps.
In this article, I’ll cover the basics of connecting the Photon to Wi-Fi and what is involved in running some basic example code on it. First, I’ll explain what some of the differences in hardware are in comparison to the Particle Core, for those who are already well versed in working with the Particle ecosystem and just want to know the hardware details!
Hardware Differences
For those who have used the Particle Core, there are a few hardware differences:
The MODE button has been renamed
The MODE button has been renamed to the SETUP button. This means when you want to reset your device, you hold down the SETUP button instead. Makes a lot more sense now to be honest.
Pin A6 is now a DAC pin
For those only looking to do simple builds with your Particle Photon similar to their efforts with the Particle Core, you can ignore this difference and refer to it as A6 in your code to use it as an analog or digital input just like you would have with the Particle Core. However, it is now capable of more than that!
The DAC pin’s true calling in life is as a Digital to Analog Converter (DAC). This is a pin which accepts digital signals and converts them to an output voltage between 0 and 3.3V. This brings possibilities of outputting audio like voice and music or initiating the movement of mechanical parts.
Moving motors and such was already possible via the Pulse-Width Modulator (PWM) output pin capabilities of some of the pins on the Core, however PWM pins do not output a true analog signal with varying voltage. PWM pins’ “duty cycle” can be varied to change the average power of the signal output. Audio and other more exact uses of analog outputs was not possible via PWM.
The DAC pin gives you a true analog pin output option. To use the DAC capabilities, refer to it as DAC or DAC1 in your code.
Pin A3 can also apparently run as a DAC output, if you refer to it as DAC2 in your code.
Pin A7 is now a WKP pin
WKP stands for Active-high Wakeup Pin. This pin can still be used as an analog or digital input on A7 in your code, however it can also be used to wake the Photon from sleep or standby. It can also be used as a PWM pin.
Improved Wi-Fi, CPU and Memory
The Photon uses a different and more reliable Wi-Fi chip – Broadcom’s BCM43362 chip. The Photon’s CPU is more powerful than the Core up from 72Mhz to 120Mhz. Flash memory is also up from 128KB of flash memory to 1MB and RAM is up from 20KB of RAM to 128KB. Overall, your creations should run even smoother on the Photon!
For more detailed hardware info, see the Photon Datasheet.
Getting Started With The Photon
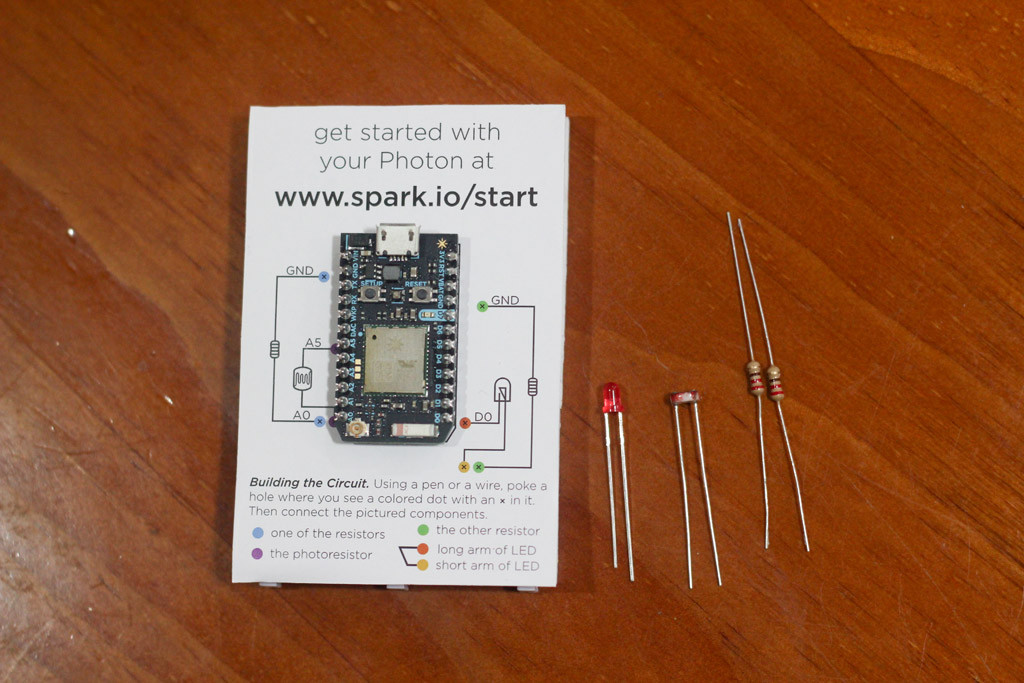
I purchased the Photon Kit which delivers the Photon packed in a really neat little box which comes prepped with a sample breadboard diagram and a few sample components (an LED, two resistors and a light sensor) for people to get started. If you are new to the world of microcontollers, you will have enough to work out the absolute basics from their kit.
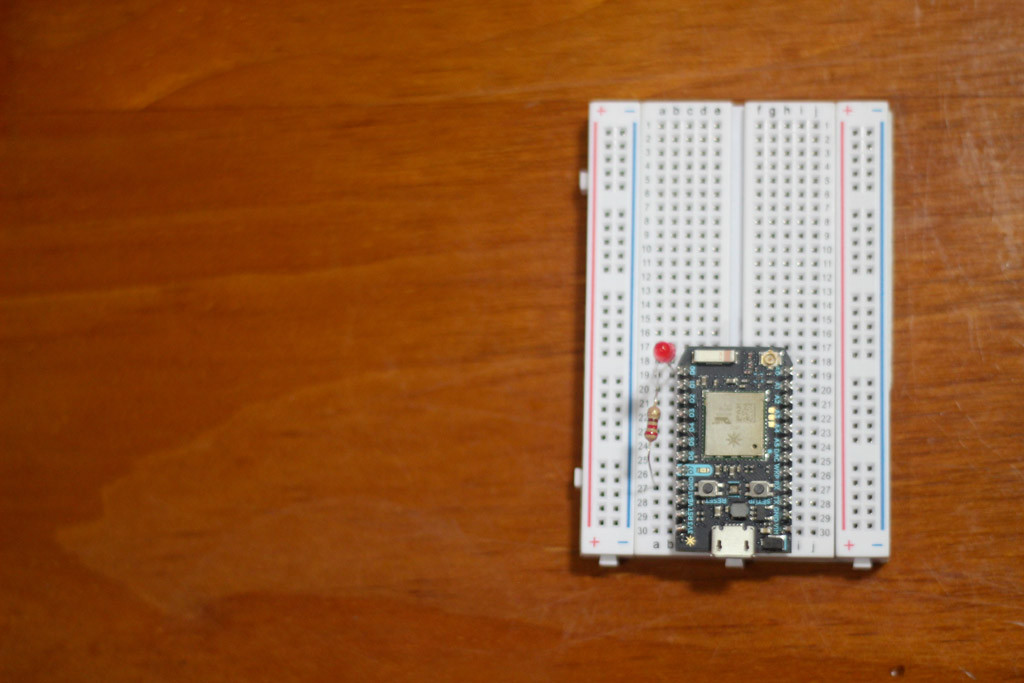
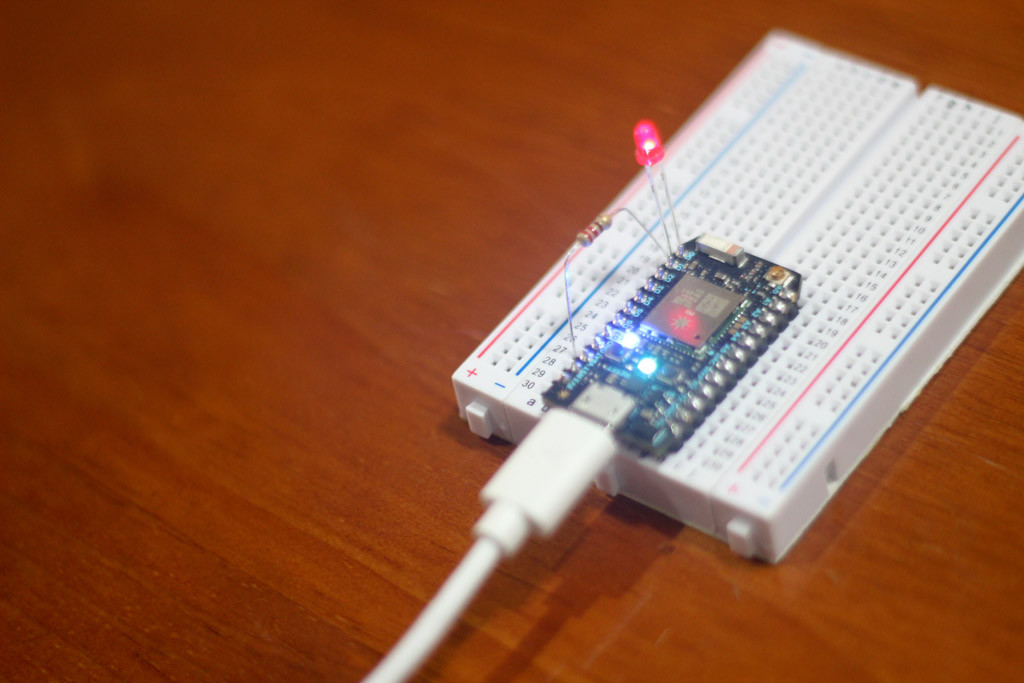
For my own simple test, I’ll be connecting the LED they provide and blinking it using their sample code. My main aim is to compare the process of connecting the Photon to Wi-Fi, getting code onto it and to compare the overall hardware. Rest assured, there will be plenty of more complicated Photon powered demos in the coming months that build upon this!
I followed their breadboard layout, however I prefer setting up my microcontroller closer to the edge of the breadboard, so I’ve moved things down a bit. Overall – it is the same as the sketch provided in the Photon kit just without the light sensor connected. I connected the LED to pin D0 (the longer positive end to B19 on my breadboard and shorter end to B18) and connected a resistor between ground (A27 on my breadboard) and the negative end of the LED (A18 on my breadboard).
The example code we will select further down in this article actually has two LEDs, so you could add a second LED to D7 to make this a bit more exciting. I was focused on a quick set up and trial of the deployment process for this article, rather than accurately testing the code itself.
To connect the Photon to Wi-Fi, you can either connect it via a smartphone app or via USB. We’ll be covering the smartphone app process here. It is almost exactly the same idea as the Core pairing process.
You’ll need the new Particle smartphone app, which you can get on the iPhone App Store and the Android Play Store. I found it to be a lot prettier than the Spark app, it has a really lovely design. All of my instructions below are referring to the Android version of the app, I did not have access to an iPhone to try the other version but I am assuming most of the steps are the same.
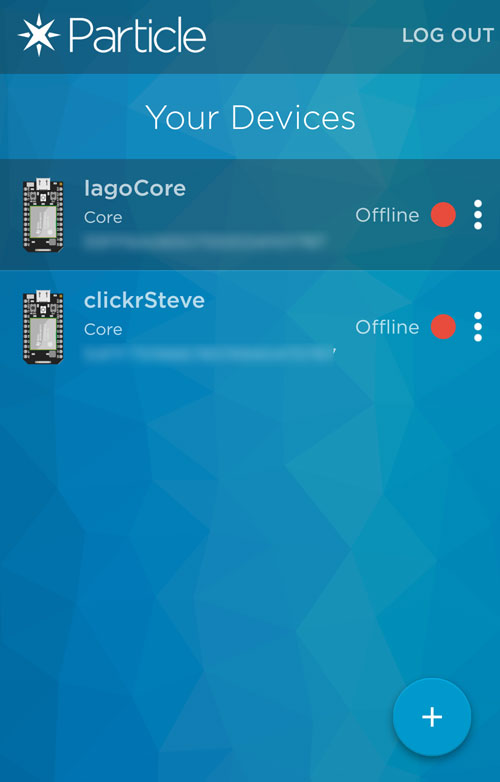
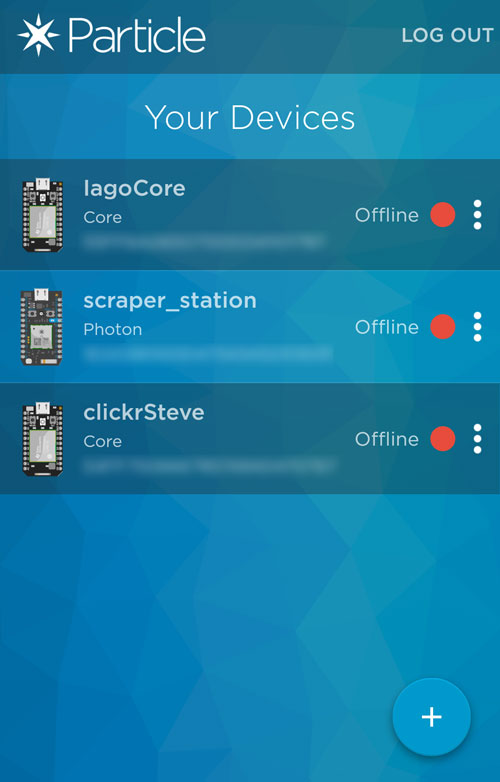
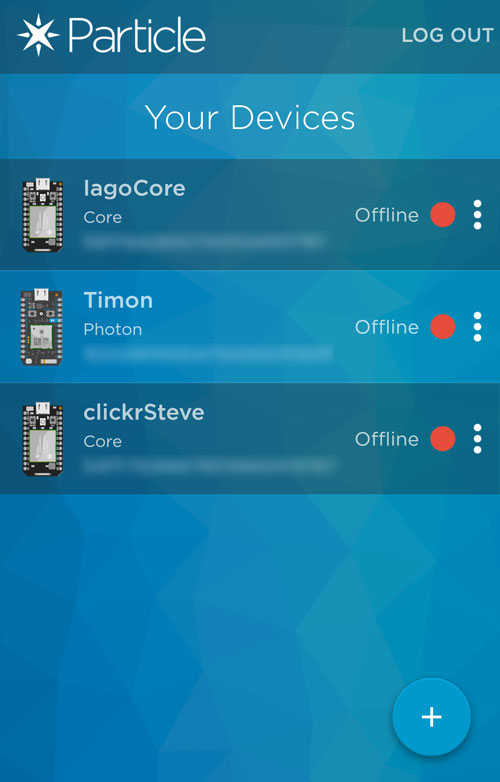
Upon installing it and logging in using your Particle log in, you’ll see a list of your devices. If you are like me and you have played around with Particle Cores in the past, you’ll see these listed already:
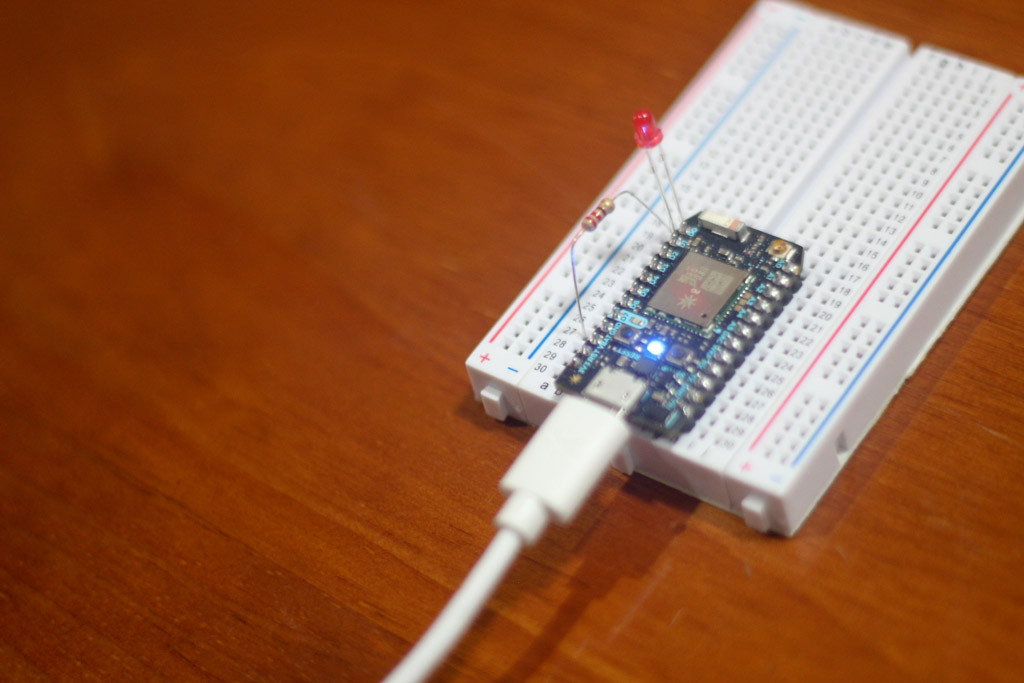
Plug in your Photon to your computer or a compatible USB power source so that it begins to flash blue. This means it is on the lookout for a Wi-Fi connection.
Click the plus icon on the bottom right and choose “Set up a Photon” to add your new device.

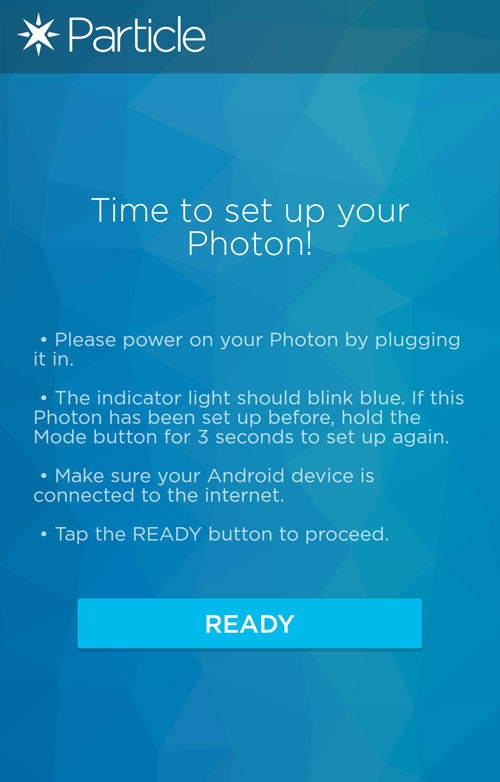
The app will tell you to make sure your Photon is online and ready to be set up. Click “READY” when your Photon is indeed ready:
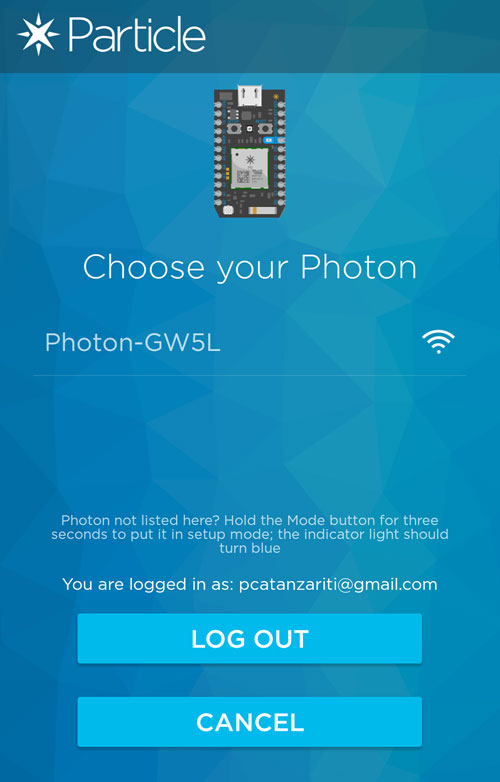
It will search and find your Photon, select it:
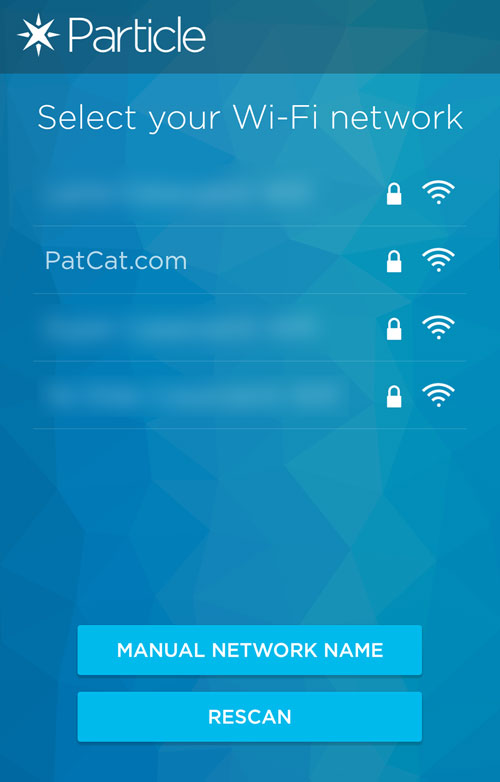
Then you can select the Wi-Fi network that you’d like your Photon to connect to. I’ve hidden the other Wi-Fi networks nearby.
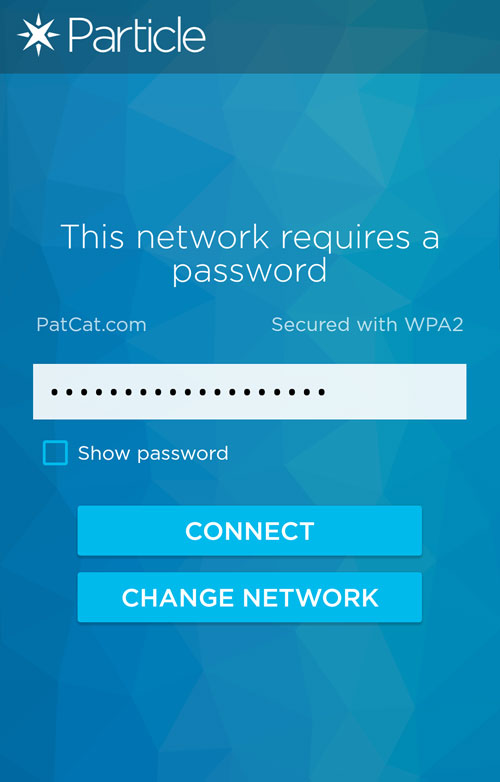
Then enter in your Wi-Fi password and click “CONNECT”:
It will connect and sort everything out for you:

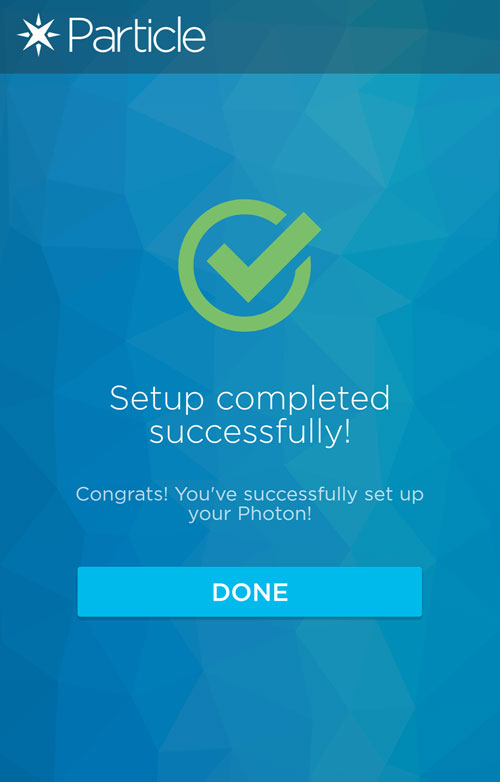
Once it is all configured, you’ll see this screen. Choose “DONE”:
It gives your Photon a random name, mine ended up with the name “scraper_station” which I thought was a tad odd.
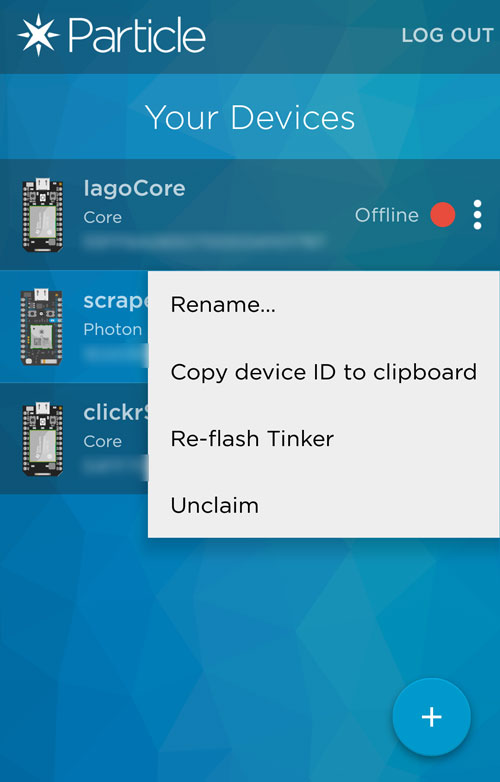
To change the name of your Photon, you can click the three dots beside the device and choose “Rename…” from the menu.
It suggests a new random name (I’ll admit, I liked this one a lot more but still decided to change it to something shorter):
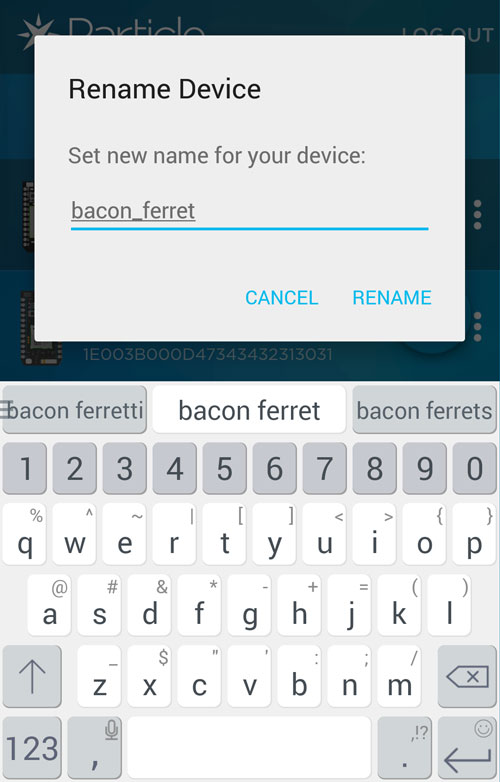
My Photon was renamed to “Timon”. I kept to the Lion King theme that my “IagoCore” had:
Putting Code Onto The Photon
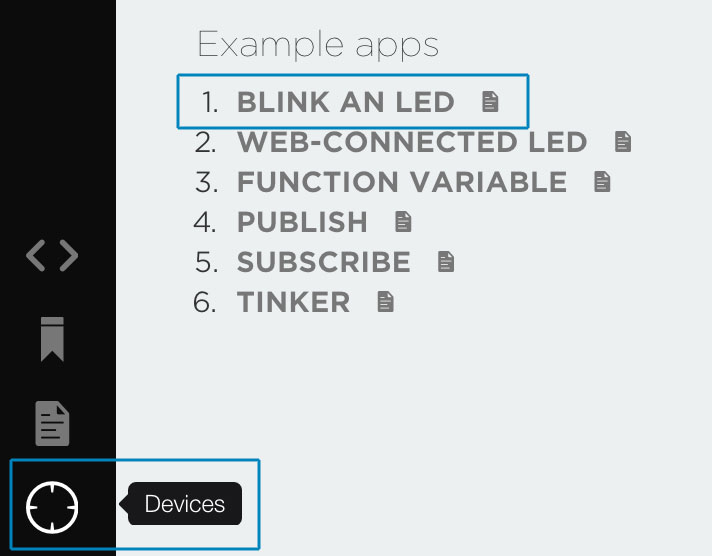
This process is completely the same as putting code onto a Particle Core. Go to https://build.particle.io and open up the “Blink an LED” example app. Then click the “Devices” icon in the bottom corner that looks like a crosshair:
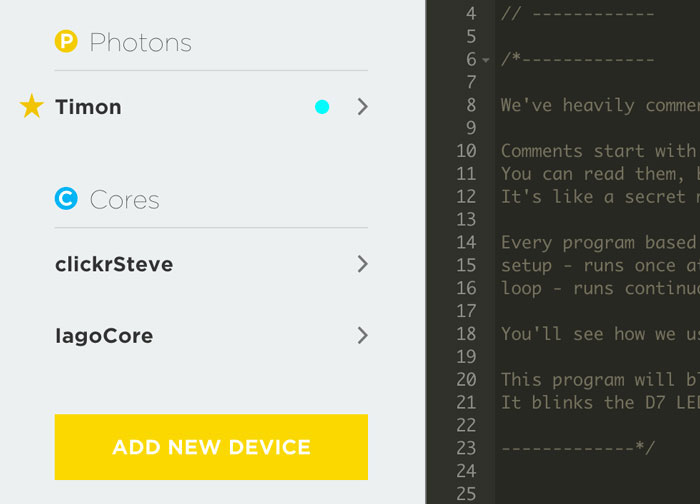
On the devices menu, you’ll see a section with Photons now available. Your Photon should be there waiting for you. Click the left of it to give it a star and make it the device you’ll flash code to.

When your device is selected, it should have a yellow star next to it:
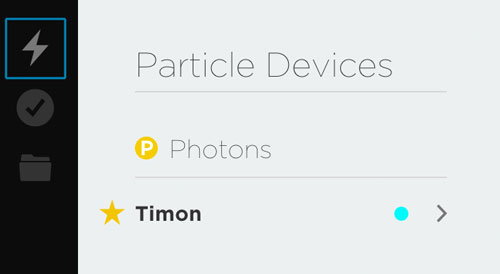
If you click the the lightning bolt icon in the top left corner, it will flash the “Blink an LED” example onto your Photon:
Your device should flash magenta for a while and then breathe cyan once more. However, this cyan breathing should be accompanied by a flashing LED light too!
I found the time taken to upload code to my device was quite lengthy, however I was doing all of this on a 4G connection so that could very well have been the cause! I would love to hear from others who follow this guide – how long does it take your Photon to pick up the code and run it with the Photon breathing cyan?
Conclusion
So far, I’m impressed with the Photon! Incredibly enough, the Photon somehow sells for $20 less than the Core – $19 instead of $39! So not only is it faster and just as easy to use… somehow it is cheaper too.
I will be spending the next few months tinkering with the Photon further but I would love to know your thoughts. Have you done any tinkering with the Photon? How have your experiences been? I’m especially interested to see how reliably it can stay connected to my rather patchy Wi-Fi networks. I’ve had difficulties getting it to switch to a new Wi-Fi network after initial configuration, but that could be my Wi-Fi playing up. You can provide your thoughts in the comments below, or get in touch with me on Twitter at @thatpatrickguy.
Further Links
Keen to read up on more about the Photon or find out something I missed? The following links should help:
- Official Photon Getting Started Guide
- What Each Photon LED Light Color Means
- The Original Photon Announcement
Frequently Asked Questions (FAQs) about Getting Started with the Particle Photon
What is the Particle Photon and what can it be used for?
The Particle Photon is a tiny Wi-Fi development kit for creating connected projects and products for the Internet of Things (IoT). It’s easy to use, powerful, and cloud-connected. With the Photon, you can create a network of devices that can communicate with each other and with the cloud, making it ideal for a wide range of applications, from home automation to industrial IoT projects.
How do I set up my Particle Photon?
Setting up your Particle Photon is straightforward. First, you need to connect it to your computer via a USB cable. Then, you need to install the Particle CLI (Command Line Interface) on your computer. Once installed, you can use the CLI to configure your Photon and connect it to your Wi-Fi network. After that, you can start programming your Photon using the Particle Web IDE or the Particle Dev desktop application.
What programming language does the Particle Photon use?
The Particle Photon uses a language called Wiring, which is similar to C/C++. It’s a high-level language that’s easy to learn and use, making it perfect for beginners and experts alike. The Particle Web IDE and Particle Dev desktop application provide a user-friendly environment for writing and uploading your code to the Photon.
Can I connect multiple Photons to the same Wi-Fi network?
Yes, you can connect multiple Photons to the same Wi-Fi network. Each Photon has a unique device ID, which allows it to communicate with the Particle Cloud independently of other devices. This means you can have multiple Photons in the same location, all doing different tasks and communicating with each other and the cloud.
How do I troubleshoot my Particle Photon?
If you’re having trouble with your Particle Photon, there are several steps you can take. First, check your Wi-Fi connection and make sure your Photon is properly connected to your network. If that doesn’t work, try resetting your Photon by holding down the RESET button for ten seconds. If you’re still having trouble, you can use the Particle CLI to diagnose and fix common issues.
Can I use the Particle Photon for commercial projects?
Absolutely! The Particle Photon is designed for both hobbyists and professionals. It’s a powerful and flexible platform that can be used to create a wide range of connected products and services. Whether you’re building a prototype or a full-scale commercial product, the Photon can help you bring your ideas to life.
What kind of sensors can I connect to my Particle Photon?
The Particle Photon is compatible with a wide range of sensors, including temperature sensors, humidity sensors, light sensors, motion sensors, and more. You can connect these sensors to your Photon using the GPIO pins, and then use the Particle Cloud to read sensor data and control your devices.
How secure is the Particle Photon?
The Particle Photon uses AES 128-bit encryption to secure all communications between the device and the Particle Cloud. This ensures that your data is safe and secure, even when transmitted over public Wi-Fi networks.
Can I use the Particle Photon without an internet connection?
While the Particle Photon is designed to be a cloud-connected device, it can also operate without an internet connection. You can program your Photon to run standalone applications that don’t require internet connectivity. However, you won’t be able to use the Particle Cloud features without an internet connection.
How do I update the firmware on my Particle Photon?
Updating the firmware on your Particle Photon is easy. You can use the Particle CLI to download and install the latest firmware. The CLI will automatically detect your Photon and install the new firmware. It’s important to keep your Photon’s firmware up to date to ensure it’s running smoothly and securely.