Getting Started with Fuel CMS, Part 1
When you hear the abbreviation CMS, you probably think about Drupal, Joomla, and even WordPress. However, there are alternatives to those heavy hitters if you want something more lightweight or flexible. If you’re look a simple administration interface, or integrate custom application code into the site, then I suggest exploring Fuel CMS. In this two-part series I’ll discuss some concepts of Fuel CMS. In this part I’ll talk about its installation and how to set up views. In the second part I’ll talk about writing a Fuel CMS module.
Key Takeaways
- Fuel CMS is a lightweight, flexible content management system built on the CodeIgniter PHP framework. It is ideal for developers who want a simple administration interface and the ability to integrate custom application code.
- The installation process of Fuel CMS is hands-on, requiring developers to manually specify various settings in the configuration and execute the database installation scripts themselves. There is no automated installer.
- Creating a page in Fuel CMS is straightforward and similar to other content management systems. Developers can specify a URL fragment, page title, and content, then save the page.
- Developers can customize the layout of a page in Fuel CMS by editing the layout setting. They can also create custom view files for pages that function differently from the rest of the site. This involves writing a controller class and method, loading the appropriate fuel_page, and specifying any necessary variables.
A Quick Overview of Fuel CMS
Fuel CMS is a content management system (obviously) built upon the CodeIgniter Framework. A good description of the project can be found on its website:
FUEL CMS is a modular-based hybrid of a framework and a content management system. It’s developed on the popular CodeIgniter PHP web framework and allows you to create your models, views and controllers like normal and only use the CMS part when and if you need it.
The administration dashboard is indeed simple and easy to understand, which is good if you’re handing the project off to a less tech-saavy customer after development. However, where in other CMS you can build a complete website without writing any code, with Fuel CMS this is not the case. You’ll have to do things yourself following the way of CodeIgniter. If you don’t like writing code, then this may not be the right CMS for you.
The documentation suggests that you should have some basic knowledge of CodeIgniter before starting, but this was my first experience with CodeIgnither and I was able to build a working site with relative ease, so experience with any MVC framework may be sufficient depending on your goals.
Development of Fuel CMS started around November 2010 and the current stable version is 0.92. Version 1.0 is currently beta.
Installing and Configuring Fuel CMS
The installation process for Fuel CMS isn’t like the other content management systems; there’s no fancy installer, only an introduction page with an explanation of various settings you need to specify in your configuration. You have to execute the database installation scripts yourself. But we are developers after all, so this isn’t something that’s insurmountable.
You can either use Git to clone the latest version of the code or you can download a copy as a ZIP archive. Regardless, place the code in the root of your htdocs directory. When you visit http://localhost (or whatever your development address may be) you should see a page listing the steps you need to perform before you can start developing your site.
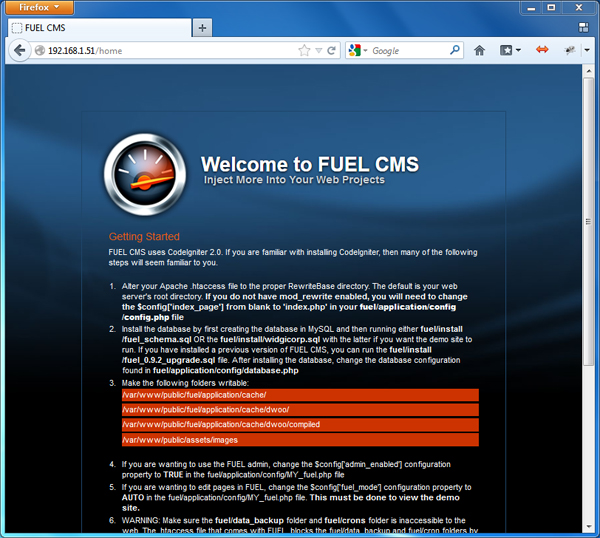
Follow the instructions to configure Apache, create the database, and change directory permissions.
Fuel CMS provides some .htaccess files to help you set up the rewrite rules and get everything running smoothly. This is where I ran into some problems though because I’m using Nginx.
The configuration files can be found under fuel/application/config. Fuel CMS can be thoroughly customized, but I’ll stick to the most important settings for right now.
Set the following in the MY_FUEL.php file:
site_name: the name of your websitefuel_mode: whether to look for page data in the database, view files, or both. (For this article, set it to “auto” which means both.)
In the database.php file, enter your database information in the corresponding fields.
If your server doesn’t support mod_rewrite, in the config.php file change the index_page option to “index.php”.
Now you’re ready to log into the admin panel at http://localhost/fuel.
Creating Your First Page
Log in into the dashboard with the default username and password, both “admin”. Once you’re logged logged in, you’ll be prompted to change that password. You should do this now or else you’ll get an annoying reminder popup with every action you do.
So here you are: in the middle you see some information, the latest news and a link to the documentation. The menu is located to the left. In Fuel CMS, everything is divided in modules: the site module, the blog module, several tool modules, and the user modules.
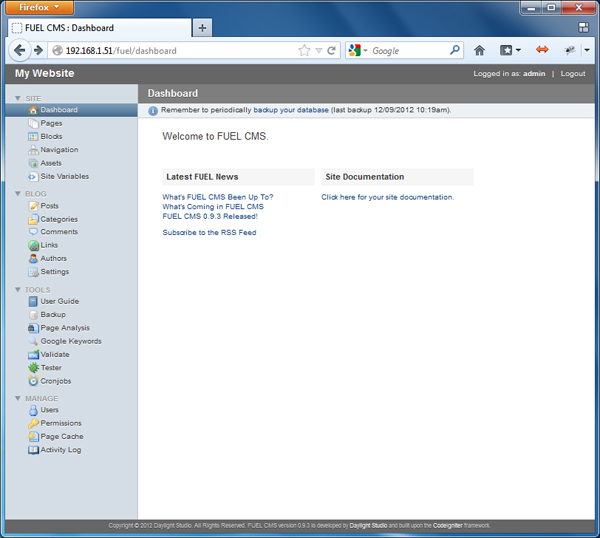
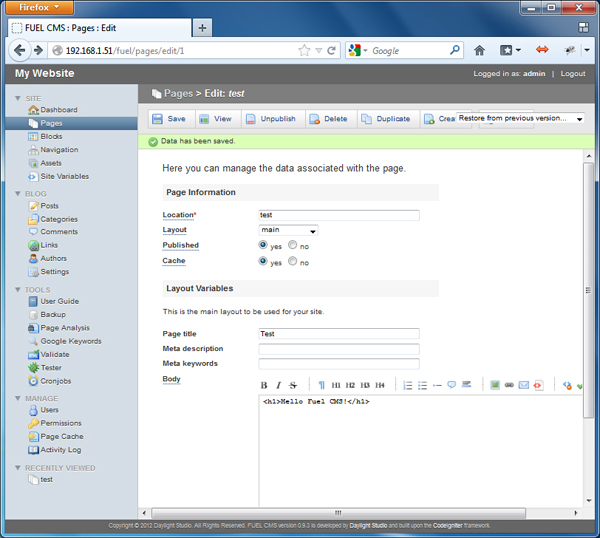
The first thing you might want to do is create a page. This is a straightforward process similar to most other content management systems. In the left menu, click on Pages and then click the Create button.
Enter a location (this is the URL fragment, so no spaces!), page title, and your content, then click Save.
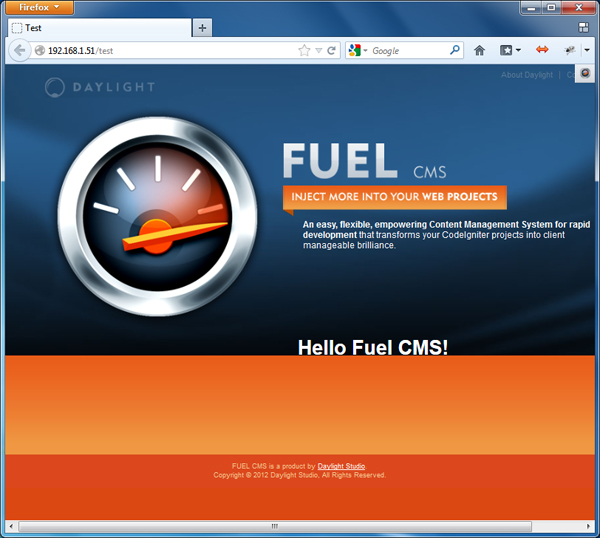
You can visit the page by going to http://localhost/index.php/test. You’ll see the text you entered, but with the same design of the installation page.
Creating A Custom View
The page you just created uses the layout of the installation page, so go back to editing your page (go to Pages in the menu and then click the page title). Note the Layout setting which is currently set “main”. Change that to “none”, save, and then check the page again. You will now see a blank page with your text.
Layouts are located in the views folder: fuel/application/views/_layouts. As we look at the default layout (main.php) we see the following:
<?php $this->load->view('_blocks/header')?>
<div id="main_inner">
<?php echo fuel_var('body', ''); ?>
</div>
<?php $this->load->view('_blocks/footer')?>
The first and the last lines include blocks: design elements which can be reused in various sections of the website. In this case the header and footer are blocks because they’ll presumably be the same on many pages throughout your site. You can also create blocks for navigation, JavaScript includes, or anything else you need.
The echo fuel_var('body') line retrieves the content you specified for the page from the database and displays it.
The example above uses layouts to put together basic editable pages. But as I spoke about earlier, you can also create custom view files. For example, if you have a page that functions differently from the the rest of them on your site, then you’ll need to write a custom view. This part of the process actually has more to do with CodeIgniter than with Fuel CMS itself.
Here we’ll follow the opt-in controller method: the URL calls an action of a controller which renders our view. Save the following as fuel/application/controllers/hello.php:
<?php
class Hello extends CI_Controller {
public function __construct()
{
parent::__construct();
}
public function index()
{
// load the fuel_page library class and pass
// it the view file you want to load
$this->load->module_library(
FUEL_FOLDER,
'fuel_page',
array('location' => 'hello')
);
$this->fuel_page->render();
}
}
We’ve defined a controller class Hello with the method index() which is called when you request the page. We load the fuel_page named “hello” which refers to hello.php in the views directory.
Now let’s add some variables which are used by the page. Variables are most commonly used to create and map input fields in the Dashboard to variables in the template. The global variables are in fuel/application/views/_variables/global.php, and we can override them by creating the file hello.php.
The content of the _variables/hello.php file is:
<?php
$vars['layout'] = 'none';
This overrides the layout variable to use the “none” layout, just as we did before with the test page.
Then over in the views folder, as hello.php we have:
<?php
echo 'Hello Fuel CMS!';
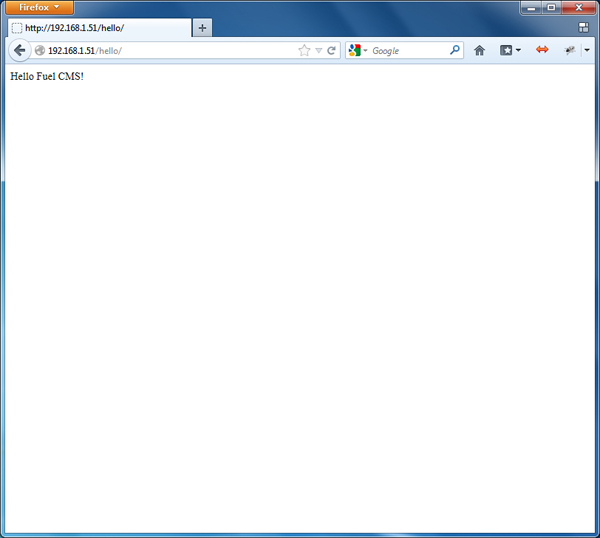
Go to http://localhost/hello and you should see the ‘Hello Fuel CMS!’ message.
When writing your views, there are some custom tags available to help keep your code clean. Fuel CMS provides uses the Dwoo templating system to turn these tags into proper PHP code. For example, you can use:
{foreach $data soldier}
{$soldier->rank} - {$soldier->name}
{/foreach}
instead of writing a native foreach loop with output statements.
Conclusion
We’ve discussed installing Fuel CMS and creating pages and views. With this basic knowledge, if we wanted to make a site with multiple pages and a custom layout, it shouldn’t be difficult to do.
In the next article I’ll explain how set up your own modules. Stay tuned!
Image via Fotolia
Frequently Asked Questions (FAQs) about Getting Started with Fuel CMS
What is Fuel CMS and why should I use it?
Fuel CMS is a flexible, easy-to-use Content Management System (CMS) built on the CodeIgniter PHP framework. It is designed to be highly customizable, allowing developers to easily modify and extend its functionality to suit their specific needs. Fuel CMS stands out for its user-friendly interface, advanced features, and robust performance. It is an excellent choice for developers looking for a powerful yet manageable CMS for their web development projects.
How do I install Fuel CMS?
Installing Fuel CMS is a straightforward process. You need to download the latest version of Fuel CMS from the official website or GitHub repository. Once downloaded, extract the files into your web server’s root directory. Then, create a new database and import the SQL file included in the Fuel CMS package. Finally, configure your database settings in the ‘fuel/application/config/database.php’ file and set your encryption key in the ‘fuel/application/config/config.php’ file.
How do I create a new page in Fuel CMS?
Creating a new page in Fuel CMS is simple. Navigate to the ‘Pages’ section in the Fuel CMS admin panel. Click on the ‘Create’ button and fill in the required fields such as location, layout, and published status. You can also add custom fields if needed. Once you’re done, click ‘Save’ to create your new page.
How can I customize the look and feel of my Fuel CMS site?
Fuel CMS allows you to customize your site’s appearance using themes. You can create your own theme or use one of the many pre-made themes available. To apply a theme, simply place its folder in the ‘themes’ directory and update the ‘theme_path’ setting in the ‘fuel/application/config/MY_fuel.php’ file.
How do I add a blog to my Fuel CMS site?
Fuel CMS includes a blog module that you can use to add a blog to your site. To enable the blog module, go to the ‘Modules’ section in the Fuel CMS admin panel and activate the ‘Blog’ module. Then, you can create and manage blog posts from the ‘Blog’ section.
How secure is Fuel CMS?
Fuel CMS is built with security in mind. It includes features like CSRF protection, XSS filtering, and password hashing to help protect your site from common security threats. However, as with any software, it’s important to keep your Fuel CMS installation and server environment up-to-date and properly configured to ensure maximum security.
Can I use Fuel CMS for e-commerce?
While Fuel CMS does not include built-in e-commerce functionality, it is flexible enough to integrate with e-commerce platforms or custom-built shopping cart systems. You can also extend Fuel CMS with additional modules to add e-commerce features.
How do I update Fuel CMS?
Updating Fuel CMS is as simple as downloading the latest version and replacing the old files with the new ones. However, before updating, it’s recommended to backup your site and database to prevent any potential data loss.
Does Fuel CMS support multiple languages?
Yes, Fuel CMS supports multilingual content. You can set up multiple languages in the ‘fuel/application/config/language.php’ file and then create language-specific versions of your pages and other content.
Where can I get help if I run into problems with Fuel CMS?
If you encounter issues while using Fuel CMS, you can seek help from the Fuel CMS community. The official Fuel CMS website includes a user guide, API documentation, and a forum where you can ask questions and share solutions with other Fuel CMS users. You can also report bugs and request features on the Fuel CMS GitHub repository.
Sponsored posts are provided by our content partners. Thank you for supporting the partners who make SitePoint possible.
Published in
·Cloud·Databases·Debugging & Deployment·Development Environment·PHP·Programming·Web·February 24, 2014


