

Logos are everywhere — they serve to represent a company or brand. That’s why designing a logo is no easy task; it has to be designed thoughtfully in order to stand out from the crowd of visual competitors. A logo should depict the clients’ ideologies perfectly. It has to be simple, unique, and interesting at the same time.
In this tutorial, I’ll walk you through the process of designing an animal logo for a construction company in Adobe Illustrator. Illustrator makes the whole process of getting your visual ideas into vector form quite easy for us. If you are not familiar with this great tool, you are missing out on a great design application. Let’s explore Illustrator through this tutorial.
Resources:
ChunkFive font
Final result: (To download the completed, layered file, click here.)

Step 1
Create a new document in Illustrator with a 600px width and a 400px height.

Step 2
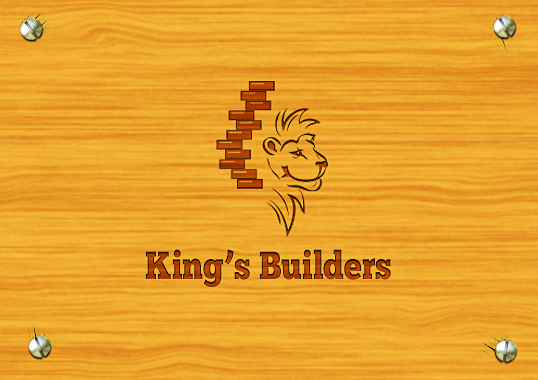
We’ll create the logo for a fictional company named King’s Builders. While making this logo, we’ll have to focus on the brand and company that we’re designing for. Since we’re designing for King’s Builders, I thought of illustrating this concept in the form of a lion (the “King” of the jungle) and few bricks to symbolize the construction trade. Your approach could be different; I am just showing you one way to do it.
First of all, we’ll draw the sketch of the lion to complement the “King” aspect. In Illustrator, set your fill color to “none,” and set stroke of pure black color. Select a 2pt stroke weight from top properties bar. Now, select the pencil tool (“N”) and draw the ear shape shown below. If you are not satisfied with the first attempt, you can redraw it until you get the desired shape. Or, you can erase the part at any point using the eraser tool. Keep drawing the sketch using the pen tool. Make sure to draw each stroke on separate new layer.

Step 3
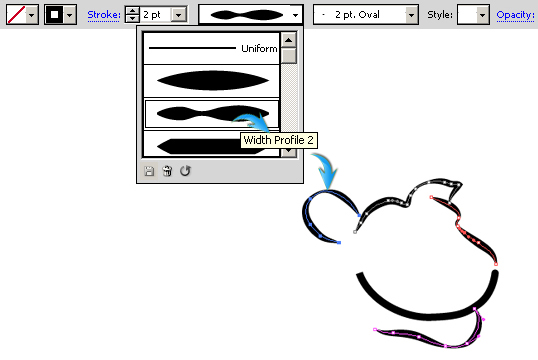
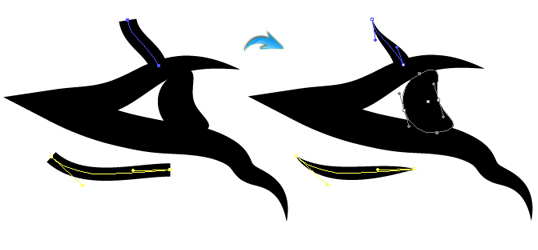
Now, we’ll give these strokes some character. Select one of the stroke layers by clicking the ring-shaped target on the respective layer and change its width profile. I am using width profile 2 for the following stroke paths.
Then, change the width of the following stroke to width profile 1.

Step 4
Draw the following two strokes on separate layer with a 1pt stroke weight.

Change their width profiles as shown below.

Step 5
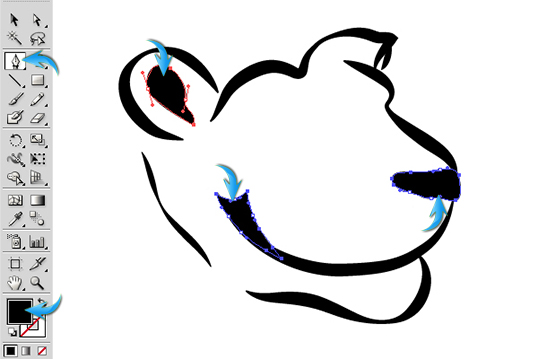
Select black as your fill color, and set stroke to none. Now, select the pen tool and draw the following shapes. It doesn’t have to be exactly like mine. You can draw it as you like.
Step 6
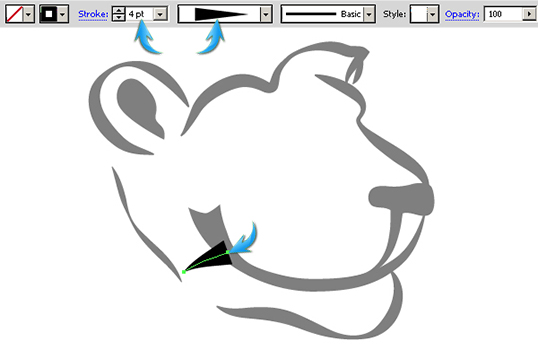
Draw the following two strokes using width profile 4.

Step 7
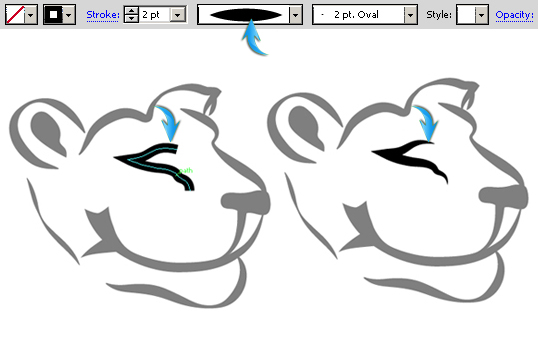
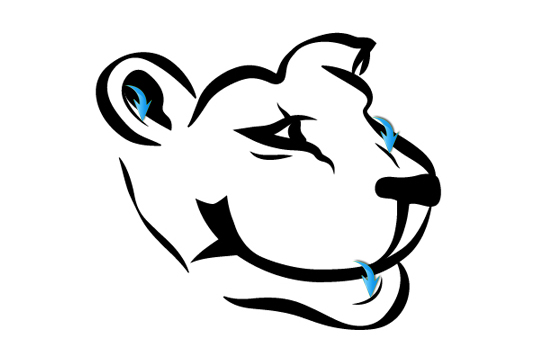
Next, we’ll make the eye for our kingly lion. Draw the stroke using a 2pt weight and width profile 1.
Step 8
Add a few more details, as shown below. Use a small stroke (0.5-0.25pt) here.
Step 9
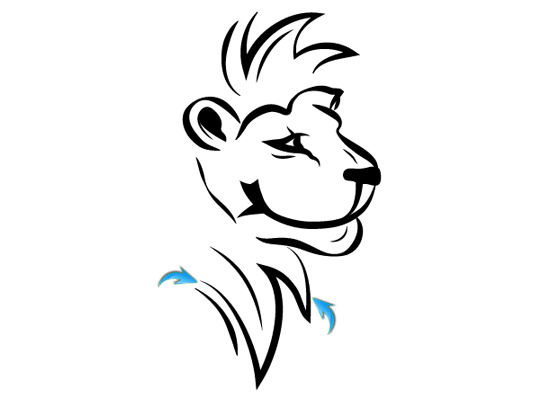
Make a few strokes for the hair using a 2pt stroke weight, and change their width profiles as shown below.

Step 10
Draw the rest of the hair strokes using the same techniques.
Step 11
We are done with the lion’s sketch. Now, we’ll move ahead to create the other half of our logo. We’ll create few bricks for that. Collect all of the lion layers into a new layer. Create a new layer and draw a rectangle using the rectangle tool. Use a black fill color for your initial brick.

Step 12
Draw a smaller white rectangle over the black one to make a highlight. Reduce the opacity of the highlighting rectangle to 50%-60%. Collect both rectangles into a new layer and label it as “brick”.

Step 13
Duplicate the “brick” layer few times and arrange these copies over each other randomly to get the effect shown below.

Step 14
Now, you can add the text. Select the type tool and type in the text just below the logo. I am using the “ChunkFive Roman” font here.
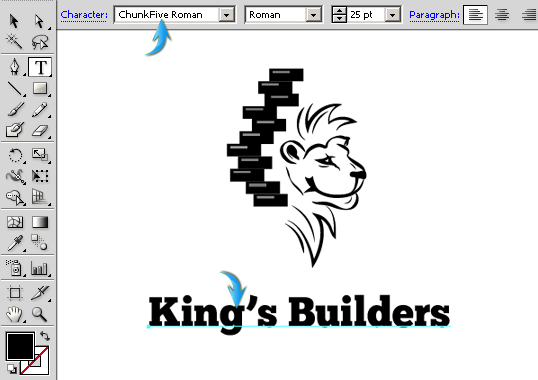
We are done with the logo. You can give it any color, texture, or treatment that you want. Since it’s a construction company, I chose wood below.
I hope you guys enjoyed the process. Do share your thoughts!
Frequently Asked Questions about Designing a Vectorized Animal Logo in Illustrator
What is the ideal size for a logo in Illustrator?
The size of a logo in Illustrator can vary depending on its intended use. However, it’s generally recommended to start with a canvas size of around 1000 x 1000 pixels. This provides enough detail for most uses, while still being manageable in terms of file size. Remember, since Illustrator is a vector-based program, your logo can be scaled up or down without losing quality. So, it’s better to start larger and scale down if needed.
How can I ensure my logo looks good in different sizes?
To ensure your logo looks good at various sizes, it’s important to keep it simple. Avoid intricate details that might get lost when the logo is scaled down. Also, regularly test your logo at different sizes to see how it looks. Illustrator allows you to scale your design without losing quality, so take advantage of this feature.
Can I use Illustrator to create a logo if I’m not a professional designer?
Absolutely! Illustrator is a powerful tool that can be used by anyone, regardless of their design experience. The key is to start with a clear idea of what you want your logo to look like, and then take the time to learn the necessary tools and techniques in Illustrator. There are plenty of tutorials and resources available online to help you get started.
What are some tips for designing an animal logo in Illustrator?
When designing an animal logo, start by sketching out your ideas on paper. This can help you refine your concept before you start working in Illustrator. Once you’re ready to start designing, use simple shapes to create the basic form of the animal. From there, you can add details and refine your design. Remember to keep your design simple and scalable, and to use colors that are appropriate for your brand.
How can I choose the right colors for my logo in Illustrator?
Choosing the right colors for your logo is crucial as it can significantly impact how your brand is perceived. Start by considering the emotions and associations you want your brand to evoke. For example, blues can convey trust and stability, while reds can convey energy and passion. Illustrator has a color guide tool that can help you choose harmonious color combinations.
How can I create a vectorized logo in Illustrator?
Creating a vectorized logo in Illustrator involves using the pen tool, shape tools, and pathfinder tool to create shapes that make up your logo. These shapes can be filled with color, and can be scaled up or down without losing quality. This makes vector logos ideal for a variety of uses, from business cards to billboards.
What file format should I save my logo in?
It’s recommended to save your logo in a vector format, such as .AI or .EPS. These formats preserve the vector data, allowing your logo to be scaled without losing quality. However, you may also need to save your logo in a raster format, such as .JPG or .PNG, for use on the web or in certain print applications.
How can I make my logo unique and memorable?
To make your logo unique and memorable, try to incorporate elements that are specific to your brand. This could be a unique color scheme, a clever use of negative space, or a symbol that has a special meaning for your brand. Remember, simplicity is key when it comes to logo design. A simple, well-designed logo is often more memorable than a complex one.
Can I use gradients in my logo design?
While it’s possible to use gradients in your logo design, it’s generally best to avoid them. Gradients can make your logo more complex and can cause issues when it’s printed in black and white or at small sizes. If you do choose to use gradients, make sure they add value to your design and don’t detract from its readability or scalability.
How can I learn more about logo design in Illustrator?
There are many resources available for learning more about logo design in Illustrator. Adobe’s own tutorials are a great place to start, as they cover a wide range of topics and are designed for users of all skill levels. There are also many online courses and tutorials available on sites like Udemy, Skillshare, and YouTube.

