
Billions of dollars of online sales are won each year with compelling web advertising. The difference between between an average, forgettable advertisement and one that makes strong positive impressions that secure sales is often just a few pixels or a few extra finishing touches. Your web advertisements should be designed intelligently, deliberately, and thoughtfully. During your designing, keep in mind those critical visual aspects that compel people to click it and learn more about your products and services.
And, believe it or not, Photoshop is not the only software that can help you assemble a sharp-looking advertisement.
Today, I’ll show you how you can make your very own web banner ad in Adobe Illustrator. I’ll be making a banner of an imaginary online shopping store as an example. Let’s get started!
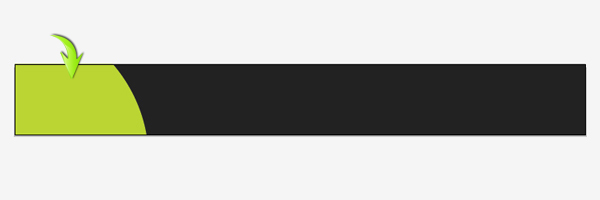
First, let’s have a look at the final result. You can download the finished advertisement here.

Step 1
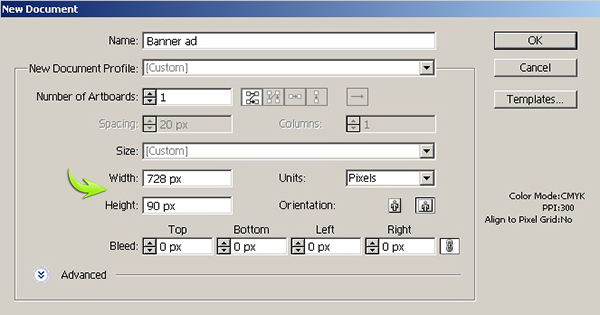
Create a new document in Adobe Illustrator with a 728px width and a 90px height.
Step 2
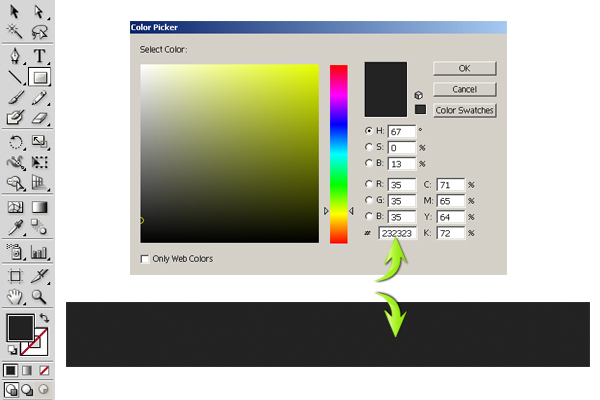
Select the rectangle tool to draw a 728px by 90px rectangle, make your “Fill” a darker gray shade, and set “Stroke” to none.
Step 3
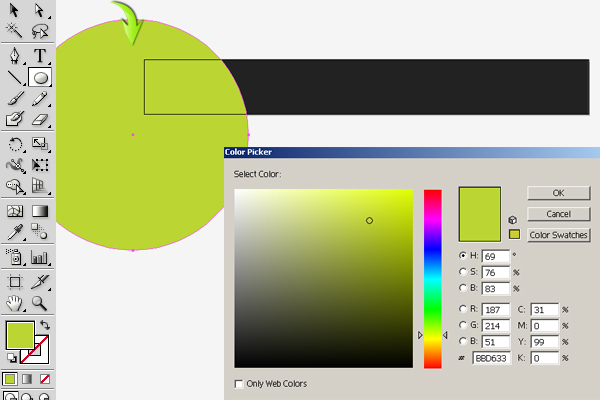
Create a new layer. Select the ellipse tool to draw the larger circle shown below. Make your “Fill” a green color and set “Stroke” to none.
Step 4
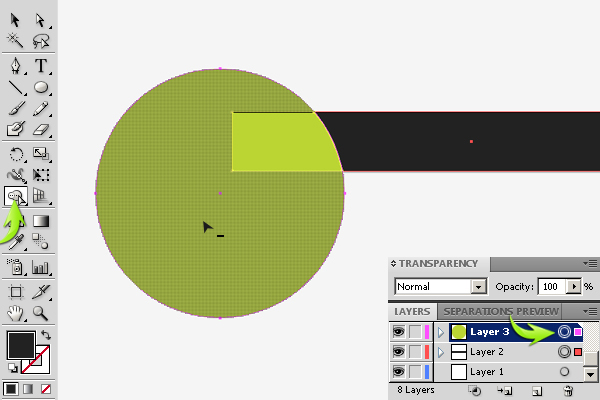
Now, select both the rectangle and ellipse layers by clicking on the ring-shaped target on these layers and pressing the “Shift” key. After that, select the shape builder tool; take its arrow over the part of the circle that falls outside the rectangle. You will notice an arrow with a “+” sign, now when you press “Alt” key, “–” sign would appear. Now, click to subtract the unwanted part of the circle.
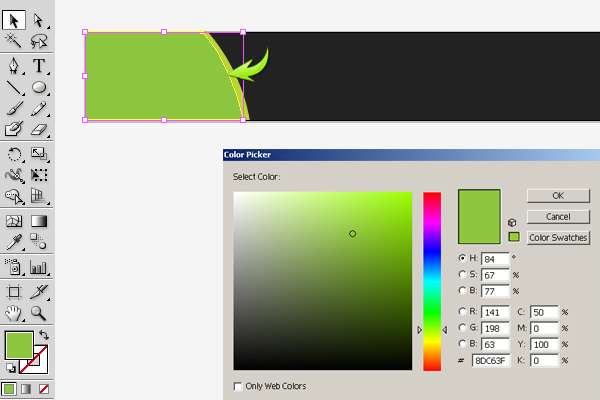
Step 5
Duplicate this shape and reduce its width a bit using the selection tool (“V”). Change its “Fill” color to a different green shade, as shown below.
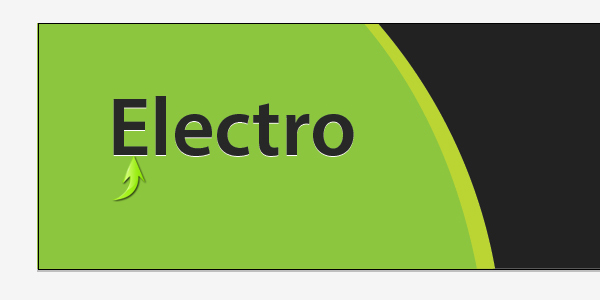
Step 6
Next, we’ll add the brand name. Create a new layer and select the type tool to type in the desired brand name. I am using “Myriad Pro” font for this. Use #282828 as your fill color.

Step 7
Duplicate the text layer, change the original text fill to pure white, and drag it one step downward to achieve the effect shown below.
Step 8
Select the line tool to draw a line below the brand name, make “Fill” to none, and select a stroke of 1pt.

Step 9
Write in your desired subtitle using the same font.

Step 10
Now, write the offer on a new layer. Use #8DC63F as your fill color, and use a stroke of #A9D161 for this text.

Duplicate this text layer, change the “Fill” of the original layer to black, set the stroke to “none,” and drag the duplicate one step downward.

Step 11
Open the money icon file in Illustrator, copy it, and paste it into your document on a new layer. Resize and position it using selection tool (“V”).

Duplicate the icon layer and reflect it vertically by going to “Object” > “Transform” > “Reflect.” Apply the following settings here.

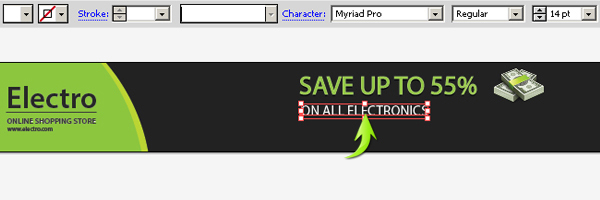
Step 12
Add text using “Myriad Pro” font with a 14pt size.
Step 13
Here, I’ve made simple bullets using the ellipse tool.

Step 14
Next, add the imagery that you want to display in the ad. You can position it as shown below. I’ve used some of my screen mockups as an example.

Step 15
Now, we’ll make a call to action button. Select the rounded rectangle tool with the following settings to draw a rectangle shown below. Use color #8DC63F as your “Fill” color and color #C5DE90 as a 1pt stroke.

Step 16
Duplicate the rectangle, change its fill color to black, and set its stroke to none. Place this layer below the original rectangle and drag it to the right and downward to form shadow of the button.

Step 17
To make the button highlight, set #FBE00B as your fill color and draw the shape shown below using the pen tool. Confine it to the button using the shape builder tool as explained in step 4.

Step 18
Reduce the opacity of the highlight layer to 40%.

Step 19
Next, type some text over the button.

Step 20
Duplicate the text layer, change the fill of the original text layer to white, and drag it one step downward.


That’s it. Our web banner ad is ready. I hope you guys enjoyed the tutorial and learned something useful.
Frequently Asked Questions about Creating Persuasive Banner Advertisements in Illustrator
What are the key elements to consider when designing a banner advertisement in Illustrator?
When designing a banner advertisement in Illustrator, it’s important to consider several key elements. Firstly, the banner should be visually appealing to attract the viewer’s attention. This can be achieved by using vibrant colors, high-quality images, and engaging typography. Secondly, the message should be clear and concise. Avoid cluttering the banner with too much information. Instead, focus on one main message that you want to communicate. Lastly, include a call-to-action. This could be a button or a link that directs the viewer to your website or a specific product page.
How can I make my banner advertisement stand out?
To make your banner advertisement stand out, you need to be creative and innovative. Use unique and eye-catching designs that can easily grab the viewer’s attention. Also, use compelling headlines and persuasive copy to engage the viewer. Remember to keep your design consistent with your brand identity to create a strong brand presence.
What are the common mistakes to avoid when creating a banner advertisement in Illustrator?
Some common mistakes to avoid when creating a banner advertisement in Illustrator include using too many colors, fonts, or images, which can make the banner look cluttered and confusing. Also, avoid using low-quality images as they can make your banner look unprofessional. Lastly, don’t forget to proofread your copy to avoid any spelling or grammar mistakes.
How can I optimize my banner advertisement for different platforms?
To optimize your banner advertisement for different platforms, you need to consider the specific requirements of each platform. For example, the size and format of the banner may vary depending on the platform. Also, consider the viewing habits of the users on each platform. For instance, mobile users may prefer vertical banners, while desktop users may prefer horizontal banners.
What are the best practices for creating a call-to-action in a banner advertisement?
The call-to-action (CTA) is a crucial element in a banner advertisement. It should be clear, concise, and compelling. Use action words like “Buy Now”, “Sign Up”, or “Learn More” to encourage the viewer to take action. Also, make sure the CTA stands out by using a contrasting color or a distinctive design.
How can I measure the success of my banner advertisement?
The success of a banner advertisement can be measured using various metrics such as click-through rate (CTR), conversion rate, and return on investment (ROI). These metrics can provide valuable insights into the effectiveness of your banner advertisement and help you make necessary adjustments to improve its performance.
Can I animate my banner advertisement in Illustrator?
While Illustrator is primarily a vector graphics editor and doesn’t support animation directly, you can create individual frames in Illustrator and then use a program like Adobe After Effects or Adobe Animate to create an animated banner.
How can I ensure my banner advertisement is accessible to all users?
To ensure your banner advertisement is accessible to all users, consider factors like color contrast, font size, and alt text for images. These elements can help users with visual impairments to understand the content of your banner.
What file formats should I use for my banner advertisement?
The file format for your banner advertisement depends on where it will be displayed. For online use, JPEG, PNG, and GIF are commonly used. If your banner includes animation, GIF or HTML5 are the preferred formats.
How can I use Illustrator to create a responsive banner advertisement?
Illustrator allows you to create responsive banner advertisements by using the Artboard tool. You can create multiple artboards with different sizes for different devices. This way, you can ensure that your banner looks great on all screen sizes.