
Key Takeaways
- Drawing tablets offer a more precise and comfortable alternative to a mouse for image editing, with a stylus allowing for more natural hand and wrist movements.
- The stylus that comes with a drawing tablet can have up to 2400 levels of pressure sensitivity, providing a much higher degree of precision than a mouse, especially for detail-oriented tasks.
- There are many different models of drawing tablets available, each with its own unique features, so you can choose the one that best suits your needs and preferences.
- Drawing tablets can be used for a variety of tasks beyond image editing, including sketching, painting, doodling, taking notes, and more, making them a versatile tool for both work and recreation.
If you have ever had a large image-retouching project, working with a mouse usually makes it a less-than-precise and laborious endeavor. After years of experience using a mouse, I have refined my ability to use a mouse to edit images. However, there are better tools than mice out there to make your image editing quicker, easier work with noticeably better results.
Working with a mouse can be tedious because your wrist is flat, and you can only work using crude dragging motions that involve your entire hand. Usually, a mouse is imprecise and clunky in your hand, and after prolonged use, your hand will start to cramp. A mouse is fine for surfing the web, scrolling, or doing simple work, but a drawing tablet allows you to complete more detail-intensive much more comfortably.
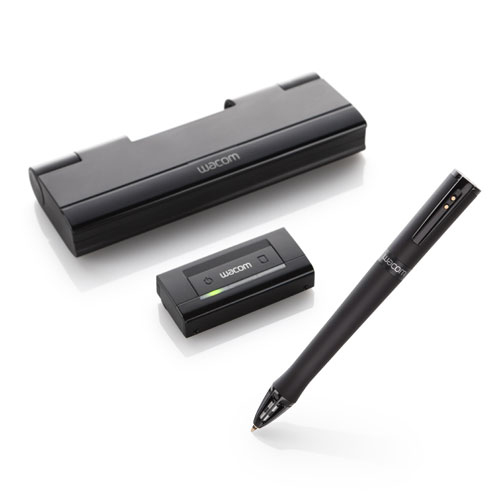
A drawing tablet usually comes with a stylus, which is closely related to a pen in shape. They are generally much easier and more comfortable to hold in your hand than a mouse, and they allow for an incredible degree of precision in your work. Wacom tablets have up to 2400 different levels of pressure sensitivity. Mice only have two levels of pressure sensitivity; clicked or not clicked. This gives tablets a huge advantage over mice, especially for detail-oriented image editing. When using Photoshop, the pressure sensitivity applies to your brushes as well. This makes it so much easier to blend colors, add effects, and apply retouching techniques.
With a stylus, you can tilt the pen, and move your hand and wrist into a natural drawing position. This allows you to have much more control over the strokes that you make. You can literally sketch with your computer. You can paint with your stylus digitally inside of Photoshop, and your work will have a more natural appearance, simply from the fact that you have a natural range of hand and finger flexibility. If you want your images to come alive and have an organic, natural, professional look, then a Wacom tablet is an ideal tool for your design work.
There are many different models available, you just have to decide which one is right for you. It really depends on the features that you want, and whether you are using it for work or recreation. The following models are available:

Bamboo
This is an entry-level drawing tablet. You can use it for sketching, painting, doodling, notes, and more. You can retouch photos with it as well. The Bamboo line is a great starter model if you want an inexpensive way to try out a drawing tablet. The Bamboo line features 1024 levels of pressure sensitivity, which is nice for realistic drawing, sketching, painting, and retouching. There are actually 3 different models of the Bamboo. You have the Bamboo Connect, the Bamboo Capture, and the Bamboo Create. There are significant differences between the models, so the choice really comes down to what you are looking for in a tablet. The Bamboo Connect and Capture do not have eraser features on the stylus. This feature is handy, because it allows you to flip the stylus around and erase a mistake like you would with a normal pencil. They are both small in size, and the Connect doesn’t come with a wireless option, a multi-touch input, Nik Color Efex Pro Filters, Corel Painter Essentials, or Adobe PS Elements. The Bamboo Create model comes with all of these features, and it has a larger workspace than the other models.
Bamboo Connect- $79.00
Bamboo Capture- $99.00
Bamboo Create- $199.00
Inkling
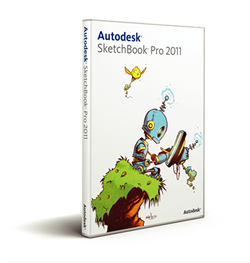
This is an interesting product, because it allows you to work traditionally, with a real pen, but it is converted and saved digitally. The concept is simple, because all you have to do is clip the receptor at the top of your artwork, and the Inkling records your work digitally, saving you the extra step of having to scan your work. Where the Inkling stands out is that you can save plenty of sketches, and you can export the file with layers as Photoshop, Illustrator SketchBook Pro, and SVG formats. This is great because you can sketch out your ideas, and then hit the ground running from a digital standpoint, because your sketches and drawings are ready to go directly from export.
Inkling- $199.00

Intuos5
The Intuos5 line is a great line of tablets for professional use. They have 2048 levels of pressure sensitivity, so you have ultimate control over your sketches, paintings, and retouching work. The Intuos models come in 3 sizes — small, medium, and large. Besides their varying sizes, the only difference among these three different models is that the small model only has 6 express keys, and the two larger models have 8. Express keys allow you to customize your settings and create hotkeys for different actions that you perform frequently. The Intuos line supports pen tilt recognition, meaning that the tablet recognizes when you are tilting the pen at an angle, and the brush or software reacts to the tilt of the stylus. The Intuos models also feature a multi-function touch ring. This is similar to scroll wheels or “jog-dials” that you would find on older iPods. You can set the scroll wheel to control different aspects of your stylus. A good example would be setting the scroll wheel to control brush size: Scroll in a clockwise motion, and the brush gets larger. Spin it the opposite way, and the brush gets smaller. The Intous line also supports multi-touch functionality, which means that you use your fingers to perform different tasks. Different multi-touch gestures will complete common task in a flick of the fingers. This line of tablets gives you a great deal of control with a lot of customizable express keys to save you a lot of time and make your work a lot sharper.
Small- $229.00
Medium- $349.00
Large- $469.00

Cintiq
The Cintiq line of tablets is incredible. Instead of drawing on a tablet, you can draw directly on the screen itself. This is extremely precise, and it’s the ultimate way to work traditionally on a digital canvas. The real difference here is portability. Obviously, these models are more fragile and hard to move between offices or studios. There are three models, the Cintiq 12WX, the Cintiq 21UX, and the Cintiq 24HD. The differences here are mainly just the size of the workspace.
Cintiq 12WX- $999.00
Cintiq 21UX- $1999.00
Cintiq 24HD- $2599.00
Apps
Bamboo Paper is a unique iOS app that works very well with the special stylus that Wacom makes for the Apple iPad. It’s not just for intensive image editing; you can use this combo for many different purposes, like presentations, sketching wireframes, doodling design ideas, mind mapping, and any other task where you might use a legal pad or a leftover napkin.
SketchbookPro is another great program that lets you create sketches quickly and efficiently. It supports layers, and you can bring your work into Photoshop. It is a great way to store digital sketches, because it’s a natural way to sketch, and it’s very fluid. It comes with a lot of tools that are similar to Photoshop. You can make straight lines, rectangles, circles, and you can blend colors. SketchbookPro is fast as well, as there is no lag when creating your sketches.
Sketchbook Pro- $59.00
The choice that you make between all of these different tablet products just depends on your preference. If you have an iPad, then obviously you will want the stylus and the Bamboo Paper app. If you are looking for an affordable way to create digital artwork with decent capabilities, then one of the bamboo tablets would be a good choice for you. If you want to create digital artwork with the ease of hotkeys and greater pressure sensitivity, than the beginner bamboo tablets, then you would select from the Intuos5 line of tablets. If you are a veteran digital artist and you want the ultimate digital sketching, painting, and retouching experience, and you want it to be as close to traditional artwork as possible, then the Cintiq line of products would be a good choice. If you are serious about your artwork, and you want a more natural way to create your work, then a tablet is most definitely the solution for you. Working with a mouse feels like working with a brick, and once you go flat, you never go back.
Do you have a preferred drawing tablet? Have you found some unusual, unanticipated uses for yours? Would you ever go back to a mouse?
Frequently Asked Questions (FAQs) About Using a Drawing Tablet
What are the benefits of using a drawing tablet for digital art?
Drawing tablets offer a more natural and intuitive way of creating digital art compared to using a mouse. They provide a direct pen-to-screen experience that closely mimics traditional drawing on paper. This allows for greater precision, control, and flexibility in creating art. Drawing tablets also come with pressure sensitivity features, which means the harder you press the pen on the tablet, the thicker and darker the lines will be. This feature is particularly useful for creating different textures and shading effects in your artwork.
Can I use a drawing tablet for tasks other than drawing?
Yes, drawing tablets are versatile tools that can be used for a variety of tasks beyond drawing. They can be used for photo editing, graphic design, 3D modeling, and even for general computing tasks like browsing the web or navigating your computer’s interface. Some professionals also use drawing tablets for tasks like handwriting recognition and capturing digital signatures.
What should I look for when buying a drawing tablet?
When buying a drawing tablet, consider factors like size, pressure sensitivity, resolution, report rate, and the type of stylus it comes with. Larger tablets offer more room to draw but are also more expensive and less portable. Pressure sensitivity refers to how the tablet responds to the pressure you apply with the stylus. Higher pressure sensitivity allows for more nuanced control over your strokes. The resolution of the tablet determines how accurately it can detect the position of the stylus, while the report rate refers to how often the tablet updates the position of the stylus.
Do I need special software to use a drawing tablet?
Most drawing tablets are compatible with popular graphic design and photo editing software like Adobe Photoshop, Illustrator, and Corel Painter. Some tablets also come with their own software. However, to fully utilize the features of a drawing tablet, you may need to install drivers or additional software provided by the tablet manufacturer.
Can I use a drawing tablet with my existing computer?
Yes, most drawing tablets are designed to work with both Windows and Mac computers. They connect to your computer via USB, Bluetooth, or in some cases, Wi-Fi. Before purchasing a tablet, check the manufacturer’s specifications to ensure it’s compatible with your computer’s operating system.
Is it difficult to transition from traditional drawing to using a drawing tablet?
There can be a learning curve when transitioning from traditional drawing to using a drawing tablet, especially in getting used to looking at the screen while drawing on the tablet. However, most artists find that with practice, using a drawing tablet becomes second nature and offers greater flexibility and control than traditional drawing.
What is the difference between a drawing tablet and a pen display?
A drawing tablet, also known as a graphics tablet, requires you to draw on a flat surface while looking at your computer screen. A pen display, on the other hand, is a monitor that you can draw directly on, providing a more intuitive and natural drawing experience.
Can I use a drawing tablet for online tutoring or teaching?
Yes, drawing tablets can be an excellent tool for online tutoring or teaching, especially in subjects like math and art where visual demonstration is important. You can use a drawing tablet to write, draw, and annotate directly on the screen, making your lessons more interactive and engaging.
How do I maintain and clean my drawing tablet?
To maintain your drawing tablet, avoid using it in dusty or humid environments and keep it away from extreme temperatures. Clean your tablet regularly with a soft, dry cloth. Avoid using wet wipes or harsh cleaning solutions as they can damage the tablet’s surface.
Are drawing tablets suitable for beginners?
Yes, drawing tablets are suitable for beginners. Many models are designed with beginners in mind, offering user-friendly features and intuitive interfaces. Some even come with tutorial software to help beginners get started. However, as with any new tool, it may take some time and practice to get used to drawing on a tablet.