


Our goal today is to setup a Rails project which uses Semaphore CI to test the project and then deploy automatically to an Amazon EC2 server using Capistrano. We’ll be using Nginx, Puma, and Postgres, along with Ruby 2.3.0 and Rails 4.2.6.
Key Takeaways
- SemaphoreCI facilitates continuous deployment by allowing automated testing and deployment to Amazon EC2, ensuring that new features are smoothly integrated and deployed.
- The setup process involves creating a Rails application, configuring a Git repository on BitBucket for version control, and setting up an Amazon EC2 server.
- Continuous Integration benefits include keeping the team updated on build status and automating the deployment process upon successful test completions.
- The deployment process utilizes Capistrano for automation, which works alongside tools like RVM, Puma, and Nginx to manage the application on the server.
- SemaphoreCI integrates seamlessly with BitBucket, allowing for easy setup of projects and automated builds based on commits to the repository.
- The article provides a comprehensive guide from setting up the Rails application to configuring the server and deploying using SemaphoreCI, aimed at simplifying the continuous deployment process for developers.
What is SemaphoreCI?
Semaphore lets you quickly set up a fast continuous delivery process for any web project. You can test every change you make and easily deploy new versions to the delight of your users. SemaphoreCI allows you to keep your team in the loo, by integrating with other services. It is now used and praised by hundreds of companies worldwide. You can read more about the offering here.
Benefits of CI
Some of the major benefits of continuous integration are:
- It keeps everybody in loop about the build health. SemaphoreCI lets everybody know if a build has failed, which commit caused the build to fail, and who authored the commit.
- Allows you to roll out new features continuously and smoothly. When new code is merged in a specified branch, the test suite is run and, if all tests pass, a deployment is triggered automatically.
Procedure
Make sure you have RVM installed. I’m running Ruby 2.3.0 and Rails 4.2.6.
Create a New Rails Application
Type the following in the terminal. I am adding the -d postgresql flag to let the generator know we want to use Postgres as the DB:
$ rails new ci-test-and-deploy-to-ec2-capistrano -d postgresql
CD into the project directory:
$ cd ci-test-and-deploy-to-ec2-capistrano
Create the database:
$ rake db:create
Generate a scaffold for our project which will create the Model, Controller, Views, and Routes. We’ll name the resource Blog and provide the field names. This will also generate a migration to create a blogs database table:
$ rails generate scaffold blog author title body:text
Migrate the database:
$ rake db:migrate
Add this line to config/routes.rb. This sets the root of the application.
root 'blogs#index'
Start your app server by running this command in the terminal:
$ rails server
Visit http://localhost:3000 to verify our app is set up just fine. You should see this screen:
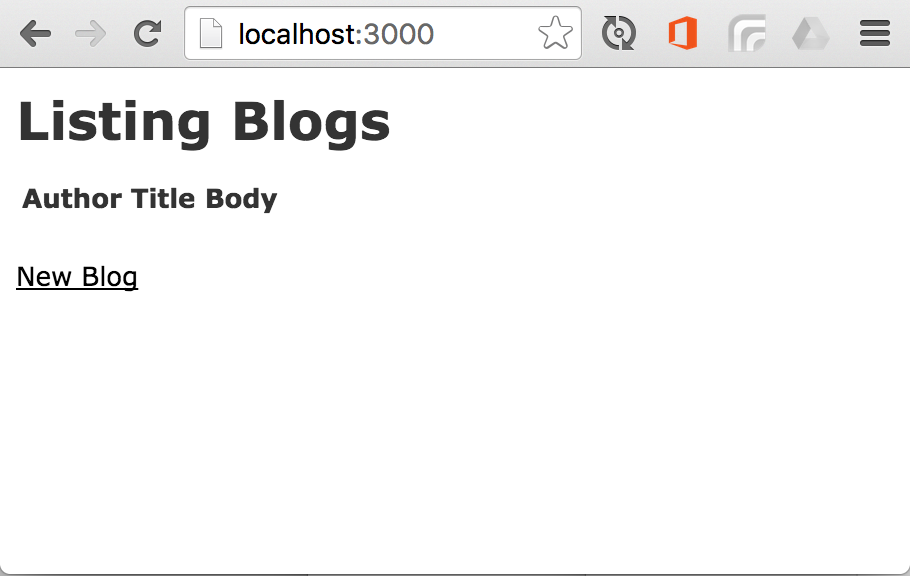
Perfect! Our basic app setup is working fine.
Version Control the project on BitBucket
Why I have picked Bitbucket over much widely adopted GitHub?
Pricing. Bitbucket gives you unlimited free repositories. Almost all the same powerful features as GitHub, plus flexible pricing. We’re going to use this as I wanted to demonstrate how people can quickly kick start a private project which is version-controlled for free and also able to ensure continuous delivery for free (100 private builds per month) with SemaphoreCI.
However, if you would like to use Github, must of what we do here is easily done on that platform.
Let’s get started with BitBucket
Signup on BitBucket.
Create and name your repo. Here we will use the sample project/app we created in earlier steps and push it to this newly created repository
You should already be in your project directory in the terminal window. cd into the directory if you aren’t already:
$ cd /path/to/my/repo
Initialize an empty git repository in your project directory:
$ git init
Initialized empty Git repository in /Users/sarmad/projects/ci-test-and-deploy-to-ec2-capistrano/.git/
Now run these commands. Don’t forget to replace git@bitbucket.org:sarmadsabih/ci-test-and-deploy-to-ec2-capistrano.git with the one shown in your repository:
$ git remote add origin git@bitbucket.org:sarmadsabih/ci-test-and-deploy-to-ec2-capistrano.git
Add and commit all the files:
$ git add -A && git commit -m "first commit"
Finally push to branch master of your repo:
$ git push origin master
Refresh the repository page and you should see the overview page. Your repo is now online on Bitbucket.
Configure an Amazon EC2 Server
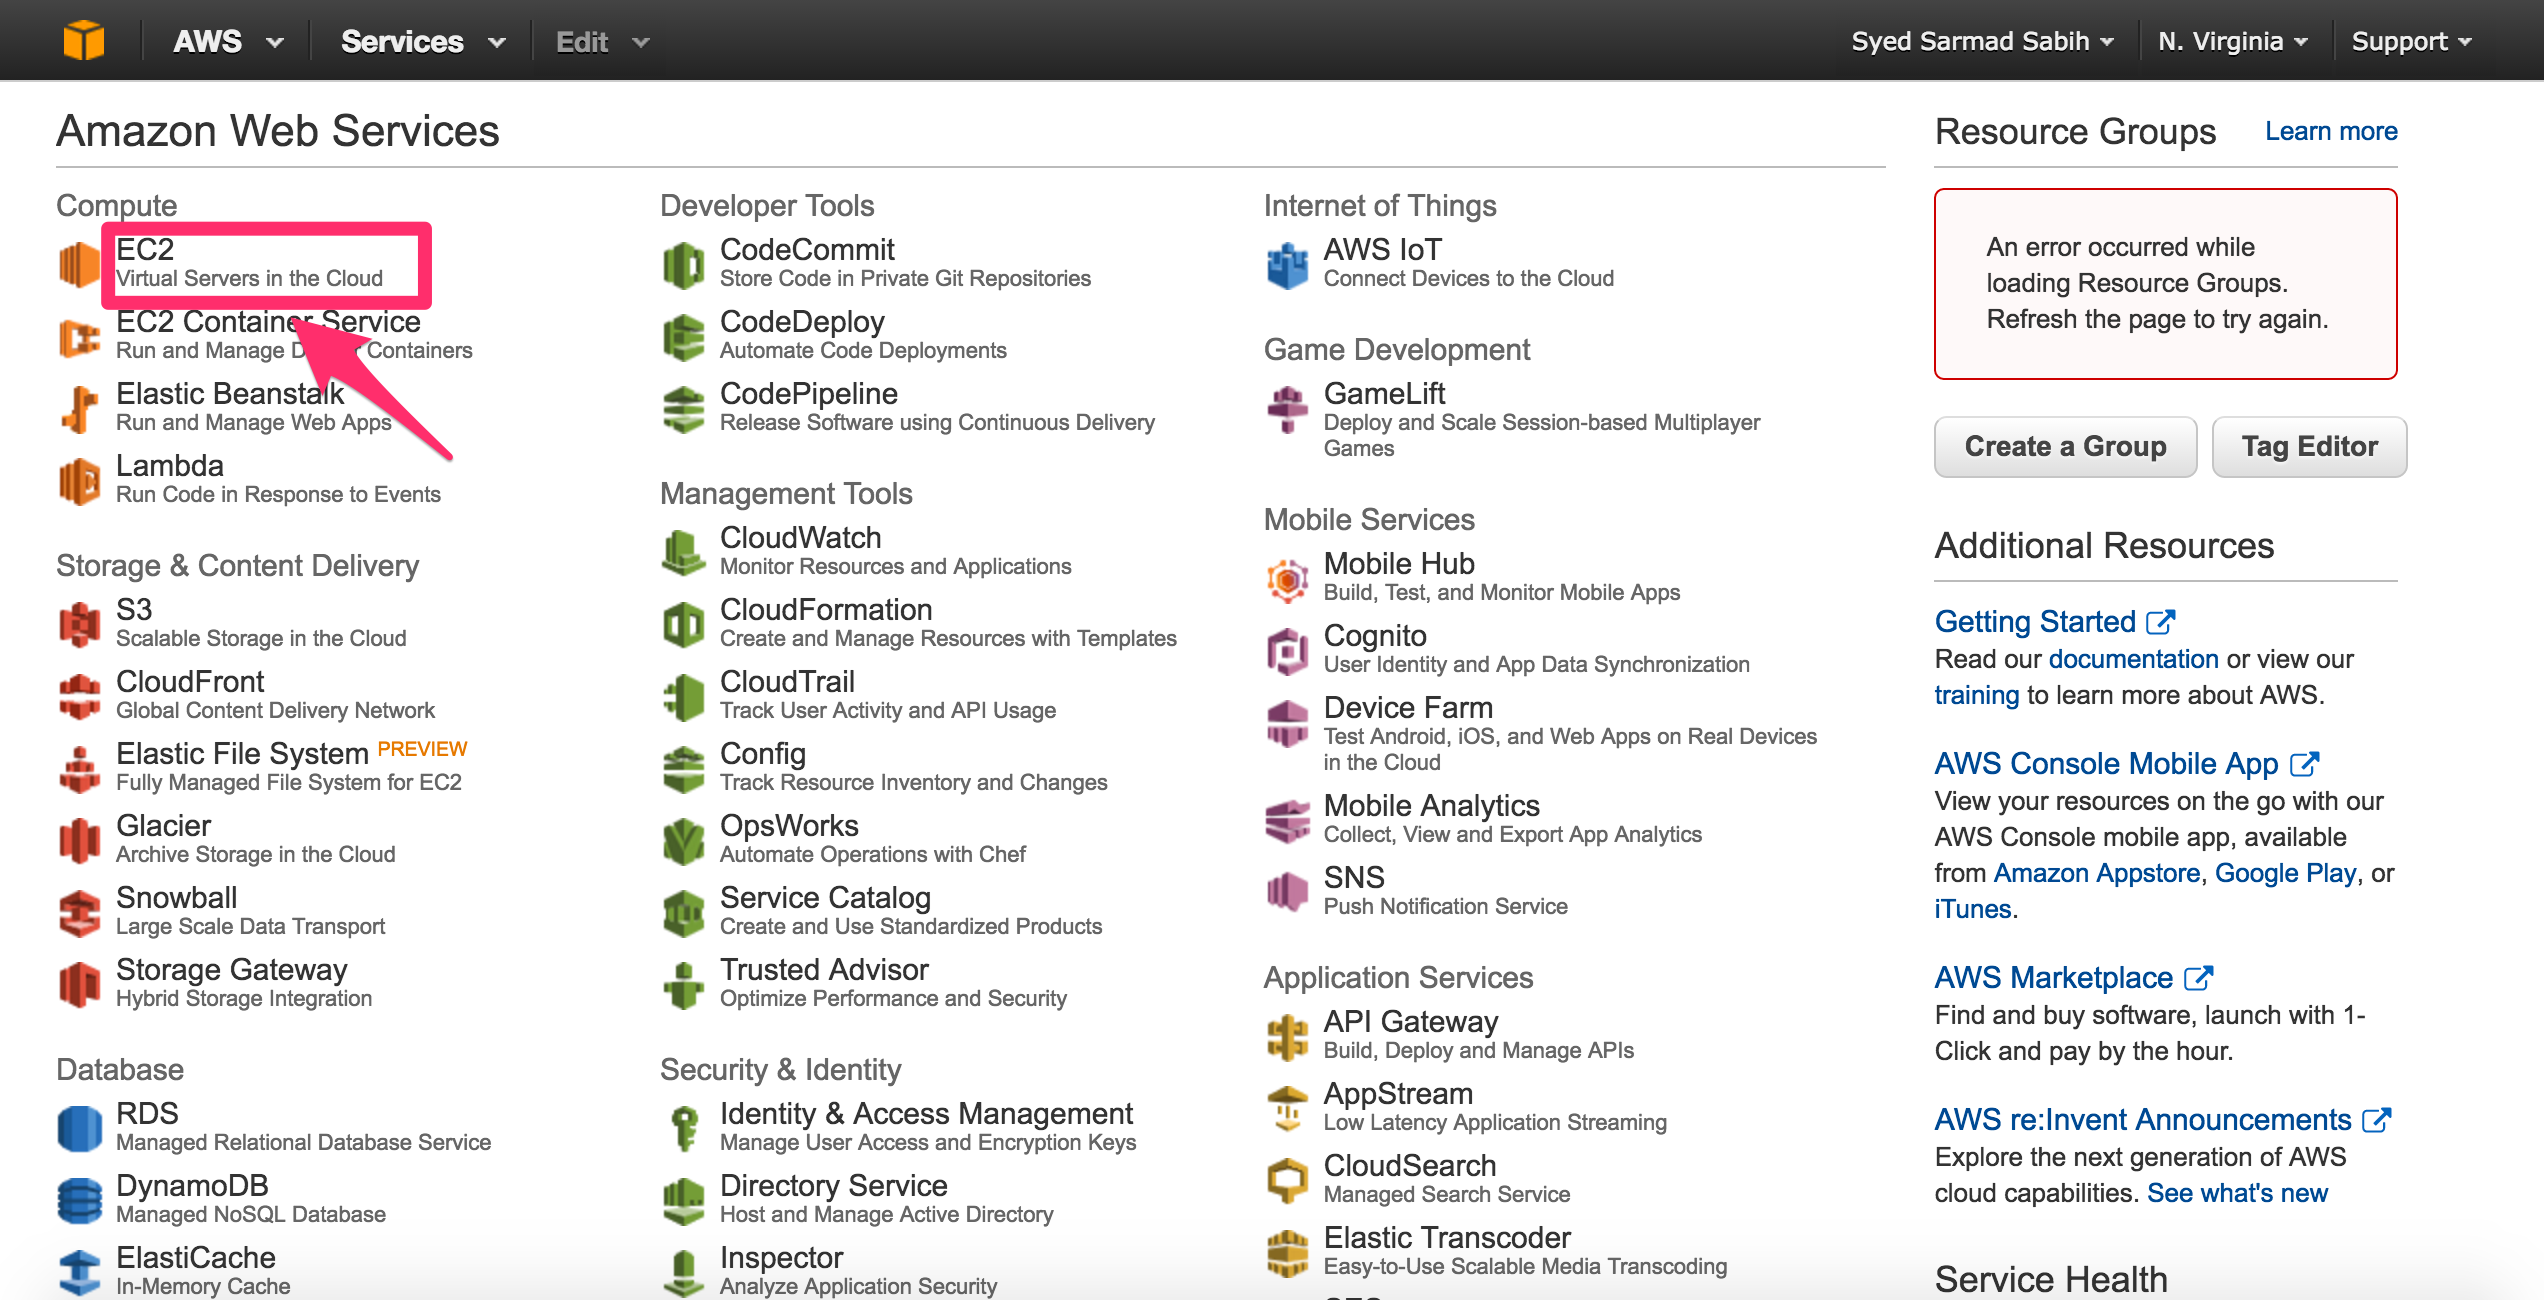
We now need to set up an Amazon EC2 server for our app. Signup for Amazon AWS. It has a free tier which is applicable for a year after the signup. The Free Tier gives you free 750 hours (A full month) per month of a t2.micro instance until your free tier expires.
Login to AWS Management console and click on the EC2 to go onto the EC2 Dashboard:
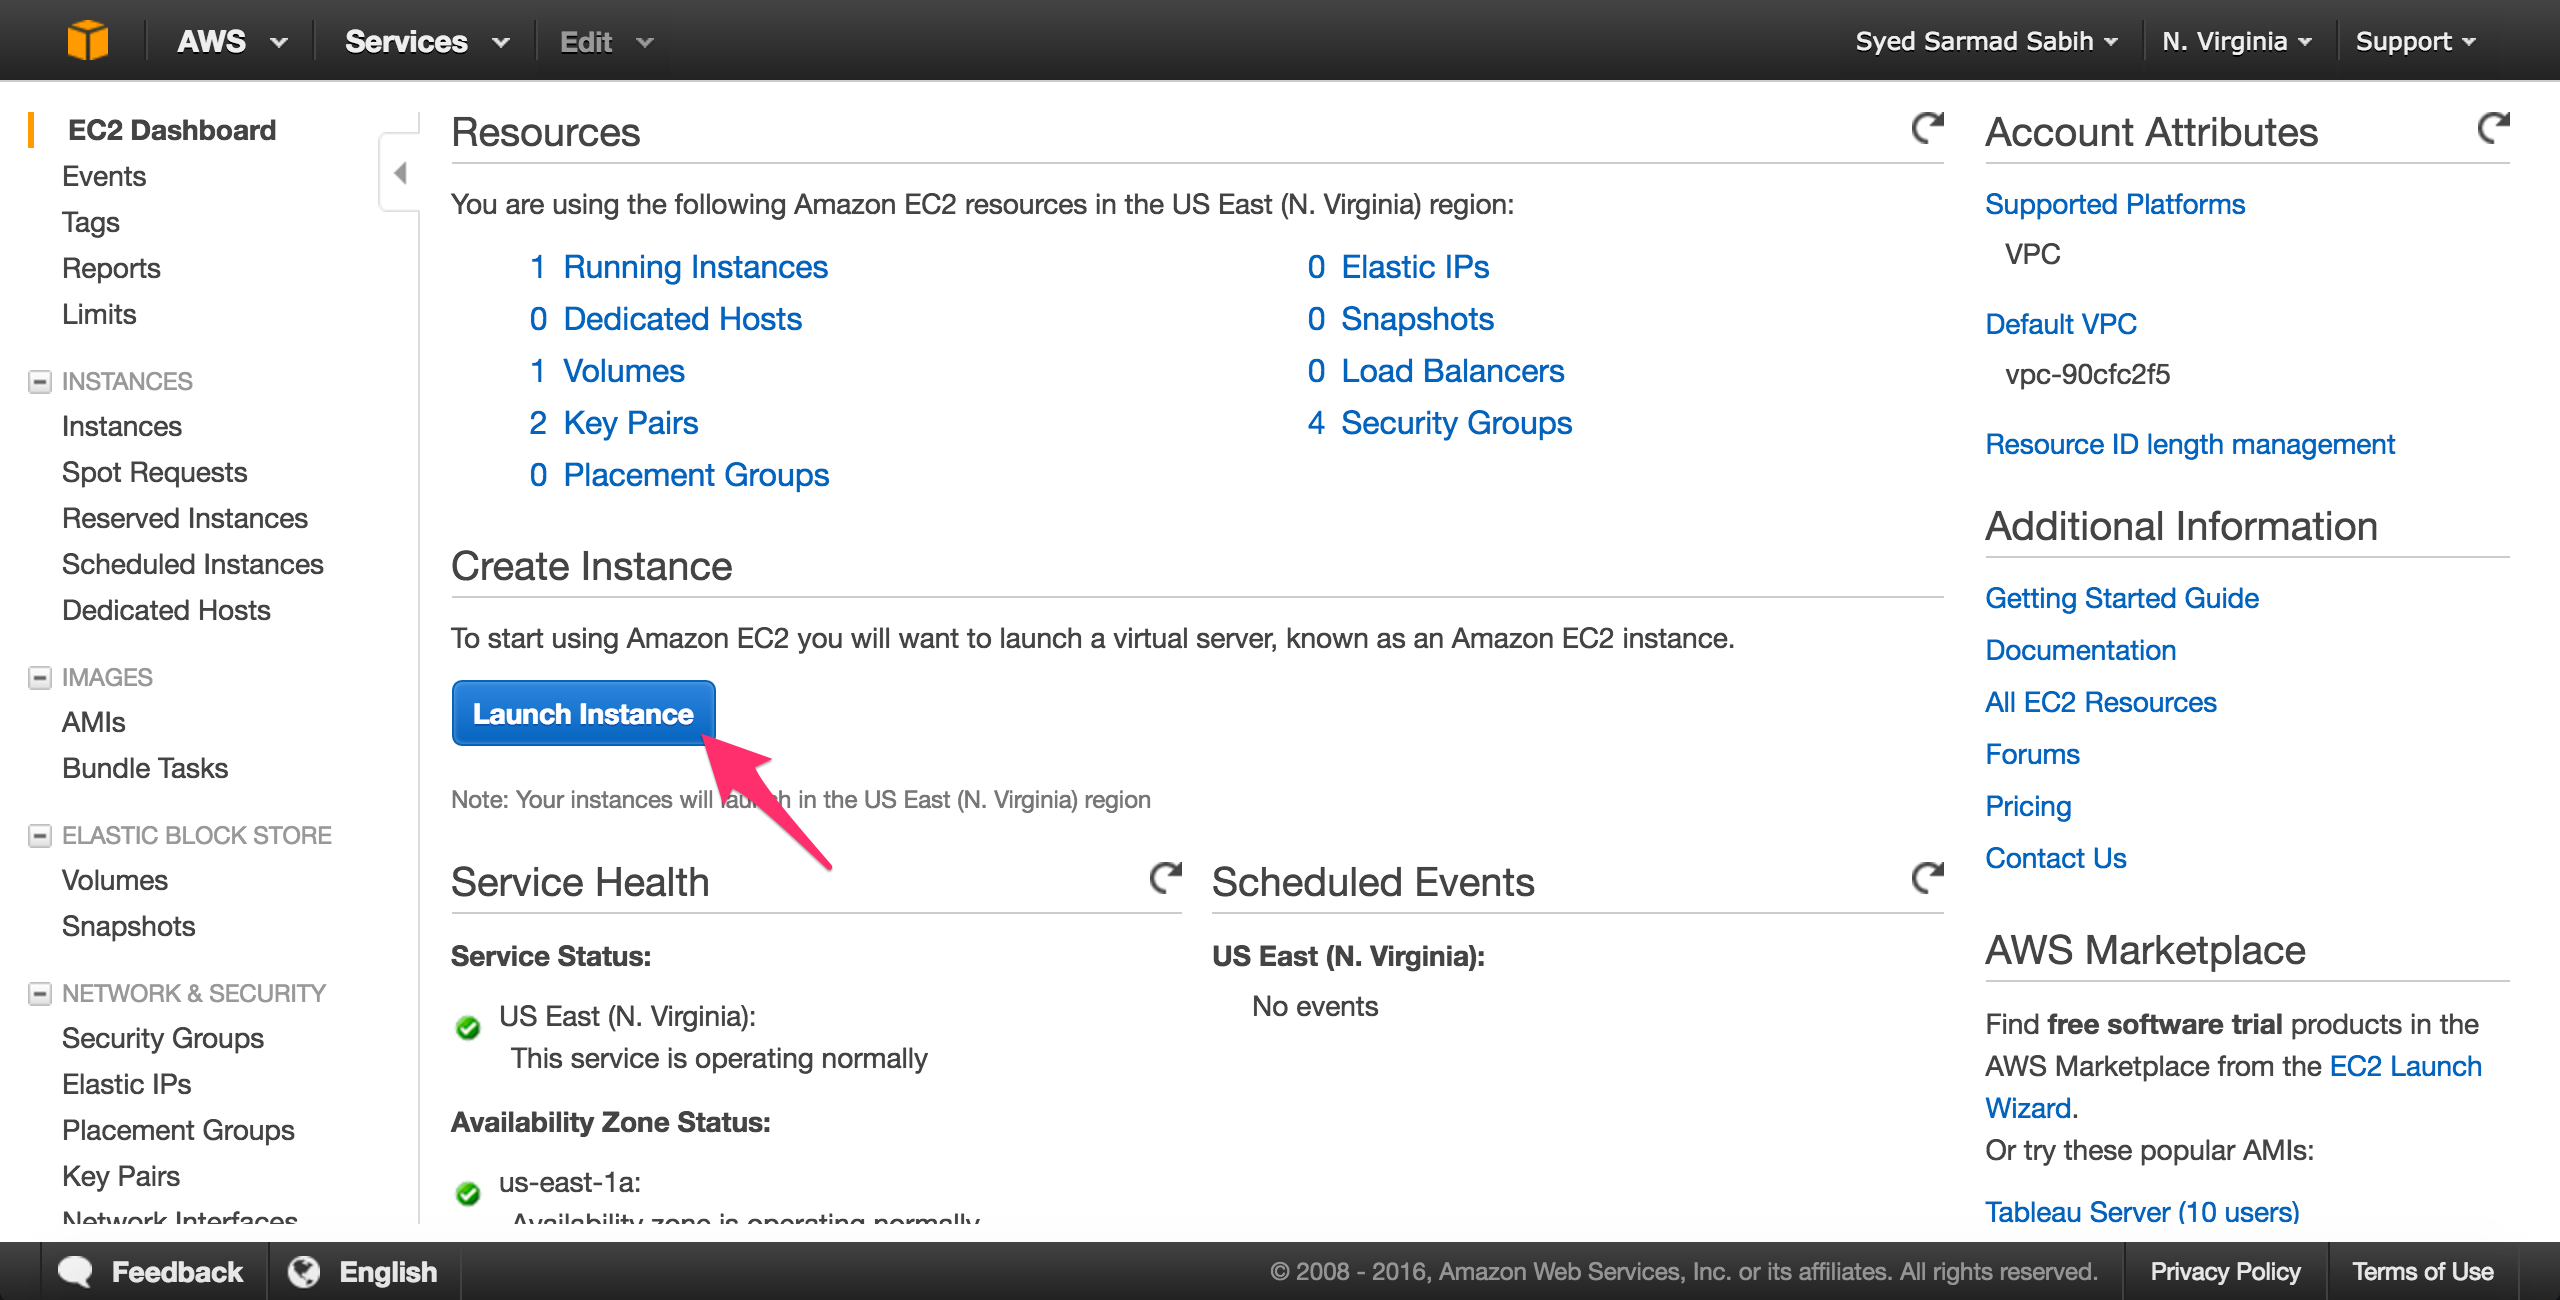
You will be taken to EC2 dashboard. Click on the “Launch Instance” button:
Select Ubuntu 14.04 LTS 64-bit as the OS:

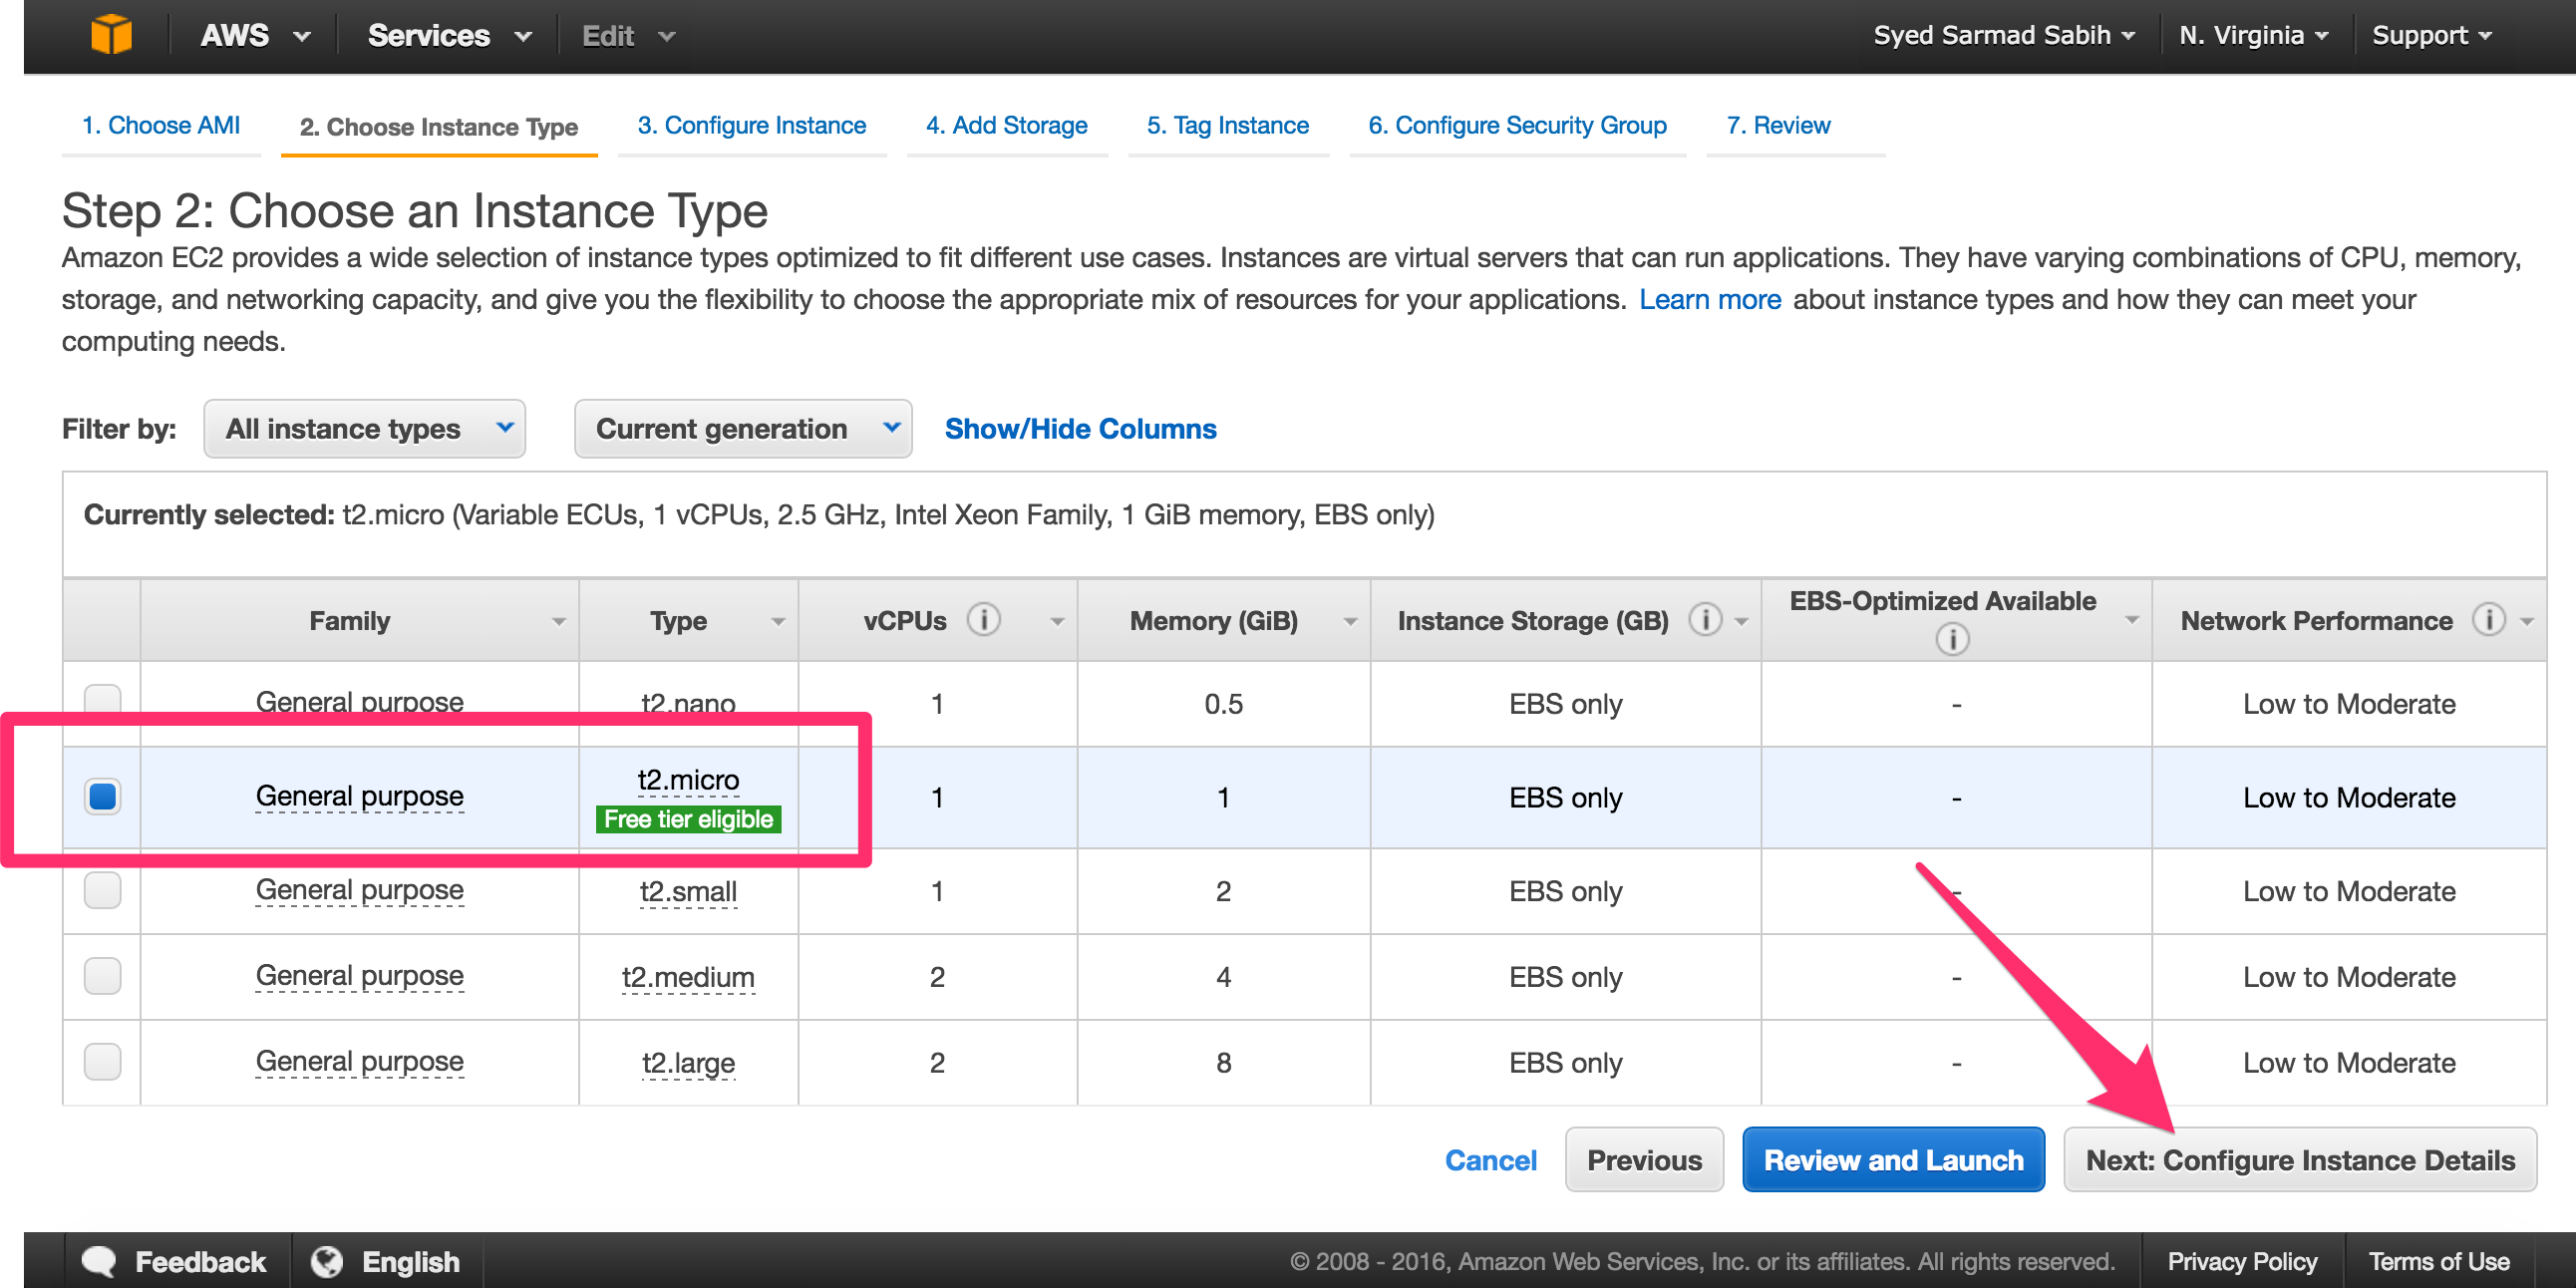
Select the t2.micro instance which is eligible for the Free tier. You may select a different instance depending on your computational requirements. Click “Next: Configure Instance Details”:
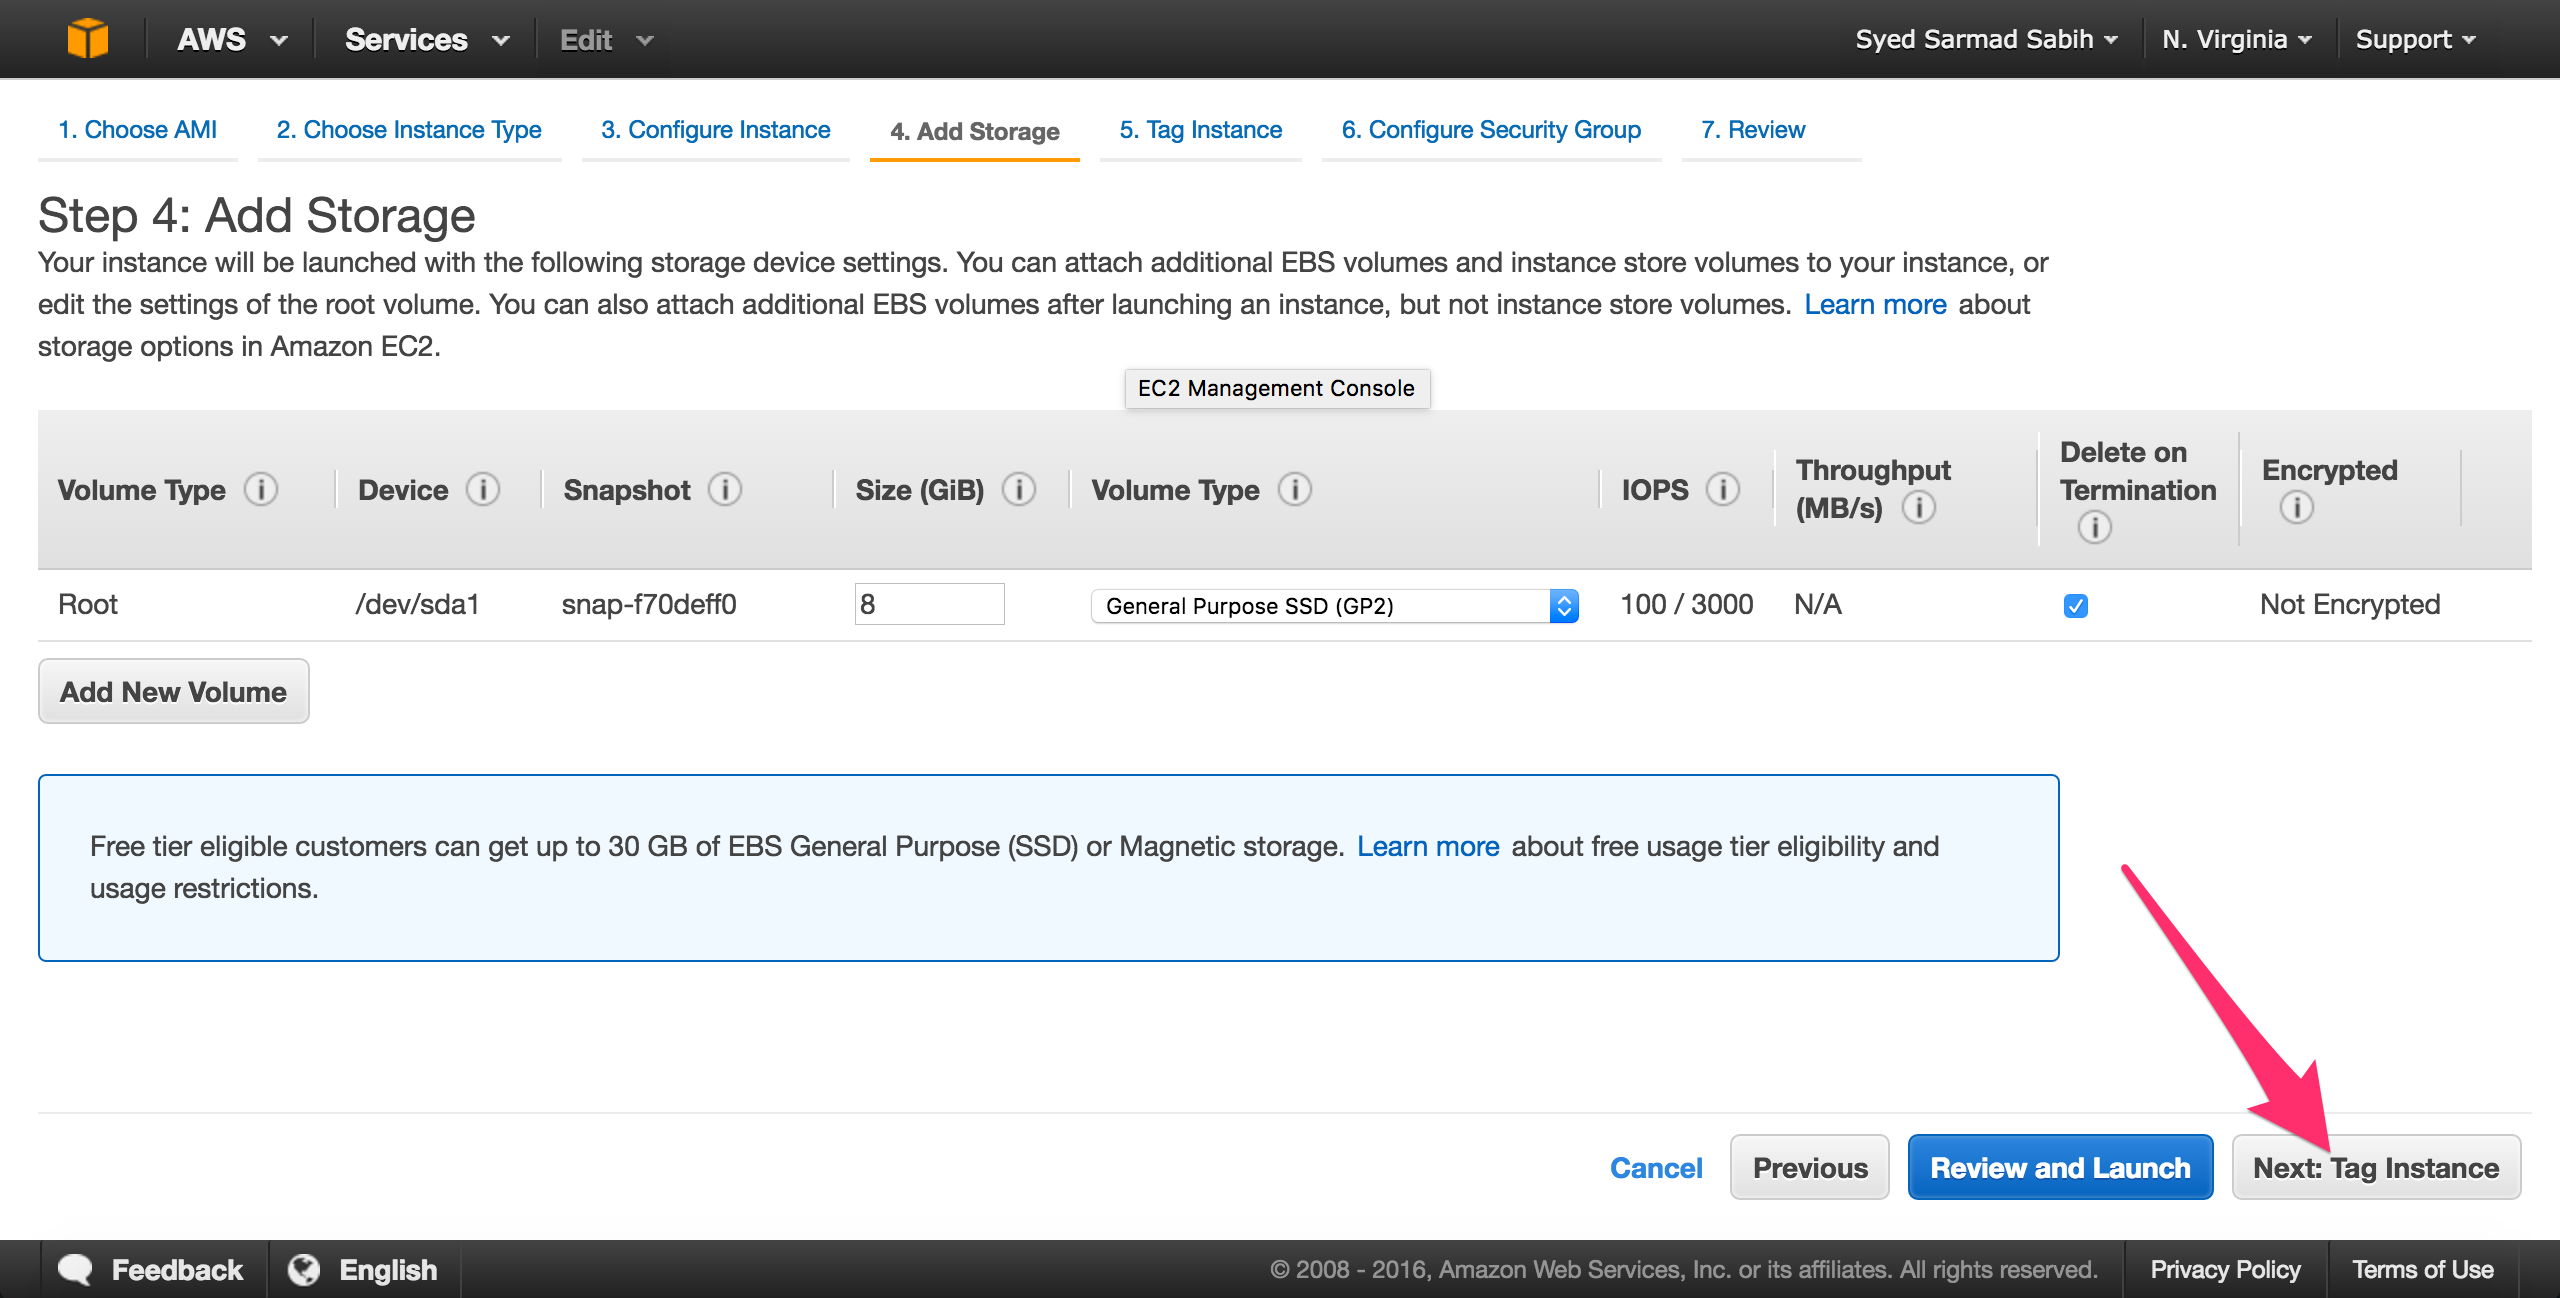
The defaults will work fine on this page. Only change values if you know what you’re doing and if it’s your requirement. Click “Next: Add Storage”:

Leave it as is and click “Next: Tag Instance”:
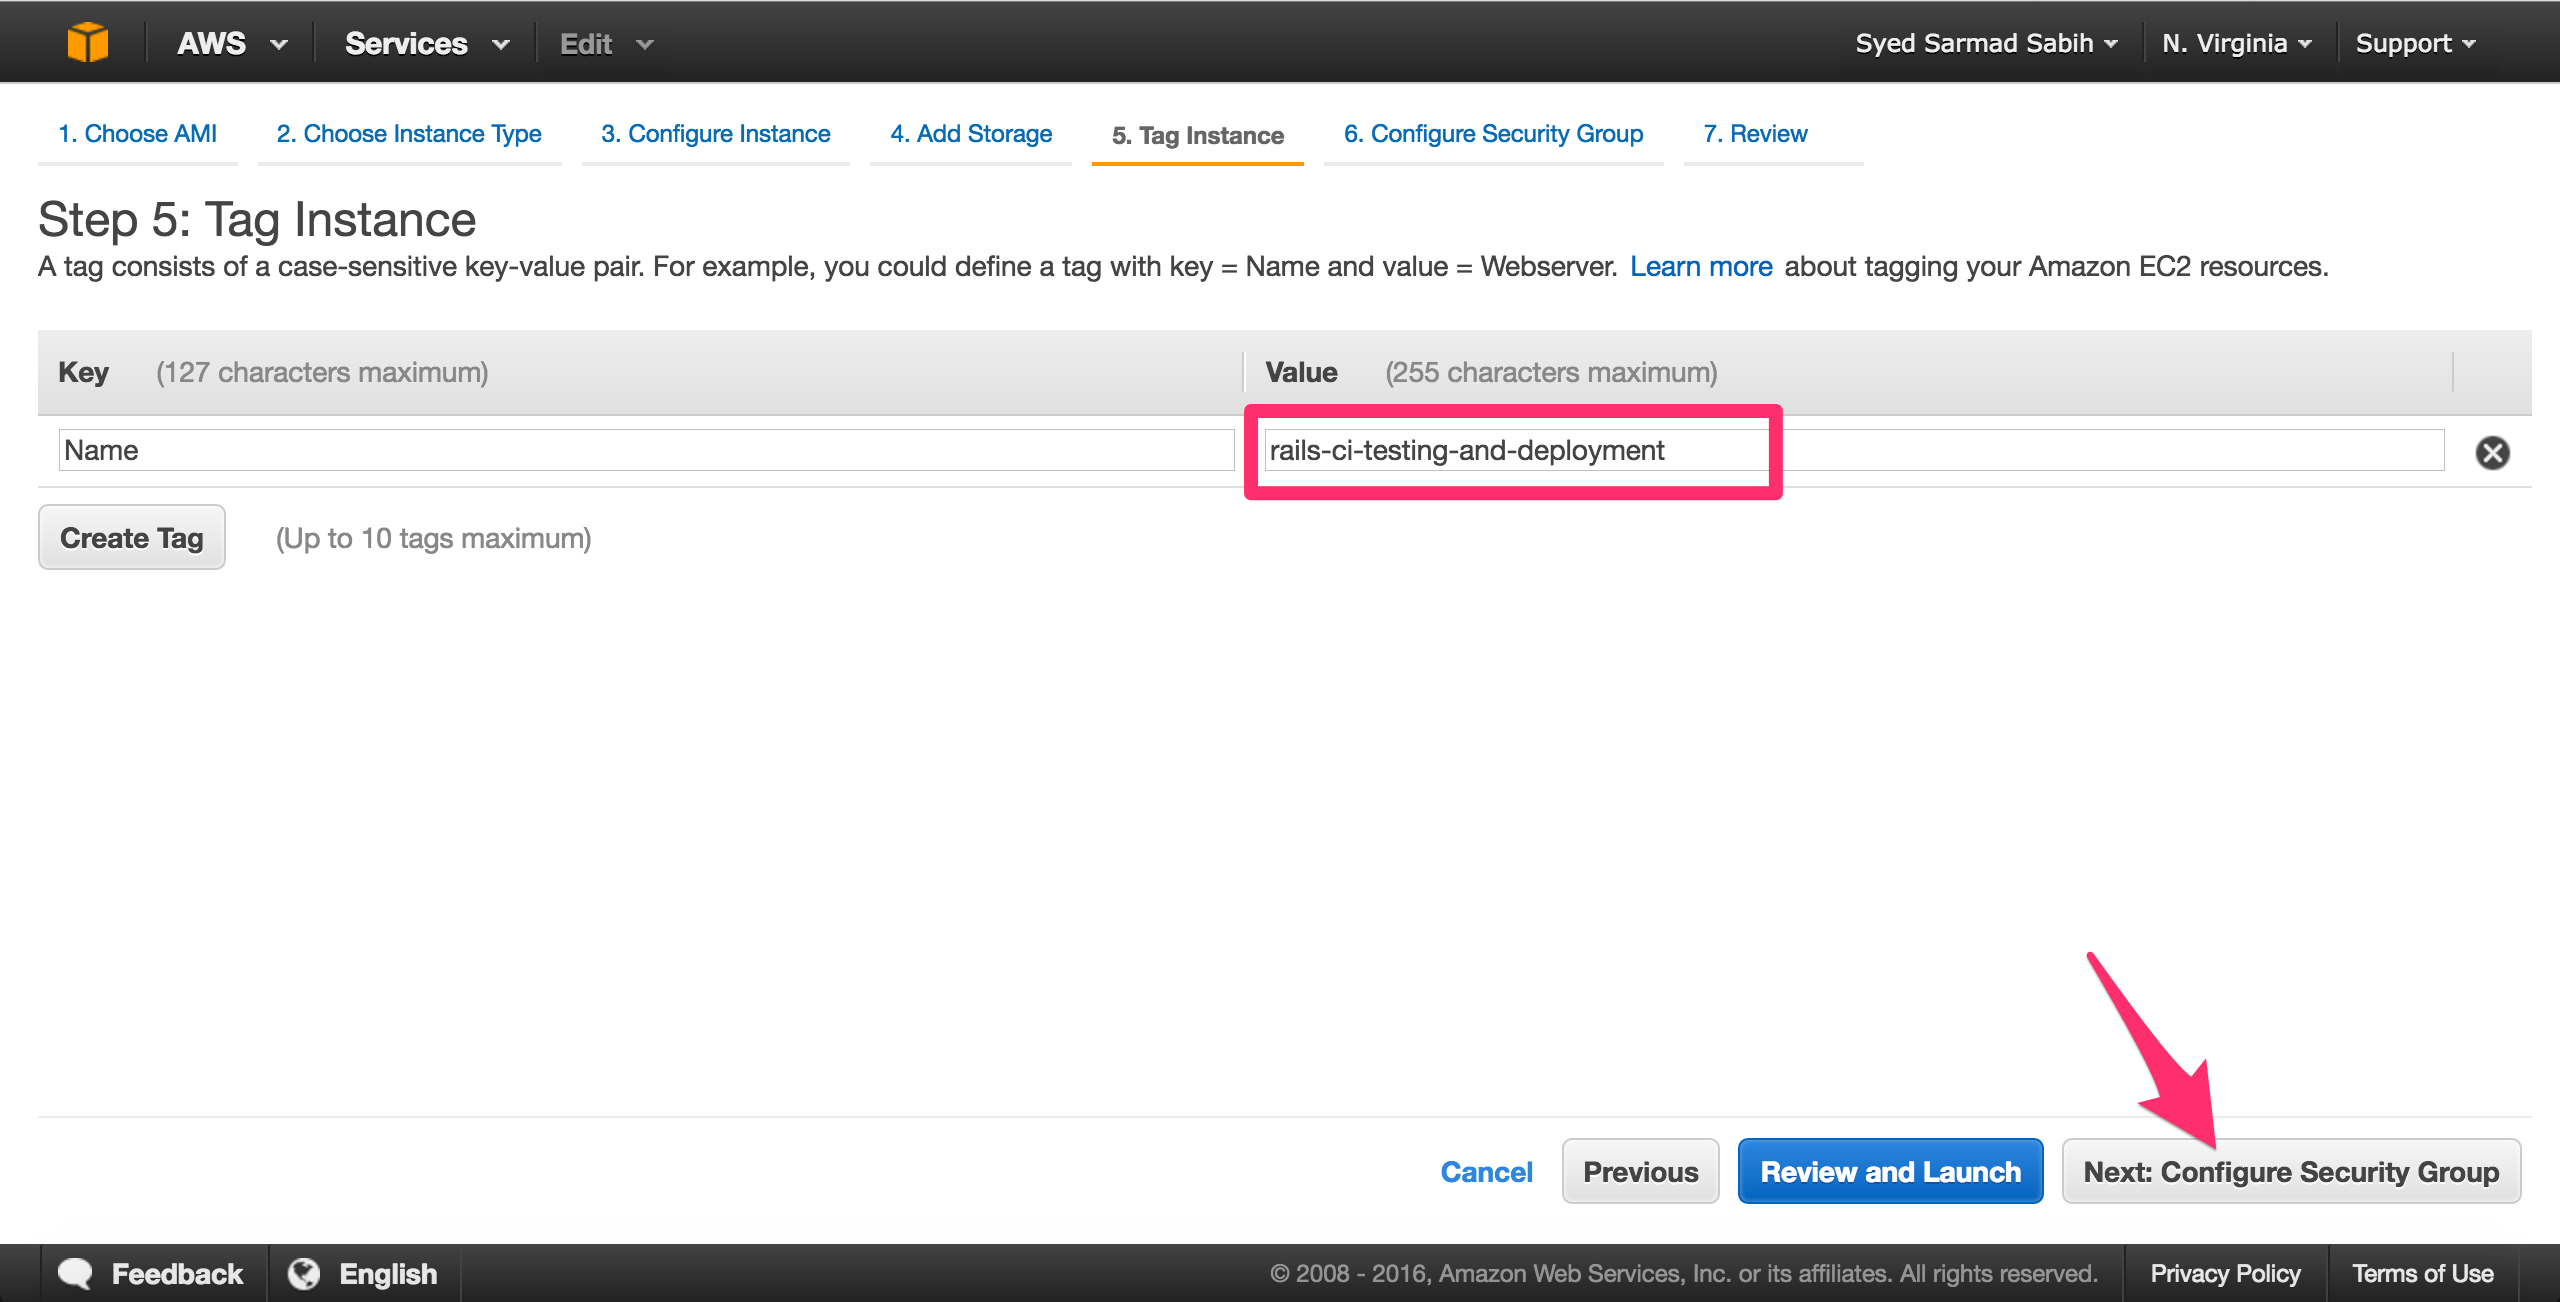
Name the instance and click “Next: Configure Security Group:
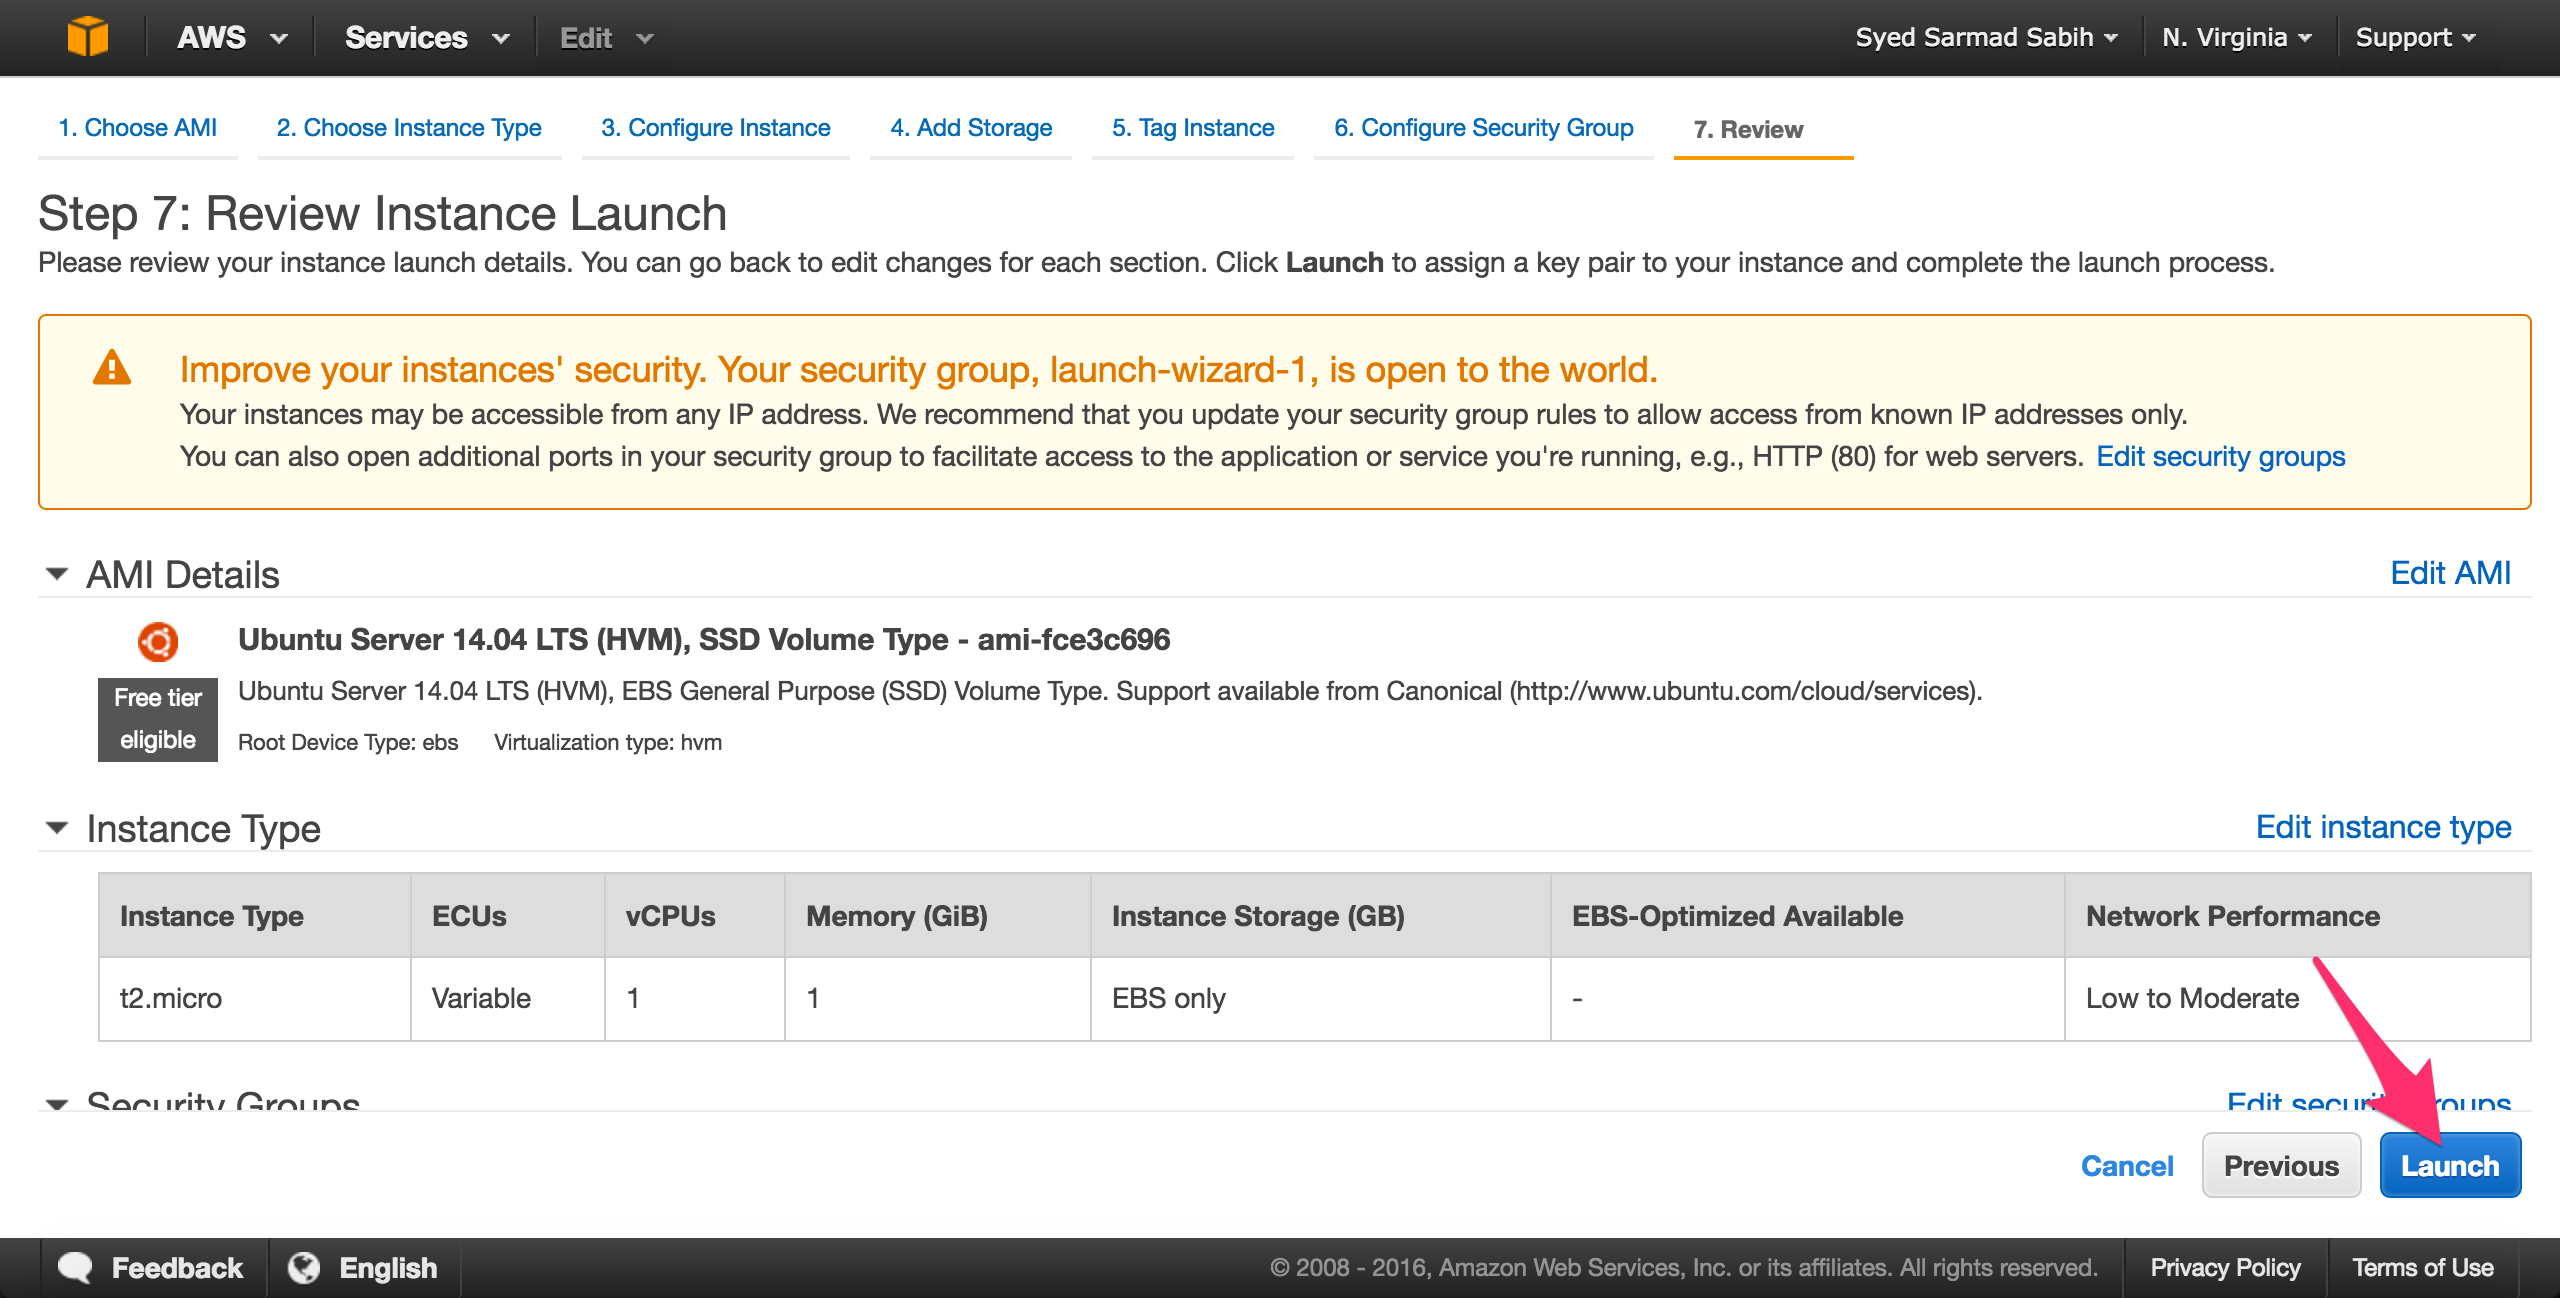
Review the settings/options you selected and click “Launch”:
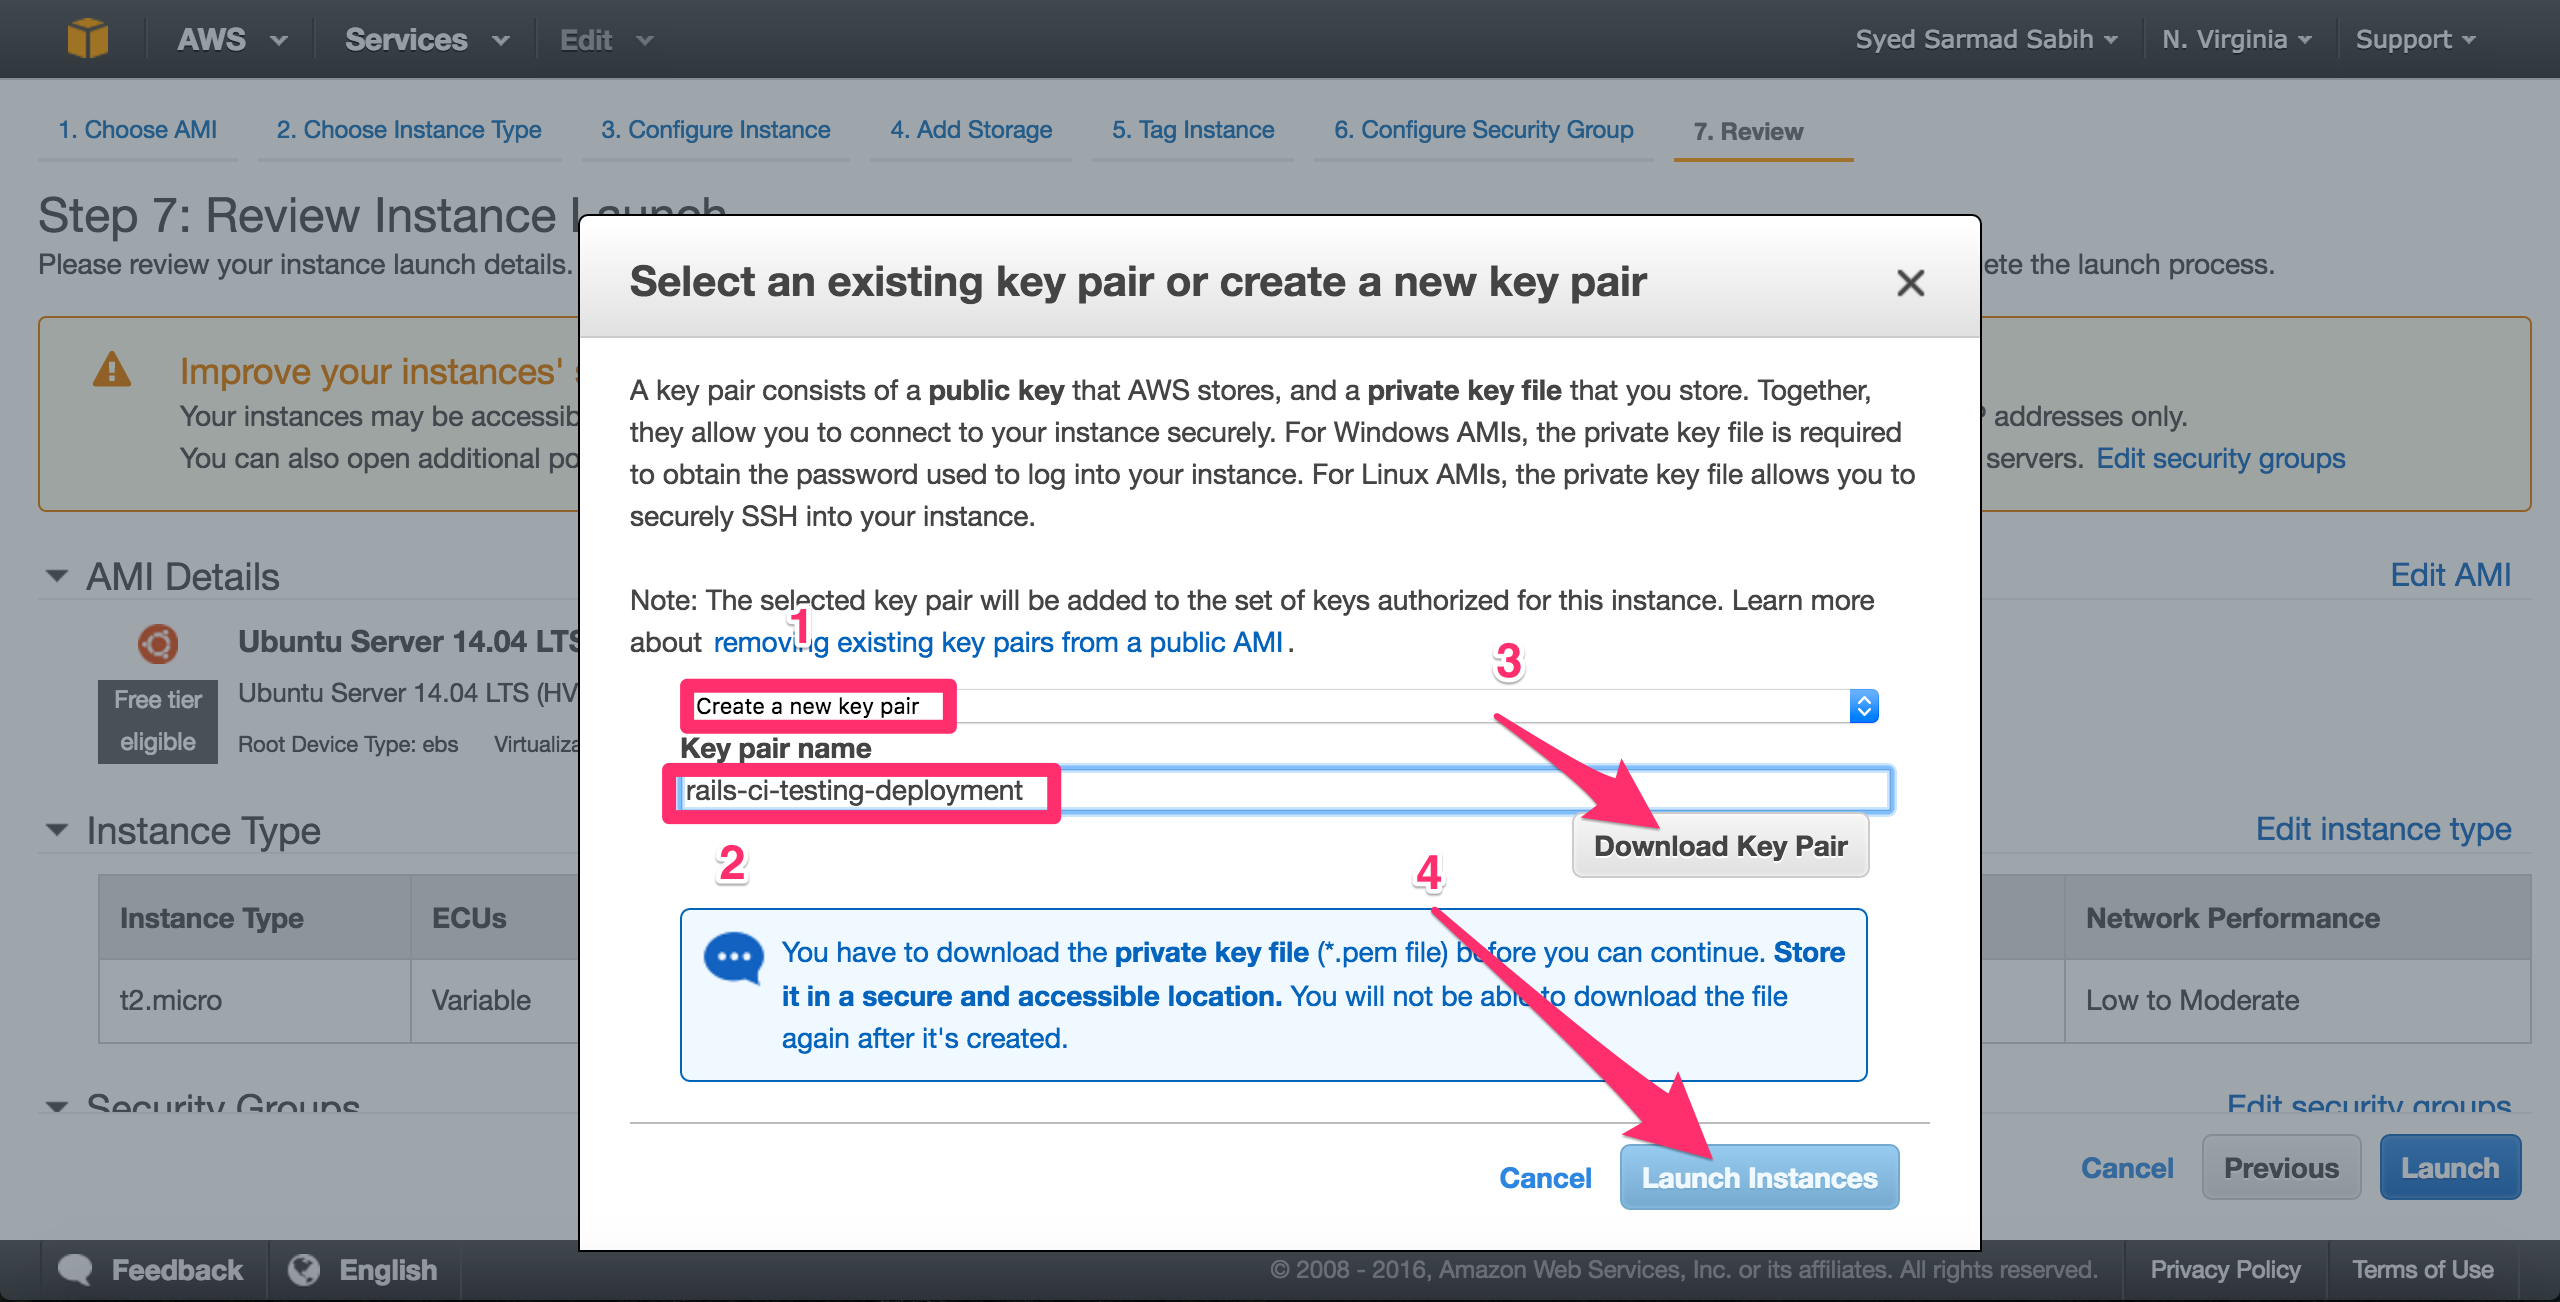
Pay attention to this step! Select “Create a new key pair” from the first drop down. Enter the name for the key pair in the input field and then download the key pair. Warning! You cannot download the key pair again after this screen. If you lose this key, you won’t be able to ssh into your Amazon EC2 instance ever (not exactly true, but it’s a pain to do so). So, download the key pair (.pem file) and keep it safe.
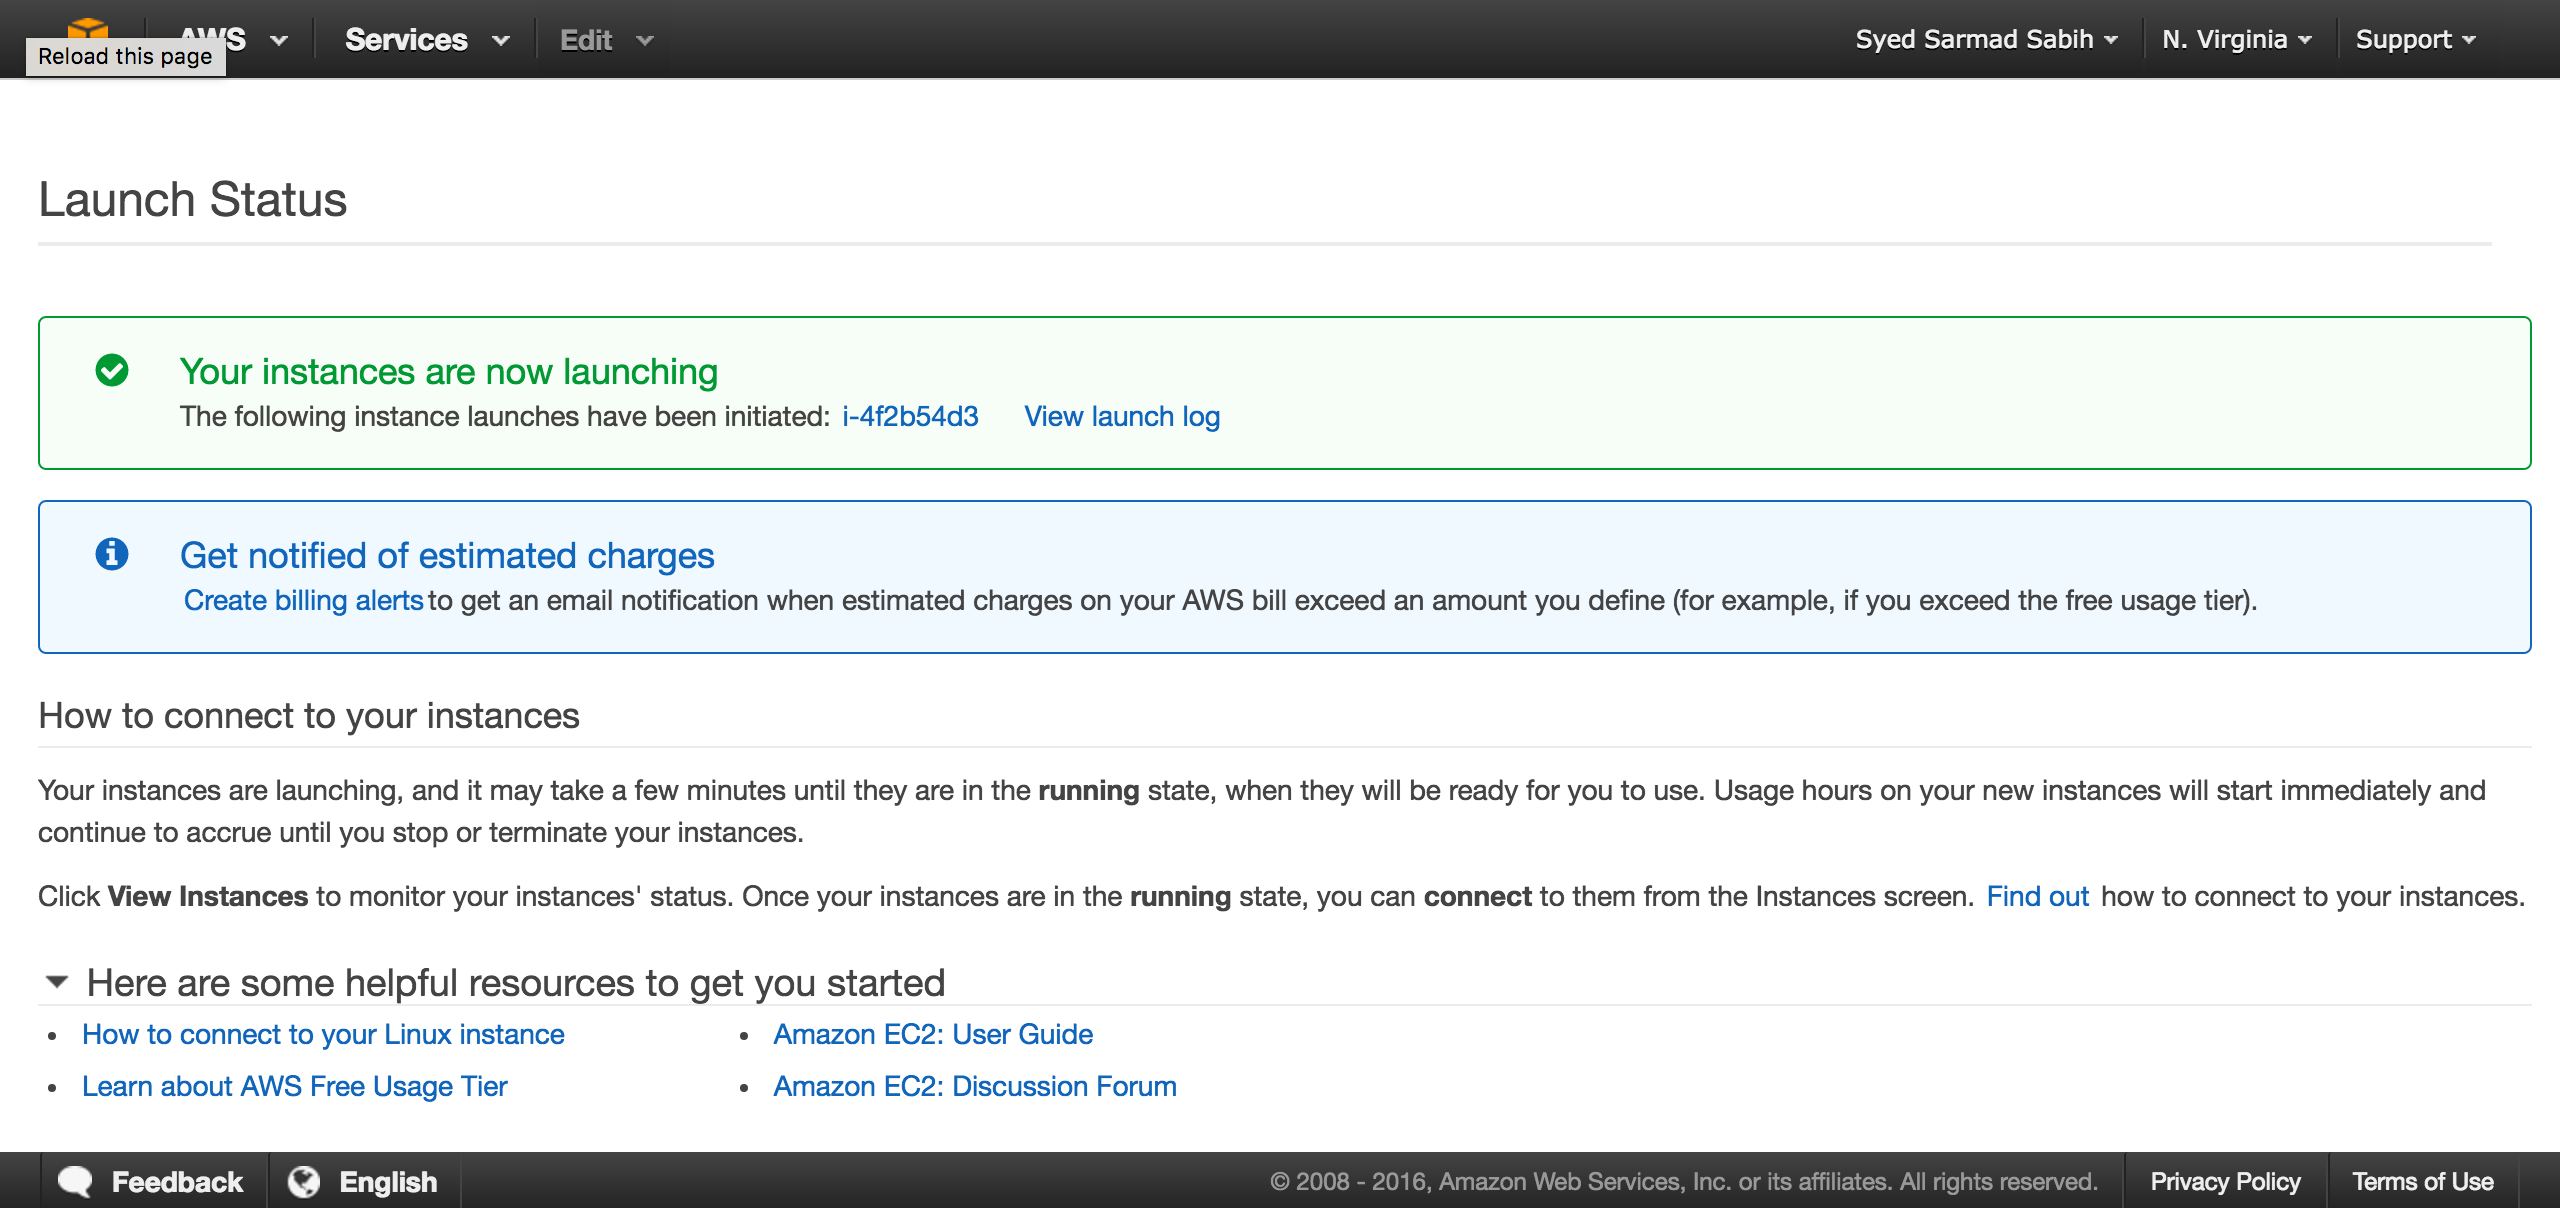
Click “Launch Instance” to finally launch the instance:
Your instance is launched:
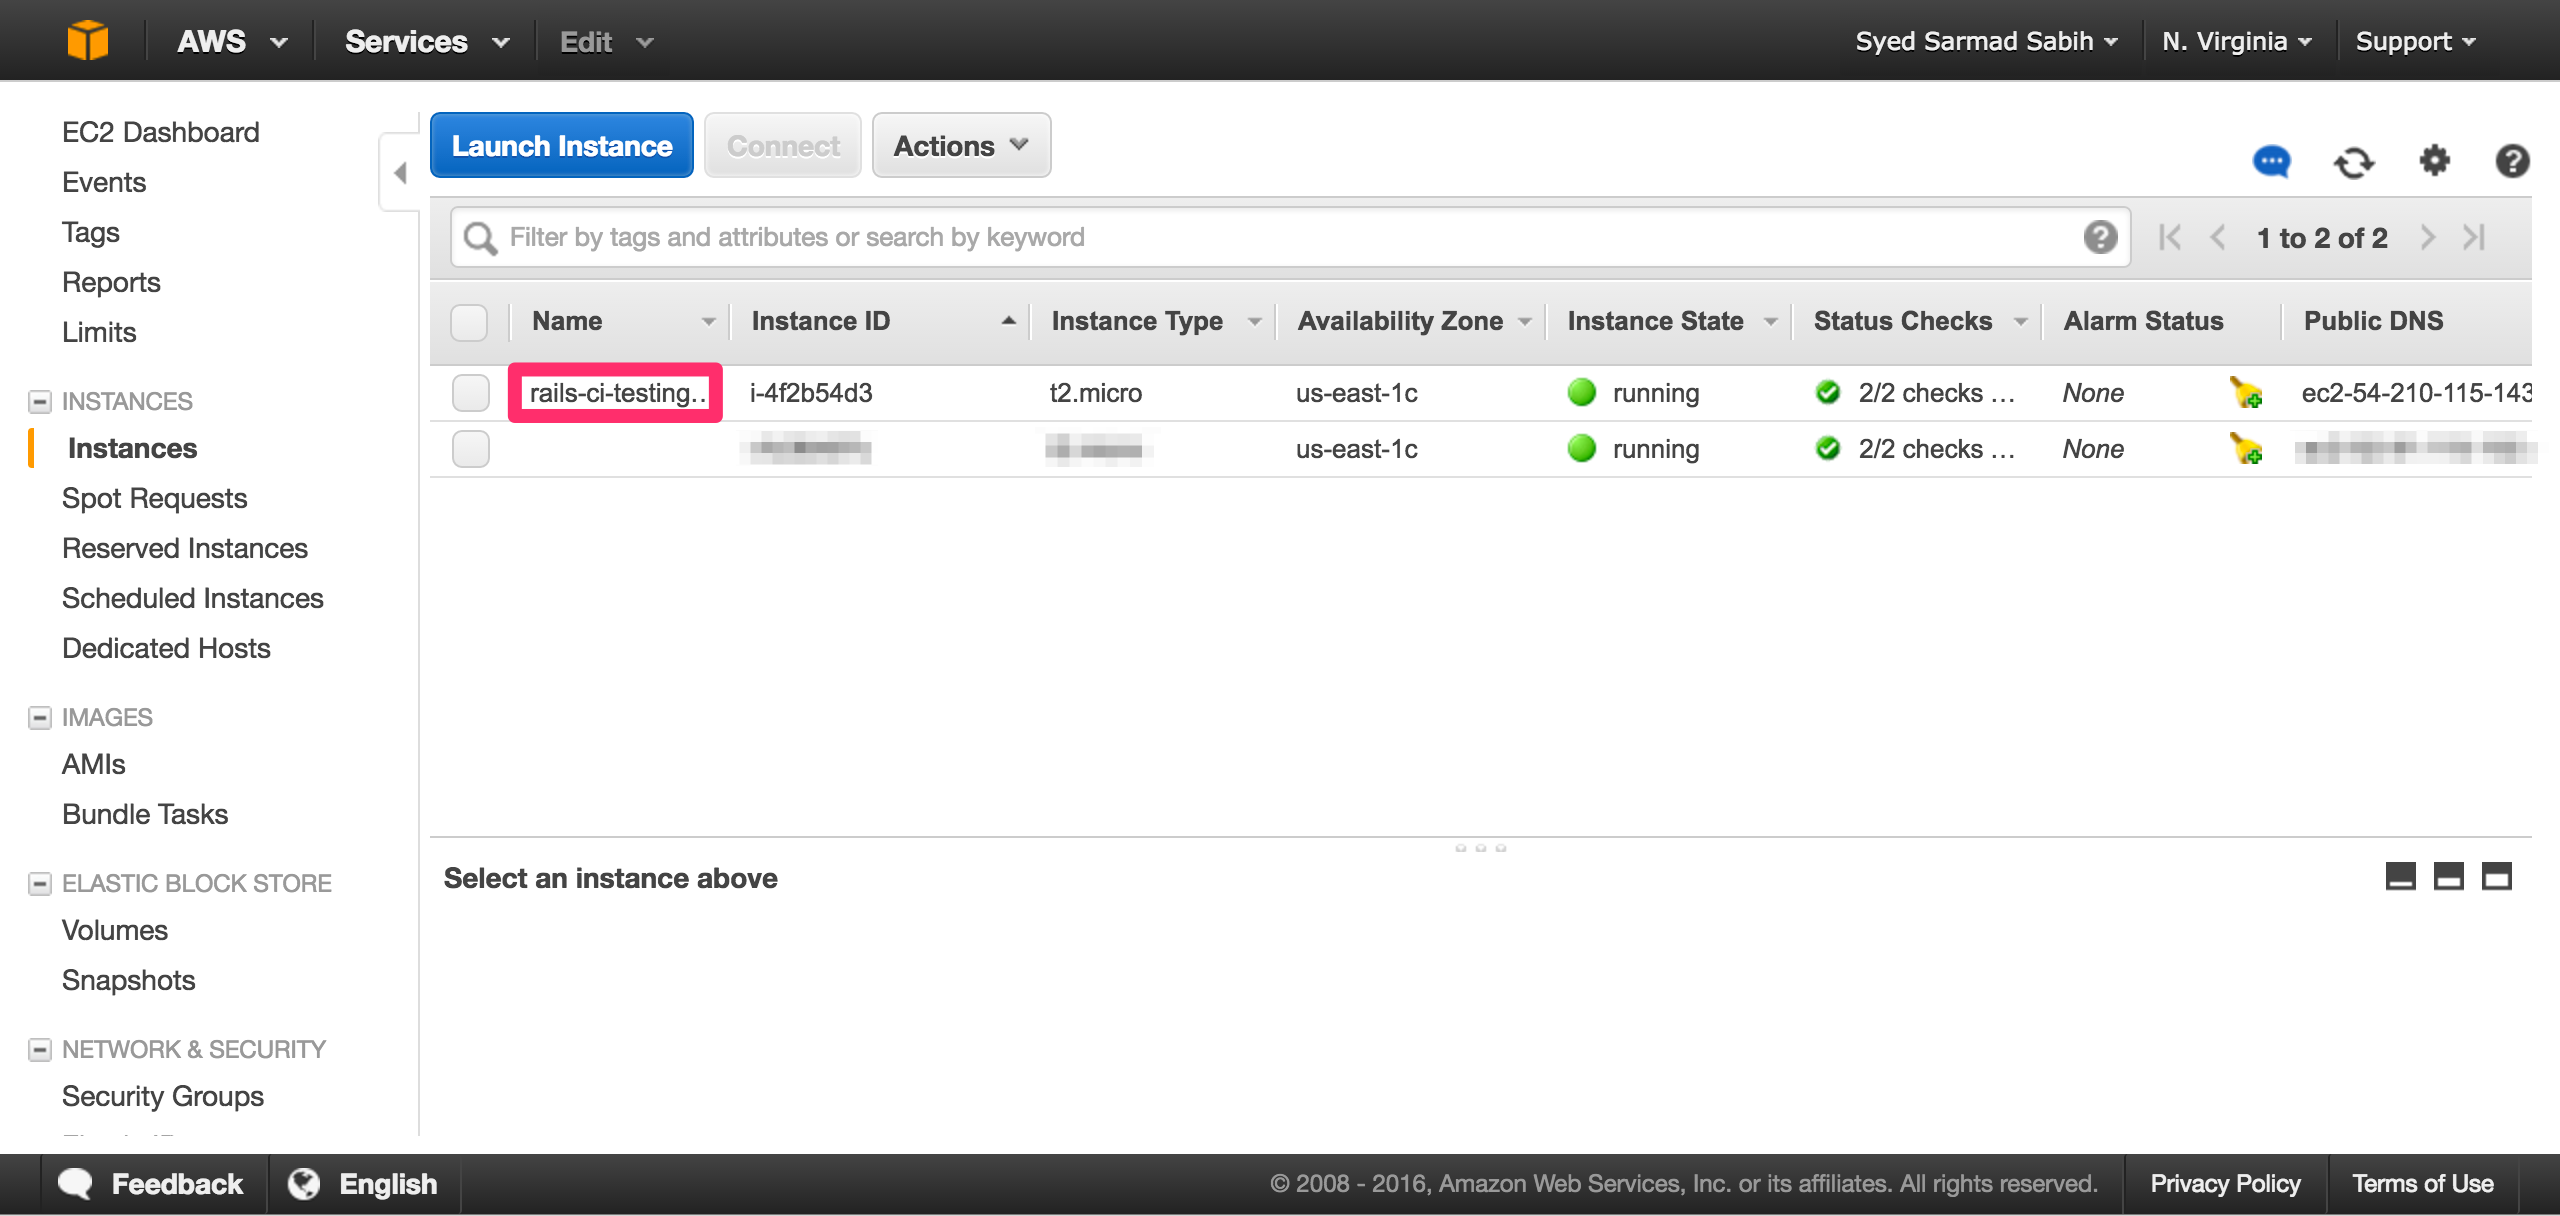
This is the page where all your instances are listed. Verify that your instance is in “Running” state and all status checks have passed:
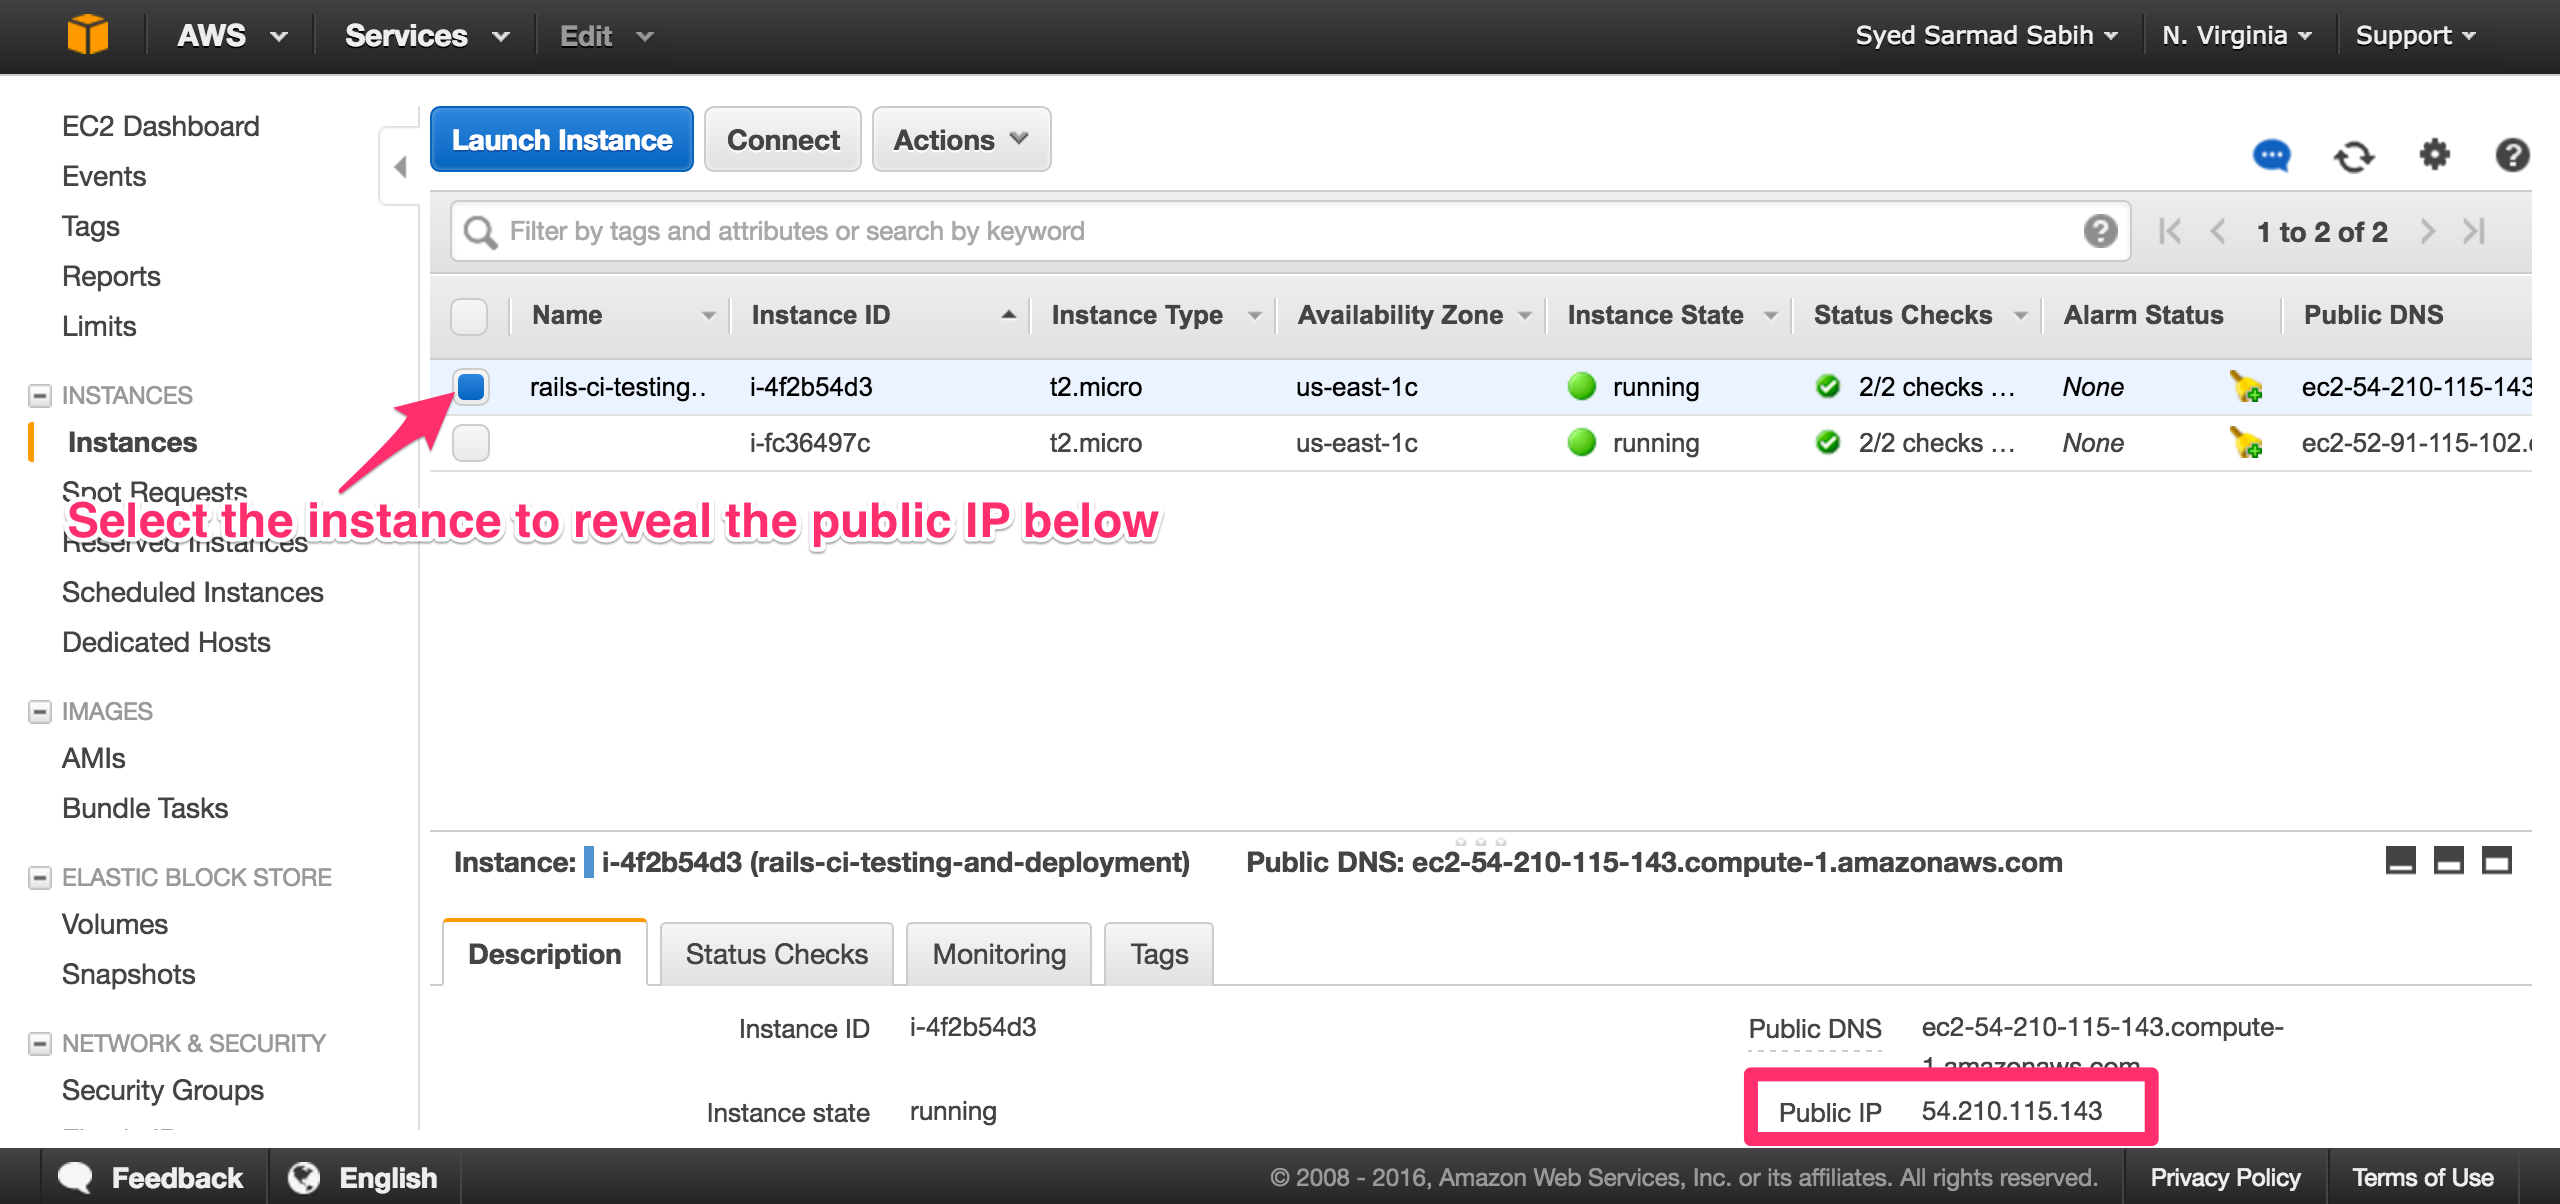
Select your instance and you will be able to see the Public IP of the instance in the bottom area of the page. Copy the Public IP, we’re going to need it shortly:
cd to the location where your .pem file is located. Mine is in my Downloads directory. Modify the following command if your pem file location is different:
$ cd ~/Downloads
Use the pwd command to get the full path to a directory:
  $ pwd
  /Users/sarmad/Downloads
You will use this path below. Don’t forget to replace the path and filename with yours. Also, replace the Public IP used below with your EC2 instance’s Public IP, the one you copied in an earlier step:
$ ssh -i "/Users/sarmad/Downloads/rails-ci-testing-deployment.pem" ubuntu@54.210.115.143
The authenticity of host '54.210.115.143 (54.210.115.143)' can't be established.
ECDSA key fingerprint is SHA256:pvhV+Nlz8erA0/crpI7QTNvYigQY2KYNoXDTcaifyBE.
Are you sure you want to continue connecting (yes/no)?
Type “yes” and press Enter. You should see:
Warning: Permanently added '54.210.115.143' (ECDSA) to the list of known hosts. @@@@@@@@@@@@@@@@@@@@@@@@@@@@@@@@@@@@@@@@@@@@@@@@@@@@@@@@@@@
@         WARNING: UNPROTECTED PRIVATE KEY FILE!          @ @@@@@@@@@@@@@@@@@@@@@@@@@@@@@@@@@@@@@@@@@@@@@@@@@@@@@@@@@@@
Permissions 0644 for '/Users/sarmad/Downloads/rails-ci-testing-deployment.pem' are too open.
As the message suggests, the permissions of your .pem file are too open, so we need to fix that. Run this command:
$ chmod 400 /Users/sarmad/Downloads/rails-ci-testing-deployment.pem
This will fix the problem. Now, run the ssh command again:
$ ssh -i "/Users/sarmad/Downloads/rails-ci-testing-deployment.pem" ubuntu@54.210.115.143
It should log you into your EC2 instance. Update the existing packages first:
ec2$ sudo apt-get update && sudo apt-get -y upgrade
Add a new user which will be used to make deployments by Capistrano. Name the user whatever you like:
ec2$ sudo useradd -d /home/sarmad -m sarmad
Set a password for the new user
ec2$ sudo passwd sarmad
Enter new UNIX password:
Retype new UNIX password:
passwd: password updated successfully
Now let’s grant our new user sudo rights:
ec2$ sudo visudo
Paste this line into the file which is opened:
sarmad ALL=(ALL:ALL) ALL
Hit CTRL+o, press Enter and CTRL+x to save and exit.
Login with the new user with this command
ec2$ su - sarmad
Enter the password. This will log you in as the sarmad (or whatever you’ve named it) user:
Create an SSH key with ssh-keygen. Press Enter on every prompt for default:
ec2$ cat .ssh/id_rsa.pub
You need to add the EC2 public key to your Bitbucket account so the EC2 user can access your repo.. Follow this and this link for more information on adding an SSH key to a Bitbucket account.
Copy EC2 Private Key for Later Use
Now copy EC2 sarmad user’s private key:
ec2$ cat id_rsa
-----BEGIN RSA PRIVATE KEY-----
some_long_random_string
-----------------------------
-----------------------------
-----------------------------
-----------------------------
-----END RSA PRIVATE KEY-----
Copy this somewhere as we’ll need it later.
Copy Your Development Machine’s Public Key to EC2
We now need to copy your local development machine’s public key to EC2. This will be used by Capistrano to SSH into the EC2 instance as the sarmad user (the user we created for deployments). Run this on EC2 terminal:
ec2$ nano .ssh/authorized_keys
Paste the local development machine’s public key in this file. Press CTRL+o, press Enter, then press CTRL+x to save and exit. Capistrano on your local development machine can now SSH into the deployment server as this user.
Configure the EC2 Environment
Install Ruby
Although we can install Ruby directly, it’s highly adopted and recommended that we use some kind of a Ruby version manager. There are two popular choices. Rbenv and RVM. We are going to use RVM. Install RVM with these commands:
ec2$ gpg --keyserver hkp://keys.gnupg.net --recv-keys 409B6B1796C275462A1703113804BB82D39DC0E3
ec2$ \curl -sSL https://get.rvm.io | bash -s stable
Source RVM as per this post install message:
* To start using RVM you need to run `source /home/sarmad/.rvm/scripts/rvm` in all your open shell windows, in rare cases you need to reopen all shell windows.
Run
ec2$ source /home/sarmad/.rvm/scripts/rvm
Install the latest stable MRI Ruby:
ec2$ rvm install ruby
In this case, Ruby-2.3.0 is installed. You can also install Ruby 2.3.0 by this command rvm install 2.3.0.
We need to install the bundler gem
ec2$ gem install bundler --no-ri --no-rdoc
Create a project directory
ec2$ mkdir rails-ci-testing-and-deployment-to-ec2-capistrano
Install NGINX
You can read more here about NGINX.
ec2$ sudo apt-get install nginx
Enter the password for sarmad and press Enter to confirm. Now, configure the default site. Open the site config file:
ec2$ sudo nano /etc/nginx/sites-available/default
Remove the existing content and paste in the following:
upstream app {
  # Path to Puma SOCK file, as defined previously
  server unix:///home/sarmad/rails-ci-testing-and-deployment-to-ec2-capistrano/shared/tmp/sockets/puma.sock fail_timeout=0;
}

server {
  listen 80;
  server_name localhost;

  root /home/sarmad/rails-ci-testing-and-deployment-to-ec2-capistrano/current/public;

  try_files $uri/index.html $uri @app;

  location / {
    proxy_set_header X-Forwarded-Proto $scheme;
    proxy_set_header X-Forwarded-For $proxy_add_x_forwarded_for;
    proxy_set_header X-Real-IP $remote_addr;
    proxy_set_header Host $host;
    proxy_redirect off;
    proxy_http_version 1.1;
    proxy_set_header Connection '';
    proxy_pass http://app;
  }

  location ~ ^/(assets|fonts|system)/|favicon.ico|robots.txt {
    gzip_static on;
    expires max;
    add_header Cache-Control public;
  }

  error_page 500 502 503 504 /500.html;
  client_max_body_size 4G;
  keepalive_timeout 10;
}
Go through this config file slowly to understand the config. It’s pretty simple, really.
Install Git
ec2$ sudo apt-get install git
Accept the defaults.
Install PostgreSQL
ec2$ sudo apt-get install postgresql postgresql-contrib libpq-dev
Again, accept the defaults. You should see the following:
* Starting PostgreSQL 9.3 database server                                 [ OK ]
Setting up postgresql (9.3+154ubuntu1) ...
Setting up postgresql-contrib-9.3 (9.3.13-0ubuntu0.14.04) ...
Setting up postgresql-contrib (9.3+154ubuntu1) ...
Processing triggers for libc-bin (2.19-0ubuntu6.9) ...
Create a datbase user. I’m naming mine sarmad, but you can name it something else:
ec2$ sudo -u postgres createuser -s sarmad
Login to the PSQL console with this command:
ec2$ sudo -u postgres psql
Change the user’s password:
postgres=# \password sarmad
Enter a password which will be used to connect to the database server. Confirm the password and we’re set.
Exit from the postgres prompt:
postgres=# \q
And press Enter. Now let’s create a production DB for our app:
ec2$ sudo -u postgres createdb -O sarmad rails-ci-testing-and-deployment-to-ec2-capistrano_production
Back in the Rails project, your * config/database.yml* should look like this:
default: &default
  adapter: postgresql
  encoding: unicode
  # For details on connection pooling, see rails configuration guide
  # http://guides.rubyonrails.org/configuring.html#database-pooling
  pool: 5

development:
  <<: *default
  database: rails-ci-testing-and-deployment-to-ec2-capistrano_development

test:
  <<: *default
  database: rails-ci-testing-and-deployment-to-ec2-capistrano_test

production:
  <<: *default
  database: rails-ci-testing-and-deployment-to-ec2-capistrano_production
  username: sarmad
  password: sarmad
  host: localhost
  port: 5432
Don’t forget to substitute any information which is different to what you’ve setup for yourself, like database name, username or password.
You may want to store DB username and password in a more confidential way. But since we are using a private repository and the scope of this tutorial is just to quickly setup CI with Rails, we can put this information in this file for now.
Create a Secret for Production
Run this command in your local (Not in EC2) project directory to generate a secret:
$ rake secret
80a602e4c5c8c173dd3d00b1492c7f952030552bf747467578be8efdc545d2e8e491497081be4fd4e15627a2e811bf47e89950db6a5162da6932eb2edb204c3a
Copy the secret and put it in the config/secrets.yml:
production:
  secret_key_base: 80a602e4c5c8c173dd3d00b1492c7f952030552bf747467578be8efdc545d2e8e491497081be4fd4e15627a2e811bf47e89950db6a5162da6932eb2edb204c3a
This is again a sensitive information which you may want to store confidentially, but to keep things simple, this will work for now.
Configure Capistrano
Let’s configure Capistrano in our project. Capistrano supports Puma and RVM. Copy these gems to your Gemfile:
gem "therubyracer", platforms: :ruby, group: :production
gem "puma"
group :developemnt do
  gem "capistrano3-puma"
  gem "capistrano"
  gem "capistrano-bundler", require: false
  gem "capistrano-rvm"
  gem "capistrano-rails", require: false
end
Run bundle install to install the new gems.
Let’s setup Capistrano by generating the config files for your environment, setting the STAGES to production. This will set up files for the production environment deployment.
$ cap install STAGES=production
mkdir -p config/deploy
create config/deploy.rb
create config/deploy/production.rb
mkdir -p lib/capistrano/tasks
create Capfile
Capified
These files are created as a result:
- config/deploy.rb
- config/deploy/production.rb
- Capfile
Your Capfile should look like this (Copy this to ensure correctness):
# Load DSL and set up stages
require "capistrano/setup"

# Include default deployment tasks
require "capistrano/deploy"

# Include tasks from other gems included in your Gemfile
#
# For documentation on these, see for example:
#
#   https://github.com/capistrano/rvm
#   https://github.com/capistrano/bundler
#   https://github.com/capistrano/rails
#   https://github.com/capistrano/passenger
#
require "capistrano/rvm"
require "capistrano/bundler"
require "capistrano/rails/assets"
require "capistrano/rails/migrations"
require "capistrano/puma"

# Load custom tasks from `lib/capistrano/tasks` if you have any defined
Dir.glob("lib/capistrano/tasks/*.rake").each { |r| import r }
Your config/deploy.rb file should look like this:
# config valid only for current version of Capistrano
lock '3.4.0'

# Change the application name with your application name
set :application, 'rails-ci-testing-and-deployment-to-ec2-capistrano'

# Change the repository URL with your repository URL
set :repo_url, 'git@bitbucket.org:sarmadsabih/ci-test-and-deploy-to-ec2-capistrano.git'

# Default branch is :master if you need to use some other branch then uncomment the line below
# And change the branch name with the name of the branch you want to use
# set :branch, :some_other_branch_you_may_want_to_use

# Don't forget to change the username (i.e sarmad in this case) with your username
# And the project directory with the name of your project directory
set :deploy_to, '/home/sarmad/rails-ci-testing-and-deployment-to-ec2-capistrano'

set :scm, :git

# Default value for :format is :pretty
# set :format, :pretty

# Default value for :log_level is :debug
# set :log_level, :debug

# Default value for :pty is false
set :pty, true

set :rvm_type, :user

# Edit this if you are using a different Ruby version
set :rvm_ruby_version, 'ruby-2.3.0'

# Default value for linked_dirs is []
set :linked_dirs, fetch(:linked_dirs, []).push('log', 'tmp/pids', 'tmp/cache', 'tmp/sockets', 'vendor/bundle', 'public/system')

# Default value for default_env is {}
# set :default_env, { path: "/opt/ruby/bin:$PATH" }

# Default value for keep_releases is 5
set :keep_releases, 5

# Pume config
set :puma_rackup, -> { File.join(current_path, 'config.ru') }
set :puma_state, "#{shared_path}/tmp/pids/puma.state"
set :puma_pid, "#{shared_path}/tmp/pids/puma.pid"
set :puma_bind, "unix://#{shared_path}/tmp/sockets/puma.sock"    #accept array for multi-bind
set :puma_conf, "#{shared_path}/puma.rb"
set :puma_access_log, "#{shared_path}/log/puma_error.log"
set :puma_error_log, "#{shared_path}/log/puma_access.log"
set :puma_role, :app
set :puma_env, fetch(:rack_env, fetch(:rails_env, 'production'))
set :puma_threads, [0, 8]
set :puma_workers, 0
set :puma_worker_timeout, nil
set :puma_init_active_record, true
set :puma_preload_app, false
Okay, we’re almost done with the server. Go back to your local machine to start deployment with Capistrano. Edit the config/deploy/production.rb to set the server IP. Open the file and paste the following into the file. Change the IP address to match with your EC@ server’s IP:
set :stage, :production

# Replace this EC2 server's public IP with your EC2 server's public IP
# Replace this user ('sarmad') with the one you created on your EC2 instance
server '54.210.115.143', user: 'sarmad', roles: %w{web app db}
Commit and push to our Bitbucket repo:
$ git add -A
$ git commit -m "ready for first deployment"
$ git push origin master
Now let’s start the deployment using Capistrano:
$ cap production deploy
The first deployment takes some time. Sit tight. This process will deploy the app, migrate the DB, and start your application server.
SSH into your EC2 instance and restart NGINX for our settings to be reloaded:
ec2$ sudo service nginx restart
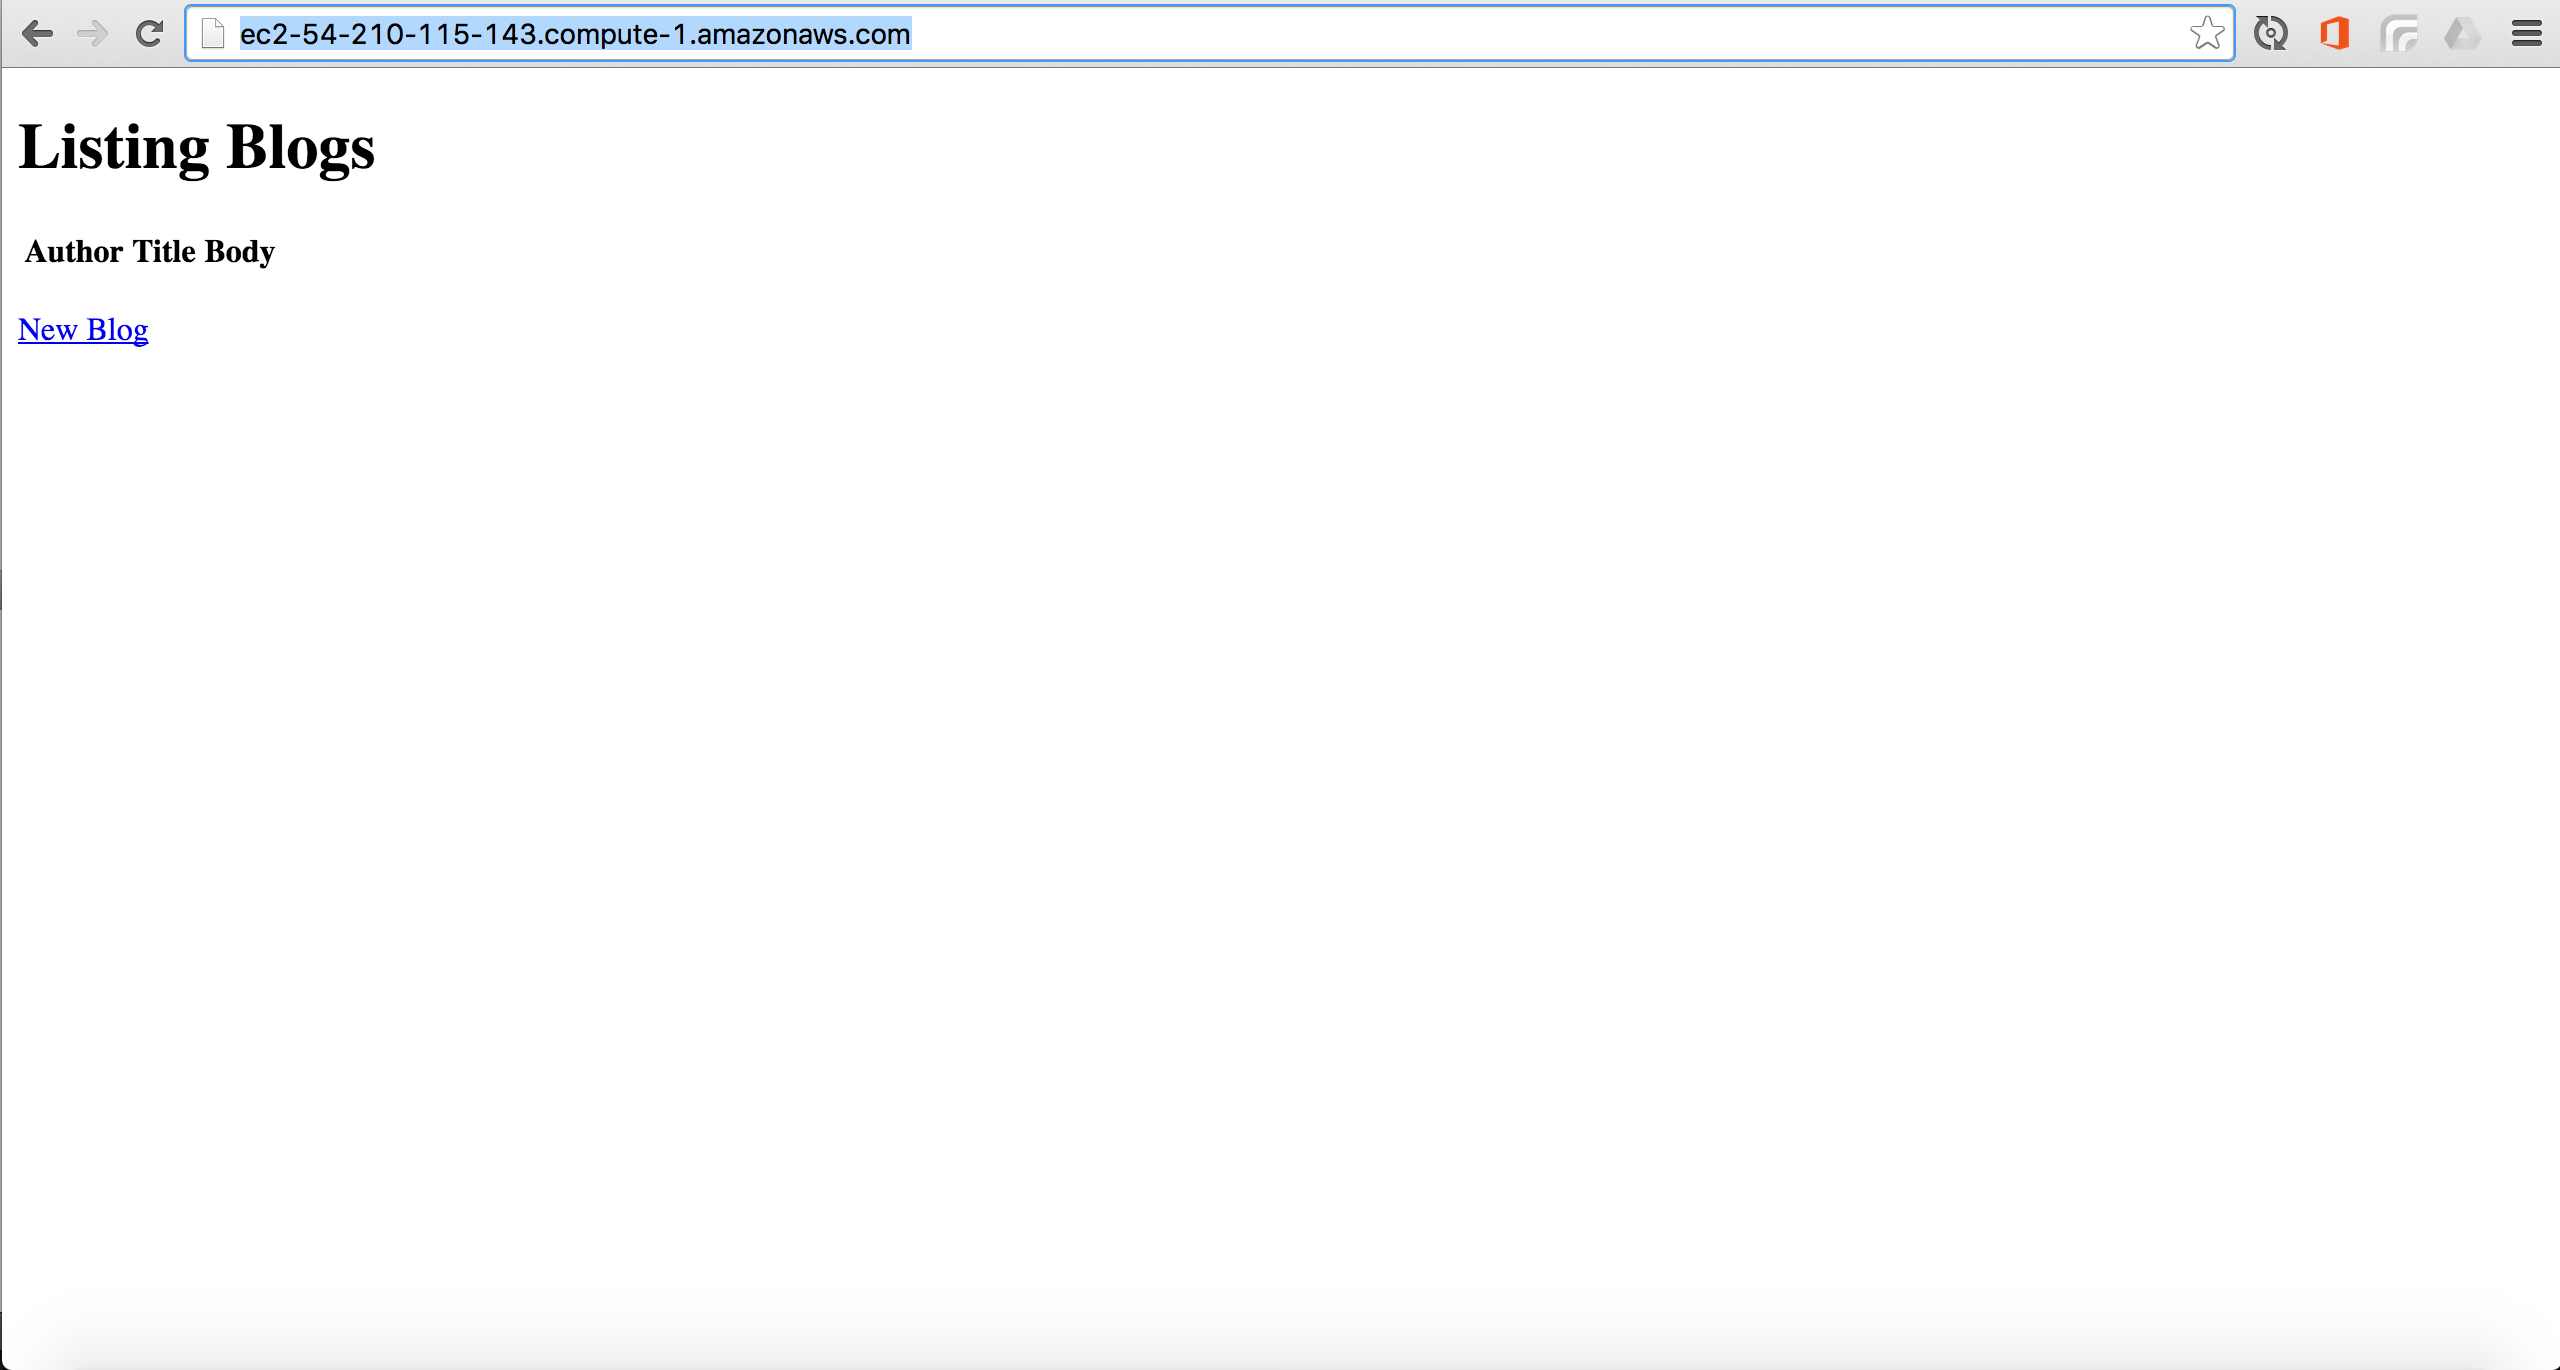
Goto http://[your EC2 Instance DNS name or Public IP] to see the app up and running:
Semaphore
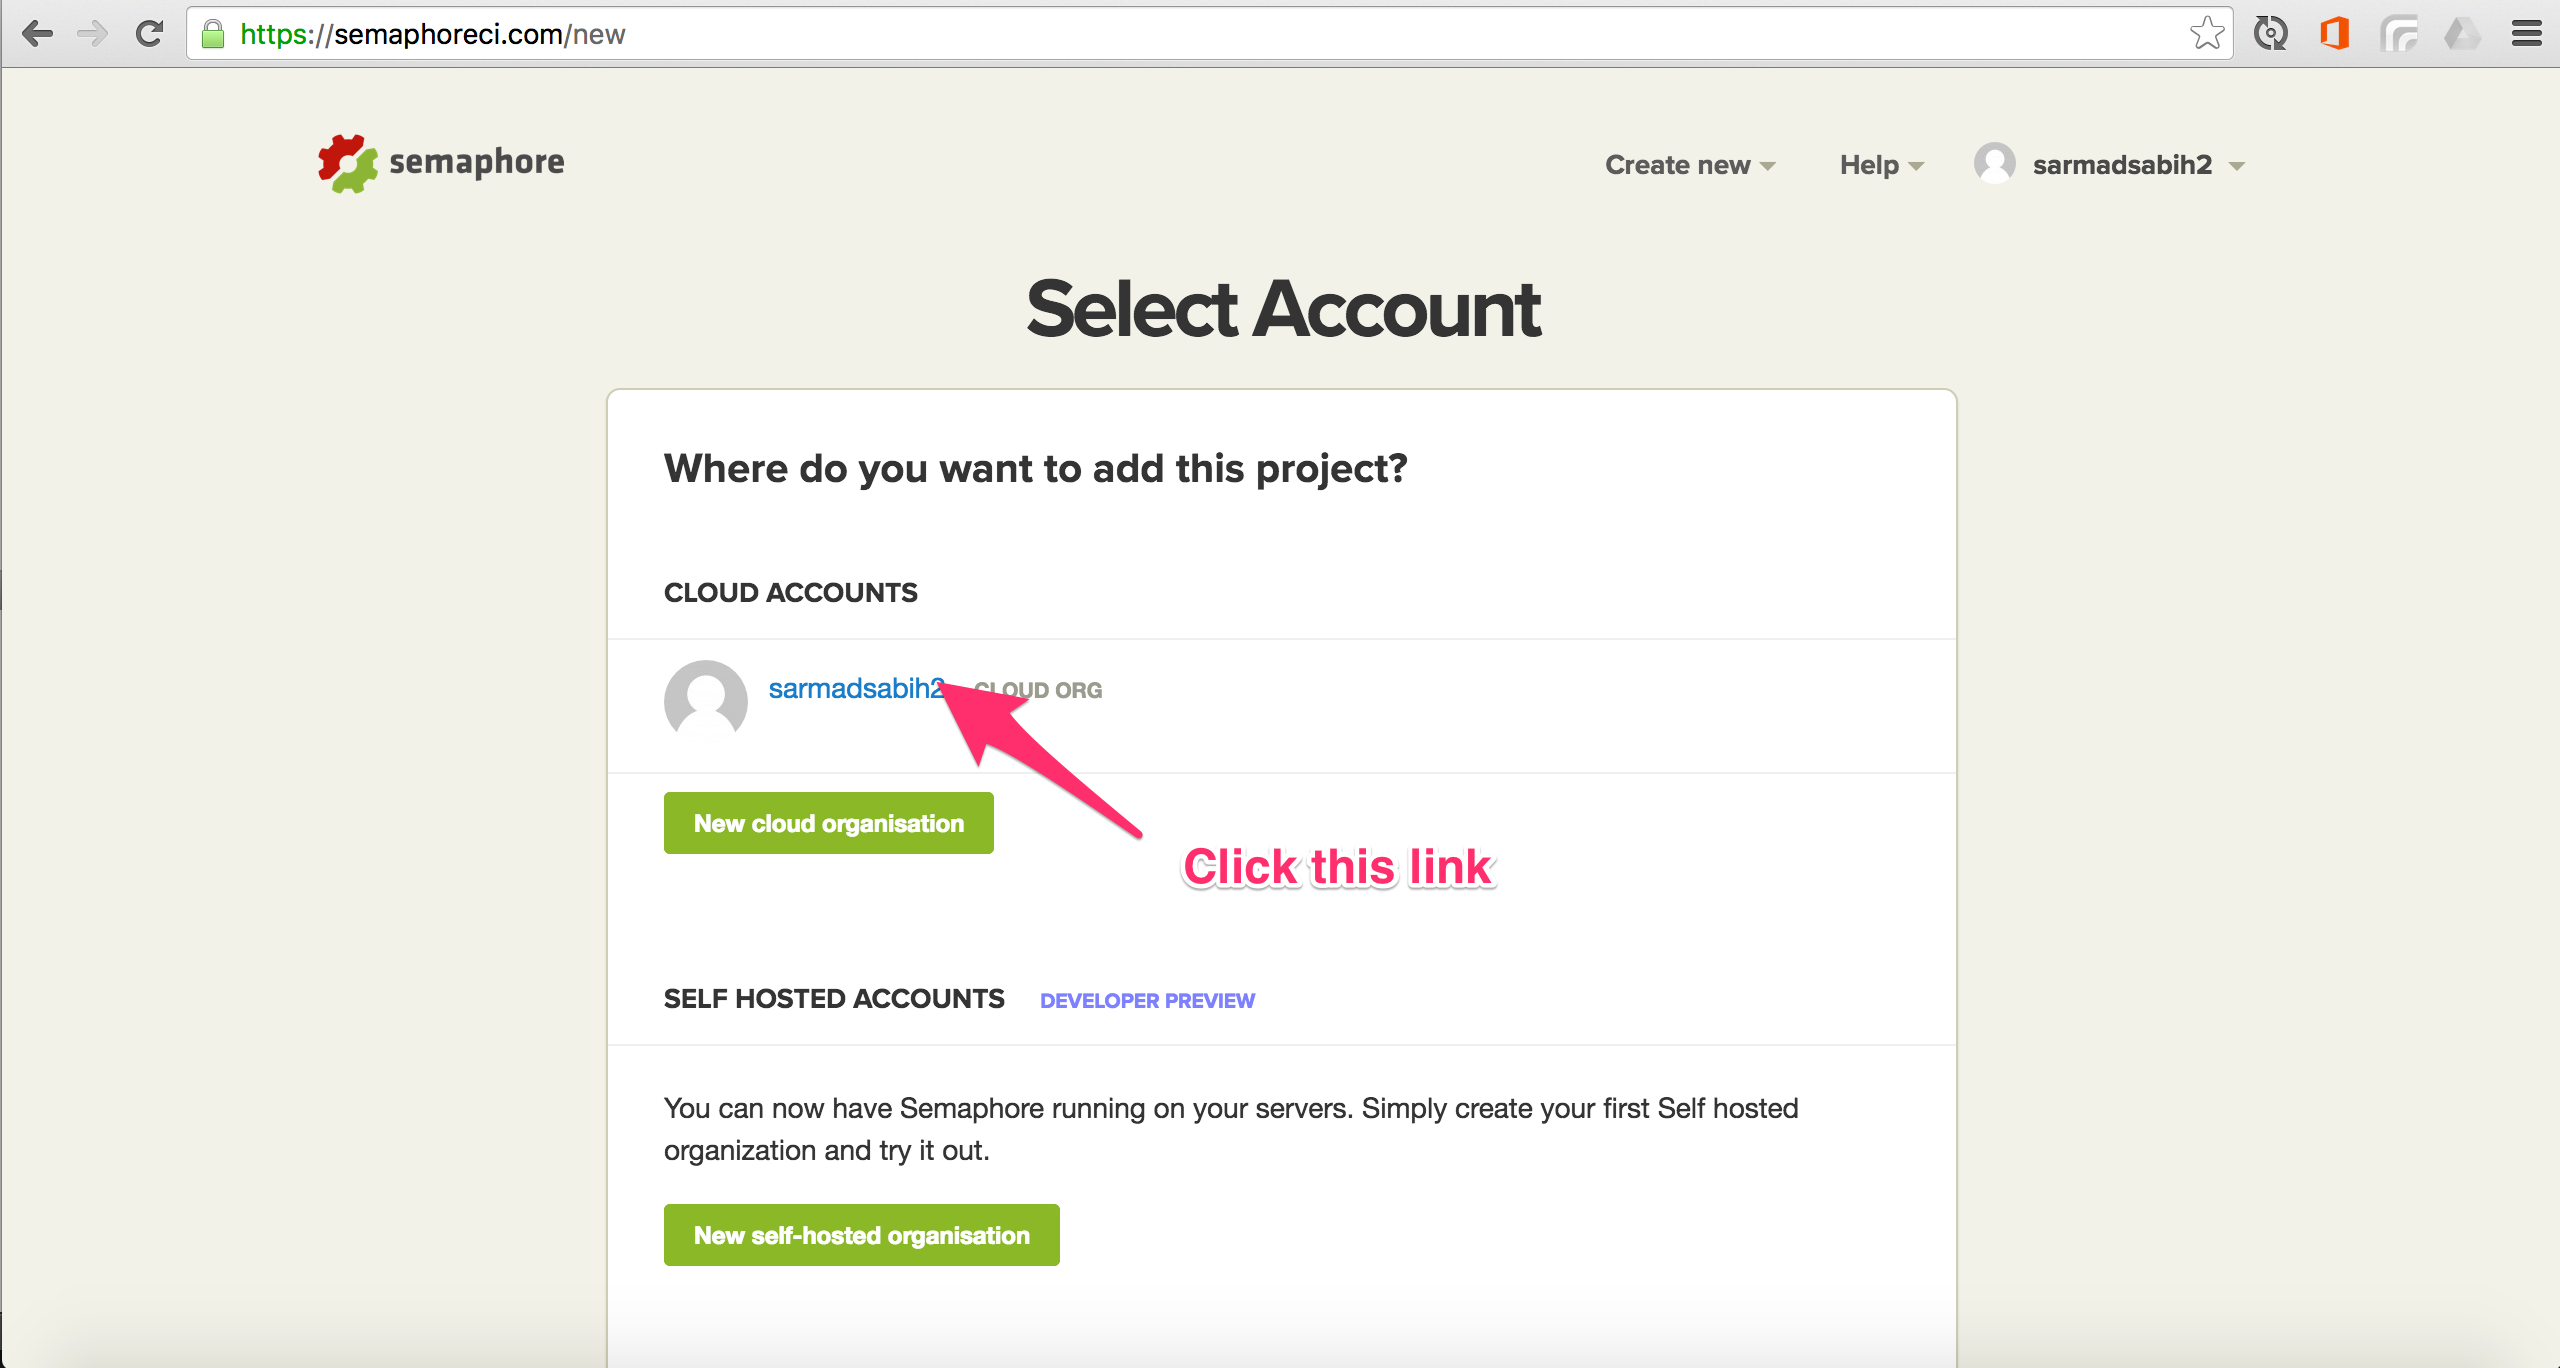
Sign up if you’re not already signed up on SemaphoreCI You’ll see this after signup. Click “Add new project”:
Click your username on the following screen:
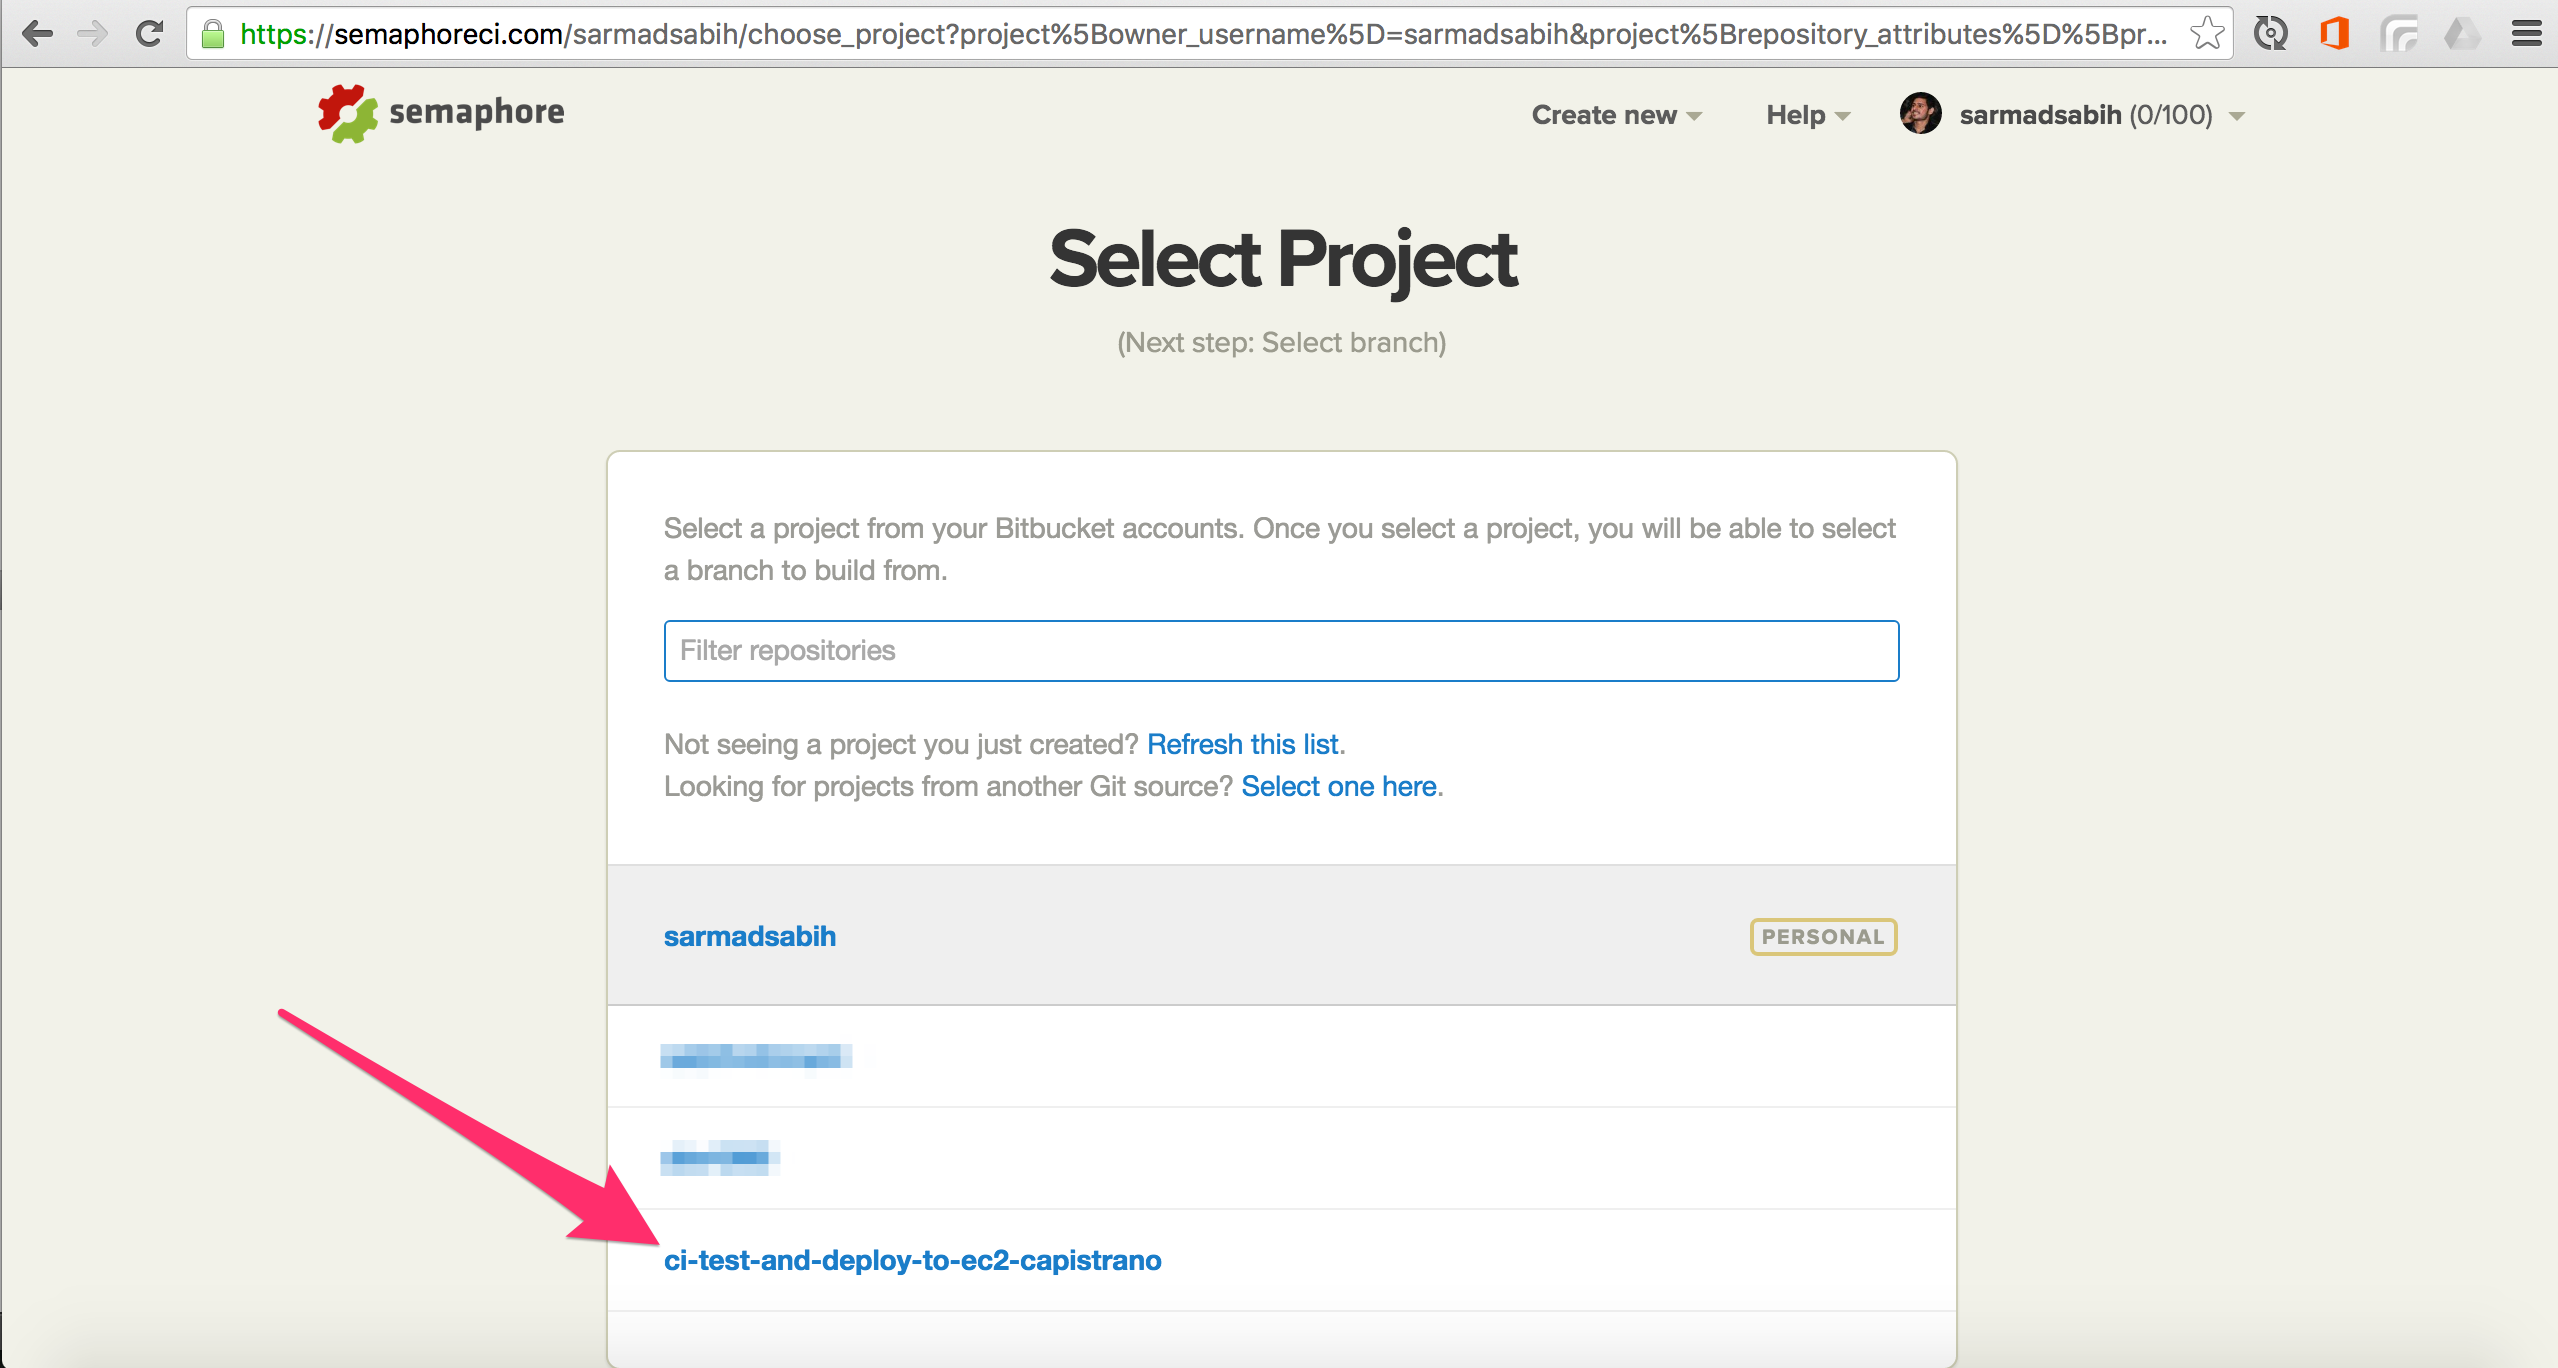
Select Bitbucket:

You’ll see a list of repositories from your Bitbucket account. Select the repo you want to add to SemaphoreCI. In our case, we’ll select the one we created for this tutorial:
Select the master branch in our case:

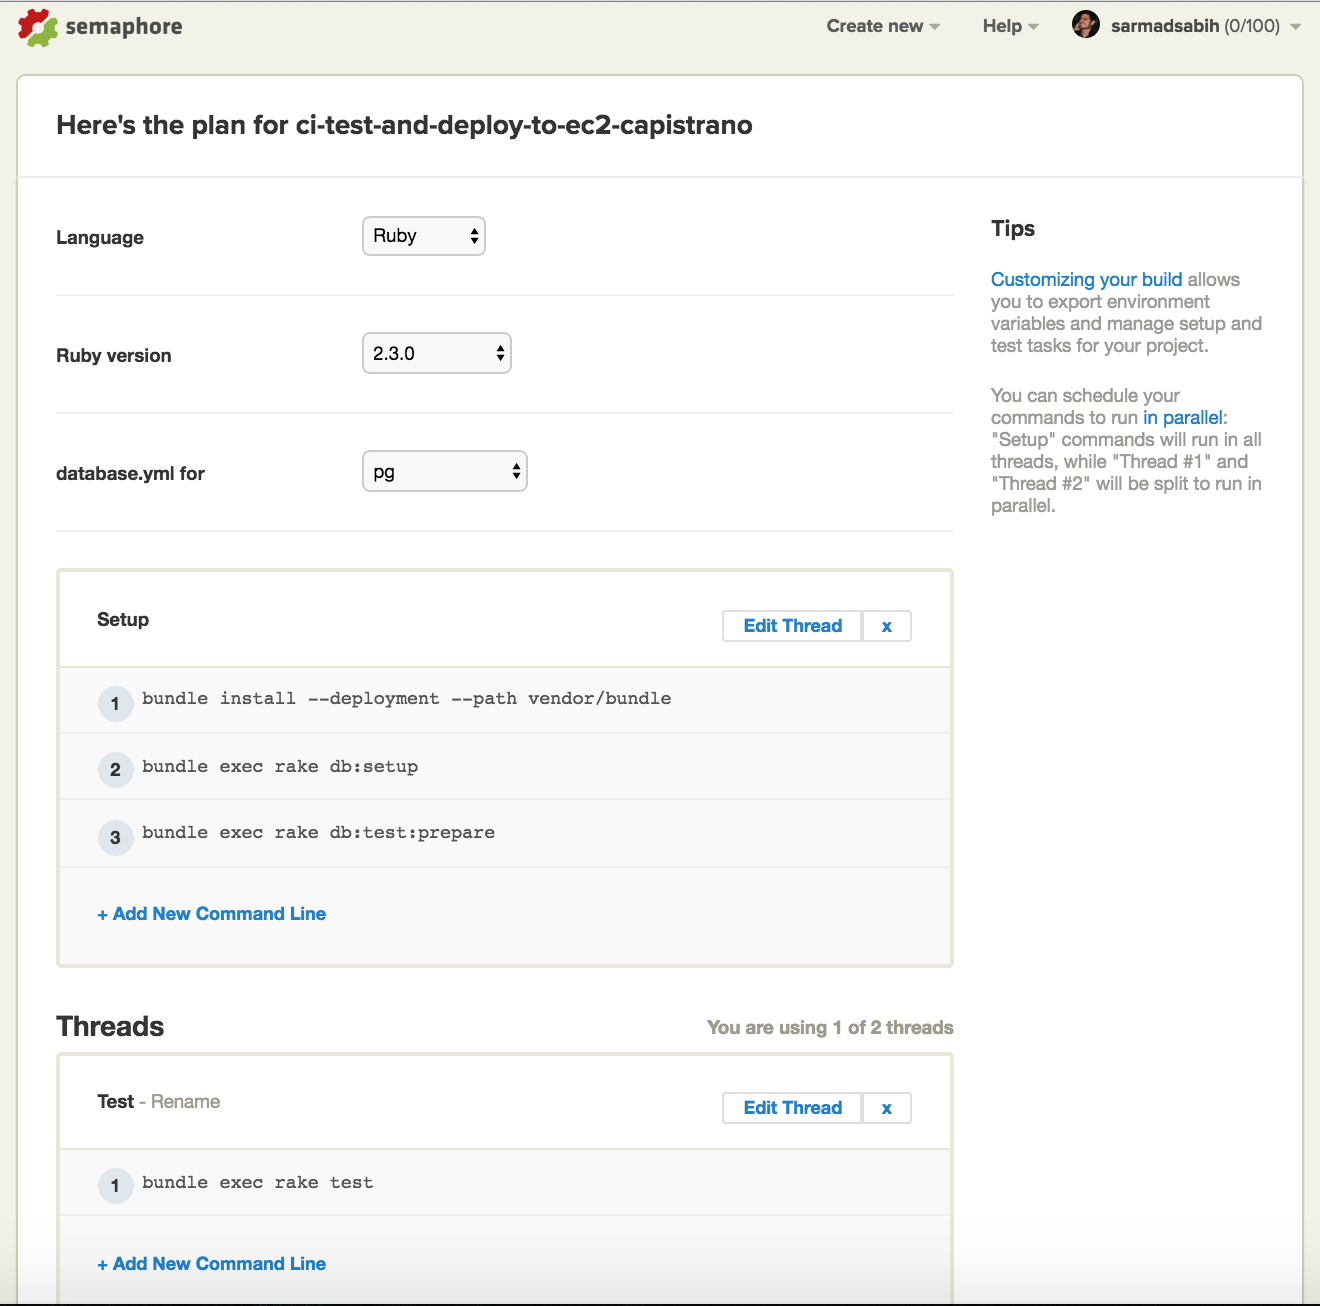
This is the settings page for your project. Match the fields selected in this screen with your project settings. Ruby 2.3.0 and PG as the database:
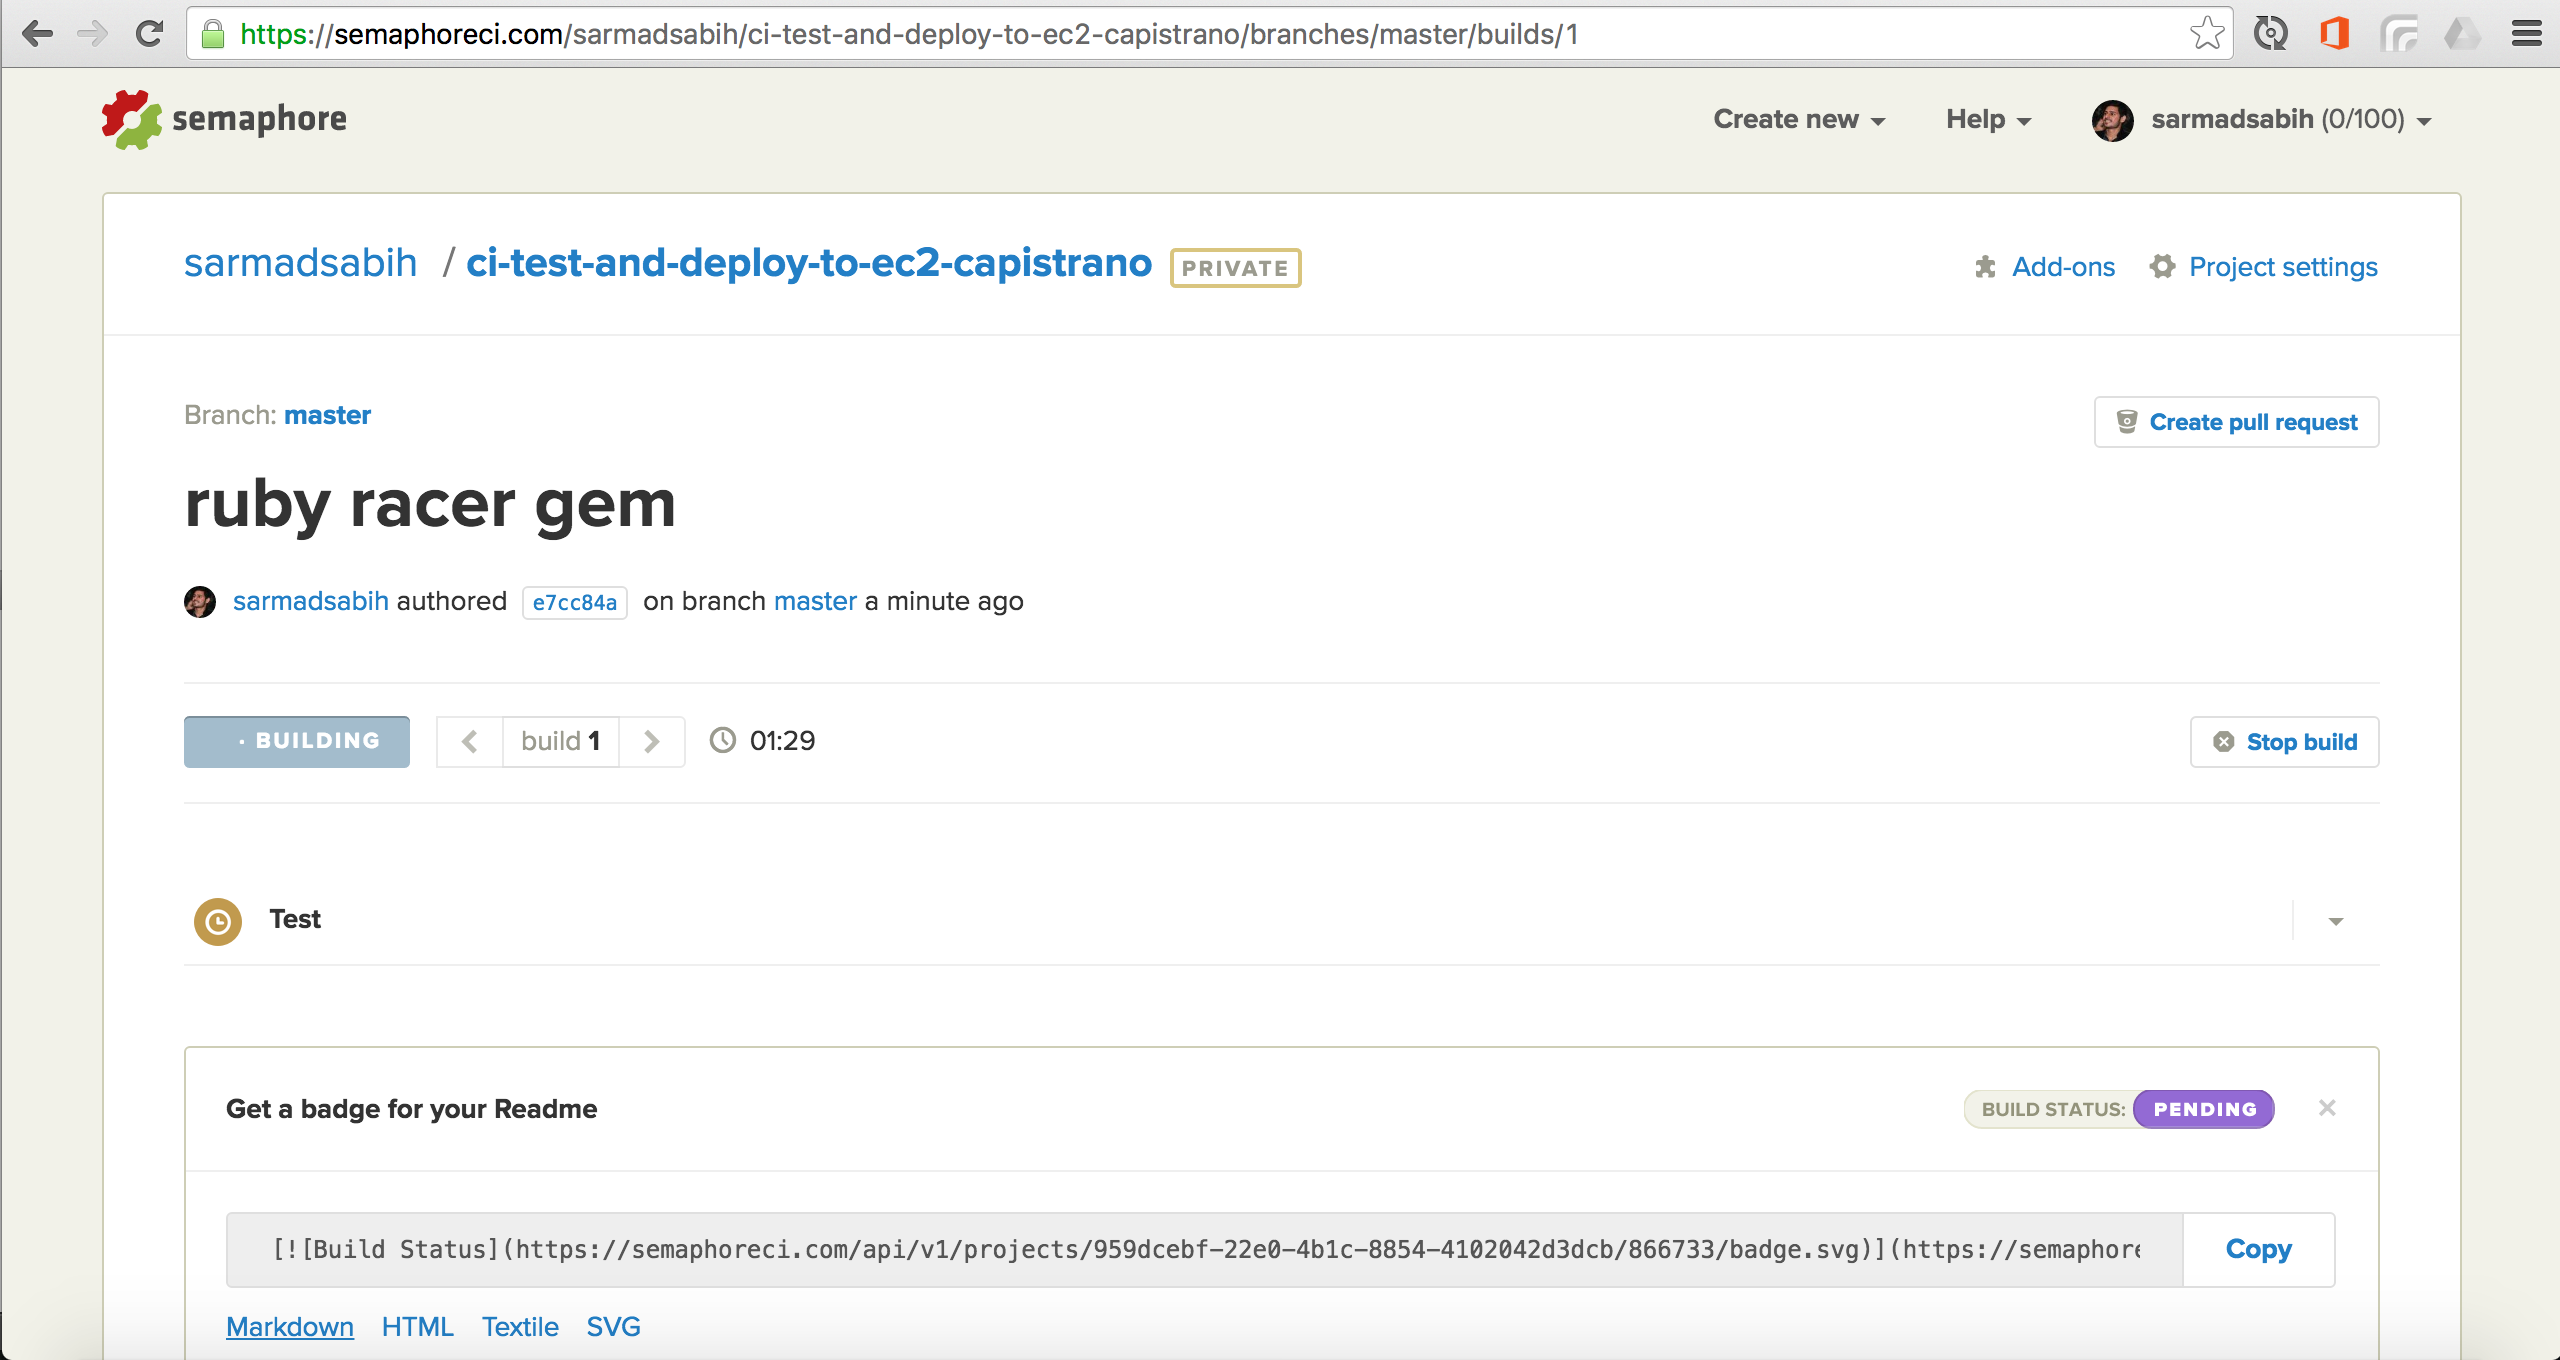
After settings, click “Build”. You can see your build in progress in the following screen:
The build is passed as a result of passing tests. In case there are failing tests, the build will fail and you’ll receive an email alert with the details of build failure.
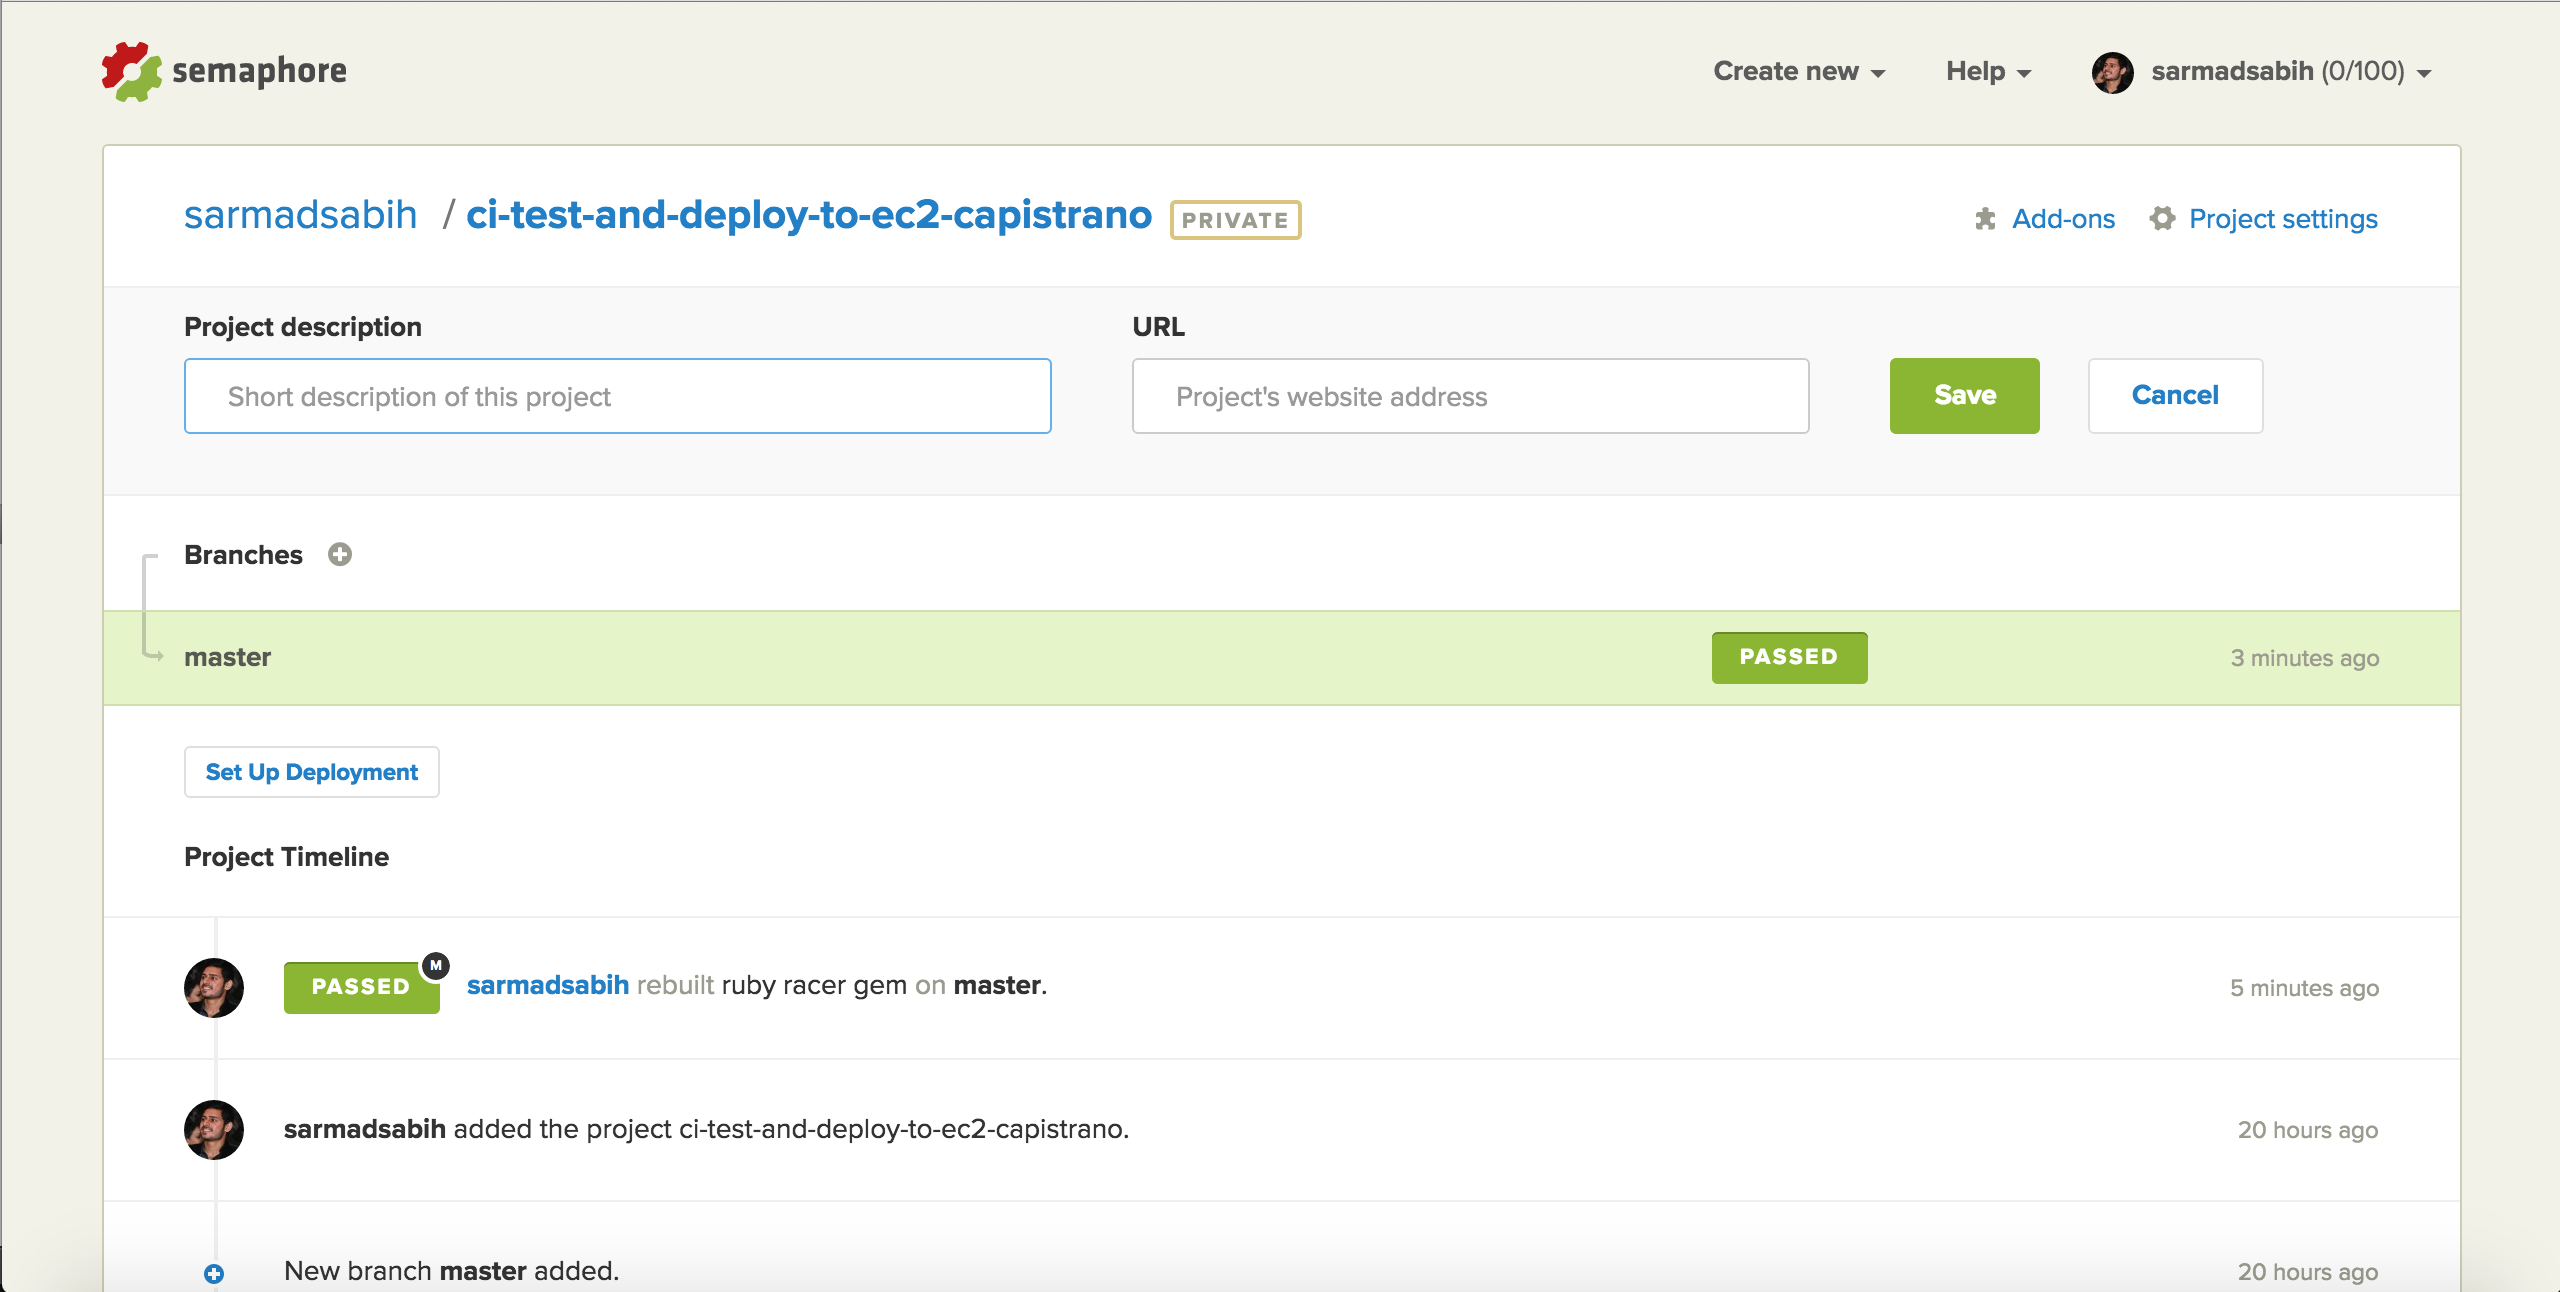
We now have a testing server setup, with 100 free private builds per month. Now, let’s setup deployment:
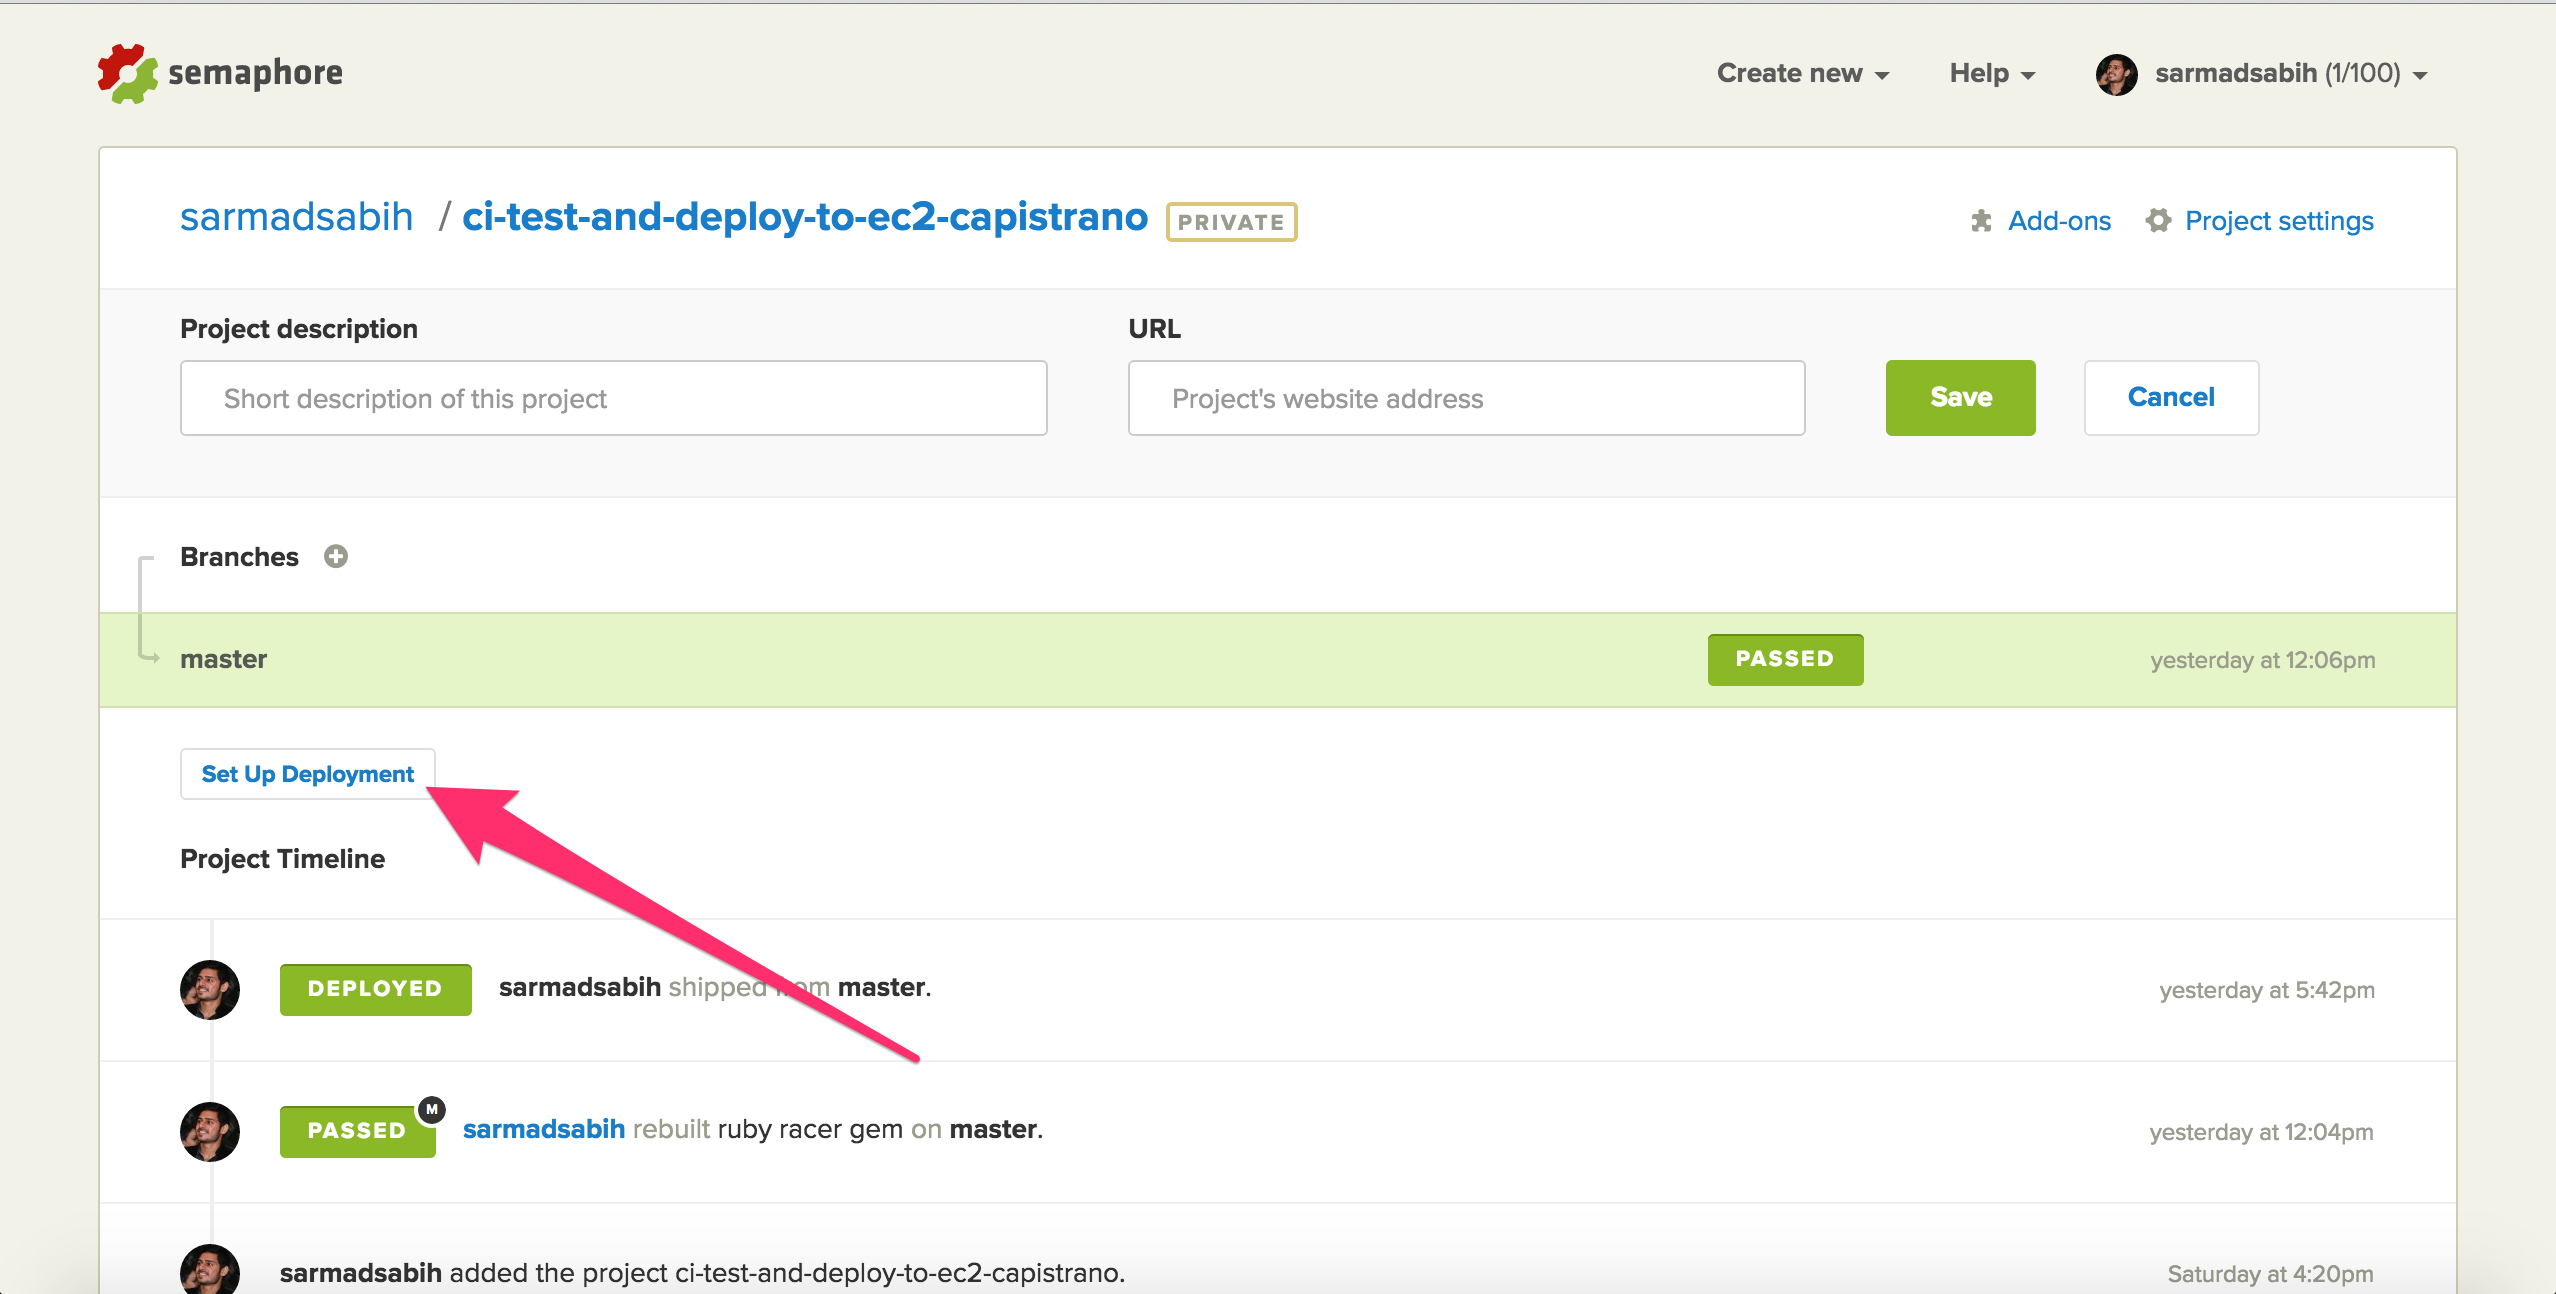
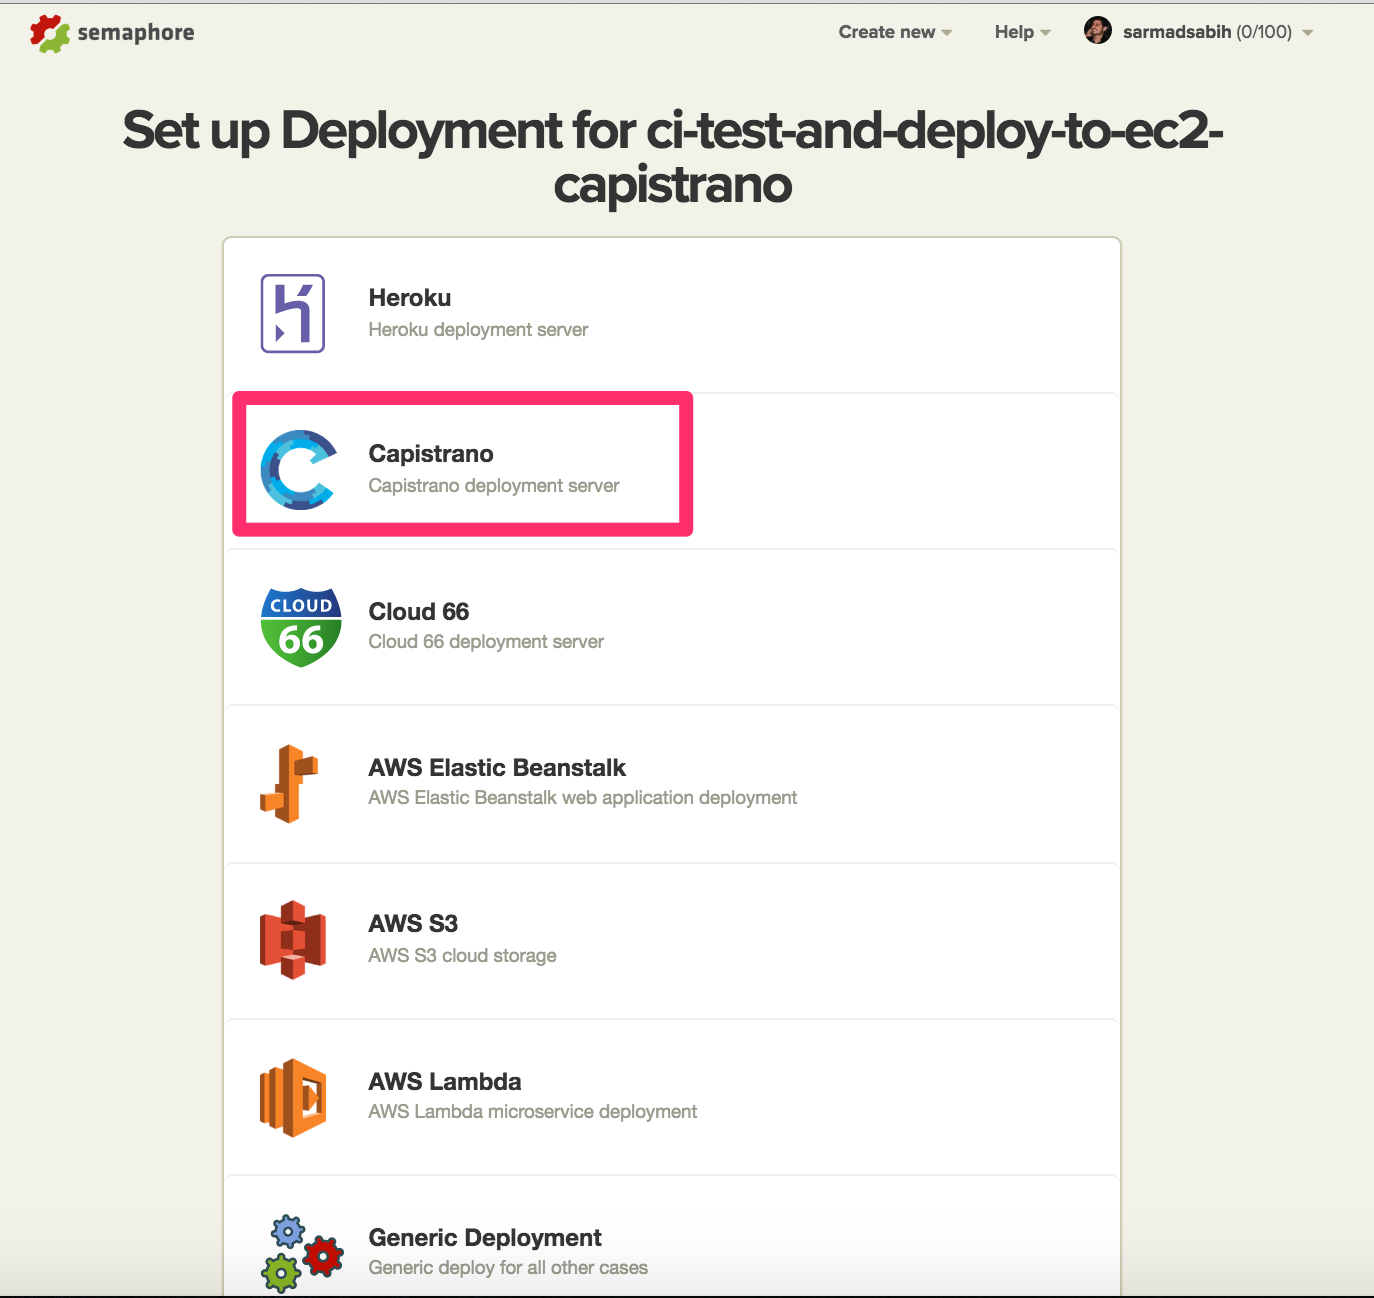
Select “Capistrano”:
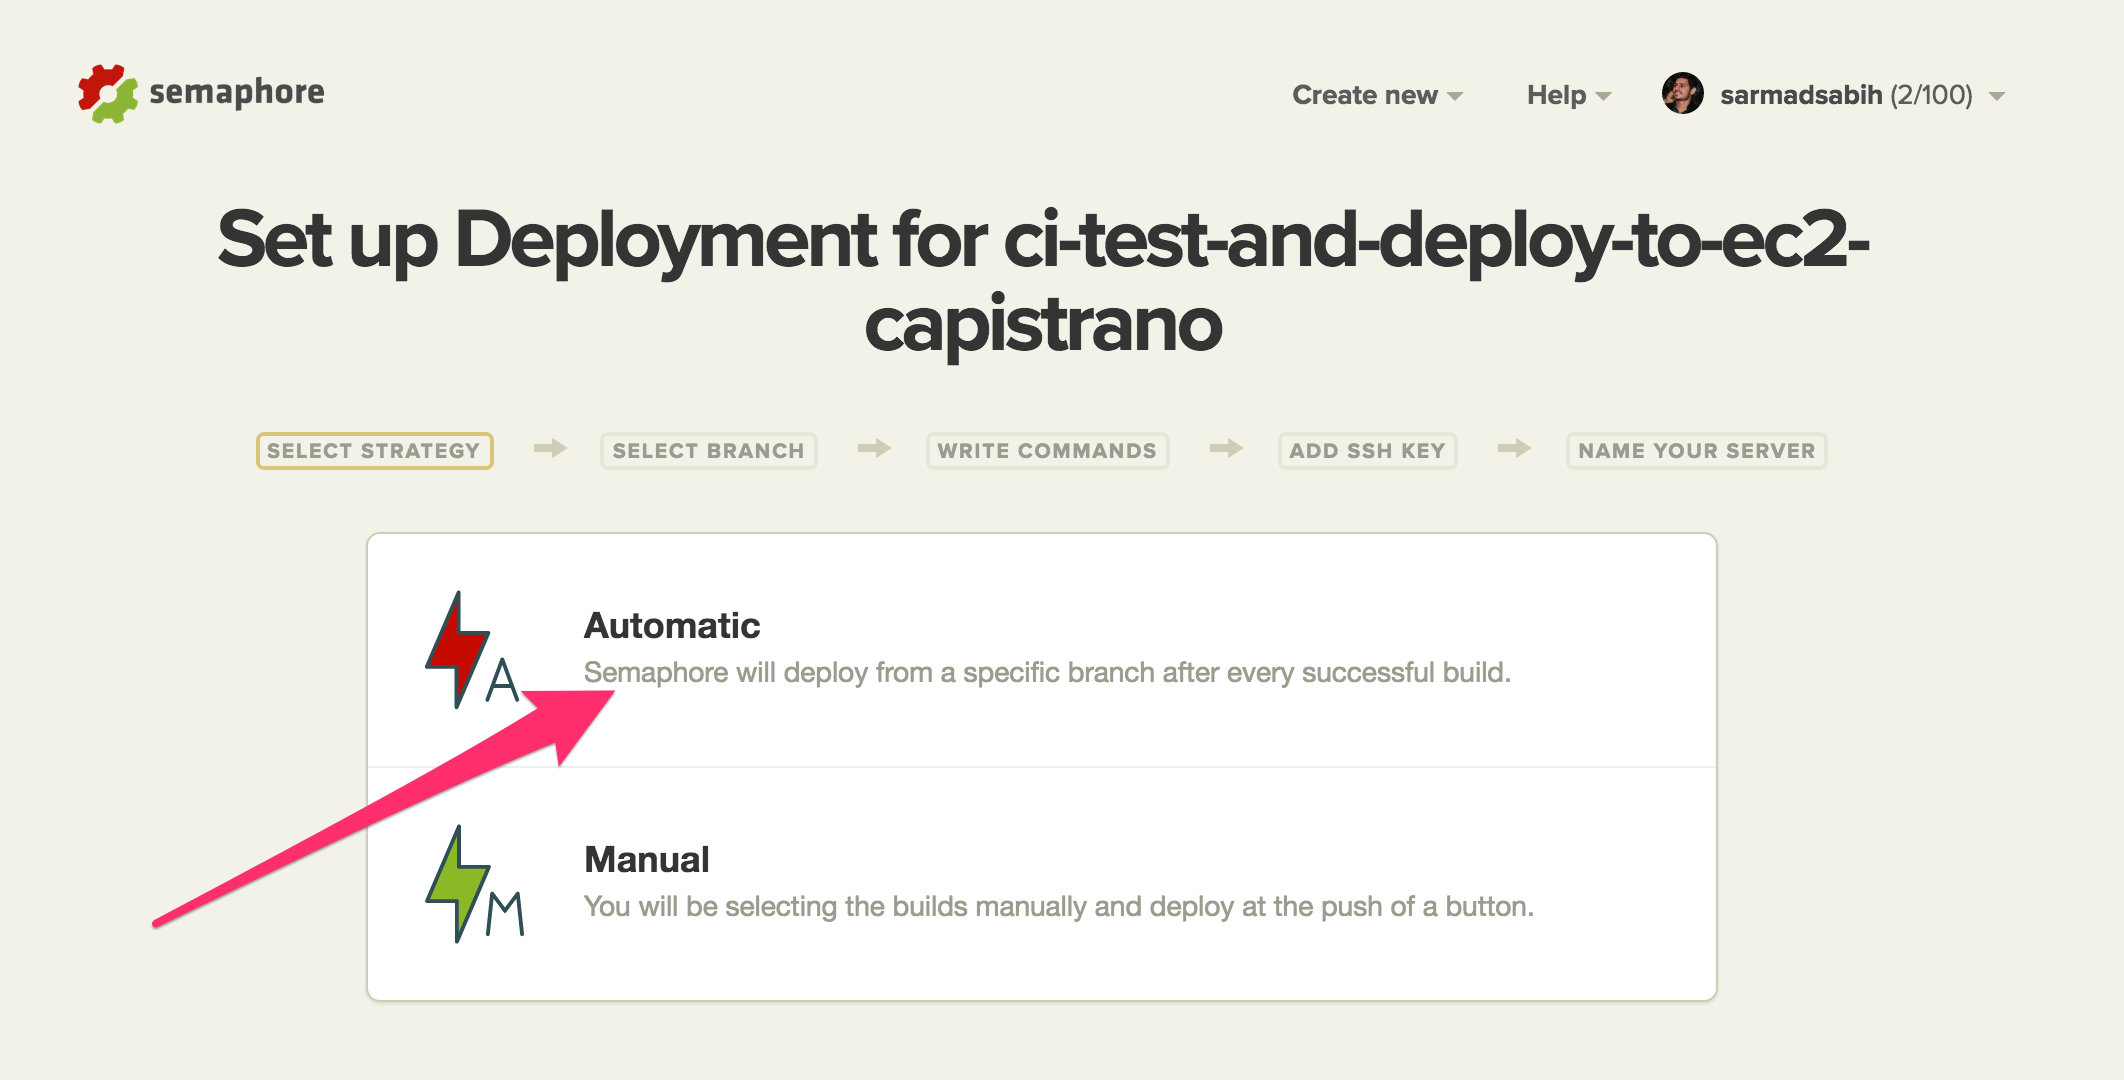
Select “Automatic”. It will trigger an automatic deployment whenever there’s a successful build on the master (or whatever branch you select) branch.
Select the branch (master) to build:

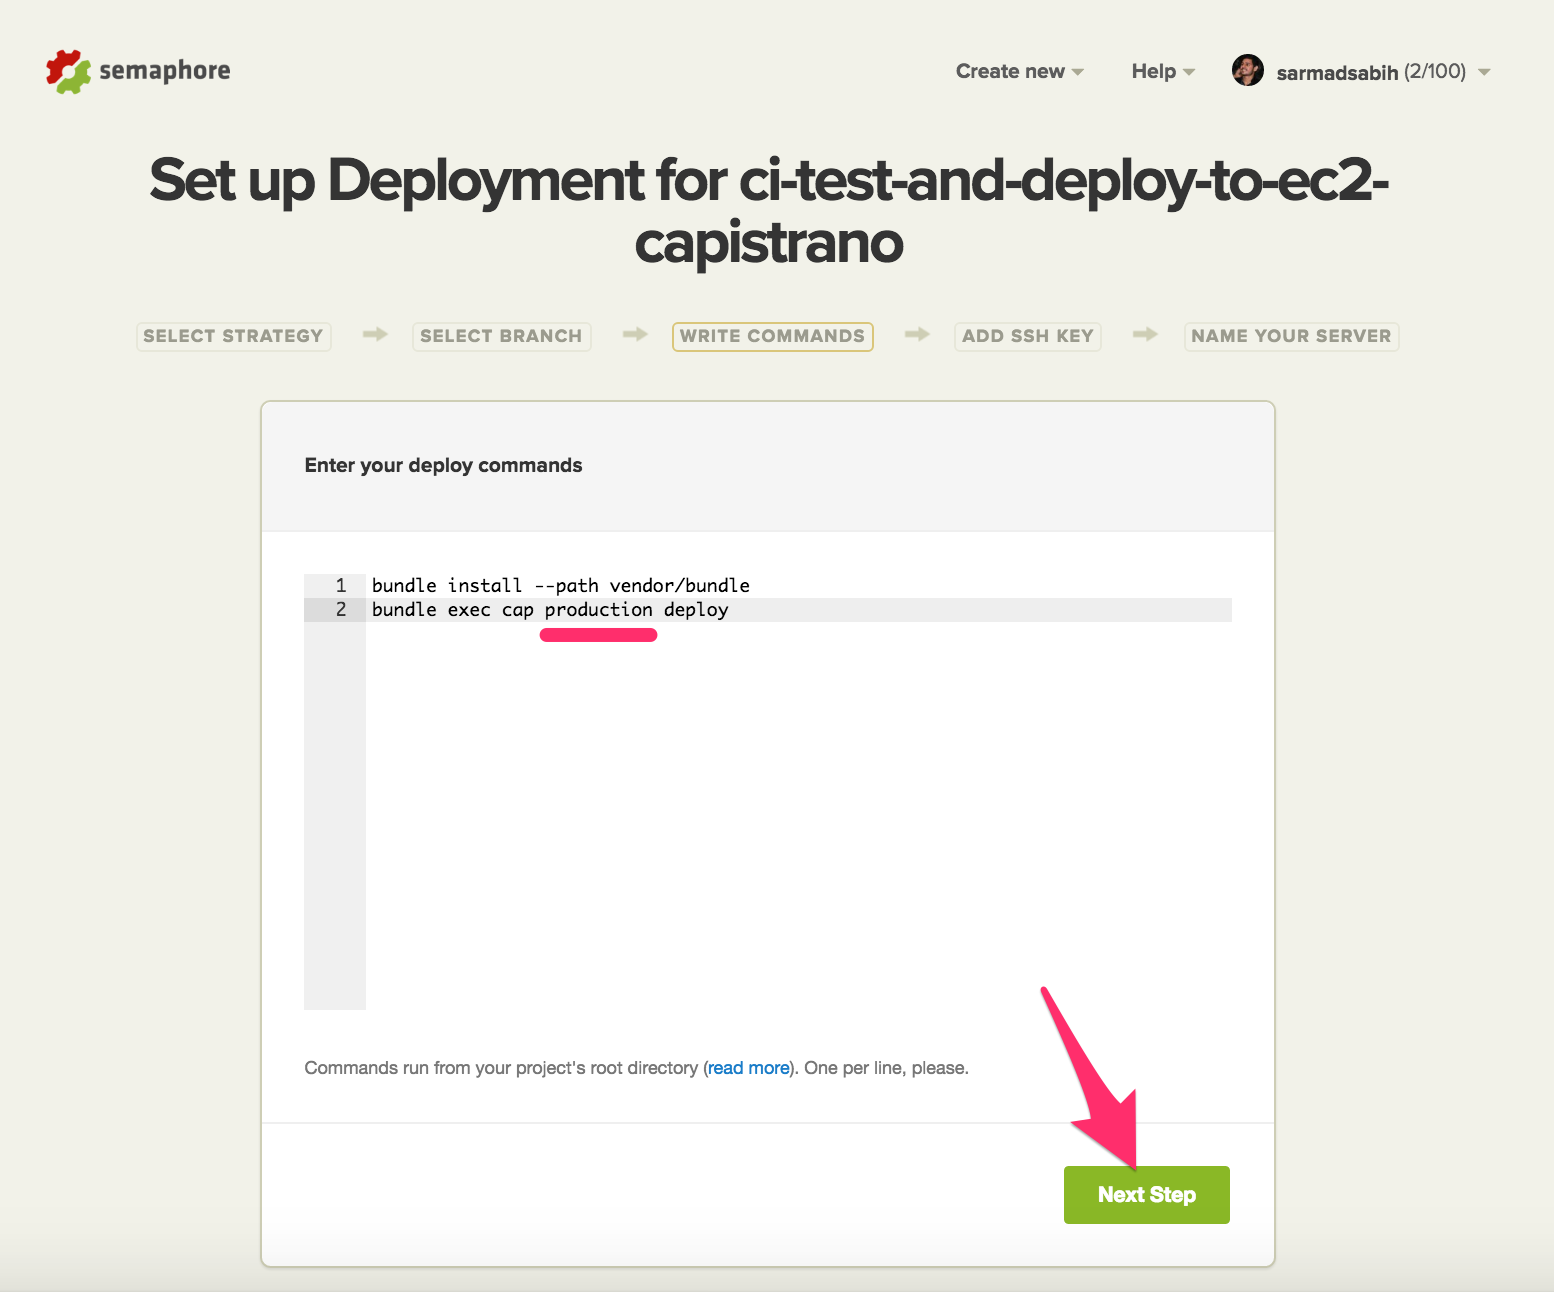
Deploy commands should look like this. Notice the keyword production in the 2nd deployment command:
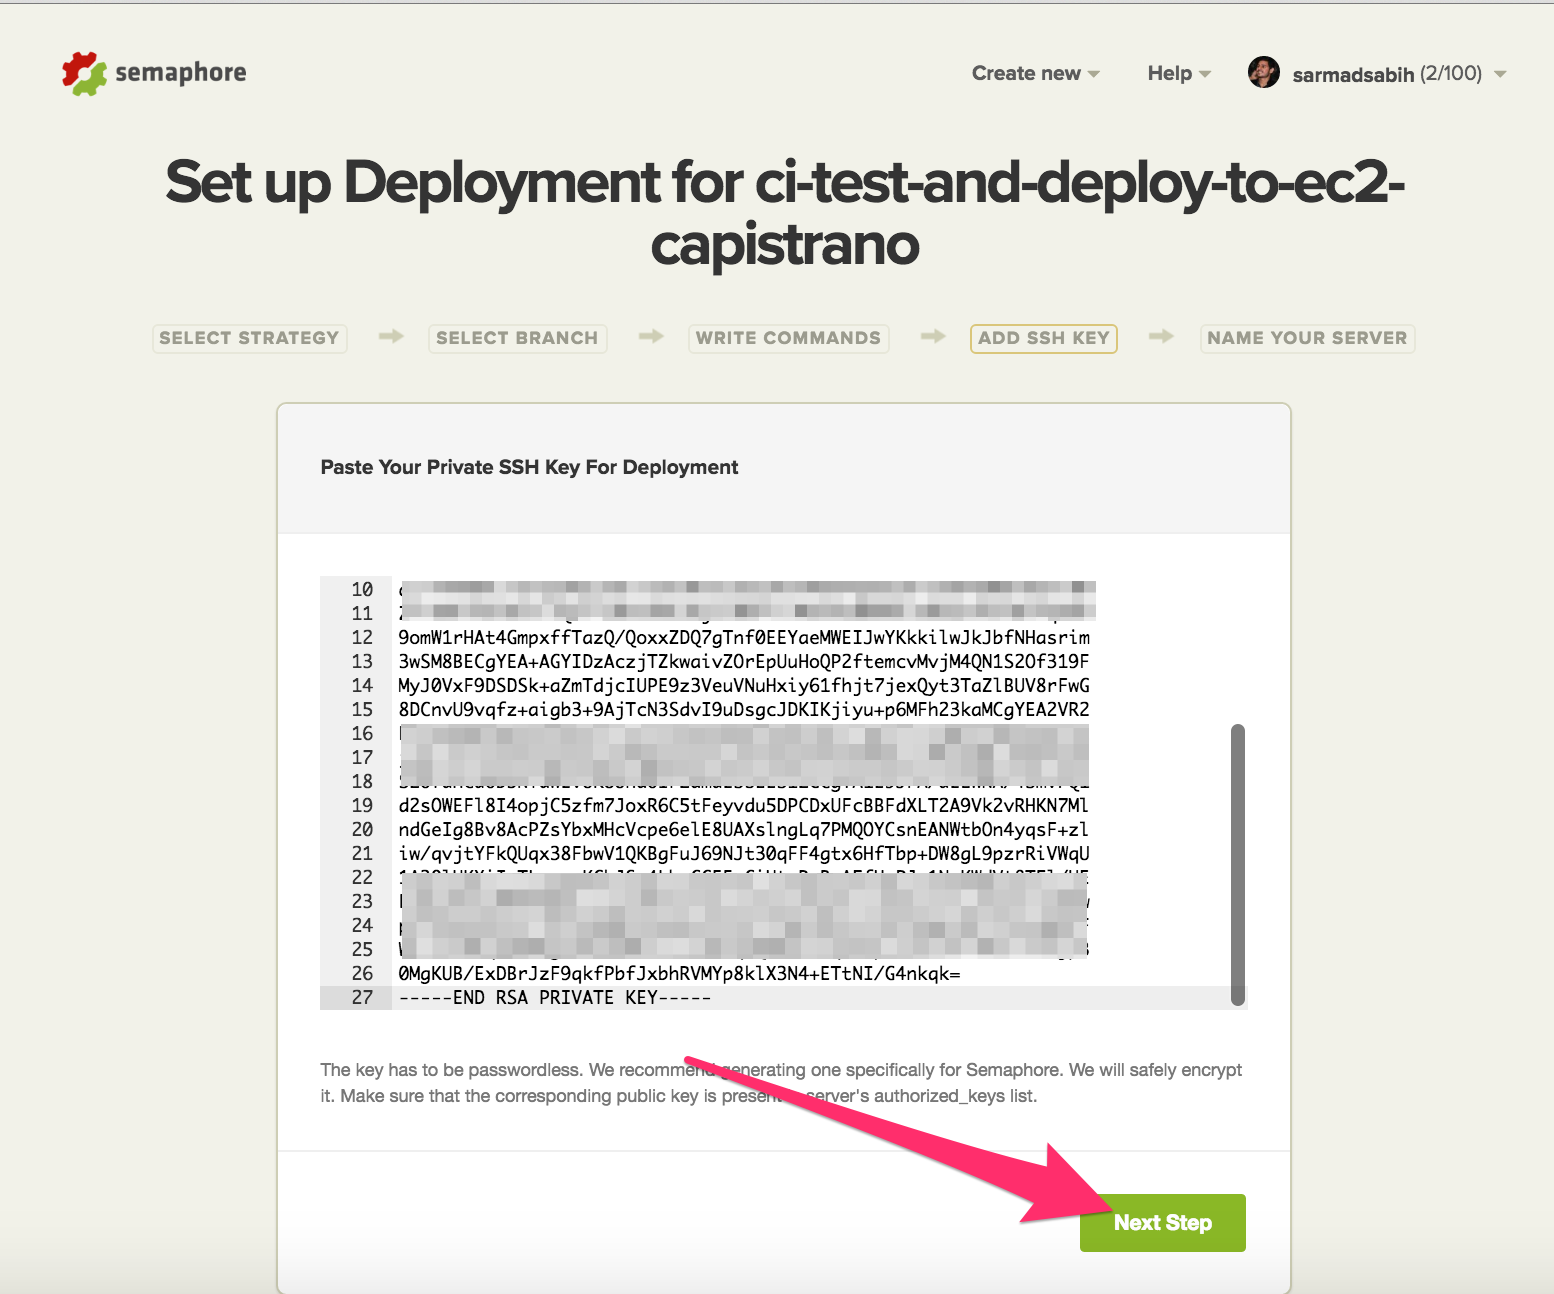
Paste the EC2 instance sarmad (or whatever deployment user you created) user’s private key into the following text area. This will let our SemaphoreCI deployment server to access our EC2 instance sarmad user through Capistrano:
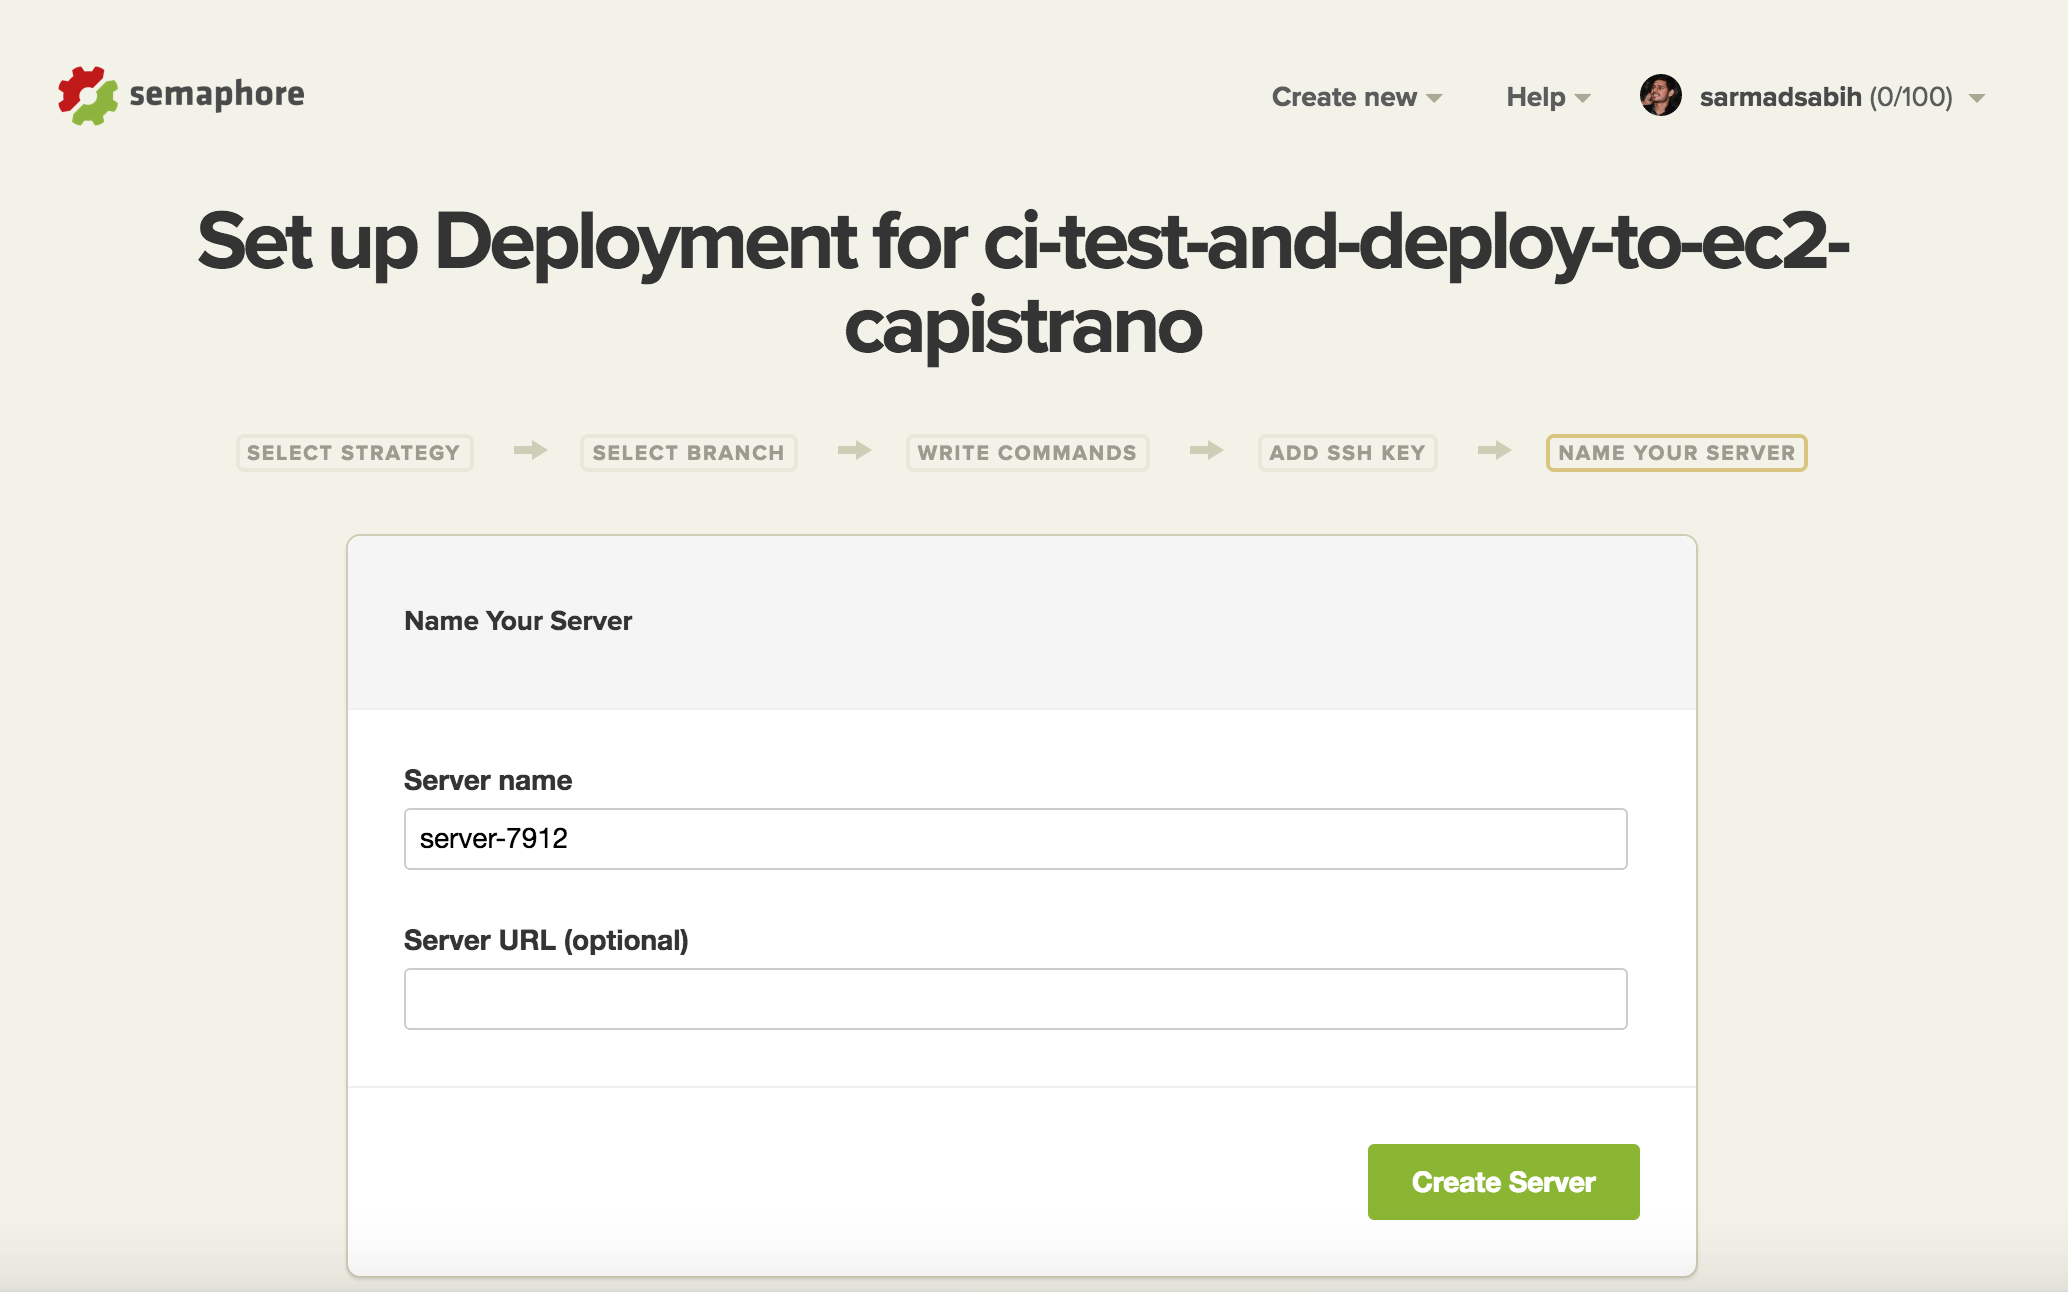
Accept the defaults and click “Create Server”:
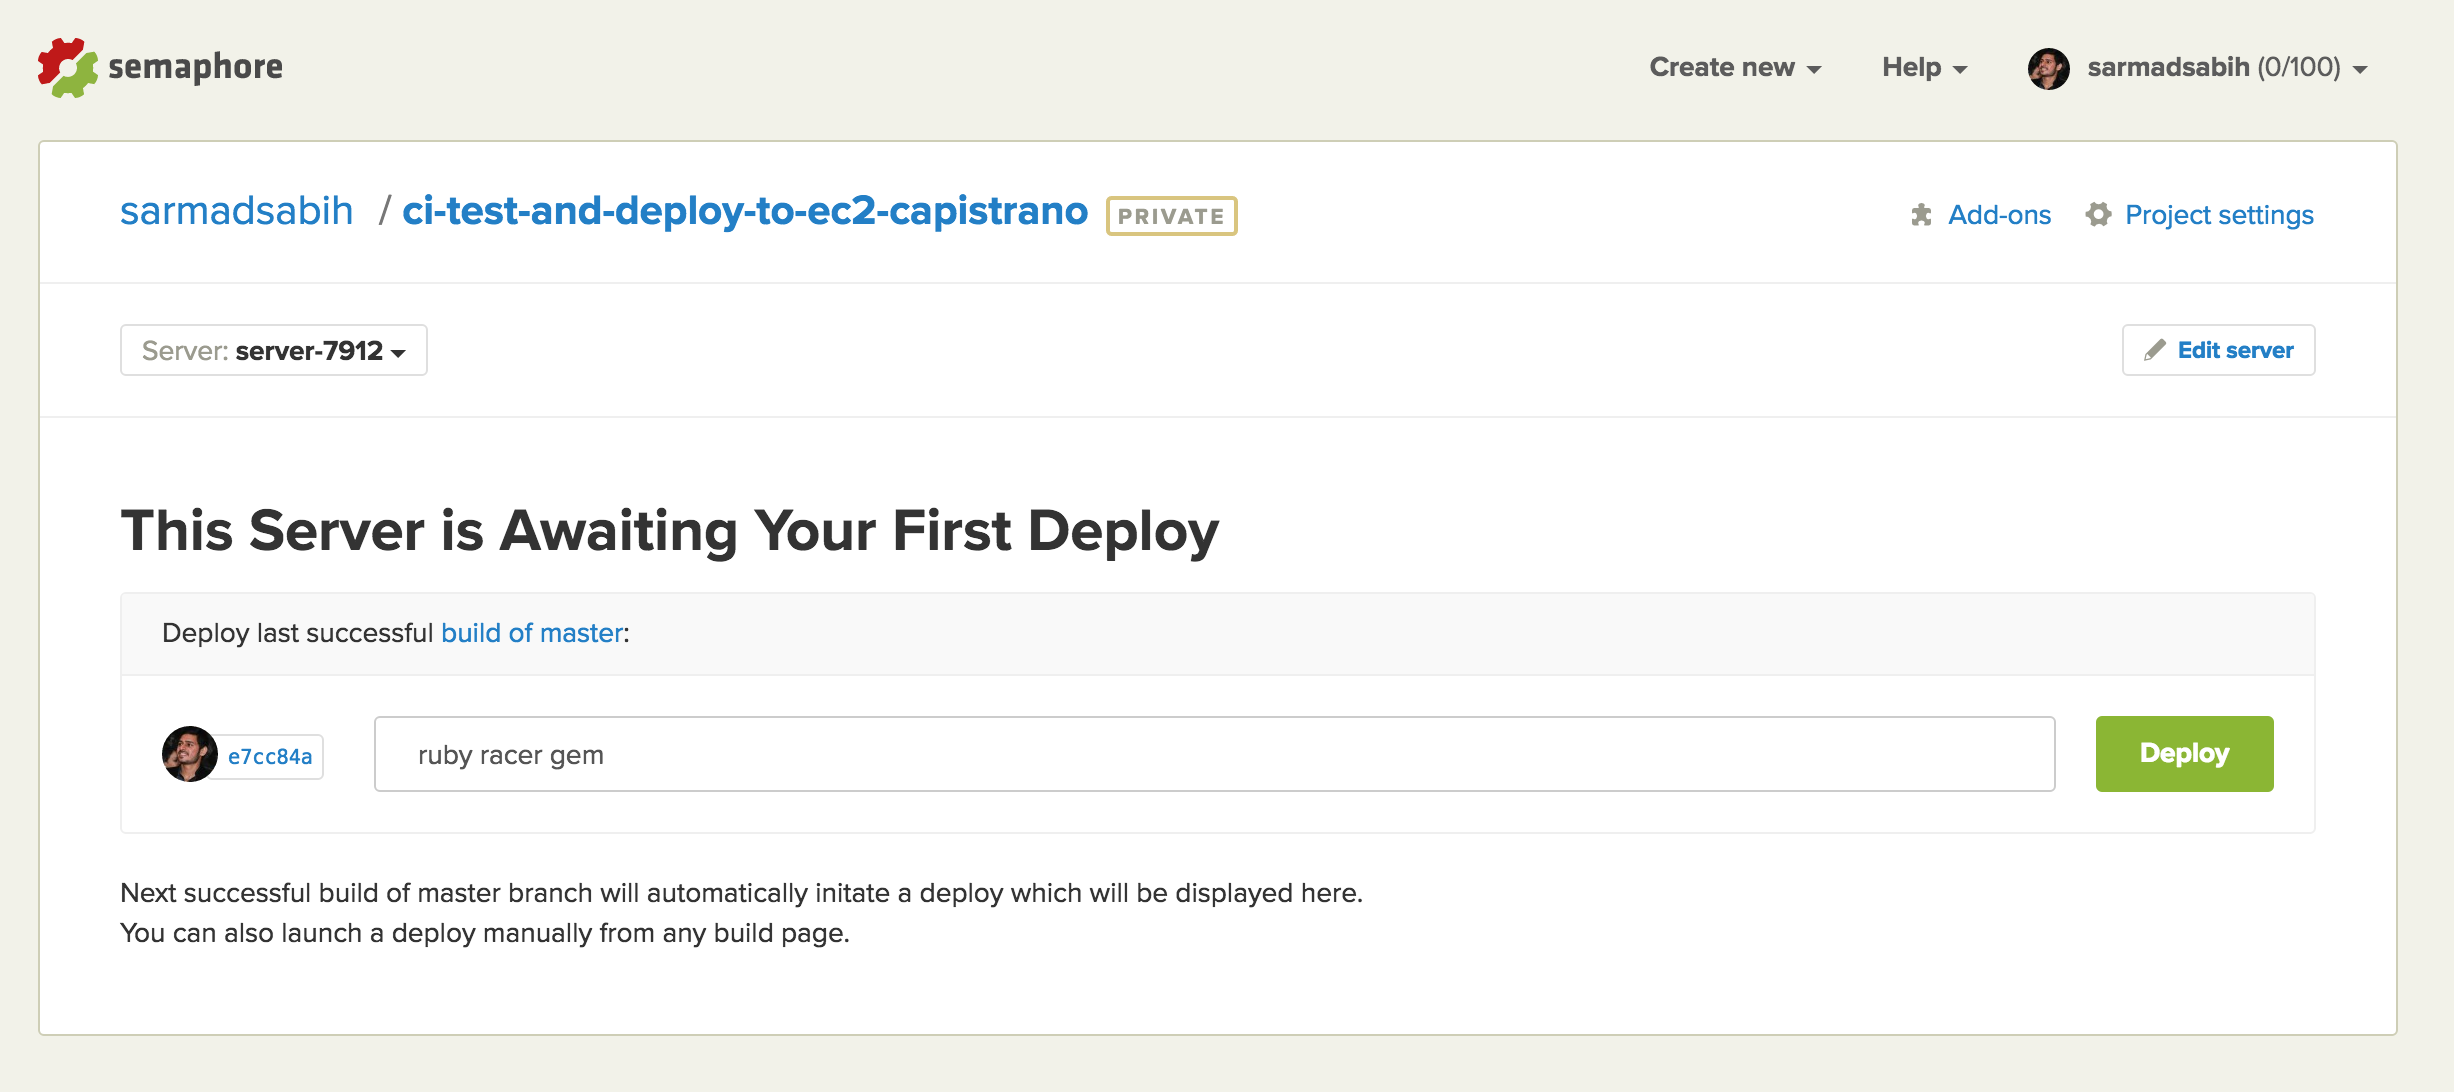
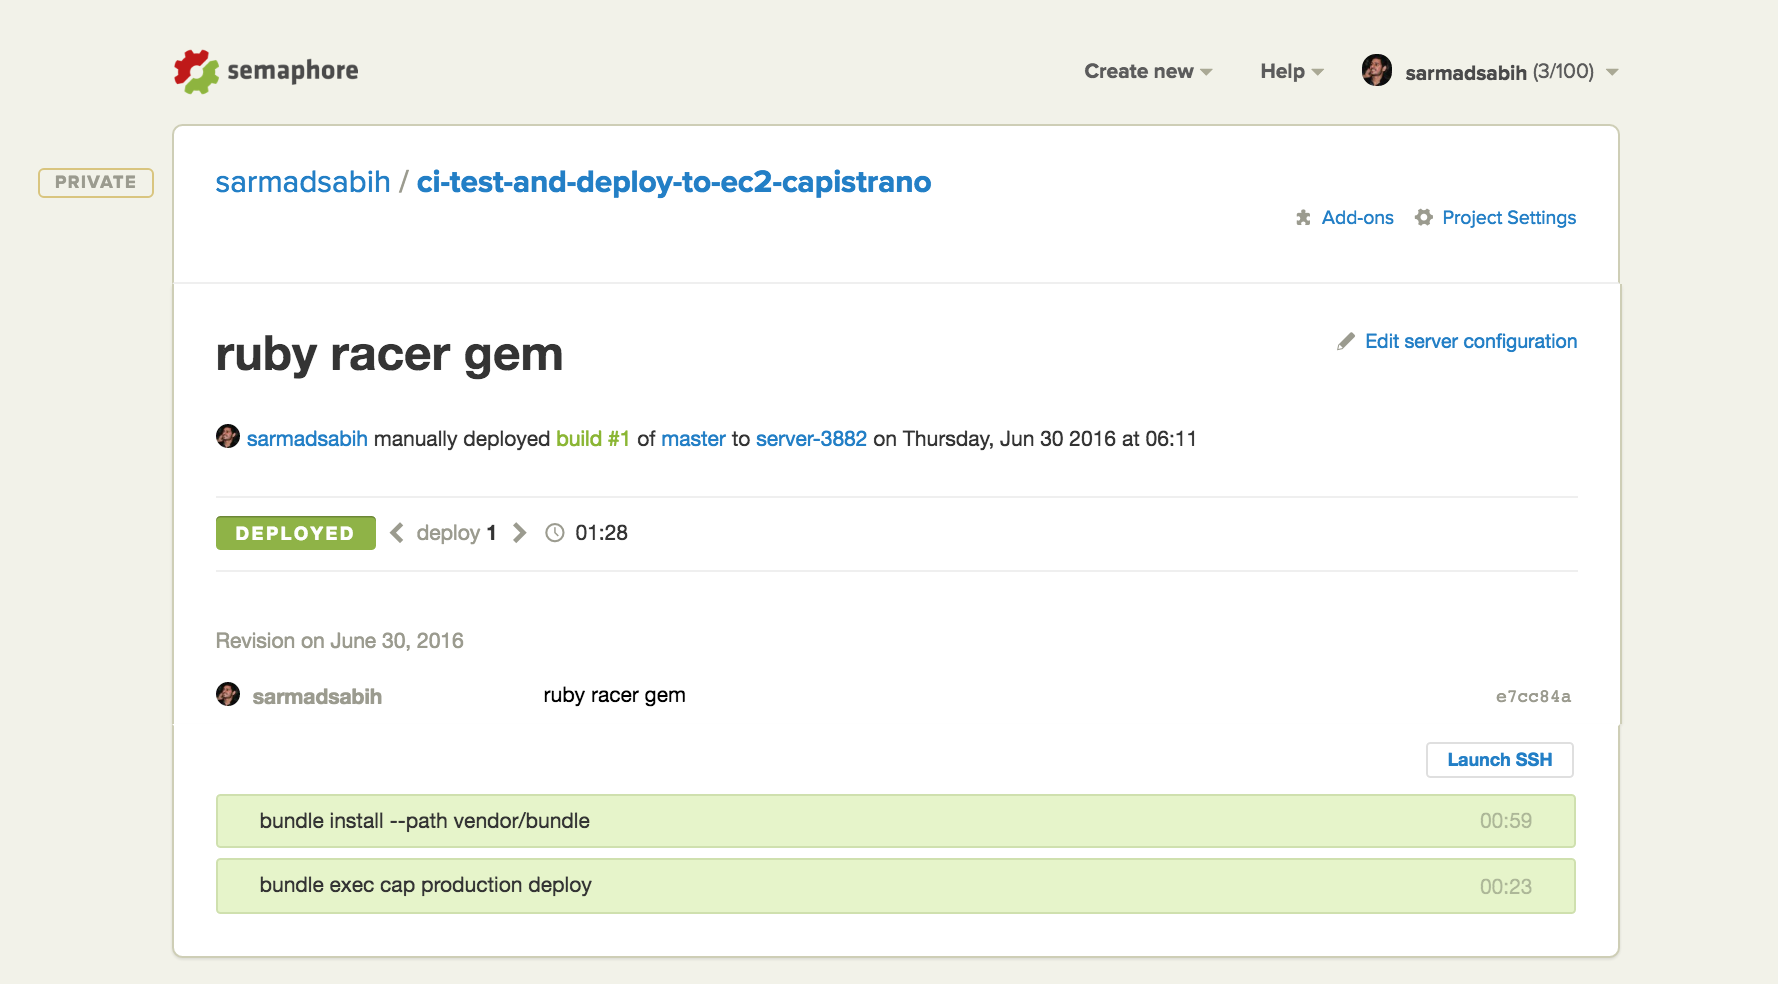
The deployment server is created and set up. Click the Deploy button to initiate the deployment with our settings:
Bingo! Deployment is successful.
Now we need to verify that if we push a failing build (push a commit with failing tests), it’s not deployed. Run rake test to verify tests are passing in the current code base:
$ rake test
Run options: --seed 52969
# Running:
.......
Finished in 0.509991s, 13.7257 runs/s, 25.4906 assertions/s.
7 runs, 13 assertions, 0 failures, 0 errors, 0 skips
Make the tests fail by making a change in test/controllers/blogs_controller_test.rb. Change the assert_response line in this test:
test "should get index" do
    get :index
    assert_response :success
    assert_not_nil assigns(:blogs)
end
Replace the assert_response :success to assert_response :error to make the test fail. Verify by running rake test:
$ rake test
Run options: --seed 47910
# Running:
..F....
Finished in 0.378145s, 18.5114 runs/s, 31.7339 assertions/s.
  1) Failure:
BlogsControllerTest#test_should_get_index [/Users/sarmad/projects/rails-ci-testing-and-deployment-to-ec2-capistrano/test/controllers/blogs_controller_test.rb:10]:
Expected response to be a <error>, but was <200>
7 runs, 12 assertions, 1 failures, 0 errors, 0 skips
It’s failing. Let’s push this change to our Bitbucket repository and monitor Semaphore CI:
$ git add -A
$ git commit -m "failing test"
$ git push origin master
Th build is in progress. We need this build to fail.

The build failed and no deployment was fired by SemaphoreCI:
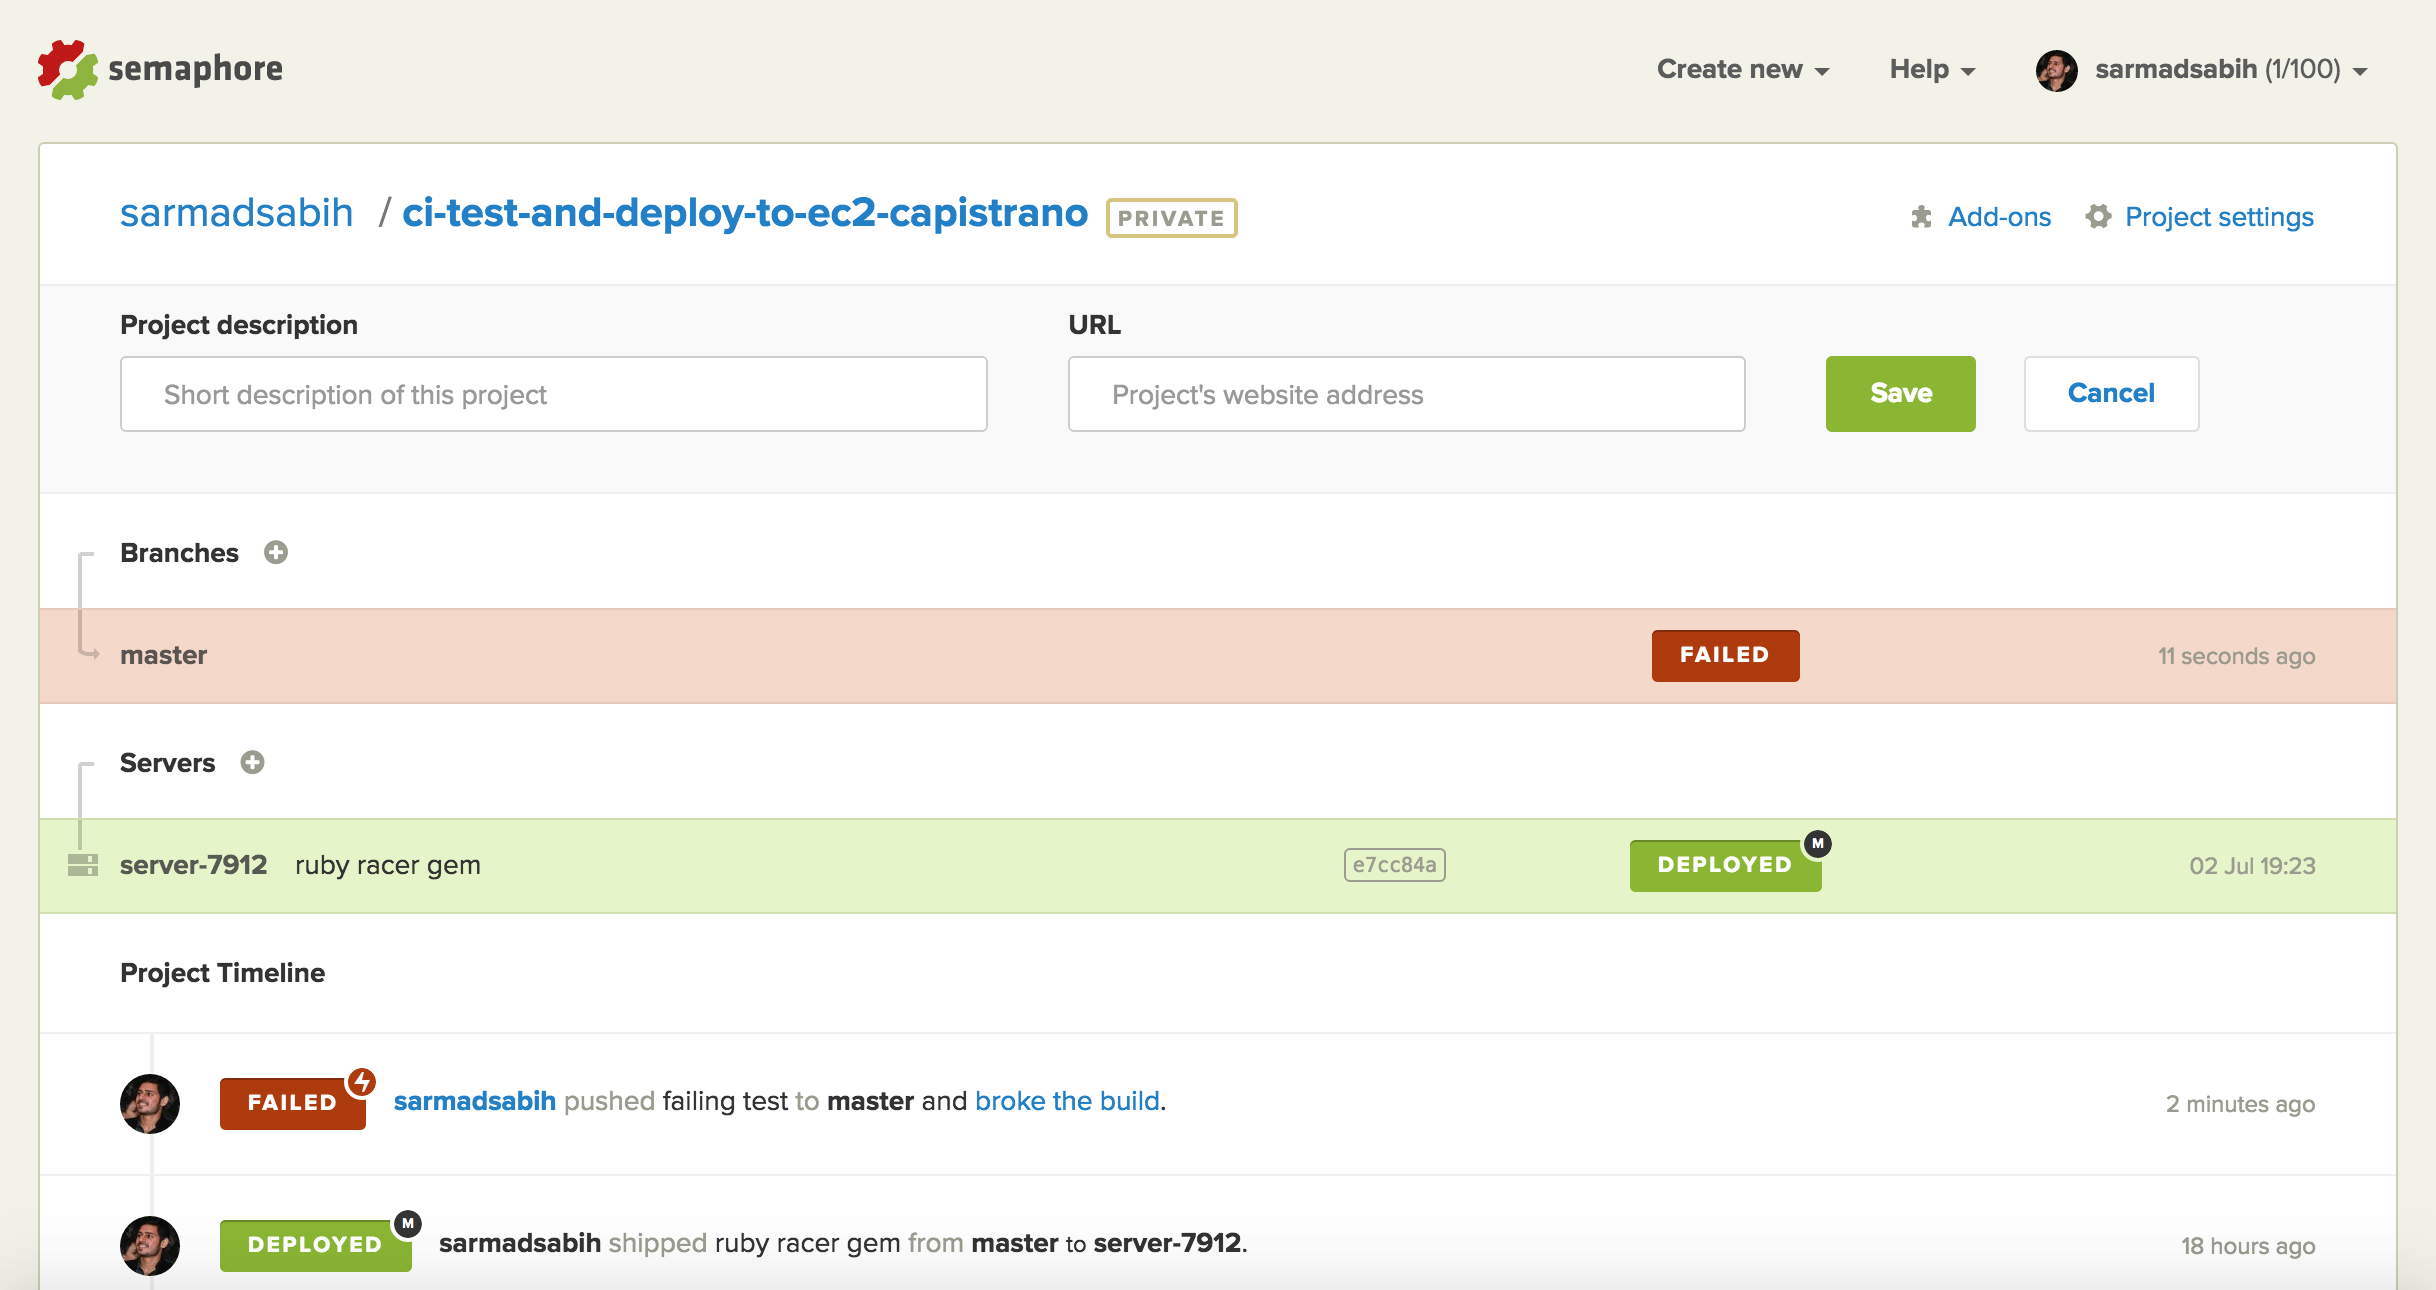
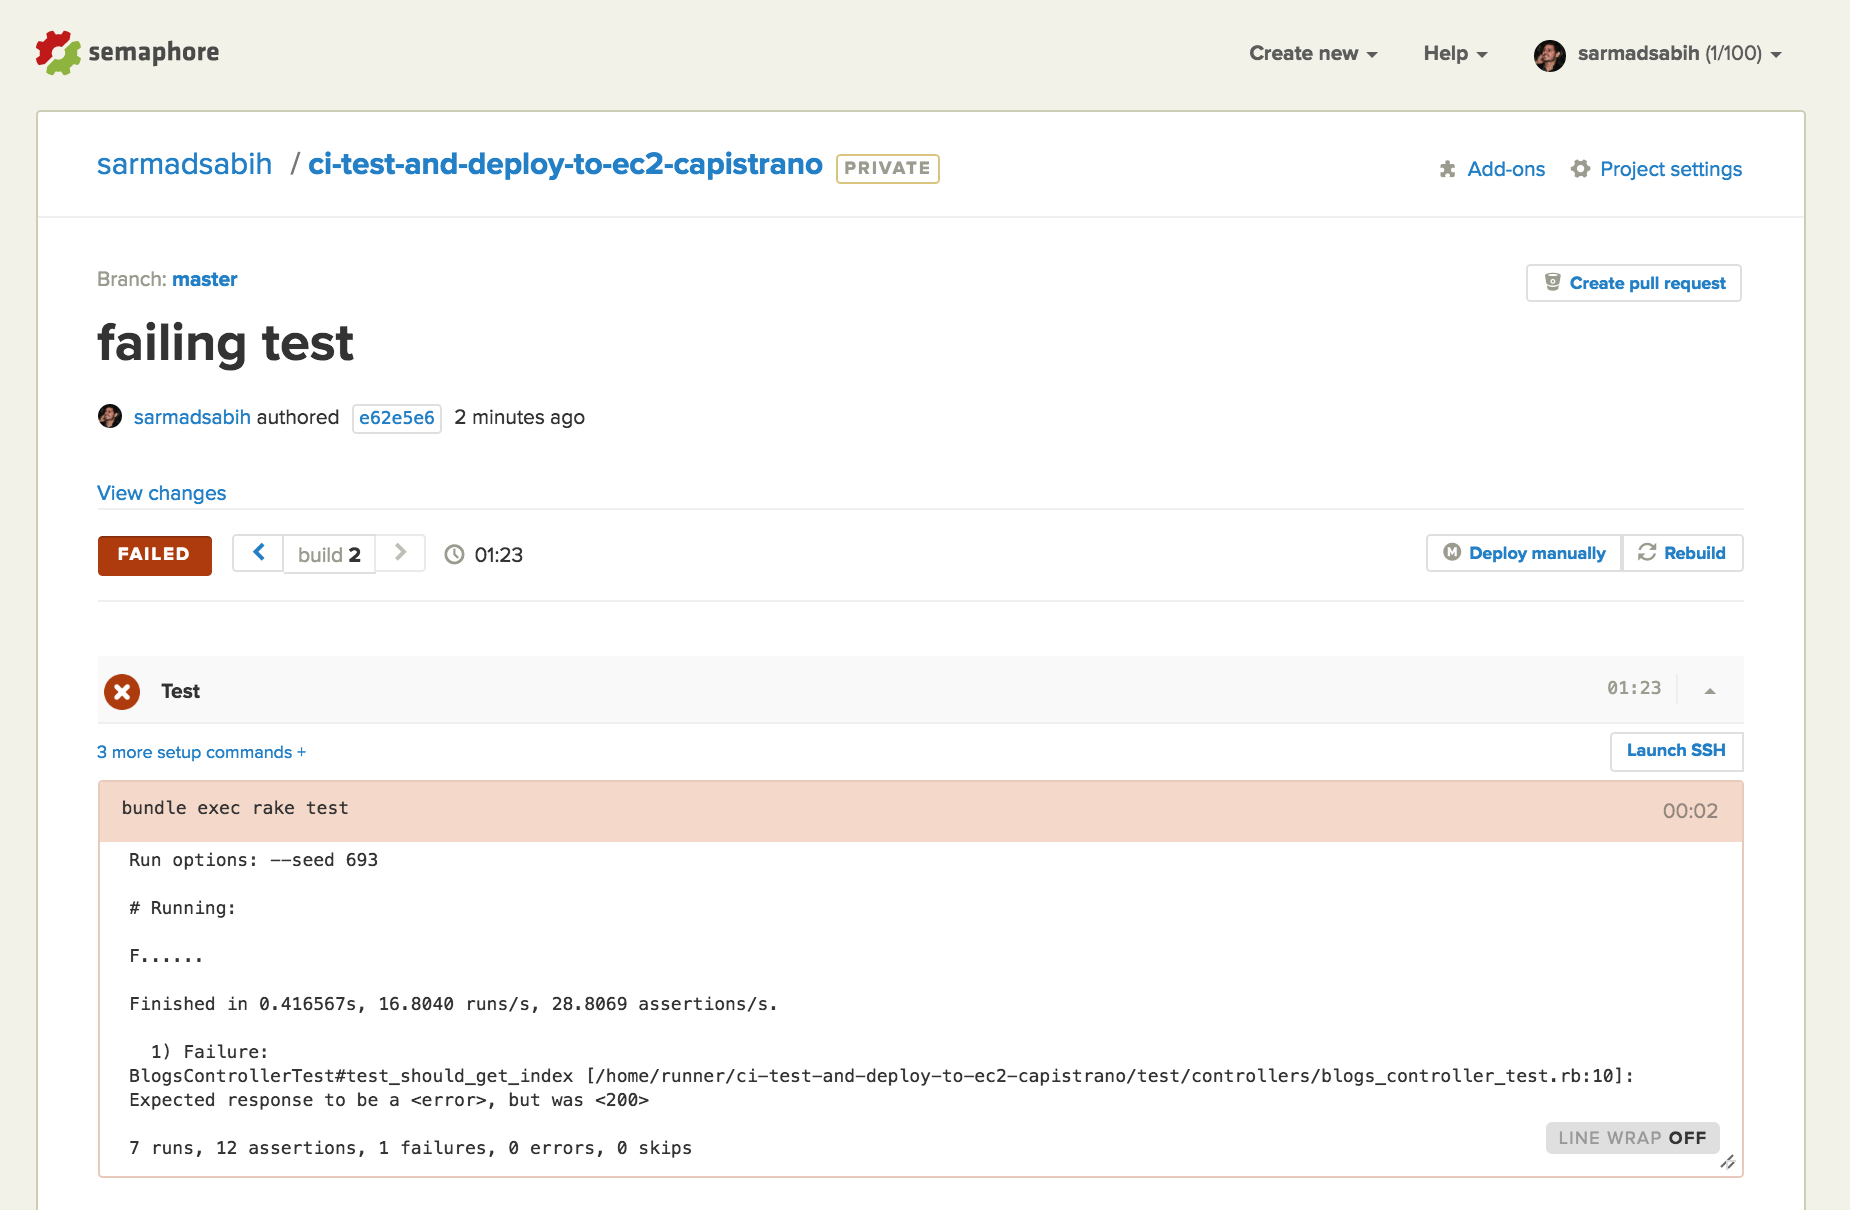
This is the Details page of the failing build. We can see which tests are failing and errors, if any.
Now let’s fix the broken test and push it to the Bitbucket repository. Revert the failing test by reverting assert_response :error back to assert_response :success.
Verify the tests passing by running rake test:
$ rake test
Run options: --seed 25838
# Running:
.......
Finished in 0.455917s, 15.3537 runs/s, 28.5140 assertions/s.
7 runs, 13 assertions, 0 failures, 0 errors, 0 skips
Commit and push to our repo:
git add -A
git commit -m "fix the broken test"
git push origin master
Monitor SemaphoreCI again:
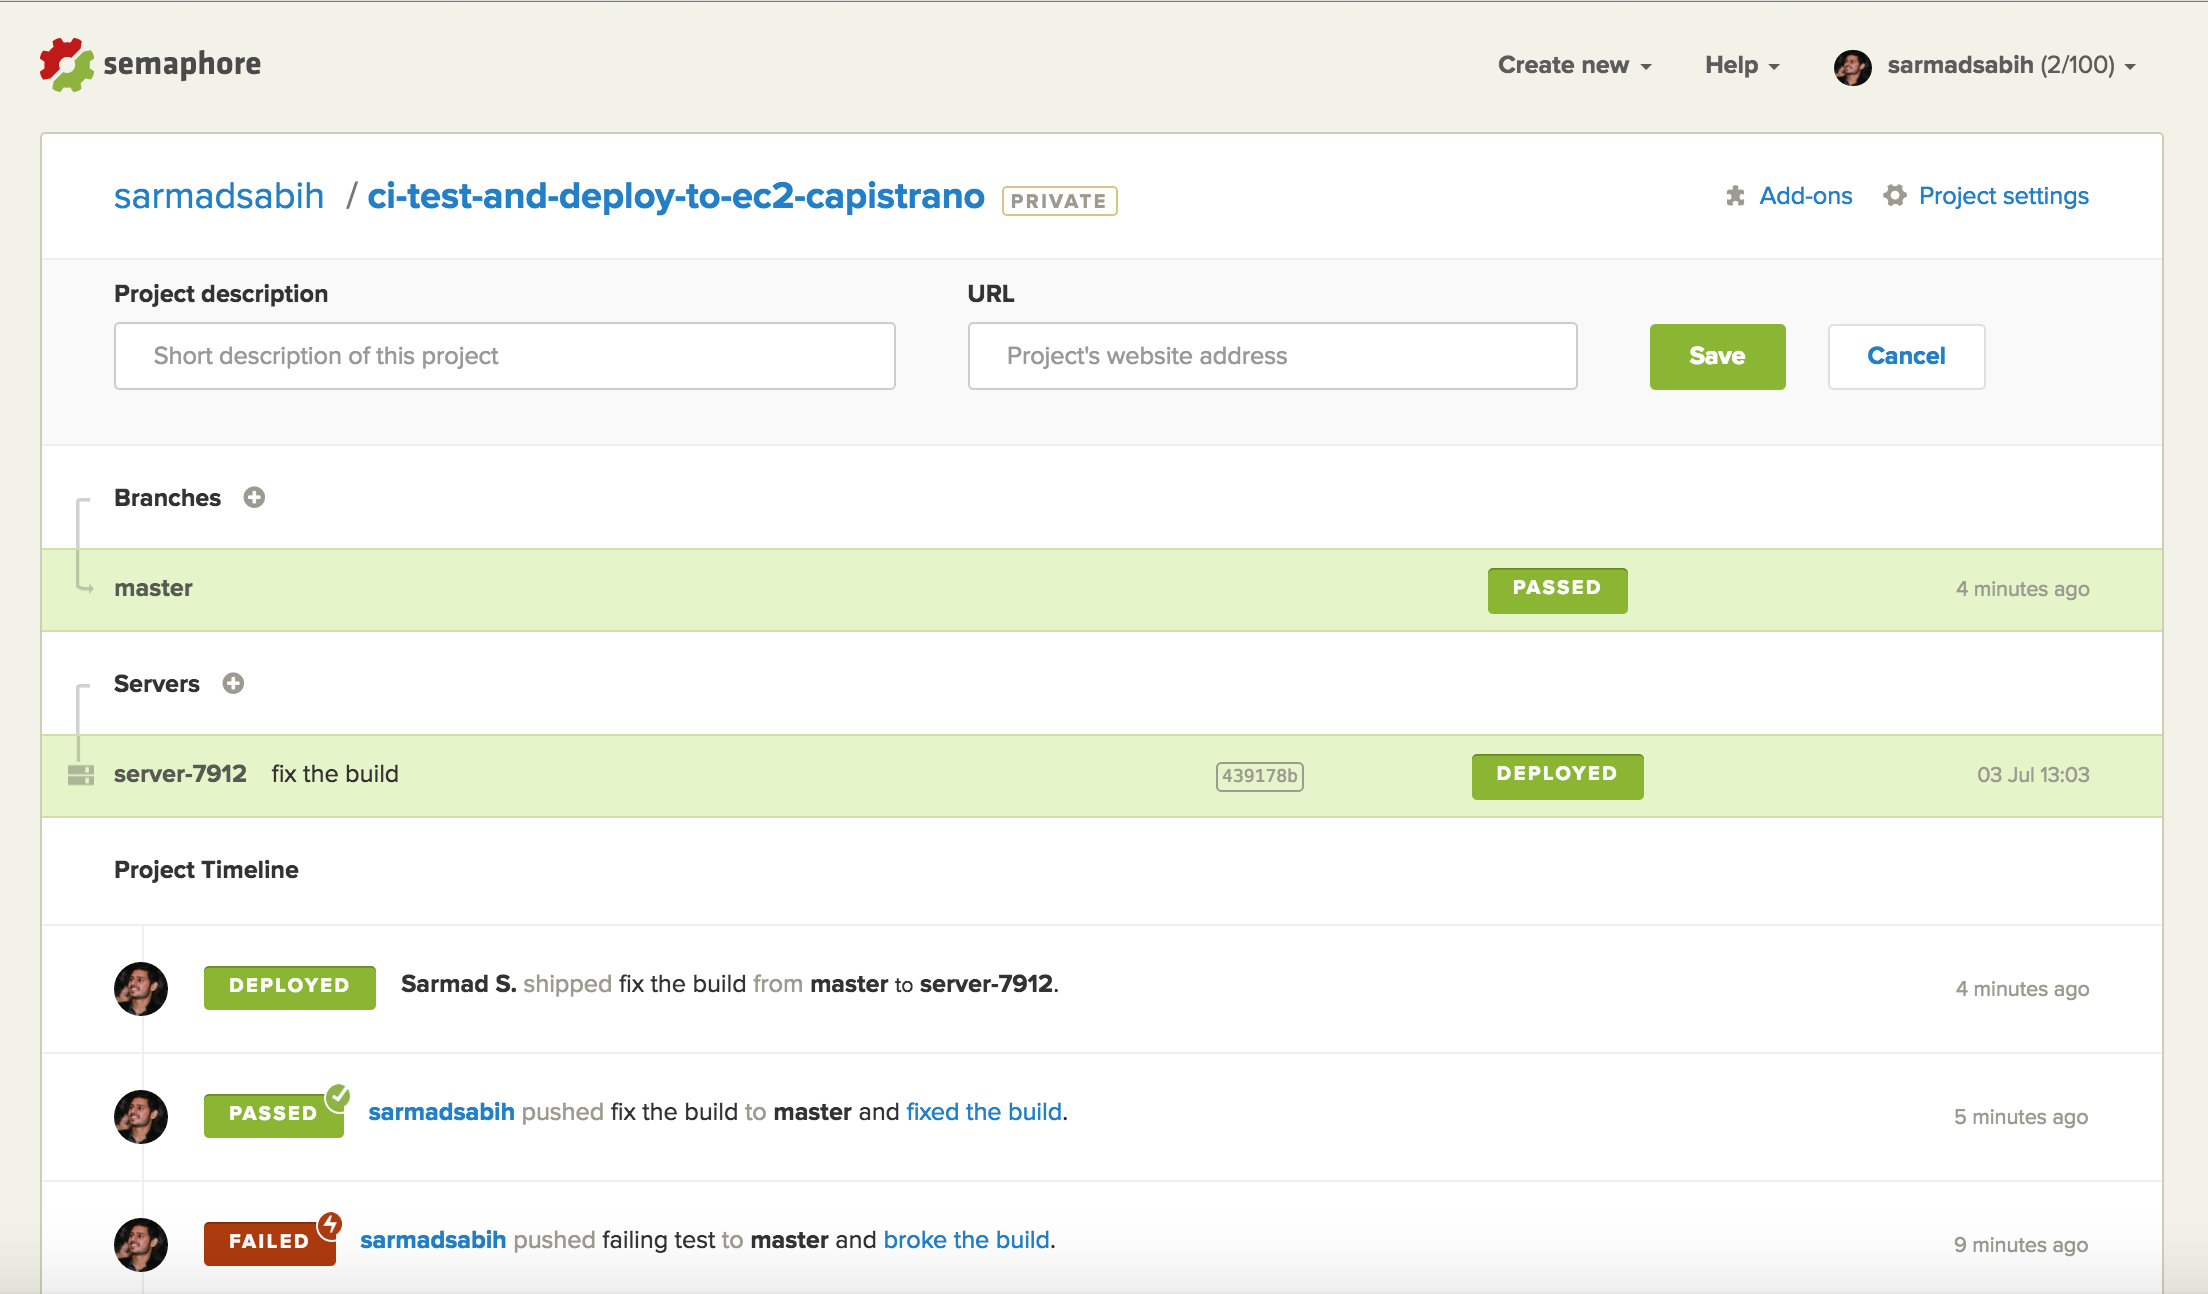
The build is successful and it fired a deployment right after the build passed.
Conclusion
You now have a Rails application deployed on a highly scalable Amazon EC2 server. Your setup incluseds an automatic deployment script set up with Capistrano, along with a testing and deployment server. This is a very powerful set of tools for Rails development which can be highly productive for most of projects. I’ve put them all together in one place so that you can get started and lay a foundation for your Rails application deployment going forward. I hope you find it useful.
Frequently Asked Questions (FAQs) on Continuous Deployment of Rails with SemaphoreCI
How does SemaphoreCI differ from other continuous integration tools?
SemaphoreCI stands out from other continuous integration tools due to its speed, simplicity, and efficiency. It is designed to be fast and to provide real-time feedback, which is crucial in a continuous integration and deployment environment. SemaphoreCI also offers parallelism, allowing multiple tasks to be run simultaneously, thereby reducing the time taken for the build and test process. It also provides a clean and intuitive user interface, making it easy to set up and manage projects.
How can I set up a Rails project on SemaphoreCI?
Setting up a Rails project on SemaphoreCI is straightforward. After signing up and logging into SemaphoreCI, you can add a new project by clicking on the ‘Add New Project’ button. You will then be prompted to connect your GitHub or Bitbucket account. Once connected, you can select the repository for your Rails project. SemaphoreCI will automatically analyze the repository and suggest a configuration. You can review and customize this configuration before proceeding. Once the setup is complete, SemaphoreCI will start running the build and test tasks for your Rails project.
How does SemaphoreCI handle database setup for Rails projects?
SemaphoreCI provides a database service box for setting up databases for Rails projects. You can specify the type of database (e.g., PostgreSQL, MySQL) and the version in the configuration file. SemaphoreCI will automatically set up the database and make it available for your build and test tasks. You can also specify custom database configuration in your Rails project’s database.yml file.
How can I configure parallelism in SemaphoreCI for my Rails project?
SemaphoreCI allows you to configure parallelism for your Rails project to speed up the build and test process. You can specify the number of parallel jobs in the configuration file. SemaphoreCI will then distribute the tasks across the specified number of jobs, running them simultaneously. You can also use the ‘semaphore.yml’ file to further customize the parallelism configuration.
How can I troubleshoot failed builds in SemaphoreCI?
SemaphoreCI provides detailed logs for each build and test task. If a build fails, you can review the logs to identify the cause of the failure. The logs include information about the commands executed, their output, and any error messages. You can also use the ‘Debug’ mode in SemaphoreCI to interactively troubleshoot failed builds.
How does SemaphoreCI integrate with GitHub?
SemaphoreCI integrates seamlessly with GitHub. Once you connect your GitHub account with SemaphoreCI, you can select the repositories for which you want to enable continuous integration. SemaphoreCI will then automatically run the build and test tasks for each commit and pull request. It also updates the status of the commit or pull request on GitHub, providing a direct link to the build results on SemaphoreCI.
Can I use SemaphoreCI for continuous deployment of my Rails project?
Yes, SemaphoreCI supports continuous deployment of Rails projects. You can configure deployment pipelines in SemaphoreCI to automatically deploy your Rails application to various environments (e.g., staging, production) after the build and test tasks are successful. SemaphoreCI supports deployment to various platforms, including Heroku, AWS, Google Cloud, and more.
How can I optimize the build and test process in SemaphoreCI for my Rails project?
SemaphoreCI provides several features to optimize the build and test process for your Rails project. You can use parallelism to run multiple tasks simultaneously, reducing the overall time taken. You can also use caching to speed up the installation of dependencies. Additionally, you can customize the build commands and test commands to suit your project’s needs.
How can I secure my sensitive data in SemaphoreCI?
SemaphoreCI provides environment variables to secure sensitive data such as API keys, database credentials, and other secrets. You can define these environment variables in the project settings in SemaphoreCI. These variables are encrypted and securely stored, and they are only exposed to the build and deployment tasks that need them.
How can I get support for SemaphoreCI?
SemaphoreCI provides comprehensive documentation that covers all aspects of using the platform. If you need further assistance, you can contact the SemaphoreCI support team via email or through the support form on their website. They also have a community forum where you can ask questions and share experiences with other SemaphoreCI users.

