Build Your Own Chrome Extension Using Angular 2 & TypeScript
This article was peer reviewed by Dan Prince. Thanks to all of SitePoint’s peer reviewers for making SitePoint content the best it can be!
Chrome extensions are small web applications that add features to the Google Chrome browser. They can extend and customize browser behavior, the developer tools or the new tabs page. Extensions can be downloaded from the Chrome Web Store.
In this tutorial we are creating a Chrome extension that lets us save website URLs and displays them on every new tab’s page. Of course, there are native Chrome bookmarks, but we want to integrate the bookmarks directly into the new tab’s page and control their visual appearance.
You can find the complete project code in the GitHub repository here, and feel free to install a running version of the extension (with a few more features).
Key Takeaways
- Utilize Angular 2 and TypeScript to build a Chrome extension that integrates bookmarks directly into a new tab’s page, enhancing both functionality and appearance.
- Set up your development environment with a basic text editor, Node Package Manager (npm), and a Google developer account for publishing the extension.
- Create the extension using Angular 2’s component-based architecture, starting with a simple bookmark component and expanding to a list component that handles multiple bookmarks.
- Manage application state and bookmark data using Angular services and local storage to persist user data across sessions.
- Enhance the Chrome extension with features like adding the current page to bookmarks via a browser action icon and overriding the default new tab page with your custom bookmark manager.
- Test, package, and prepare the Chrome extension for distribution through the Chrome Web Store, ensuring all necessary files and permissions are correctly configured in the manifest.json file.
What We’re Building
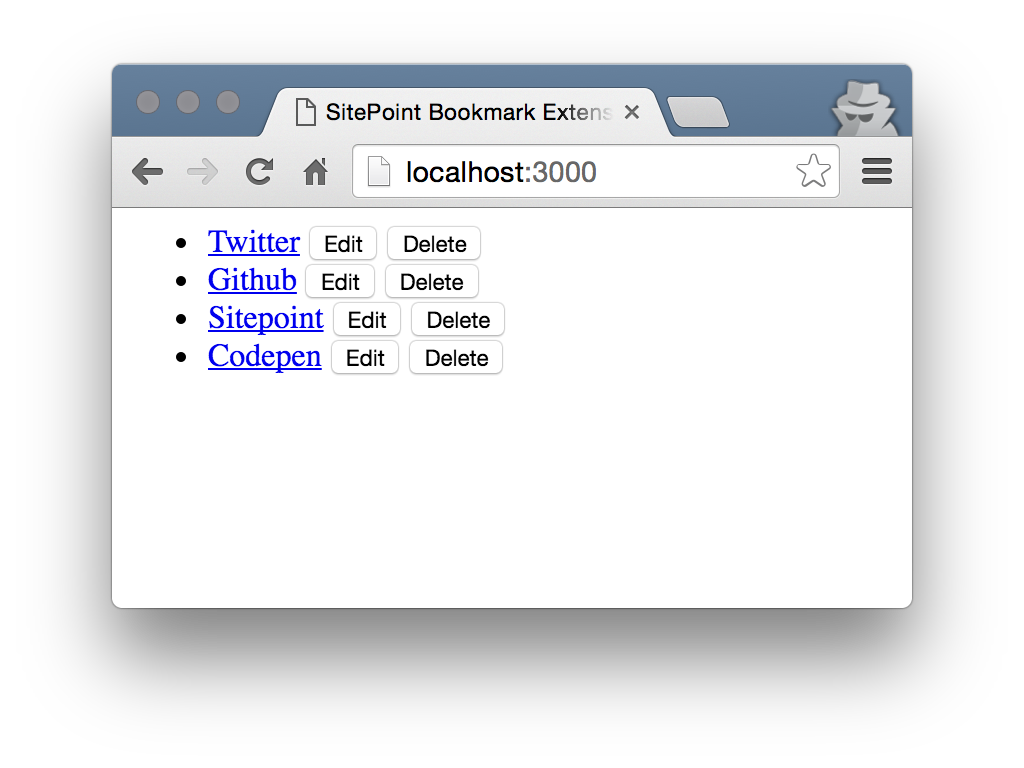
Let’s start with a brief overview of what we want to develop. The screenshot shows that we will create a list consisting of a variable amount of bookmark items. The bookmarks are links that open the respective URLs when clicked.
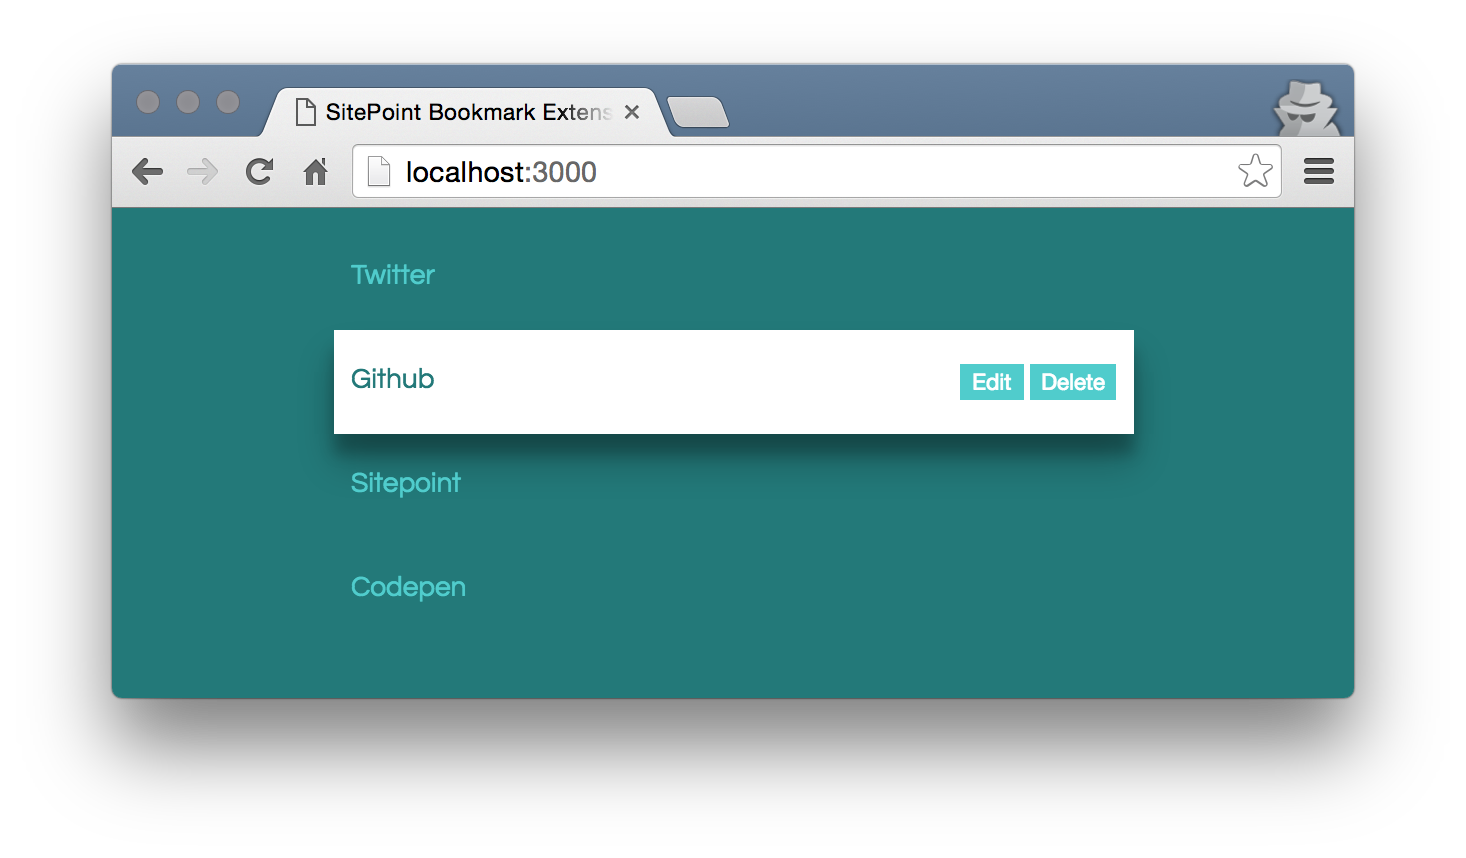
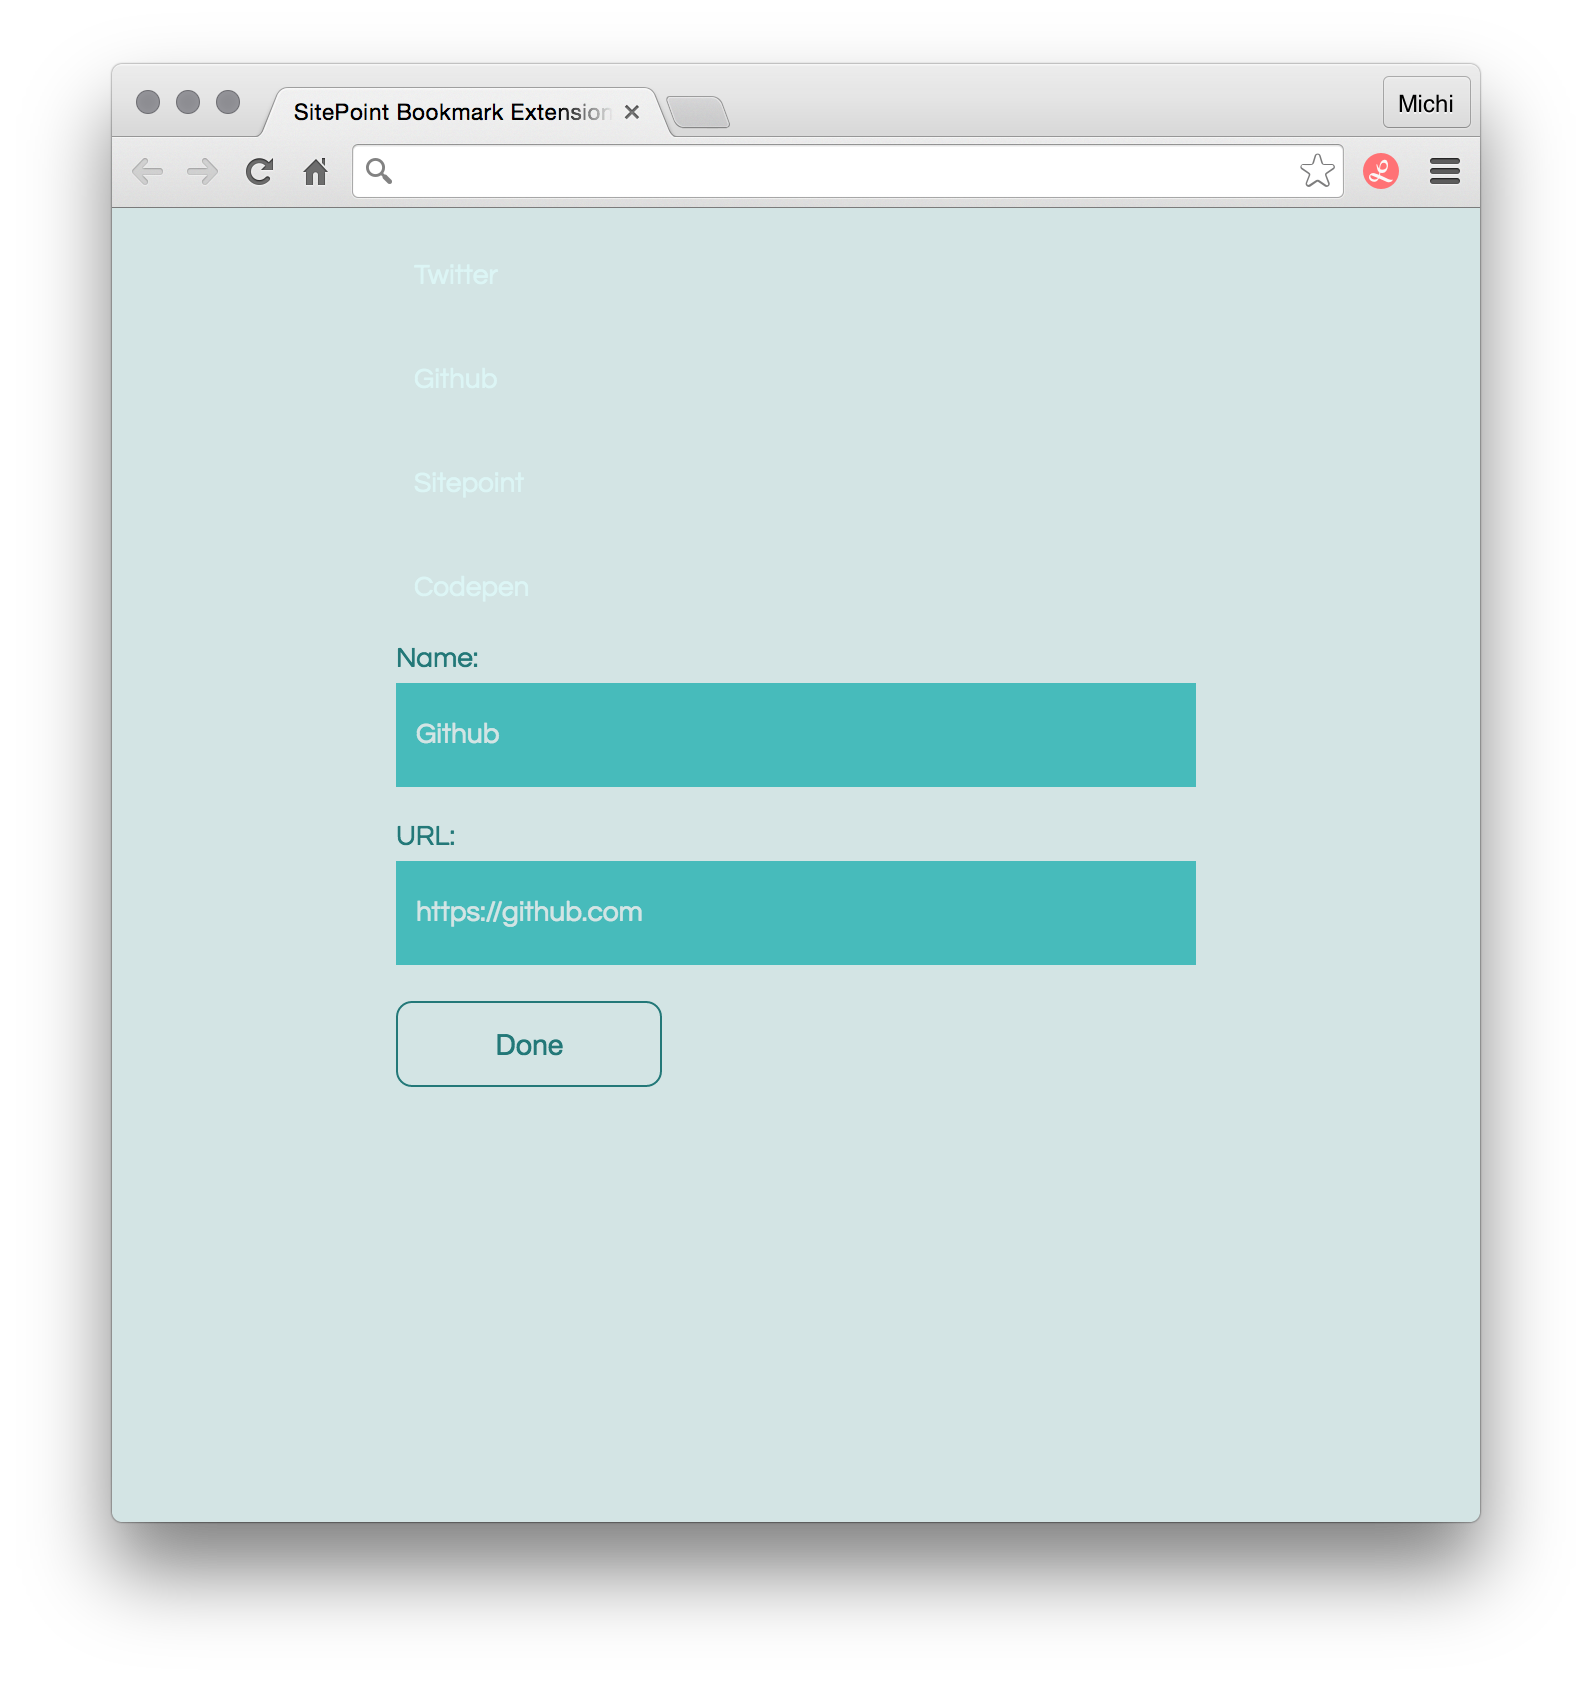
Every bookmark needs two pieces of information: its title and its URL. There will be an option to edit this information and another to delete the bookmark. To edit a bookmark, we’ll need a form with two input fields and a submit button.
To handle user input and render the list, we are going to use Angular 2 with TypeScript. Angular 2 is great for building client-side applications, and it works well with TypeScript, a typed super-set of JavaScript. If you’d like to start with an introduction to Angular 2 and TypeScript, I recommend this article.
You don’t need more than a text editor and the Node Package Manager (npm) to follow this tutorial. However, publishing an extension requires a Google developer account, which can be created here.
Setup and Structure
It is time to work on the actual app, so let’s create a new project folder:
mkdir sitepoint-extension && cd sitepoint-extension
TypeScript Config
Next we’ll add a tsconfig.json file to the project folder. This file instructs the TypeScript compiler how to compile our .ts files.
{
  "compilerOptions": {
    "target": "ES5",
    "module": "system",
    "moduleResolution": "node",
    "sourceMap": true,
    "emitDecoratorMetadata": true,
    "experimentalDecorators": true,
    "removeComments": false,
    "noImplicitAny": false
  },
  "exclude": [
    "node_modules"
  ]
}
The important settings are the compilerOptions. There we specify that the ECMAScript target version should be ES5 and that the module code generation should happen with SystemJS ("module": "system").
With "sourceMap": true source map files will be generated. These .map files are great for debugging, because with them the browser can map the compiled ES5 code onto the TypeScript code.
For this tutorial we do not need to know more about the tsconfig.json file. The complete documentation can be found here.
Package.json
We are using npm to install the packages we need, and npm scripts to create some development and build tasks. To do this, we add a package.json to our main directory.
Angular 2 is currently in beta. For this tutorial, I used the beta 7 version. You may use a newer version of course, but I can not guarantee that everything will work smoothly because the framework might still change.
{
  "name": "SitePointBookmarkExtension",
  "description": "A Chrome Extension for Bookmarks",
  "version": "1.0.0",
  "scripts": {
    "lite": "lite-server",
    "tsc": "tsc",
    "tsc:w": "tsc -w",
    "start": "concurrently \"npm run tsc:w\" \"npm run lite\""
  },
  "dependencies": {
    "angular2": "2.0.0-beta.7",
    "systemjs": "0.19.22",
    "es6-promise": "^3.0.2",
    "es6-shim": "^0.33.3",
    "reflect-metadata": "0.1.2",
    "rxjs": "5.0.0-beta.2",
    "zone.js": "0.5.15"
  },
  "devDependencies": {
    "concurrently": "^2.0.0",
    "lite-server": "^2.1.0",
    "typescript": "^1.7.5"
  }
}
Now let’s install the packages with
npm install
Notice that there are some prepared npm scripts included that can be executed with npm run [script name]. At the moment, there are four scripts which will help us compile our TypeScript files and create a development server.
Manifest.json
Before we create our app, we need to add yet another .json file, the manifest.json. This file is necessary for every Chrome extension, as it specifies information about how the Web Store and the browser should handle the extension.
We will complete the file later, but for now let’s just add the required and recommended properties:
{
    "manifest_version": 2,
    "name": "SitePoint Bookmark Extension",
    "short_name": "Make the most of a new tab",
    "description": "This extension helps you save your favorite webpages.",
    "version": "1.0.0",
    "author": "Michaela Lehr @fischaelameer"
}
Bookmark Component
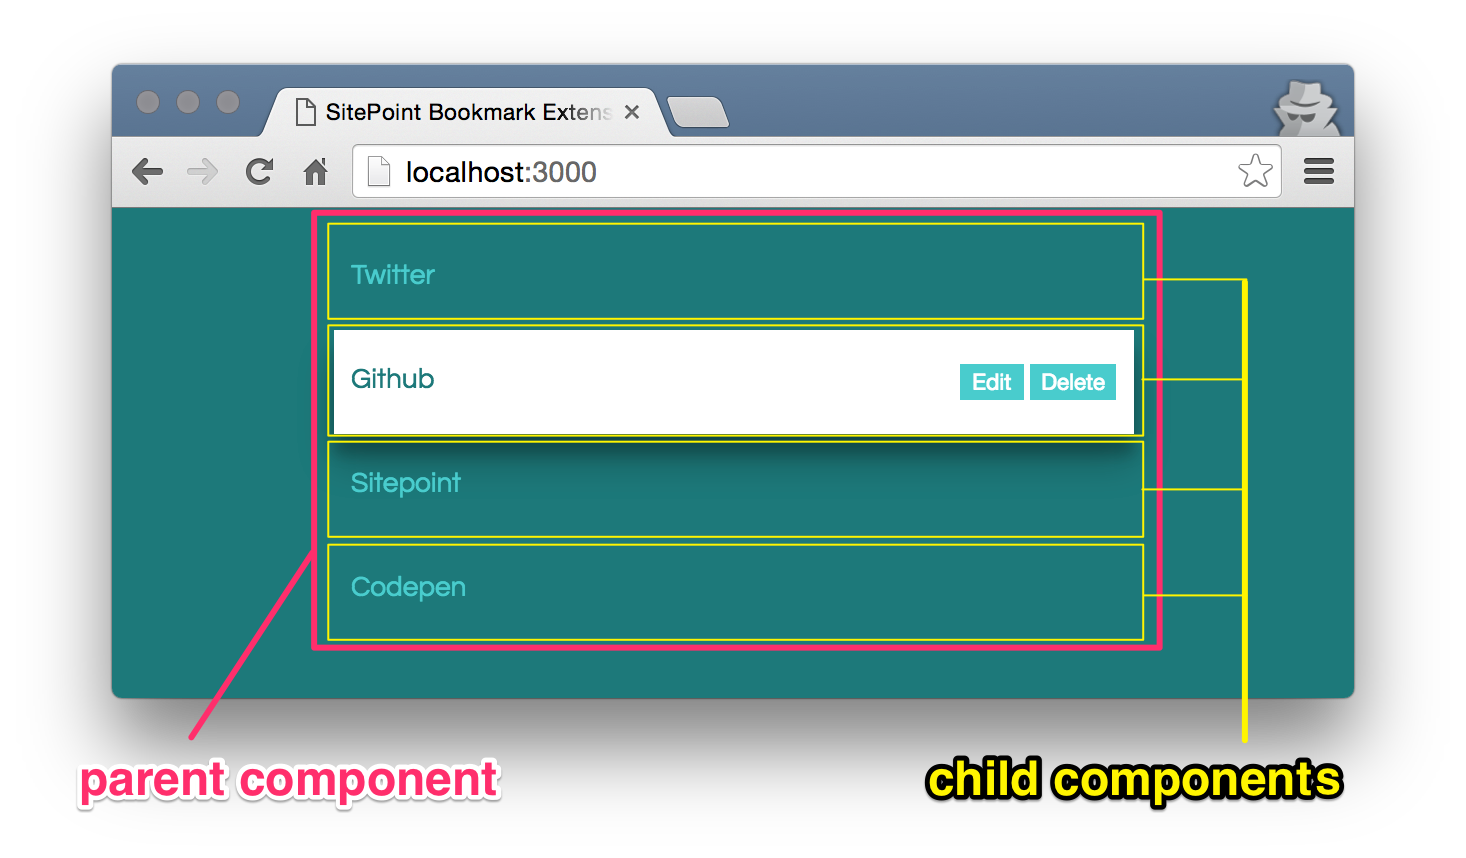
Angular 2 is a component-based framework and our first component will be a single bookmark. This component will later be a child component, since we’ll be creating a parent list component to contain the bookmarks.
Let’s create a new folder scripts and, within, a file called bookmark.component.ts.
// To create a component, we need Angular's "Component" function.
// It can be imported from the "angular2/core" module.
import { Component } from 'angular2/core';

// A component decorator tells Angular that the "BookmarkComponent" class
// is a component and adds its meta data: the selector and the template.
@Component({
    selector: 'sp-bookmark',
    template: '<h1>Bookmark</h1>'
})

// The "BookmarkComponent" module exports the "BookmarkComponent" class,
// because we will need it in other modules,
// e.g. to create the bookmark list.
export class BookmarkComponent { }
To bootstrap the BookmarkComponent component, we have to add another file, we call boot.ts:
// We need to reference a type definition (or 'typings') file
// to let TypeScript recognize the Angular "promise" function
// (we'll need this later on) otherwise we'll get compile errors.
/// <reference path="../node_modules/angular2/typings/browser.d.ts" />

// Angular's "bootstrap" function can be imported
// from the angular2/platform/browser module.
// Since we want to bootstrap the "BookmarkComponent",
// we have to import it, too.
import { bootstrap }    from 'angular2/platform/browser'
import { BookmarkComponent } from './bookmark.component'

// We can now bootstrap the "BookmarkComponent" as the root component.
bootstrap( BookmarkComponent );
Another new file, system.config.js, configures the SystemJS module loader. It will load the boot.ts file, we just created.
// SystemJS is the module loader for the application.
// It loads the libraries and our modules and then catches and logs errors,
// that may occur during the app launch.
System.config({
  packages: {
    scripts: {
      format: 'register',
      defaultExtension: 'js'
    }
  }
});
System.import('scripts/boot')
  .then(null, console.error.bind(console));
Before we can see anything in the browser, the last thing we need is an index.html file. We put the file in the root of our project directory, on the same level as the .json files.
<html>
  <head>

    <title>SitePoint Bookmark Extension</title>
    <meta name="viewport" content="width=device-width, initial-scale=1">

    <!-- We load the libraries we need directly from the "node_modules" folder.
    In a more complex project, we would use a different approach here,
    e.g. working with a build tool like gulp.js or Angular-CLI. -->
    <script src="node_modules/angular2/bundles/angular2-polyfills.js"></script>
    <script src="node_modules/systemjs/dist/system.src.js"></script>
    <script src="node_modules/rxjs/bundles/Rx.js"></script>
    <script src="node_modules/angular2/bundles/angular2.dev.js"></script>

    <!-- Load the SystemJS config -->
    <script src="scripts/system.config.js"></script>

  </head>

  <body>
    <!-- Here we are using the selector "sp-bookmark",
    which we defined as component meta data in the "BookmarkComponent" decorator.
    Everything inside the element tag will only be seen
    until our application is loaded. -->
    <sp-bookmark>Loading bookmarks...</sp-bookmark>
  </body>

</html>
Let’s test what we’ve done by compiling the TypeScript files and starting the server:
npm run start
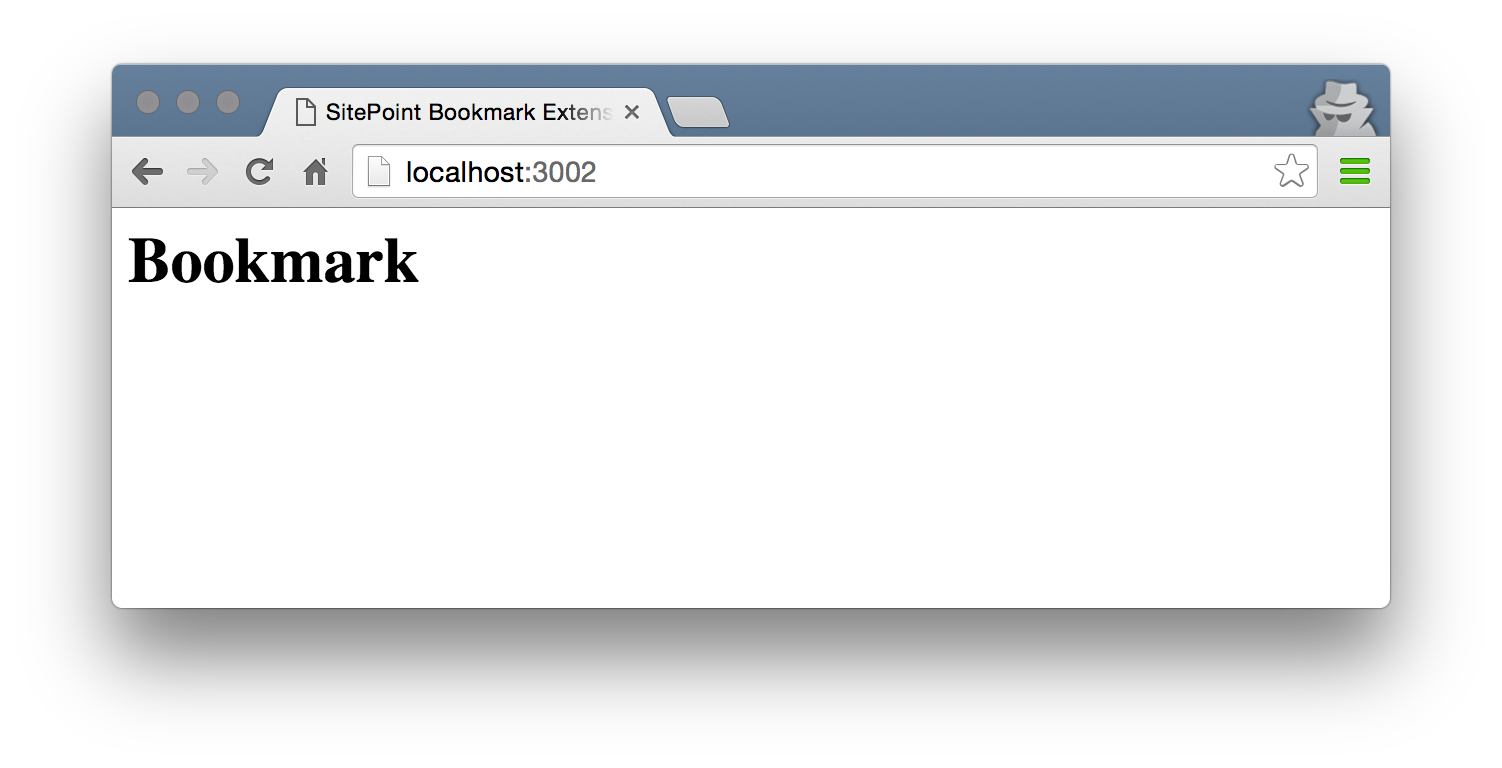
If everything worked correctly, we should see the browser open a new tab and showing a paragraph “Loading bookmarks…” before displaying our template, the headline “Bookmark”.
Bookmark Template
At the moment, our bookmark template only consists of a static headline, but this is not what we actually want. To display the complete markup of a bookmark, we will reference a separate html template called bookmark.html.
Let’s create a new folder templates in our project root, and within, our new bookmark template:
<div class="bookmark">
  <!-- We are using the interpolation template syntax
  to bind the component properties "bookmark.name"
  and "bookmark.url" to our template. -->
  <a href="{{bookmark.url}}" class="bookmark__link">{{bookmark.name}}</a>
  <!-- Every bookmark has two buttons, to let users edit and delete a bookmark.-->
  <span class="bookmark__button-wrapper">
    <!-- The edit button has an event binding "(click)",
    which sets the component variable "submitted" to true.
    It also has a property binding "[hidden]",
    which hides the button, when the variable "submitted" is true. -->
    <button class="bookmark__button" (click)="submitted=true" [hidden]="submitted">
      Edit
    </button>
    <!-- The delete button uses an event binding "(click)",
    that calls the component function "onDelete()",
    when a user clicks it. -->
    <button class="bookmark__button" (click)="onDelete(bookmark)">Delete</button>
  </span>
  <!-- To edit a bookmark, we show a form
  if the value of the property "submitted" is false. -->
  <div class="bookmark__form-wrapper" [hidden]="!submitted">
    <!-- The form has a submit button,
    which allows us to use the Angular directive "ngSubmit".
    It calls another component function "onSubmit()". -->
    <form class="bookmark__form" (ngSubmit)="onSubmit()">
      <label class="bookmark__form__label">Name: </label>
      <!-- There are two input fields for the two properties
      "bookmark.name" and "bookmark.url".
      Both use the two-way data binding template syntax,
      to change the property values. -->
      <input class="bookmark__form__input" [(ngModel)]="bookmark.name"
        placeholder="Name"/>
      <label class="bookmark__form__label">URL: </label>
      <input class="bookmark__form__input" [(ngModel)]="bookmark.url"
        placeholder="URL"/>
      <button class="bookmark__form__button" type="submit">Done</button>
    </form>
  </div>
</div>
The template reference templateUrl replaces the template meta data in the BookmarkComponent decorator:
@Component({
    selector: 'sp-bookmark',
    templateUrl: './templates/bookmark.html'
})
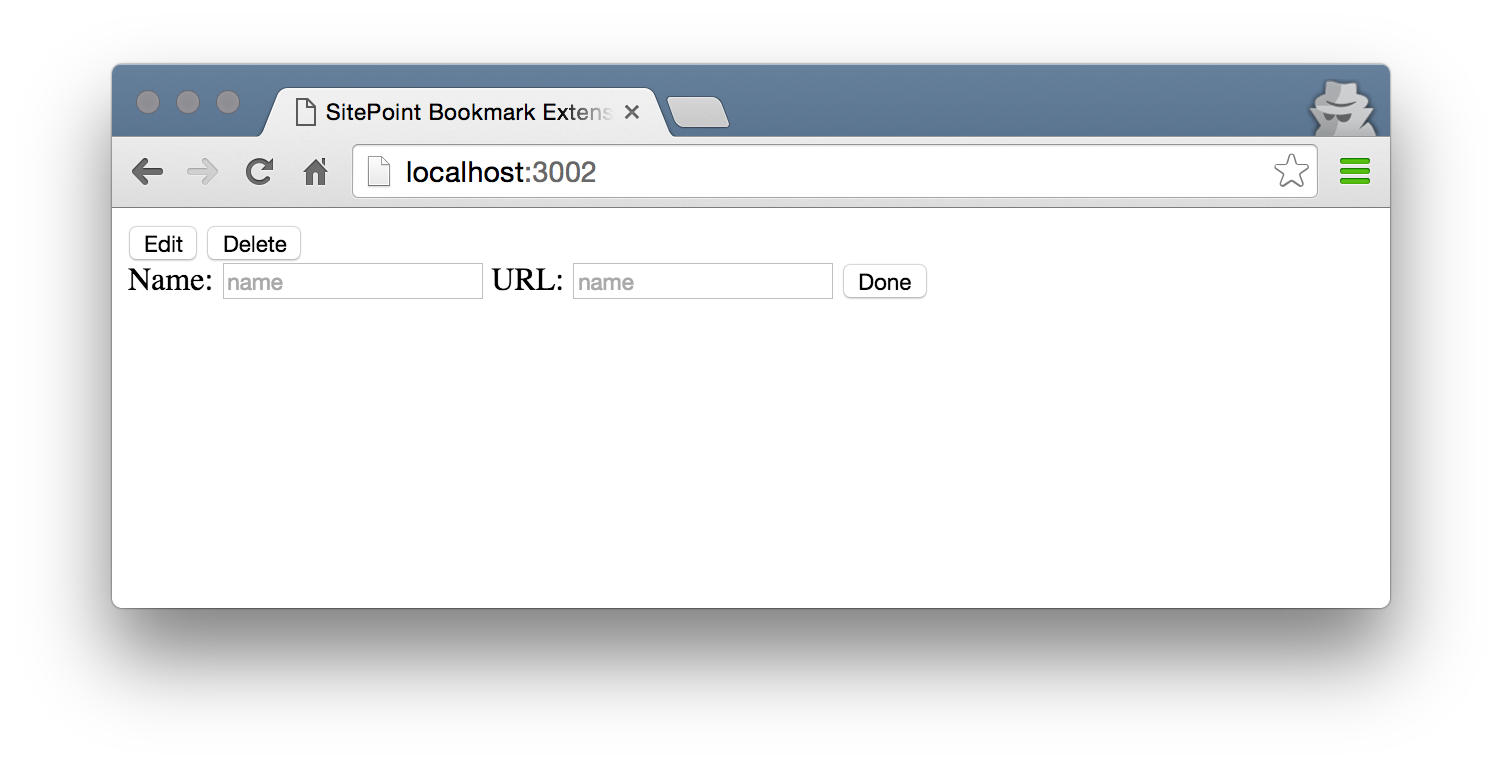
The browser shows both buttons Edit and Delete together with the form. The interpolations stay empty, because the properties bookmark.name and bookmark.url were not declared.
Let’s add the missing properties to the BookmarkComponent. We can use dynamic data from a preset or localStorage later on, but for now, let’s stick with a hard-coded bookmark.
import { Component } from 'angular2/core';

// We are using an interface to represent a bookmark.
// A single bookmark is now strongly typed:
// it has to have two properties "name" and "url",
// which both must be a string.
interface Bookmark {
  name : string,
  url : string
}

@Component({
    selector: 'sp-bookmark',
    templateUrl: './templates/bookmark.html'
})

export class BookmarkComponent {

  // The bookmark property is of the type "Bookmark",
  // defined in the interface above.
  bookmark : Bookmark = {
   name : 'SitePoint',
   url : 'https://sitepoint.com'
  }

  // Setting the default value for the "submitted" property.
  submitted = false;

}
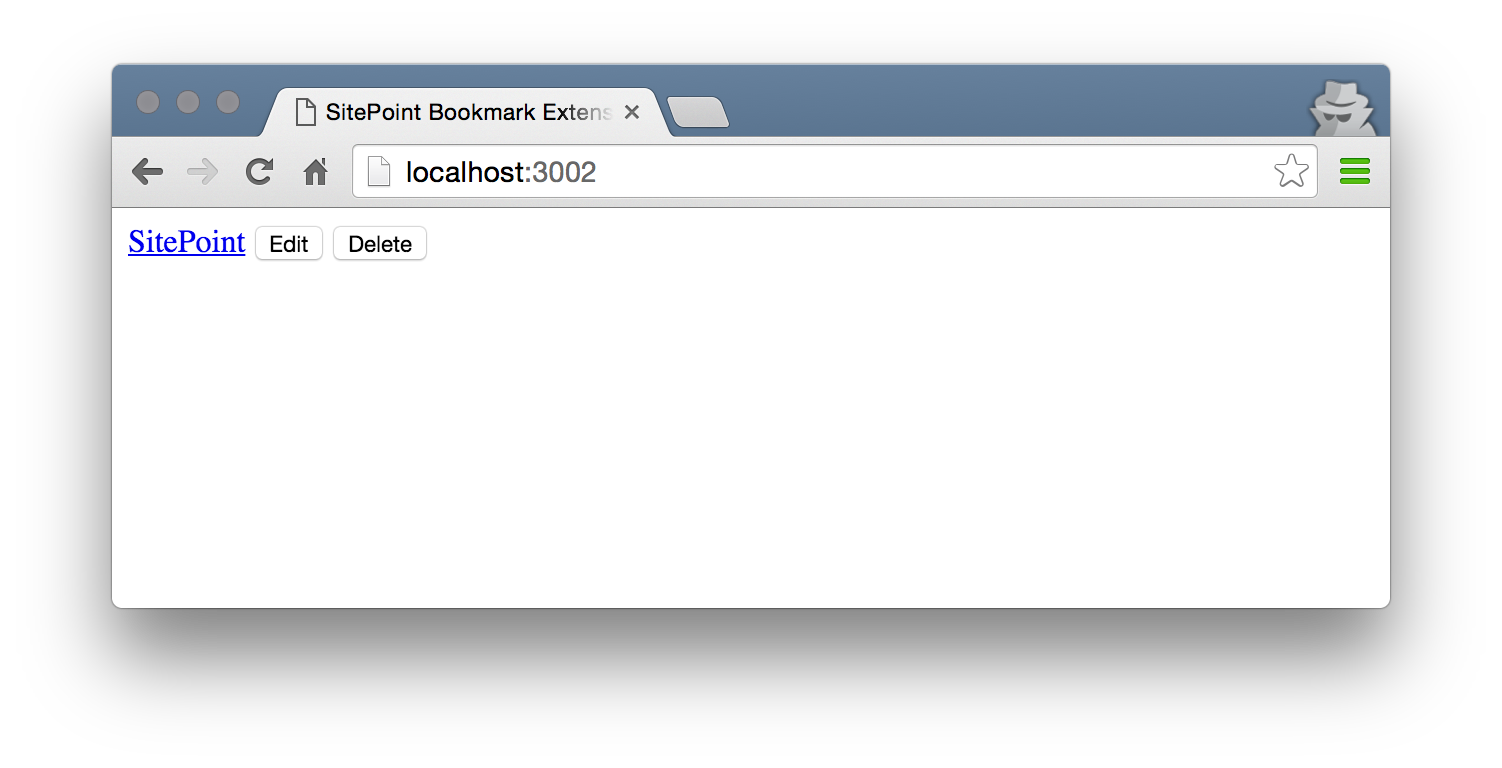
Switching to the browser it should show us a working hyperlink with two buttons. The form is currently hidden, as we set the value of the property submitted to false. The functionality for editing and deleting a bookmark is not working yet, since we haven’t implement it yet.
Bookmark Lists
To create a list of bookmarks and populate it with some data, we will create the parent component list.component.ts.
import { Component } from 'angular2/core';
import { Bookmark } from './bookmark.component';
import { BookmarkComponent } from './bookmark.component';

// The ListComponent metadata defines the component's selector,
// the url of the template and the directives used in this template.
@Component({
    selector: 'sp-list',
    templateUrl: './templates/list.html',
    directives: [ BookmarkComponent ]
})

export class ListComponent { }
We also need to change the component mentioned in the boot.ts file and the element used in index.html. We want our app to load the ListComponent, which will in turn load the BookmarkComponent.
/// <reference path="../node_modules/angular2/typings/browser.d.ts" />

import { bootstrap }    from 'angular2/platform/browser';
import { ListComponent } from './list.component';

bootstrap( ListComponent );
<body>
  <sp-list>Loading bookmarks...</sp-list>
</body>
Default Data
In this state, the bookmark list will be empty for new users as default data are missing. First-time users should see some bookmarks, though, so we will create some default bookmark data in a new file called list.data.constant.ts:
// We are using a constant here,
// because we do not want to change the default data.
export const BOOKMARKS = [
  { 'name': 'Twitter', 'url': 'https://twitter.com' },
  { 'name': 'Github', 'url': 'https://github.com' },
  { 'name': 'Sitepoint', 'url': 'https://sitepoint.com' },
  { 'name': 'Codepen', 'url': 'https://codepen.com' }
];
List Service
We do not want the ListComponent to decide whether the default data or the data stored in localStorage should be used, so a new file called list.service.ts will handle the data import.
import { BookmarkComponent } from './bookmark.component';
import { BOOKMARKS } from './list.data.constant';

// Importing the "Injectable" function from the angular2/core module
// and adding the "@Injectable" decorator lets us use dependency injection
// in this service.
import { Injectable } from 'angular2/core';

@Injectable()

export class ListService {

  // We create three variables:
  // one for possible data in the localStorage,
  // one for our default data and
  // one for the data our service should return.
  bookmarksLocalStorage = JSON.parse(  localStorage.getItem('sp-bookmarklist') );
  bookmarksDefaultData = BOOKMARKS;
  bookmarksToReturn = this.bookmarksDefaultData;

  // The "getBookmarks()" function checks if there is data in the local storage.
  // If there is, we return this data,
  // if there isn't we return the default data.
  getBookmarks() {
    if ( this.bookmarksLocalStorage !== null ) {
      this.bookmarksToReturn = this.bookmarksLocalStorage;
    }
    return Promise.resolve( this.bookmarksToReturn );
  }

  // A "setBookmarks()" function saves new data in the local storage.
  setBookmarks( bookmarks : Object ) {
    localStorage.setItem( 'sp-bookmarklist', JSON.stringify( bookmarks ) );
  }

}
Now let’s use the service in our ListComponent. We have to import the service, add it to the component as a provider, and inject it by passing it to a private variable in the constructor function.
Also, we have to add the OnInit lifecycle hook, which gets called as soon as the ListComponent gets activated. This function will use the ListService to get the list of bookmarks. Since we will get the bookmarks asynchronously, we are using ES2015 promises and arrow functions.
import { Component } from 'angular2/core';
import { OnInit } from 'angular2/core';
import { Bookmark } from './bookmark.component';
import { BookmarkComponent } from './bookmark.component';
import { ListService } from './list.service';

@Component({
    selector: 'sp-list',
    templateUrl: './templates/list.html',
    directives: [ BookmarkComponent ],
    providers: [ ListService ]
})

export class ListComponent implements OnInit {

  public bookmarks : Object;

  constructor( private listService : ListService ) {}

  // The function "getBookmarkLists" requests the bookmarks asynchronously.
  // When the promise is resolved, the callback function assigns
  // the bookmarks to the component's bookmarks property.
  getBookmarkLists() {
    this.listService.getBookmarks().then( bookmarks => this.bookmarks = bookmarks );
  }

  // The "ngOnInit" function gets called, when the component gets activated.
  ngOnInit() {
    this.getBookmarkLists();
  }

}
List Template
What is missing now is a list.html template. So let’s create one and put it in the templates folder. The template only contains a <section> element with an unordered list. A list element in this list gets repeated with Angular’s built-in structural directive *ngFor. Inside the list element the BookmarkComponent component’s selector <sp-bookmark> is used.
<section class="bookmarklist-container bookmarklist-container--blue-dark">
  <ul class="bookmarklist__sublist">
    <!-- Angular's built-in structural directive "*ngFor"
    instantiates a list element for each bookmark.
    The hash prefix means, that the private variables
    "bookmark" and "i" are created.
    They can be used on the list element's child elements.-->
    <li *ngFor="#bookmark of bookmarks; #i = index">
      <!-- The template property binding "[bookmark]"
      sets the value to the component property "bookmark".
      In addition there are two custom component event bindings
      "(bookmarkChanged)" and "(bookmarkDeleted)".
      Whenever one of these events were raised,
      their respective functions will be executed. -->
      <sp-bookmark [bookmark]="bookmark" (bookmarkChanged)="setBookmarks()"
        (bookmarkDeleted)="deleteBookmark(bookmark, i)"></sp-bookmark>
    </li>
  </ul>
</section>
To make everything work, we have to make one small change in the bookmark.component.ts file. We are using the template property binding [bookmark]. So this property has to be declared as an input property in the component decorator:
@Component({
    selector: 'sp-bookmark',
    templateUrl: './templates/bookmark.html',
    inputs : ['bookmark']
})
The browser now shows the list with the default data.
Events
At this point we’re only missing the functionality for editing and deleting a bookmark. The clicks for editing and removing a bookmark happen in the child component bookmark, and the parent component should react to them. What we need is a way to let the child component speak to the parent component. This can be achieved with custom events.
We already prepared the click handlers for both buttons in the bookmark.html template, and added the two event listeners (bookmarkChanged) and (bookmarkDeleted) for both events in the list.html template. Let’s add some events emitters to bookmark.component.ts:
import { Component } from 'angular2/core';
import { Output } from 'angular2/core';
import { EventEmitter } from 'angular2/core';

// [...] I left some code out of the example to save space.

export class BookmarkComponent {

  bookmark : Bookmark;
  submitted = false;

  // Events flow outside the child component and therefor need an output decorator.
  @Output() bookmarkChanged : EventEmitter<any> = new EventEmitter();
  @Output() bookmarkDeleted : EventEmitter<any> = new EventEmitter();

  // Whenever a user clicks on "Done" after editing a bookmark,
  // an event is fired, which indicates that the bookmark was changed.
  // To hide the form, the "submitted" property is set to false again.
  onSubmit( bookmark : Bookmark ) {
    this.submitted = false;
    this.bookmarkChanged.emit( bookmark );
  }

  // When the "Delete" button is clicked, the event "bookmarkDeleted"
  // will be fired.
  onDelete( bookmark : Bookmark ) {
    this.bookmarkDeleted.emit( bookmark );
  }

}
Next, we have to react to these events in ListComponent with the two functions setList() and deleteBookmark():
// [...]

export class ListComponent implements OnInit {

  public bookmarks : Array< Object >;

  constructor( private listService : ListService ) {}

  getBookmarkLists() {
    this.listService.getBookmarks().then( bookmarks => this.bookmarks = bookmarks );
  }

  ngOnInit() {
    this.getBookmarkLists();
  }

  // setList uses the "ListService" to save the complete list.
  setList() {
    this.listService.setBookmarks( this.bookmarks );
  }

  // The function deletes the bookmark and saves the complete list.
  deleteBookmark( bookmark : Bookmark, i : number ) {
    this.bookmarks.splice( i, 1 );
    this.setList();
  }

}
Now everything is working. Check both functionalities by editing or deleting a bookmark.
Styling
Before adding the extension functionality to create new bookmarks with the Chrome extension button, we will take a few seconds to add some CSS. Since we already prepared the markup with classes, we just have to add a CSS file in a new CSS folder and reference it in the index.html. You can download the CSS here.
<html>
  <head>

    <title>SitePoint Bookmark Extension</title>
    <meta name="viewport" content="width=device-width, initial-scale=1">

    <link rel="stylesheet" href="css/main.css">

    <!-- [...] -->

</html>
The app now looks like this:

Chrome Extension Features
We are ready to add some Chrome extension features. What we want to do is add an icon to the Chrome browser toolbar, which will save the current open page to our bookmark list when it is clicked. Furthermore a new tab should open the Angular 2 bookmark list instead of Chrome’s default new page. Let’s begin by using the Chrome JavaScript API to save the current open webpage into our list.
Event Page
We have to add an extra script to the scripts folder, that will be loaded, when a user clicks the icon in the toolbar. Since we are using Event Pages for this task, we will call the new script eventPage.ts. Some code should be executed, when a user clicks the toolbar icon. So we use the Chrome.browserAction.onClicked listener. To get the title and URL of the currently opened tab, the Chrome.tabs API is necessary.
///<reference path="chrome/chrome.d.ts" />

import { Injectable } from 'angular2/core';
import { ListService } from './list.service';

@Injectable()

export class EventPage {

  // The event listener should be set when the "EventPage" class is initialized.
  // Therefore we are using the constructor for adding it to the "Chrome.browserAction".
  // To set and get the bookmarkLists, we are using the "ListService".
  constructor ( listService : ListService ) {

    let bookmarkLists : Array< Object >;

    // The "Chrome.browserAction" object throws an error,
    // when it is not available in development mode.
    // This is why we are only logging a message,
    // if it is undefined.
    if (typeof chrome.browserAction !== 'undefined') {
      // The Chrome "browserAction" is responsible for the icon in the Chrome toolbar.
      // This is when we are get the latest list of bookmarks from the "ListService"
      // and call the function "getSelectedTab" after the promise is resolved.
      chrome.browserAction.onClicked.addListener( function ( tab ) {
        listService.getBookmarks().then( bookmarkLists => {
          bookmarkLists = bookmarkLists;
          getSelectedTab( bookmarkLists );
        });
      });
    } else {
      console.log( 'EventPage initialized' );
    }

    // The Chrome tabs API gives us access to the current tab,
    // its title, and its url, which we are using to add a new bookmark
    // and save the list of bookmarks again with the "ListService".
    function getSelectedTab( bookmarkLists ) {
      chrome.tabs.getSelected( null, function ( tab ) {
        let newBookmark : Object = {
          name : tab.title,
          url : tab.url
        };
        bookmarkLists.push( newBookmark );
        listService.setBookmarks( bookmarkLists );
      });
    }
  }

}
The first line needs some explanation, because we need more files to allow the script to be compiled. To use features of the Chrome JavaScript API in TypeScript, we have to tell TypeScript about the API’s global objects. To achieve this we have to add the reference path ///<reference path="chrome/chrome.d.ts" /> to the script and also TypeScript definition files (.d.ts) to our project’s script folder. The file we need can be downloaded here.
Manifest.json
Everything comes together in the manifest.json file. Let’s add the necessary properties one after another. First we will add a reference to the extension icons and the toolbar icons with a tooltip:
"icons": {
    "19": "Icon-19.png",
    "38": "Icon-38.png",
    "48": "Icon-48.png",
    "128": "Icon-128.png"
},

"browser_action": {
    "default_icon": {
        "19": "Icon-19.png",
        "38": "Icon-38.png"
    },
    "default_title": "Open a new tab to view your bookmarks."
}
A Chrome Override Page will load our Angular app, whenever a user opens a new tab:
"chrome_url_overrides" : {
    "newtab": "index.html"
}
The background property with a persistent: false object adds the Chrome event listeners for the Event Page script:
"background": {
    "page": "index.html",
    "persistent": false
}
Next we have to provide settings for the content security policy (CSP). The default content security policy for "manifest_version": 2 is script-src 'self'; object-src 'self'. In our case, we have to add unsafe-eval because one of our libraries depends on evaluated JavaScript.
"content_security_policy": "script-src 'self' 'unsafe-eval'; object-src 'self'"
The last thing we have to add to the manifest.json is a permissions property, that allows us access information about the active tab.
"permissions": ["activeTab"]
Test the Extension in Chrome
We are ready to test the extension in action. Browsing to chrome://extensions/ gives an overview of the current installed extensions and also an option to upload an unpacked extension. To upload an extension to the Chrome Web Store, it has to be compressed as .zip. Let’s add two more npm scripts, that will help us copy the modules we need into a lib folder and compress everything:
"copy-lib": "mkdir lib && cp node_modules/{angular2/bundles/angular2-polyfills.js,systemjs/dist/system.src.js,rxjs/bundles/Rx.js,angular2/bundles/angular2.dev.js} lib/",

"compress": "zip -r -X $npm_package_name-$npm_package_version.zip ./{templates/*,lib/*,css/*,scripts/*.js,*.html,manifest.json,*.png,*.ico}"
Don’t forget to change the reference to these files in the index.html file:
<script src="lib/angular2-polyfills.js"></script>
<script src="lib/system.src.js"></script>
<script src="lib/Rx.js"></script>
<script src="lib/angular2.dev.js"></script>
We run the npm scripts with
npm run copy-lib
npm run compress
And we are done! To test the extension in Chrome, visit chrome://extensions/, activate the developer mode and use the “Load unpacked extension” button to upload the unpacked zip folder. A new tab should show our bookmark app and clicking on the new extension icon on another website in the toolbar, should add a new bookmark to this list. The extension’s tab has to be refreshed, to make the new bookmark visible.
Note: To debug the eventPage script we can open a debug window from the chrome://extensions/ page. There is a hyperlink for background pages called “Inspect views”.
What to Do Next?
Our bookmark app can definitely be improved:
- There are additional features you could add, like changing the color scheme, and a bookmark import.
- There are also UX improvements, e.g. a feedback popup after a user successfully added a new bookmark.
- We might want to add unit tests or end-to-end tests to our app. A developer’s guide about testing Angular 2 apps can be found here.
- A better build process and some environment variables would be great. Instead of npm scripts, we could use the Angular-CLI which has further options for scaffolding, a local development server and end-to-end tests.
- And of course, you may want to publish your app to the Web Store. This can be done from the Chrome Developer Dashboard.
I hope this tutorial has given you a first impression and some inspiration for developing a Chrome extension with Angular 2 and TypeScript. If you want to dive deeper into these topics, I can recommend these resources:
- API Preview and official Cookbooks for Angular 2
- TypeScript Handbook
- Chrome Platform API documentation
Frequently Asked Questions (FAQs) on Building Chrome Extensions with Angular 2
How do I start building a Chrome extension using Angular 2?
To start building a Chrome extension using Angular 2, you first need to set up your development environment. This involves installing Node.js and npm, which are essential for managing Angular packages and running the application. Once you have these installed, you can use the Angular CLI to create a new Angular project. After creating the project, you can start building your Chrome extension by creating a manifest.json file, which is the configuration file for the extension.
What is the role of the manifest.json file in a Chrome extension?
The manifest.json file is a crucial component of a Chrome extension. It provides important information about the extension such as its name, version, permissions, and files it needs to run. This file is read by the Chrome browser to understand how to interact with the extension. It’s important to correctly configure this file to ensure your extension functions as expected.
How can I debug my Chrome extension built with Angular 2?
Debugging a Chrome extension built with Angular 2 is similar to debugging any other web application. You can use Chrome’s built-in Developer Tools to inspect elements, view console logs, and debug scripts. To access these tools, right-click on your extension’s popup and select “Inspect”. This will open the Developer Tools where you can debug your extension.
How can I use Angular services in my Chrome extension?
Angular services can be used in a Chrome extension just like in any other Angular application. You can create a service using the Angular CLI and inject it into your components using Angular’s dependency injection system. This allows you to share data and functionality across different components in your extension.
How can I package and distribute my Chrome extension built with Angular 2?
Once you’ve built your Chrome extension with Angular 2, you can package it by creating a .zip file of your project directory. This .zip file can then be uploaded to the Chrome Web Store for distribution. Remember to include all necessary files in your .zip file, including the manifest.json file and any assets used by your extension.
Can I use TypeScript to build my Chrome extension with Angular 2?
Yes, you can use TypeScript to build your Chrome extension with Angular 2. In fact, Angular is built with TypeScript, so it’s the recommended language for developing Angular applications. TypeScript provides static typing, which can help catch errors early in the development process, and it also offers features like classes and interfaces that can make your code more organized and easier to understand.
How can I handle permissions in my Chrome extension built with Angular 2?
Permissions in a Chrome extension built with Angular 2 are handled through the manifest.json file. In this file, you can specify the permissions your extension needs to function. These might include permissions to access certain websites, read and modify browser history, or use browser features like notifications or storage.
Can I use Angular routing in my Chrome extension?
Yes, you can use Angular’s routing system in your Chrome extension. This allows you to create a multi-page extension with navigation between different views. However, keep in mind that each view in your extension will be a separate Angular application, so you’ll need to handle state management accordingly.
How can I update my Chrome extension built with Angular 2?
To update your Chrome extension built with Angular 2, you need to increment the version number in your manifest.json file and upload the updated .zip file to the Chrome Web Store. Once the update is approved, it will be automatically pushed to all users who have installed your extension.
Can I use Angular DevTools to debug my Chrome extension?
Yes, you can use Angular DevTools to debug your Chrome extension. Angular DevTools is a Chrome extension itself that provides tools for debugging and profiling Angular applications. It can be used to inspect the component tree, analyze change detection, and view component properties and state.
Michaela is a front-end developer and UX designer from Berlin. She has co-founded the development studio GeilDanke. In her free time she enjoys making games, practicing yoga, surfing and knitting.

