

Key Takeaways
- Angular 2 is built using ES6 and ES7 features, focusing on simplicity and targeting evergreen browsers, unlike Angular 1 which was built using ES5.
- TypeScript, a typed superset of JavaScript developed by Microsoft, is used in Angular 2 to reduce runtime errors and improve coding efficiency.
- The tutorial demonstrates setting up an Angular 2 project using TypeScript, including cloning a seed project and setting up the development environment.
- Key concepts in Angular 2 include components and services, which replace directives and controllers from Angular 1, enhancing modularity and maintainability.
- Angular 2’s use of observables instead of promises for HTTP requests introduces a new way of handling asynchronous data that integrates seamlessly with Angular’s change detection mechanisms.
This article is based on a alpha version of Angular 2 which is now obsolete. For an up-to-date tutorial, please see the article Angular 2 Tutorial: Create a CRUD App with Angular CLI.
The current stable version of Angular (i.e, Angular 1.x) was built using the features of ES5 and was meant to work on most of the browsers, including some of the older versions of IE. The framework had to create a module system of its own, abstract away some of the language features, and provide a highly abstracted and configuration based interface to work on.
All good things of Angular 1 are still available in Angular 2 but the framework is simpler. Angular 2 is built with features of ES6 (and ES7), Web Components in mind, and targeting evergreen browsers.
TypeScript is a typed super set of JavaScript which has been built and maintained by Microsoft and chosen by the AngularJS team for development. The presence of types makes the code written in TypeScript less prone to run-time errors. In recent times, the support for ES6 has been greatly improved and a few features from ES7 have been added as well.
In this article, we’ll see how to use Angular 2 and TypeScript to build a simple application. As Angular 2 is still in alpha, syntax of the code snippets shown in this article may change before it reaches the stable release. The code developed in this article is available on GitHub.
Basics of Angular 2
Angular 2 was built with simplicity in mind. The team removed a number of recipes of Angular 1 that made us think “Why are we doing this?” (if you want to know what has been removed, I suggest you to take a look at this video titled Angular 2.0 Core session by Igor and Tobias). Now the framework is made of a small set of building blocks and some conventions to be followed.
The building blocks which are present in Angular 2 are:
- Components: A component is similar to directives in Angular 1. It is built with features of Web Components. Every component has a view and a piece of logic. It can interact with services to achieve its functionality. The services can be “Dependency Injected” into the component. Anything that has to be used in view of the component has to be a public member on the instance of the component. The components use property binding to check for changes in the values and act on the changes. The components can handle events and event handlers are the public methods defined in the component’s class.
- Services: A service is a simple ES6 class with some annotations for Dependency Injection.
As in Angular 1, Angular 2 uses Dependency Injection to get references of the objects. As scope has been removed from the framework, we don’t have digest cycle running. Therefore, we don’t need to keep calling scope.$apply while working in non-Angular world. Angular 2 uses Zone.js to kick the changes and this library knows when to act.
An Angular 2 application starts with a component, and the rest of the application is divided into several components which are loaded inside the root component.
If you want to learn more about the basics of Angular 2, please check Victor Savkin’s blog post about Core Concepts in Angular 2.
Setting Up
Angular 2 is still in alpha at the time of this writing, so the framework and the resources around it are still raw. They’ll go through a number of changes and will get better by the time it will be ready for production.
There is a great number of seed projects to get started with Angular 2 and TypeScript. I think that this one by Elad Katz could be a good starting point to do some practice. To start, if you want to follow along with this tutorial, clone this repository. Then, follow the instructions mentioned in the readme file to install and run the seed project.
The repository:
- contains a basic Angular 2 application using TypeScript
- uses JSPM/SystemJS to load dependencies on the pages
- refers to TypeScript definition files of libraries using TSD and defines the missing definitions of Angular 2 in a local file called
angular2.temp.d.ts - recalls an Express REST API to consume in Angular
- uses Gulp to transpile TypeScript code to ES5 and start a Node.js server
- contains source TypeScript files which are located inside the scripts folder while the public folder is used to store transpiled files.
How to Pin Your Achievements
Building Express APIs
Now that you’ve an idea of what Angular 2 is and you have also cloned the seed project, let’s modify it. We’ll build a simple application to pin your achievements on a board. As the first thing, let’s add the Express APIs to get and add the achievements. As I forked the repository and modified the seed project to add basic Express APIs, you’ll see an endpoint serving the existing list of all the achievements. To post a new achievement, we need to add an endpoint.
To achieve this first task, open the server.js file and add the following snippet:
app.post('/api/achievements', function(request, response){

    achievements.push(JSON.parse(request.body));

    response.send(achievements);

});
As Angular 2’s Http API is still pretty raw, it posts the data in the form of plain text. So, let’s add a bodyParser middleware to read the text from the request body:
app.use(bodyParser.text({

   type: 'text/plain'

}));
Modifying Startup Component and Routes
The index.html file is the starting point of the application. The body portion of this file loads the bootstrap script and creates the my-app component. This component in turn loads other components into the application. The bootstrap.ts file bootstraps the AngularJS application using the main component. As you see, the required injectables exported by the other modules are passed into the function. This makes the services and the directives exported by these modules available to all child components of my-app. We’ll be using a form in the application and for that we need to add formInjectables exported by the module angular2/forms to the list of the injectables:
import {formInjectables} from 'angular2/forms';

bootstrap(MyApp, [routerInjectables, httpInjectables, formInjectables, AchievementsService]);
The startup component of the project is located inside the app folder. The component has two annotations applied on it:
- Component: It holds the configuration properties of the component like selector, names of properties, names of events and list of the injectables into the component. The value of the selector can be the same as the string to be used on HTML markup, it doesn’t need to be camel-cased
- View: The view annotation loads the data needed for the view part of the component. It includes an HTML template (can be inline or a template URL) and a list of the directives that the component needs
Below, you can see the relevant code:
@Component({

  selector: 'my-app'

})

@View({

  templateUrl: _settings.buildPath + '/components/app/app.html',

  directives: [RouterLink, RouterOutlet]

})
The my-app component has to define the routes for the application and provide a placeholder to load the child views. The Router service can be used inside the MyApp class to define the routes. The following snippet defines the two routes needed for the application:
export class MyApp {

  constructor(@Inject(Router) router: Router) {

    router.config([

      { path: '', as: 'home', component: Home },

      { path: '/add', as: 'add', component: Add }

    ]);

  }

}
As the add component has not been added yet, you’ll face some issues if you try to run the application now. We need to create a new folder inside the components folder and name it add. Then, we add two files inside this folder: add.ts and add.html. Finally, add the following snippet to the add.ts file (we’ll add more code later):
import {Component, View} from 'angular2/angular2';

import { _settings } from '../../settings'

import {FormBuilder, Validators, formDirectives, ControlGroup} from 'angular2/forms';

import {Inject} from 'angular2/di';

import {Router} from 'angular2/router';

import {AchievementsService} from '../../services/achievementsService';
@Component({

  selector: 'add',

  injectables: [FormBuilder]

})

@View({

	templateUrl: _settings.buildPath + '/components/add/add.html',

  directives:[formDirectives]

})

export class Add {

}
The view of this component will have a form accepting inputs to be saved as a new achievement. So, add the following HTML to this page:
<div>Add New Achievement</div>

<br />

<form>

  <div class="input-group">

    <span>Title</span>

    <input type="text" id="title" class="form-control" />

  </div>

  <div class="input-group">

    <span>Type</span>

    <input type="text" id="type" class="form-control" />

  </div>

  <div class="input-group">

    <span>From</span>

    <input type="text" id="from" class="form-control" />

  </div>

  <div> </div>

  <div class="input-group">

    <input type="submit" value="click" class="btn btn-primary" />

    <input type="reset" value="Reset" class="btn" >

  </div>

</form>
In the view, we need to create links for navigating between the pages. The router-link attribute component helps us in doing this. We need to assign the name of the component to the attribute and it’ll take care of building the link based on the path previously configured for the component.
<ul class="nav navbar-nav">

  <li>

    <a router-link="home">Home</a>

  </li>

  <li>

    <a router-link="add">Add</a>

  </li>

</ul>
The final piece of the HTML code we need in the root component is a route-outlet element. This is the place where the child components will be loaded while navigating across the views.
<router-outlet></router-outlet>
Listing all the Achievements
Now, let’s modify the home component to display a list of all the achievements in the form of pinned boxes on a wall. We’ll use Bootstrap to style this page. Bootstrap’s CSS is already loaded in index.html from a CDN.
Before working on the UI, let’s create a service to send Ajax requests to the Express.js API to interact with the data. We have a file named dummyService under the services folder. Rename it as achievementsService and the class inside the file as AchievementsService. Add the following code to this file. This piece of code sets up Dependency Injection for the service and adds a method to get all the achievements from the service:
import {Component, View} from 'angular2/angular2';

import { Inject} from 'angular2/di';

import {Http} from 'angular2/http';
export class AchievementsService {

  constructor( @Inject(Http) private http: Http) {

  }
  getAllAchievements(): any {

    var path = '/api/achievements';

    return this.http.get(path);

  }

}
The methods of the Http class don’t return promises but observables. The latter are the objects that have built-in capabilities to notify when something changes. The home component needs an object of the AchievementsService and NgFor directive to retrieve and show the list of the achievements.
To move on with the project, replace the code in home.ts with the following:
import {Component, View, NgFor} from 'angular2/angular2';

import { _settings } from '../../settings'

import {AchievementsService} from '../../services/achievementsService';

import {Inject} from 'angular2/di';
@Component({

  selector: 'home',

  injectables: [AchievementsService]

})

@View({

  templateUrl: _settings.buildPath + "/components/home/home.html",

  directives: [NgFor]

})

export class Home {

  achievements: Array;
  constructor( @Inject(AchievementsService) private achievementsService: AchievementsService) {

    achievementsService.getAllAchievements()

      .map(r => r.json())

      .subscribe(a => {

        this.achievements = a;

      });

  }

}
The subscribe callback added in the above snippet is called after the observable sends a notification. Zones understand how the observables work and update the UI after the observable has set the value. The markup in the file home.html is really straightforward and it’s shown below:
<div class="row">

  <div *ng-for="#achievement of achievements" class="thumbnail col-md-3 col-sm-3 col-lg-3">

    <span class="glyphicon glyphicon-pushpin"></span>

    <div class="caption">

      <strong>{{achievement.title}}</strong>

    </div>

    <p class="text-center">Level: {{achievement.type}}</p>

    <p class="text-center">From: {{achievement.from}}</p>

  </div>

</div>
Everything in the above snippet looks familiar except two special characters on the div element containing ng-for. The meaning of these symbols is:
- The star symbol in front of
ng-forindicates that the content inside the element will be registered as a template - The hash symbol in front of the record variable achievement makes it a local variable. It can be used inside the template for data binding
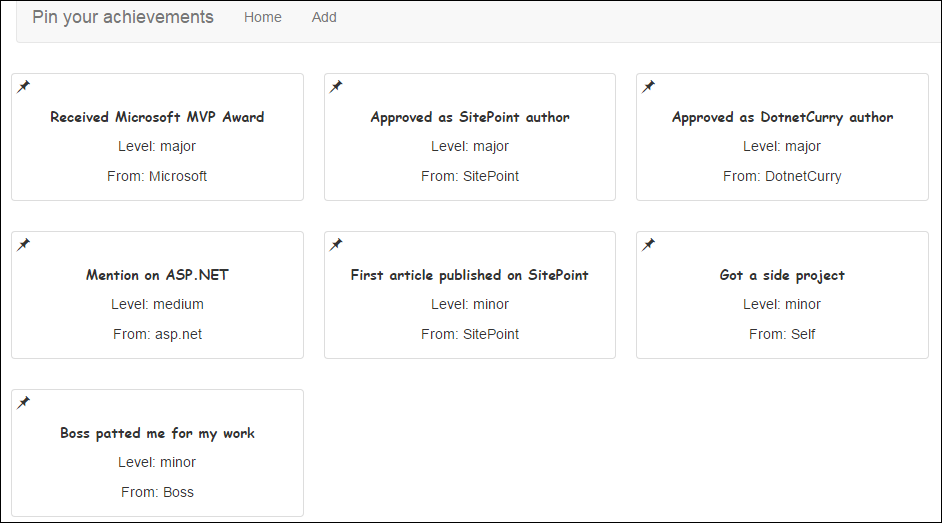
Let’s save these changes and run the application. You’ll see the list of the achievements in the form of boxes.
Adding a New Achievement
We need to have a form accepting details of an achievement and send these details to the Express server on submission. Add the following method to AchievementsService to post data to the server:
addAnAchievement(newAchievement) {

  var path = '/api/achievements';

  return this.http.post(path, JSON.stringify(newAchievement));

}
The add component view will perform the following tasks:
- Accept values in a form and post it to the Express server
- Once the value is successfully inserted, redirect the user to the home screen
Forms can be created and managed in multiple ways in Angular 2. They can be template driven, model driven and data driven. Discussing more details of these approaches is outside the scope of this article, but in case you’re interested, in this project we’ll use the model driven approach. Though we won’t be using validation in this article, you’ll be happy to know that forms in Angular 2 also support validation.
In model driven approach, we need to create a model object to be bound on the form and declaratively attach it to the form. The fields in the form are bound to the properties of the model object. The value of the model object is passed to the service to send it to the server.
The next step you need to perform is to open the file add.ts and add the following code inside the Add class:
addAchievementForm: any;
constructor( @Inject(FormBuilder) private formBuilder: FormBuilder,

    @Inject(Router) private router: Router,

    @Inject(AchievementsService) private achievementsService: AchievementsService) {

  this.addAchievementForm = formBuilder.group({

    title: [''],

    type: [''],

    from: ['']

  });

}
addAchievement() {

  this.achievementsService.addAnAchievement(this.addAchievementForm.value)

    .map(r => r.json())

    .subscribe(result => {

      this.router.parent.navigate('/');

    });

}
The property addAchievementForm on the class has to be used on the form. The properties of this object would be attached to the controls inside the form using ng-control directive. The method addAchievement uses the form model object to pass the value entered on the screen to the server and sends the user to the home screen once it receives a response.
You may have noticed that we’re not handling error cases of the HTTP requests. That is because the feature is not yet available in the HTTP API, but surely it’ll get better in the future.
Now, open the file app.html and modify the form element as shown below:
<form (ng-submit)="addAchievement()" [ng-form-model]="addAchievementForm">
In the above snippet, the parenthesis around ng-submit indicate that it’s an event. The function assigned to it would be called when the form is submitted by the user. The square brackets around the ng-form-model directive indicate the value is bound to a property of instance of the component.
Now the only pending change is attaching fields of the model object to the input controls. The following snippet shows the modified input text box for the title, and modify the other controls accordingly:
<input type="text" id="title" ng-control="title" class="form-control" />
To conclude, save all the changes and run the application. You should be able to add new achievements now.
Conclusions
Angular 2 embraces the current latest and greatest technologies of the front-end world. In addition, by using TypeScript to write code, it boosts up the productivity of the developers. As we saw, the framework is completely re-written and helps you in doing many things in a simpler way. As the framework is still in alpha, I suggest you to not use it in an application that is in production. Be patient and wait to see how the AngularJS team shapes its baby.
Frequently Asked Questions about Angular 2 and TypeScript
What are the benefits of using TypeScript over JavaScript for Angular 2?
TypeScript is a statically typed superset of JavaScript that compiles to plain JavaScript. It offers several advantages over JavaScript when used with Angular 2. Firstly, TypeScript provides static typing which helps with code robustness and maintainability. It can catch errors at compile-time rather than at runtime, which can save a lot of debugging time. Secondly, TypeScript supports ES6 features like classes, modules, and interfaces, which are extensively used in Angular 2. Lastly, TypeScript has great tooling support with IntelliSense, which provides active hints as a code is added.
How do I get started with Angular 2 using TypeScript?
To get started with Angular 2 using TypeScript, you need to set up your development environment first. This involves installing Node.js and npm, and then using npm to install TypeScript and Angular CLI. Once the setup is complete, you can create a new Angular project using the “ng new” command. The project will have a default structure with a “src” folder where you can start writing your Angular 2 code using TypeScript.
Can I use other programming languages for Angular 2?
Yes, besides TypeScript, you can also use JavaScript (ES5 and ES6) and Dart to write Angular 2 applications. However, TypeScript is the most preferred language for Angular 2 due to its static typing and ES6 feature support.
What is the role of decorators in Angular 2 and TypeScript?
Decorators are a special kind of declaration in TypeScript. They are used in Angular 2 to add metadata to classes, properties, methods, and method parameters. This metadata tells Angular how to process a class or a class member. For example, the @Component decorator tells Angular that a class is an Angular component.
How do I handle events in Angular 2 using TypeScript?
In Angular 2, you can handle events such as clicks or user input using event binding. You can bind a DOM event to a method in your TypeScript component class using parentheses around the event. Inside the method, you can write the code to handle the event.
How do I use services in Angular 2 with TypeScript?
Services in Angular 2 are TypeScript classes that encapsulate well-defined functionality. They can be injected into components and other services using Angular’s dependency injection system. To create a service, you define a class and decorate it with the @Injectable decorator.
How do I use modules in Angular 2 with TypeScript?
Modules in Angular 2 help organize an application into cohesive blocks of functionality. An Angular module is a TypeScript class decorated with the @NgModule decorator. It can declare components, directives, and pipes, and can import functionality from other modules.
How do I use forms in Angular 2 with TypeScript?
Angular 2 provides two ways to work with forms: template-driven and reactive. Both methods involve creating a form model, binding it to HTML form elements, and accessing the form data in your TypeScript component class.
How do I use routing in Angular 2 with TypeScript?
Routing in Angular 2 allows you to navigate from one view to another as users perform tasks in your application. You can define routes in a separate TypeScript file or directly in the @NgModule decorator. The RouterModule provides services for navigating to routes and getting information about the current route.
How do I test Angular 2 applications written in TypeScript?
Angular 2 provides testing utilities that make it easy to test your TypeScript components, services, and pipes. You can write unit tests using Jasmine and run them with the Karma test runner. For end-to-end testing, you can use Protractor.