

When I first came across Heroku it was a Ruby-only cloud service. I wasn’t a Ruby developer so I quickly forgot about it. But then they partnered with Facebook and you could create a Facebook app hosted on Heroku with the Facebook PHP-SDK in just a couple of clicks.
Now the question: is it possible to create a PHP application with Heroku that works both outside and inside of Facebook? The answer is yes, and I’ll show you how.
In this article you’ll create a simple link-sharing application. Its user can share a URL with a title and an optional description. Each user is identified by a name and email address (which is kept private). If the user runs the app inside Facebook, the name and email fields are taken from his or her profile.
Key Takeaways
- Heroku initially supported only Ruby but now integrates with the Facebook PHP SDK, allowing developers to easily create Facebook apps.
- A free Heroku account provides basic usage including 750 dyno hours and a 5MB database monthly, with additional features available upon verifying with a credit card.
- The development setup for Heroku involves installing Ruby, Git, and the Heroku command-line utility, followed by configuring SSH keys and Heroku credentials.
- The application creation process includes local coding, initializing a Git repository, and pushing the code to Heroku using Git, which automatically updates the app.
- Heroku supports database flexibility; it defaults to PostgreSQL but allows configuration for other databases like SQLite for local development.
- Adding Facebook functionality to the app requires downloading the Facebook PHP SDK, registering the app with Facebook, and configuring it to handle user data and authentication effectively.
Create Your Heroku Account
All you need to get started with Heroku is to create a free account; it only takes 5 minutes and an email address.
Basic usage of Heroku is free. As stated in the platform documentation, “each app you create has free access to 750 dyno hours per month and a 5MB database.” A dyno is a single web process responding to HTTP requests and running your code.
If you want to take advantage of HTTPS, you need to verify your Heroku account using a credit card. This is required if you want to serve your Facebook app over HTTPS, but you won’t be billed if you use the basic SSL addon.
Install the Tools of the Trade
The Heroku development process is based on Ruby and Git – the heroku command-line utility is a Ruby gem, and every time you push your code with Git the app will be updated in real time. Thus, you need to:
- Install Ruby (in OSX version 1.8.x is already installed, which is fine).
- Install Git.
- Install the Heroku gem (as simple as sudo gem install heroku).
- Configure your environment with your Heroku credentials and your SSH keys.
The best way to do all of these things is to follow the Getting Started with Heroku quickstart guide.
Also, for this project you want to install the Taps gem to help transferring databases.
[sourcecode language=”bash”]Vitos-Laptop:~ vito$ sudo gems install taps[/sourcecode]
Create Your App
To create the app, you’ll write your code locally, initialize the Git repository, and then push the code to Heroku.
Create Your App Locally
Create an empty directory for your application and setup your local web server.
[sourcecode language=”bash”]
Vitos-Laptop:~ vito$ cd /Users/Shared/WebServer/Sites
Vitos-Laptop:Sites vito$ mkdir HeroLinks
[/sourcecode]
Configure your local web server with a new site that points to that directory with an URL like http://herolinks.local.
Init Your Git Repository
Initialize your repository inside the app directory:
[sourcecode language=”bash”]
Vitos-Laptop:Sites vito$ cd HeroLinks
Vitos-Laptop:HeroLinks vito$ git init
Initialized empty Git repository in .git/
Vitos-Laptop:HeroLinks vito$ cat
Vitos-Laptop:HeroLinks vito$ git add .
Vitos-Laptop:HeroLinks vito$ git commit -m “HeroLinks app created.”
[/sourcecode]
Create the App on Heroku
By default, Heroku uses a Ruby environment for its hosted apps. To create a PHP application you need to customize the command’s arguments to use the stack named cedar. The command to create an app looks like:
[sourcecode language=”bash”]Vitos-Laptop:HeroLinks vito$ heroku create HeroLinks –stack cedar
Creating herolinks… done, stack is cedar
http://herolinks.herokuapp.com/ | git@heroku.com:herolinks.git
Git remote heroku added
[/sourcecode]
With this command, Heroku creates the application and the remote repository and then returns the URL and app details.
You publish your application with the following:
[sourcecode language=”bash”]Vitos-Laptop:HeroLinks vito$ git push heroku master[/sourcecode]
You must create and commit at least one file or the command will fail. I created an index.php file with a welcome message.
The output to the push should look similar to:
[sourcecode language=”bash”]
Counting objects: 3, done.
Writing objects: 100% (3/3), 253 bytes, done.
Total 3 (delta 0), reused 0 (delta 0)
—–> Heroku receiving push
—–> PHP app detected
—–> Bundling Apache v2.2.19
—–> Bundling PHP v5.3.6
—–> Discovering process types
Procfile declares types -> (none)
Default types for PHP -> web
—–> Compiled slug size is 21.5MB
—–> Launching… done, v4
http://herolinks.heroku.com deployed to Heroku
To git@heroku.com:herolinks.git
* [new branch] master -> master
[/sourcecode]
Start Coding
I don’t want to detract from the main focus of this article, Heroku and Facebook, by coding every detail from scratch. Instead, I’m using some pre-made stuff:
- Bootstrap – a CSS toolkit from Twitter (for interface styling)
- Slim – a lightweight but powerful PHP framework (for the main controller)
- a couple libraries extracted from the CakePHP framework (for data validation and sanitization)
- a simple PDO wrapper database class (self-made)
As you can see from the following directory structure, the application is very simple.
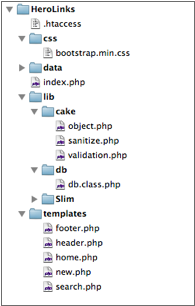
An .htaccess file redirects all traffic to the index.php page which is the main application file and contains all the business logic.
The lib directory contains the PHP libraries and the folder named templates holds the interface files. I have three pages: a home page that displays a list of all the links shared (home.php), a page with the form needed to submit a new link (new.php), and a search results page (search.php).
Database Access
The Heroku platform provides each Ruby application with a shared 5MB PosgreSQL database. For PHP applications, the shared database is not created by default and must be added with the command:
[sourcecode language=”bash”]Vitos-Laptop:HeroLinks vito$ heroku addons:add shared-database[/sourcecode]
Each application has access to the database using a special environment variable DATABASE_URL which contains the connection string. It is accessible from your PHP code with $_ENV[“DATABASE_URL”].
If you purchase a dedicated database add-on such as Heroku Postgres, you can use the psql console application to manage your database. For shared databases you have to manage it manually, with the exception of the db:push and db:pull import/export utilities.
I don’t have PosgreSQL installed on my local machine, so my code use SQLite locally and the data directory contains my database. Here’s how I switch between PostgreSQL and SQLite in code:
[sourcecode language=”php”]<?php
// if $_ENV[“DATABASE_URL”] is empty then the app is not running on Heroku
if (empty($_ENV[“DATABASE_URL”])) {
$config[“db”][“driver”] = “sqlite”;
$config[“db”][“url”] = “sqlite://” . realpath(“data/my.db”);
}
else {
// translate the database URL to a PDO-friendly DSN
$url = parse_url($_ENV[“DATABASE_URL”]);
$config[“db”][“driver”] = $url[“scheme”];
$config[“db”][“url”] = sprintf(
“pgsql:user=%s;password=%s;host=%s;dbname=%s”,
$url[“user”], $url[“pass”], $url[“host”],
trim($url[“path”], “/”));
}[/sourcecode]
First I set the default SQLite database if $_ENV[“DATABASE_URL”] is empty as it means the app is not running on Heroku. If the app is running on Heroku then I parse the database URL and convert it into a PDO-friendly connection string. The URL looks like this:
[sourcecode language=”php”]postgres://username:password@host/database[/sourcecode]
and looks like this after it is converted:
[sourcecode language=”php”]pgsql:user=username;password=password;host=host;dbname=database[/sourcecode]
The Main Application Controller
The index.php file is the main application controller. After the database setup, there is the Facebook configuration, the loading of other PHP libraries, and then a new instance of a Slim application object is created.
[sourcecode language=”php”]<?php
// Load the core Slim framework…
require_once “lib/Slim/Slim.php”;
// …add other accessory libraries
require_once “lib/db/db.class.php”;
require_once “lib/cake/sanitize.php”;
require_once “lib/cake/validation.php”;
// and then the Facebook SDK
require_once “lib/facebook/facebook.php”;
// Create a new Slim application
$app = new Slim();[/sourcecode]
Here I create the Slim application using its default settings, I could also pass an associative array of settings, but the defaults are enough for now.
I use Slim to map the application’s URLs to PHP functions. The application has a total of four URLs: / (the root), /new, /search and /install.
With Slim you can map a URL to different functions that handle different HTTP methods or you can map the same function to one or more HTTP methods. I want my root URL to be accessible by the GET and POST methods because when it’s running inside Facebook’s iframe element it receives some POST data from the hosting environment called a signed request. Here’s how to do it:
[sourcecode language=”php”]<?php
$app->map(“/”, function () use ($app, $config) {
// do something
})->via(“GET”, “POST”);
[/sourcecode]
The code maps the root URL to an anonymous function allowing only the GET and POST HTTP methods. The function is called whenever the user requests the application root URL using GET or POST.
The Application Installer
I would normally build a cross-environment installer, but there are some differences between SQLite and PosgresSQL that make doing so beyond the scope of this article. Instead, I enable the installer only in the local version of the app and then use Heroku’s database utilities to copy the data to the remote database.
The function associated with the /install URI first performs a check against the global $config variable to decide which environment is running in. If you are on your local system then the table-creation query is executed using standard PDO statements.
[sourcecode language=”php”]<?php
$app->get(“/install”, function() use ($app) {
global $config;
// check driver and perform install only for SQLite/local
if ($config[“db”][“driver”] == “sqlite”) {
if ($db = Db::getConnection()) {
$query = “CREATE TABLE IF NOT EXISTS links (
id INTEGER PRIMARY KEY,
url VARCHAR(255),
title VARCHAR (100),
description VARCHAR(512),
username VARCHAR(50),
useremail VARCHAR(100),
created DATE DEFAULT (datetime(‘now’,’localtime’))
)”;
try {
$stmt = $db->prepare($query);
$stmt->execute();
$app->flash(“info”, “Application installed successfully!”);
$app->redirect(“/”);
}
catch (PDOException $e) {
$app->flashNow(“error”, “Unable to install application: ” .
$e->getMessage());
}
}
else {
$app->flashNow(“error”, “Unable to open DB”);
}
}
else {
$app->flashNow(“info”, “Install command is for local/SQLite only, try to run <code>heroku db:push sqlite://data/my.db</code> instead!”);
}
$app->render(“default.php”, array(“action” => “install”));
});
[/sourcecode]
The $db variable is a PDO object, the static method Db::getConnection() takes care of managing the connection and returns NULL on error.
The flash() method stores a message in the current session, giving it a key label of “info”. The message is then available to the next request (i.e., the next page).
I also have a flashNow() method; the message stored with this method is available in the current request inside the $flash variable.
Using the appropriate keys (i.e., error, info, warning, etc.) I can style the message accordingly using Bootstrap’s pre-made CSS styles, for example:
[sourcecode language=”php”]
<?php
if (!empty($flash[“error”])) {
?>
<div class=”alert-message error”>
<?php echo $flash[“error”] ?>
</div>
<?php
}
[/sourcecode]
The render() method takes two parameters:
- the PHP (or HTML) view file to render
- an associative array of variables which are passed to the view file
In this case I pass a variable named “action” containing the value “install”; the default.php file will have a local $action variable to use. The view files are placed in the templates directory by default, but this path can be customized using Slim’s configuration API (see Slim’s manual for more info). Once your database is functioning locally, you can use Heroku’s tools to import the schema (and data if found) into the remote database.
[sourcecode language=”php”]Vitos-Laptop:HeroLinks vito$ heroku db:push sqlite://data/my.db[/sourcecode]
The output should look similar to:
[sourcecode language=”php”]Loaded Taps v0.3.23
Warning: Data in the app ‘herolinks’ will be overwritten and will not be recoverable.
! WARNING: Potentially Destructive Action
! This command will affect the app: herolinks
! To proceed, type “herolinks” or re-run this command with –confirm herolinks[/sourcecode]
Type the name of your app to confirm the import and your database will be imported into Heroku.
Application Flow
The rest of the application is straightforward and follows an approach similar to the Model-View-Controller pattern, except there isn’t a model.
The homepage fetches the last 10 links from the database using a common SQL query. The results are stored in the $links array and passed to the view file (home.php) by the render() method.
[sourcecode language=”php”]
<?php
$app->map(“/”, function () use ($app) {
$pageTitle = “Latest Links”;
$action = “home”;
$links = array();
if ($db = Db::getConnection()) {
$query = “SELECT * FROM links ORDER BY created DESC LIMIT 10”;
try {
foreach ($db->query($query) as $link) {
$links[] = $link;
}
}
catch (PDOException $e) {
$app->flashNow(“error”, $e->getMessage());
}
}
else {
$app->flashNow(“error”, “Unable to open DB”);
}
$app->render(“home.php”, array(
“pageTitle” => $pageTitle,
“action” => $action,
“links” => $links));
})->via(“GET”, “POST”);
[/sourcecode]
[sourcecode language=”php”]
<?php
if (!empty($links)) {
?>
<h2>Latest links</h2>
<table class=”linklist zebra-striped” summary=”Latest submitted links”>
<tr>
<th>Site</th>
<th>Description</th>
<th>User</th>
<th>Date</th>
</tr>
<?php
foreach($links as $link){
?>
<tr>
<td><a href=”<?php echo $link[“url”] ?>” rel=”external”><?php echo $link[“title”] ?></a></td>
<td><?php echo $link[“description”] ?></td>
<td><?php echo $link[“username”] ?></td>
<td><?php echo date(“d F Y H:i”, strtotime($link[“created”])) ?></td>
</tr>
<?php
}
?>
</table>
<?php
}
else {
?>
<div class=”alert-message block-message info”>
<p>Sorry, the link database is empty!</p>
<div class=”alert-actions”><a class=”btn primary” href=”/new” >Add a link now</a></div>
</div>
<?php
}
[/sourcecode]
The Add Link page retrieves the form’s data using Slim’s request()->isPost() and request()->post() methods. The data is cleaned and validated with the Sanitize and Validation classes from the CakePHP framework.
[sourcecode language=”php”]
<?php
$app->map(“/new”, function () use ($app) {
$pageTitle = “Add new link”;
$action = “new”;
$data = array();
$errors = array();
if ($app->request()->isPost()) {
$data = $app->request()->post();
$data = Sanitize::clean($data, array(“escape” => false));
$valid = Validation::getInstance();
if (!$valid->email($data[“useremail”])) {
$errors[“useremail”] = “Invalid email address”;
}
if (!$valid->notEmpty($data[“username”])) {
$errors[“username”] = “Please insert your name”;
}
if (!$valid->notEmpty($data[“title”])) {
$errors[“title”] = “Please insert a title”;
}
if (!$valid->url($data[“url”])) {
$errors[“url”] = “Invalid or empty URL”;
}
if (empty($errors)) {
if ($db = Db::getConnection()) {
$query = “INSERT INTO links (url, title, description, username, useremail) VALUES(:url, :title, :description, :username, :useremail)”;
try {
$stmt = $db->prepare($query);
$stmt->bindParam(“:url”, $data[“url”]);
$stmt->bindParam(“:title”, $data[“title”]);
$stmt->bindParam(“:description”, $data[“description”]);
$stmt->bindParam(“:username”, $data[“username”]);
$stmt->bindParam(“:useremail”, $data[“useremail”]);
$stmt->execute();
$app->flash(“info”, “Link added successfully!”);
$app->redirect(“/”);
}
catch (PDOException $e) {
$app->flashNow(“error”, “Unable to save your URL: ” . $e->getMessage());
}
}
else {
$app->flashNow(“error”, “Unable to open DB”);
}
}
}
$app->render(“new.php”, array(
“pageTitle” => $pageTitle,
“action” => $action,
“data” => $data,
“errors” => $errors));
})->via(“GET”, “POST”);
[/sourcecode]
Errors are stored in the $errors array which is used by both the controller and the view. The controller checks for errors to determine if the data should be inserted in the database and the view to display the error message near to each form field.
[sourcecode language=”php”]
<form action=”” method=”post” accept-charset=”utf-8″>
<fieldset>
<div class=”clearfix<?php if (!empty($errors[“url”])) echo ” error” ?>”>
<label for=”url”>Site URL</label>
<div class=”input”>
<input type=”text” size=”30″ name=”url” id=”url” class=”xlarge” value=”<?php echo (!empty($data[“url”])) ? $data[“url”] : “”; ?>”>
<?php
$field = “url”;
if (!empty($errors[$field])) {
?>
<span class=”help-inline”><?php echo $errors[$field] ?></span>
<?php
}
?>
</div>
</div>
<!– Other fields here –>
</fieldset>
</form>
[/sourcecode]
PDO prepared statements are used to insert data into the database, wrapped in a try-catch block. The flashNow() method displays any PDO error messages (though obviously in a production environment this should be avoided).
The search page is similar to the homepage but with the difference of processing the search term before executing the SQL query.
[sourcecode language=”php”]
<?php
$app->get(“/search(/:key) “, function($key = null) use ($app) {
$pageTitle = “Link Search”;
$action = “search”;
$links = array();
if ($app->request()->isGet()) {
if (empty($key)) {
$key = $app->request()->get(“key”);
}
$key = Sanitize::clean($key, array(“escape” => false));
}
if ($db = Db::getConnection()) {
$query = “SELECT * FROM links WHERE (title LIKE :key OR url LIKE :key) ORDER BY created DESC”;
try {
$stmt = $db->prepare($query);
$needle = “%” . $key . “%”;
$stmt->bindParam(“:key”, $needle, PDO::PARAM_STR);
$stmt->execute();
while ($link = $stmt->fetch(PDO::FETCH_ASSOC)) {
$links[] = $link;
}
}
catch (PDOException $e) {
$app->flashNow(“error”, “Unable to execut search: ” . $e->getMessage());
}
}
else {
$app->flashNow(“error”, “Unable to open DB”);
}
$app->render(“search.php”, array(
“pageTitle” => $pageTitle,
“action” => $action,
“key” => $key,
“links” => $links));
});
[/sourcecode]
The syntax $app->get(“/search(/:key) “, function($key = null) means that any string after the /search action name is treated as a search term and stored inside the $key parameter for the function. In any case the $key variable is sanitized before use.
Adding Facebook Functionality
The application works well in stand-alone mode, but in order to use it inside Facebook and take advantage of the user’s data you need to:
- download the Facebook PHP SDK from GitHub
- register your application within Facebook starting at the Developer’s page
I copied the src directory of the SDK into my app’s lib directory and renamed it to facebook.
To register a Facebook app you must provide some details such as the URL of the application (e.g., http://myapp.heroku.com) and the name of the canvas (e,g., myapp) which is the identifier for the application inside Facebook (e.g., https://apps.facebook.com/myapp/).
Note: It’s possible to omit the HTTPS url. By doing this your application can be used only with the secure-mode option disabled (check your Facebook account’s settings for more info).
Once your application is registered with Facebook you can provide the configuration details in the index.php controller:
[sourcecode language=”php”]<?php
$config[“facebook”][“appId”] = “YOUR_APP_ID”;
$config[“facebook”][“secret”] = “YOUR_APP_SECRET”;
$config[“facebook”][“canvas”] = “your-app-canvas”;
$config[“facebook”][“canvas_url”] = “https://apps.facebook.com/your-app-canvas/”;[/sourcecode]
You also need to provide another configuration setting, the home URL which is passed to the authorization API:
[sourcecode language=”php”]<?php
$config[“app”][“home”] = “https://your-app.heroku.com”;[/sourcecode]
The integration with Facebook happens in two code sections. The first creates a new Facebook object as a property of the $app object. The advantage of this approach is that you have access to this connection anywhere you have access to the application object. Set the facebookCanvas property to tell the application it’s running inside an iframe provided by Facebook.
[sourcecode language=”php”]<?php
$app = new Slim();
$app->Facebook = new Facebook($config[“facebook”]);
$app->facebookUserProfile = null;
$app->facebookCanvas = isRunningInsideFacebook();
[/sourcecode]
The second integration point is the function isRunningInsideFacebook() which tells the app if it’s running on Facebook (essentially it checks for the signed_request variable sent via the HTTP POST method).
[sourcecode language=”php”]<?php
function isRunningInsideFacebook() {
return !empty($_REQUEST[“signed_request”]);
}[/sourcecode]
The function facebookInit() takes care of all the other stuff. For example, it checks to see if it has the right authorization. The signed request is parsed using the Facebook SDK searching for the user_id field. If it doesn’t have that field then the application is not authorized by the user and it redirects him to the authorization page.
[sourcecode language=”php”]
<?php
function facebookInit() {
global $app;
global $config;
if ($fbData = $app->Facebook->getSignedRequest()) {
// redirect to Facebook Authorization if the User ID is not in the request
if (empty($fbData[“user_id”])) {
$auth_url = “https://www.facebook.com/dialog/oauth?client_id=”
. $config[“facebook”][“appId”] . “&redirect_uri=” . urlencode($config[“app”][“home”])
. “&scope=email”;
echo ‘<script>top.location.href = “‘ . $auth_url . ‘”;</script>’;
exit;
}
}
if ($fbAccessToken = $app->Facebook->getAccessToken()) {
// if code is present it was sent by an auth request, so redirect back to Facebook App Page
if ($code = $app->request()->get(“code”)) {
$app->redirect($config[‘facebook’][“canvas_url”]);
}
$user = $app->Facebook->getUser();
if ($user) {
try {
// proceed knowing you have a logged-in user who is authenticated
$app->facebookUserProfile = $app->Facebook->api(“/me”);
$app->facebookUserProfile[“logout”] = $app->Facebook->getLogoutUrl();
}
catch (FacebookApiException $e) {
$app->flashNow(“error”, $e->getMessage());
$user = null;
}
}
}
}
[/sourcecode]
If the app is authorized to see the user’s data, it checks for the code parameter passed by Facebook’s OAuth service after a successful authorization. The service redirects the user to the application’s URL outside of the iframe so I chose to redirect back to the framed version. Different parameters are passed in the query string if the authorization is denied for some reason, but I ignore them for this article.
The code then requests the user’s profile using the Facebook API which is saved into the $app->facebookUserProfile property.
But exactly when is all of this code executed? I’ve slightly edited the routing code of the main URLs to accommodate this:
[sourcecode language=”php”]
<?php
$app->map(“/”, “facebookInit”, function () use ($app, $config) {
// other code here
})->via(“GET”, “POST”);
[/sourcecode]
In Slim’s terminology this is called a Middleware. The facebookInit() function is called before the anonymous function that processes the route. By using this feature, each page can access and use the Facebook data.
Summary
I’ve shown you in this article an example of a simple app built taking advantage of Heroku, the Facebook SDK, and other free components. I hope it has stimulated your curiosity and your desire to build your next application in Heroku’s cloud. You will find the full source code of the application on CloudSpring’s GitHub account if you’d like to clone it and explore. Happy coding!
Frequently Asked Questions (FAQs) about Building Your App in the Cloud with Heroku and the Facebook SDK
How can I migrate my SQLite3 database to Heroku?
Heroku does not support SQLite3 databases. Instead, it uses PostgreSQL. To migrate your SQLite3 database to PostgreSQL, you can use the ‘pgloader’ tool. First, install it on your local machine. Then, use the command ‘pgloader sqlite://path/to/your/database.db postgresql:///newdatabase’ to migrate your data. After that, you can push your PostgreSQL database to Heroku using the ‘heroku pg:push’ command.
How can I use SQLite on Heroku?
As mentioned earlier, Heroku does not support SQLite. It uses PostgreSQL. However, you can use SQLite in your local development environment and PostgreSQL in production. To do this, you need to configure your database settings in your application. In your ‘database.yml’ file, set the adapter for the development environment to ‘sqlite3’ and for the production environment to ‘postgresql’.
How can I pull a Heroku database into a local SQLite3 database?
You can’t directly pull a Heroku database into a local SQLite3 database because Heroku uses PostgreSQL. However, you can pull a Heroku database into a local PostgreSQL database using the ‘heroku pg:pull’ command. Then, you can convert the PostgreSQL database to SQLite3 using a tool like ‘pgloader’.
How can I deploy a Rails app with SQLite3 to Heroku?
Heroku does not support SQLite3. If you want to deploy a Rails app with SQLite3 to Heroku, you need to convert your SQLite3 database to PostgreSQL. You can do this using the ‘pgloader’ tool. After converting your database, you can deploy your app to Heroku using the ‘git push heroku master’ command.
What is the Facebook SDK and how can I use it with Heroku?
The Facebook SDK is a set of tools that allows developers to integrate their apps with Facebook. It provides features like Facebook Login, sharing, app events, and more. To use the Facebook SDK with Heroku, you need to add the Facebook SDK to your app, configure your Facebook app settings, and deploy your app to Heroku.
How can I integrate the Facebook SDK with my Heroku app?
To integrate the Facebook SDK with your Heroku app, you need to add the Facebook SDK to your app, configure your Facebook app settings, and deploy your app to Heroku. You can add the Facebook SDK to your app by including the SDK in your project and initializing it with your app ID and app secret.
How can I configure my Facebook app settings for Heroku?
To configure your Facebook app settings for Heroku, you need to set the app domain to your Heroku app’s URL and the site URL to your Heroku app’s URL. You also need to add the Heroku platform to your app and set the callback URL to your Heroku app’s URL.
How can I deploy my app to Heroku?
To deploy your app to Heroku, you need to create a Heroku account, install the Heroku CLI, and create a new Heroku app. Then, you can deploy your app to Heroku using the ‘git push heroku master’ command.
How can I manage my Heroku app?
You can manage your Heroku app using the Heroku CLI or the Heroku Dashboard. The Heroku CLI provides commands for managing your app, while the Heroku Dashboard provides a graphical interface for managing your app.
How can I troubleshoot issues with my Heroku app?
You can troubleshoot issues with your Heroku app by checking the Heroku logs using the ‘heroku logs’ command. You can also use the ‘heroku run’ command to run one-off dynos for debugging. If you’re still having trouble, you can contact Heroku support for help.

