

This article was updated in April 2016 to reflect changes in Android
Despite many articles related to Android on SitePoint, it’s been a while since we had a real ‘beginners’ tutorials. How better to fill that gap than with a staple of beginners tutorials, the ‘To Do’ App.
Key Takeaways
- Android Studio is the recommended IDE for Android development, complete with an integrated Android SDK.
- Basic Java knowledge is required to effectively follow the tutorial and build the TodoList application.
- The tutorial covers creating a simple user interface with a ListView for tasks and a menu option to add new tasks using an AlertDialog.
- Data is stored and retrieved from a SQLite database, with the app’s functionality allowing for adding and deleting tasks.
- The guide is designed for beginners and provides a solid foundation in Android app development by creating a practical Todo application.
Needed Software
The ingredients every Android developer needs are:
- Android Studio, the official Android IDE (integrated development environment ). There may be still developers using the old ADT plugin for Eclipse, but that’s not maintained anymore. IntelliJ IDEA also supports Android development, so you may use that too.
- The Android SDK is the toolchain that manages everything required to build an Android app. It ships with Android Studio, but if you decide to use another IDE, you’ll have to download it.
It’s useful to have an Android device so you can test the app during development. If you can’t get your hands on an Android device, you can use the default emulator or Genymotion.
Note: Android’s biggest positive and flaw is it’s flexibility. I will use a particular IDE and SDK version, if your setup is different, then settings, code and screenshots may also vary.
You will need basic Java knowledge to follow this tutorial.
Getting Started
You can find the final code for this project on GitHub.
To create a new project, open Android Studio and click Start a new Android Studio project. Name the application “TodoList”, and add your company domain, which will be the application package. There can’t be two apps on the Play Store with the same package name or called “com.example”. I will name mine com.aziflaj.todolist.
Next, pick the platforms you want to develop for. I recommend setting the minimum SDK to support API level 15 and above. This means the application will support every smartphone with Android 4.0.3 or later.
On the next screen select Empty Activity and keep the name as MainActivity.
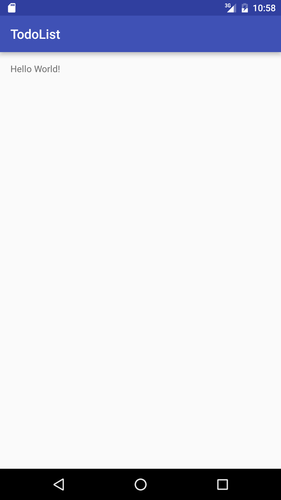
When Android Studio finishes generating the project you have the default “Hello, World” app.
Building the View
In MainActivity.java, you should have code something like the below:
package com.aziflaj.todolist; // This will refelect your package name

import android.support.v7.app.AppCompatActivity;
import android.os.Bundle;

public class MainActivity extends AppCompatActivity {

    @Override
    protected void onCreate(Bundle savedInstanceState) {
        super.onCreate(savedInstanceState);
        setContentView(R.layout.activity_main);
    }
}
On line 11, you set the view of this activity to R.layout.activity_main, which points to a file called activity_main.xml in the /res/layout directory of the project. A view controls layout of the Android interface and looks like this:
<?xml version="1.0" encoding="utf-8"?>
<RelativeLayout xmlns:android="http://schemas.android.com/apk/res/android"
    xmlns:tools="http://schemas.android.com/tools"
    android:layout_width="match_parent"
    android:layout_height="match_parent"
    android:paddingBottom="@dimen/activity_vertical_margin"
    android:paddingLeft="@dimen/activity_horizontal_margin"
    android:paddingRight="@dimen/activity_horizontal_margin"
    android:paddingTop="@dimen/activity_vertical_margin"
    tools:context="com.aziflaj.todolist.MainActivity">

    <TextView
        android:layout_width="wrap_content"
        android:layout_height="wrap_content"
        android:text="Hello World!" />
</RelativeLayout>
In the main view, you will add a ListView, which will contain a ToDo item in each row. To do this, replace the TextView element with the code below:
<ListView
  android:id="@+id/list_todo"
  android:layout_width="wrap_content"
  android:layout_height="wrap_content" />
Now you will define a list item, which will represent a task in the interface.
Create a new layout file in the /res/layout folder called item_todo.xml. You will add two elements to this file, a TextView to show the task, and a “Done” Button to delete the task. Add this code to item_todo.xml, replacing anything that is already there.
<?xml version="1.0" encoding="utf-8"?>
<RelativeLayout xmlns:android="http://schemas.android.com/apk/res/android"
    android:layout_width="match_parent"
    android:layout_height="match_parent"
    android:layout_gravity="center_vertical">

    <TextView
        android:id="@+id/task_title"
        android:layout_width="wrap_content"
        android:layout_height="wrap_content"
        android:layout_alignParentLeft="true"
        android:layout_alignParentStart="true"
        android:text="Hello"
        android:textSize="20sp" />

    <Button
        android:id="@+id/task_delete"
        android:layout_width="wrap_content"
        android:layout_height="wrap_content"
        android:layout_alignParentEnd="true"
        android:layout_alignParentRight="true"
        android:text="Done" />

</RelativeLayout>
The app needs a menu item to allow user to add more tasks. Add a main_menu.xml file in the /res/menu directory with the following code:
<?xml version="1.0" encoding="utf-8"?>
<menu xmlns:android="http://schemas.android.com/apk/res/android"
    xmlns:app="http://schemas.android.com/apk/res-auto">
    <item
        android:id="@+id/action_add_task"
        android:icon="@android:drawable/ic_menu_add"
        android:title="Add Task"
        app:showAsAction="always" />
</menu>
Add the code below to the MainActivity.java file, after the onCreate method:
@Override
public boolean onCreateOptionsMenu(Menu menu) {
    getMenuInflater().inflate(R.menu.main_menu, menu);
    return super.onCreateOptionsMenu(menu);
}

@Override
public boolean onOptionsItemSelected(MenuItem item) {
    switch (item.getItemId()) {
        case R.id.action_add_task:
            Log.d(TAG, "Add a new task");
            return true;

        default:
            return super.onOptionsItemSelected(item);
    }
}
Android developers frequently create a TAG constant with the name of the class for logging. Add this to the beginning of the MainActivity class:
public class MainActivity extends AppCompatActivity {
    private static final String TAG = "MainActivity";
...
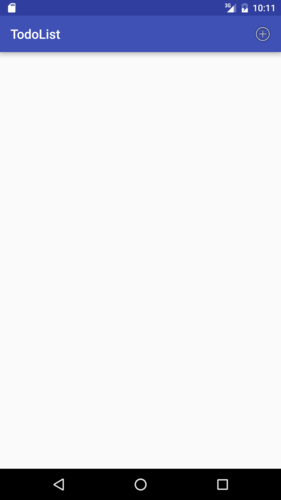
The onCreateOptionsMenu() method inflates (renders) the menu in the main activity, and uses the onOptionsItemSelected() method to react to different user interactions with the menu item(s). If you run the application, it should look something like this:
If you click the add button, you will see something like this in the Android Studio log:
03-26 22:12:50.327 2549-2549/? D/MainActivity: Add a new task
Next, you will add an AlertDialog to get the task from the user when the add item button is clicked. You already know where to add the code to react to the user, so replace the logging statement with this:
final EditText taskEditText = new EditText(this);
AlertDialog dialog = new AlertDialog.Builder(this)
        .setTitle("Add a new task")
        .setMessage("What do you want to do next?")
        .setView(taskEditText)
        .setPositiveButton("Add", new DialogInterface.OnClickListener() {
            @Override
            public void onClick(DialogInterface dialog, int which) {
                String task = String.valueOf(taskEditText.getText());
                Log.d(TAG, "Task to add: " + task);
            }
        })
        .setNegativeButton("Cancel", null)
        .create();
dialog.show();
Now, clicking the plus button gives you this:
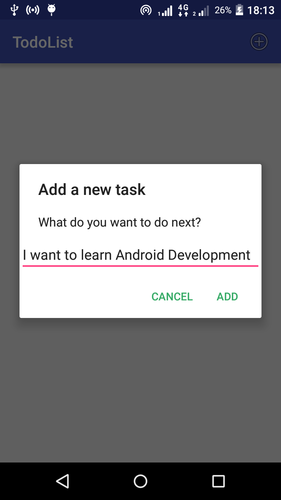
Enter some text and when you click the add button, the Android Studio log (“logcat”) will show something like this:
03-26 23:32:18.294 12549-12549/? D/MainActivity: Task to add: I want to learn Android Development
Storing and Retrieving Data
Android ships with an embedded SQLite database. The database needs a table before it can store any tasks, called “TaskTable”. Create a new db folder in the same location as MainActivity.java. Then create a new class called TaskContract with the file name TaskContract.java:
Add this code to TaskContract.java, changing the two package names appropriately.
package com.aziflaj.todolist.db;

import android.provider.BaseColumns;

public class TaskContract {
    public static final String DB_NAME = "com.aziflaj.todolist.db";
    public static final int DB_VERSION = 1;

    public class TaskEntry implements BaseColumns {
        public static final String TABLE = "tasks";

        public static final String COL_TASK_TITLE = "title";
    }
}
The TaskContract class defines constants which used to access the data in the database. You also need a helper class called TaskDbHelper to open the database. Create this class in the db package and add the following code:
package com.aziflaj.todolist.db;

import android.content.Context;
import android.database.sqlite.SQLiteDatabase;
import android.database.sqlite.SQLiteOpenHelper;

public class TaskDbHelper extends SQLiteOpenHelper {

    public TaskDbHelper(Context context) {
        super(context, TaskContract.DB_NAME, null, TaskContract.DB_VERSION);
    }

    @Override
    public void onCreate(SQLiteDatabase db) {
        String createTable = "CREATE TABLE " + TaskContract.TaskEntry.TABLE + " ( " +
                TaskContract.TaskEntry._ID + " INTEGER PRIMARY KEY AUTOINCREMENT, " +
                TaskContract.TaskEntry.COL_TASK_TITLE + " TEXT NOT NULL);";

        db.execSQL(createTable);
    }

    @Override
    public void onUpgrade(SQLiteDatabase db, int oldVersion, int newVersion) {
        db.execSQL("DROP TABLE IF EXISTS " + TaskContract.TaskEntry.TABLE);
        onCreate(db);
    }
}
On lines 15 to 17 is this SQL query:
CREATE TABLE tasks (
    _id INTEGER PRIMARY KEY AUTOINCREMENT,
    title TEXT NOT NULL
);
Now you need to adapt MainActivity to store data in the database. Add this code where you defined the DialogInterface.OnClickListener() for the AlertDialog‘s add button, replacing:
String task = String.valueOf(taskEditText.getText());
Log.d(TAG, "Task to add: " + task);
with:
String task = String.valueOf(taskEditText.getText());
SQLiteDatabase db = mHelper.getWritableDatabase();
ContentValues values = new ContentValues();
values.put(TaskContract.TaskEntry.COL_TASK_TITLE, task);
db.insertWithOnConflict(TaskContract.TaskEntry.TABLE,
        null,
        values,
        SQLiteDatabase.CONFLICT_REPLACE);
db.close();
This makes the whole onOptionsItemSelected() method look like:
@Override
public boolean onOptionsItemSelected(MenuItem item) {
    switch (item.getItemId()) {
        case R.id.action_add_task:
            final EditText taskEditText = new EditText(this);
            AlertDialog dialog = new AlertDialog.Builder(this)
                    .setTitle("Add a new task")
                    .setMessage("What do you want to do next?")
                    .setView(taskEditText)
                    .setPositiveButton("Add", new DialogInterface.OnClickListener() {
                        @Override
                        public void onClick(DialogInterface dialog, int which) {
                            String task = String.valueOf(taskEditText.getText());
                            SQLiteDatabase db = mHelper.getWritableDatabase();
                            ContentValues values = new ContentValues();
                            values.put(TaskContract.TaskEntry.COL_TASK_TITLE, task);
                            db.insertWithOnConflict(TaskContract.TaskEntry.TABLE,
                                    null,
                                    values,
                                    SQLiteDatabase.CONFLICT_REPLACE);
                            db.close();
                        }
                    })
                    .setNegativeButton("Cancel", null)
                    .create();
            dialog.show();
            return true;

        default:
            return super.onOptionsItemSelected(item);
    }
}
Add a private instance of TaskDbHelper in the MainActivity class:
private TaskDbHelper mHelper;
And initialize it in the onCreate() method:
mHelper = new TaskDbHelper(this);
If you run the application, you won’t see any differences in the UI, but you can check that the database is working by executing these commands on the terminal:
[local] $ adb shell
[android] $ run-as com.aziflaj.todolist
[android] $ cd databases
[android] $ sqlite3 com.aziflaj.todolist.db
sqlite3> .dump
Note: If the two last commands don’t work for you, the SQLite3 utility is not included in most production devices, but you can install it by yourself.
Now you need to fetch all the data from the database and show it in the main view.
Replace your MainActivity.onCreate() method with this:
@Override
protected void onCreate(Bundle savedInstanceState) {
    super.onCreate(savedInstanceState);
    setContentView(R.layout.activity_main);

    mHelper = new TaskDbHelper(this);
    SQLiteDatabase db = mHelper.getReadableDatabase();
    Cursor cursor = db.query(TaskContract.TaskEntry.TABLE,
            new String[]{TaskContract.TaskEntry._ID, TaskContract.TaskEntry.COL_TASK_TITLE},
            null, null, null, null, null);
    while(cursor.moveToNext()) {
        int idx = cursor.getColumnIndex(TaskContract.TaskEntry.COL_TASK_TITLE);
        Log.d(TAG, "Task: " + cursor.getString(idx));
    }
    cursor.close();
    db.close();
}
When you run the application, LogCat will show a list of all the tasks stored in the database. Next you will display data in the main view using an Adapter.
Get a reference to the ListView created in activity_main.xml file by adding an instance of the ListView:
private ListView mTaskListView;
Initialize the reference by adding this line of code to the onCreate() method, right after creating mHelper:
mTaskListView = (ListView) findViewById(R.id.list_todo);
Move the code (with some changes) that was logging the tasks into a private method called updateUI():
private void updateUI() {
    ArrayList<String> taskList = new ArrayList<>();
    SQLiteDatabase db = mHelper.getReadableDatabase();
    Cursor cursor = db.query(TaskContract.TaskEntry.TABLE,
            new String[]{TaskContract.TaskEntry._ID, TaskContract.TaskEntry.COL_TASK_TITLE},
            null, null, null, null, null);
    while (cursor.moveToNext()) {
        int idx = cursor.getColumnIndex(TaskContract.TaskEntry.COL_TASK_TITLE);
        taskList.add(cursor.getString(idx));
    }

    if (mAdapter == null) {
        mAdapter = new ArrayAdapter<>(this,
                R.layout.item_todo,
                R.id.task_title,
                taskList);
        mTaskListView.setAdapter(mAdapter);
    } else {
        mAdapter.clear();
        mAdapter.addAll(taskList);
        mAdapter.notifyDataSetChanged();
    }

    cursor.close();
    db.close();
}
Add this private field to the MainActivity class:
private ArrayAdapter<String> mAdapter;
This ArrayAdapter will help populate the ListView with the data.
If you don’t understand the updateUI() method, that’s OK. Instead of logging the tasks, add them into an ArrayList of Strings. Then check if mAdapter is created or not. If it isn’t, and mAdapter is null, create and set it as the adapter of the ListView:
mAdapter = new ArrayAdapter<>(this,
        R.layout.item_todo, // what view to use for the items
        R.id.task_title, // where to put the String of data
        taskList); // where to get all the data

mTaskListView.setAdapter(mAdapter); // set it as the adapter of the ListView instance
If the adapter is already created (which implies that it’s assigned to the ListView), clear it, re-populate it and notify the view that the data has changed. This means that the view will repaint on the screen with the new data.
To see the updated data, you need to call the updateUI() method every time the underlying data of the app changes. So, add it in two places:
- In the
onCreate()method, that initially shows all the data - After adding a new task using the
AlertDialog
Deleting Tasks
After finishing a task, it should be deleted from the list.
Open the item_todo.xml layout and add this line to the Button tag:
android:onClick="deleteTask"
When the button is clicked, it calls this method deleteTask() in the MainActivity class:
public void deleteTask(View view) {
    View parent = (View) view.getParent();
    TextView taskTextView = (TextView) parent.findViewById(R.id.task_title);
    String task = String.valueOf(taskTextView.getText());
    SQLiteDatabase db = mHelper.getWritableDatabase();
    db.delete(TaskContract.TaskEntry.TABLE,
            TaskContract.TaskEntry.COL_TASK_TITLE + " = ?",
            new String[]{task});
    db.close();
    updateUI();
}
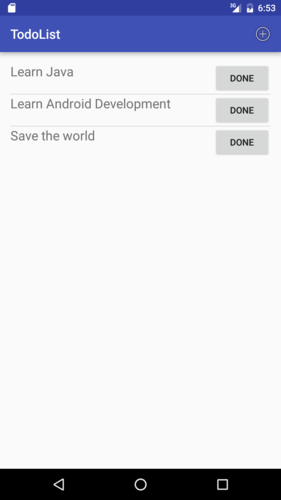
Now, clicking the Done button will delete the task from the list and the SQLite database.
Final Words
After writing all this code, you have a simple TodoList application, built with Java for Android. If this tutorial has got you interested in learning more, then your next step is looking through the rest of SitePoint’s Android content. Enjoy!
Frequently Asked Questions (FAQs) about Starting Android Development and Creating a Todo App
What are the prerequisites for starting Android development?
Before you start Android development, you need to have a basic understanding of Java or Kotlin programming languages as Android apps are primarily built using these languages. You should also be familiar with XML for designing app layouts. Additionally, you need to install Android Studio, the official integrated development environment (IDE) for Android app development. It comes with a code editor, debugger, and a simulator for testing your app.
How do I install Android Studio?
You can download Android Studio from the official Android Developer website. After downloading, run the installer and follow the instructions to install Android Studio. Once installed, you can start a new project by selecting “Start a new Android Studio project” from the welcome screen.
How do I create a new project in Android Studio?
To create a new project in Android Studio, click on “File” > “New” > “New Project”. You will be asked to provide details like the name of your application, the location to save the project, and the package name. You will also need to select the minimum SDK version for your app. After providing these details, click on “Finish” to create your project.
How do I design the layout for my app?
Android Studio provides a visual editor for designing the layout of your app. You can access it by opening the XML file for your layout (usually named activity_main.xml) and clicking on the “Design” tab at the bottom of the editor. You can drag and drop UI elements from the palette to your layout and adjust their properties in the attributes panel.
How do I add functionality to my app?
You can add functionality to your app by writing code in the Java or Kotlin file corresponding to your activity (usually named MainActivity.java or MainActivity.kt). For example, if you have a button in your layout, you can add a click listener to it in your activity file and write the code to be executed when the button is clicked.
How do I run and test my app?
You can run your app by clicking on the “Run” button in the toolbar or pressing Shift + F10. Android Studio will ask you to select a deployment target. You can choose to run your app on a real device connected to your computer or on an emulator. To test your app, you can write unit tests in a separate test directory in your project.
How do I debug my app?
Android Studio provides a debugger for troubleshooting your app. You can set breakpoints in your code by clicking on the gutter next to the line where you want the breakpoint. Then, run your app in debug mode by clicking on the “Debug” button in the toolbar or pressing Shift + F9. The execution will stop at the breakpoints, and you can inspect the variables and step through the code.
How do I create a Todo app?
To create a Todo app, you need to design a layout with a text input for entering tasks and a button for adding them. In your activity file, you can add a click listener to the button and write the code to add the entered task to a list. You can display the list of tasks using a RecyclerView or a ListView.
How do I save the tasks in my Todo app?
You can save the tasks in your Todo app using various methods such as Shared Preferences, SQLite database, or Room persistence library. For example, to save tasks using Shared Preferences, you can create a SharedPreferences object, get an editor from it, put your data into the editor, and apply the changes.
How do I publish my app on the Google Play Store?
To publish your app on the Google Play Store, you need to create a signed APK or AAB (Android App Bundle) of your app. You can do this in Android Studio by clicking on “Build” > “Generate Signed Bundle / APK”. Then, you need to create a developer account on the Google Play Console, pay a one-time registration fee, and follow the steps to publish your app.