

Key Takeaways
- Genymotion is a commercial Android emulator that improves upon its predecessor, AndroVM, by using x86 architecture virtualization and OpenGL hardware acceleration for more efficient app running. It creates a virtual machine through VirtualBox, providing support for hardware sensors such as GPS, accelerometer, and battery.
- The Genymotion emulator is available for Windows, Mac, and Linux. It offers a free version for general testing and a premium license for additional features. Installation requires creating an account on the Genymotion website and downloading an installer for your machine.
- Genymotion can be integrated with Eclipse and Android Studio for development. This integration allows developers to use Genymotion virtual devices when running their apps. To avoid launching Genymotion each time, developers can install the Genymotion plugin available for both Eclipse and Android Studio.
- Genymotion offers several additional features, including the ease of installing an APK file by simply dragging and dropping it to the virtual device. However, it no longer supports Google apps, though users can still enable Google app support by installing a compatible Google apps package on a virtual device.
If you have been developing Android apps for some time and have been using the default emulator, then you know how frustratingly slow it can be. Even on a powerful machine, it is manageable at best. The emulator is not only slow in booting up, but on all subsequent runs of your app. A solution to this was AndroVM which provided an Android VM client for VirtualBox. This resulted in an emulator that was noticeably faster than the default Android emulator.
AndroVM was bought by Genymobile and they released Genymotion which is a commercial product that improves on AndroVM.
The Genymotion emulator uses x86 architecture virtualization and OpenGL hardware acceleration which makes running your apps more efficient. It works by creating a virtual machine through VirtualBox to deliver an Android emulator with support for hardware sensors such as GPS, accelerometer and battery. It is available for Windows, Mac and Linux. You can get it for free and it has a premium license which adds more features to the emulator. For a list of these, take a look at this list. For general testing, the free version is sufficient.
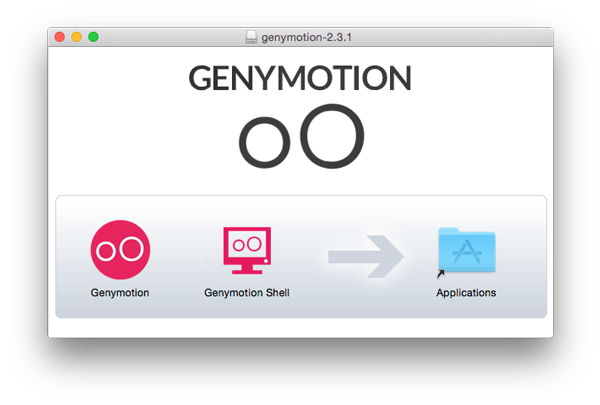
To download, create an account on the Genymotion website. When you log in you will be directed to a download page where you download an installer for your machine. For Mac and Linux, you will need to first install Oracle VirtualBox. The Windows installer includes the VirtualBox dependency so you won’t need to install it manually. For installation instructions for your particular development environment, check out this page. When installing VirtualBox, ensure you have VirtualBox Networking enabled.For the Mac install, make sure to drag both Genymotion and Genymotion Shell to the Applications folder.
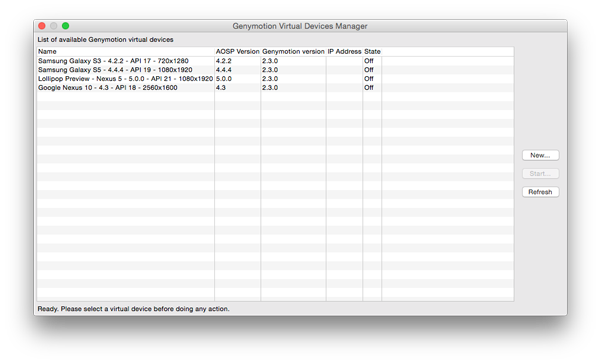
After installing, launch the Genymotion application to open the main Genymotion window where you can see a list of virtual devices, add new devices and configure settings.
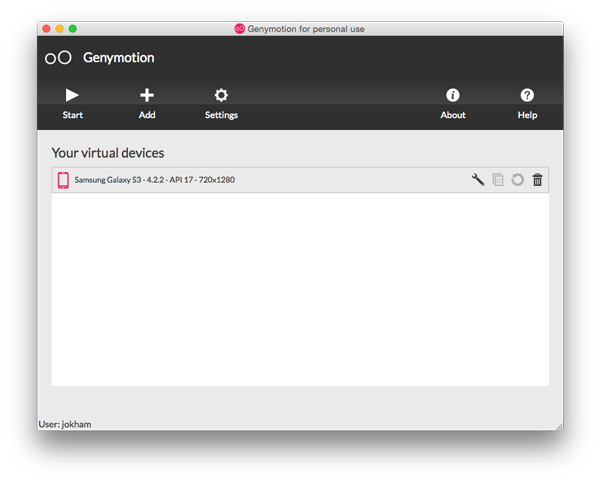
Since this is your first install, you won’t have any virtual devices listed or be logged in as shown in the above image.
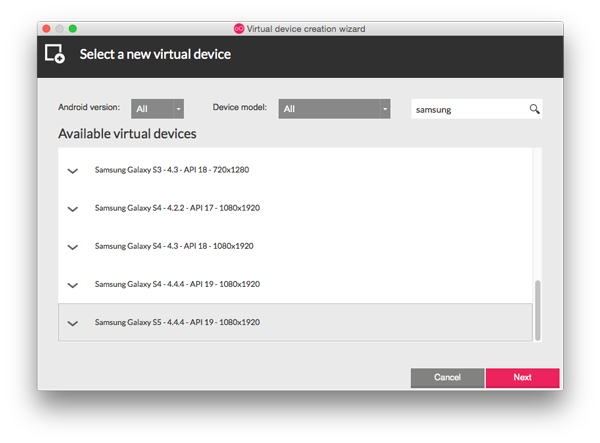
To add a device, click on the Add button. You will be prompted to log in to discover available virtual devices. After signing in, you will be shown a list of available devices, which you can filter by Android version or device model. At time of writing this article, the highest version number is Android 5.0 preview running on a Nexus 5.
Select the device you want to add and click Next. We’ll add a Samsung Galaxy S5 running Android 4.4.4.
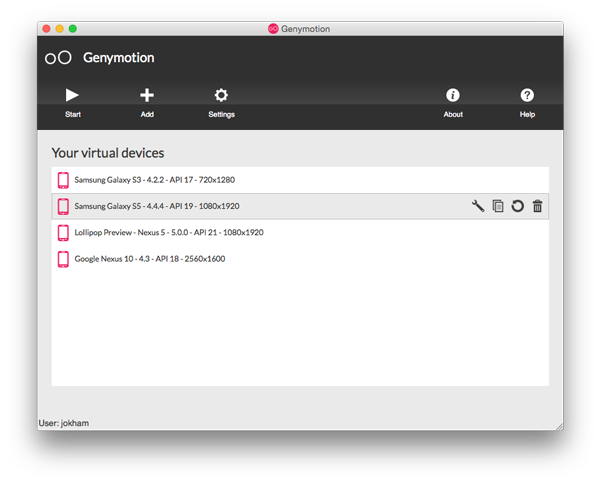
The virtual device will be downloaded and once the download is complete, the device will be listed in the main Genymotion window. Below is a list of my downloaded virtual devices (I added a few more to the list).
To launch the device, select it and press Start. Notice the time it takes to boot up and compare it to the default emulator.
The virtual device looks similar to the default emulator except for the controls on its right. These are used for the various sensors Genymotion offers. The image below shows the difference between the free version and paid version of a device. On the free version, some of the sensor controls are disabled.
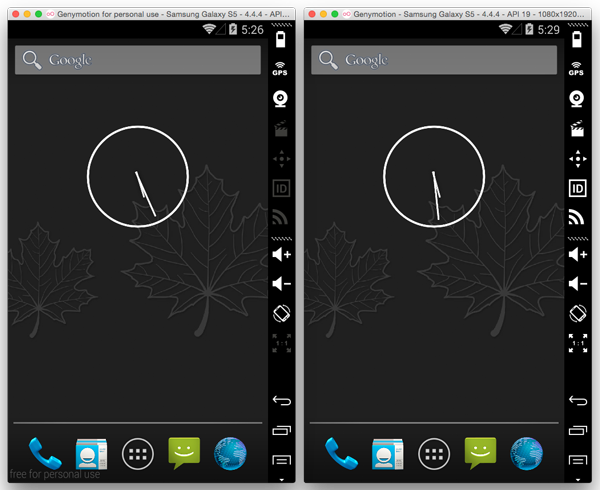
From the top, the controls are:
- Battery – Offers the ability to test your app under different battery conditions.
- GPS – Use this to set different locations for your device and test Geolocation functionality of your apps.
- Camera – Sets the front and back cameras of the virtual device. If your computer has a webcam, you can use this. You can also set a dummy webcam to be used which shows a blank view with a moving Genymotion icon.
- Capture – Enables you to take screenshots or screencasts of the virtual device. This is useful for recording your app in use.
- Remote Control – Enables you to take control of a virtual device from another physical device (running Android 2.2 or above). An attached physical device will forward touch inputs and accelerometer events to Genymotion. Thus, you can test your app as if you were holding a device in your hands.
- Identifiers – Shows Device ID and Android ID numbers. You can view and edit these values at any time, without having to reboot the virtual device.
- Network – Enables you to test how an app reacts with different types of network qualities.
- Increase Volume
- Decrease Volume
- Rotate Screen
- Pixel Perfect – Enables high precision of your user interface and ensures every pixel of your app looks as it should. One pixel of the virtual device is displayed using one pixel of your computer screen.
Eclipse and Android Studio Integration
To use a Genymotion virtual device during development, launch the device and when you run your app in your chosen IDE, the virtual device will be listed in the list of available devices.
If you don’t want to launch Genymotion every time you want to use its devices, install the Genymotion plugin that is available for both Eclipse and Android Studio.
For Eclipse, open Help -> Install New Software , click on the Add button to add a new Update Site. Give it the name Genymotion and url of http://plugins.genymotion.com/eclipse/. Click Ok and then in the Available Software window, select Genymobile from the list and click on Next. Follow the prompts until installation is complete. Eclipse will need to restart.
On restarting Eclipse, you will notice an icon for the Genymotion Virtual Device Manager.

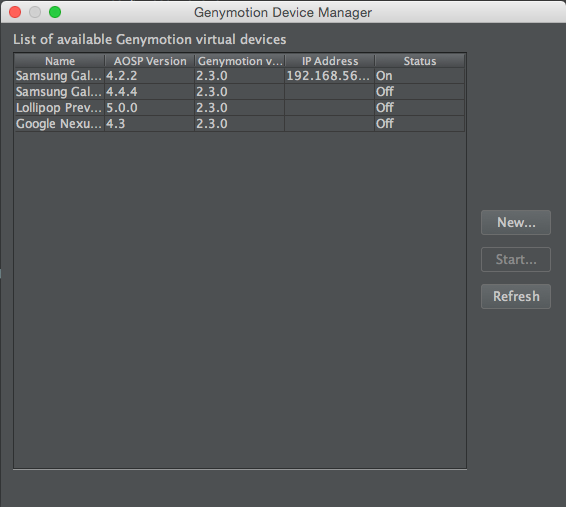
Launch the Genymotion Virtual Device Manager. This is similar to the default device manager where you can see a list of your devices and start them. If you select New from the manager, it will open Genymotion, as you can’t create a device from here. To run a device, click on Start after selecting the device from the list and the device will launch without needing to have Genymotion running.
When a Genymotion virtual device is running, it will be among the list of devices you can run your app on when you run the application.
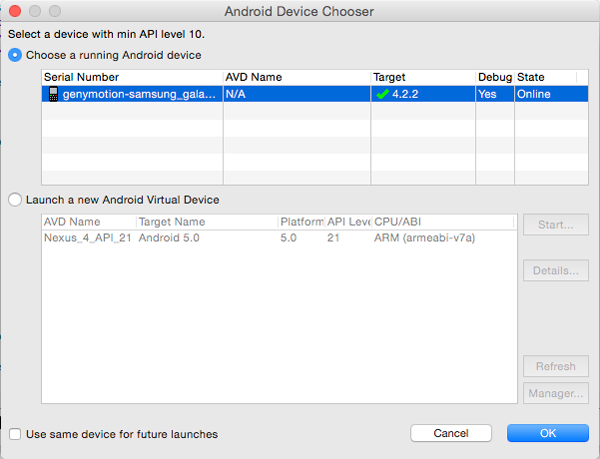
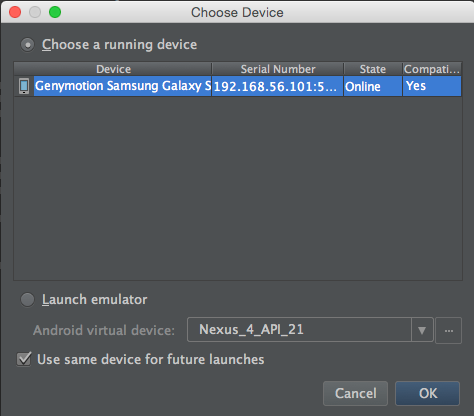
Note: This is a bug that started appearing on Mac OSX Yosemite. When you chose to run your app on a device, thus launching the Android Device Chooser, as shown above. You might not see the running Genymotion device listed as available. A simple fix is to resize the serial number tab and you will see the genymotion emulator that is running.
For Android Studio, open Settings. This is different for different OS’s. For Mac, it’s Android Studio -> Preferences. In the window that appears, under IDE Settings, select Plugins. Click on Browse repositories button and search for Genymotion. Select Genymotion from the search results and click on the Install Plugin button. After installation, Android Studio will restart.
On restarting, the Genymotion Virtual Device Manager icon will have been added to the toolbar.
![]()
On clicking the icon, you will be prompted to set the path to the Genymotion application. For Mac, this should be /Applications/Genymotion.app. After setting the path you will now be able to launch the device manager.
On running your app, the running Genymotion virtual device will be among the choices of devices you can run your app on.
Extra Features worth Mentioning
Personally, because of its speed, I prefer using Genymotion over the default emulator. But there are a couple more features it provides that I really like. First is the ease of installing an apk file. With the default emulator, there are several steps you have to go through to run an apk file on the device, with Genymotion, you simply drag and drop the file to the virtual device.
The second feature is actually a feature that Genymotion doesn’t support anymore. Previous Genymotion versions supported Google apps, which meant that you could install apps from the Google play store on the virtual device just as you would on a real device. This could come in handy when researching features to include in your app by looking at how various apps implemented the features. You could install apps on different virtual devices, thus test the app on phones and tablets without needing to purchase a variety of real testing devices.
You can still enable Google app support on Genymotion by installing a compatible Google apps package on a virtual device. But as the Genymotion team states.
“If you decide to add the needed package by yourself, it will be at your own risk and responsibility and we will not be liable for it”.
If you’d rather not take that route but would still like to run Android apps from the Google Play Store on your computer, then the two emulators: Andy and BlueStacks might be better alternatives.
Frequently Asked Questions (FAQs) about Genymotion Android Emulator
What are the system requirements for Genymotion?
Genymotion is a versatile Android emulator that can run on various operating systems. For Windows, it requires a 64 bit CPU, VT-x or AMD-V capable, enabled in BIOS, and a recent OpenGL 2.0 capable video card. For MacOS, it requires a 64 bit CPU, VT-x capable, enabled in BIOS, and a recent OpenGL 2.0 capable video card. For Linux, it requires a 64 bit CPU, VT-x or AMD-V capable, enabled in BIOS, a recent OpenGL 2.0 capable video card, and Linux Kernel version 3.10 or above.
How can I install Genymotion on my computer?
To install Genymotion, first, download the installer from the official Genymotion website. Once downloaded, run the installer and follow the on-screen instructions. After installation, you will need to sign in or create a Genymotion account to use the emulator.
Can I use Genymotion for app testing?
Yes, Genymotion is an excellent tool for app testing. It allows you to emulate different Android devices with various Android versions. This feature is particularly useful for developers who want to ensure their apps work correctly on different devices and Android versions.
Is Genymotion free to use?
Genymotion offers both free and paid versions. The free version is suitable for personal use and comes with limited features. The paid versions offer more advanced features and are designed for professional use, including app development and testing.
How can I emulate a specific Android device using Genymotion?
Genymotion allows you to emulate a wide range of Android devices. To do this, open Genymotion and click on the “Add” button. You will see a list of available devices. Select the device you want to emulate, and click “Next”. The emulator will then download and install the necessary files for the selected device.
Can I use Genymotion without an internet connection?
Yes, you can use Genymotion without an internet connection. However, you will need an internet connection for the initial setup and to download virtual devices.
How can I update Genymotion?
To update Genymotion, go to the “Help” menu and select “Check for Updates”. If an update is available, you will be prompted to download and install it.
Can I run multiple instances of Genymotion at the same time?
Yes, Genymotion allows you to run multiple instances at the same time. This feature is useful for testing how your app interacts with other apps or for testing multiplayer game features.
Does Genymotion support Google Play Services?
Yes, Genymotion supports Google Play Services. However, not all virtual devices come with Google Play Services installed. You may need to manually install Google Play Services on some devices.
Can I use Genymotion on a virtual machine?
Yes, you can use Genymotion on a virtual machine. However, you will need to ensure that your virtual machine meets the system requirements for Genymotion.