Simple 3D Effect Wrap-Around Navigation Menu In Photoshop
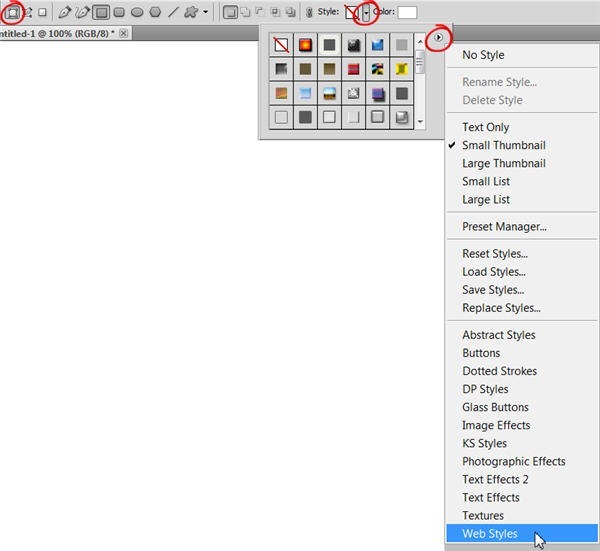 You will be asked if you want to replace or append your current styles. Choose append. Scroll down through the new styles which have been added and choose “Black To Transparent 2.” Now draw out a rectangle that fills about half or two thirds of your document. It’s okay to draw the rectangle so it goes outside the boundaries of the document. Finally, on the new rectangle layer that appears in your layer panel, add a Stroke layer style in white, 2 pixels thick. You should end up with something like this:
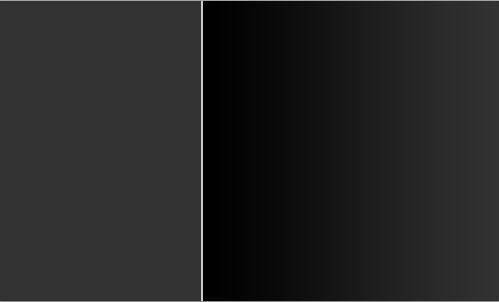
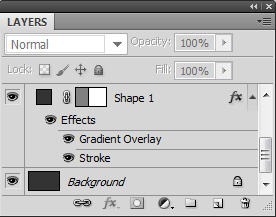 Okay, so that’s the background set up. The area on the left is our sidebar where we’ll add our simple 3D menu.
3. Select the Rounded Rectangle Shape tool in the toolbox. It will be hidden under the Rectangle Shape tool. In the tool options bar at the top of the screen, make sure Shape Layers is selected and set the color to #990000 (deep red). Drag out a rectangle something like this:
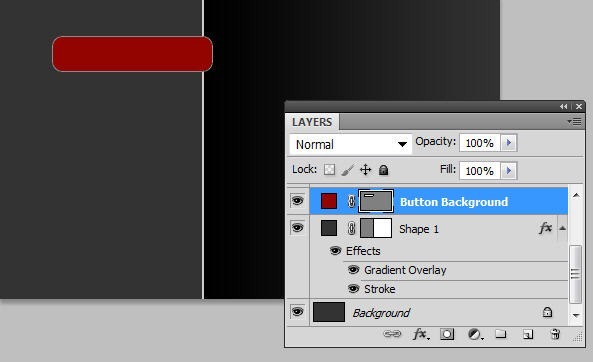 Rename the shape layer to “Button Background.”
5. Now we’ll use the pen tool to draw a shape that will make it look like the button is being folded under the sidebar. Select the Pen tool and set the options to Shape Layers and set the color to white. Zoom right in so you can see clearly what you’re drawing. Draw a shape something like this:
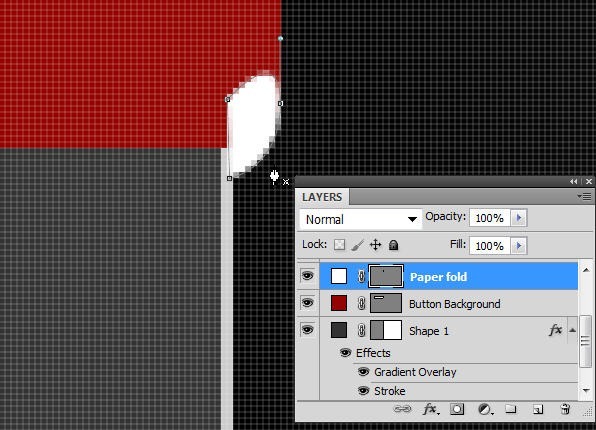 Now rename the new shape layer “Paper Fold.”
6. Drag the Paper Fold layer under the Button Background Layer.
7. The next step is to change the Button Background (which is a vector shape) so that the bottom right corner looks like it is folding downwards, matching the top right corner. Choose the Direct Selection tool (white arrow) from the tool box and then click on the edge of the red button so that you can see the anchor points.
Click and drag the rightmost anchor point down so you start to get a downwards curve. Use the Bezier handles to adjust the direction and shape of the curve. You will also need to move the anchor point to the left and adjust the curve with the handles for that point too. Try to get a shape something like this:
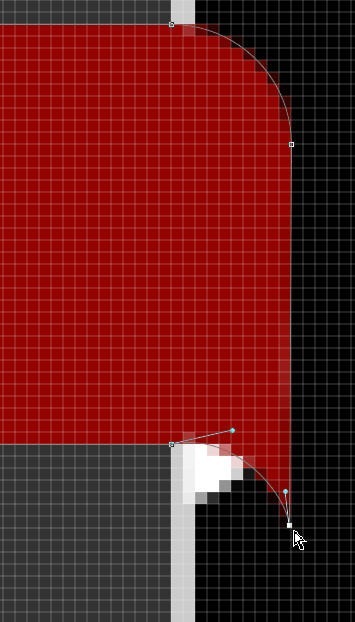 8. So our button has now changed shape a little bit and it’s overlapping our Paper Fold layer. Select the Paper Fold layer and with the Move tool, drag it down so it looks like the corners meet and fold correctly.
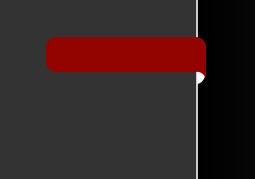 9. Select the Button Background Layer and add a Layer Style of Stroke size 3, in white, position outside.
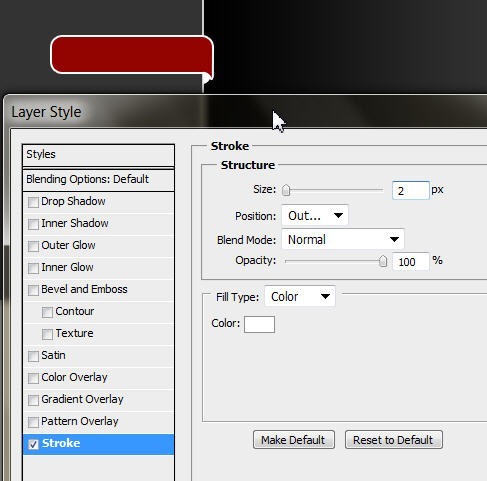 10. We need to delete the right end of the stroke. To do we can put the stroke effect onto a separate layer and mask out the right end. With the Button Background shape layer selected go to Layer > Layer Style > Create Layer. You will notice an extra layer underneath your button shape layer. Select it and add a Quick Mask. Use a black paintbrush to paint out the white stroke on the right side of the button. Also gently mask out part of the top curve.
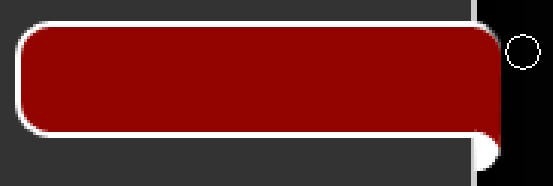 11. With the white stroke layer still selected, add a Drop Shadow layer style. This gives a really nice effect and really lifts the button off the page. Play around with the sliders to see what kind of effect you like best. These are the values I used.
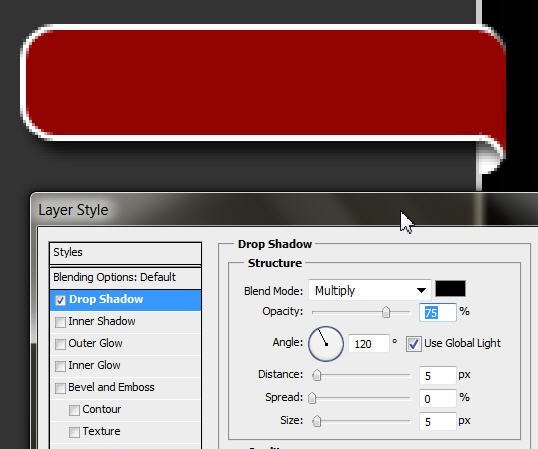 Click OK to add the drop shadow.
12. Select the Background Button layer and add an Inner Shadow with the following values:
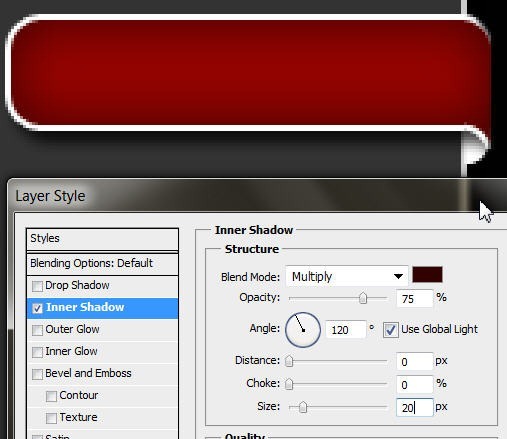 Click OK to apply the Inner Shadow.
13. Nearly there! The last step is to add some text to your button. And voila!
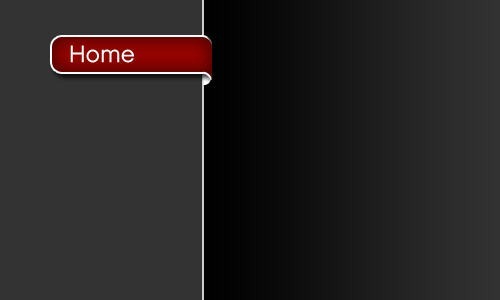 You will probably require more than one button in your navigation bar so rather than repeat the whole process we can just duplicate what we’ve made.
14. On the layers panel, click on the “Create a Group” button. Rename the group to “Button.” Now select all the layers that you’ve created to make up your button and drag them into the group. Make sure you don’t drag in the first background you made.
15. To duplicate the group, drag it down through the layers panel and drop it on the “Create New Layer” icon.
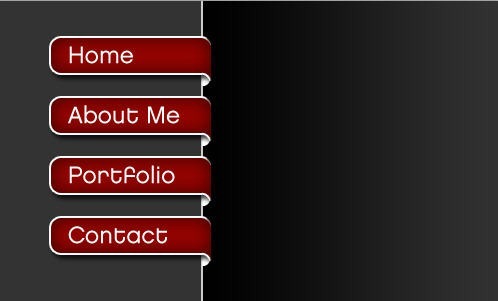
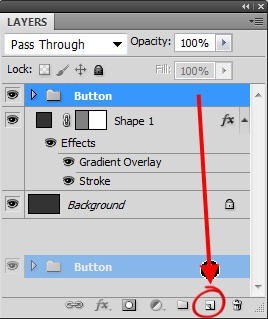 15. Once you’ve created a duplicate, select the Move tool in the toolbox (but don’t click anywhere on the screen), simply use the up and down arrow keys to move the entire group up and down. Repeat this process till you have all the buttons you need, then change the text in each one. Here’s my completed navigation bar.
Frequently Asked Questions about Creating a 3D Effect Wrap Around Navigation Menu in Photoshop
How can I create a 3D effect in Photoshop without using the 3D tools?
While Photoshop does have a dedicated set of 3D tools, you can create a 3D effect without using them. This can be achieved by using the layer style options such as Bevel and Emboss, which can give your layers a 3D appearance. You can also use gradients and shadows to give depth to your objects. The key is to understand how light and shadow work in a 3D space and apply that knowledge to your 2D canvas.
What are some tips for creating a realistic 3D effect in Photoshop?
To create a realistic 3D effect in Photoshop, it’s important to pay attention to details. Use gradients to create depth and volume, and add shadows to make your object appear as if it’s interacting with the space around it. Also, consider the perspective and angle of your light source, as this can greatly affect the appearance of your 3D object.
Can I use the 3D effect wrap around navigation menu technique in other Adobe software?
Yes, the principles of creating a 3D effect can be applied to other Adobe software such as Illustrator or Animate. However, the tools and methods may vary slightly. For instance, in Illustrator, you would use the 3D effect tool, while in Animate, you would use the drawing and shape tools to create your 3D objects.
How can I make my 3D effect wrap around navigation menu responsive?
To make your 3D effect wrap around navigation menu responsive, you would need to incorporate CSS and HTML coding. This would involve setting the width and height of your menu items to a percentage rather than a fixed pixel value, and using media queries to adjust the layout for different screen sizes.
What are some common mistakes to avoid when creating a 3D effect in Photoshop?
Some common mistakes to avoid when creating a 3D effect in Photoshop include not considering the light source, overusing the Bevel and Emboss tool, and not adding enough depth to your objects. It’s also important to keep your design consistent and to not overcomplicate your design with too many 3D elements.
How can I add a 3D effect to text in Photoshop?
Adding a 3D effect to text in Photoshop can be done using the layer style options. You can add a Bevel and Emboss effect to give your text a 3D appearance, and use gradients and shadows to add depth. You can also use the 3D tools to extrude your text and give it a 3D shape.
Can I animate my 3D effect wrap around navigation menu in Photoshop?
While Photoshop does have some animation capabilities, it’s not the best tool for creating complex animations. However, you can create simple animations such as hover effects for your 3D effect wrap around navigation menu using CSS and HTML coding.
How can I improve my skills in creating 3D effects in Photoshop?
Improving your skills in creating 3D effects in Photoshop can be achieved through practice and learning. There are many online tutorials and courses available that can help you understand the tools and techniques involved. It’s also helpful to study 3D art and design to understand how light, shadow, and perspective work in a 3D space.
What are some creative ways to use the 3D effect wrap around navigation menu?
The 3D effect wrap around navigation menu can be used in a variety of creative ways. For instance, you could use it to create a unique website header, a dynamic sidebar, or even a interactive infographic. The possibilities are endless, and it all depends on your creativity and design skills.
Can I use the 3D effect wrap around navigation menu technique in print design?
Yes, the 3D effect wrap around navigation menu technique can be used in print design. However, keep in mind that unlike digital design, print design does not have the ability to be interactive or responsive. Therefore, the 3D effect would be purely visual and would not have any functional purpose.
Jennifer Farley is a designer, illustrator and design instructor based in Ireland. She writes about design and illustration on her blog at Laughing Lion Design.
