
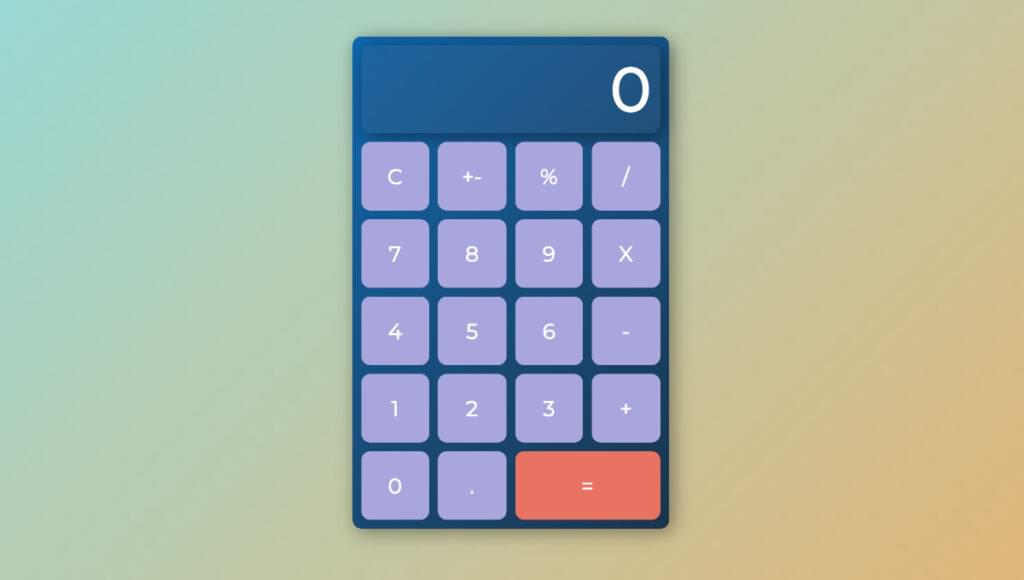
In this tutorial, we’ll be building a React Calculator app. You’ll learn how to make a wireframe, design a layout, create components, update states, and format the output.
To get you inspired, here’s a link to the deployed project we’ll be building.
Also, here’s the source code, just for reference if you need help in any stage of the project.
Key Takeaways
- Start by creating a basic wireframe and design layout using tools like Figma, focusing on component structure rather than color schemes initially.
- Utilize the create-react-app command for setting up a React project quickly and efficiently, followed by cleaning up the default boilerplate.
- Organize the app into distinct components such as Wrapper, Screen, ButtonBox, and Button, each with its own dedicated CSS for styling.
- Implement functionality by defining states and handlers in React for various calculator operations like addition, subtraction, multiplication, division, and special functions like reset and invert values.
- Enhance user interaction by formatting input and output values, ensuring numbers are displayed with proper separators and handling multiple decimal points correctly.
- Compile the entire application ensuring all components interact seamlessly, providing a functional and visually appealing calculator app.
Planning
Since we’ll be building a Calculator app, let’s pick a scope that’s not too complicated for learning but also not too basic for covering different aspects of creating an app.
The features we’ll implement include:
- add, subtract, multiply, divide
- support decimal values
- calculate percentages
- invert values
- reset functionality
- format larger numbers
- output resize based on length
To start off, we’ll draw a basic wireframe to display our ideas. For this, you can use free tools like Figma or Diagrams.net.
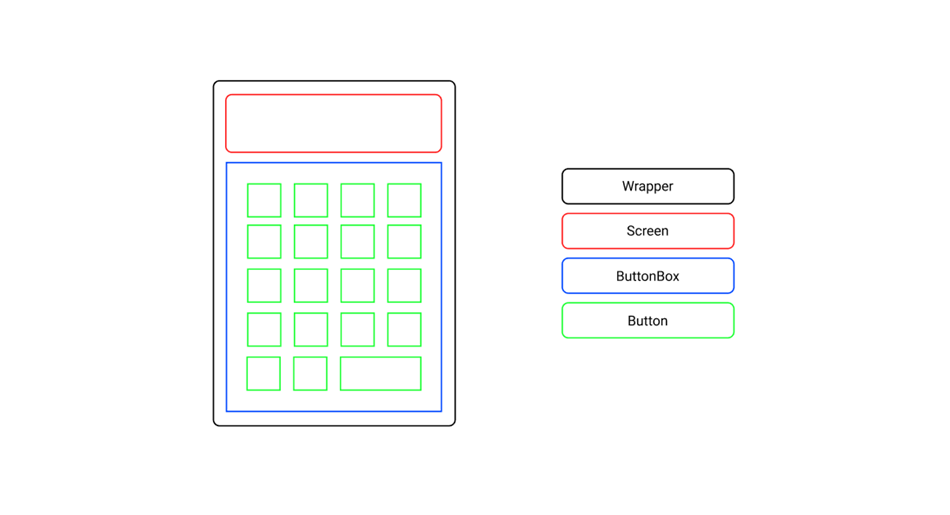
Note that, in this phase, it’s not that important to think about colors and styling. What matter most is that you can structure the layout and identify the components involved.
Design Colors
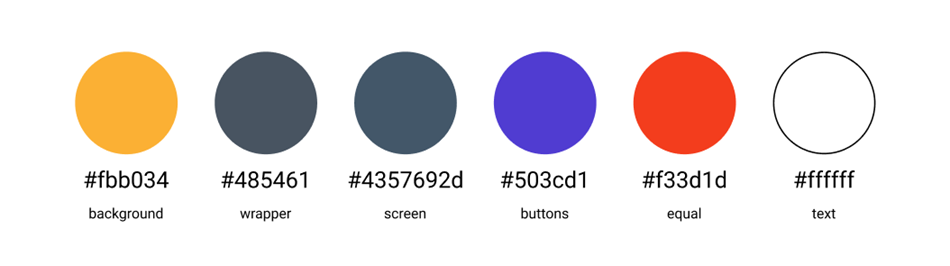
Once we’ve dealt with the layout and the components, all that will be left to do to complete the design is to pick a nice color scheme.
Below are some guidelines for making the app look great:
- the wrapper should contrast with the background
- the screen and button values should be easy to read
- the equals button should in a different color, to give some accent
Based on the criteria above, we’ll use the color scheme shown below.
Setting Up the Project
To start, open the terminal in your projects folder and create a boilerplate template using the create-react-app. To do that, run the command:
npx create-react-app calculator
That’s the fastest and easiest way to set up a fully working React app with zero config. All you need to do after that is run cd calculator to switch to the newly created project folder and npm start to start your app in the browser.
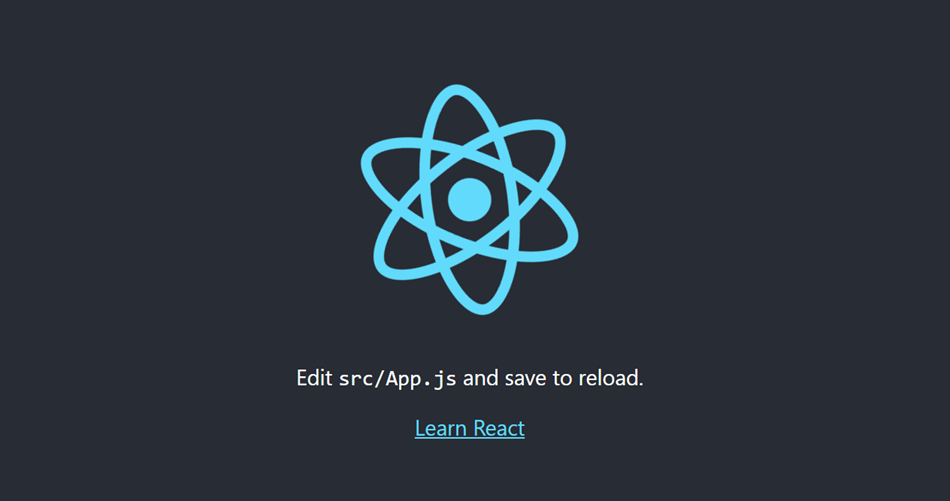
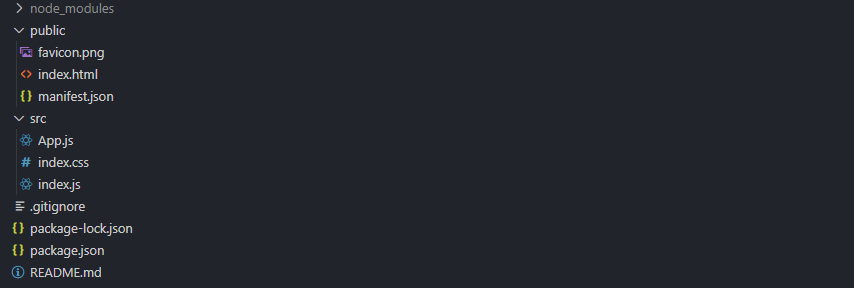
As you can see, it comes with some default boilerplate, so next we’ll do some cleaning up in the project folder tree.
Find the src folder, where the logic of your app will live, and remove everything except App.js to create your app, index.css to style your app, and index.js to render your app in the DOM.
Create Components
Since we’ve already done some wireframing, we already know the main building blocks of the application. Those are Wrapper, Screen, ButtonBox, and Button.
First create a components folder inside the src folder. We’ll then create a separate .js file and .css file for each component.
If you don’t want to create those folders and files manually, you can use the following one-liner to get things set up quickly:
cd src && mkdir components && cd components && touch Wrapper.js Wrapper.css Screen.js Screen.css ButtonBox.js ButtonBox.css Button.js Button.css
Wrapper
The Wrapper component will be the frame, holding all the children components in place. It will also allow us to center the whole app afterward.
Wrapper.js
import "./Wrapper.css";

const Wrapper = ({ children }) => {
  return <div className="wrapper">{children}</div>;
};

export default Wrapper;
Wrapper.css
.wrapper {
  width: 340px;
  height: 540px;
  padding: 10px;
  border-radius: 10px;
  background-color: #485461;
  background-image: linear-gradient(315deg, #485461 0%, #28313b 74%);
}
Screen
The Screen component will be the top section child of the Wrapper component, and its purpose will be to display the calculated values.
In the features list, we included display output resize on length, meaning longer values must shrink in size. We’ll use a small (3.4kb gzip) library called react-textfit for that.
To install it, run npm i react-textfit and then import and use it like shown below.
Screen.js
import { Textfit } from "react-textfit";
import "./Screen.css";

const Screen = ({ value }) => {
  return (
    <Textfit className="screen" mode="single" max={70}>
      {value}
    </Textfit>
  );
};

export default Screen;
Screen.css
.screen {
  height: 100px;
  width: 100%;
  margin-bottom: 10px;
  padding: 0 10px;
  background-color: #4357692d;
  border-radius: 10px;
  display: flex;
  align-items: center;
  justify-content: flex-end;
  color: white;
  font-weight: bold;
  box-sizing: border-box;
}
ButtonBox
The ButtonBox component, similarly to the Wrapper component, will be the frame for the children — only this time for the Button components.
ButtonBox.js
import "./ButtonBox.css";

const ButtonBox = ({ children }) => {
  return <div className="buttonBox">{children}</div>;
};

export default ButtonBox;
ButtonBox.css
.buttonBox {
  width: 100%;
  height: calc(100% - 110px);
  display: grid;
  grid-template-columns: repeat(4, 1fr);
  grid-template-rows: repeat(5, 1fr);
  grid-gap: 10px;
}
Button
The Button component will provide the interactivity for the app. Each component will have the value and onClick props.
In the stylesheet, we’ll also include the styles for the equal button. We’ll use Button props to access the class later on.
Button.js
import "./Button.css";

const Button = ({ className, value, onClick }) => {
  return (
    <button className={className} onClick={onClick}>
      {value}
    </button>
  );
};

export default Button;
Button.css
button {
  border: none;
  background-color: rgb(80, 60, 209);
  font-size: 24px;
  color: rgb(255, 255, 255);
  font-weight: bold;
  cursor: pointer;
  border-radius: 10px;
  outline: none;
}

button:hover {
  background-color: rgb(61, 43, 184);
}

.equals {
  grid-column: 3 / 5;
  background-color: rgb(243, 61, 29);
}

.equals:hover {
  background-color: rgb(228, 39, 15);
}
Render elements
The base file for rendering in React apps is index.js. Before we go further, make sure your index.js looks as follows:
import React from "react";
import ReactDOM from "react-dom";

import App from "./App";
import "./index.css";

ReactDOM.render(
  <React.StrictMode>
    <App />
  </React.StrictMode>,
  document.getElementById("root")
);
Also, let’s check index.css and make sure we reset the default values for padding and margin, pick some great font (like Montserrat in this case) and set the proper rules to center the app in the viewport:
@import url("https://fonts.googleapis.com/css2?family=Montserrat&display=swap");

* {
  margin: 0;
  padding: 0;
  font-family: "Montserrat", sans-serif;
}

body {
  height: 100vh;
  display: flex;
  align-items: center;
  justify-content: center;
  background-color: #fbb034;
  background-image: linear-gradient(315deg, #fbb034 0%, #ffdd00 74%);
}
Finally, let’s open the main file App.js, and import all the components we created previously:
import Wrapper from "./components/Wrapper";
import Screen from "./components/Screen";
import ButtonBox from "./components/ButtonBox";
import Button from "./components/Button";

const App = () => {
  return (
    <Wrapper>
      <Screen value="0" />
      <ButtonBox>
        <Button
          className=""
          value="0"
          onClick={() => {
            console.log("Button clicked!");
          }}
        />
      </ButtonBox>
    </Wrapper>
  );
};

export default App;
In the example above we have rendered just a single Button component.
Let’s create an array representation of the data in the wireframe, so we can map through and render all the buttons in the ButtonBox:
import Wrapper from "./components/Wrapper";
import Screen from "./components/Screen";
import ButtonBox from "./components/ButtonBox";
import Button from "./components/Button";

const btnValues = [
  ["C", "+-", "%", "/"],
  [7, 8, 9, "X"],
  [4, 5, 6, "-"],
  [1, 2, 3, "+"],
  [0, ".", "="],
];

const App = () => {
  return (
    <Wrapper>
      <Screen value=0 />
      <ButtonBox>
        {
          btnValues.flat().map((btn, i) => {
            return (
              <Button
                key={i}
                className={btn === "=" ? "equals" : ""}
                value={btn}
                onClick={() => {
                  console.log(`${btn} clicked!`);
                }}
              />
            );
          })
        }
      </ButtonBox>
    </Wrapper>
  );
};
Check your terminal and make sure your React app is still running. If not, run npm start to start it again.
Open your browser. If you followed along, your current result should look like this:
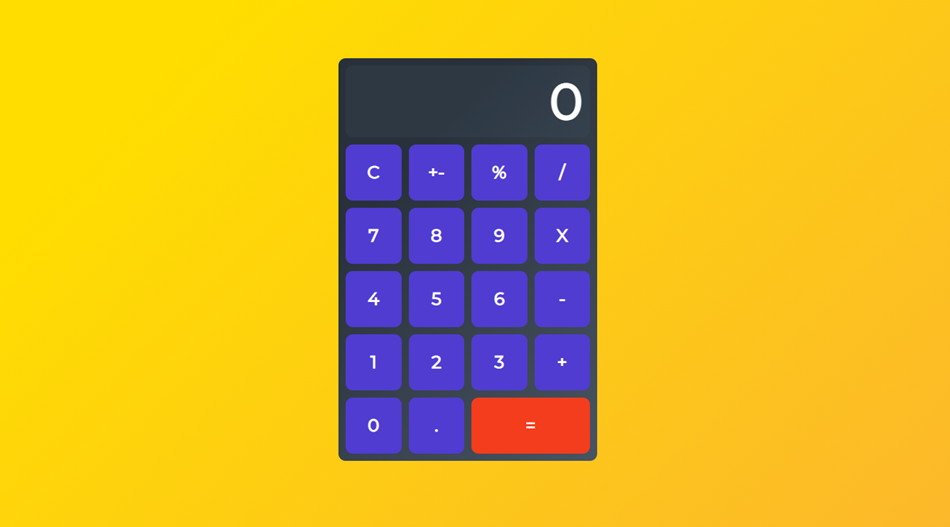
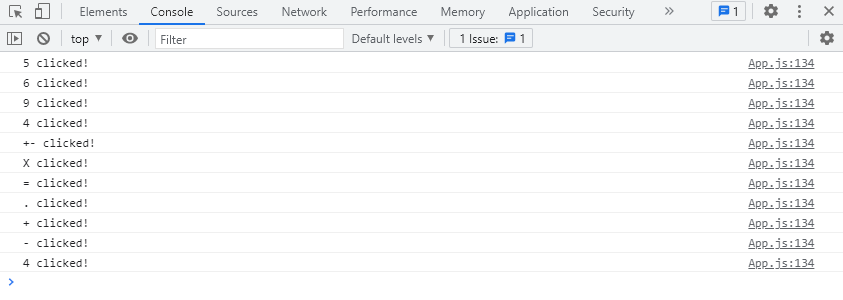
If you want, you can also open the browser’s devtools and test out the log values for each button pressed.
Define states
Next, we’ll declare the state variables using React useState hook.
Specifically, there’ll be three states: num, the entered value; sign, the selected sign: and res, the calculated value.
In order to use the useState hook, we must first import it in App.js:
import React, { useState } from "react";
In the App function, we’ll use an object to set all states at once:
import React, { useState } from "react";

// ...

const App = () => {
  let [calc, setCalc] = useState({
    sign: "",
    num: 0,
    res: 0,
  });

  return (
    // ...
  );
};
Functionality
Our app looks nice, but there’s no functionality. Currently, it can only output button values into the browser console. Let’s fix that!
We’ll start with the Screen component. Set the following conditional logic to value prop, so it displays the entered number (if the number is typed in), or the calculated result (if the equals button is pressed).
For that, we’ll use the built-in JS ternary operator, which is basically a shortcut for the if statement, taking in an expression and returning a value after ? if the expression is true, or after : if the expression’s false:
<Screen value={calc.num ? calc.num : calc.res} />
Now let’s edit the Button component so it can detect different button types and execute the assigned function once the specific button is pressed. Use the code below:
import React, { useState } from "react";

// ...

const App = () => {
  // ...

  return (
    <Wrapper>
      <Screen value={calc.num ? calc.num : calc.res} />
      <ButtonBox>
        {btnValues.flat().map((btn, i) => {
          return (
            <Button
              key={i}
              className={btn === "=" ? "equals" : ""}
              value={btn}
              onClick={
                btn === "C"
                  ? resetClickHandler
                  : btn === "+-"
                  ? invertClickHandler
                  : btn === "%"
                  ? percentClickHandler
                  : btn === "="
                  ? equalsClickHandler
                  : btn === "/" || btn === "X" || btn === "-" || btn === "+"
                  ? signClickHandler
                  : btn === "."
                  ? commaClickHandler
                  : numClickHandler
              }
            />
          );
        })}
      </ButtonBox>
    </Wrapper>
  );
};
Now we’re ready to create all the necessary functions.
numClickHandler
The numClickHandler function gets triggered only if any of the number buttons (0–9) are pressed. Then it gets the value of the Button and adds that to the current num value.
It will also make sure that:
- no whole numbers start with zero
- there are no multiple zeros before the comma
- the format will be “0.” if “.” is pressed first
- numbers are entered up to 16 integers long
import React, { useState } from "react";

// ...

const App = () => {
  // ...

  const numClickHandler = (e) => {
    e.preventDefault();
    const value = e.target.innerHTML;

    if (calc.num.length < 16) {
      setCalc({
        ...calc,
        num:
          calc.num === 0 && value === "0"
            ? "0"
            : calc.num % 1 === 0
            ? Number(calc.num + value)
            : calc.num + value,
        res: !calc.sign ? 0 : calc.res,
      });
    }
  };

  return (
    // ...
  );
};
commaClickHandler
The commaClickHandler function gets fired only if the decimal point (.) is pressed. It adds the decimal point to the current num value, making it a decimal number.
It will also make sure that no multiple decimal points are possible.
Note: I’ve called the handling function “commaClickHandler” because, in many parts of the world, integers and decimals are separated by a comma and not a decimal point.
// numClickHandler function

const commaClickHandler = (e) => {
  e.preventDefault();
  const value = e.target.innerHTML;

  setCalc({
    ...calc,
    num: !calc.num.toString().includes(".") ? calc.num + value : calc.num,
  });
};
signClickHandler
The signClickHandler function gets fired when the user press either +, –, * or /. The particular value is then set as a current sign value in the calc object.
It will also make sure that there’s no effect on repeated calls:
// commaClickHandler function

const signClickHandler = (e) => {
  e.preventDefault();
  const value = e.target.innerHTML;

  setCalc({
    ...calc,
    sign: value,
    res: !calc.res && calc.num ? calc.num : calc.res,
    num: 0,
  });
};
equalsClickHandler
The equalsClickHandler function calculates the result when the equals button (=) is pressed. The calculation is based on the current num and res value, as well as the sign selected (see the math function).
The returned value is then set as the new res for the further calculations.
It will also make sure that:
- there’s no effect on repeated calls
- users can’t divide with 0
// signClickHandler function

const equalsClickHandler = () => {
  if (calc.sign && calc.num) {
    const math = (a, b, sign) =>
      sign === "+"
        ? a + b
        : sign === "-"
        ? a - b
        : sign === "X"
        ? a * b
        : a / b;

    setCalc({
      ...calc,
      res:
        calc.num === "0" && calc.sign === "/"
          ? "Can't divide with 0"
          : math(Number(calc.res), Number(calc.num), calc.sign),
      sign: "",
      num: 0,
    });
  }
};
invertClickHandler
The invertClickHandler function first checks if there’s any entered value (num) or calculated value (res) and then inverts them by multiplying with -1:
// equalsClickHandler function

const invertClickHandler = () => {
  setCalc({
    ...calc,
    num: calc.num ? calc.num * -1 : 0,
    res: calc.res ? calc.res * -1 : 0,
    sign: "",
  });
};
percentClickHandler
The percentClickHandler function checks if there’s any entered value (num) or calculated value (res) and then calculates the percentage using the built-in Math.pow function, which returns the base to the exponent power:
// invertClickHandler function

const percentClickHandler = () => {
  let num = calc.num ? parseFloat(calc.num) : 0;
  let res = calc.res ? parseFloat(calc.res) : 0;

  setCalc({
    ...calc,
    num: (num /= Math.pow(100, 1)),
    res: (res /= Math.pow(100, 1)),
    sign: "",
  });
};
resetClickHandler
The resetClickHandler function defaults all the initial values of calc, returning the calc state as it was when the Calculator app was first rendered:
// percentClickHandler function

const resetClickHandler = () => {
  setCalc({
    ...calc,
    sign: "",
    num: 0,
    res: 0,
  });
};
Input Formatting
One last thing to complete the feature list in the intro would be to implement value formatting. For that, we could use a modified Regex string posted by Emissary:
const toLocaleString = (num) =>
  String(num).replace(/(?<!\..*)(\d)(?=(?:\d{3})+(?:\.|$))/g, "$1 ");
Essentially what it does is take a number, format it into the string format and create the space separators for the thousand mark.
If we reverse the process and want to process the string of numbers, first we need to remove the spaces, so we can later convert it to number. For that, you can use this function:
const removeSpaces = (num) => num.toString().replace(/\s/g, "");
Here’s the code where you should include both functions:
import React, { useState } from "react";

// ...

const toLocaleString = (num) =>
  String(num).replace(/(?<!\..*)(\d)(?=(?:\d{3})+(?:\.|$))/g, "$1 ");

const removeSpaces = (num) => num.toString().replace(/\s/g, "");

const App = () => {
  // ...

  return (
    // ...
  );
};
Check out the next section with full code on how to add toLocaleString and removeSpaces to the handler functions for the Button component.
Putting It All Together
If you’ve followed along, the whole App.js code should look like this:
import React, { useState } from "react";

import Wrapper from "./components/Wrapper";
import Screen from "./components/Screen";
import ButtonBox from "./components/ButtonBox";
import Button from "./components/Button";

const btnValues = [
  ["C", "+-", "%", "/"],
  [7, 8, 9, "X"],
  [4, 5, 6, "-"],
  [1, 2, 3, "+"],
  [0, ".", "="],
];

const toLocaleString = (num) =>
  String(num).replace(/(?<!\..*)(\d)(?=(?:\d{3})+(?:\.|$))/g, "$1 ");

const removeSpaces = (num) => num.toString().replace(/\s/g, "");

const App = () => {
  let [calc, setCalc] = useState({
    sign: "",
    num: 0,
    res: 0,
  });

  const numClickHandler = (e) => {
    e.preventDefault();
    const value = e.target.innerHTML;

    if (removeSpaces(calc.num).length < 16) {
      setCalc({
        ...calc,
        num:
          calc.num === 0 && value === "0"
            ? "0"
            : removeSpaces(calc.num) % 1 === 0
            ? toLocaleString(Number(removeSpaces(calc.num + value)))
            : toLocaleString(calc.num + value),
        res: !calc.sign ? 0 : calc.res,
      });
    }
  };

  const commaClickHandler = (e) => {
    e.preventDefault();
    const value = e.target.innerHTML;

    setCalc({
      ...calc,
      num: !calc.num.toString().includes(".") ? calc.num + value : calc.num,
    });
  };

  const signClickHandler = (e) => {
    e.preventDefault();
    const value = e.target.innerHTML;

    setCalc({
      ...calc,
      sign: value,
      res: !calc.res && calc.num ? calc.num : calc.res,
      num: 0,
    });
  };

  const equalsClickHandler = () => {
    if (calc.sign && calc.num) {
      const math = (a, b, sign) =>
        sign === "+"
          ? a + b
          : sign === "-"
          ? a - b
          : sign === "X"
          ? a * b
          : a / b;

      setCalc({
        ...calc,
        res:
          calc.num === "0" && calc.sign === "/"
            ? "Can't divide with 0"
            : toLocaleString(
                math(
                  Number(removeSpaces(calc.res)),
                  Number(removeSpaces(calc.num)),
                  calc.sign
                )
              ),
        sign: "",
        num: 0,
      });
    }
  };

  const invertClickHandler = () => {
    setCalc({
      ...calc,
      num: calc.num ? toLocaleString(removeSpaces(calc.num) * -1) : 0,
      res: calc.res ? toLocaleString(removeSpaces(calc.res) * -1) : 0,
      sign: "",
    });
  };

  const percentClickHandler = () => {
    let num = calc.num ? parseFloat(removeSpaces(calc.num)) : 0;
    let res = calc.res ? parseFloat(removeSpaces(calc.res)) : 0;

    setCalc({
      ...calc,
      num: (num /= Math.pow(100, 1)),
      res: (res /= Math.pow(100, 1)),
      sign: "",
    });
  };

  const resetClickHandler = () => {
    setCalc({
      ...calc,
      sign: "",
      num: 0,
      res: 0,
    });
  };

  return (
    <Wrapper>
      <Screen value={calc.num ? calc.num : calc.res} />
      <ButtonBox>
        {btnValues.flat().map((btn, i) => {
          return (
            <Button
              key={i}
              className={btn === "=" ? "equals" : ""}
              value={btn}
              onClick={
                btn === "C"
                  ? resetClickHandler
                  : btn === "+-"
                  ? invertClickHandler
                  : btn === "%"
                  ? percentClickHandler
                  : btn === "="
                  ? equalsClickHandler
                  : btn === "/" || btn === "X" || btn === "-" || btn === "+"
                  ? signClickHandler
                  : btn === "."
                  ? commaClickHandler
                  : numClickHandler
              }
            />
          );
        })}
      </ButtonBox>
    </Wrapper>
  );
};

export default App;
Final Notes
Congratulations! You’ve created a fully functional and styled app. Hopefully you’ve learned a thing or two during the process!
Some further ideas for you to explore would be to add some scientific features, or to implement the memory with the list of previous calculations.
If you have any issue reports or feature requests, feel free to leave them in the GitHub repo. If you like the project, feel free to star it.
FAQs on How to Build a Calculator App in React
How Do I Start Building a Calculator App Using React?
To start building a calculator app using React, you first need to set up your development environment. This includes installing Node.js and npm (Node Package Manager) on your computer. Once you have these installed, you can create a new React project using the command “npx create-react-app calculator”. This will create a new directory called “calculator” with all the necessary files and dependencies to start a React project. From there, you can start building your calculator app by creating components for the calculator’s display and buttons, and implementing the logic for calculations.
What Are the Key Components of a Calculator App in React?
The key components of a calculator app in React are the Display component and the Button component. The Display component is responsible for showing the user’s input and the result of calculations. The Button component represents each button on the calculator, including number buttons, operation buttons (like +, -, *, /), and the equals button. Each Button component needs to have an event handler that updates the state of the app when the button is clicked.
How Do I Handle User Input in a React Calculator App?
In a React calculator app, user input is typically handled through the state of the app. When a button is clicked, an event handler function is triggered that updates the state of the app. For example, if a user clicks the “1” button, the event handler function would append “1” to the current input string in the state. This state update then triggers a re-render of the Display component, showing the updated input to the user.
How Do I Implement Calculation Logic in a React Calculator App?
The calculation logic in a React calculator app can be implemented in a function that is triggered when the equals button is clicked. This function would take the current input string from the state, parse it into numbers and operations, perform the calculations, and then update the state with the result. This state update would then trigger a re-render of the Display component, showing the result of the calculation to the user.
How Do I Handle Errors in a React Calculator App?
Errors in a React calculator app can be handled by adding error checking to the calculation function. For example, if the input string is not a valid mathematical expression (like “1++2”), the calculation function could update the state with an error message instead of a result. This state update would then trigger a re-render of the Display component, showing the error message to the user.
How Do I Style a React Calculator App?
A React calculator app can be styled using CSS. Each component in the app can have its own CSS file, which defines the styles for that component. These styles can include things like colors, fonts, sizes, and positioning. The CSS files are then imported into the corresponding component files, applying the styles to the components.
How Do I Test a React Calculator App?
A React calculator app can be tested using various testing libraries and frameworks, such as Jest and React Testing Library. These tools allow you to write tests for your components and functions, checking that they behave as expected. For example, you could write a test that simulates a user clicking the “1” button, and checks that the Display component shows “1”.
How Do I Deploy a React Calculator App?
A React calculator app can be deployed using various deployment platforms, such as Netlify, Vercel, or GitHub Pages. These platforms allow you to upload your app’s code, and they take care of hosting the app and making it accessible on the internet. Before deploying, you need to build your app for production using the command “npm run build”, which creates a build directory with optimized versions of your app’s files.
Can I Add More Features to My React Calculator App?
Yes, you can add more features to your React calculator app. Some ideas for additional features include scientific calculator functions (like sin, cos, tan, log, etc.), memory functions (like M+, M-, MR, MC), and a history of previous calculations. To add these features, you would need to create new components and/or update existing components, and implement the corresponding logic in your app’s state and functions.
Can I Use Other Libraries or Frameworks with React to Build a Calculator App?
Yes, you can use other libraries or frameworks with React to build a calculator app. For example, you could use Redux for state management, or Bootstrap for styling. These libraries and frameworks can provide additional functionality and make it easier to build certain parts of your app. However, they also add complexity and dependencies to your app, so you should only use them if necessary.