Vagrantfile Explained: Setting Up and Provisioning with Shell

In the introduction, we showed you how to create a Vagrant base box, installing the latest Ubuntu 14.04 LTS in the virtual machine to use it as the guest operating system.
In this part you will learn how to setup a development environment using Vagrant, which you can use and reuse in your development. Note that while you can use the box we created in the previous part for the remainder of this post, you don’t have to – this will all work on any Ubuntu based Vagrant box.
Key Takeaways
- The Vagrantfile is a key configuration component for any Vagrant development environment. It’s written in Ruby and is used for basic variable assignment. Every configuration option can be placed inside this file.
- Provisioning is a crucial aspect of Vagrant, allowing for automatic software installations and configurations in the virtual machine. Vagrant supports multiple provisioning options, including basic shell scripts and software automation managers like Puppet, Chef or Ansible.
- Vagrant allows for network configurations such as public or private networks and port forwarding. It also supports syncing of project files between the host and the guest operating systems. This ensures that project files aren’t lost if the virtual machine is deleted.
- Shell script provisioning is an easy way to provision a base box. It eliminates the need for learning or installing tools like Puppet or Ansible. Shell script provisioning involves defining the provisioning type and loading and running a shell script from a file or URL.
The Vagrantfile
The primary configuration location for any Vagrant development environment is a file called Vagrantfile which you need to place in your project’s folder.
The configuration syntax of this Vagrantfile is Ruby, but you do not need to be a Ruby programmer or have any knowledge of the programming language to write this configuration file. You’ll mostly do basic variable assignment in the configuration.
Every configuration option you will need you can place inside this file.
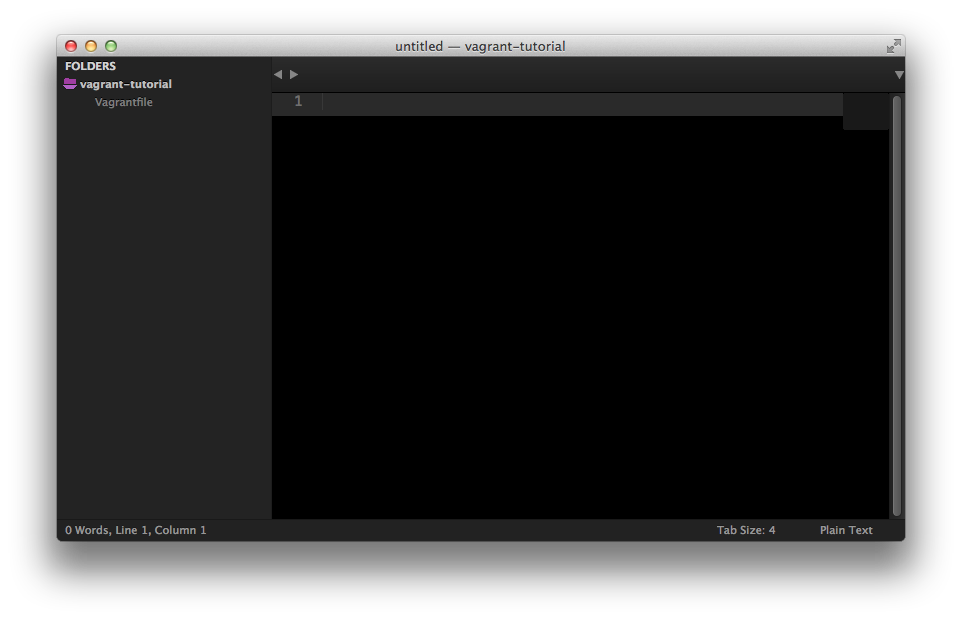
Let’s go ahead and create a test folder called vagrant-tutorial and inside this folder create the file named Vagrantfile so your folder structure looks like this:
About provisioning
The primary purpose of Vagrant is to have a base virtual machine and to give you the framework for creating automatic software installations and configurations in the virtual machine.
By letting Vagrant handle the provisioning of software, it also gives you the flexibility in configuration and more importantly, makes this process repeatable and automatic.
Vagrant doesn’t care how you provision the virtual machine, it offers multiple options ranging from basic shell scripts to software automation managers such as Puppet, Chef or Ansible. You can even configure it to use multiple provisioners at the same time.
Of course there’s always the possibility to vagrant ssh into the base virtual machine and install your required software manually, but that defeats the purpose of Vagrant and all the flexibility it offers when provisioning a box.
Provisioning prerequisites
Before we can start provisioning the base box, we need to set a few required options in our configuration file.
Vagrant API version
Vagrant uses API versions for its configuration file, this is how it can stay backwards compatible. So in every Vagrantfile we need to specify which version to use. The current one is version 2 which works with Vagrant 1.1 and up. Let’s write this block in our Vagrantfile.
Vagrant.configure("2") do |config|

end
Specifying the base box
Next, we need to specify the base Vagrant box we created in the introductory post. That base box is hosted on Vagrant Cloud, so we only need to specify the name and Vagrant will automatically get it from there.
Let’s write this option in the configuration file, inside the block:
config.vm.box = "primalskill/ubuntu-trusty64"
Network configurations
After all this is set up, we need to specify the network configurations. Vagrant has multiple ways of allowing us to communicate with the virtual machine from the outside world, such as public or private network and port forwarding.
We’re going to set up port forwarding for now. Insert the following line into your configuration file:
config.vm.network :forwarded_port, guest: 80, host: 8931, auto_correct: true
What the above line defines is that if you have a web server inside the virtual machine listening on port 80, then it can be accessed from the host machine on port 8931, for example by typing localhost:8931 in your browser.
The auto_correct option set to true tells Vagrant to handle port collisions automatically. There are cases when you have multiple vagrant boxes running with the same port open on the host machine, in these cases Vagrant will automatically resolve the conflicting ports.
If port collisions occur, Vagrant will output the corrections during the vagrant up boot up process.
Syncing project files
A good practice to follow when you’re using a Vagrant development environment, or as a matter of fact any virtualized development environment, is to share your project files between the host and the guest operating systems, so that your project files are not copied into the virtual machine, because if you delete your VM, the files will be lost with it.
Sharing folders between the host and the guest operating systems is very easy to do with Vagrant. Just enter the following config into the Vagrantfile:
config.vm.synced_folder "./", "/var/www", create: true, group: "www-data", owner: "www-data"
Let’s go over the arguments. The first argument is the host machine folder to be shared with the VM, in our case to share the current folder where the Vagrantfile was created. The second argument is the target folder inside the virtual machine.
create: true specifies that if the target folder (/var/www) does not exist, then create it automatically.
group: “www-data” and owner: “www-data” specifies the owner and the group of the shared folder inside the VM. By default most web servers use www-data as the owner accessing the files, it’s a good practice to set the ownership to this user.
VirtualBox specific configurations
Now that we configured the network and synced folders, we should configure the virtual machine itself. Vagrant lets you dynamically modify the VM – you can change the name, memory, etc.
We can do this within the provider block, which in our case is virtualbox. So let’s create the block, set the name and memory:
config.vm.provider "virtualbox" do |v|

    v.name = "SitePoint Test Vagrant"

    v.customize ["modifyvm", :id, "--memory", "1024"]

end
Vagrant uses VBoxManage for setting VM specific parameters before booting it up. For more configuration parameters you can visit the VirtualBox VBoxManage documentation.
The :id is the virtual machine’s ID, which needs to be passed to VBoxManage everytime we want to modify something VM specific. Fortunately, Vagrant handles this for us, so we just need to pass this variable.
Shell script provisioning
The easiest way to provision a base box is to use basic shell script commands which then run inside the virtual machine. This also removes the need for learning or installing Puppet, Ansible and similar tools – even though they can sometimes be more effective provisioners. We’ll deal with them in future articles.
We need to define the provisioning type, which in our case is called shell. Let’s write that inside this block in the configuration file:
config.vm.provision "shell" do |s|

    s.path "provision/setup.sh"

end
Vagrant has two types of shell provisioning, inline and external. With inline you can write shell commands in the Vagrantfile itself, but let’s focus on external provisioning, which simply means to load and run a shell script from a file (relative to Vagrantfile) or even from a URL.
In our case we want to load provision/setup.sh file, let’s create it and write the following in this file:
#!/bin/bash
echo "Provisioning virtual machine..."
Now, run vagrant up and it will output Provisioning virtual machine… on the screen. Note that Vagrant will provision the virtual machine only once on the first run, any subsequent provisioning must be executed with the --provision flag either vagrant up --provision or vagrant reload --provision. The provisioning will re-run also if you destroy the VM and rebuild it with vagrant destroy and vagrant up.
Installing Base Packages
Let the fun begin! Let’s install the base packages, namely: Git, Nginx, PHP-FPM and MySQL. In the provision/setup.sh file append the following lines:
    echo "Installing Git"

    apt-get install git -y > /dev/null
    echo "Installing Nginx"

    apt-get install nginx -y > /dev/null
Simple as that, but while installing Git and Nginx is straightforward, this is not the case with PHP and MySQL, because each has specific configuration options.
Installing PHP
Unfortunately Ubuntu’s APT (Advanced Packaging Tool) database is not always up-to-date with the latest stable PHP version, therefore we need to switch to a different source when installing it. For this, we need to install a couple of tools before we can actually install PHP itself.
Add the following commands into the setup.sh file:
    echo "Updating PHP repository"

    apt-get install python-software-properties build-essential -y > /dev/null

    add-apt-repository ppa:ondrej/php5 -y > /dev/null

    apt-get update > /dev/null
After this, type in the following lines to install PHP and a couple of essential extensions:
    echo "Installing PHP"

    apt-get install php5-common php5-dev php5-cli php5-fpm -y > /dev/null
    echo "Installing PHP extensions"

    apt-get install curl php5-curl php5-gd php5-mcrypt php5-mysql -y > /dev/null
Installing MySQL
Installing MySQL is even trickier, because the installation process will prompt you for the root password, but Vagrant needs to automate the installation and somehow fill in the password automatically.
For this we need to install a tool called debconf-utils. Go ahead and type in the following lines in setup.sh:
apt-get install debconf-utils -y > /dev/null
Now, we can use this tool to tell the MySQL installation process to stop prompting for a password and use the password from the command line instead:
    debconf-set-selections <<< "mysql-server mysql-server/root_password password 1234"
    debconf-set-selections <<< "mysql-server mysql-server/root_password_again password 1234"
In the two commands above 1234 is the actual password we set the root password to.
Now we can go ahead and install MySQL without getting the root password prompts:
apt-get install mysql-server -y > /dev/null
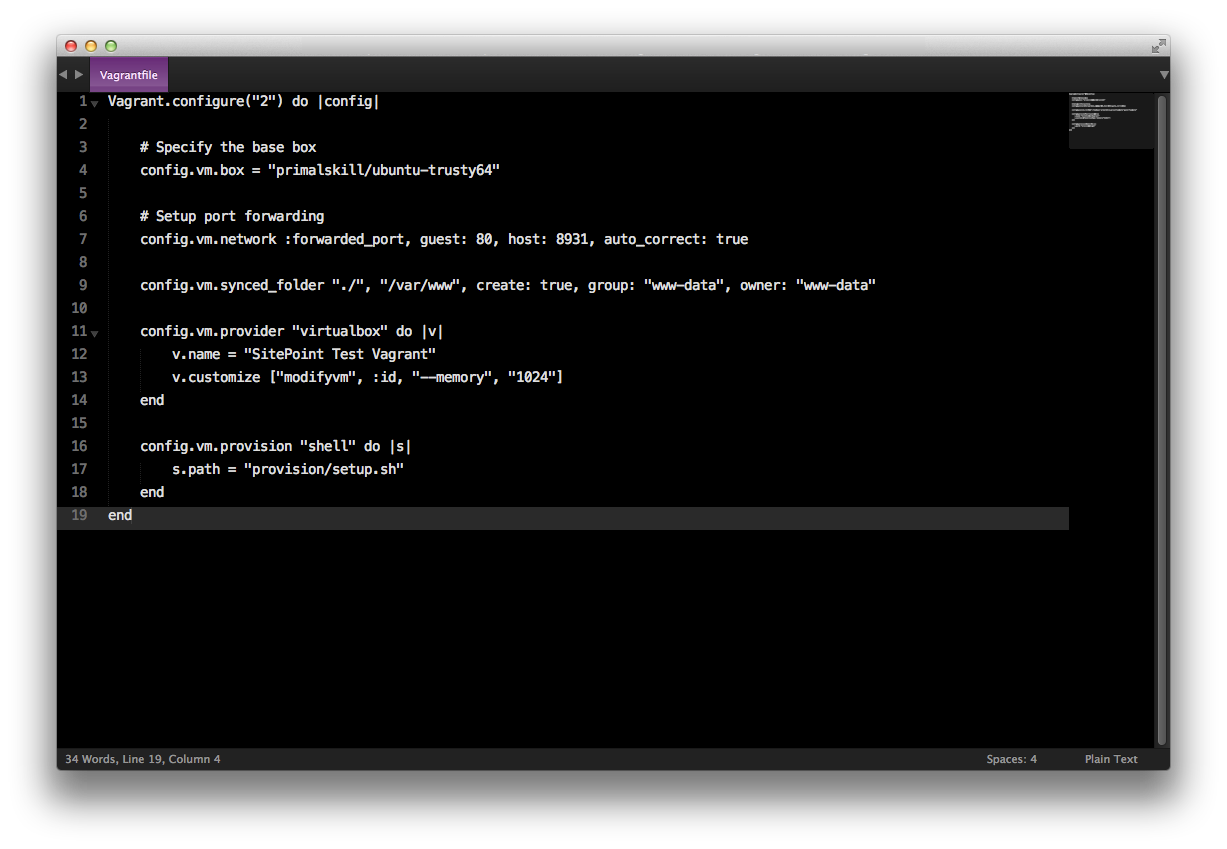
If you entered the commands corectly in the files, it should look like this:
Vagrantfile
provision/setup.sh

Notes
- At the end of every command, you can see > /dev/null. This simply suppresses the output from the installation processes. If you would like to see the output when provisioning, simply remove it.
- When you try to install a package using the apt-get install command, it will always ask for confirmation, the -y flag specifies “yes”, so it won’t prompt you for confirming each installation.
Configuring Nginx settings
Now that we installed the neccessary packages for a PHP development environment, we also need to configure Nginx to actually serve the project files.
The easiest way of doing this, is to simply create a file in our synced folder and use that as Nginx’s configuration file.
Let’s create a file called nginx_vhost (no file extension) in our provision folder inside another folder called config. I.e. the path to the file will be provision/config/nginx_vhost.
The file will contain an Nginx basic virtual host configuration:
    server {

        listen 80;

        server_name localhost;
        root /var/www/src/;

        index index.php index.html;
        # Important for VirtualBox

        sendfile off;
        location / {

            try_files $uri $uri/ =404;

        }
        location ~* \.php {

            include fastcgi_params;
            fastcgi_pass unix:/var/run/php5-fpm.sock;
            fastcgi_param SCRIPT_FILENAME $document_root$fastcgi_script_name;

            fastcgi_cache off;

            fastcgi_index index.php;

        }

    }
Insert the following lines into setup.sh to copy this configuration to the Nginx folder:
    echo "Configuring Nginx"

    cp /var/www/provision/config/nginx_vhost /etc/nginx/sites-available/nginx_vhost > /dev/null
    ln -s /etc/nginx/sites-available/nginx_vhost /etc/nginx/sites-enabled/
    rm -rf /etc/nginx/sites-available/default
    service nginx restart > /dev/null
The Nginx virtual host configuration points to /var/www/src/ folder as the document root. Let’s create this folder and an index.php file inside it. Also, let’s write the following “mandatory” code inside this file:
<?php echo "Hello World!"; ?>You final folder structure should look like this:
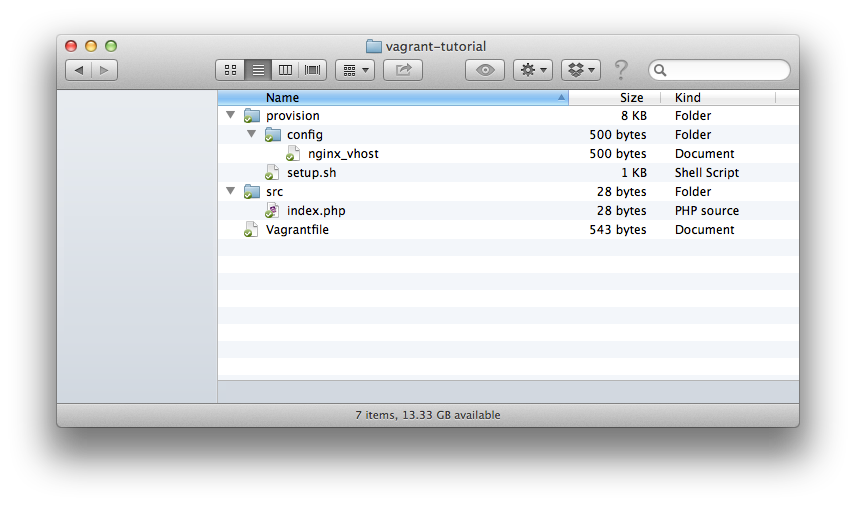
After running “vagrant up” you should be able to access the “Hello World” page by visiting localhost:8931 in your browser.
Note: All the configuration files are available at https://github.com/primalskill/vagrant-base-config
Conclusion
In this article, you learned how to provision a Vagrant base box using a shell script, installing Nginx, PHP, Git, MySQL and how to configure the web server. In future posts, we’ll look at other provisioning methods.
Got any feedback? Leave it in the comments below!
Frequently Asked Questions (FAQs) about Vagrantfile
What is the significance of the Vagrantfile in Vagrant?
The Vagrantfile is a crucial component in Vagrant. It serves as the main configuration file for any Vagrant project. It is written in Ruby, but you don’t need to know Ruby to work with it. The Vagrantfile is used to define the type of machine required for a project, and how to configure and provision these machines. Vagrant uses this file to create the environment specified by the user. It is designed to be version controlled and shared, enabling other developers to replicate the same environment.
How can I specify multiple machines in a Vagrantfile?
Vagrant allows you to define multiple machines in a single Vagrantfile through a feature called “Multi-Machine”. This is useful when you want to manage and automate the configuration of multiple machines at once. To specify multiple machines, you can use the config.vm.define command followed by the name of the machine and a block of code that contains the configuration for that machine.
How can I use provisioning in Vagrantfile?
Provisioning in Vagrant is the process of automatic installation and configuration of the software and packages needed in your development environment. You can use shell scripts, Chef, or Puppet for provisioning. In the Vagrantfile, you can specify the provisioner and the path to the provisioning script using the config.vm.provision command.
How can I set up networking in a Vagrantfile?
Vagrant supports various networking options such as forwarded ports, private networks, and public networks. You can configure networking in the Vagrantfile using the config.vm.network command followed by the type of network and any necessary options. For example, to create a forwarded port, you would use config.vm.network "forwarded_port", guest: 80, host: 8080.
How can I sync folders in a Vagrantfile?
Vagrant uses synced folders to allow you to continue working on your project’s files on your host machine, but have them update and be reflected in your guest machine. You can configure synced folders in the Vagrantfile using the config.vm.synced_folder command followed by the path to the folder on the host and the path on the guest.
How can I specify a provider in a Vagrantfile?
Vagrant supports multiple providers such as VirtualBox, VMware, AWS, etc. You can specify the provider in the Vagrantfile using the config.vm.provider command followed by the name of the provider and a block of code that contains any provider-specific configuration.
How can I use variables in a Vagrantfile?
You can use variables in a Vagrantfile to make your configuration more flexible and reusable. Variables in Vagrantfile are defined and used just like in any Ruby script. You can define a variable using the equals sign (=) and then use it later in your configuration by simply calling its name.
How can I debug a Vagrantfile?
If you encounter issues with your Vagrantfile, you can use Vagrant’s built-in debugging tool. You can enable this by setting the VAGRANT_LOG environment variable to the desired log level. For example, VAGRANT_LOG=info vagrant up will start Vagrant with the log level set to info.
How can I update a Vagrantfile?
To update a Vagrantfile, you simply edit the file with your changes and save it. The next time you run vagrant up, Vagrant will read the updated Vagrantfile and apply your changes. If the machine is already running, you can apply the changes by running vagrant reload.
How can I share my Vagrant environment with others?
Vagrant provides a feature called “Vagrant Share” that allows you to share your Vagrant environment with others. This is useful for collaboration and troubleshooting. To share your environment, you simply run the vagrant share command. This will provide a URL that others can use to access your environment.
George Fekete is a web developer with 10 years of experience in client-side and server-side technologies, mainly PHP, JavaScript, working on various mid-sized and large web applications. He is the founder and CTO of Primal Skill, a web development and consulting company in Romania.


Published in
·automation·Cloud·Debugging & Deployment·Meta·Open Source·PHP·Programming·Web·July 17, 2014