Re-Introducing PHPUnit: Getting Started with TDD in PHP

There are a lot of PHPUnit posts on our site already (just check the PHP Testing section), but it’s been a while since we’ve actually introduced people to it, and the tool has evolved significantly since then.
This article aims to re-introduce the tool in a modern way, to a modern audience, in a modern PHP environment – if you’re unfamiliar with PHPUnit or testing, this post is for you.

Here we assume you’re familiar with object oriented PHP and are using PHP version 7 and above. To get an environment up and running which has PHP 7 pre-installed, and to be able to follow instructions in this post to the letter without getting tripped up, we suggest you use Homestead Improved. Note also that some command line usage will be expected, but you will be guided through it all. Don’t be afraid of it – it’s a tool more powerful than you can imagine.
If you’re wondering why we’re recommending everyone use a Vagrant box, I go in depth about this in Jump Start PHP Environment, but this introduction of Vagrant will explain things adequately as well.
Key Takeaways
- PHPUnit is a testing framework for PHP that simplifies the process of writing and running tests, ensuring code quality and facilitating Test Driven Development (TDD).
- Test Driven Development (TDD) is a methodology where tests are written before the actual code, guiding development and ensuring that the code behaves as expected from the start.
- Setting up PHPUnit involves creating a project with Composer, installing PHPUnit as a development dependency, and configuring a phpunit.xml file to manage test suites and bootstrap settings.
- Writing your first test in PHPUnit involves extending the PHPUnit\Framework\TestCase class and using assertions to define expected outcomes, which drives the development of functional code.
- Data providers in PHPUnit allow for cleaner and more organized tests by separating test data from test logic, enabling easy addition of new test cases without modifying the test methods.
- Code coverage reports generated by PHPUnit help identify untested parts of the codebase, ensuring comprehensive testing and improving the robustness of the application.
What exactly is Test Driven Development?
Test Driven Development is the idea that you write code in such a way that you first write another bit of code the sole purpose of which is making sure that the originally intended code works, even if it’s not written yet.
Checking if something is indeed what we expect it to be is called asserting in TDD-land. Remember this term.
For example, an assertion that 2+2=4 is correct. But if we assert that 2+3=4, the testing framework (like PHPUnit) will mark this assertion as false. This is called a “failed test”. We tested is 2+3 is 4, and failed. Obviously, in your application you won’t be testing for sums of scalar values – instead, there’ll be variables which the language will replace with real values at run-time and assert that, but you get the idea.
What is PHPUnit?
PHPUnit is a collection of utilities (PHP classes and executable files) which makes not only writing tests easy (writing tests often entails writing more code than the application actually has – but it’s worth it), but also allows you to see the output of the testing process in a nice graph which lets you know about code quality (e.g. maybe there’s too many IFs in a class – that’s marked as bad quality because changing one condition often requires rewriting as many tests as there are IFs), code coverage (how much of a given class or function has been covered by tests, and how much remains untested), and more.
In order not to bore you with too much text (too late?), let’s actually put it to use and learn from examples.
The code we end up with at the end of this tutorial can be downloaded from Github.
Bootstrapping an Example Application
To drive the examples home, we’ll build a simple command line package which lets users turn a JSON file into a PHP file. That PHP file will contain the JSON data as an associative PHP array. This is just a personal use case of mine – I use Diffbot a lot and the output there can be enormous – too large to manually inspect, so easier processing with PHP can come in very handy.
Henceforth, it is assumed that you are running a fully PHP 7 capable environment with Composer installed, and can follow along. If you’ve booted up Homestead Improved, please SSH into it now with vagrant ssh, and let’s begin.
First, we’ll go into the folder where our projects live. In the case of Homestead Improved, that’s Code.
cd Code
Then, we’ll create a new project based on PDS-Skeleton and install PHPUnit inside it with Composer.
git clone https://github.com/php-pds/skeleton converter
cd converter
composer require phpunit/phpunit --dev
Notice that we used the --dev flag to only install PHPUnit as a dev dependency – meaning it’s not needed in production, keeping our deployed project lightweight. Notice also that the fact that we started with PDS-Skeleton means our tests folder is already created for us, with two demo files which we’ll be deleting.
Next, we need a front controller for our app – the file all requests are routed through. In converter/public, create index.php with the following contents:
<?php
echo "Hello world";
You should be familiar with all the above contents. With our “Hello World” contents in place, let’s make sure we can access this from the browser.
If you’re using Homestead Improved, I hope you followed instructions and set up a virtual host or are accessing the app via the virtual machine’s IP.
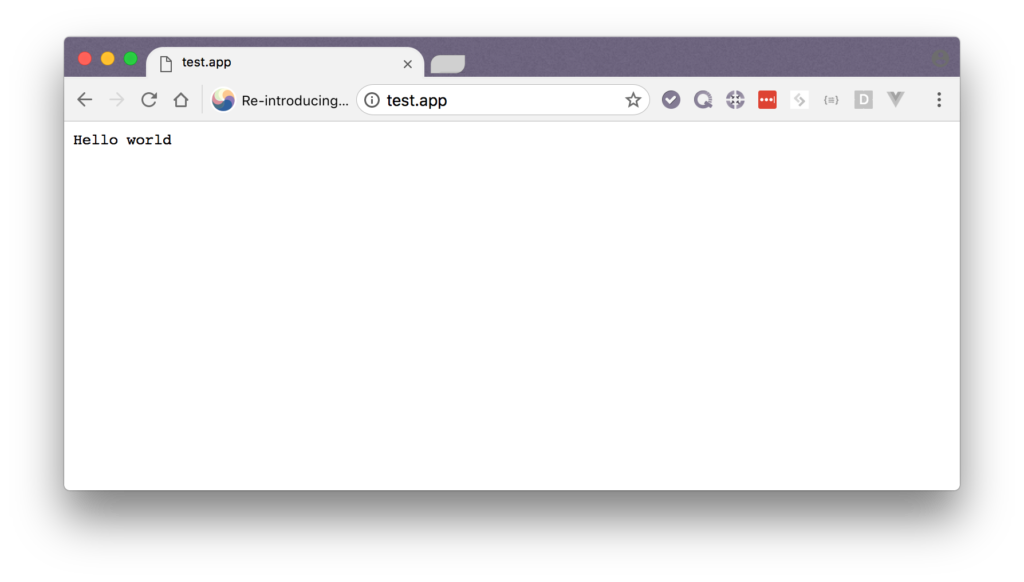
Let’s delete the extra files now. Either do it manually, or run the following:
rm bin/* src/* docs/* tests/*
You may be wondering why we need the front controller with Hello World. We won’t be using it in this tutorial, but later on as we test our app as humans, it’ll come in handy. Regardless, it won’t be part of the final package we deploy.
Suites and Configurations
We need a PHPUnit configuration file which tells PHPUnit where to find the tests, which preparation steps to take before testing, and how to test. In the root of the project, create the file phpunit.xml with the following content:
<phpunit bootstrap="tests/autoload.php">
  <testsuites>
    <testsuite name="converter">
      <directory suffix="Test.php">tests</directory>
    </testsuite>
  </testsuites>
</phpunit>
phpunit.xml
A project can have several test suites, depending on context. For example, everything user-account-related could be grouped into a suite called “users”, and this could have its own rules or a different folder for testing that functionality. In our case, the project is very small so a single suite is more than enough, targeting the tests directory. We defined the suffix argument – this means PHPUnit will only run those files that end with Test.php. Useful when we want some other files among tests as well, but don’t want them to be run except when we call them from within actual Test files.
You can read about other such arguments here.
The bootstrap value tells PHPUnit which PHP file to load before testing. This is useful when configuring autoloading or project-wide testing variables, even a testing database, etc – all things that you don’t want or need when in production mode. Let’s create tests/autoload.php:
<?php

require_once __DIR__.'/../vendor/autoload.php';
tests/autoload.php
In this case, we’re just loading Composer’s default autoloader because PDS-Skeleton already has the Tests namespace configured for us in composer.json. If we replace template values in that file with our own, we end up with a composer.json that looks like this:
{
    "name": "sitepoint/jsonconverter",
    "type": "standard",
    "description": "A converter from JSON files to PHP array files.",
    "homepage": "https://github.com/php-pds/skeleton",
    "license": "MIT",
    "autoload": {
        "psr-4": {
            "SitePoint\\": "src/SitePoint"
        }
    },
    "autoload-dev": {
        "psr-4": {
            "SitePoint\\": "tests/SitePoint"
        }
    },
    "bin": ["bin/converter"],
    "require-dev": {
        "phpunit/phpunit": "^6.2"
    }
}
After this, we run composer du (short for dump-autoload) to refresh the autoloading scripts.
composer du
The First Test
Remember, TDD is the art of making errors first, and then making changes to the code that gets them to stop being errors, not the other way around. With that in mind, let’s create our first test.
<?php

namespace SitePoint\Converter;

use PHPUnit\Framework\TestCase;

class ConverterTest extends TestCase {

    public function testHello() {
        $this->assertEquals('Hello', 'Hell' . 'o');
    }

}
tests/SitePoint/Converter/ConverterTest.php
It’s best if the tests follow the same structure we expect our project to have. With that in mind, we give them the same namespaces and same directory tree layouts. Thus, our ConverterTest.php file is in tests, subfolder SitePoint, subfolder Converter.
The file we’re extending is the most basic version of the Test class that PHPUnit offers. In most cases, it’ll be enough. When not, it’s perfectly fine to extend it further and then build on that. Remember – tests don’t have to follow the rules of good software design, so deep inheritance and code repetition are fine – as long as they test what needs to be tested!
This example “test case” asserts that the string Hello is equal to the concatenation of Hell and o. If we run this suite with php vendor/bin/phpunit now, we’ll get a positive result.
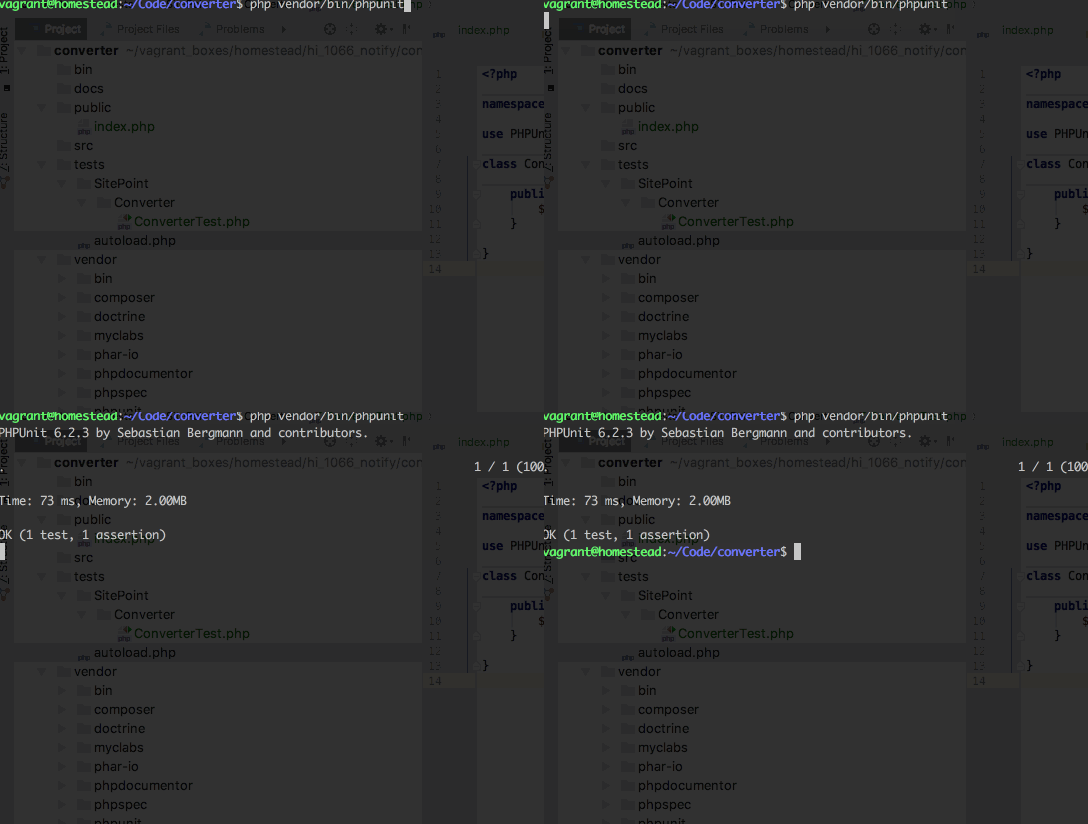
PHPUnit runs every method starting with
testin aTestfile unless told otherwise. This is why we didn’t have to be explicit when running the test suite – it’s all automatic.
Our current test is neither useful nor realistic, though. We used it merely to check if our setup works. Let’s write a proper one now. Rewrite the ConverterTest.php file like so:
<?php

namespace SitePoint\Converter;
use PHPUnit\Framework\TestCase;

class ConverterTest extends TestCase
{

    public function testSimpleConversion()
    {
        $input = '{"key":"value","key2":"value2"}';
        $output = [
            'key' => 'value',
            'key2' => 'value2'
        ];
        $converter = new \SitePoint\Converter\Converter();
        $this->assertEquals($output, $converter->convertString($input));
    }
}
tests/SitePoint/Converter/ConverterTest.php
Okay, so what’s going on here?
We’re testing a “simple” conversion. The input is a JSON string, an object stringified, and the expected output is its PHP array version. Our test asserts that our Converter class, when processing the $input using the convertString method, produces the desired $output, just as defined.
Re-run the suite.
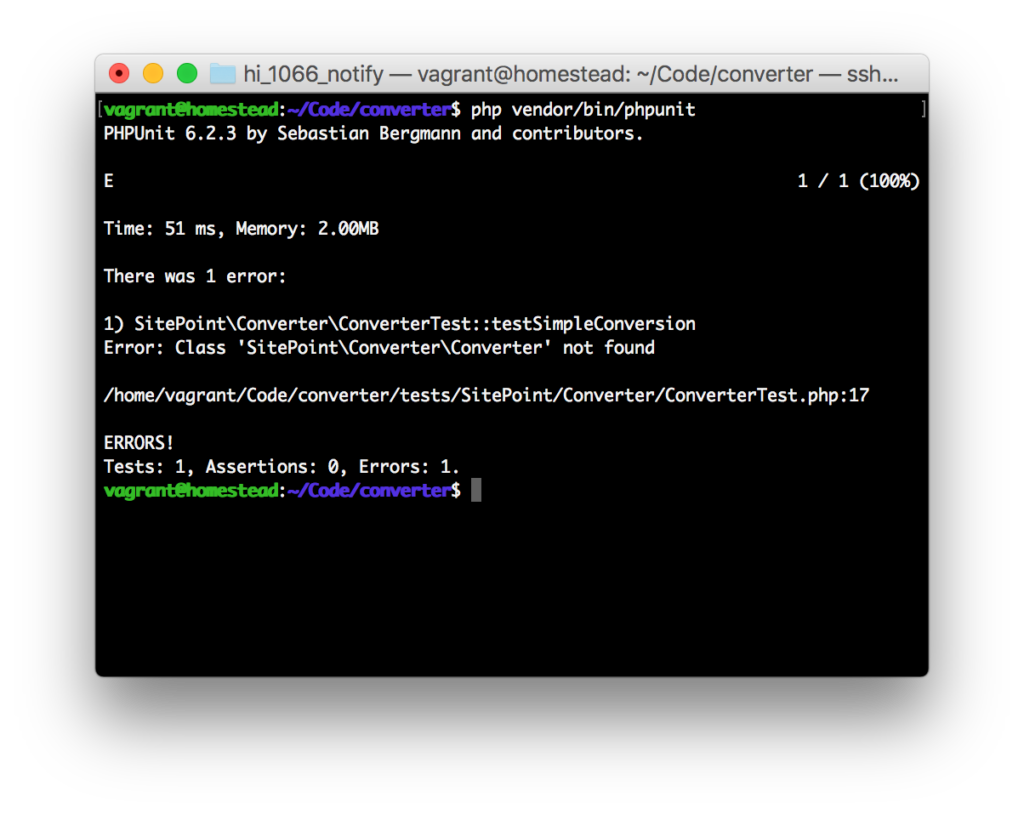
A failing test! Expected, since the class doesn’t even exist yet.
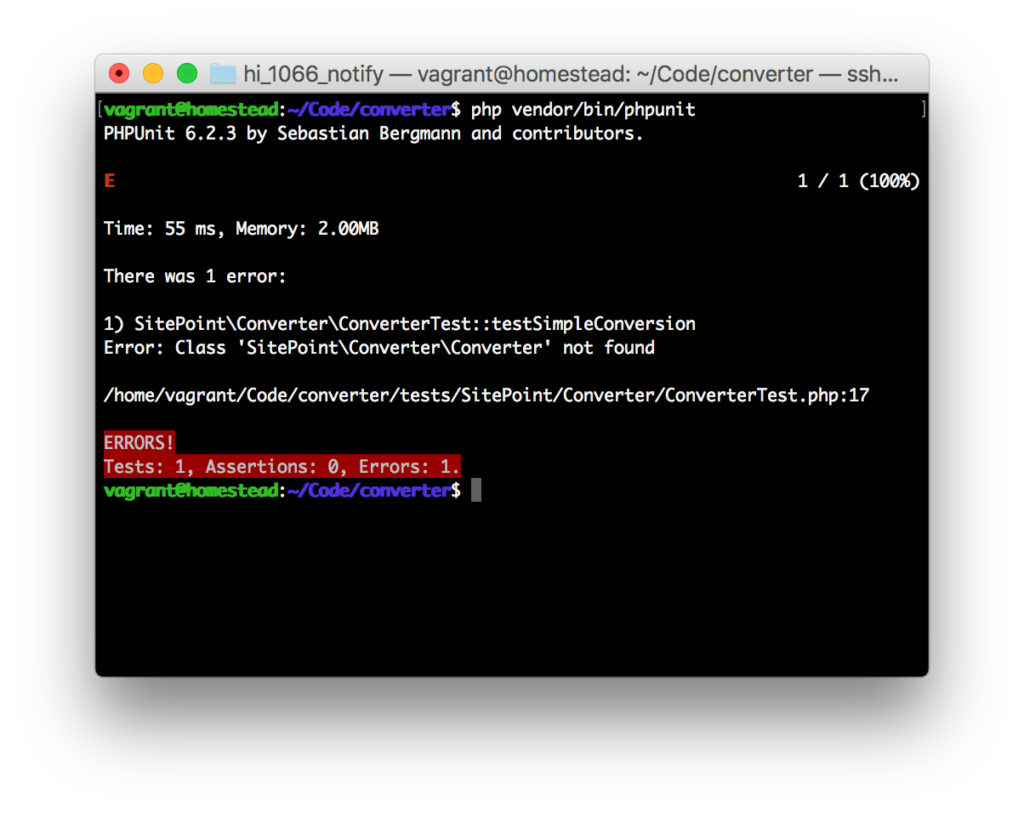
Let’s make things a little bit more dramatic – with color! Edit the phpunit.xml file so that the <phpunit tag contains colors="true", like so:
<phpunit colors="true" bootstrap="tests/autoload.php">
Now if we run php vendor/bin/phpunit, we get a more dramatic output:
Making the Test Pass
Now, we begin the process of making this test pass.
Our first error is: “Class ‘SitePoint\Converter\Converter’ not found”. Let’s fix that.
<?php

namespace SitePoint\Converter;

class Converter
{

}
src/SitePoint/Converter/Converter.php;
Now if we re-run the suite…
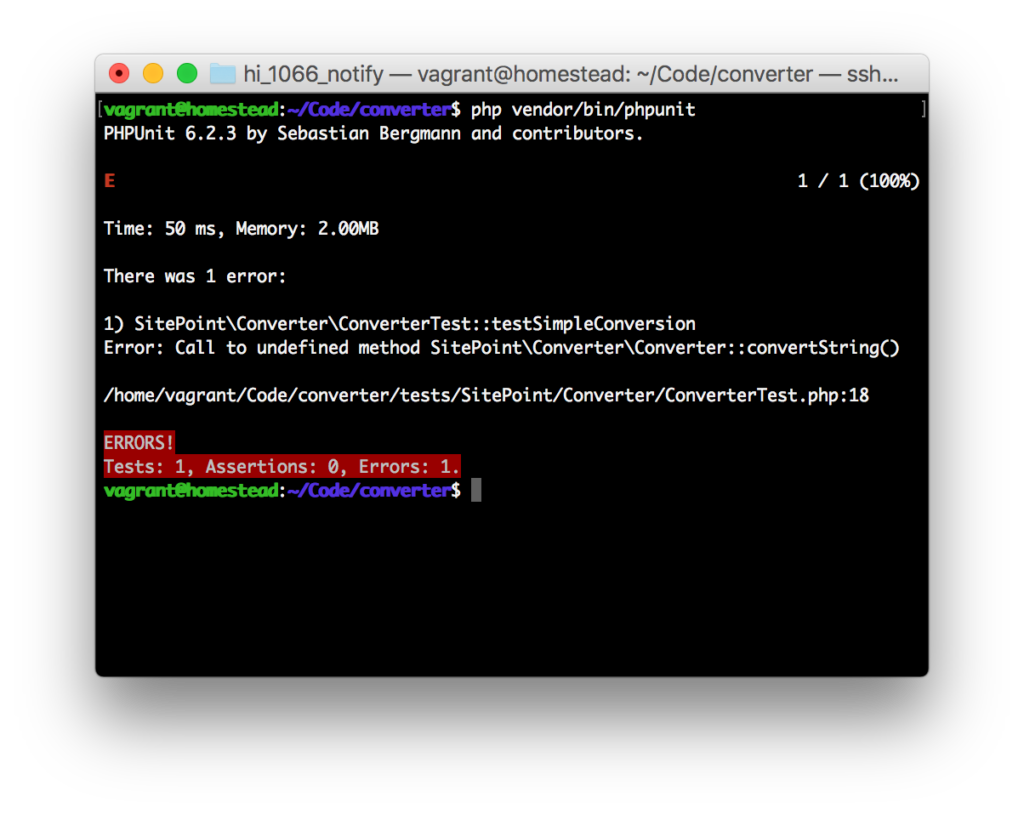
Progress! We’re missing the method we invoked now. Let’s add it to our class.
<?php

namespace SitePoint\Converter;

class Converter
{
    public function convertString(string $input): ?array
    {

    }
}
src/SitePoint/Converter/Converter.php;
We defined a method which accepts an input of type string, and returns either an array or null if unsuccessful. If you’re not familiar with scalar types (string $input), learn more here, and for nullable return types (?array), see here.
Re-run the tests.
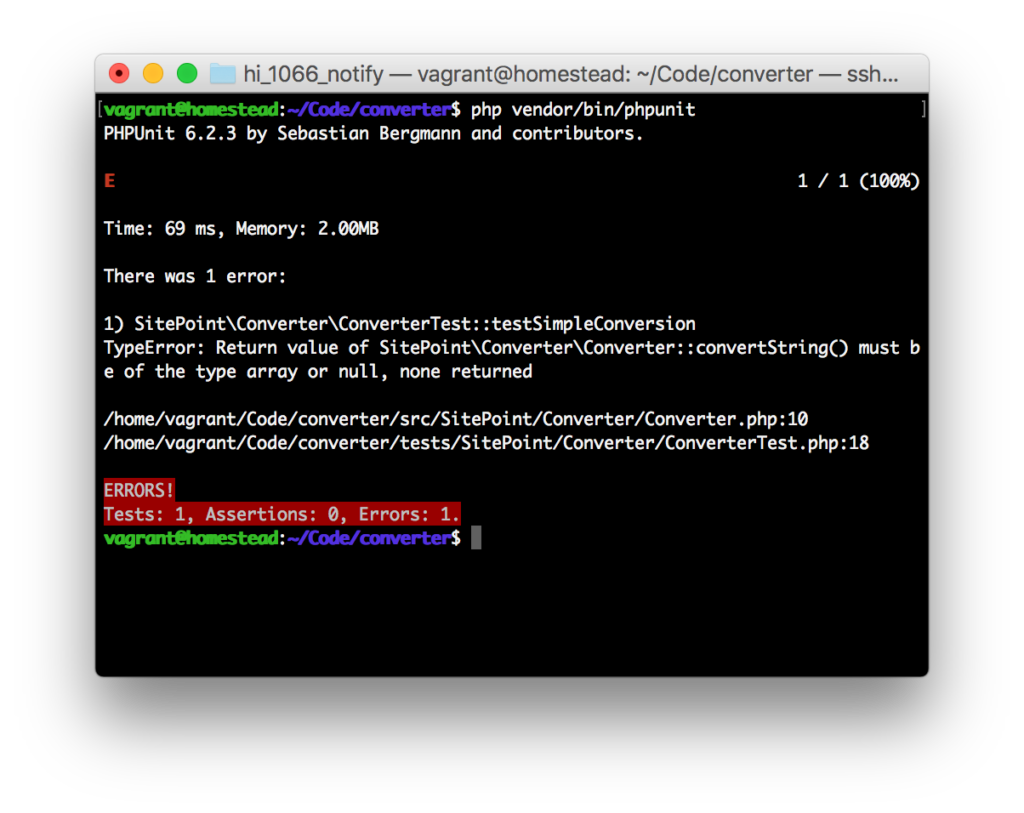
This is a return type error – the function returns nothing (void) – because it’s empty – and it’s expected to return either null or an array. Let’s complete the method. We’ll use PHP’s built-in json_decode function to decode a JSON string.
    public function convertString(string $input): ?array
    {
        $output = json_decode($input);
        return $output;
    }
src/SitePoint/Converter/Converter.php;
Let’s see what happens if we re-run the suite.
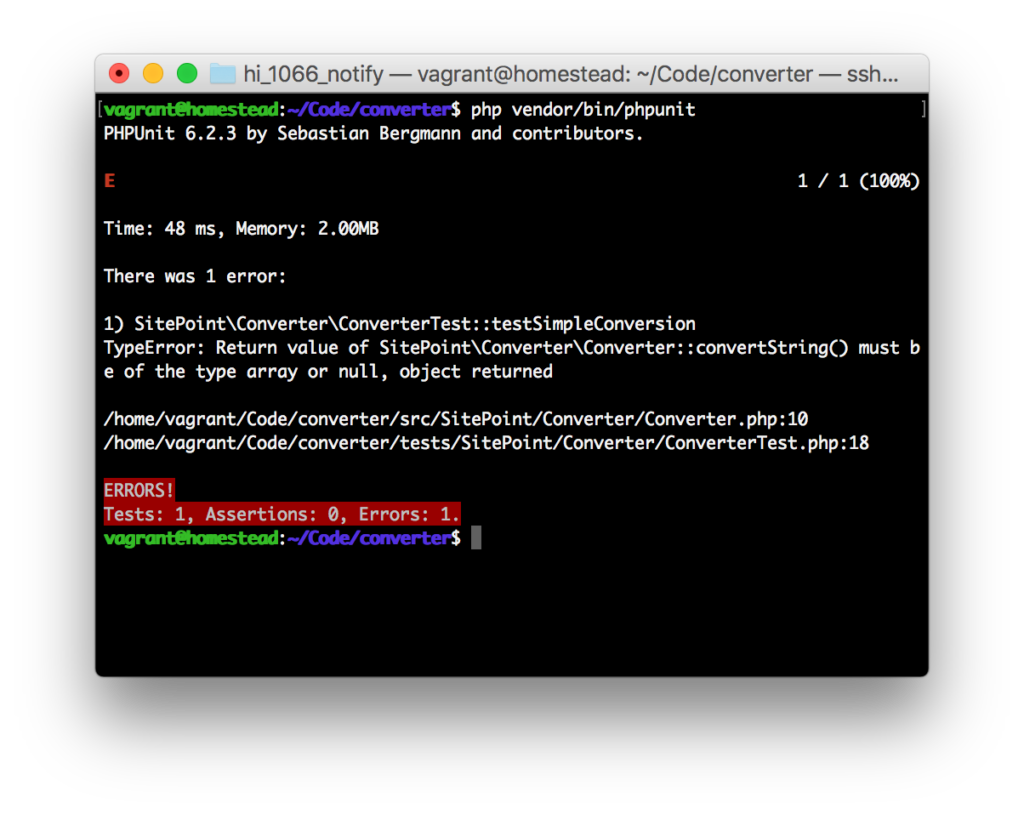
Uh oh. The function returns an object, not an array. Ah ha! That’s because we didn’t activate “associative array” mode on the json_decode function. The function turns JSON arrays into stdClass instances by default, unless told otherwise. Change it like so:
    public function convertString(string $input): ?array
    {
        $output = json_decode($input, true);
        return $output;
    }
src/SitePoint/Converter/Converter.php;
Re-run the suite.
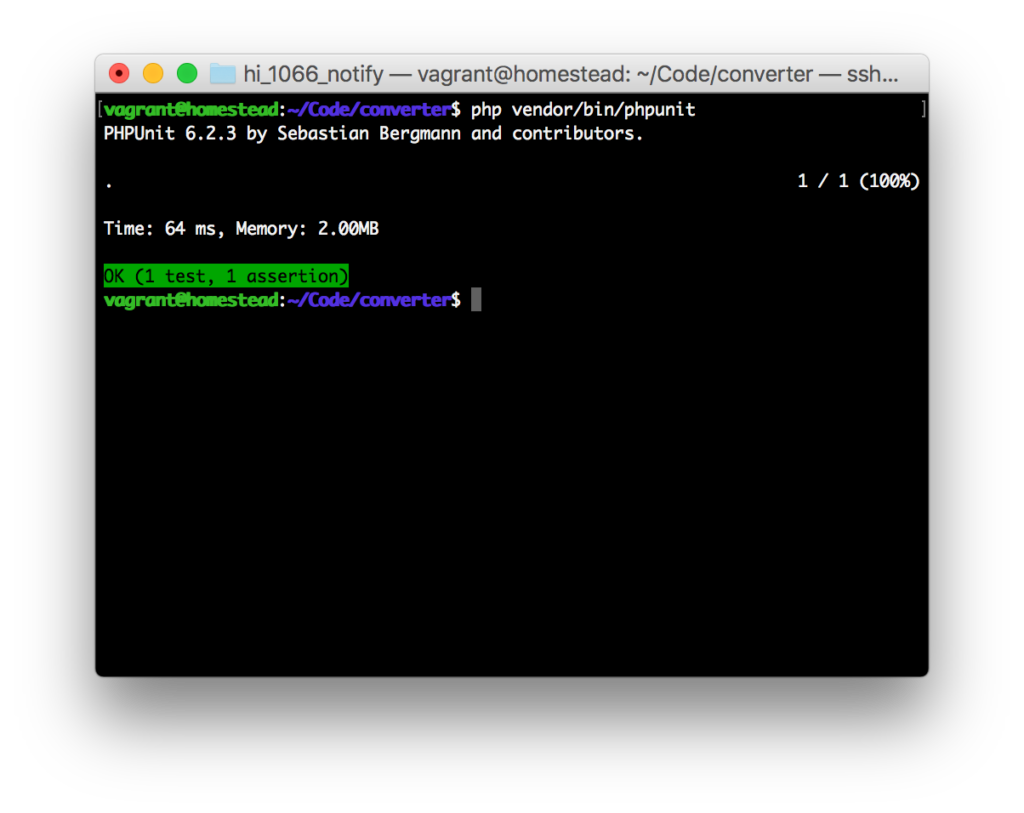
Huzzah! Our test now passes! It gets the exact same output we expect from it in the test!
Let’s add a few more test cases now, to make sure our method really performs as intended. Let’s make those a little more complicated than the simple example we started with. Add the following methods to ConverterTest.php:
    {
        $input     = '{"key":"value","key2":"value2","some-array":[1,2,3,4,5]}';
        $output    = [
            'key'        => 'value',
            'key2'       => 'value2',
            'some-array' => [1, 2, 3, 4, 5],
        ];
        $converter = new \SitePoint\Converter\Converter();
        $this->assertEquals($output, $converter->convertString($input));
    }

    public function testMoreComplexConversion()
    {
        $input     = '{"key":"value","key2":"value2","some-array":[1,2,3,4,5],"new-object":{"key":"value","key2":"value2"}}';
        $output    = [
            'key'        => 'value',
            'key2'       => 'value2',
            'some-array' => [1, 2, 3, 4, 5],
            'new-object' => [
                'key'  => 'value',
                'key2' => 'value2',
            ],
        ];
        $converter = new \SitePoint\Converter\Converter();
        $this->assertEquals($output, $converter->convertString($input));
    }

    public function testMostComplexConversion()
    {
        $input     = '[{"key":"value","key2":"value2","some-array":[1,2,3,4,5],"new-object":{"key":"value","key2":"value2"}},{"key":"value","key2":"value2","some-array":[1,2,3,4,5],"new-object":{"key":"value","key2":"value2"}},{"key":"value","key2":"value2","some-array":[1,2,3,4,5],"new-object":{"key":"value","key2":"value2"}}]';
        $output    = [
            [
                'key'        => 'value',
                'key2'       => 'value2',
                'some-array' => [1, 2, 3, 4, 5],
                'new-object' => [
                    'key'  => 'value',
                    'key2' => 'value2',
                ],
            ],
            [
                'key'        => 'value',
                'key2'       => 'value2',
                'some-array' => [1, 2, 3, 4, 5],
                'new-object' => [
                    'key'  => 'value',
                    'key2' => 'value2',
                ],
            ],
            [
                'key'        => 'value',
                'key2'       => 'value2',
                'some-array' => [1, 2, 3, 4, 5],
                'new-object' => [
                    'key'  => 'value',
                    'key2' => 'value2',
                ],
            ],
        ];
        $converter = new \SitePoint\Converter\Converter();
        $this->assertEquals($output, $converter->convertString($input));
    }
tests/SitePoint/Converter/ConverterTest.php
We made each test case a bit more complex than the previous one, with the last one containing multiple objects in an array. Re-running the test suite shows us that everything is fine…
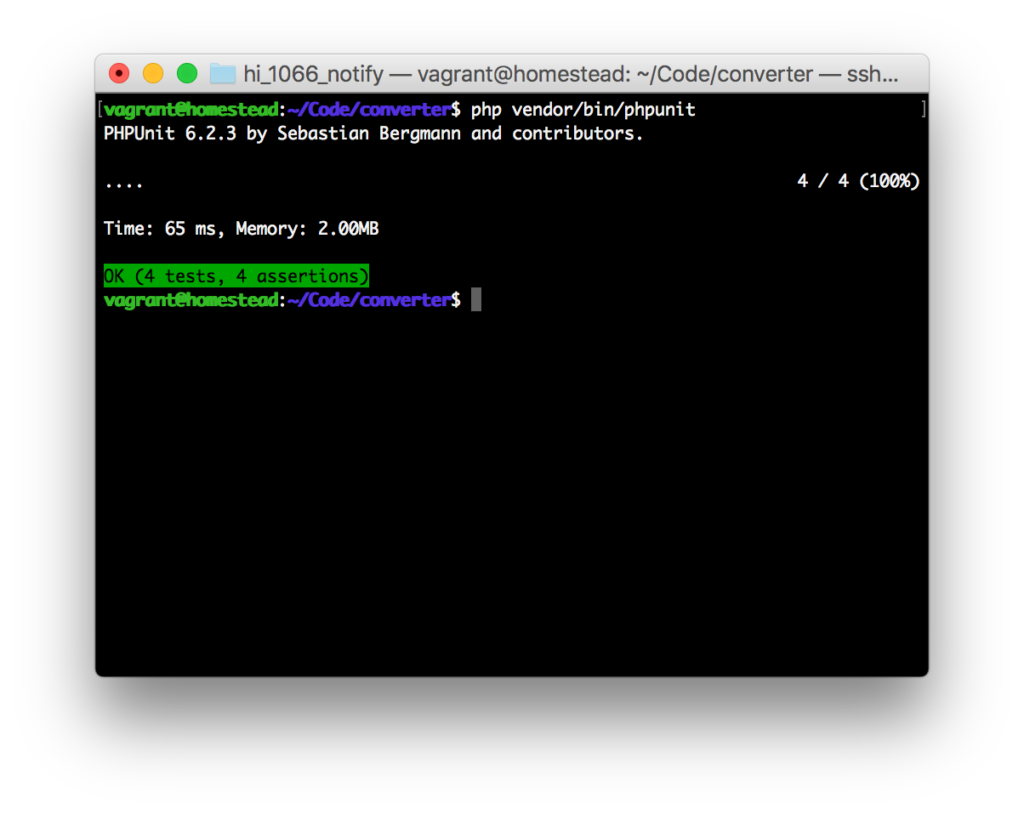
… but something feels wrong, doesn’t it? There’s an awful lot of repetition here, and if we ever change the class’ API, we’d have to make the change in 4 locations (for now). The advantages of DRY are starting to show even in tests. Well, there’s a feature to help with that.
Data Providers
Data providers are special functions in Test classes which have one specific purpose: to provide a set of data to a test function, so that you don’t need to repeat its logic across several test functions like we did. It’s best explained on an example. Let’s refactor our ConverterTest class to this:
<?php

namespace SitePoint\Converter;

use PHPUnit\Framework\TestCase;

class ConverterTest extends TestCase
{

    public function conversionSuccessfulProvider()
    {
        return [
            [
                '{"key":"value","key2":"value2"}',
                [
                    'key'  => 'value',
                    'key2' => 'value2',
                ],
            ],

            [
                '{"key":"value","key2":"value2","some-array":[1,2,3,4,5]}',
                [
                    'key'        => 'value',
                    'key2'       => 'value2',
                    'some-array' => [1, 2, 3, 4, 5],
                ],
            ],

            [
                '{"key":"value","key2":"value2","some-array":[1,2,3,4,5],"new-object":{"key":"value","key2":"value2"}}',
                [
                    'key'        => 'value',
                    'key2'       => 'value2',
                    'some-array' => [1, 2, 3, 4, 5],
                    'new-object' => [
                        'key'  => 'value',
                        'key2' => 'value2',
                    ],
                ],
            ],

            [
                '[{"key":"value","key2":"value2","some-array":[1,2,3,4,5],"new-object":{"key":"value","key2":"value2"}},{"key":"value","key2":"value2","some-array":[1,2,3,4,5],"new-object":{"key":"value","key2":"value2"}},{"key":"value","key2":"value2","some-array":[1,2,3,4,5],"new-object":{"key":"value","key2":"value2"}}]',
                [
                    [
                        'key'        => 'value',
                        'key2'       => 'value2',
                        'some-array' => [1, 2, 3, 4, 5],
                        'new-object' => [
                            'key'  => 'value',
                            'key2' => 'value2',
                        ],
                    ],
                    [
                        'key'        => 'value',
                        'key2'       => 'value2',
                        'some-array' => [1, 2, 3, 4, 5],
                        'new-object' => [
                            'key'  => 'value',
                            'key2' => 'value2',
                        ],
                    ],
                    [
                        'key'        => 'value',
                        'key2'       => 'value2',
                        'some-array' => [1, 2, 3, 4, 5],
                        'new-object' => [
                            'key'  => 'value',
                            'key2' => 'value2',
                        ],
                    ],
                ],
            ],

        ];
    }

    /**
     * @param $input
     * @param $output
     * @dataProvider conversionSuccessfulProvider
     */
    public function testStringConversionSuccess($input, $output)
    {
        $converter = new \SitePoint\Converter\Converter();
        $this->assertEquals($output, $converter->convertString($input));
    }

}
tests/SitePoint/Converter/ConverterTest.php
We first wrote a new method called conversionSuccessfulProvider. This hints at the expectation that all the provided cases should return a positive result, because the output and input match. Data providers return arrays (so that the test function can auto-iterate through elements). Each element of this array is a single test case – in our case, each element is an array with two elements: the former is input, the latter is output, just like before.
We then consolidated the test functions into a single one with a more generic name, indicative of what’s expected: testStringConversionSuccess. This test method accepts two arguments: input and output. The rest of the logic is identical to what it was before. Additionally, in order to make sure the method uses the dataprovider, we declare the provider in the docblock of the method with @dataProvider conversionSuccessfulProvider.
That’s all there is to it – we now get the exact same result.
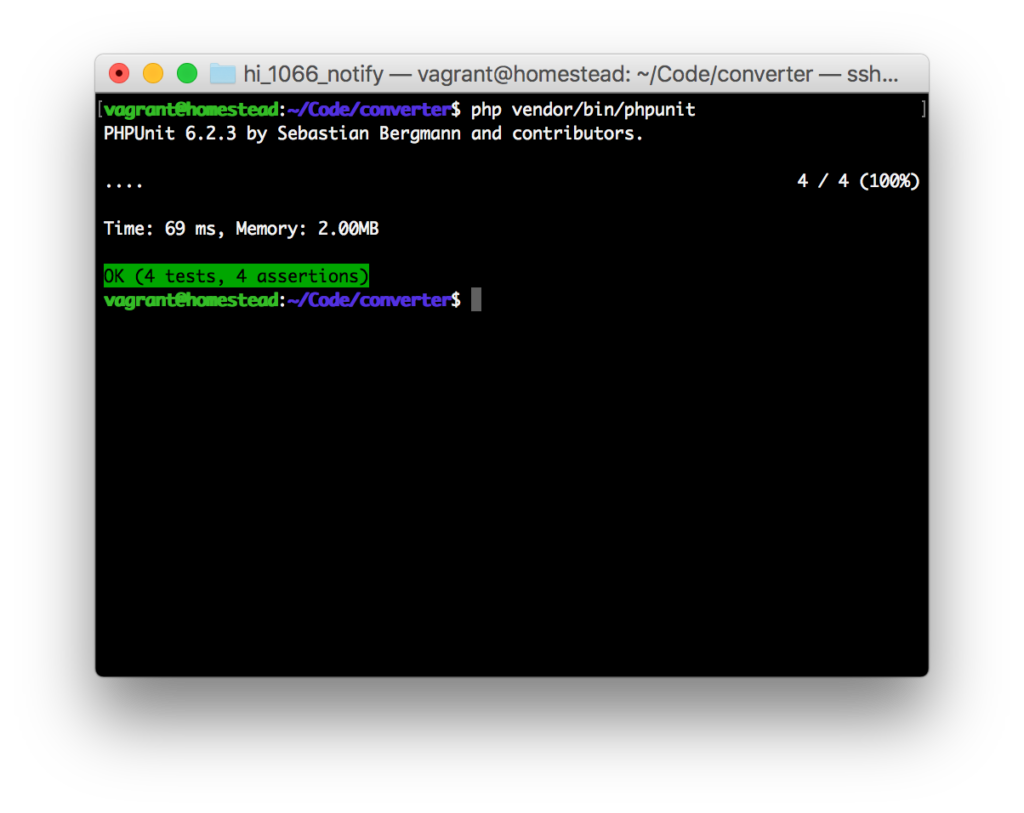
If we now wish to add more test cases, we only need to add more input-output pairs into the provider. No need to invent new method names or repeat logic. Convenient, right?
An Introduction into Code Coverage
Before we sign off on this part and let you absorb everything we’ve covered so far, let’s briefly discuss code coverage.
Code coverage is a metric telling us how much of our code is covered by tests. If our class has two methods, but only one is ever being tested in the tests, then our code coverage is at most 50% – depending on how many logical forks (IFs, switches, loops, etc.) the methods have (every fork should be covered by a separate test). PHPUnit has the ability to generate code coverage reports automatically after running a given test suite.
Let’s quickly get that set up. We’ll expand phpunit.xml by adding <logging> and <filter> sections as elements immediately inside <phpunit>, so as level 1 elements (if <phpunit> is level 0 or root):
<phpunit ...>
    <filter>
        <whitelist>
            <directory suffix=".php">src/</directory>
        </whitelist>
    </filter>
    <logging>
        <log type="tap" target="tests/build/report.tap"/>
        <log type="junit" target="tests/build/report.junit.xml"/>
        <log type="coverage-html" target="tests/build/coverage" charset="UTF-8" yui="true" highlight="true"/>
        <log type="coverage-text" target="tests/build/coverage.txt"/>
        <log type="coverage-clover" target="tests/build/logs/clover.xml"/>
    </logging>
Filter sets up a whitelist telling PHPUnit which files to pay attention to while testing. This one translates to all .php files inside /src, at any level. Logging tells PHPUnit which reports to generate – various tools can read various reports, so it doesn’t hurt to generate more formats than one might need. In our case, we’re really just interested in the HTML one.
Before this can work, we need to activate XDebug, as that’s the PHP extension PHPUnit uses to inspect the classes it’s walking through. Homestead Improved comes with the phpenmod tool for activating and deactivating PHP extensions on the fly:
sudo phpenmod xdebug
If you’re not using HI, follow XDebug installation instructions relevant to your OS distribution. This article should help.
Re-running the suite will now inform us of generated coverage reports. Additionally, they’ll appear in the directory tree at the specified location.
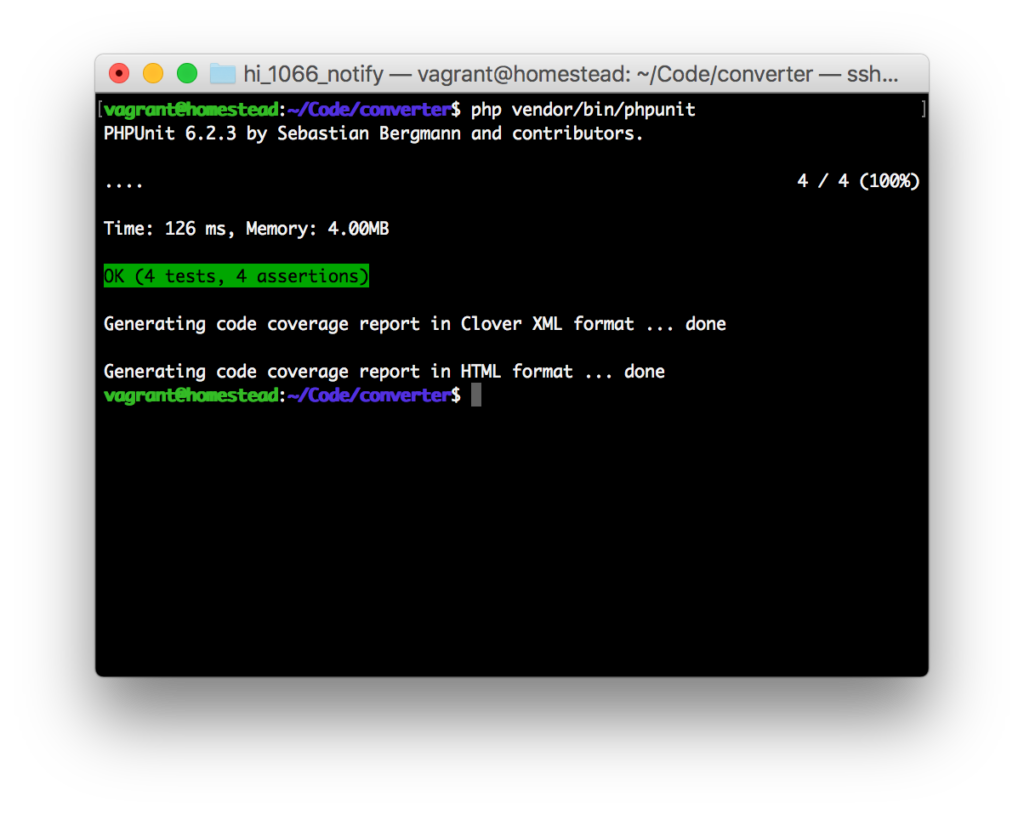
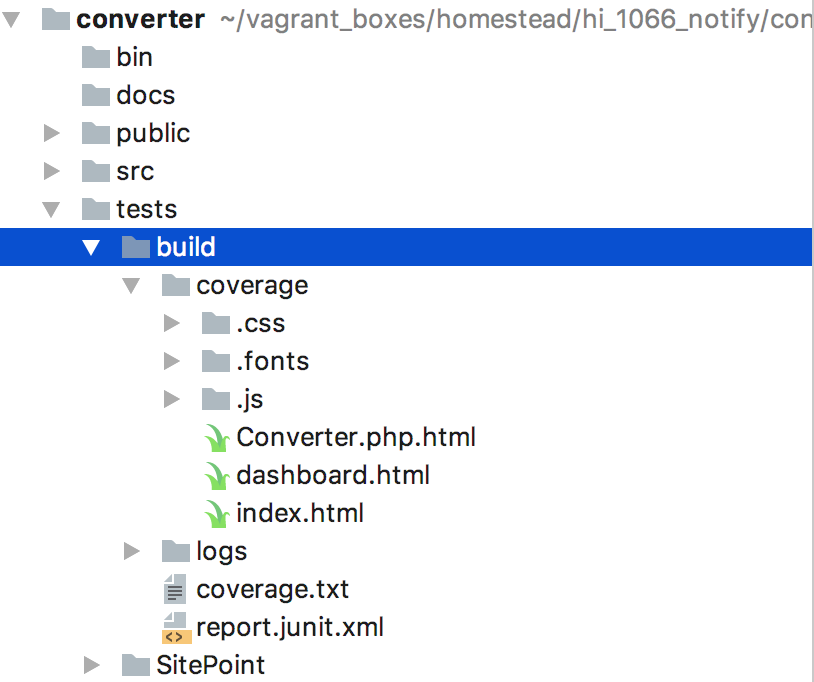
Let’s open the index.html file in the browser. Straight drag and drop into any modern browser should work just fine – no need for virtual hosts or running servers – it’s just a static file.
The index file will list a summary of all tests. You can click into individual classes to see their detailed coverage reports, and hovering over method bodies will summon tooltips that explain how much a given method is tested.
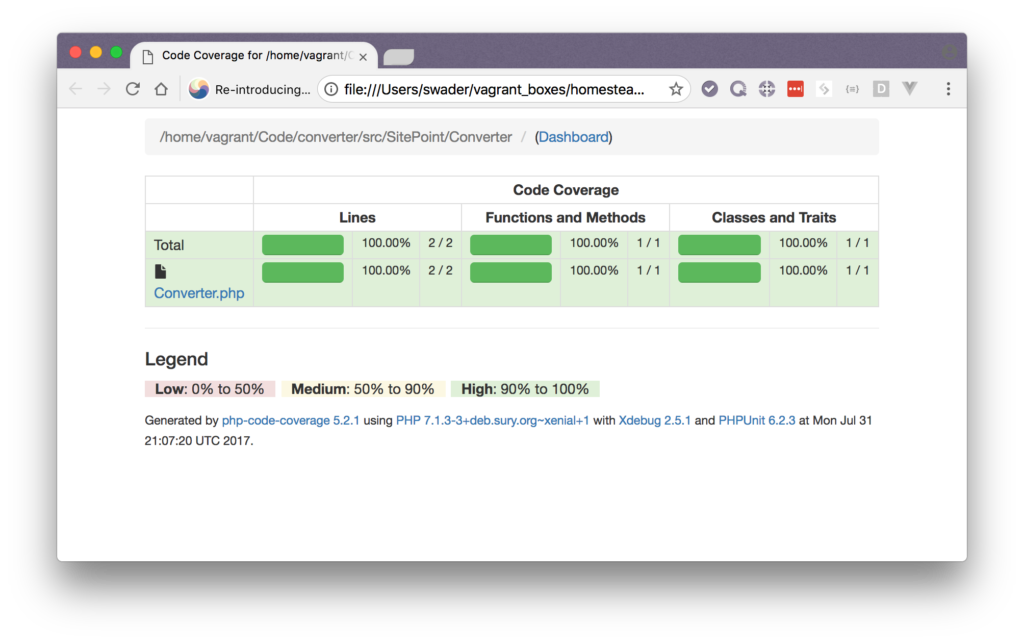
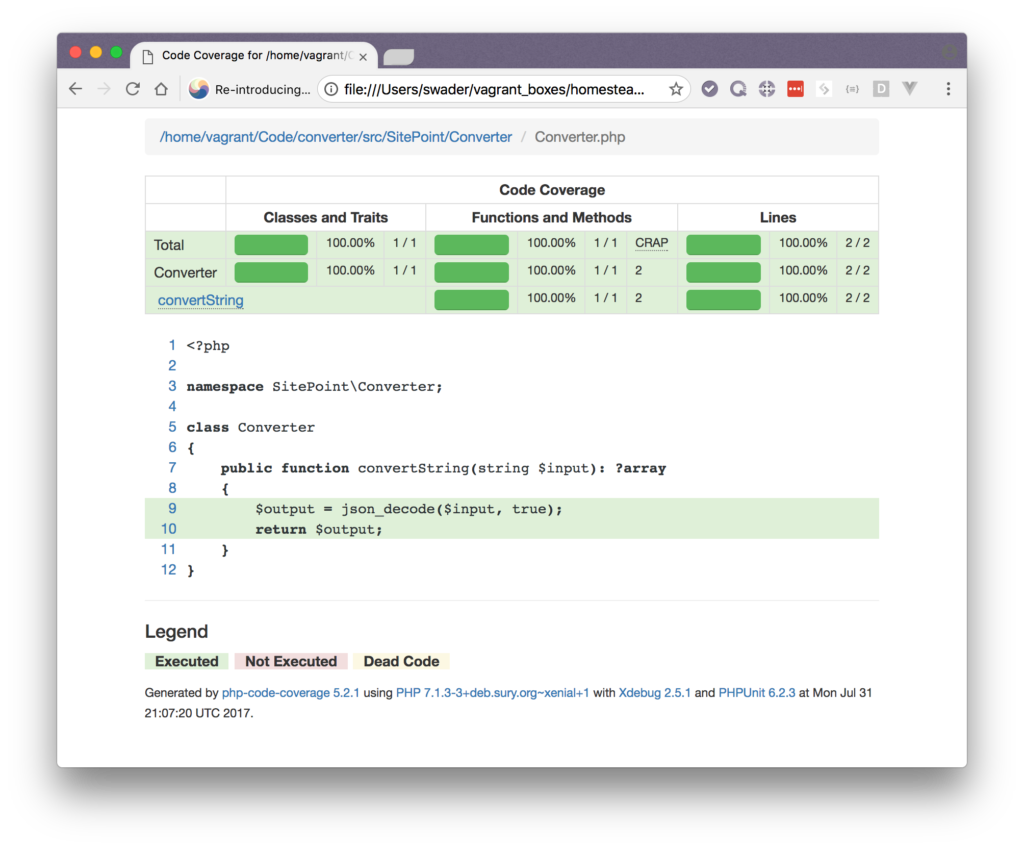

We’ll go into much more depth about code coverage in a follow-up post as we further develop our tool.
Conclusion
In this introduction of PHPUnit, we looked at test driven development (TDD) in general, and applied its concepts to the starting stage of a new PHP tool. All the code we’ve written can be downloaded from Github.
We went through PHPUnit basics, explained data providers, and showed code coverage. This post only touched on some of the basic concepts and features of PHPUnit, and we encourage you to explore further on your own, or to request clarification on concepts that you deem confusing – we’d love to be able to clear more things up for you.
In a followup post, we’ll cover some intermediate techniques and further develop our application.
Please leave your comments and questions below!
Frequently Asked Questions about PHPUnit and Test-Driven Development in PHP
What is the importance of Test-Driven Development (TDD) in PHP?
Test-Driven Development (TDD) is a software development approach where tests are written before the actual code. This approach is crucial in PHP development as it helps to ensure that the code works as expected. It allows developers to consider all possible scenarios and edge cases, leading to more robust and error-free code. TDD also makes it easier to maintain and refactor code in the future, as the tests provide a safety net that can catch any breaking changes.
How do I install PHPUnit for TDD in PHP?
PHPUnit is a popular testing framework used for TDD in PHP. To install PHPUnit, you need to have Composer, a dependency management tool in PHP. Once you have Composer installed, you can install PHPUnit by running the command composer require --dev phpunit/phpunit ^9 in your project directory. This will install PHPUnit and add it as a development dependency in your project.
How do I write my first test in PHPUnit?
Writing a test in PHPUnit involves creating a new class that extends the PHPUnit\Framework\TestCase class. Each method in this class represents a test case. Here’s a simple example:class ExampleTest extends PHPUnit\Framework\TestCase{
public function testAddingTwoPlusTwoResultsInFour()
{
$this->assertEquals(4, 2 + 2);
}}
In this example, the assertEquals method is an assertion that checks if the two arguments are equal. If they are not, the test fails.
How do I run tests in PHPUnit?
To run tests in PHPUnit, you use the phpunit command followed by the name of the test file. For example, if your test file is named ExampleTest.php, you would run the tests with the command ./vendor/bin/phpunit tests/ExampleTest.php.
What are some best practices for TDD in PHP?
Some best practices for TDD in PHP include writing tests before the actual code, keeping tests small and focused on a single functionality, and using descriptive names for your tests. It’s also important to write tests for all possible scenarios, including edge cases and failure cases. Lastly, remember to run your tests frequently to catch any errors as early as possible.
How can I use mocks in PHPUnit?
Mocks are objects that simulate the behavior of real objects in controlled ways. In PHPUnit, you can create mocks using the createMock method. This is useful when you want to isolate the code you are testing from external dependencies.
What is the difference between TDD and traditional testing?
The main difference between TDD and traditional testing is when the tests are written. In traditional testing, tests are written after the code. In TDD, tests are written before the code. This leads to a different development workflow and often results in better test coverage and more robust code.
How does TDD help in improving the quality of the code?
TDD improves the quality of the code by ensuring that all code is tested and works as expected. It encourages developers to think about all possible scenarios and edge cases, leading to more robust and error-free code. TDD also makes it easier to maintain and refactor code in the future, as the tests provide a safety net that can catch any breaking changes.
Can I use TDD for existing projects or only for new ones?
While TDD is often associated with new projects, it can also be used for existing projects. Adding tests to existing code can help catch bugs and make the code more robust. It can also make it easier to add new features or refactor the code in the future.
What are the challenges of implementing TDD in PHP and how can I overcome them?
Some challenges of implementing TDD in PHP include the initial learning curve, the time required to write tests, and the need to maintain the tests over time. However, these challenges can be overcome with practice and by seeing the value that TDD brings in terms of code quality and maintainability. It’s also important to remember that the time spent writing tests can save time in the future by catching bugs early and making it easier to add new features or refactor the code.
Bruno is a blockchain developer and technical educator at the Web3 Foundation, the foundation that's building the next generation of the free people's internet. He runs two newsletters you should subscribe to if you're interested in Web3.0: Dot Leap covers ecosystem and tech development of Web3, and NFT Review covers the evolution of the non-fungible token (digital collectibles) ecosystem inside this emerging new web. His current passion project is RMRK.app, the most advanced NFT system in the world, which allows NFTs to own other NFTs, NFTs to react to emotion, NFTs to be governed democratically, and NFTs to be multiple things at once.
Published in
·Debugging & Deployment·Development Environment·Microsoft Tech·PHP·Programming·Web·December 7, 2013
Published in
·automation·Debugging & Deployment·Development Environment·Libraries·PHP·Testing·August 31, 2015

