


This article was sponsored by AppGini. Thank you for supporting the partners who make SitePoint possible.
I honestly can’t think of how many possible reasons there are that you might need a database, especially today. So let’s hypothesize for a moment that you’re a web developer in training.
It’s already a pretty confronting world. You’re going to learn HTML, CSS, and JavaScript at an absolute minimum. Then you’ll probably need to pick up a JavaScript library such as jQuery, React, Angular, or whatever you’re drawn to, and more than likely some kind of server-side tech, be it PHP, Ruby, Node.js… you get the idea.
And I would say that without fail, even if your ultimate aspiration is to be the best front-end developer out there, you are absolutely going to need to pick up some database skills. Even if you’re working with an amazing ORM, it’s to your benefit to know what’s happening under the hood.
Imagine that you want to try your hand at building some kind of web app. You need data, right? If you’re just getting started with APIs you might want to start with a simple weather app, but if you want to try something more complex you may just need to create a database yourself.
Trying to learn too many skills at once has been the downfall of many great people.
Adding databases into the mix is enough to overload someone. Even if SQL syntax isn’t overly complex, trying to understand how a relational database fits together can be overwhelming, especially when it comes to designing, seeding, and optimizing one.
Key Takeaways
- AppGini simplifies database creation, making it accessible for users with limited SQL knowledge, and is ideal for quickly prototyping web applications.
- To start using AppGini, download and install the software on a Windows system, and ensure PHP and MySQL are running on your machine.
- AppGini allows users to easily design databases with features like automatic primary key configuration, special field properties, and foreign key integration for data integrity.
- The tool provides a customizable Bootstrap frontend, with options to modify themes and integrate custom HTML, CSS, and JavaScript.
- AppGini supports efficient data management processes like adding new records and exporting data to CSV, enhancing productivity in database management.
- Admin features in AppGini include user and group management with customizable permissions, facilitating the creation of applications with varying access controls.
Why AppGini?
For every argument for using a generator to build things, there are many more against it. But using a tool such as AppGini certainly has its merits, and I believe there are several strong use-cases.
AppGini makes creating a database very easy, such that you can realistically have a database up and running in a few minutes — though, of course, a more complex database will take longer. It’s great for people with limited SQL or Relational Database Management System knowledge, or those who want to prototype an idea with limited time wastage, but you can also use it to efficiently built a production-ready database.
How to Get Started with AppGini
To get started you’ll need to download AppGini and install it, though a caveat here is that it only runs natively on Windows. Linux users can follow these instructions to virtualize AppGini.
Once installed, you’ll also need to make sure you have PHP and MySQL running on your machine, with recommended minimum versions being 5.2 and 4 respectively.
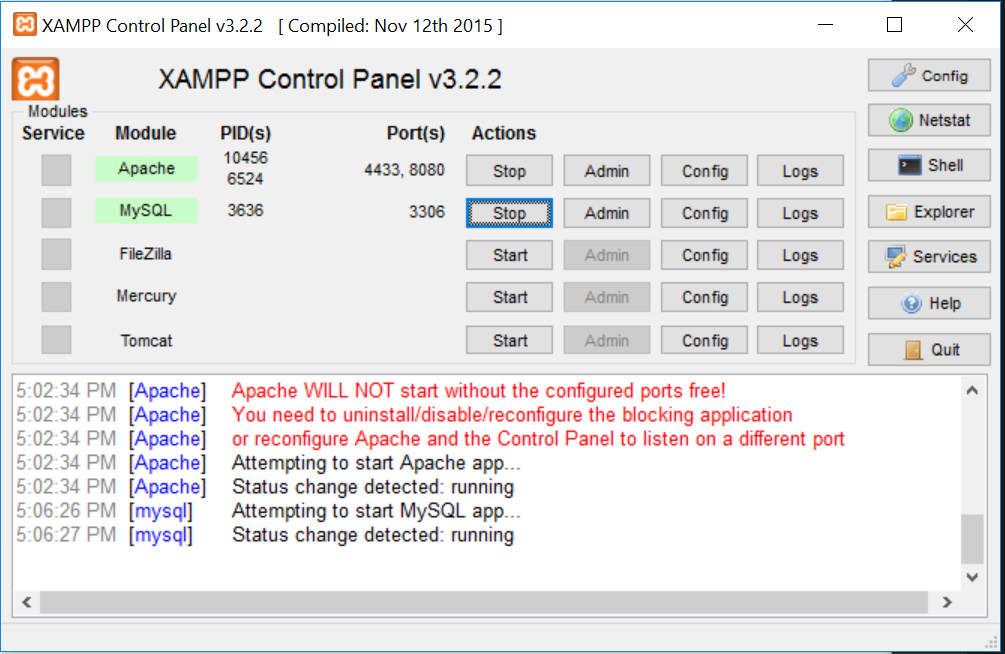
If you don’t have PHP and MySQL set up on your machine right now, there are an abundance of ways to do it — however, for this tutorial I’ve opted to use XAMPP with PHP 5.5 and MySQL 5, which you can download here. Once you’ve got it installed, start the Apache and MySQL servers and verify they are working by opening http://localhost in your browser. You XAMPP control panel should look something like this:
What We’re Going to Build with AppGini
We’re going to build a database that you might expect to use for a very simple content management system. For this, we’re going to need to make three tables with various fields.
- Users (ID, userName, userEmail, userDob, userImage)
- Categories (ID, categoryID, categoryName)
- Posts (ID, AuthorID[FK], postTitle, postContent, postPublishDate, categoryID[FK])
As we go through creating this I’ll be explaining some of the data types we are working with, and how AppGini handles fields with special names.
Creating a Database in AppGini
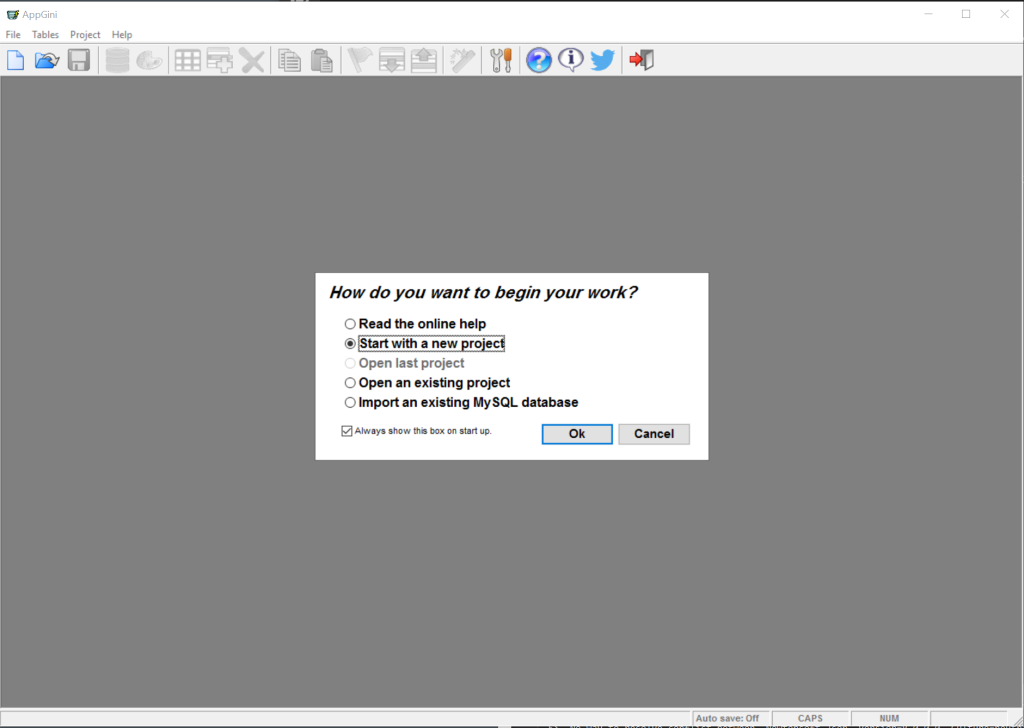
When you open AppGini it will ask you how you want to begin. We’re just going to choose start a new project and click OK.
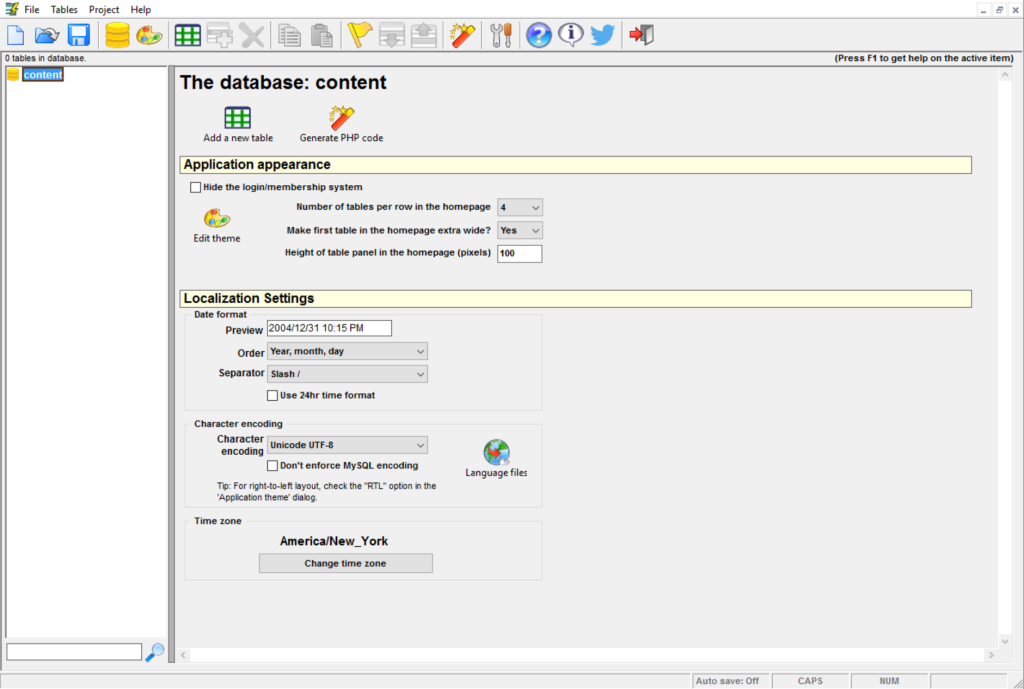
AppGini will start the project for you with just a database name, new_db, chosen. Here you want to click on new_db and change the name as you please — I’m changing this to be named content.
In the main pane you can modify the appearance as you please, but what I want to focus on here are the localization settings. I want to change the date format to Year, Month, Day, and set the character encoding to UTF-8, though that should already be set by default. It’s worth noting that AppGini does support Right-to-Left languages, so you can safely use Arabic, Hebrew, and so on with it.
Before we move on, here’s what I’m looking at.
Creating Tables in Our DB
The first table we’re going to create is users, and we can do that simply by clicking on ‘Add a new table` — you can see this in the previous screenshot, both in the top menu and in the main pane under the database name.
As soon as you add a new table, AppGini will set the cursor so you can change the name, so naturally we’re going to call this one users. I’m going to add in a description stating what the table holds, which will be visible on the AppGini-generated dashboard later.
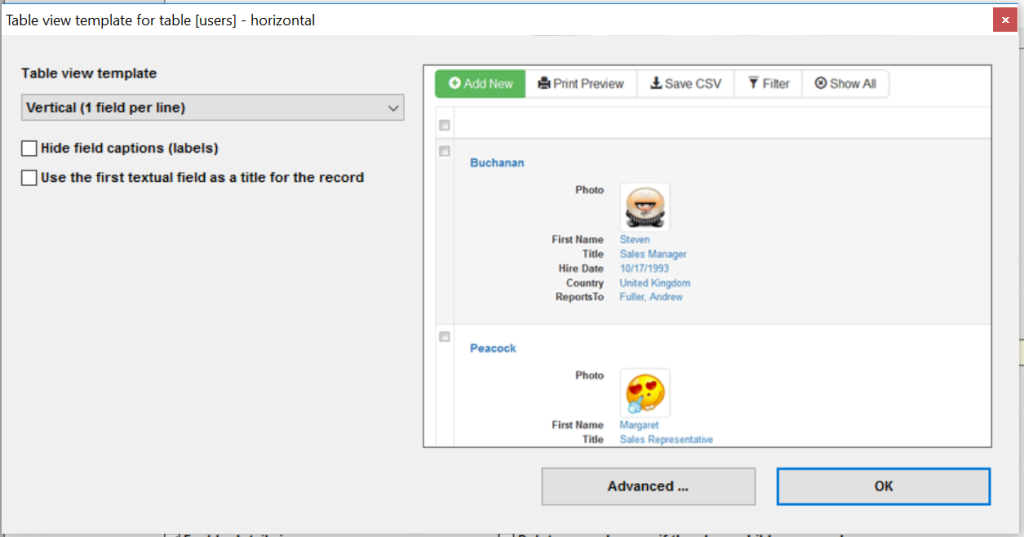
Depending on the data you’re looking to use, you may wish to change the table view template from horizontal to one of the other options, such as Vertical, pictured below, however I find the default works just fine.
Now we need to add some fields to our table. You can do this by clicking on “Add Field” which is to the right of “Add Table” in the menu.
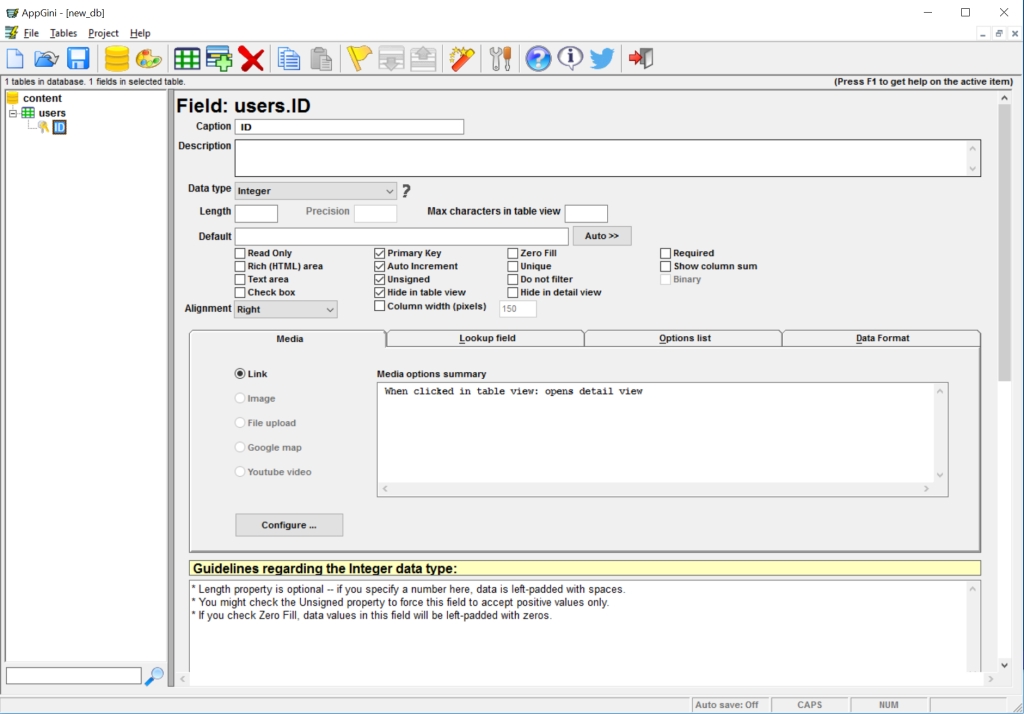
When you do this, again, AppGini will automatically put the cursor in the field name in the left pane. We’re going to call this first field ID, which in AppGini is treated specially. When you name a field ID, it will automatically set it to the Primary Key of the table, make it auto-increment, and hide it in the table view. In an RDBMS such as SQL, the Primary Key is a unique identifier for each row that is set automatically by the database engine when you add a record. Its value auto-incrementing means that each new row’s Primary Key has a value of the prior + 1. We’re going to leave it hidden in the table view because we do not need to see it.
Our next step is to add another field called simply userName. It requires no special configuration and will be created as a character field of up to 40 characters in length.
Next we’ll add another field, this time userEmail — but when adding it, we’re going to call it just email. Email is another special word in AppGini, where it will set certain properties for the to-be-generated front end, basically setting the value to have a mailto link, as you can see below.
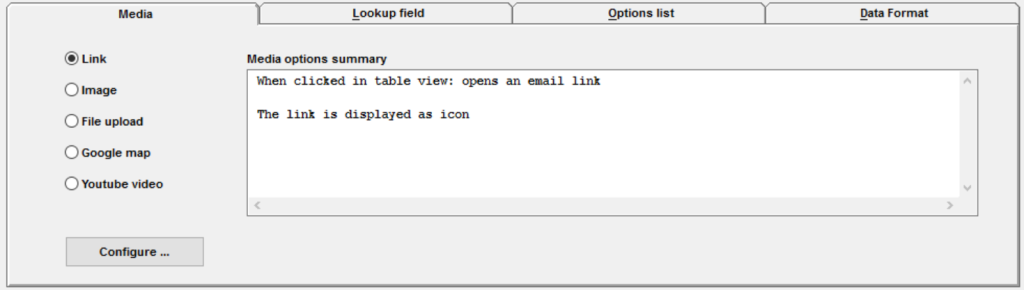
Once you’ve named it email for the autogenerated properties, click on the name and update to userEmail.
Now we’re going to add another field. We want to call it userDob but we’re first going to call it date as this is another special word in AppGini, where it will automatically set some properties. In this case, the field’s data type will automatically be set to type Date. Once created, click on the field’s name and change it to userDob, and then change the “Caption” field to “Date of Birth”.
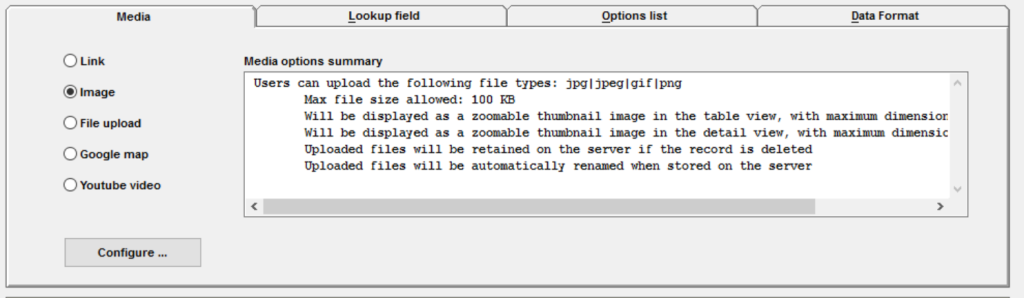
Our final field in this table will be userImage, though yet again we’re going to call it something different — this time it will start as image which sets certain properties for the front end including a prefilled description, so create that and then rename it to userImage. Below you can see the media options summary.
With the users table complete, we’re going to make a new one, this time called categories. After creating the users table this one should be super simple. We want to create two fields.
categoryId— name itidto start then rename tocategoryId, andcategoryName— which we don’t have to do anything special with, though I recommend changing the “Caption” field to “Category Name”
Finally, we create our third and final table, called posts. Start off by creating a field in this table called id, but then rename it to postId, so we can take advantage of AppGini’s behavior for the best result from the least effort.
The second field to create for this table is going to be called authorID. Rather than have to fill this in manually for every post that is added, we want it to use data from another table, so we’re going to click on the “Lookup field” tab, select a Parent table of users, then set the caption fields to ID and userName as pictured below.
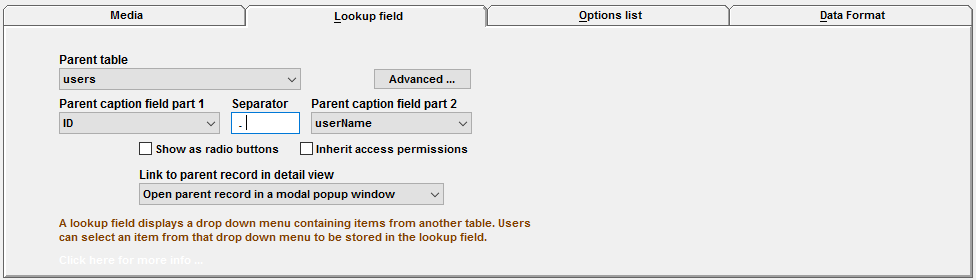
We’re going to basically do the same thing again, but this time for a field called categoryId, where we’ll go into “Lookup field” and set the caption fields to categoryId and categoryName respectively, pictured below.
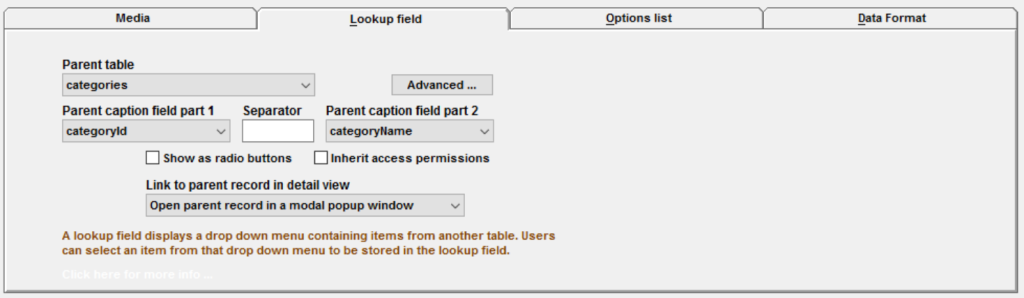
Why are we using Lookups? Data integrity. In using Lookups in our tables, what we’re actually doing is setting the field’s value to be a Foreign Key, which is simply the Primary Key from another table, and there are three main benefits:
- The data needed for an item in this table can be pulled from another, preventing data duplication
- It becomes almost impossible to insert invalid data into that particular field
- The data is, ideally speaking, protected from being accidentally deleted, where you couldn’t delete a user who had 10 posts without first deleting their posts.
Now create another table, this time called postTitle. The defaults will most likely suffice, though the character limit will be 40, which you may wish to change to be larger. I’d also recommend changing the “Caption” field to “Post Title”.
Next we’re going to create the postContent table. Because this is going to store the text that would constitute a post we need to give it some more room to move. As such we want to change the Data type to Text, which is a field that can hold slightly over two billion characters. I’ll also recommend changing the “Caption” to “Post Content”. We also want to change the field’s front end display type to Rich (HTML) area so formatting can be added as required, pictured below for clarity:

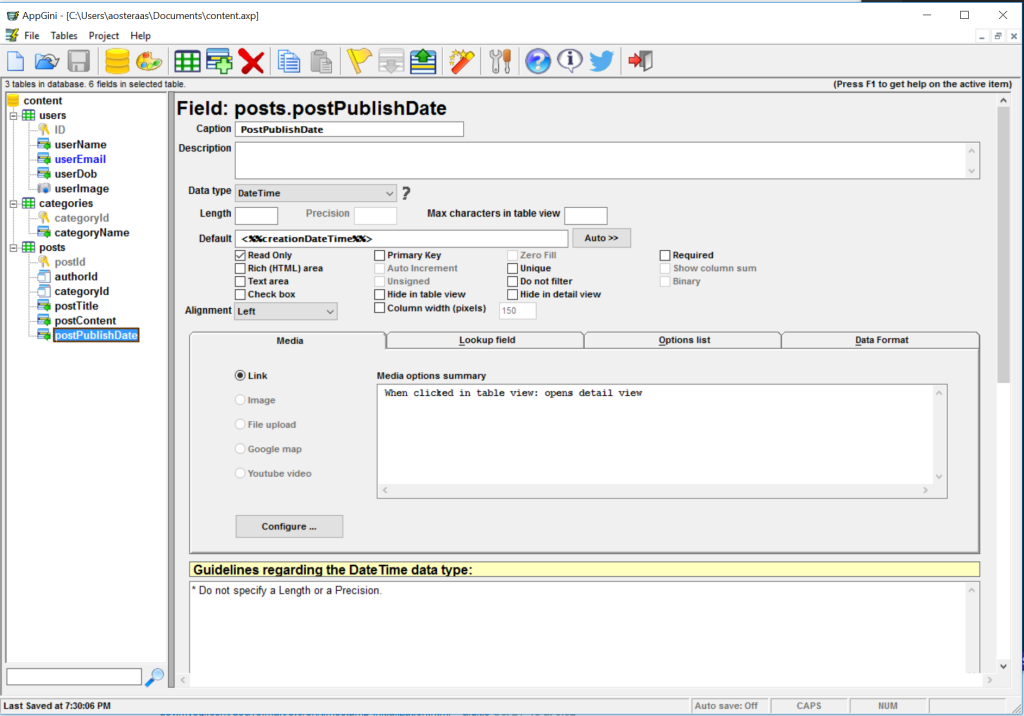
And with that it’s time to create our final table, this time called postPublishDate, and we’re going to set the Data type to DateTime because we want the post to have not just a publish date but the time as well. With this field we want to click on the Auto menu and select Creation date and time so that this is automatically populated, however, this will also set the field as Read Only. And of course, I recommend changing the “Caption” to something a bit more user friendly, in this case “Publish Date”.
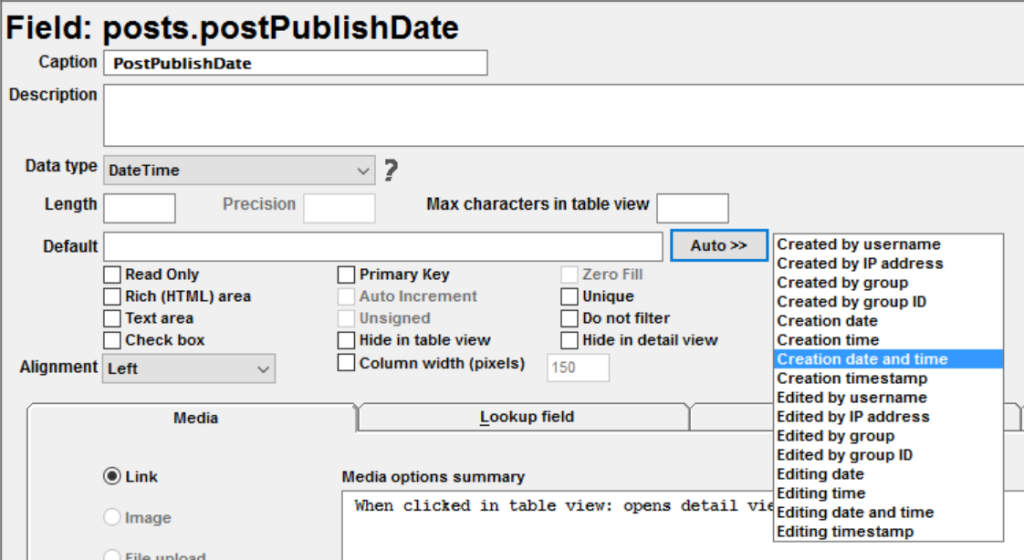
If you wanted to be able to track when it was changed, you could create another field and set its Data type to DateTime and under Auto choose Editing date and time. Otherwise, if you’ve been following along this is how your AppGini will look.
Deploying Our DB
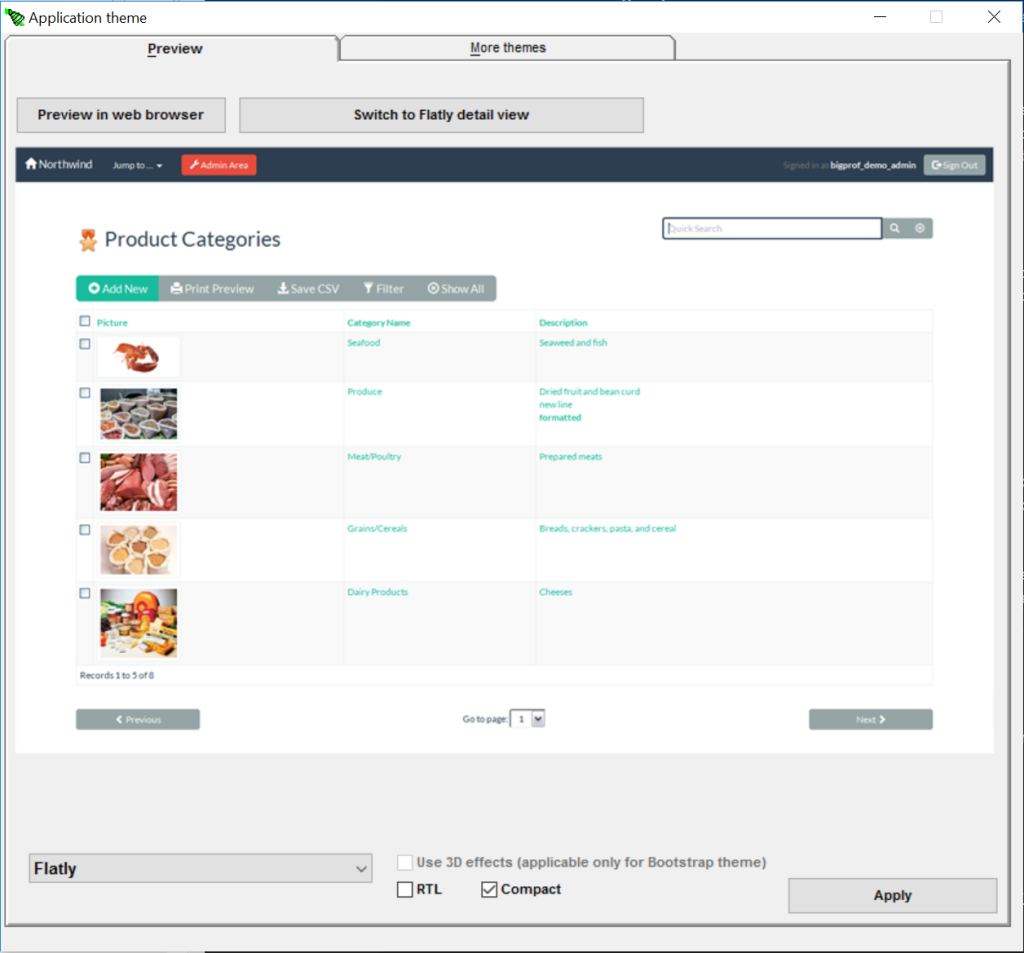
Alright! We’ve created the structure for our database, so now it’s just about time to deploy. By default, AppGini will deploy with a standard Bootstrap frontend, however you’re able to change this easily by clicking on your database in the left-hand pane, and then selecting Edit theme.
In here you’ll get a preview of how it’s going to look by default. Using the dropdown you can change the theme to another Bootstrap-based template, some of which I am sure readers will recognize from Bootswatch. Below you can see that I have selected Flatly and the preview has updated accordingly.
Remember to hit RTL if you need it!
And with that it’s time to hit Generate PHP Code, after which you’ll need to tell AppGini where to deploy the actual code. If you’re using XAMPP and followed the default install then you’ll want to put it in C:\xampp\htdocs\foldername where we will substitute foldername with content. Assuming everything went well you should see an output window just like this.
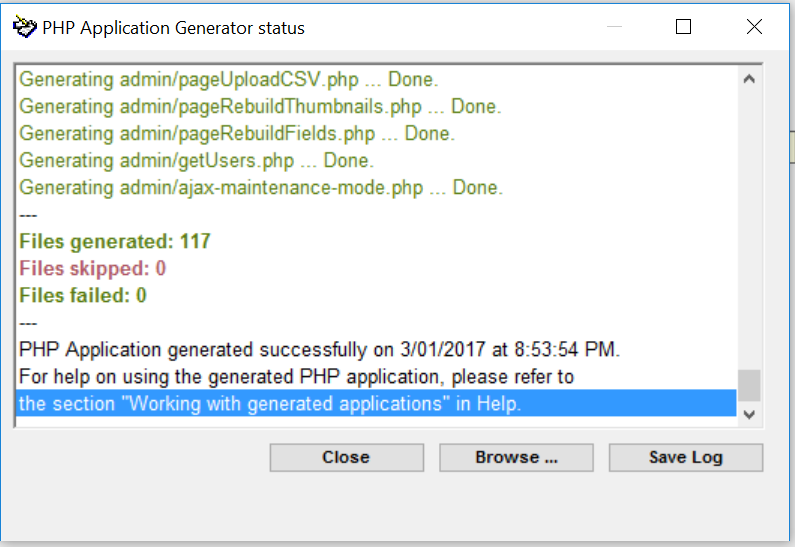
What I want to stress here is that if you want, you can make practically any number of changes to your Database and run the PHP generator again, without fear of losing your data.
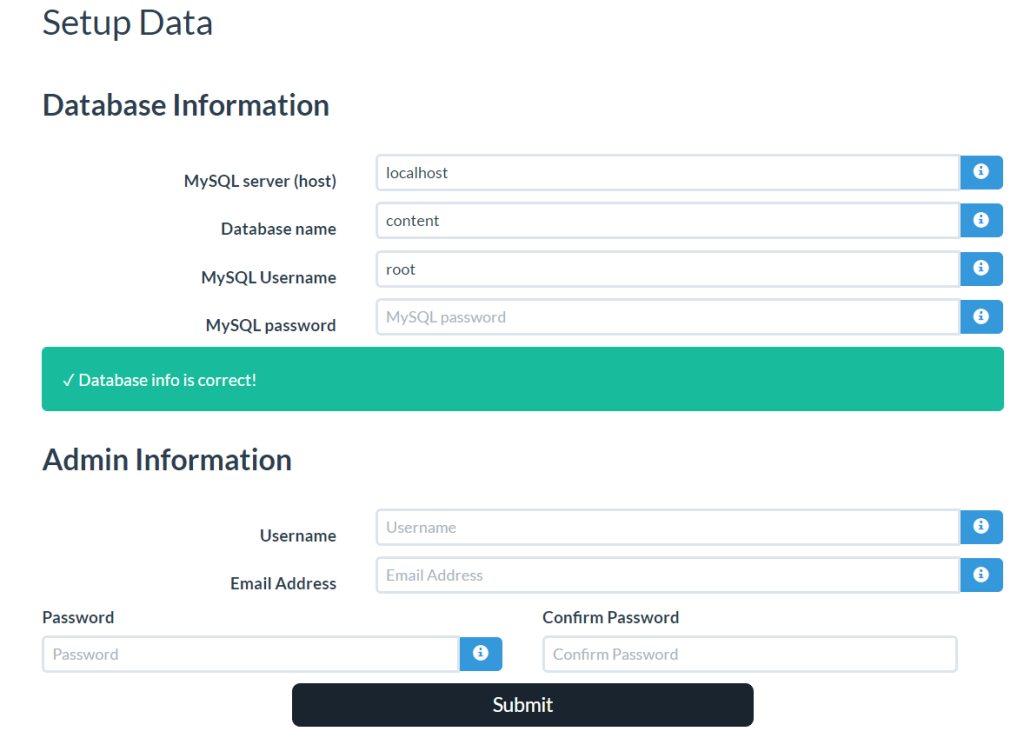
Otherwise it’s time to open our project in the browser, which for most people will be http://localhost/content. You’ll see a message saying there’s no configuration file, but not to worry: simply click on continue and you’ll see another message identifying that you’ll need to know the database server, name, username, and password. If you’re using XAMPP in its absolute default configuration, your details will be as follows:
- Server: localhost
- Database name: content (you don’t need to create the database first)
- Username: root
- Password: blank
This is all pictured below, however you’ll also need to set an Admin username, email, and password. Please note, these are not related to the content database we have created — these are to log in to the AppGini generated dashboard.
If all goes to plan, you’ll see a success message from which you can navigate to start adding data, import from CSV, or go to the admin homepage to modify application settings. We’ll get straight down to business and start adding data.
Inputting Information into Our DB
First up, we’re going to be adding user data to our users table. If you haven’t already, click on “Start adding data” and then “Users” which will show you everything in that table right now (which is, obviously, nothing).
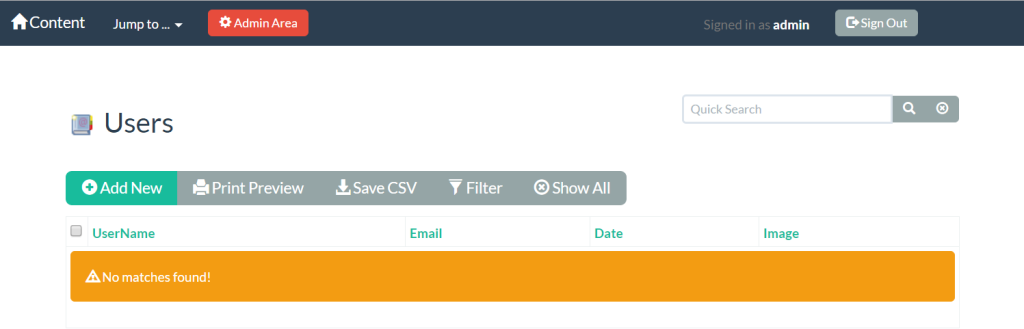
Of course, we’re going to click on “Add New” and get started. I’m going to keep it simple and just add a dummy user to the Database as pictured below.
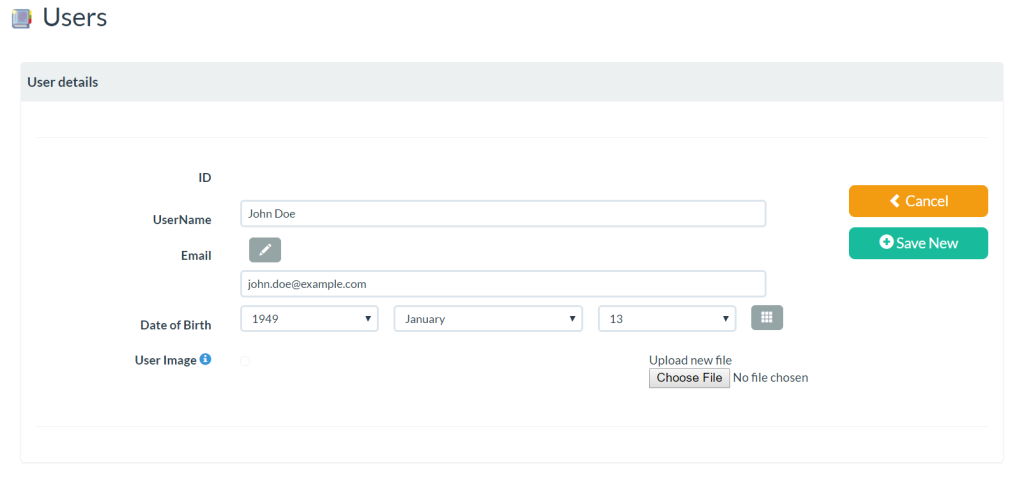
Fill it out as required and when you’re done just click on “Save New”. You’ll see something like this, where we can see all the user data we just put in, and change if required:
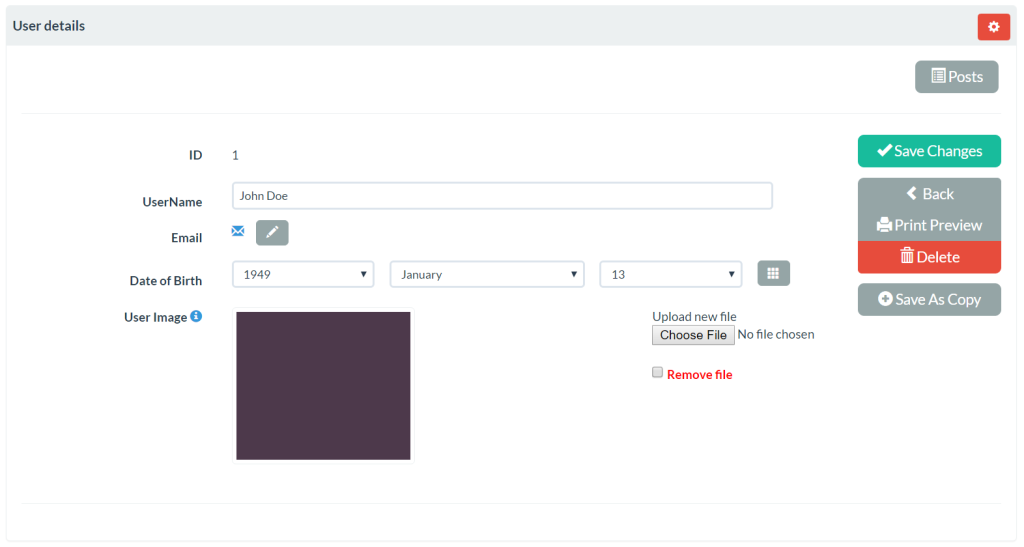
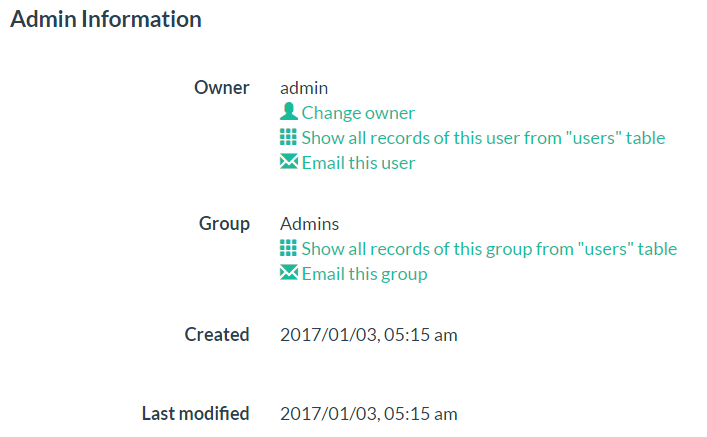
If you are to click the red cog pictured (which shows only when the user is signed in as administrator) you’ll receive a small dialog where you can see the record owner, change said owner, email the user, and so on.
From the top menu let’s select Jump to… and navigate into our Categories table and once again, we’re going to add a new record. Because of the limited scope of this table, the only value we can input is the category name, so I’m just going to call my category by “news”.
When you’ve done that, use the Jump to… menu again, but this time head into Posts and click on “Add New”.
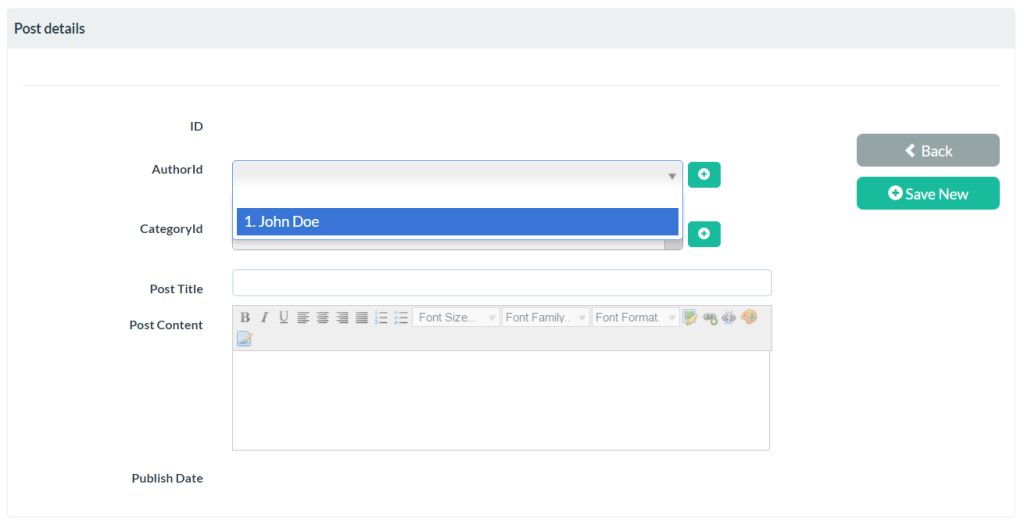
Here you can see that we’ve got a more interesting view to work with. Naturally we can’t change the ID or Publish Date of the post, as they’re managed by the database, and as for the Author ID and Category ID, they’re restricted to what’s in dropdowns. However, the latter two have + buttons next to them, and if you click on those you can add new user and category records while you’re creating the post.
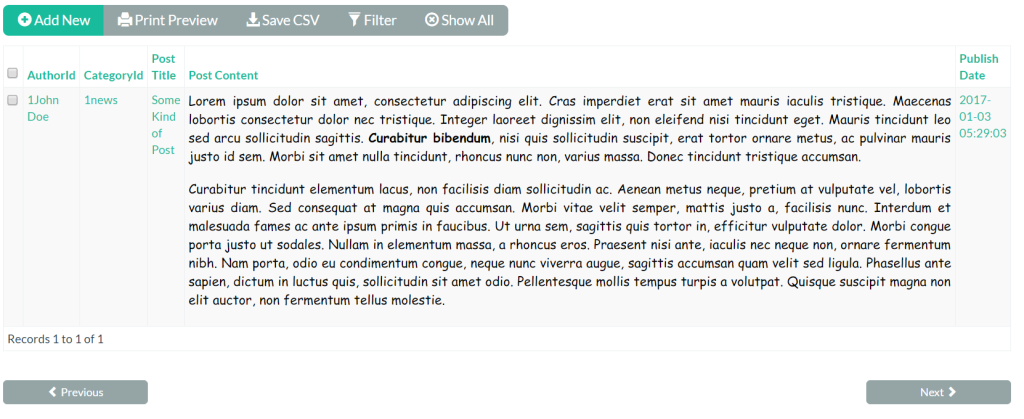
I’m not going to do either of those, instead electing to set a post title and paste in some classic lorem ipsum into the WYSIWYG editor, though I’ll change it to Comic Sans because I’m a classy guy. When you’re done hit save, then navigate back to the posts table and you should see something like this.
And, well, that’s basically it. That’s how you create a database in AppGini and can feed in data via the generated front end.
Exporting to CSV
When you’ve got some data in your tables, if at any time you want to back that data up, you just need to navigate to the table in question, and click on “Save CSV” which will automatically download a CSV to your computer named after the table.

Admin Area
The generated app comes with an admin area, which at base gives you an overview of your database. However, there are three main tasks you can perform:
- Group administration
- Member administration
- Utilities
We’re going to be focusing on groups and member administration, so from the Groups menu item up top, select “View Groups” and you’ll see the following:
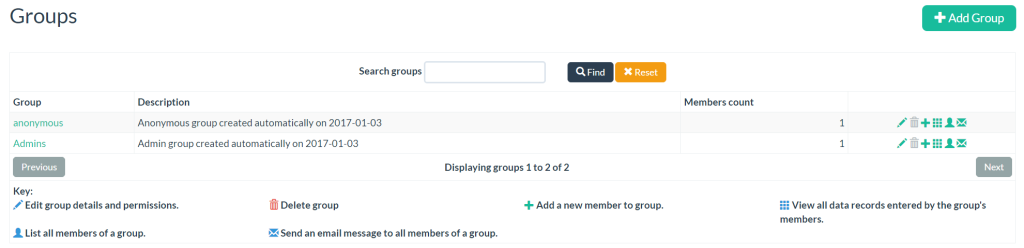
This is the kind of area that would come in handy if you were using AppGini to build a company dashboard of some kind, something that needed many users with varying permissions. With that in mind, let’s click on “Add Group”.
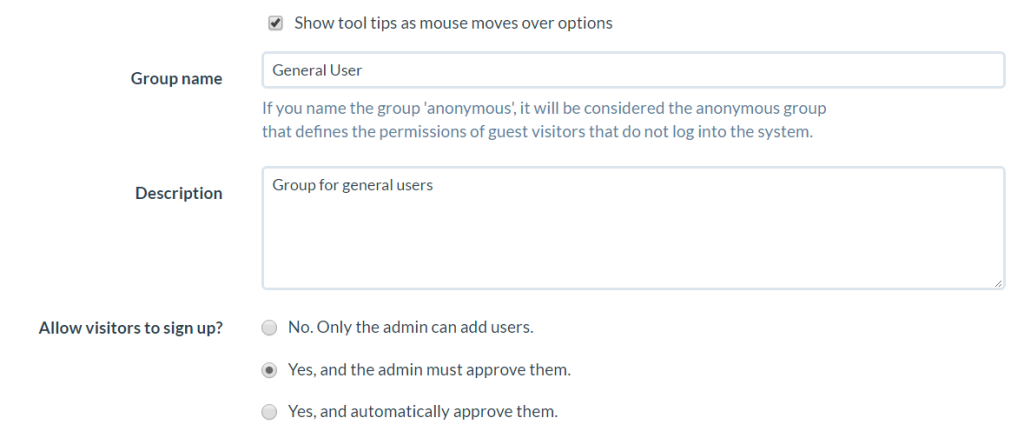
You’ll need to define a Group Name at a minimum, but other than that you can set a description, how you want users to be added, such as only added by an admin, that joining requires admin approval, or that users can join without approval.
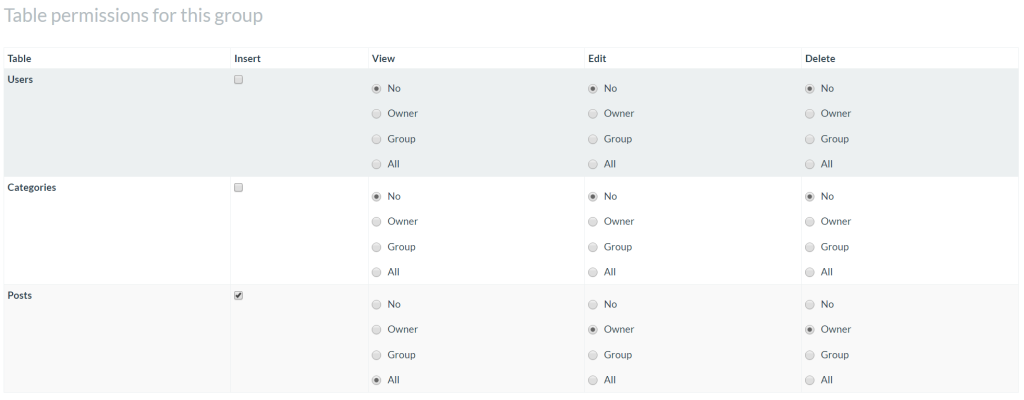
Next, and most importantly, come permissions. Obviously it’s up to you how you define things, but I have modified the permissions so that users in this group can add posts to the posts table, view all posts, but only edit and delete those that they themselves have created.
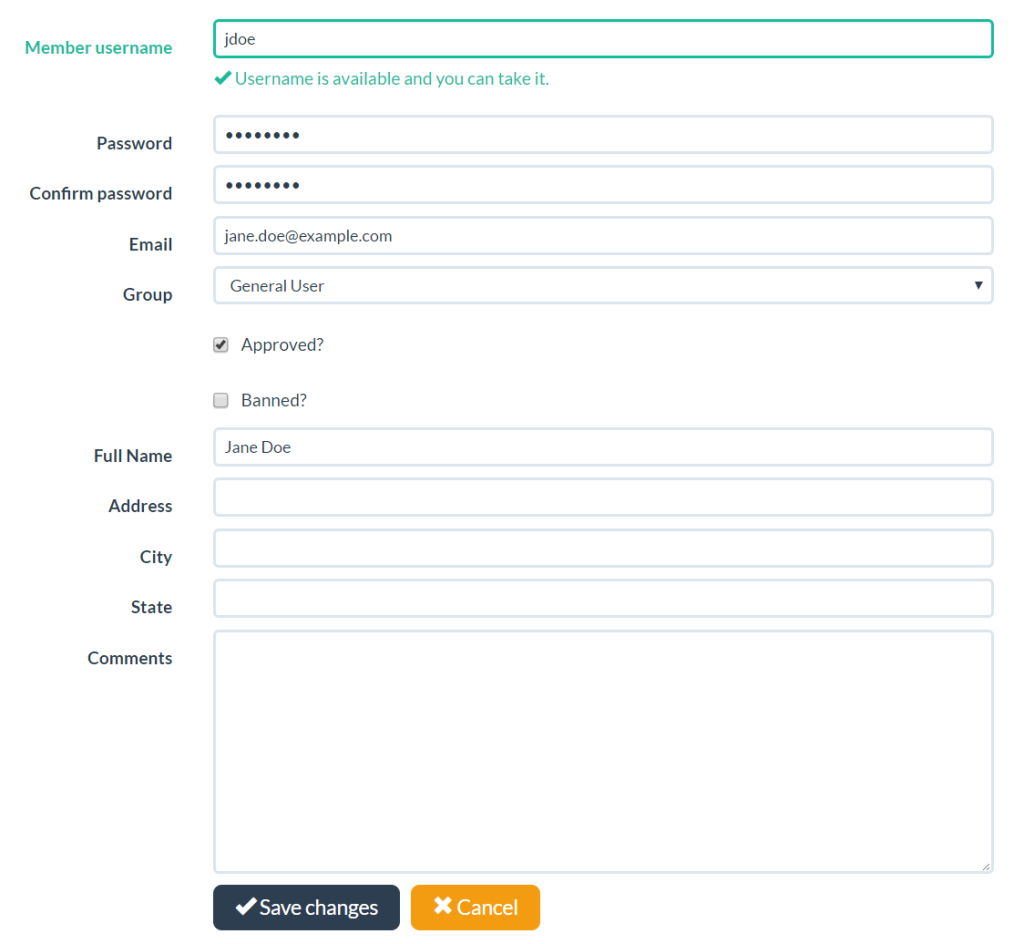
Once you’ve hit save, you’ll get a new sub menu from which we can simply add a new member to the group, so let’s do just that.

You’ll get the kind of form one would expect when adding a new user to a system, where you set a username, password, and so on.
Of course, by default, the user will inherit the permissions of the group to which they belong, however are able to set a user’s permissions on a per-account basis. This can be done at any time by navigating to Members in the Admin area, editing the user in question, then clicking “Set special permissions for this user”
Customizing Code
You’ll also find that it’s really easy to customize the look and behavior of AppGini. In the folder you deployed to — again, in this case it is C:\xampp\htdocs\content — you’ll find another folder called hooks and in there, two files of note, footer-extras.php and header-extras.php. You can add any HTML, CSS, and JavaScript to these files and it will be applied to all pages on the user’s view.
For example, because I know the theme is built with Bootstrap, I can add the following into footer-extras.php
<div class="container">
    <div class="row">
        <div class="col-md-6">
            <h4>Column on the left</h4>
        </div>
        <div class="col-md-6">
            <h4>Column on the right</h4>
        </div>
    </div>
</div>
And it’ll show up on the front end as you would expect it to:
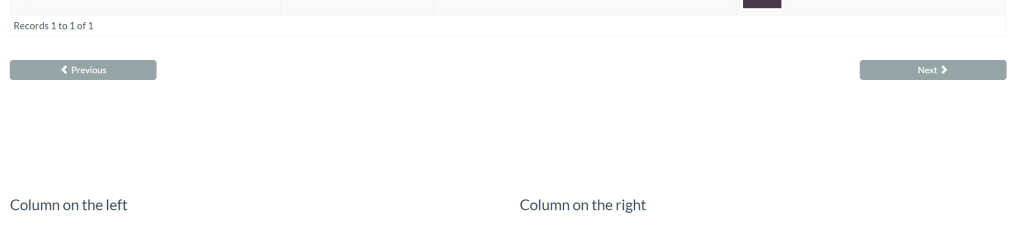
Most importantly of all, changes made to these files will not be overwritten by AppGini if you need to regenerate the application at a later time.
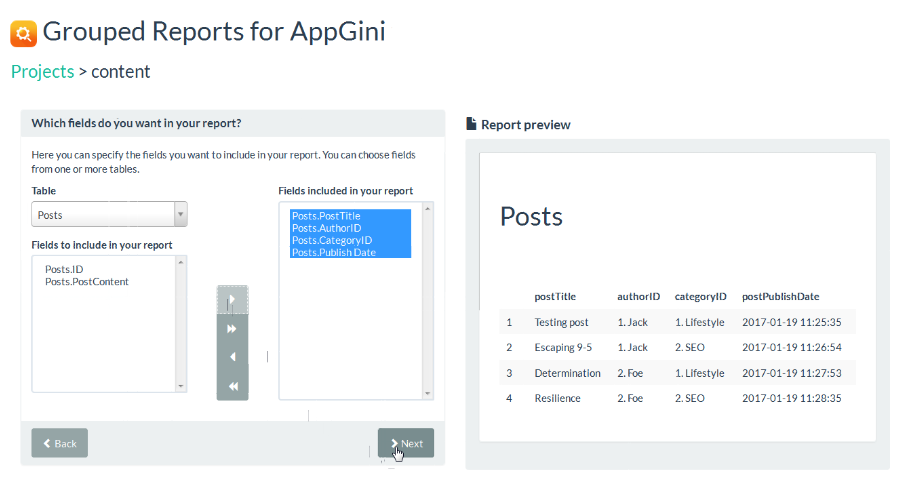
Upcoming: Grouped Reports
In an upcoming plugin — Grouped Reports for AppGini — you’ll be able to easily generate reports from your database. Just add your AppGini project file, which will be evaluated, and then choose the table you want to generate a report from, then simply pick the columns. As soon as you have selected some columns AppGini will generate a report preview to give you an idea of what you’ll be receiving.
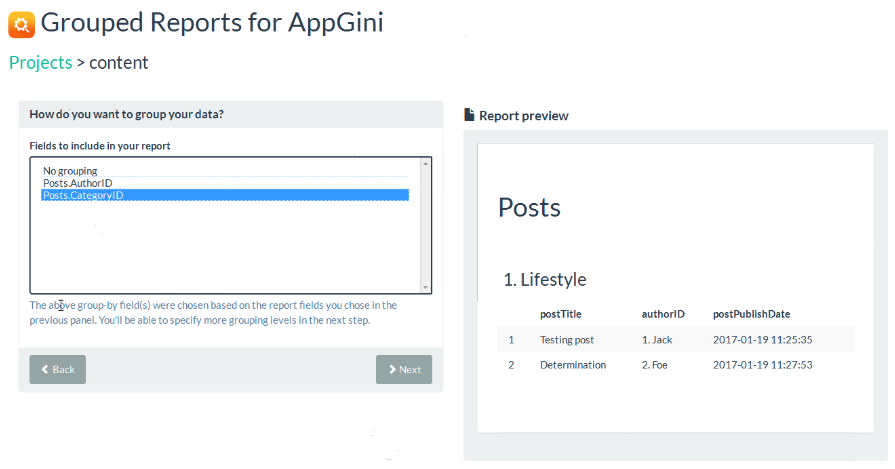
You can also choose to group the data in the report very easily. In this example, you can see that we’ve opted to group by the AuthorID.
Conclusion
Hopefully this has provided an overview of how AppGini works and gives you some ideas as to how you can use it to increase your productivity as a developer, or to create easy-to-use applications. You can find out more about AppGini on the app’s website.
Frequently Asked Questions about Prototyping Web Apps with AppGini
What is AppGini and how does it help in prototyping web apps?
AppGini is a powerful tool that allows you to design and prototype web applications quickly and efficiently. It is a PHP code generator that automates the process of creating a database-driven application. With AppGini, you can define your database, set up your tables, and generate PHP scripts that interact with your database. This significantly reduces the time and effort required to build a functional prototype, allowing you to focus more on the design and user experience aspects of your web application.
How can I install and set up AppGini?
Installing and setting up AppGini is a straightforward process. You can download the software from the official website and install it on your computer. Once installed, you can start creating your web application by defining your database and setting up your tables. AppGini provides a user-friendly interface that guides you through the process, making it easy even for beginners.
Can I customize the generated PHP scripts?
Yes, you can customize the generated PHP scripts to suit your specific needs. AppGini provides a flexible and powerful framework that allows you to modify the scripts as needed. You can add custom code, modify the database queries, and even change the layout and design of the generated pages.
What kind of web applications can I build with AppGini?
AppGini is a versatile tool that can be used to build a wide range of web applications. Whether you’re building a simple contact management system, a complex e-commerce platform, or anything in between, AppGini can help you get your prototype up and running quickly.
How secure are the web applications built with AppGini?
AppGini places a high priority on security. The generated PHP scripts include built-in security measures to protect your application and data. These include protection against SQL injection attacks, cross-site scripting (XSS), and other common web application vulnerabilities.
Can I use AppGini for commercial projects?
Yes, you can use AppGini for commercial projects. The software is licensed per developer, so each developer working on a project would need their own license. There are no restrictions on the number of applications you can build or the number of users who can use your applications.
Does AppGini provide support and updates?
Yes, AppGini provides support and updates for its software. When you purchase a license, you get one year of free updates and access to the support forum. After the first year, you can choose to renew your access to updates and support for a small fee.
Can I integrate AppGini with other software or services?
Yes, you can integrate AppGini with other software or services. The generated PHP scripts are open and flexible, allowing you to integrate with other systems as needed. This includes integrating with other databases, APIs, or third-party services.
What are the system requirements for AppGini?
AppGini is a lightweight software that can run on most modern computers. The minimum system requirements are a Windows operating system (Windows 7 or later), a web server with PHP 5.3 or later, and a MySQL database.
Can I use AppGini on a Mac or Linux system?
While AppGini is a Windows-based software, you can use it on a Mac or Linux system using a virtual machine or a software like Wine. However, please note that this is not officially supported and may require some technical knowledge to set up.

