Key Takeaways
- SemaphoreCI, a continuous integration and delivery service, can be used in conjunction with Laravel Envoy or Deployer to automate the deployment process after successful testing.
- Deployment tools such as Laravel Envoy and Deployer can be set up to work with SemaphoreCI by defining servers and creating tasks to handle the deployment process. The deployment strategy can be configured on the project’s page in SemaphoreCI, with the option for automatic or manual deployment.
- The integration and deployment process is triggered by committing changes to the repository. If any issues arise, SemaphoreCI provides the ability to view logs and investigate the problem. It also offers the option to SSH into the build server for further troubleshooting.
This article was peer reviewed by Wern Ancheta and Viraj Khatavkar. Thanks to all of SitePoint’s peer reviewers for making SitePoint content the best it can be!
Test automation, continuous integration, and continuous delivery are quite widespread in the community now. This brought to life multiple services trying to make the process more enjoyable and less overwhelming for developers, so they can focus on delivering software instead of building/configuring tools to do that. One of those services is SemaphoreCI.
In this article, we’re going to cover how to use our own deploy scripts and tools to continue the deployment process after a successful test.
We will be using SemaphoreCI for continuous delivery and Deployer to push our code to the DigitalOcean production server. If you’re not familiar with Deployer, we recommend you check out this introduction.

Demo Application
We’ll be using a 500px application that loads photos from the marketplace. It was built using Laravel and you can read the full article about its building process here, and find the repo on GitHub.
Creating a Deployer Script
The way Deployer works is by us defining servers, and then creating tasks that handle the process of deploying the application to those servers. Our deploy.php script looks like this:
<?php

require_once "recipe/common.php";

set('ssh_type', 'native');
set('default_stage', 'staging');
env('deploy_path', '/var/www');
env('composer_options', 'install --no-dev --prefer-dist --optimize-autoloader --no-progress --no-interaction');
set('copy_dirs', [
    'app/commands',
    'app/config',
    'app/controllers',
    'app/database',
    'app/lang',
    'app/models',
    'app/src',
    'app/start',
    'app/tests',
    'app/views',
    'app/filters.php',
    'app/routes.php',
    'bootstrap',
    'public',
    'composer.json',
    'composer.lock',
    'artisan',
    '.env',
]);

set('shared_dirs', [
    'app/storage/cache',
    'app/storage/logs',
    'app/storage/meta',
    'app/storage/sessions',
    'app/storage/views',
]);
set('writable_dirs', get('shared_dirs'));
set('http_user', 'www-data');

server('digitalocean', '174.138.78.215')
    ->identityFile()
    ->user('root')
    ->stage('staging');

task('deploy:upload', function() {
    $files = get('copy_dirs');
    $releasePath = env('release_path');

    foreach ($files as $file)
    {
        upload($file, "{$releasePath}/{$file}");
    }
});

task('deploy:staging', [
    'deploy:prepare',
    'deploy:release',
    'deploy:upload',
    'deploy:shared',
    'deploy:writable',
    'deploy:symlink',
    'deploy:vendors',
    'current',// print current release number
])->desc('Deploy application to staging.');

after('deploy:staging', 'success');
You should read the Deployer article if you’d like to learn more about what this specific script does. Our next step is to set up a SemaphoreCI project. Please read the crash course article if you’ve never tried SemaphoreCI before, and do that.
Setting up Deployment
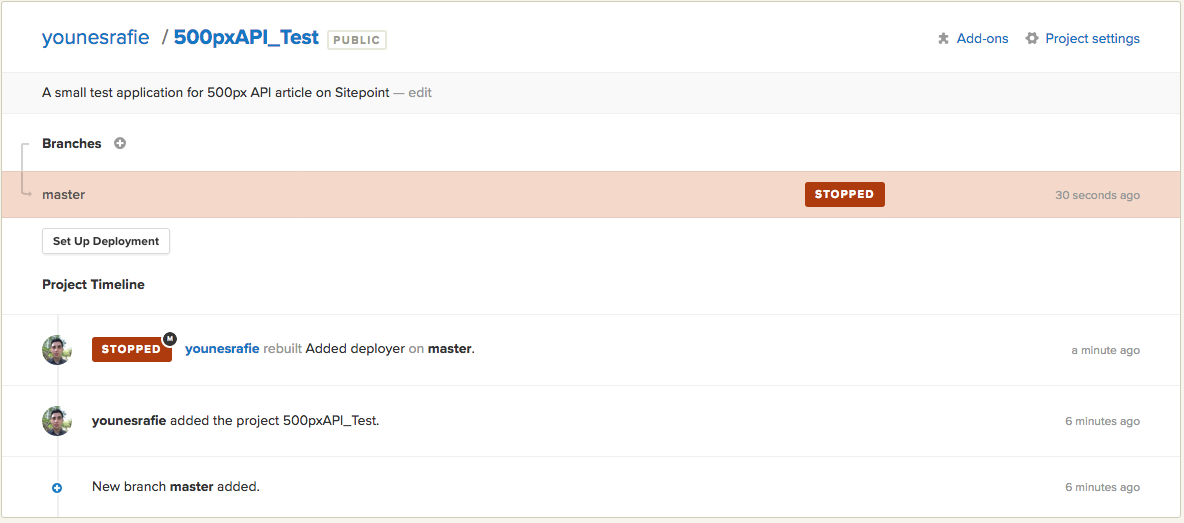
To configure the deployment strategy, we need to go to the project’s page and click Set Up Deployment.
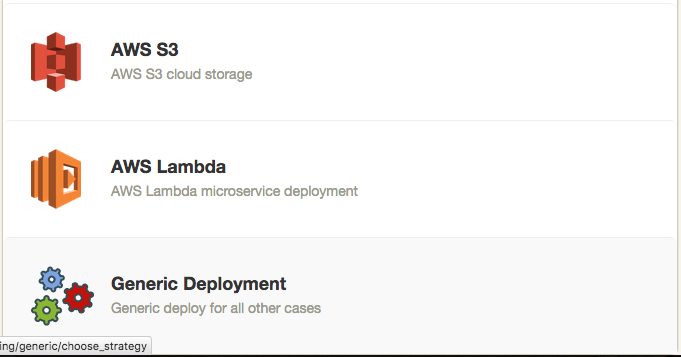
Next, we select the generic deployment option, so that SemaphoreCI gives us the freedom to add manual configuration.
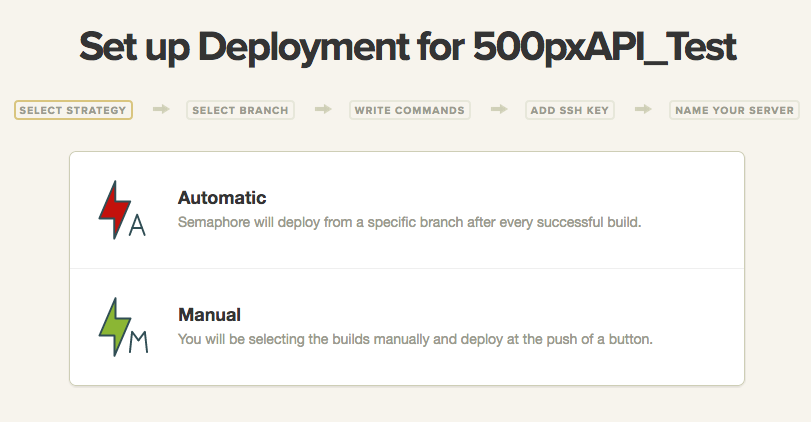
After selecting automatic deployment, SemaphoreCI will give us the ability to specify deployment commands. The difference between manual and automatic, is that automatic deployment is triggered after every successful test, while manual will let us deploy any successful commit.
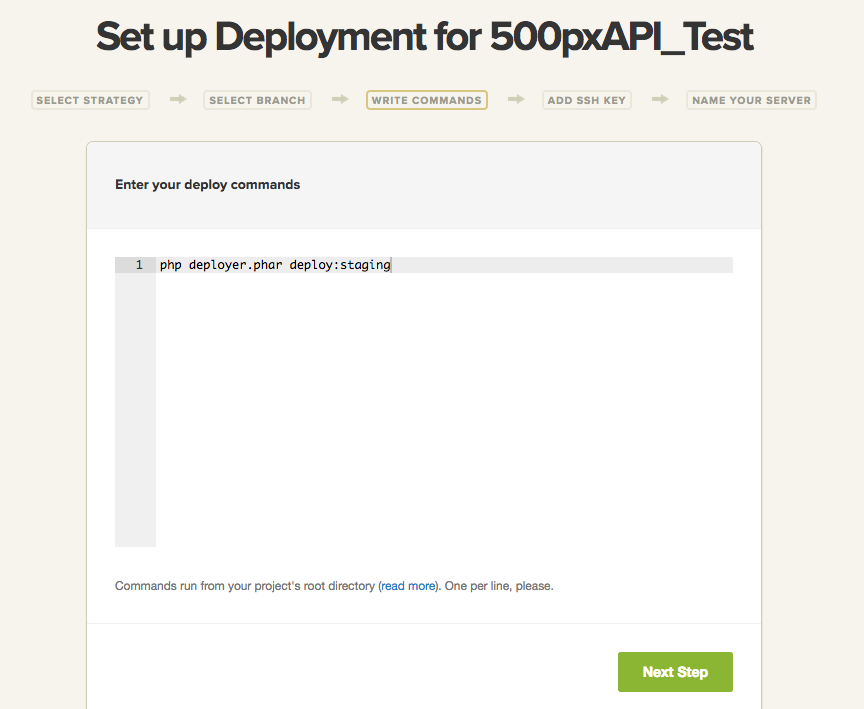
We can choose to include the deployer.phar in our repo as a PHAR file or require it using Composer. Either way, the commands will be similar.
If we chose to deploy the application using SSH, SemaphoreCI gives us the ability to store our SSH private key on their servers and make it available in the deployment phase.
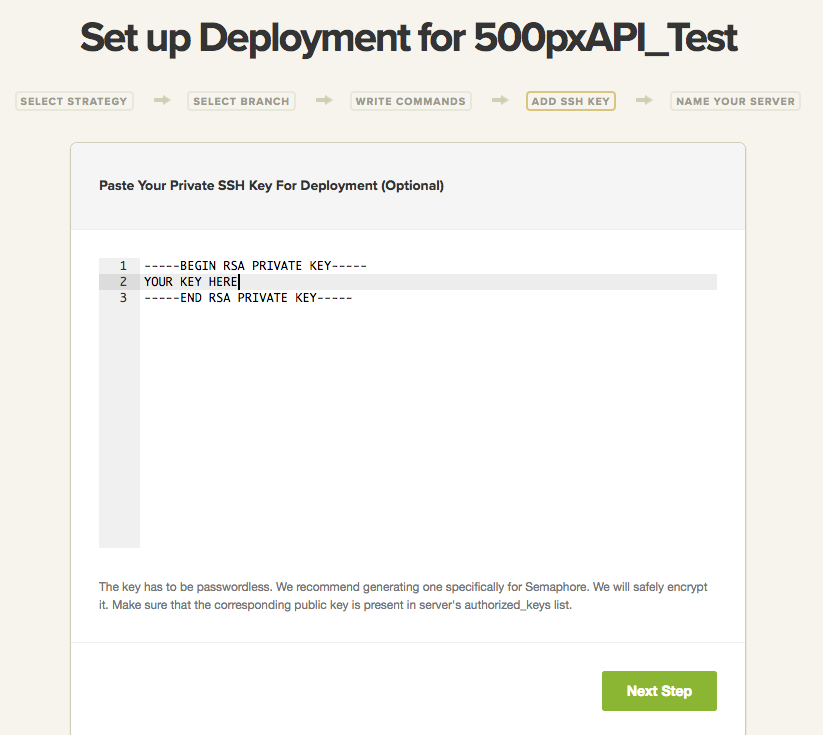
Note: SemaphoreCI recommends that we create a new SSH key specifically for the deployment process. In case someone stole our keys or something, we can easily revoke it. The key will also be encrypted before storing it on their end.
The key will be available under ~/.ssh/id_rsa, so the identityFile() can be left at the default.
Push to Deploy
Now that everything is set up, we need to commit some changes to the repository to trigger the integration and deployment process.
// Edit something
git add .
git commit -am "Updated deploy"
git push origin master
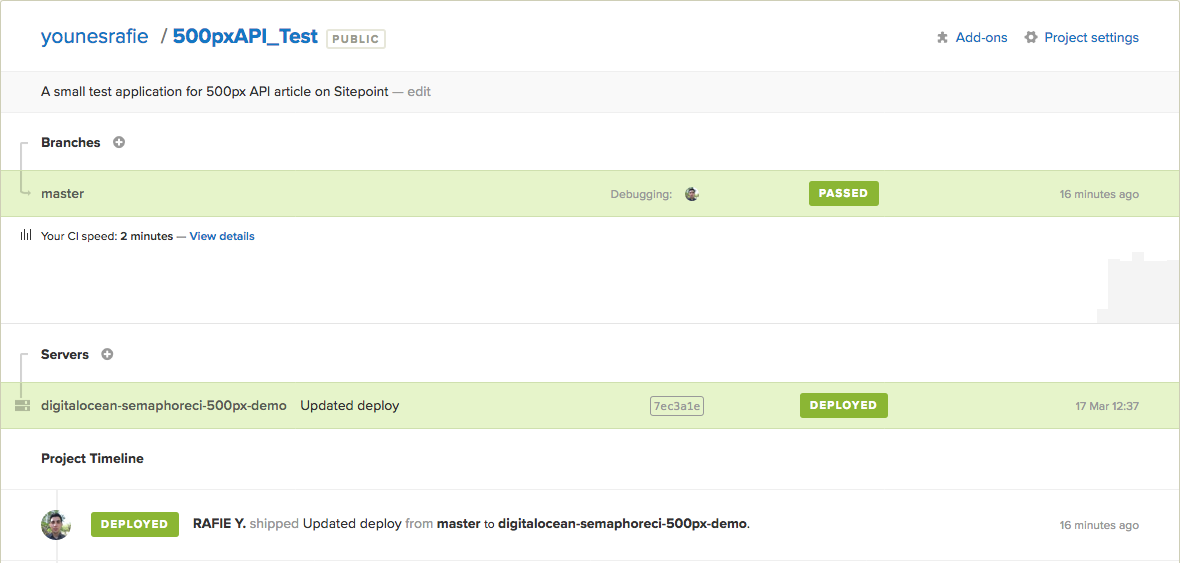
If something went wrong, we can click on the failed deploy process and see the logs to investigate the problem further.
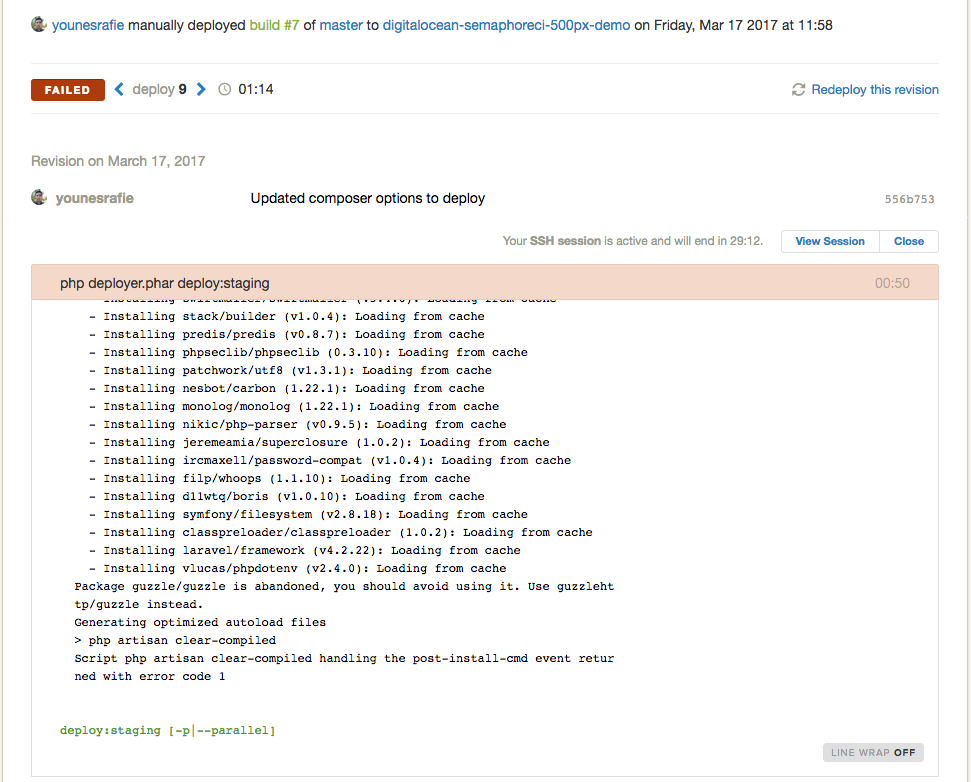
The above screenshot is a failed commit due to the php artisan clear-compiled command returning an error because the mcrypt extension wasn’t enabled.
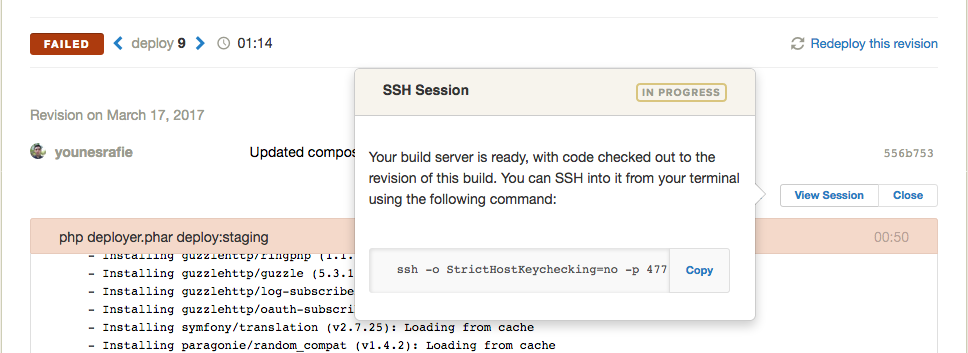
Note: Another neat trick that SemaphoreCI provides is SSHing to the build server to see what went wrong.
Other Deployment Tools
The same process we used here may be applied to any other deployment tool. Laravel Envoy, for example, might be configured like this:
@servers(['web' => 'root@ip-address'])

@task('deploy', ['on' => 'web'])
cd /var/www

@if($new) {{-- If this is the first deployment --}}
git init
git remote add origin repo@github.git
@endif

git reset --hard
git pull origin master

composer update
composer dumpautoload -o

@if($new)
    chmod -R 755 storage
    php artisan storage:link
    php artisan key:generate
@endif

php artisan migrate --force

php artisan config:clear
php artisan route:clear

php artisan optimize
php artisan config:cache
php artisan route:cache
php artisan view:clear
@endtask
And in the deployment command step, we would install and run Envoy:
cd /var/www
composer global require "laravel/envoy=~1.0"
envoy run deploy
That’s it! Envoy will now authenticate with the key we’ve added and run the update command we specified.
Conclusion
CI/CD tools are a great improvement to a developer’s workflow, and certainly help teams integrate new code into production systems. SemaphoreCI is a great choice that I recommend for its easy to use interface and its wonderful support. If you have any comments or questions, please post them below!
Frequently Asked Questions (FAQs) on Laravel Envoy, Deployer and SemaphoreCI
How can I integrate Laravel Envoy with SemaphoreCI for continuous integration?
Integrating Laravel Envoy with SemaphoreCI involves a few steps. First, you need to set up your Laravel project on SemaphoreCI. After that, you need to install Envoy in your project using composer. Once installed, you can create an Envoy.blade.php file in your project root directory. This file will contain all the tasks that you want to automate. Then, you can add a new command in your SemaphoreCI pipeline to run the Envoy tasks. The command will look something like this: php vendor/bin/envoy run deploy.
What are the benefits of using Deployer with Laravel?
Deployer is a deployment tool written in PHP, it’s simple, functional and perfect for PHP applications like Laravel. It provides out-of-the-box support for Laravel, which means you don’t have to write custom scripts to deploy your Laravel applications. Deployer takes care of all the deployment tasks, such as pulling the latest code from your repository, running composer install, running migrations, and restarting PHP-FPM. It also supports zero-downtime deployments, atomic deployments, and parallel deployments, which can significantly reduce your deployment time.
How can I use GitLab CI/CD with Laravel and Envoy?
To use GitLab CI/CD with Laravel and Envoy, you need to create a .gitlab-ci.yml file in your project root directory. This file will define the stages of your CI/CD pipeline. You can define a stage for testing your application, a stage for building your application, and a stage for deploying your application. In the deploy stage, you can use Envoy to automate the deployment tasks. You just need to add a script in your .gitlab-ci.yml file to run the Envoy tasks, like this: script: php vendor/bin/envoy run deploy.
How can I configure Laravel properly for CI/CD?
Configuring Laravel for CI/CD involves setting up your testing environment, writing tests for your application, setting up your build process, and setting up your deployment process. You can use PHPUnit for testing, Composer for managing dependencies, and tools like Laravel Envoy or Deployer for automating deployment tasks. You also need to choose a CI/CD platform, like SemaphoreCI or GitLab CI/CD, and configure it to run your tests, build your application, and deploy your application.
How can I deploy a Laravel application with CI/CD and Envoy?
Deploying a Laravel application with CI/CD and Envoy involves setting up a CI/CD pipeline that includes a deployment stage. In this stage, you can use Envoy to automate the deployment tasks. You just need to create an Envoy.blade.php file in your project root directory and define your tasks in this file. Then, you can add a command in your CI/CD pipeline to run the Envoy tasks. The command will look something like this: php vendor/bin/envoy run deploy.
What is the role of SemaphoreCI in Laravel deployment?
SemaphoreCI is a continuous integration and delivery platform that can automate the process of testing and deploying your Laravel applications. You can set up a pipeline in SemaphoreCI to run your tests, build your application, and deploy your application. SemaphoreCI supports a wide range of languages and frameworks, including PHP and Laravel, and it integrates with many popular tools, like Laravel Envoy and Deployer.
How can I use Laravel Envoy for deployment?
Laravel Envoy allows you to define tasks in a Blade syntax and run them on your remote servers. To use Envoy for deployment, you need to install it in your project using composer. Then, you can create an Envoy.blade.php file in your project root directory and define your deployment tasks in this file. Once your tasks are defined, you can run them using the envoy run command.
How can I use Deployer for Laravel deployment?
Deployer is a PHP deployment tool that provides out-of-the-box support for Laravel. To use Deployer for Laravel deployment, you need to install it in your project using composer. Then, you can create a deploy.php file in your project root directory and define your deployment tasks in this file. Once your tasks are defined, you can run them using the dep deploy command.
What are the differences between Laravel Envoy and Deployer?
Laravel Envoy and Deployer are both PHP deployment tools, but they have some differences. Envoy uses a Blade syntax for defining tasks, while Deployer uses a PHP syntax. Envoy is more Laravel-specific, while Deployer provides support for many different frameworks. Envoy is simpler and easier to use, but Deployer offers more advanced features, like zero-downtime deployments, atomic deployments, and parallel deployments.
Can I use both Laravel Envoy and Deployer in the same project?
Yes, you can use both Laravel Envoy and Deployer in the same project. However, it’s usually not necessary to use both tools, as they serve similar purposes. You can choose the one that best fits your needs. If you prefer a simpler tool with a Blade syntax, you can choose Envoy. If you prefer a more advanced tool with support for many different frameworks, you can choose Deployer.
