

Software is playing an ever bigger role in how companies compete across a broad range of industries. Large organizations are finding that their current approaches to managing software are limiting their ability to respond as quickly as business requires. Continuous delivery helps with this.

Understanding continuous delivery, a now already long-standing buzzword, is not a problem, but implementing it in the right way has been a challenge for quite a few of us, and one we’ll discuss in this post.
Key Takeaways
- Continuous delivery is a software management approach that enables rapid response to business requirements. Implementing continuous delivery can be challenging, but tools like Semaphore CI can automate the process, making it more manageable.
- Semaphore CI is a continuous integration and deployment tool that supports multiple languages and frameworks, and integrates with popular version control systems like GitHub and Bitbucket. It provides real-time feedback on the build status, supports parallel and sequential execution of tasks, and automates the entire deployment process.
- Setting up Continuous Deployment with Semaphore CI involves connecting your version control system with Semaphore CI, configuring your build settings and deployment pipeline in Semaphore CI, and specifying the commands to run tests and deploy your application. Semaphore CI also allows you to set up different deployment pipelines for different environments.
- Semaphore CI stands out for its simplicity and speed. It’s easy to set up and use, and provides real-time feedback on the build and deployment status. However, it’s a paid service, and if paying for CD isn’t in your budget right now, Gitlab is an open source alternative to the Semaphore platform.
Getting Started
We can easily upload our files to a server using an open source desktop client like Filezilla. Those who have used this are aware that this process is cumbersome and irritating as it doesn’t let us automate the deployment process, and we always end up having to upload the whole project, even if we have modified only a part of it. Alternatively, we could do a git pull on the server and our application is instantly in its latest state, but this workflow doesn’t work in today’s world where we have to continuously deliver software to our end users bug-free.
In this article, we will cover the process of deploying a Laravel application on a Digital Ocean server through a continuous delivery pipeline using Semaphore. The source code for the application is present on Github.
Set up a Project on Semaphore
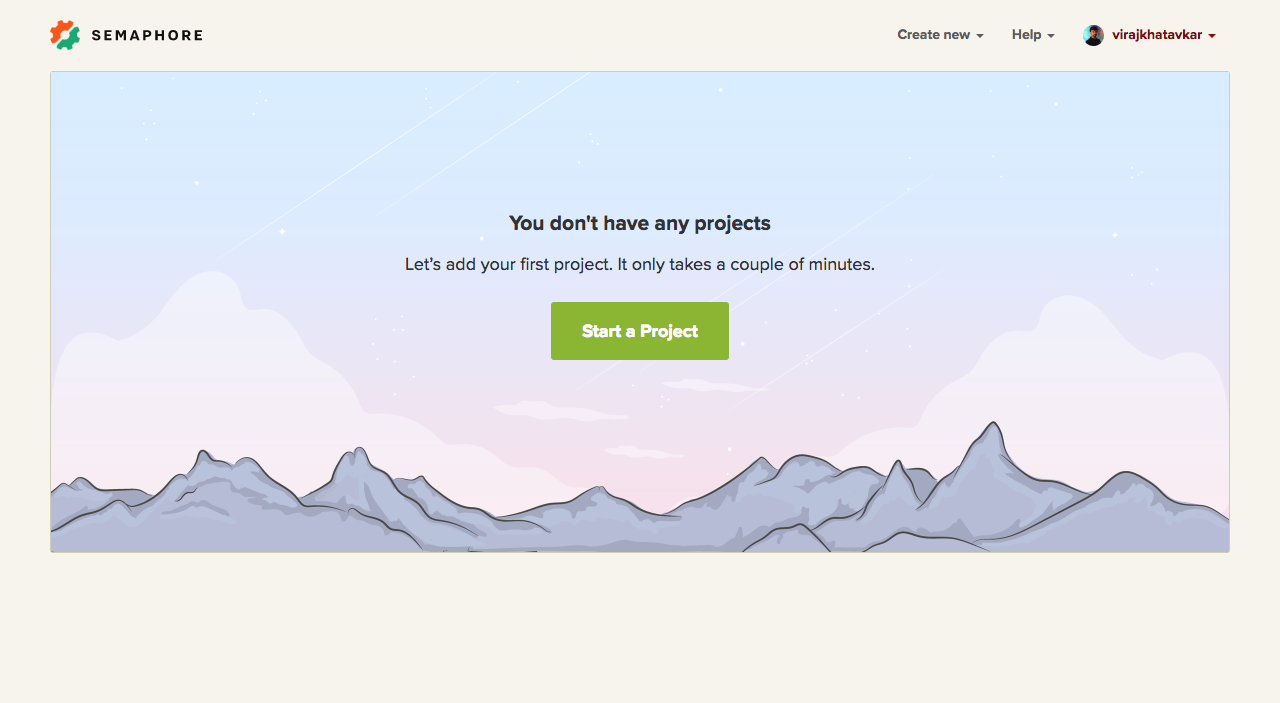
First, create a Semaphore account. After signing up, we see a page to create a new project.
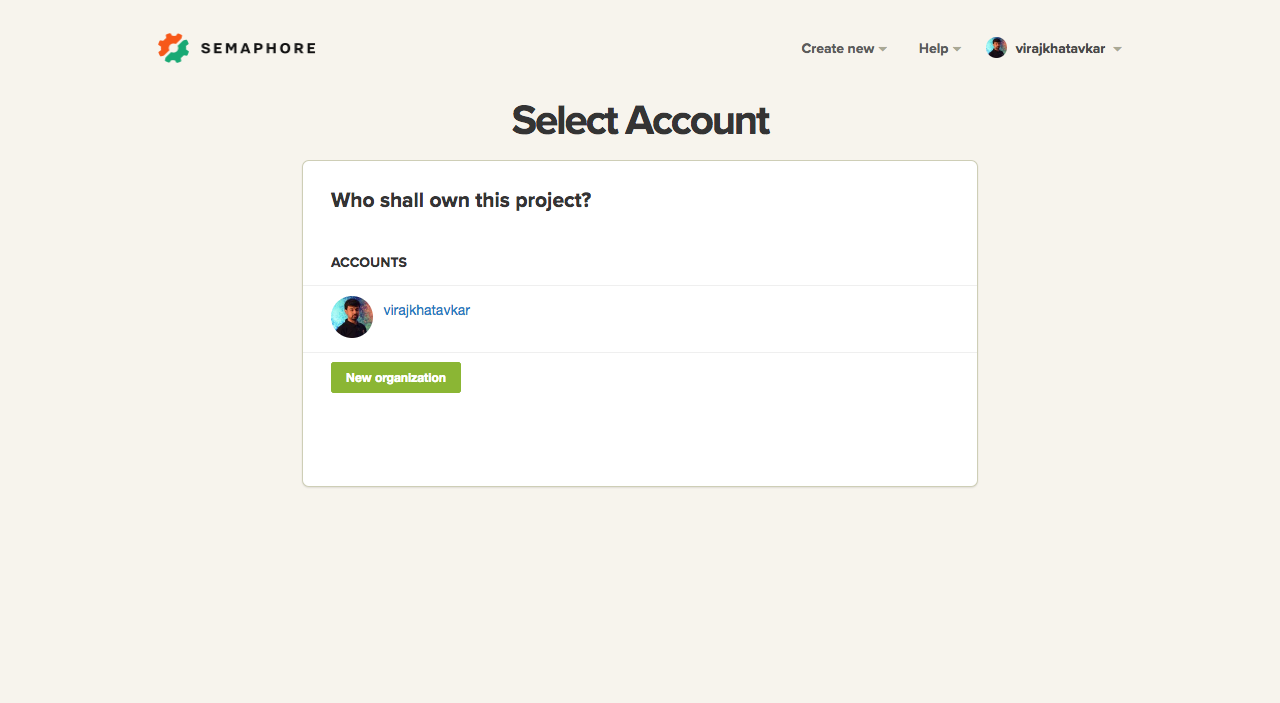
We then have to select the account where our repository is present. If you haven’t connected your source code repository provider with Semaphore, you can do so in this step. Semaphore natively supports Bitbucket and Github.
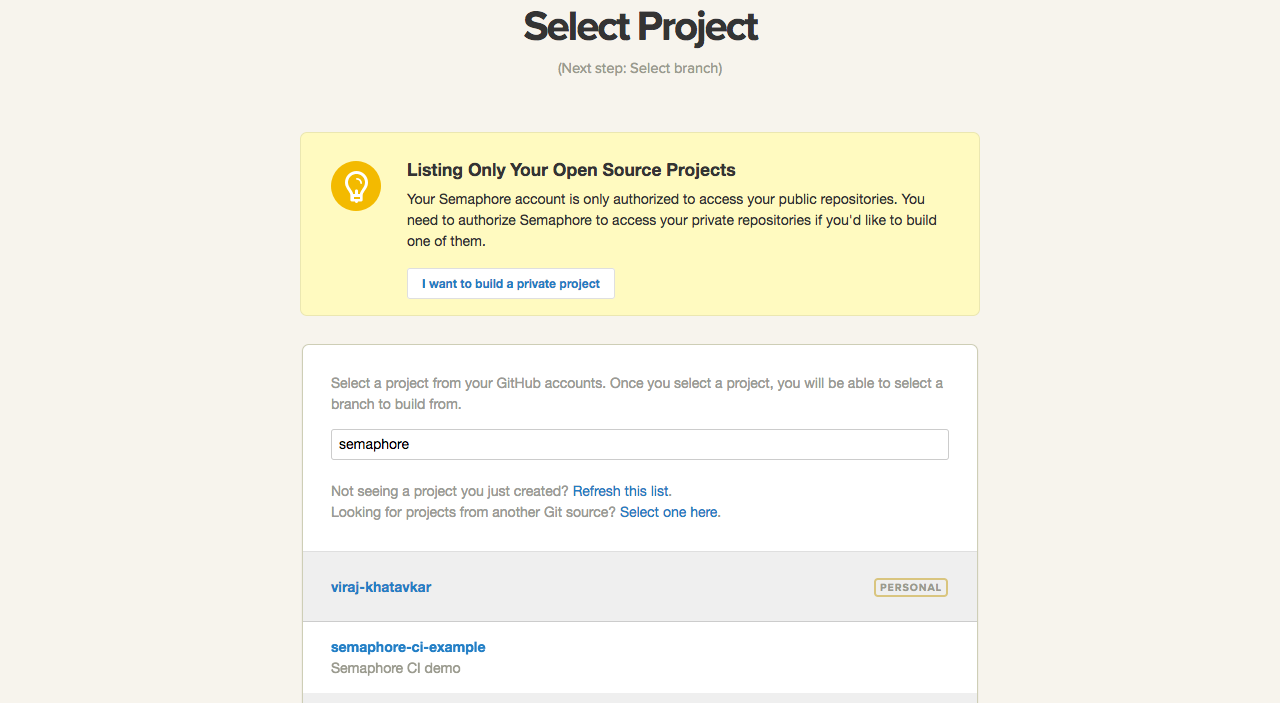
If you forked the aforementioned repo, you can select it in this step:
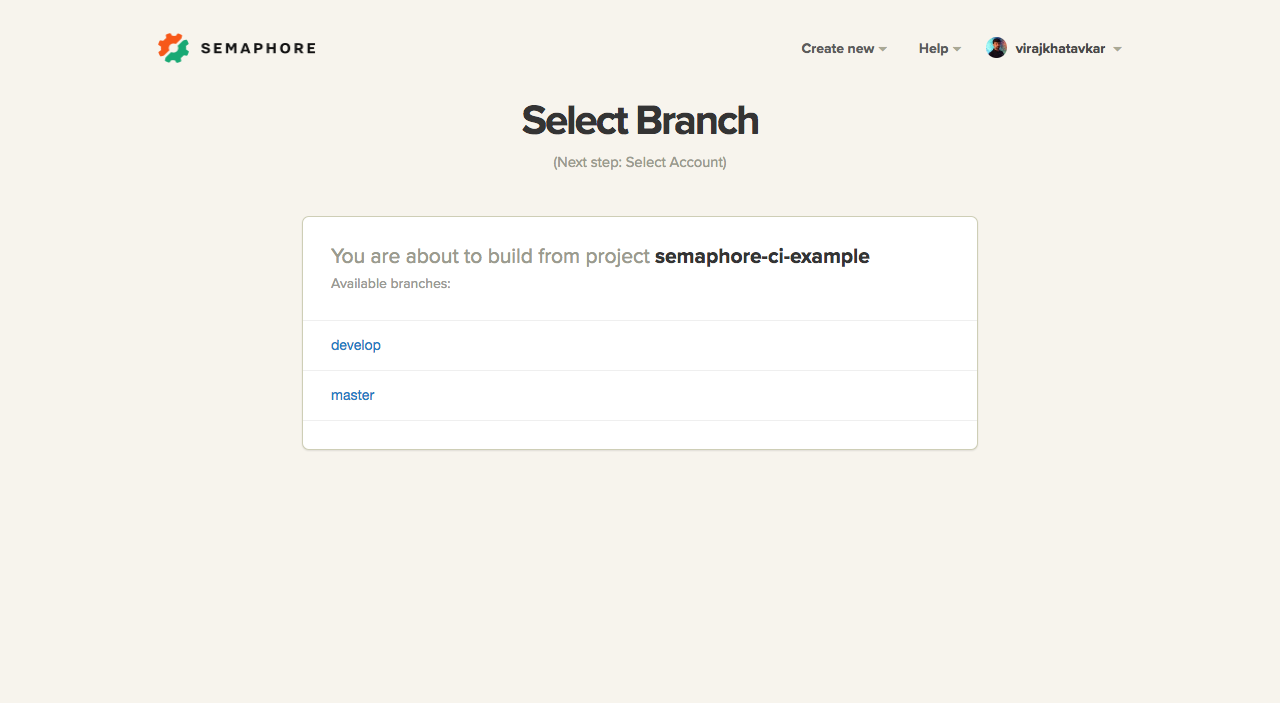
We will select the master branch for our case:
Once we select a branch, Semaphore will start analyzing the project.
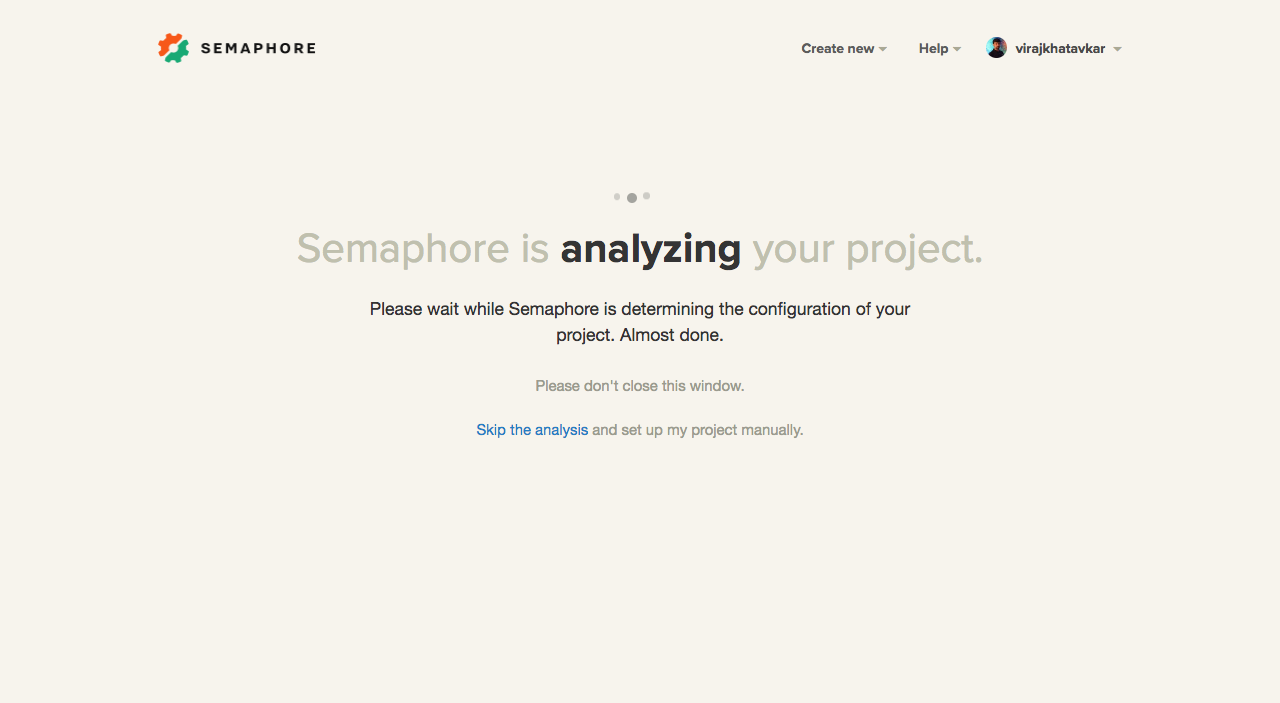
Semaphore will try to clone the repository on their server and fetch some meta information to get started. For our example project, the following meta information was identified:
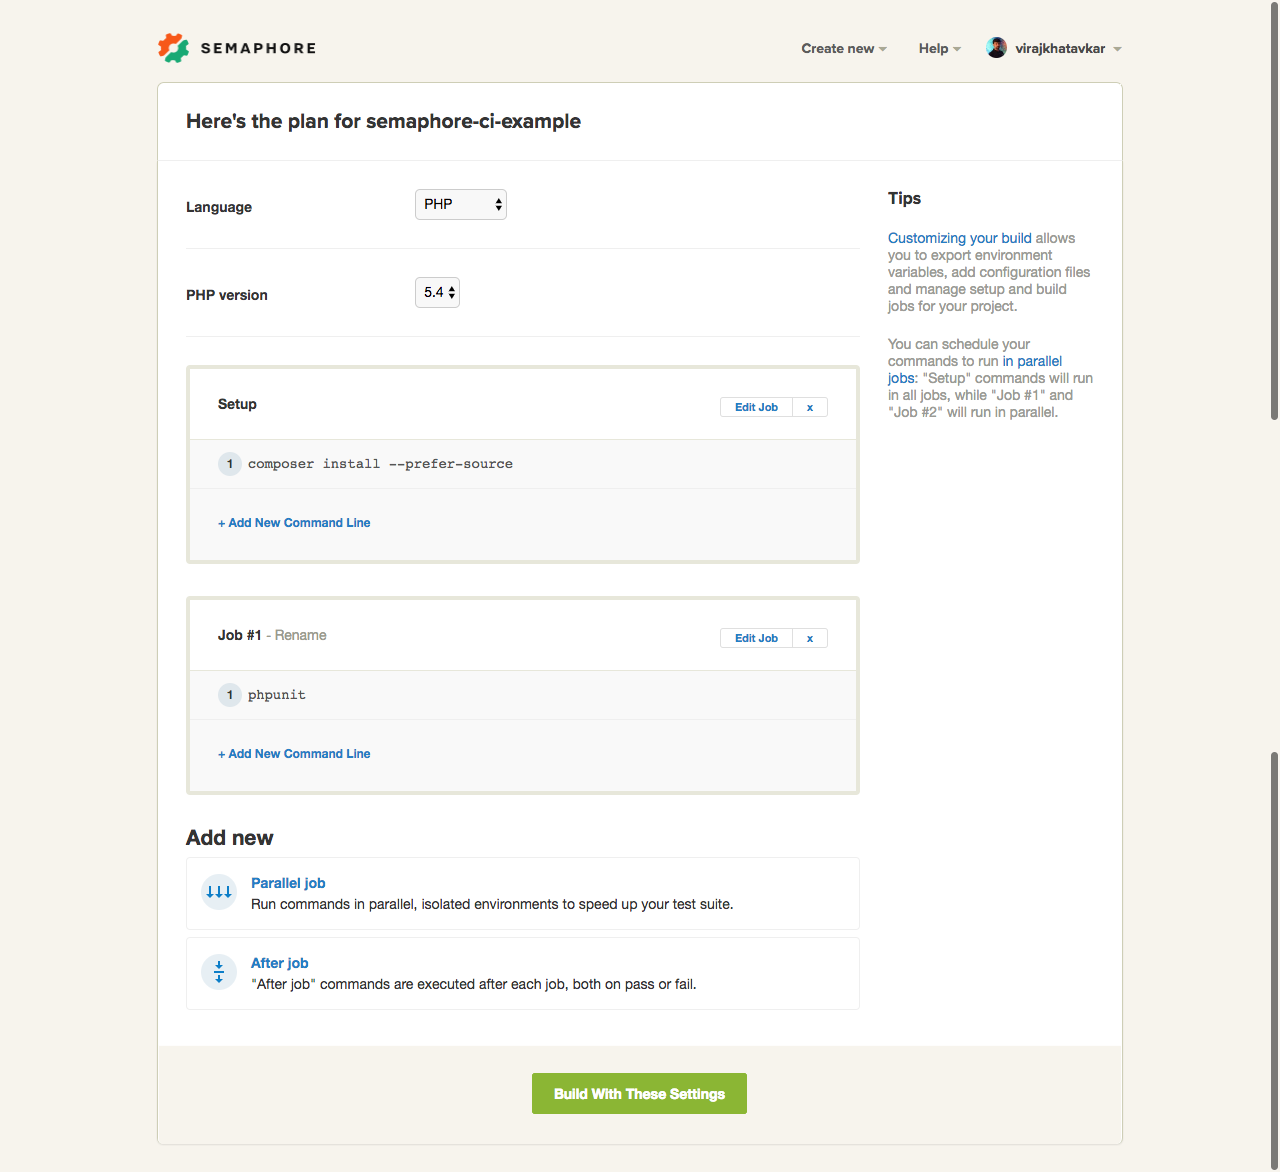
We will select PHP version 7 as our preferred PHP version and move on.
Configure Builds
We will modify the above settings to best suit our project. Please check the settings thoroughly before moving forward with a build to avoid errors.
Our First Build
After configuring the appropriate settings, we can click Build in the above screen. The build’s progress will be printed on the screen.
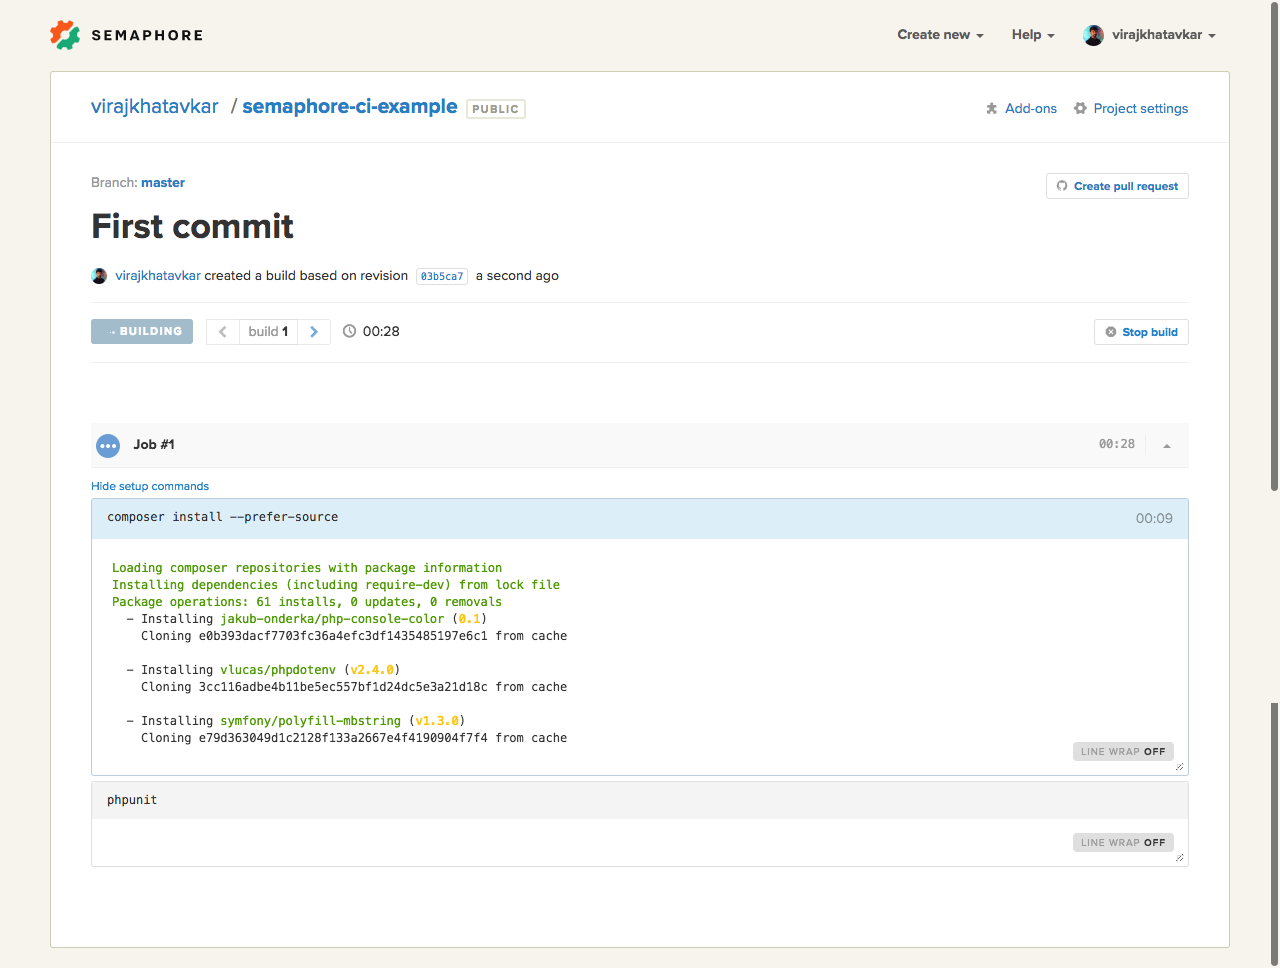
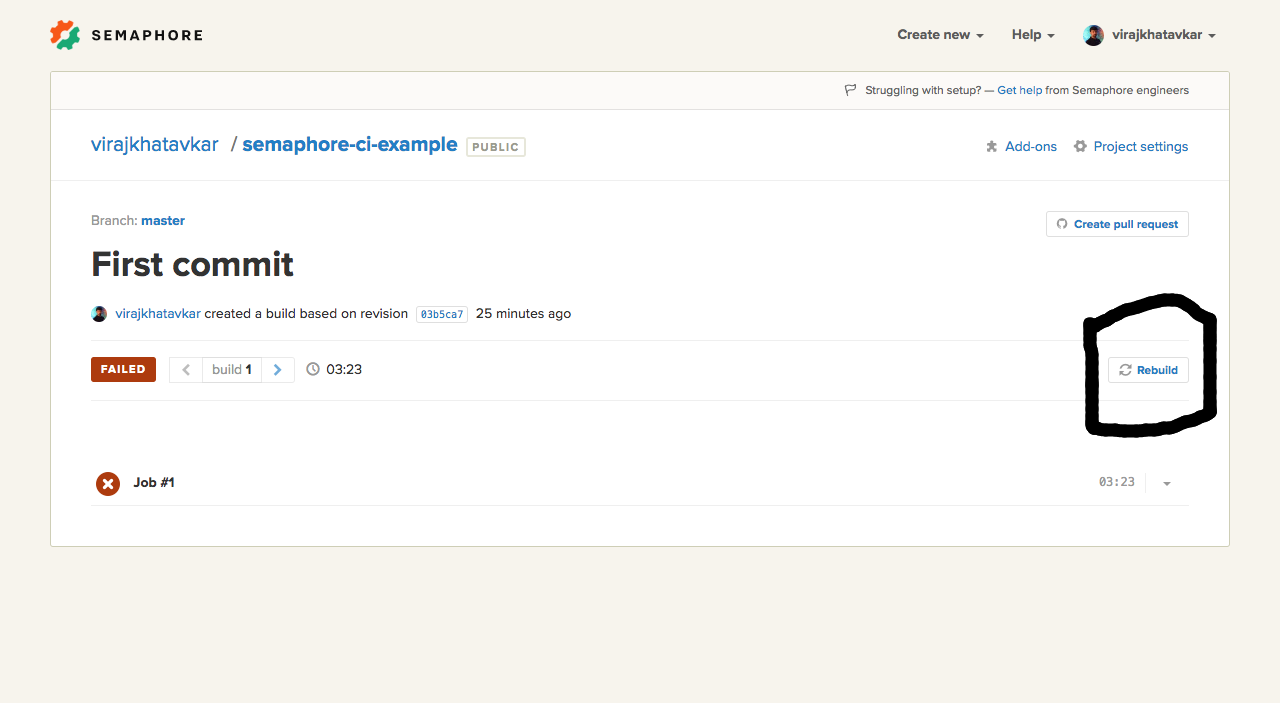
Oops! Our build fails due to failing tests. This indicates that there is a problem with our code.
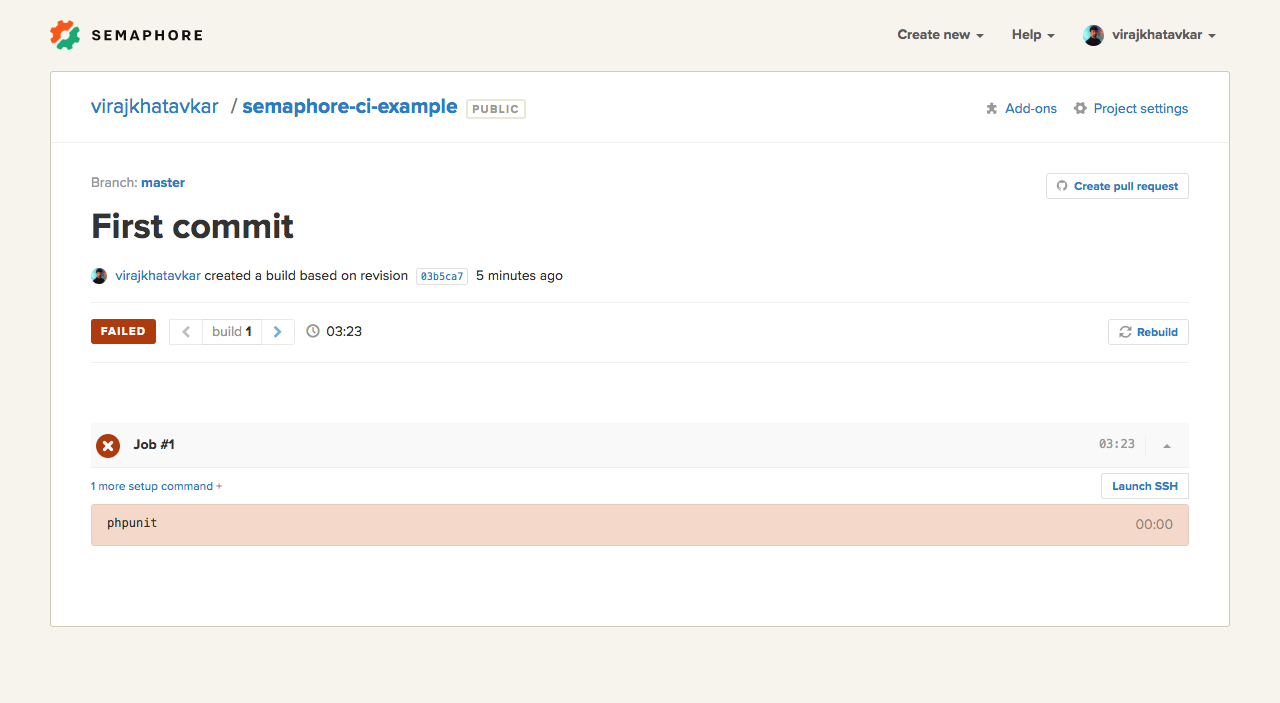
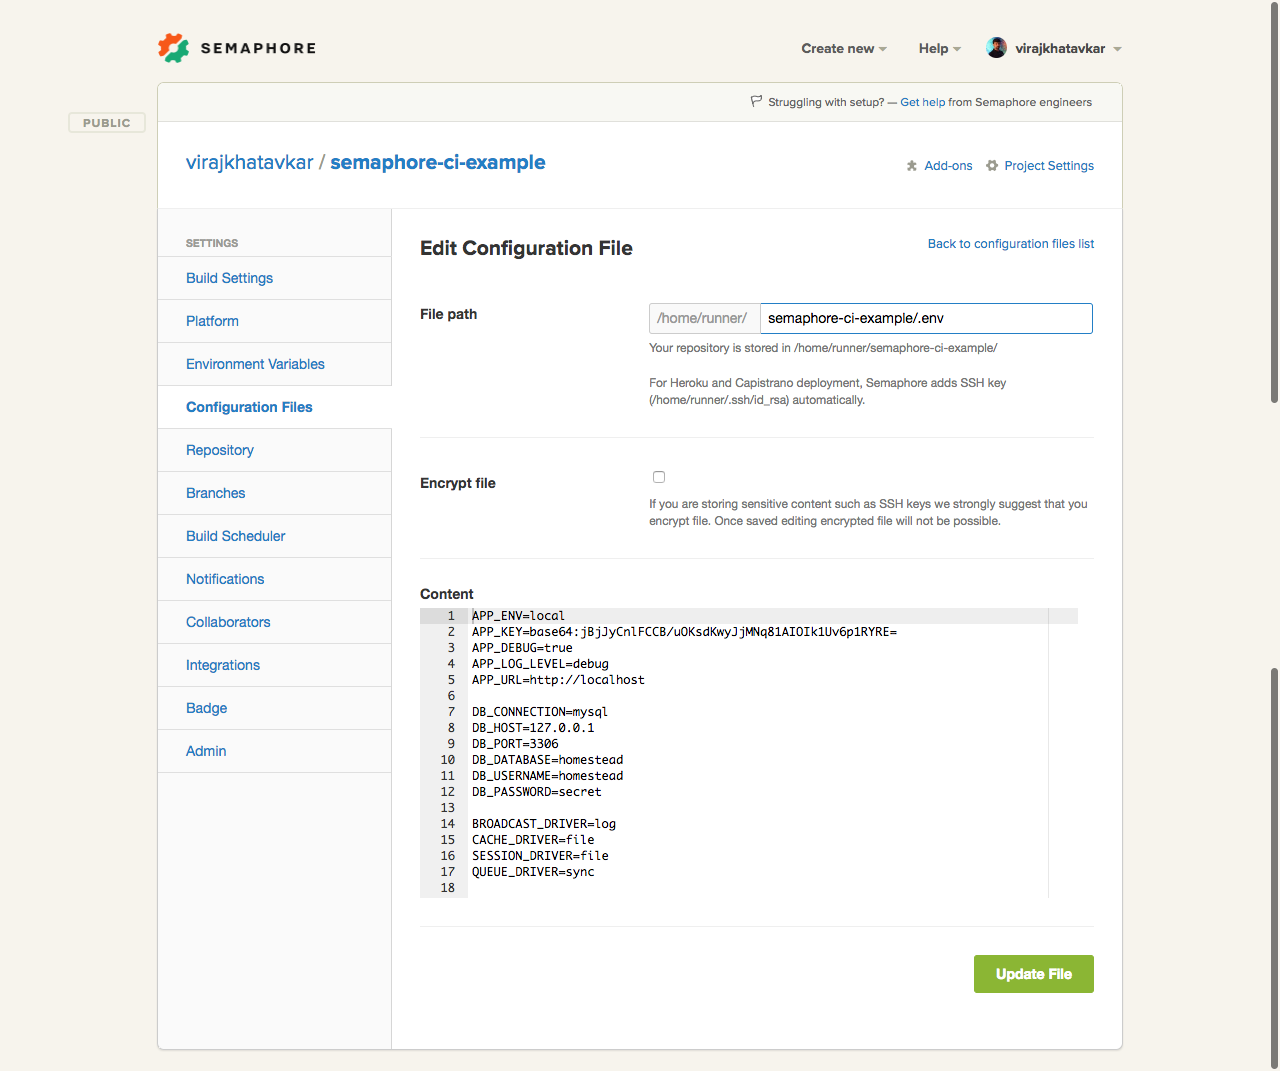
In this case, the problem lies in the configuration of our build. A typical Laravel application requires an environment file at its root with the necessary configuration parameters. We haven’t configured the file in our project yet. Let us create an environment file at the root of our project.
Go to Project Settings -> Configuration files and create the environment file for our project as follows:
We can either push to the master branch or rebuild from the Semaphore UI itself to start our build process again. For now, we will initiate a rebuild from the UI itself by clicking on the Rebuild button on the right-hand side of the last failed build.
Semaphore will start rebuilding our repository by installing the necessary dependencies and running tests with PHPUnit. We can see that our build is passing sucessfully.

Parallelize Your Builds
Massive test groups are a fact of any above-average sized project. The downside of having such impressive test coverage is that it takes a massive amount of time to run the build. In such scenarios, parallelization is essential.
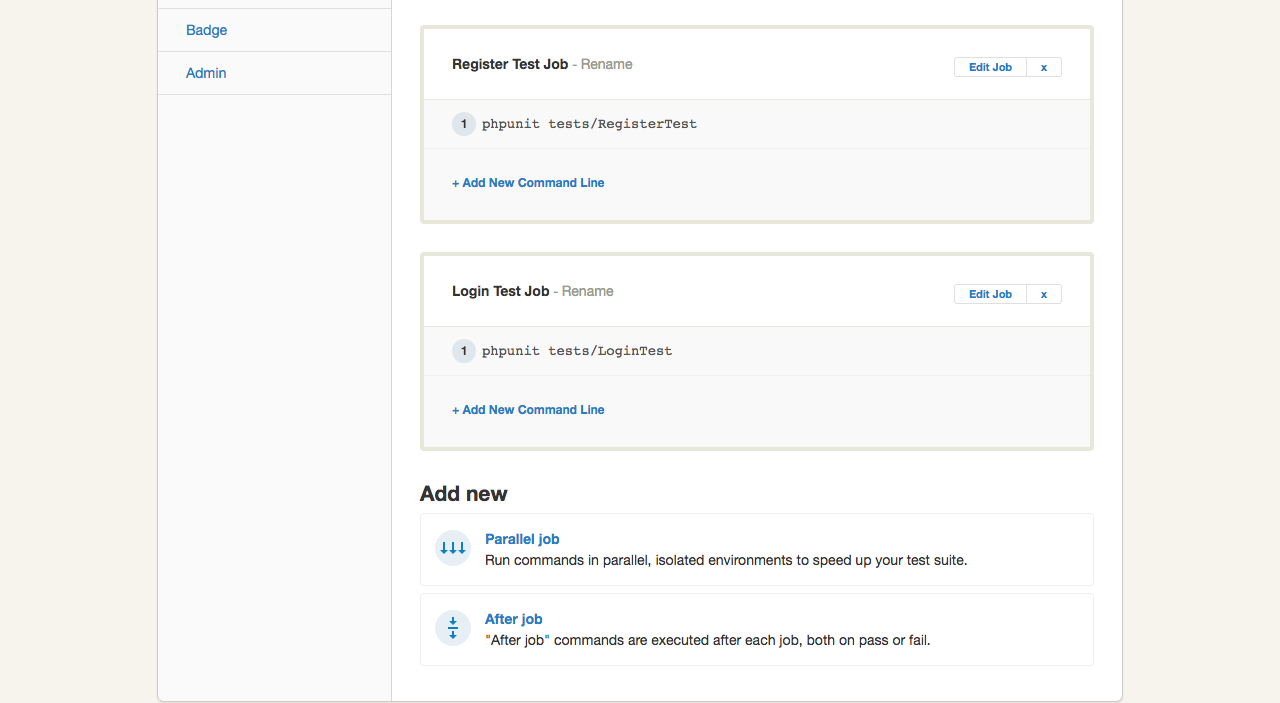
The fundamentals behind parallelization are to divide our test suites into smaller groups which can be run in parallel. You can divide into groups on the basis of similar functional requirements or independent services or any other logical parameter that best suits your project. I would prefer to group these into similar functional requirements.
In our application, I have written two simple test classes for the Login Page and the Register Page. Let us run parallel test builds in Semaphore. Below is the code for these two tests:
#LoginTest.php

class LoginTest extends TestCase
{
    /**
     * A basic functional test example.
     *
     * @return void
     */
    public function testLoginPage()
    {
        $this->visit('/login')
             ->see('Login Now');
    }
}
//RegisterTest.php

class RegisterTest extends TestCase
{
    /**
     * A basic functional test example.
     *
     * @return void
     */
    public function testRegisterPage()
    {
        $this->visit('/register')
             ->see('Register Now');
    }
}
Now we can configure a parallel job in our build settings to run these two tests separately. You can learn more about parallel test configuration in Semaphore’s documentation.
Let’s push to the master branch to trigger the build process.
git push origin master
Once we push to master, Semaphore will automatically detect the change and trigger our build with parallel jobs.
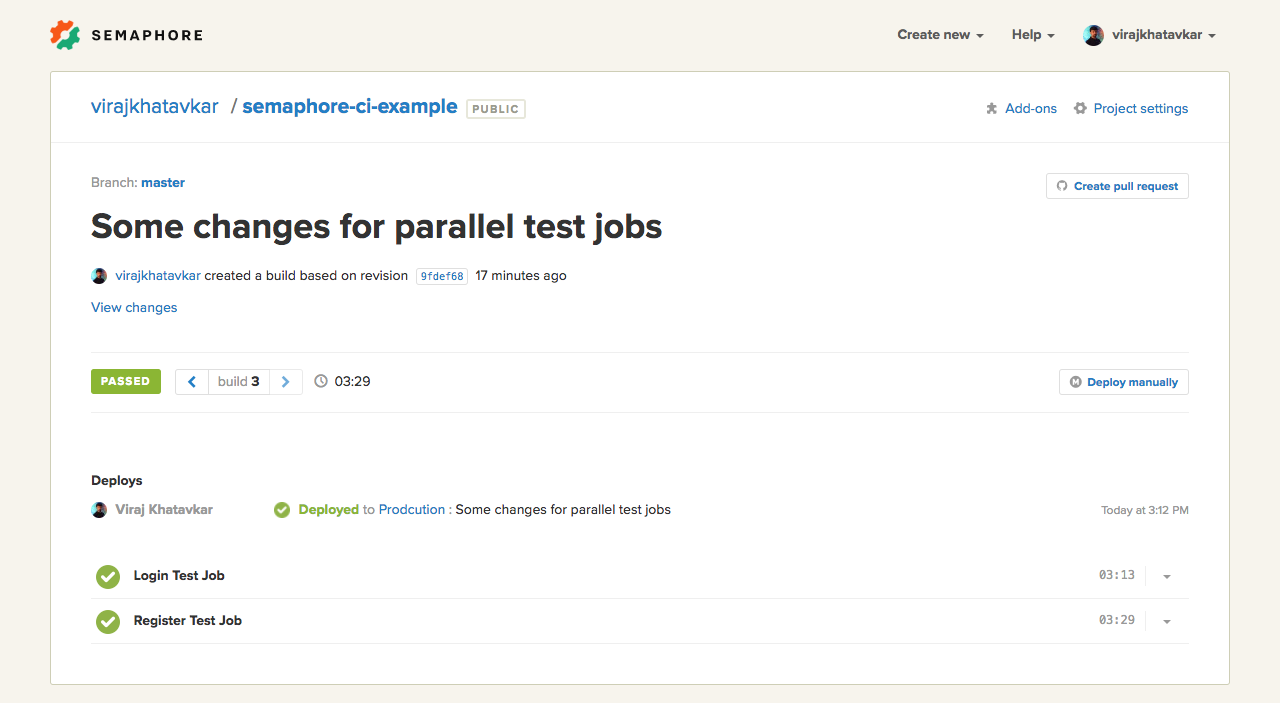
Our tests are executed in parallel as shown in the screenshot above.
Continuous Deployment
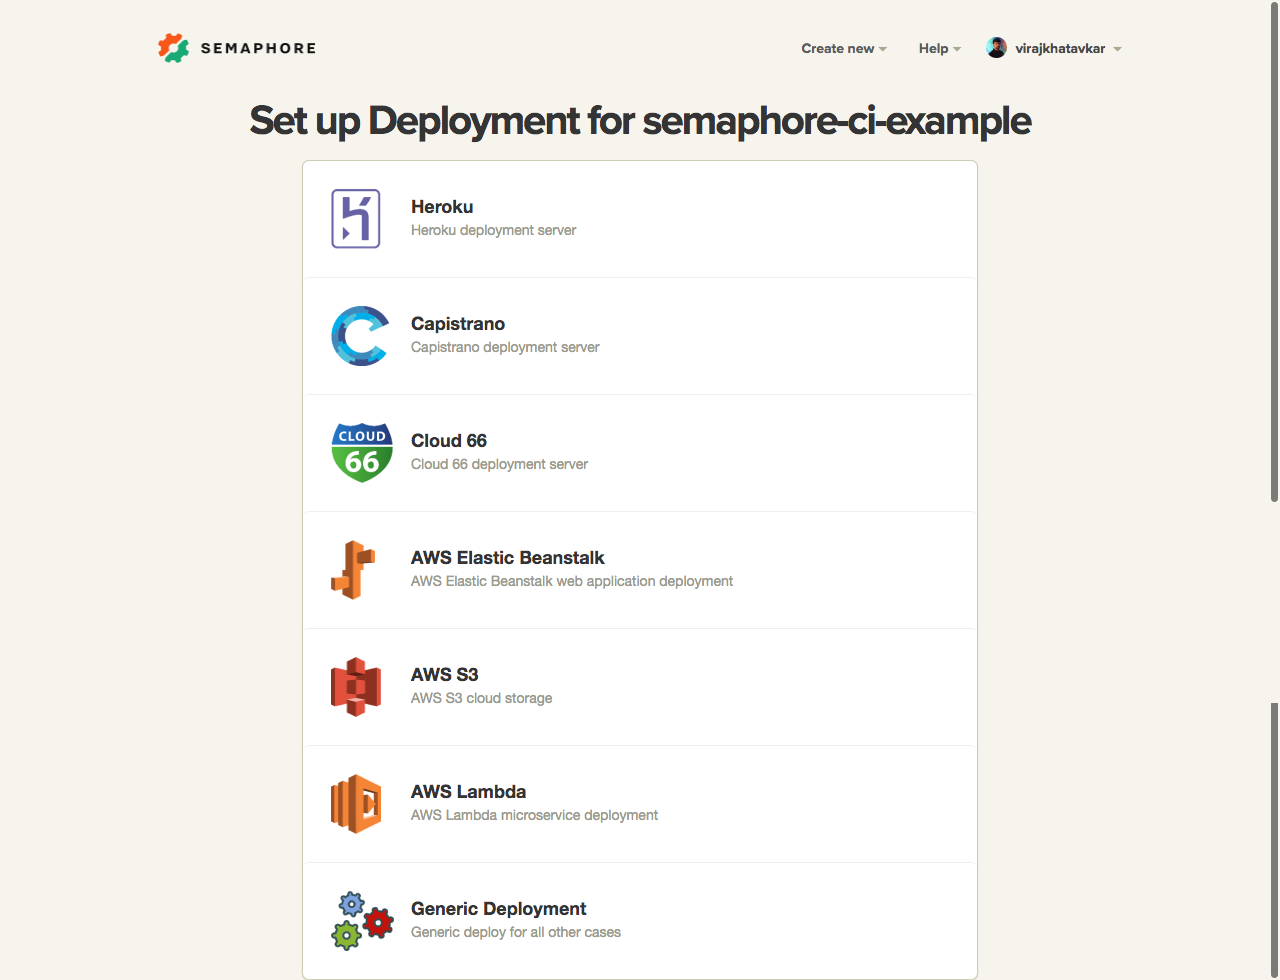
Finally, let’s set up the deployment process for our project. We will deploy our repository to a Digital Ocean server (make sure you set up a Droplet with the server pointed to home/USER/default before proceeding – good tutorial here). Let’s go through each of the steps:
We will select a Generic Deployment option as we will run our own custom commands to deploy.
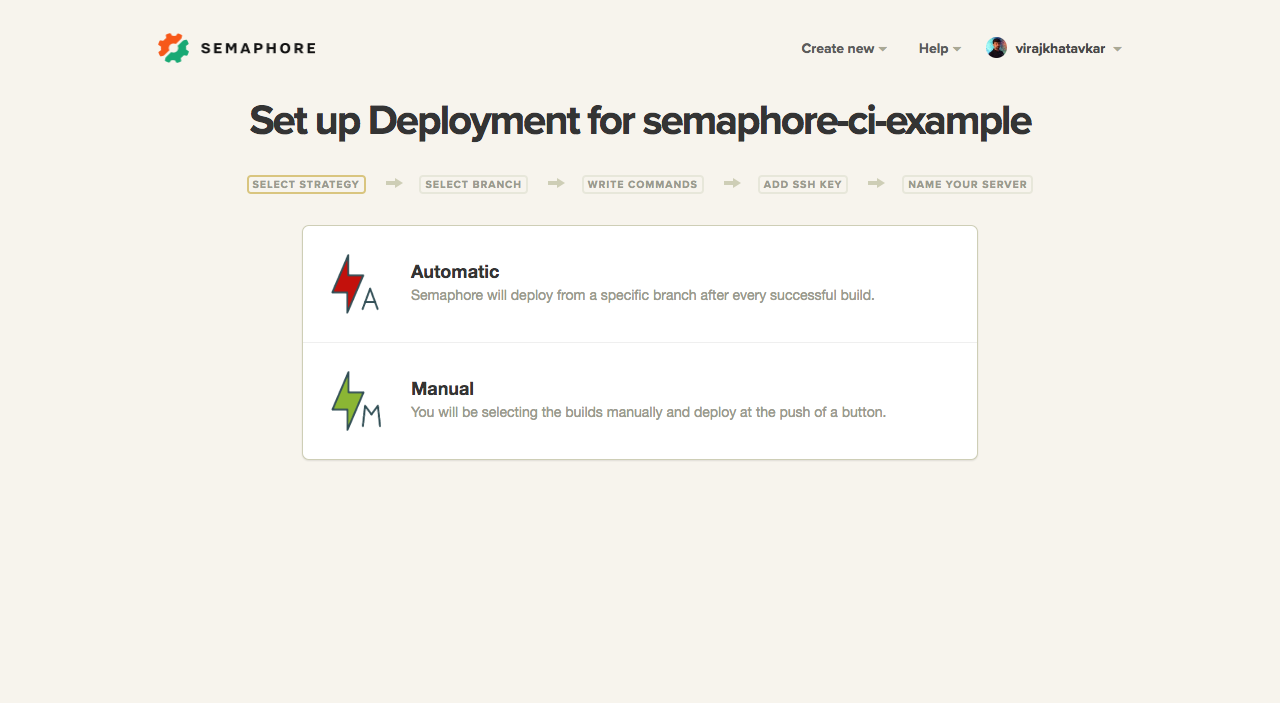
We can select either “Automatic” or “Manual” for deployment strategy. We will select “Automatic Deployment”. This will trigger an automatic deployment whenever we push to our master branch and the build passes.
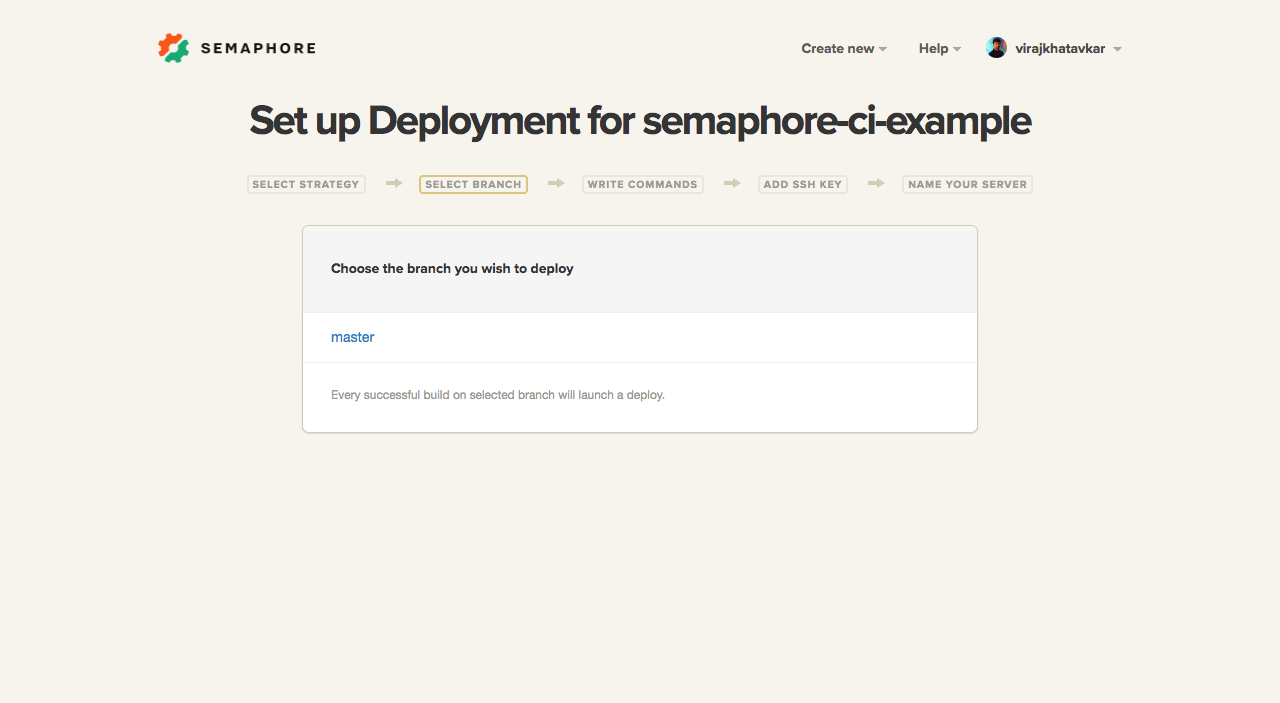
Here, we need to select the branch we wish to deploy. We will select the master branch.
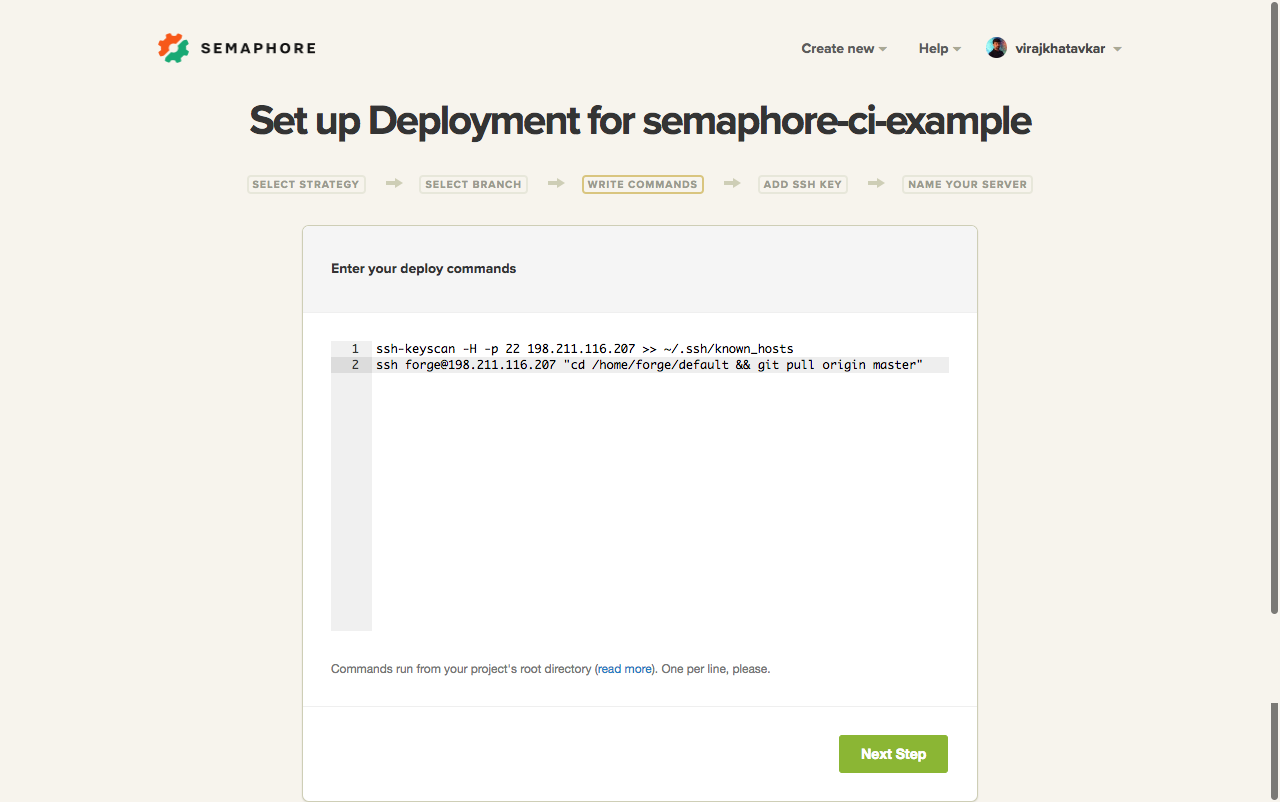
We will enter our custom deployment commands that we want Semaphore to execute for us. The first command gathers the public SSH host keys of our server(s) to avoid an authorization prompt during deployment.
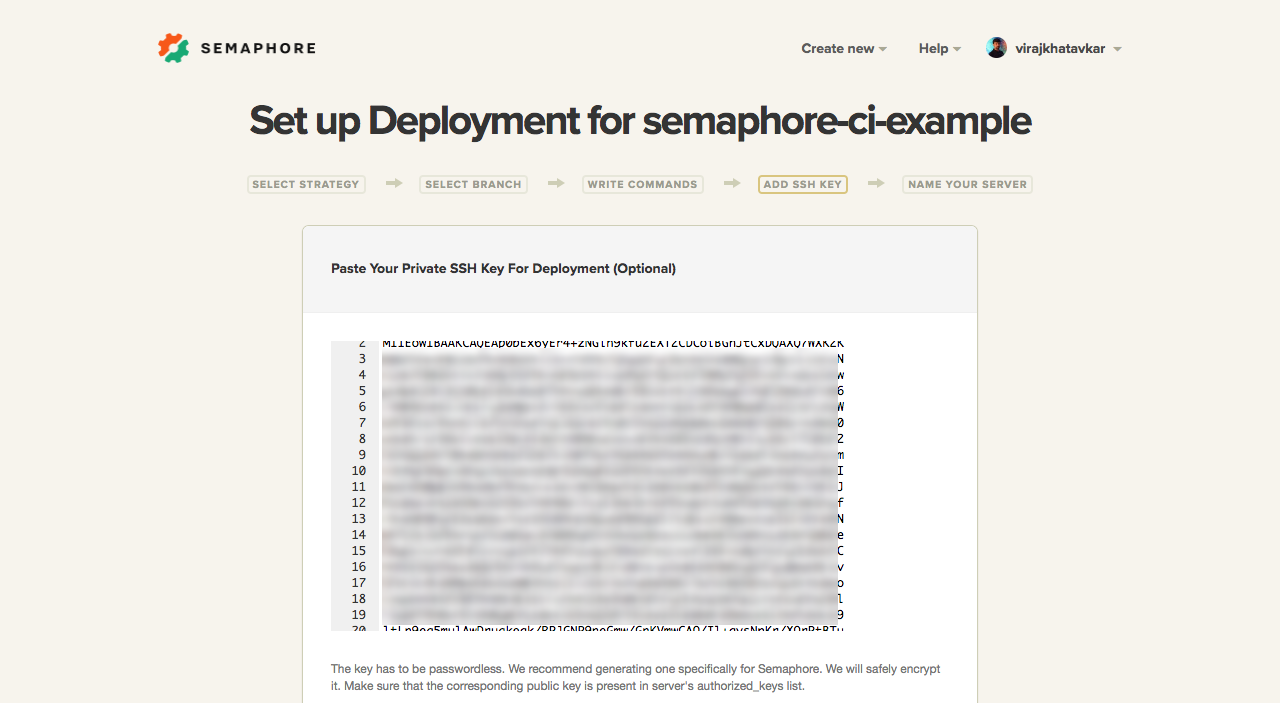
Paste the private key of your deployment user in the text area given below. This will allow Semaphore to access our Digital Ocean server and execute the deployment commands.
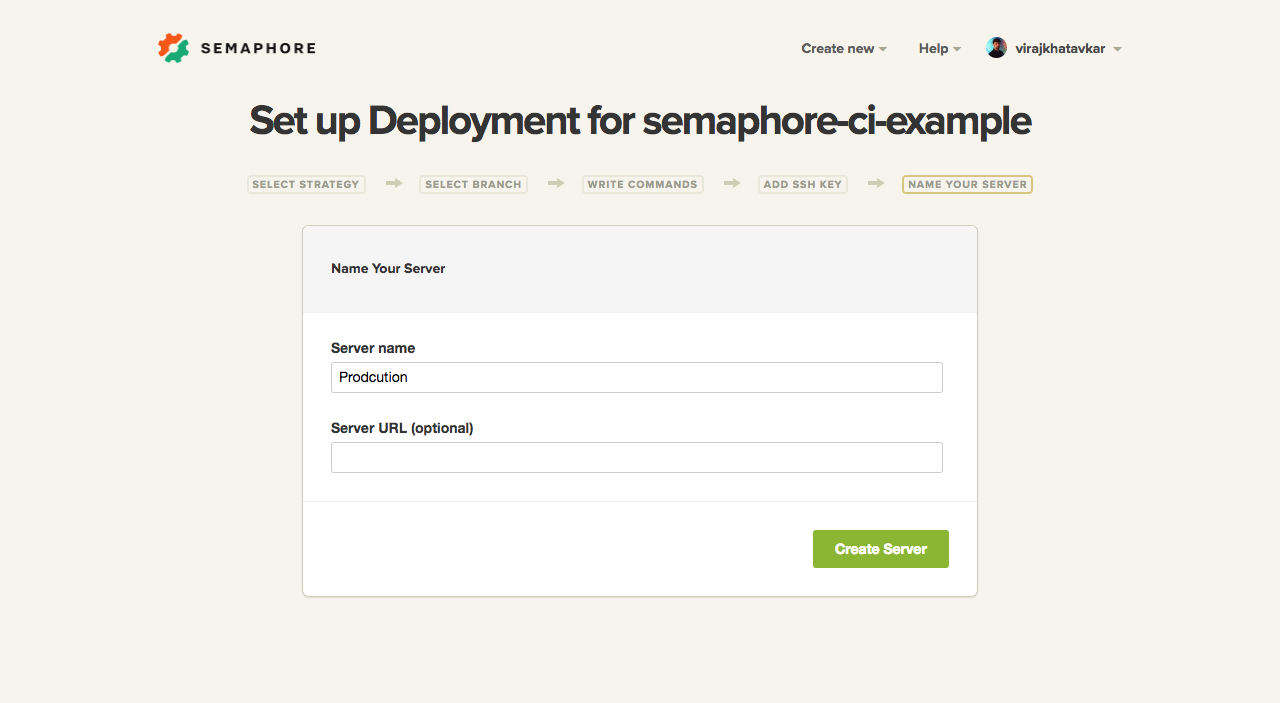
Enter your desired server name and continue:
We have set up our deployment server successfully. Let’s initiate a manual deployment once to make sure that everything runs smoothly.
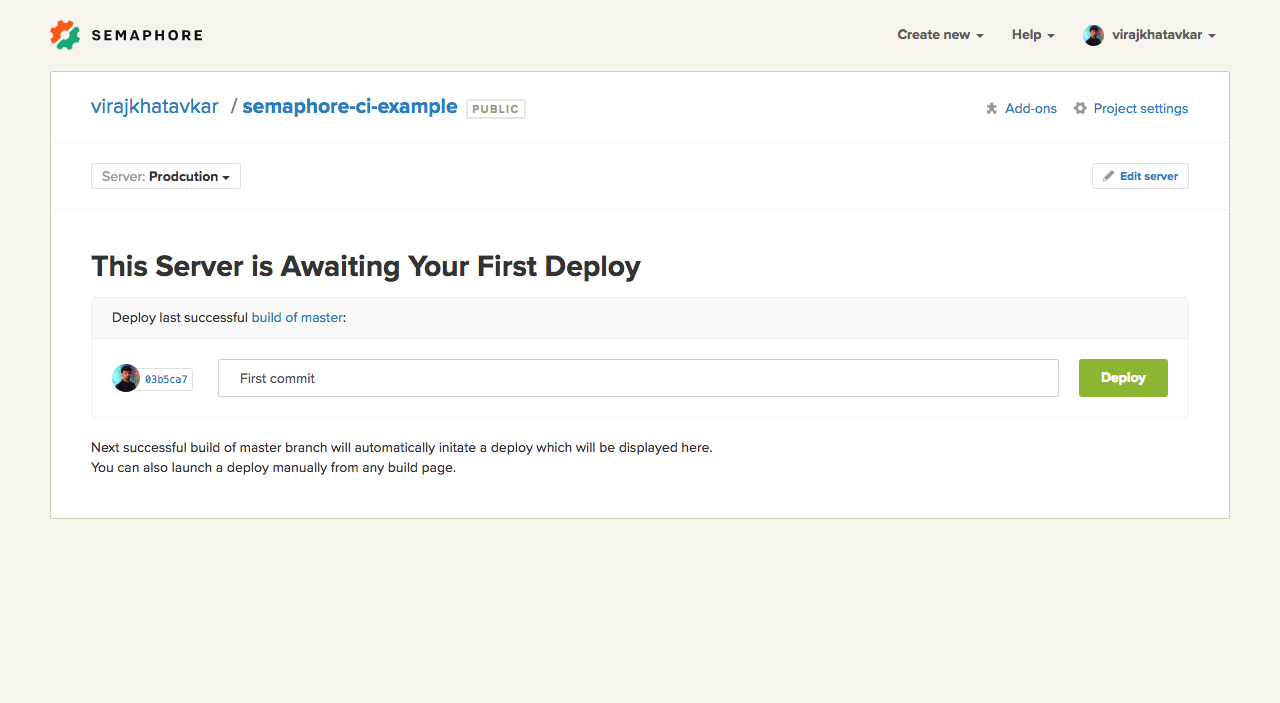
Congratulations! The first deployment has been completed without any errors.
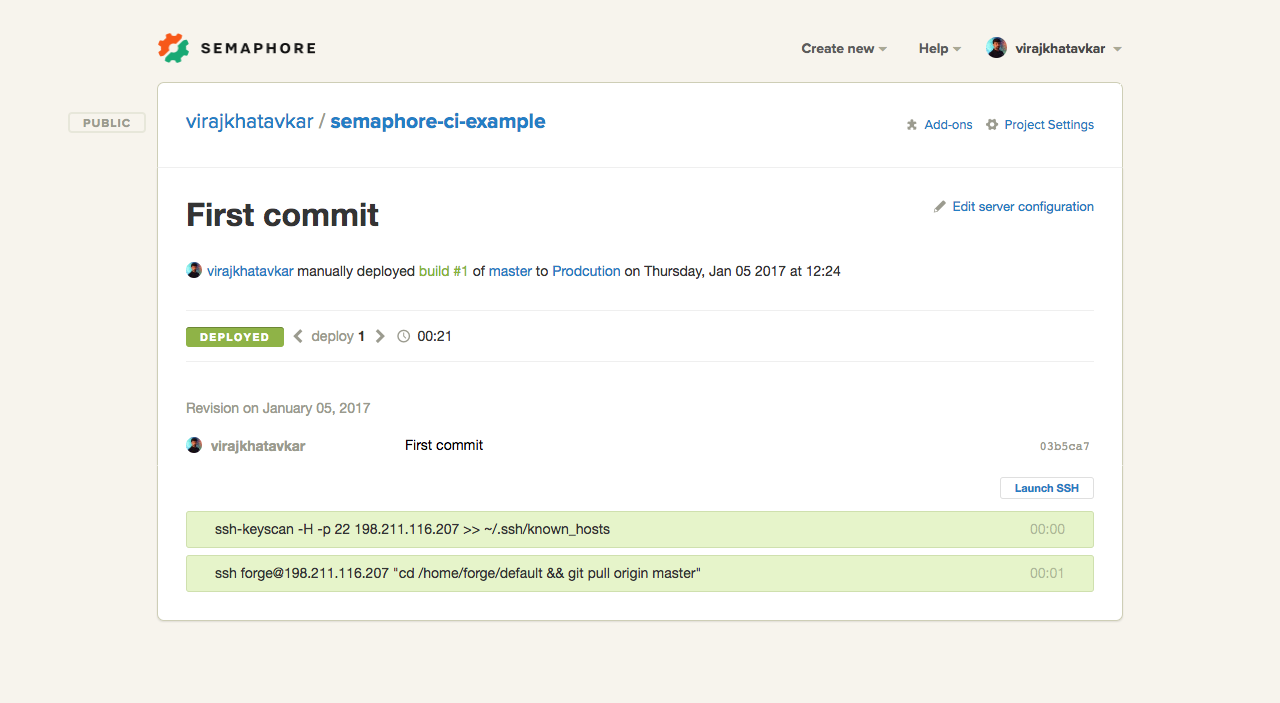
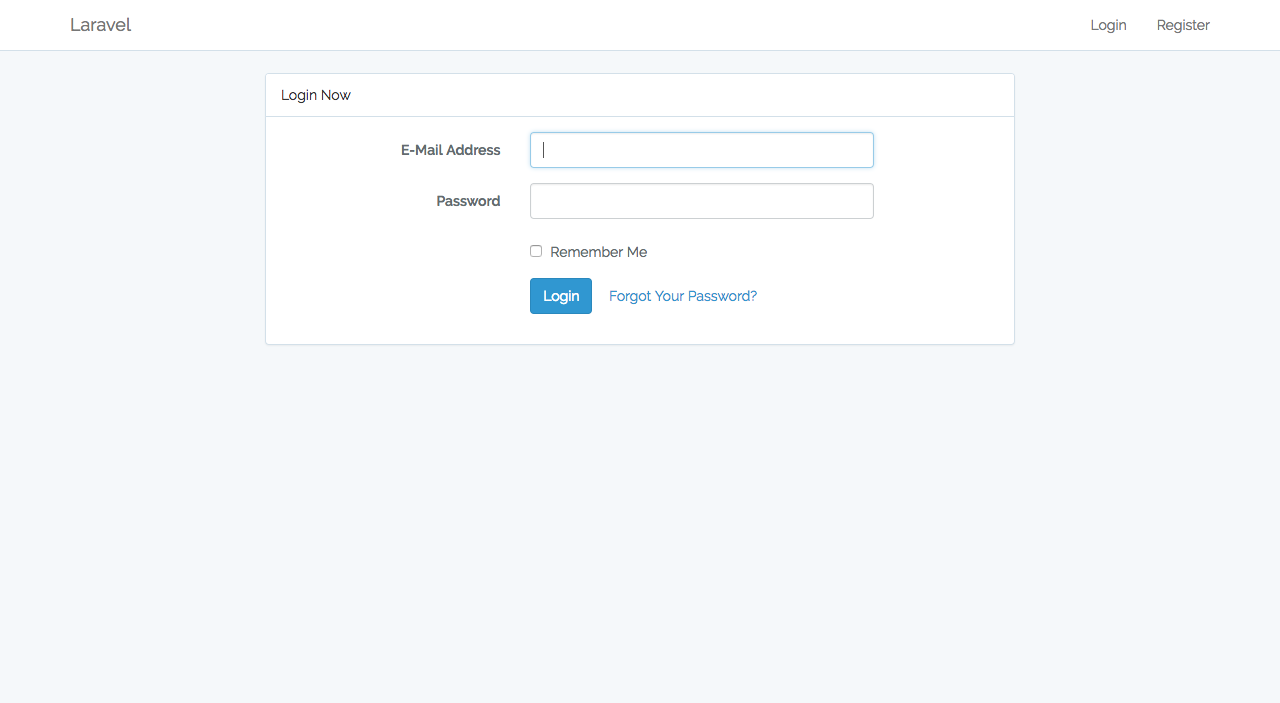
If we go to the actual website, we can see that the application has been deployed:
Note: If your build fails, then any deployment configured to be run on your servers will not be triggered. Deployment is triggered only after a successful build.
Henceforth, whenever you push to your master branch, Semaphore will build your project, run your tests and deploy automatically. Let’s do a test push and see the process.
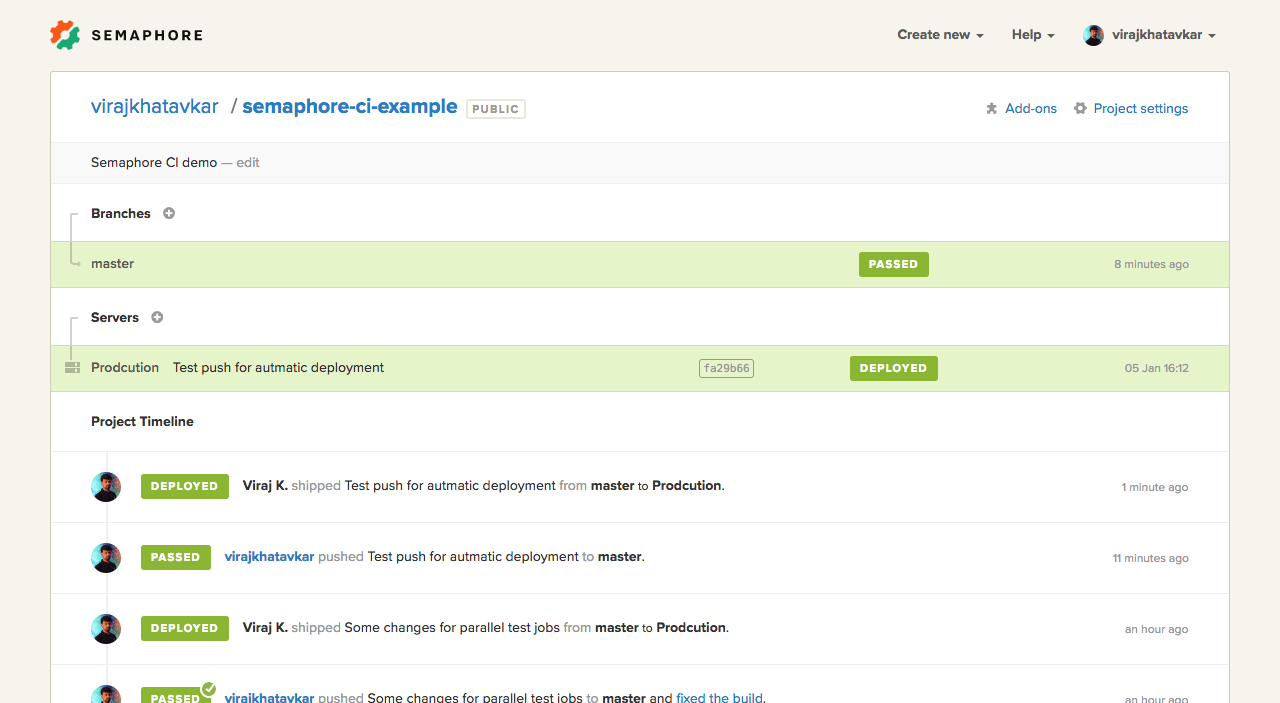
Our project was built successfully and deployed to our server.
Open Source Alternatives
Semaphore is a paid service, but gives a good bang for your buck. If paying for CD isn’t in your budget right now, Gitlab is one open source alternative to the Semaphore platform. The functionality is more or less identical, with the downside being that you have to set everything up manually, and performance can be a serious issue.
Conclusion
We now have a PHP application deployed to a Digital Ocean server with a continuous delivery pipeline in place. Whenever you push to a specific branch or someone sends a pull request, the build will be triggered automatically. Semaphore will handle all the hassles for you and let you know the status of your build.
Note that this is just a simple crash course into the above concepts – building assets like JS and CSS, and zero-downtime deployment is also possible with both Semaphore and custom solutions, and something we’ll cover in a future post. In the meanwhile, you can look into our past tutorial about Deployer – a tool that can assist the above stack in achieving that.
How do you deploy your PHP projects? Have you used Semaphore? How do you feel about it? Using any other free or paid alternatives? Let us know!
Frequently Asked Questions on Continuous Deployment with Semaphore CI
What is Continuous Deployment and how does it work with Semaphore CI?
Continuous Deployment is a software development practice where every code change goes through the entire pipeline and is automatically deployed to the production environment, making the software always ready for release. Semaphore CI is a continuous integration and deployment tool that automates this process. It allows developers to push code changes, run tests, and deploy applications with ease. It supports multiple languages and frameworks, and integrates with popular version control systems like GitHub and Bitbucket.
How do I set up Continuous Deployment with Semaphore CI?
Setting up Continuous Deployment with Semaphore CI involves a few steps. First, you need to connect your version control system (like GitHub or Bitbucket) with Semaphore CI. Then, you need to configure your build settings and deployment pipeline in Semaphore CI. This includes specifying the commands to run tests and deploy your application. Semaphore CI also allows you to set up different deployment pipelines for different environments (like staging and production).
What are the benefits of using Semaphore CI for Continuous Deployment?
Semaphore CI offers several benefits for Continuous Deployment. It automates the entire deployment process, reducing the risk of human error and speeding up the release cycle. It provides real-time feedback on the build status, helping developers to quickly identify and fix issues. It also supports parallel and sequential execution of tasks, allowing for faster and more efficient builds.
How does Semaphore CI handle testing in the Continuous Deployment process?
Semaphore CI supports a wide range of testing frameworks and allows you to run tests in parallel, speeding up the testing process. It provides real-time feedback on the test results, helping developers to quickly identify and fix issues. It also supports automatic retries of failed tests, reducing the impact of flaky tests on the deployment process.
Can I use Semaphore CI for Continuous Deployment if I’m using a different version control system?
Yes, Semaphore CI supports integration with popular version control systems like GitHub and Bitbucket. If you’re using a different version control system, you can still use Semaphore CI by manually setting up a webhook to trigger builds on code changes.
How does Semaphore CI ensure the security of my code and deployment process?
Semaphore CI takes several measures to ensure the security of your code and deployment process. It uses secure, encrypted connections for all data transfers. It also provides role-based access control, allowing you to control who can access your projects and deployment pipelines.
What kind of support does Semaphore CI offer for troubleshooting issues in the Continuous Deployment process?
Semaphore CI provides comprehensive documentation and a community forum for troubleshooting issues. It also offers email support for technical issues. In addition, it provides real-time feedback on the build and deployment status, helping you to quickly identify and fix issues.
Can I customize the deployment pipeline in Semaphore CI?
Yes, Semaphore CI allows you to fully customize your deployment pipeline. You can specify the commands to run tests and deploy your application, and set up different deployment pipelines for different environments. You can also control the execution order of tasks, and run tasks in parallel or sequentially.
How does Semaphore CI handle rollbacks in the Continuous Deployment process?
Semaphore CI supports automatic rollbacks in case of deployment failures. You can configure the rollback commands in your deployment pipeline. In case of a deployment failure, Semaphore CI will automatically execute the rollback commands to revert your application to the previous state.
How does Semaphore CI compare to other Continuous Deployment tools?
Semaphore CI stands out for its simplicity and speed. It’s easy to set up and use, and it provides real-time feedback on the build and deployment status. It supports a wide range of languages and frameworks, and integrates with popular version control systems. It also offers advanced features like parallel execution of tasks and automatic retries of failed tests. However, the best tool for you depends on your specific needs and preferences.