

This article is part of a web development series from Microsoft. Thank you for supporting the partners who make SitePoint possible.
React is quickly becoming the most popular JavaScript library for building user interface (UI) components for HTML/CSS/JS applications. Among a crowded field of frameworks and libraries, it stands out as a simple and efficient approach to building complex, composable UIs that efficiently update the DOM. React was born out of Facebook’s desire to have better UI components for its Facebook and Instagram web applications.
This post serves as an introduction to a series of blog posts on how to build components with React. The post will explore the assets needed to create React components, examples and explanations of some of the core functionality, as well as comparisons to other JavaScript UI solutions. Additionally, JSX combined with Babel will demonstrate React’s extended syntax, JSX, to simplify the code needed to build HTML and React Component declaratively. React is also cross-browser compatible, and works great in Microsoft Edge.
Key Takeaways
- React is a popular JavaScript library for building user interface components for HTML/CSS/JS applications. It is known for its simplicity and efficiency in building complex, composable UIs that efficiently update the DOM.
- React components are created using the createClass function of the React object. The only required property for a component is the render property, which points to a function object used to render the DOM of the component.
- JSX, or JavaScript syntax extension, is a technique used in React to create a more familiar declarative syntax for content, while wrapping that declarative content in JavaScript. It simplifies the process of creating new elements in code.
- React components have two kinds of data: state and properties. Properties, which can be accessed through the props property of the component, are the preferred way of configuring and managing data for a component.
- React components are designed to be composable, meaning they can be combined together to build larger, more sophisticated components. This feature distinguishes React from other JavaScript solutions that use template logic instead of composable components.
Hello World
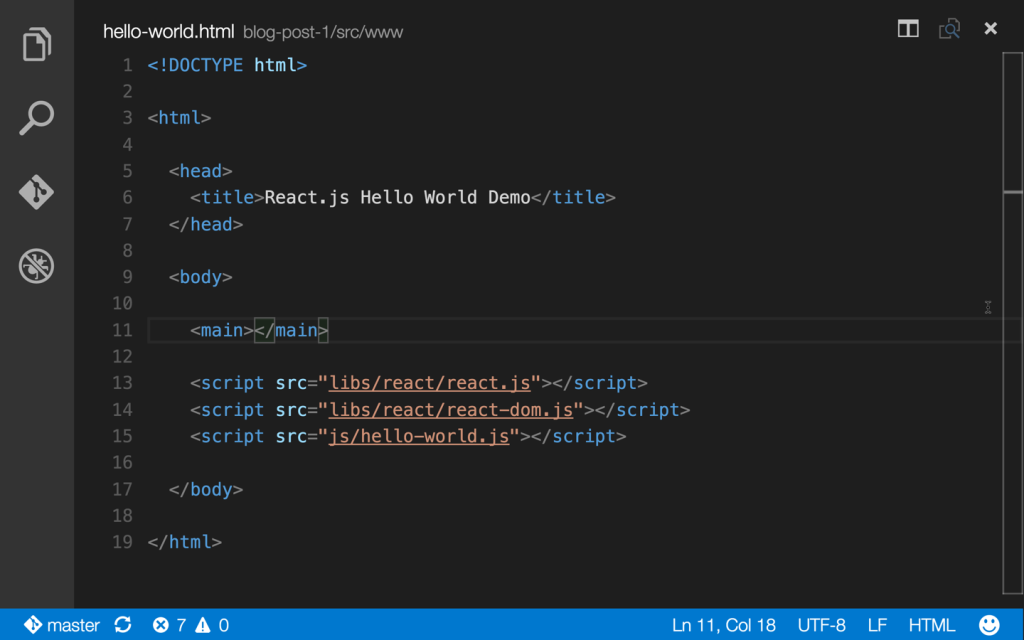
To get started with React.js, let’s setup a Hello World demonstration with CodePen. To view the demonstration, and edit the code, please click on the graphic link in the upper left hand corner “Edit on CodePen”.
See the Pen React.js Hello World Demo by SitePoint (@SitePoint) on CodePen.
To setup this CodePen, click on “Settings” in the header, then on “JavaScript”, and you will see, two external JavaScript files were included: React and React-DOM. Both files are referenced from Facebook, and their URLs are:
React: https://fb.me/react-0.14.3.js
React-DOM: https://fb.me/react-dom-0.14.3.js
The first React JavaScript file contains the React library, while the second library React-DOM, contains code to use React with the DOM of a web browser.
Screenshots are from Visual Studio Code
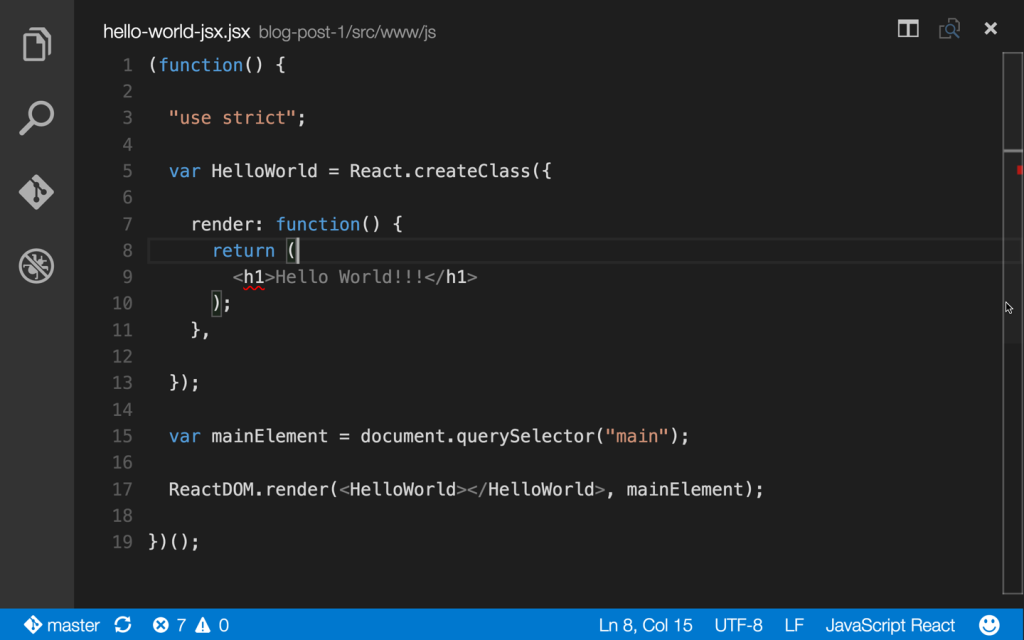
To create React Components, use the createClass function of the React object. The createClass function expects an object configuring the component to be passed in. The createClass function is a helper function for creating new components which inherit from React.Component. If you are using using ES2015 natively in the browser or through a transpiler such as Babel, then it’s possible to inherit directly from React.Component using the new class and extends keywords. To use Babel in CodePen, click on “Settings”, then “JavaScript”, and select it from the “JavaScript Preprocessor” drop down list.
See the Pen React.js Hello World ES2015 Demo by SitePoint (@SitePoint) on CodePen.
Regardless of the approach to creating the class structure for the component, the result is the same.
The only required property for a component is the render property, which points to a function object which is used to actually render the DOM of the component. The implementation of the render function introduces a new function, createElement, that is provided by the React object. The createElement function is used to create new DOM elements with React. The function expects up to three parameters.
The first parameter is the name of the HTML element or React Component to create. HTML elements should be a lowercase string containing only the name of the element without the angle brackets and no attributes. Examples of acceptable HTML element arguments include “h1”, “p”, etc. In addition to HTML element names, React Component objects can be passed in. For React Components, the object itself, not a string name of the object, is passed in.
The second parameter is an object of the properties to pass in. For HTML elements, these properties correspond to the attributes of the HTML element. For React Components, these properties correspond to stateless (state will be covered in a future blog post) data for use when rendering the component.
Finally, the third parameter represents the child elements of the element being created. In the “Hello World” example, the child content of the h1 element is the content “Hello World!” In addition to textual content, element objects can be passed in.
See the Pen React.js Child Content Demo by SitePoint (@SitePoint) on CodePen.
Or by using an array, multiple child elements can be passed in as well.
See the Pen React.js Child Content List Demo by SitePoint (@SitePoint) on CodePen.
To utilize the React Components in a web page, the ReactDOM object’s render function is used. It expects an element object, and a root element to which the DOM of the element object will be appended. In the code demonstration, the createElement function is used to create an instance of the HelloWorld component, while document.querySelector is used to select the main element to which the instantiated and rendered HelloWorld component is appended. Once appended, the component appears in the web page, and the React demonstration is complete.
JSX
React has many benefits over other UI solutions. Its overall API is comparatively small, and has a fast learning curve. In an hour or so, many developers are up and running using this new library to build reusable, extensible and maintainable UI components. For building small components the pure JavaScript code API is great, but for larger components working with the createElement function quickly becomes tedious.
One of the goals of React is to eschew the template-driven UI solutions such as Angular.js or Handlebars. Many developers consider such template-driven UI approaches to be antithetical to proper UI design because they can allow XSS exploits, are difficult to update when data changes occur, and can be difficult to extend/reuse. Many of the complaints center around the usage of logic in the template itself. React offers an alternative of a composable (discussed later), code-driven approach for building UIs. The function createElement is used to create new elements in code, including the setting of element attributes and the definition of child content. Nevertheless, it is tedious to use especially when there is no logic per se, and some HTML elements (including attributes) or React Components simply need to be easily created. React’s solution is to use a more familiar declarative syntax for such content, while wrapping that declarative content in JavaScript.
The compromise between ease of coding and not introducing logic into the template was achieved through a technique called JSX (JavaScript syntax extension).
To view the demonstration and edit the code, please click on the graphic link in the upper left hand corner “Edit on CodePen”.
See the Pen React.js JSX Demo by SitePoint (@SitePoint) on CodePen.
The result of the JSX transpilation is JavaScript with createElement calls. To see the resulting JavaScript, click on the “View Compiled” link at the upper right of the JavaScript frame in the CodePen. The JSX syntax is easier for developers, while the result is the same code-driven UI solution that React desired to achieve.
Babel is used to transpile the JSX to JavaScript. Originally, Babel was simply an ES6 JavaScript transpiler. With the completion of ES6 (ES2015), Babel has been extended to serve as a platform for creating JavaScript code including plugins such as the one for JSX. Within CodePen, Babel with the JSX plugin is automatically transpiling the JSX code each time the CodePen is executed.
The React web site recommends the use of JSX, and many developers use it. Nevertheless, using JSX is not required, and React.js applications work the same regardless of its usage. The remaining code demonstrations in this post will feature JSX (unless otherwise noted).
Properties
React Components have two kinds of data: state and properties. State data represents data that will be updated by a user or from the server. While state is important, it should be limited to as little as needed, with emphasis put on the properties which can be passed data (including state data from a component which manages state) to be rendered in the DOM. A future post will cover state data, as properties are the preferred way of configuring and managing data for a component. Also, as a side note for now, React does not support two-way data binding by default.
Earlier in this post, properties were discussed in conjunction with the createElement function. Within React Components, properties passed to the component can be accessed through the props property of the component.
To see a demonstration of the props property and edit the code, please click on the graphic link in the upper left hand corner “Edit on CodePen”.
See the Pen React.js JSX Properties Demo by SitePoint (@SitePoint) on CodePen.
In the above CodePen example using JSX, the property had a static value and was passed in using an attribute in the JSX syntax. In addition to passing a static value, a value from a JavaScript variable can passed in using the curly brace template variable syntax.
See the Pen React.js JSX Variable Property Demo by SitePoint (@SitePoint) on CodePen.
In addition to using the JSX syntax, a plain JavaScript object can be used with the non-JSX version.
See the Pen React.js JS Properties Demo by SitePoint (@SitePoint) on CodePen.
When component properties (or state) change, React performs a process called Reconciliation to determine what DOM updates are needed to render the updated property and state information. React’s mechanism for this is quite sophisticated and even involves the use of virtual DOM to compare changes to make selective and fast updates to the DOM without having to re-render everything. Reconciliation will be thoroughly discussed in a future post.
Composable Components
React Components are designed to be composable, they can be combined together to build larger more sophisticated components. Consider the example of an HTML table. Typically, tables include a header and body sections. The header row is static while there are a variable number of body rows dependent upon the data available at any given moment. Such a table is a perfect example of composable component. The table itself can be a component with each row of data being a different component as shown in the demonstration below. To view the demonstration and edit the code, please click on the graphic link in the upper left hand corner “Edit on CodePen”.
See the Pen React.js Composable Components Demo by SitePoint (@SitePoint) on CodePen.
Other JavaScript solutions such as Angular.js and Handlebars use template logic instead of composable components.
Conclusion
As demonstrated thus far, React is a great solution for building UIs. It’s easy to get up and running, and brings simplicity and efficiency to JavaScript UI development. Finally, a great place to host React applications is on Microsoft Azure. To view an example of the composable component demonstration above hosted on Azure, open Microsoft Edge and visit http://react-widgets.azurewebsites.net/. In future posts, this application will be expanded to leverage additional capabilities of React and the Flux architecture.
More Hands-on with Web Development
This article is part of the web development series from Microsoft and DevelopIntelligence on practical JavaScript learning, open source projects, and interoperability best practices including Microsoft Edge browser and the new EdgeHTML rendering engine.
DevelopIntelligence offers instructor-led JavaScript Training, AngularJS Training and other Web Development Training for technical teams and organizations.
We encourage you to test across browsers and devices including Microsoft Edge – the default browser for Windows 10 – with free tools on dev.microsoftedge.com:
- Scan your site for out-of-date libraries, layout issues, and accessibility
- Download free virtual machines for Mac, Linux, and Windows
- Check Web Platform status across browsers including the Microsoft Edge roadmap
- Remotely test for Microsoft Edge on your own device
More in-depth learning from our engineers and evangelists:
- Interoperability best practices (series):
- Coding Lab on GitHub: Cross-browser testing and best practices
- Woah, I can test Edge & IE on a Mac & Linux! (from Rey Bango)
- Advancing JavaScript without Breaking the Web (from Christian Heilmann)
- Unleash 3D rendering with WebGL (from David Catuhe)
- Hosted web apps and web platform innovations (from Kiril Seksenov)
Our community open source projects:
- vorlon.JS (cross-device remote JavaScript testing)
- manifoldJS (deploy cross-platform hosted web apps)
- babylonJS (3D graphics made easy)
More free tools and back-end web dev stuff:
- Visual Studio Code (lightweight code-editor for Mac, Linux, or Windows)
- Visual Studio Dev Essentials (free, subscription-based training and cloud benefits)
- Code with node.JS with trial on Azure Cloud
Frequently Asked Questions (FAQs) about Getting Started with React
How do I set up my development environment for React?
Setting up your development environment for React involves a few steps. First, you need to install Node.js and npm (Node Package Manager) on your computer. You can download these from the official Node.js website. Once installed, you can verify the installation by typing ‘node -v’ and ‘npm -v’ in your terminal. The next step is to install the create-react-app command-line tool using npm. You can do this by typing ‘npm install -g create-react-app’ in your terminal. Now, you’re ready to create your first React application.
What is JSX and why is it important in React?
JSX stands for JavaScript XML. It is a syntax extension for JavaScript, which allows you to write HTML-like code in your JavaScript code. It’s not necessary to use JSX in React development, but it makes the code more readable and easier to write. JSX is important in React because it provides a simple and elegant way to create React elements and components, and it also supports JavaScript expressions, allowing you to embed JavaScript logic in your HTML-like syntax.
How do I create a new React application?
To create a new React application, you can use the create-react-app command-line tool. Open your terminal, navigate to the directory where you want to create your application, and type ‘create-react-app my-app’, where ‘my-app’ is the name of your application. This will create a new directory named ‘my-app’ with all the necessary files and dependencies for a React application.
How do I display ‘Hello, World!’ in React?
To display ‘Hello, World!’ in React, you need to create a React component. In your App.js file, you can create a functional component that returns a JSX element with the text ‘Hello, World!’. Here’s an example:function App() {
return (
<div>
Hello, World!
</div>
);}export default App;
How do I run my React application?
To run your React application, navigate to your application’s directory in your terminal and type ‘npm start’. This will start a local development server and open your application in your default web browser.
How do I add CSS to my React components?
There are several ways to add CSS to your React components. One way is to create a separate CSS file and import it in your component file. For example, if you have a CSS file named ‘App.css’, you can import it in your App.js file like this: ‘import ‘./App.css’;’. Another way is to use inline styles, which allows you to write CSS directly in your JSX code.
How do I handle events in React?
In React, you can handle events such as clicks, form submissions, and key presses by using event handlers. An event handler is a function that gets called when a specific event occurs. You can add event handlers to your JSX elements by using special attributes like ‘onClick’, ‘onSubmit’, ‘onChange’, etc.
What are props in React and how do I use them?
Props (short for properties) are a way of passing data from parent components to child components in React. You can pass props to a child component by adding attributes to the JSX element that represents the child component. The child component can then access the props using the ‘props’ object.
How do I use state in React?
State in React is a way of storing and managing data that can change over time and affect the rendering of your components. You can use state in your components by using the ‘useState’ hook, which is a function that allows you to add state to your functional components.
How do I fetch data from an API in React?
Fetching data from an API in React can be done using the ‘fetch’ function or other libraries like ‘axios’. You can call the API in the ‘componentDidMount’ lifecycle method (for class components) or inside a ‘useEffect’ hook (for functional components). Once the data is fetched, you can store it in your component’s state and use it to render your component.